 |
LTSD4 Bloodshead! PBP Commentary |
Undercard bout
|
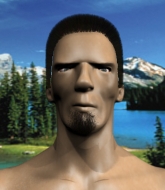
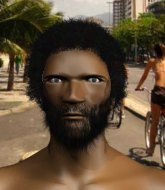
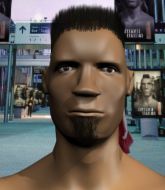
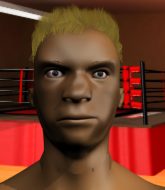
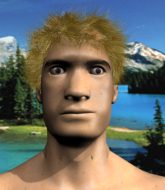
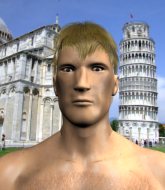
Coming up we have a heavyweight MMA rules bout between Dave Batista (ranked 0 p4p, 0 weight class) and Tank Abott (ranked 0 p4p, 0 weight class). Over to our ring announcer for the fighter introductions!
 |
|
 |
| 193 cm
25
260 lbs
2 - 0 - 0 |
|
185 cm
25
260 lbs
0 - 1 - 0 |
BJJ Blue Belt
Brawler
Cuts easily |
|
BJJ Blue Belt
Brawler
Very confident |
|
| |
|
Ladies and gentlemen. This fight is 3 rounds, in the heavyweight division.
Introducing the fighter to my left, fighting out of the red corner.
With a record of
2 - 0 - 0, fighting out of Los Angeles, Dave Batista!
And introducing the fighter to my right, fighting out of the blue corner.
With a record of
0 - 1 - 0, fighting out of Los Angeles, Tank Abott!
The judges for this bout are Timothy Bukovac, Jack Bonds and Don Winkell.

The bell rings for round one and we are underway!
Abott lunges in with swinging rights and lefts but Batista circles away quickly and effectively.
Abott fails to land with a series of punches.

Abott shoots in from a long way out. He's driving through with the takedown attempt and he eventually gets it, landing in Batista's guard.
The referee looks like he's ready to step in and stand the fighters back up.

Batista kicks Abott off and gets to his feet.
Batista doesn't manage to clinch there - Abott circles away.
Abott tries to close the distance and clinch up against the cage but Batista paws at him with a jab and circles away.
Abott darts in and lands a nice takedown into half guard.
Batista has no desire to be mounted, so is trying to control. Abott is working away from the top position though.

Abott is trying to work for a kimura. This could be trouble! No, Batista has managed to free his arm - good work.
Abott not throwing his punches with enough precision this time.
The ref warns both fighters not to hold the cage as they work up against the meshing.

That's one minute gone in the round.
Abott looks over to his corner - he wants some instructions but his corner are not responding.

Batista looking to work for a kimura from the bottom.
Batista manages to escape and get back to his feet!
Batista is looking to clinch.
Abott throws a sloppy head kick and Batista moves out of range easily.
Batista is trying hard to land a takedown here. Abott sprawls well and keeps this one on the feet.
Batista connects with a body shot.
Batista shoots in for a takedown but Abott shows good takedown defense.

Abott gets a clinch.

That's two minutes gone in the round.
Abott looking to slow down the pace here.
Batista is stalling here. The referee will be looking to step in if he doesn't pick up the pace.

Batista gets double underhooks and manages to take the fight to the ground.
We've seen a great period of action over the last minute or so - credit to both fighters for going all out!
Batista preventing the sweep.
Abott thows some rabbit punches from the bottom but they don't do any damage.
The fighters are pressed up against the cage, both looking to find a bit of space to work.
Batista postures up.
Batista lands a couple of elbows.
Abott working a defensive guard here.
Batista is just sitting in guard, looking to avoid any submissions.

That's three minutes gone in the round.
Abott is active off his back here, looking for submissions.
Abott can't keep his opponent in guard - Batista advances to half guard, no doubt looking to mount.
Batista slows the pace down in half guard.
The fighters are starting to perspire pretty heavily.
Abott keeping his head moving to avoid the ground and pound.
Batista thows a wild elbow that connects with the canvas.
Abott gets back to full guard.
Batista avoids a guillotine attempt easily.
Abott looks gassed!

That's four minutes gone in the round.
Batista sneaks a leg through and gets to half guard. That was like a knife through butter how easily he passed Abott's guard.
Batista is trying to control the action in half guard but Abott is working away on the bottom, looking perhaps to get back to full guard.
Abott wants to get back to his feet.
Batista trying to control the action but Abott is working from the bottom.
As the round comes to an end the crowd are showing their appreciation for a great round of action.
Batista slips a nice elbow through Abott's hands, connecting with Abott's forehead.
And thats the end of the round the fighters go back to their corners.
That was a close round but I would say that Dave Batista will probably get the nod.
That's the end of the interval. I'm sure that seemed a lot quicker than a minute for our two fighters! Back to the action.

Abott displays good takedown defense there as he swats away a double leg from Batista.
Batista closes the distance and scores a nice trip takedown into half guard. Abott did well to prevent Batista getting side control.
Abott is looking to regain full guard. Not this time though.
Batista works his way into side control.
Abott is not content to let Batista control the position.
Batista working away diligently from side control. Landing strikes effectively there - that will score him some points on the judges scorecards.
Batista lands some shots froms side control.
Abott wants to control but Batista postures up.
That's one minute gone in the round.
Batista is looking to take a break and control but Abott is keeping him honest, looking to work from the bottom.
Abott is trying to control Batista's posture but Batista avoids it.
Abott bucks up and tries to throw Batista off but instead Batista has got his back!
Batista scores with punches to the body.
Batista throwing damaging strikes from the back! Abott could be in trouble here!
Batista lands shots from the back.
Fantastic stuff here - a very entertaining period of action, which has drawn cheers from the crowd.
Abott is staying cool under pressure, defending well against the rear naked choke attempt from his opponent.
That's two minutes gone in the round.
Batista tries to get the hooks in deep but Abott pushed the leg off.
Batista lands with a nice looking elbow that stuns Abott.
Batista is working for the rear naked choke. He has one arm under the chin but Abott has hold of the other arm. A bit of a stalemate here.
Abott trying to control the hands but Batista won't let him.
That's three minutes gone in the round.
Abott tries to escape the position.
Batista has been looking to land a fair amount of strikes on the ground. He might be looking to soften his opponent up in order to work for a submission.
Abott trying to control the hands but Batista won't let him.
I really don't envy Abott right now.
Batista throwing damaging strikes from the back! Abott could be in trouble here!
Abott is breathing heavily.
Batista looking for the choke from the back.
That's four minutes gone in the round.
Batista loading up with punches from the back mount - how long can Abott hold on?
The crowd are loving this. Great action here.
Batista has his opponent's back and is working for the choke.
Abott wants to control his opponent's hands but Batista gets his hands free.
Batista connects with a series of strikes and the referee is calling for Abott to escape the position.
Batista lands shots from the back.
Abott turns into Batista and is now in his guard.
The crowd are going absolutely nuts as the round comes to an end - what a fantastic round of action!
Batista keeping full guard, as Abott tries to pass.
Abott tries to stand but Batista is controlling from the bottom.
And thats the end of the round the fighters go back to their corners.
Dave Batista dominated that second round.
That's time! Batista's corner gives him a slap on the ass as he gets ready to fight. And we move into the final round!

Abott gets taken down but at least he's managed to land in guard.
Batista pressing down on his opponent's thigh, looking to pass guard. Abott is keeping the position for now.
Abott is working from a closed guard but he's struggling to control his opponent.
Batista showing good wrestling skills to control the position.
Abott trying to control the position here.
Batista sitting in guard, not really doing much.
That's one minute gone in the round.

We're going to have a standup here because Dave Batista wasn't active enough for the referee's liking.
Abott shoots in looking for a takedown but Batista manages to keep the fight standing, pushing Abott's face into the canvas for good measure before circling away.
Batista fakes an overhand right and shoots for a takedown. Abott sprawls well initially but Batista persists and gets the takedown into half guard.
Abott takes a big intake of breath there - he's definitely tired.
Batista landing with strikes to the body and head, softening up his opponent.
Batista is keeping good posture, landing some ground and pound.
Batista seems like he's working for an arm triangle here. He's freed his trapped foot and he's rotating nicely. Abott is in big trouble! He's tapping out! This one is aaaaaaaaaaaall over!
Ladies and gentlemen, after 1:56 of round 3, we have a winner by way of Submission (Arm Triangle). Dave Batista!
|
|
|
|
|
|
|
|
|
|
|
|
|
|
|
|
|
|
|
|
|
|
|
| S |
C
A |
G |
S |
C
B |
G |
|
S |
C |
G |
|
energy
A | B |
|
hype
A | B |
|
pop
A | B |
|
mgr
A | B |
|
FIGHT
RATING
100% |
|
|
|
|
|
|
|
Undercard bout
|
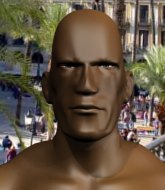
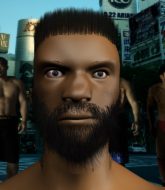
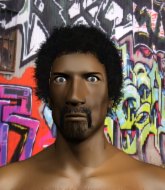
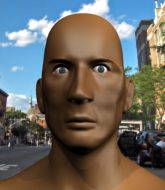
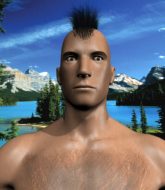
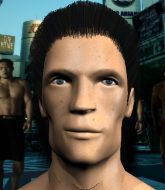
Coming up we have a heavyweight MMA rules bout between Bobby Lashley (ranked 0 p4p, 0 weight class) and Huge Bum (ranked 0 p4p, 0 weight class). Well, the cameraman is lingering on a pretty young lady for a bit too long there. Keep your eyes on the fighters buddy or you'll miss the fighter intros!
 |
|
 |
| 190 cm
25
260 lbs
1 - 1 - 0 |
|
185 cm
18
235 lbs
0 - 0 - 0 |
BJJ Blue Belt
Brawler
KO power |
|
BJJ Blue Belt
Brawler
Solid chin |
|
| |
|
Ladies and gentlemen. This fight is 3 rounds, in the heavyweight division.
Introducing the fighter to my left, fighting out of the red corner.
With a record of
1 - 1 - 0, fighting out of Los Angeles, Bobby Lashley!
And introducing the fighter to my right, fighting out of the blue corner.
With a record of
0 - 0 - 0, fighting out of Los Angeles, Huge Bum!
The judges for this bout are Frank Antenori, Jack Bonds and Timothy Bukovac.
The bell rings for round one and we are underway!
Lashley feints and then dives in with a takedown. That was a long way out but the feint bought him enough time to close the distance and complete the takedown. Now we'll play guard for a bit and see who can get the better of that position.
We must be close to a standup if these guys don't pick up the pace.
Bum looking for submissions from the bottom here. Moving his hips around, possibly looking for an armbar.
Lashley stops Bum from standing up.
Lashley pressing down on his opponent's thigh, looking to pass guard. Bum is keeping the position for now.
Lashley decides he's had enough of playing guard and decides to stand. Come on Bum, up you get!

Lashley moves into the clinch.
Lashley lands a nice trip takedown into half guard.
Lashley drops an elbow to the side of Bum's head.
Fantastic stuff here - a very entertaining period of action, which has drawn cheers from the crowd.
Lashley is looking to advance position but Bum won't allow it.
Bum trying to control here.
Lashley gets to his feet - back to striking we go!
That's one minute gone in the round.
Bum misses with a hook to the body
and Lashley counters with a takedown into full mount! That could mean trouble for Bum!
Lashley lands a shot to the body, followed up by a shot to the exposed head of his trapped opponent.
Bum tries to hold on but Lashley postures up.
Lashley raining down hammerfists from mount.
Lashley working to secure an arm triangle but it's not happening for him just yet.
This is a great period of action - very entertaining stuff!
Lashley in mount throwing good strikes here, bouncing his opponent's head off the canvas.
Lashley controlling the pace for now.
The fighters are pressed up against the cage, both looking to find a bit of space to work.
Bum wants to control but Lashley is having none of it.
That's two minutes gone in the round.
Lashley in mount throwing good strikes here, bouncing his opponent's head off the canvas.

It looks like Huge Bum has been cut.
Bum taking shots to the head.
Bum looks gassed!
Lashley content just to control the position here.
Lashley lands an elbow that was bordering on illegal but the referee lets it go with a warning.

Bum is rocked!
Lashley controlling the position easily from mount.
Lashley is in full mount looking to finish with strikes. He lands a big shot, followed by another and Bum goes limp! The ref jumps in to end the fight - a big win for Lashley!
Ladies and gentlemen, after 3:58 of round 1, we have a winner by way of KO (Strikes). Bobby Lashley!
|
|
|
|
|
|
|
|
|
|
|
|
|
|
|
|
|
|
|
|
|
|
|
| S |
C
A |
G |
S |
C
B |
G |
|
S |
C |
G |
|
energy
A | B |
|
hype
A | B |
|
pop
A | B |
|
mgr
A | B |
|
FIGHT
RATING
60% |
|
|
|
|
|
|
|
Undercard bout
|
Coming up we have a middleweight MMA rules bout between Dean Lister (ranked 0 p4p, 0 weight class) and Santino Marella (ranked 0 p4p, 0 weight class). Over to our ring announcer for the fighter introductions!
 |
|
 |
| 185 cm
25
196 lbs
2 - 0 - 0 |
|
182 cm
25
194 lbs
0 - 1 - 0 |
BJJ Blue Belt
Basic striking
Cuts easily |
|
BJJ Blue Belt
Brawler
Tends to cut |
|
| |
|
Ladies and gentlemen. This fight is 3 rounds, in the middleweight division.
Introducing the fighter to my left, fighting out of the red corner.
With a record of
2 - 0 - 0, fighting out of Los Angeles, Dean Lister!
And introducing the fighter to my right, fighting out of the blue corner.
With a record of
0 - 1 - 0, fighting out of Los Angeles, Santino Marella!
The judges for this bout are Frank Antenori, Don Winkell and Timothy Bukovac.
The bell rings for round one and we are underway!
Lister drives through with a takedown into Marella's guard. Let's see what he can do from the top position.
The ref warns both fighters not to hold the cage as they work up against the meshing.
Marella working the defensive guard well to avoid strikes from Lister.
Marella working for a triangle but Lister defends it easily.
Lister wants to control from the top but Marella keeps moving.
Marella trying to control the position here.
Marella is working from a closed guard but he's struggling to control his opponent.
That's one minute gone in the round.
Marella keeping moving, preventing Lister from controlling successfully.

Well, the referee has seen enough. Neither fighter is active enough on the ground so he's stood them back up.
No luck with that takedown attempt from Lister.
Lister stuffs a takedown. It's all about dictating where the fight takes place and Lister wants it to stay on the feet.
Lister swats away the attempt to clinch by Marella.
Lister tries to score a power double leg takedown but Marella sees that one coming and sprawls well. That will dishearten Lister somewhat.
Marella thuds his shin into the meat of Lister's side.
Lister looks for a takedown here. Will he get it? Marella is fending him off so far but Lister persists. Nope, Marella circles away and we're back to standing.
That's three failed takedown attempts in the round for Dean Lister. That's going to take a lot out of him.
Marella circles away from the clinch attempt.
That's two minutes gone in the round.
Marella throws a looping left and ducks down for a takedown. He's got his arms around Lister's waist but Lister gets an underhook and avoids the takedown by throwing Marella off to one side.
Lister has a takedown stuffed.
Lister throws a lazy head kick
and Marella counters into the clinch. Nicely done.
Lister has moved round to his opponent's back and is looking for a suplex! Oh snap! He's tossed Marella clear over his head and slammed him to the mat!
Marella preventing the rear naked choke attempt from Lister.
Fantastic stuff here - a very entertaining period of action, which has drawn cheers from the crowd.
Lister just keeping the dominant position. He can't wait too long though, otherwise the referee will stand them back up.
Marella is defending well here and trying to improve his position.
Marella is very frustrated here, being controlled quite effectively by Lister.
That's three minutes gone in the round.
Marella preventing the rear naked choke attempt from Lister.
Marella wants to control his opponent's hands but Lister gets his hands free.
Marella covering up well under a series of strikes from Lister.
Marella wants to control his opponent's hands but Lister gets his hands free.
Lister wants to control but Marella is keeping busy.
Marella is trying to get back to his feet but he's not managed it yet.
Lister is hanging on to Marella's back as he tries to escape.
That's four minutes gone in the round.
Marella just trying to survive but Lister is wriggling into a better position, looking to finish.
Marella covering up well under a series of strikes from Lister.
Lister softening up his opponent with strikes here.
Marella is trying to break free.
Lister lands a shot to the body.
Marella covers up after that shot from Lister.
This has been an exciting period of action!
The crowd hopeful of a finish here - Lister's supporters are on their feet, screaming for him to go for the rear naked choke.
As the round comes to an end the crowd are showing their appreciation for a great round of action.
Marella trying to control but not successfully.
Marella covers up after that shot from Lister.
And thats the end of the round the fighters go back to their corners.
Dean Lister dominated that round.
The referee calls time. The cornermen exit stage left and we're back to business.
Lister throws a combination but it was largely blocked by Marella.
Dean Lister is looking to throw some combinations by the looks of things.
Marella misses with a kick to the body.
Marella fails with a takedown attempt.
Horrible takedown by Marella or perhaps it was just good defense by Lister which made him look bad.
Marella swings and misses with a hook to the body.
Lister shoots in for a takedown but Marella shows good takedown defense there and keeps this one on the feet.
Marella fails miserably with a takedown attempt.
Dean Lister has stuffed three takedown attempts in the round now. That's going to take a lot out of Santino Marella.
Lister avoids the head kick by Marella.
Lister gets the takedown into side control.
Lister is looking to take a break and control but Marella is keeping him honest, looking to work from the bottom.
Dean Lister overall seems to be getting the better of the ground position in the fight so far.
That's one minute gone in the round.
Lister has knee on belly and moves into mount.
Marella tries to lock up and control but Lister gives him a forearm to the face and pushes him away.
Lister looking to control and managing it successfully.
Lister trying to control but he's not successful this time.
Marella is wriggling around trying to escape.
That's two minutes gone in the round.
Lister lands with some strikes.
Lister lands with some strikes.
Marella is desperately trying to get back to half guard.
Lister lands a big elbow.
Lister controlling from mount.
Marella is bucking up trying to escape but Lister cracks him with another couple of good strikes.
We've seen a great period of action over the last minute or so - credit to both fighters for going all out!
Lister fakes a shot to the body and cracks his opponent in the head. Nice ground and pound there!
Marella working to try and regain half guard.
That's three minutes gone in the round.
Lister is going oldschool here, as he tries to force Marella to tap using a forearm choke. This isn't 1993 though, so Marella shrugs it off.
Lister has been looking to land a fair amount of strikes on the ground. He might be looking to soften his opponent up in order to work for a submission.
Marella tries to lock up and control but Lister gives him a forearm to the face and pushes him away.
The fighters are pressed up against the cage, both looking to find a bit of space to work.
Marella is trying desperately to improve position.
Lister controlling from the full mount.
Marella just holding on.
That's four minutes gone in the round.
Marella is desperately trying to get back to half guard.
Lister can't quite control the action as he would like just now, as Marella is looking to escape.
Marella can't escape the position.
As the round comes to an end the crowd are showing their appreciation for a great round of action.
BOOM! Lister connects with a massive shot to the dome!
Lister fakes a shot to the body and cracks his opponent in the head. Nice ground and pound there!
The crowd cheering loudly, showing their appreciation for the quality fight we're seeing here.
Lister goes for an armbar but he's fallen flat on his backside there and now Marella is on top in guard.
And thats the end of the round the fighters go back to their corners.
Dean Lister dominated that second round.
The fighters get back to their feet, the hooter sounds and we're back to the action! Ladies and gentlemen, this is the final round!
Marella moves into the clinch successfully.
Marella on the defensive, avoiding the knees to the body.
Marella changes levels and goes for a takedown here. Lister fights it off and pushes away nicely.
Lister shoots in but Marella avoids the takedown attempt easily.
No joy there for Lister, who threw a few shots but didn't land.
Marella is trying hard to land a takedown here. Lister sprawls well and keeps this one on the feet.
Marella gets caught flat footed, as Lister shoots in with a quick takedown into guard.
Marella wants to sweep here but Lister controlling him for the moment.
Marella has a loose triangle. He'll be looking to tighten that up but Lister can see exactly what he's planning and manages to posture up and free himself.
Marella takes a big intake of breath there - he's definitely tired.
That's one minute gone in the round.
Lister passes into half guard.
Marella is trying to control but Lister manages to pass to mount!
Lister tries to control but Marella wriggling away.
Lister working Marella over with strikes here.
That's two minutes gone in the round.
Lister in mount throwing good strikes here, bouncing his opponent's head off the canvas.
Marella in a bad spot here, taking shots to the head.
Lister lands with some strikes.
Marella is writhing around trying to get back to his feet.
Lister lands a big elbow.
Lister content just to control the position here.
We've seen a great period of action over the last minute or so - credit to both fighters for going all out!
Marella can't escape the position.
Lister landing shots from mount.
Lister is standing up, even though he is in mount.
That's three minutes gone in the round.
Horrible takedown by Lister or perhaps it was just good defense by Marella which made him look bad.
Lister swings and misses with a hook to the body.
Lister closes this distance looking for a takedown but Marella circles away.
That's three failed takedown attempts in the round for Dean Lister. That's going to take a lot out of him.
Lister closes the distance and lands a one-two.
Marella dives in and scores a takedown into Lister's guard.
Marella tries to free his leg and advance position but Lister is retaining full guard.
Lister kicks Marella off and gets to his feet.
Marella scores with a three punch combo!
A telegraphed takedown attempt from Lister is defended easily by Marella.
Marella clinches up against the cage.
That's four minutes gone in the round.
The crowd are loving this. Great action here.
Marella stalling here - the referee won't stand for too much of that.
Lister goes for a takedown in the clinch but Marella prevents it.
Lister wants a takedown.
Lister has had enough of the clinch but Marella keeps him there for the moment.
Lister takes a knee right on the jaw!
As the round comes to an end the crowd are showing their appreciation for a great round of action.
Marella turns his hips and lands a very nice judo throw into side control!
Marella thinks about going for a far side armbar but bails out and retains the dominant position instead.
Santino Marella has stepped it up - he knows he needs a finish here!
Dean Lister is fighting for a decision here - he's started to take the cautious approach.
Marella throws an elbow but Lister slips to the side and avoids it well.
And that's the end of the fight!
Dean Lister showed his dominance in that final round.
Well I reckon that's a shut out for Lister, winning every round. Will the judges agree? They are the ones who matter, even if they are often depressingly incompetent. Over to the ring announcer for the scorecards.
Ladies and gentlemen, after 3 rounds of action, we go to the scorecards for a decision.
Judge Frank Antenori scores the fight 30:27
Judge Don Winkell scores the fight 30:27
Judge Timothy Bukovac scores the fight 30:27
In favor of your winner, by unanimous decision... Dean Lister!
|
|
|
|
|
|
|
|
|
|
|
|
|
|
|
|
|
|
|
|
|
|
|
| S |
C
A |
G |
S |
C
B |
G |
|
S |
C |
G |
|
energy
A | B |
|
hype
A | B |
|
pop
A | B |
|
mgr
A | B |
|
FIGHT
RATING
58% |
|
|
|
|
|
|
|
Undercard bout
|
Coming up we have a heavyweight MMA rules bout between Mark Hunt (ranked 0 p4p, 0 weight class) and Bob Sapp (ranked 0 p4p, 0 weight class). Bob Sapp will no doubt be trying to keep this one on the feet, where he has a distinct advantage.
 |
|
 |
| 177 cm
25
260 lbs
2 - 1 - 0 |
|
193 cm
25
275 lbs
0 - 1 - 0 |
BJJ Blue Belt
Brawler
Big heart |
|
BJJ Blue Belt
Brawler
Determined |
|
| |
|
Ladies and gentlemen. This fight is 3 rounds, in the heavyweight division.
Introducing the fighter to my left, fighting out of the red corner.
With a record of
2 - 1 - 0, fighting out of Los Angeles, Mark Hunt!
And introducing the fighter to my right, fighting out of the blue corner.
With a record of
0 - 1 - 0, fighting out of Los Angeles, Bob Sapp!
The judges for this bout are Jack Bonds, Timothy Bukovac and Don Winkell.
The bell rings for round one and we are underway!
Hunt closes this distance looking for a takedown but Sapp circles away.
Hunt rushes forward with a series of wild hooks but Sapp moves out of range and avoids them all easily.
Sapp lands a nice leg kick that just misses Hunt's sensitive parts.
Hunt fakes high and shoots in for a takedown but Sapp avoids it really well and circles away.
A nice inside leg kick there by Sapp. That's going to slow Hunt down.
Good exchange - Sapp coming out on top.
Hunt shoots in for a takedown but Sapp shows good takedown defense.
That's three failed takedown attempts in the round for Mark Hunt. That's going to take a lot out of him.
Hunt throws a head kick but Sapp moves out of range.
Sapp has a takedown stuffed.
Sapp pulls out of a head kick attempt.
Sapp gets his takedown attempt stuffed easily
and Hunt counters with a nice double leg into guard.
That's one minute gone in the round.
The referee claps his hands together and tells the fighters to work.
Hunt throwing strikes from guard but Sapp blocks nicely.
Hunt stands up and looks to throw the legs aside to pass to side control. Sapp swivels though and keeps the full guard.
Sapp not looking particularly offensive just at the moment.
Sapp punching to the body, from the bottom.
Hunt lands a couple of decent looking shots.
Sapp looking for submissions from the bottom here. Moving his hips around, possibly looking for an armbar.
Sapp looking to sweep here. No luck so far.
Hunt might be looking to lock onto one of his opponent's long limbs for a submission, whilst we're on the ground.
Hunt trying to control the position from guard on top but Sapp is wriggling around, looking for whatever he can.
Hunt controlling from the top position.
That's two minutes gone in the round.
Sapp has Hunt pulled in close to control his posture.
The fighters are pressed up against the cage, both looking to find a bit of space to work.
Sapp has a loose triangle. He'll be looking to tighten that up but Hunt can see exactly what he's planning and manages to posture up and free himself.
Sapp looks gassed!
Hunt is looking to stand up but Sapp won't let him.
Hunt wants to control from the top but Sapp keeps moving.
The ref stands the fighters back up. Mark Hunt wasn't doing enough on the ground.
Sapp tries to clinch up but Hunt circles away and keeps his distance.
That's three minutes gone in the round.
Sapp thows a body kick. Hunt tries to catch it but that hurt him.
Sapp tries to clinch up.
Sapp is trying hard to land a takedown here. Hunt sprawls well and keeps this one on the feet.
Hunt has Sapp up against the cage in a clinch.
Hunt has managed to pull guard. Let's see whether he can work an aggressive guard. It will also be interesting to see what tactics Sapp uses from the top position.
Hunt manages to sweep nicely, so he's now on top. Sapp manages to get himself to full guard.
Hunt stands up over Sapp, holding his feet. He dives back in and lands a decent shot to the head.
Hunt pressing down on his opponent's thigh, looking to pass guard. Sapp is keeping the position for now.
Hunt advances position into side control!
That's four minutes gone in the round.
Sapp tries to improve position but can't.
Sapp seems a little lost for a moment, as Hunt dominates the positioning.
Hunt scoring with punches from side control.
This has been an exciting period of action!
Hunt stands up and we're back to a striking position.
Hunt shoots in for a takedown from distance. He catches Sapp napping and manages to drive through into side control!
Sapp is looking for a sweep.
The crowd are going absolutely nuts as the round comes to an end - what a fantastic round of action!
Sapp dodges the ground and pound from Hunt.
Hunt tries for an arm triangle. That looks pretty tight to me. Is this one over!?! Possibly, maybe, no Hunt has let go of the choke. Obviously it wasn't as tight as we thought!
Hunt trying to control the action but Sapp is working from the bottom.
And thats the end of the round the fighters go back to their corners.
Mark Hunt dominated that round.
Well, the break between rounds is over. Let's get back to the scrappin!
Sapp tries to close the distance and clinch but Hunt swats him to one side with an open hand palm strike and circles away.
Hunt decides to change it up a bit and drives through with a nice takedown into half guard.
Hunt is sneakily working for an arm triangle but Sapp sees it coming and defends easily.
Hunt is trying to control the action in half guard but Sapp is working away on the bottom, looking perhaps to get back to full guard.
Sapp is pressing down on Hunt's left leg trying to get back to full guard. He's managed it.
Sapp trying to control the position.
Sapp has momentary wrist control but Hunt slips an elbow through the middle.
Hunt gets to his feet. Sapp looking to butt scoot but the ref puts an end to that. On your feet son!
That's one minute gone in the round.
Hunt feints and then dives in with a takedown. That was a long way out but the feint bought him enough time to close the distance and complete the takedown. Now we'll play guard for a bit and see who can get the better of that position.
Sapp looking to control.
Sapp is breathing heavily.
Sapp working for a triangle but Hunt defends it easily.
Sapp is working from a closed guard but he's struggling to control his opponent.
Sapp is looking for a triangle but Hunt pushes his legs off easily.
Hunt lands a couple of decent looking shots.
That's two minutes gone in the round.
Hunt passes into half guard.
Hunt not throwing his punches with enough precision this time.
Hunt is trying to work for a kimura. This could be trouble! No, Sapp has managed to free his arm - good work.
Hunt sitting and controlling from the half guard.
Hunt is working hard to pass the guard. He's done it - he's now in full mount! Trouble for Sapp!
Fantastic stuff here - a very entertaining period of action, which has drawn cheers from the crowd.
Hunt has control of Sapp's right arm, working for a kimura. It's a bit of a token attempt though and Sapp regains control of the situation pretty easily.
That's three minutes gone in the round.
Hunt controlling the pace for now.
Sapp tries to hold on but Hunt postures up.
Sapp can't escape the position.
Hunt with shots to the head and body - Sapp looks very uncomfortable down there.
Hunt landing shots from mount.
That's four minutes gone in the round.
Hunt with shots to the head and body - Sapp looks very uncomfortable down there.
Sapp taking shots to the head.
Mark Hunt overall seems to be getting the better of the ground position in the fight so far.
Fantastic stuff here - a very entertaining period of action, which has drawn cheers from the crowd.
Sapp is in all sorts of trouble here.
Hunt is in the full mount, landing strikes.
Hunt in mount throwing good strikes here, bouncing his opponent's head off the canvas.
Sapp is rocked!
Hunt lands a heavy shot. That's hurt Sapp! Hunt sees the opportunity and turns up the heat - strike after strike land to the defenseless Sapp and the ref dives in to save him! This one is all over!
Ladies and gentlemen, after 4:46 of round 2, we have a winner by way of KO (Strikes). Mark Hunt!
A victorious Mark Hunt thanked his army of followers in his post fight interview, telling people to make sure they follow him on Twitter.
|
|
|
|
|
|
|
|
|
|
|
|
|
|
|
|
|
|
|
|
|
|
|
| S |
C
A |
G |
S |
C
B |
G |
|
S |
C |
G |
|
energy
A | B |
|
hype
A | B |
|
pop
A | B |
|
mgr
A | B |
|
FIGHT
RATING
43% |
|
|
|
|
|
|
|
Undercard bout
|
Coming up we have a light heavyweight MMA rules bout between Utter Bum (ranked 0 p4p, 0 weight class) and Mark Krzepicki (ranked 0 p4p, 0 weight class). Both fighters look fresh as a daisy as they make their way towards the cage.
 |
|
 |
| 184 cm
18
212 lbs
0 - 0 - 0 |
|
194 cm
26
220 lbs
6 - 2 - 0 |
BJJ Blue Belt
Brawler
Self confident |
|
Decent wrestler
World class MT
Knockout power |
|
| |
|
Ladies and gentlemen. This fight is 3 rounds, in the light heavyweight division.
Introducing the fighter to my left, fighting out of the red corner.
With a record of
0 - 0 - 0, fighting out of Los Angeles, Utter Bum!
And introducing the fighter to my right, fighting out of the blue corner.
With a record of
6 - 2 - 0, fighting out of Los Angeles, Mark Krzepicki !
The judges for this bout are Frank Antenori, Timothy Bukovac and Don Winkell.
The bell rings for round one and we are underway!
Krzepicki lands a jab.

Krzepicki lands a big head kick that sends Bum tumbling to the mat! Krzepicki takes a step backwards and waves Bum back to his feet - he wants the finish!

Bum is rocked!
Wooooo! Give it up for these two warriors! They are putting on a show!
Krzepicki feints a jab and as Bum dips his head, Krzepicki unleashes a brutal head kick that catches Bum right on the jaw! Timbeeer! Bum falls backwards in slow motion, only propped up by the cage! Krzepicki smiles a psychotic smile as he stares down his unconscious opponent. That is a scary man.
Ladies and gentlemen, after 0:15 of round 1, we have a winner by way of KO (Head Kick). Mark Krzepicki !
|
|
|
|
|
|
|
|
|
|
|
|
|
|
|
|
|
|
|
|
|
|
|
| S |
C
A |
G |
S |
C
B |
G |
|
S |
C |
G |
|
energy
A | B |
|
hype
A | B |
|
pop
A | B |
|
mgr
A | B |
|
FIGHT
RATING
100% |
|
|
|
|
|
|
|
Co-main event
|
Coming up we have a welterweight MMA rules bout between Frank Trig (ranked 0 p4p, 0 weight class) and Mardy Bum (ranked 0 p4p, 0 weight class). We have two fighters making their debuts here, so let's see who comes out of this one with their first professional victory.
 |
|
 |
| 175 cm
25
181 lbs
0 - 0 - 0 |
|
180 cm
18
175 lbs
0 - 0 - 0 |
BJJ Blue Belt
Brawler
Good chin |
|
BJJ Blue Belt
Brawler
Very confident |
|
| |
|
Ladies and gentlemen. This fight is 3 rounds, in the welterweight division.
Introducing the fighter to my left, fighting out of the red corner.
With a record of
0 - 0 - 0, fighting out of Los Angeles, Frank Trig!
And introducing the fighter to my right, fighting out of the blue corner.
With a record of
0 - 0 - 0, fighting out of Las Vegas, Mardy Bum!
The judges for this bout are , Jack Bonds and Frank Antenori.
The bell rings for round one and we are underway!
Bum throws a leg kick but Trig checks it.
Bum pivots as if he's going to throw a leg kick but stops half way.
Bum will have to do better than that with his takedown attempts.
Trig shoots in and bounces Bum off the cage to secure the takedown into guard.
The referee claps his hands together and tells the fighters to work.
Trig decides he's had enough of playing guard and decides to stand. Come on Bum, up you get!
Bum shoots in looking for a takedown but Trig manages to keep the fight standing, pushing Bum's face into the canvas for good measure before circling away.
Trig looking to score a takedown here. Bum is defending well but Trig drives through and ends up in Bum's guard.
Trig gets to his feet and steps away from his opponent.
Wooooo! Give it up for these two warriors! They are putting on a show!
Bum tries to clinch but Trig moves out of range.
Trig shoots in and bounces Bum off the cage to secure the takedown into guard.
Trig passes into half guard.
That's one minute gone in the round.
Bum is looking for a sweep. Trig is wise to his cunning plan and keeps the top position.
Trig is looking to advance position but Bum won't allow it.
The ref warns both fighters not to hold the cage as they work up against the meshing.
Trig is thwarting Bum's attempts to control the position.
Bum tries to get to full guard but Trig has control of the leg.
Trig moves into full mount! Bum won't be happy about that!
Trig content just to control the position here.
That's two minutes gone in the round.
Trig has controlled the position for a good 20 seconds, which will no doubt be starting to frustrate his opponent.
Bum defends a decent attempt at a guillotine from Trig.
Trig working for a submission but Bum is keeping him at bay.
That's three minutes gone in the round.
Bum wants to use the cage to get back to his feet here.
Bum looks gassed!
Trig takes a little breather and maintains the position. The referee will be looking for him to stay active from such a dominant position though.
Trig is landing with some decent strikes but Bum is trying to advance his position so the referee is letting the fight continue.
Trig in mount throwing good strikes here, bouncing his opponent's head off the canvas.
That's four minutes gone in the round.
Trig controlling his opponent.
Trig prevents Bum from getting the reversal.
Trig content just to control the position here.
Bum working to try and regain half guard.
And thats the end of the round the fighters go back to their corners.
Frank Trig dominated that round.
The fighters get back to their feet, the hooter sounds and we're back to the action!
Trig fakes an overhand right and shoots for a takedown. Bum sprawls well initially but Trig persists and gets the takedown into half guard.
Trig prevents Bum from improving his position.
Trig is just sitting in half guard, waiting for something to happen.
Trig stands up and beckons Bum to join him on the feet.
Bum tries to clinch but Trig moves out of range.
That's one minute gone in the round.
Bum fails with a takedown attempt.
Trig has closed the distance and engaged Bum in a clinch.
Trig slowing the pace effectively.

Trig breaks the clinch and we're back to striking at distance.
Bum wants to clinch.
Trig shoots in for a takedown! He's got it and he's managed to land in full mount! That's better than Trig was expecting from the takedown attempt, I'm sure!
Trig controlling from the full mount.
Trig raining down shots from the mount!
That's two minutes gone in the round.
Trig looking to control and managing it successfully.
Trig get's back to his feet.
The crowd are loving this. Great action here.
Trig fakes a strike and closes the distance, dragging Bum to the ground. Trig is now in Bum's guard.
Bum is breathing heavily.
That's three minutes gone in the round.
Trig gets to his feet - Bum follows without any prompting.
Frank Trig is looking to throw some combinations by the looks of things.
Trig looking to shoot here. He's gone for it and he's landed a takedown into mount! Oh, that's bad for Bum!
Trig looking to control and managing it successfully.
Trig is working on an americana here. Ooh, that looks pretty nasty! Nope, Bum has managed to escape the submission attempt.
Bum tries to hold on but Trig pushes him away.
That's four minutes gone in the round.
Bum is looking to improve his position but Trig isn't that keen on the idea.
Trig sitting in mount, just looking to control for the moment.
Trig lands a heavy elbow.
Trig is really dominating this fight. Is there anything that Bum can do to turn this around?
Wooooo! Give it up for these two warriors! They are putting on a show!
As the round comes to an end the crowd are showing their appreciation for a great round of action.
Trig controlling from mount.
Trig's ground tactics aren't going to win him many fans. Let's hope he's got fireworks for us if he gets back to his feet because he's not doing much on the ground.
And thats the end of the round the fighters go back to their corners.
Frank Trig dominated that second round.
The fighters get back to their feet, the hooter sounds and we're back to the action! The crowd applaud as we get ready to start the final round!
Trig has Bum up against the cage in a clinch.
Bum misses with an elbow over the top.
Bum is trying to stall.
Bum tries a knee to the head but Trig blocks it.
Trig gets double underhooks to prevent a takedown attempt from Bum.
Trig pulls Bum into guard.
Bum is sitting in close to Trig's body. Trig has gone for a guillotine from the bottom. Oh damn, that looks pretty tight! Bum is panicking - it looks like this one could be all over! Yes, Bum is tapping! That was a very nice submission by Trig.
Ladies and gentlemen, after 1:57 of round 3, we have a winner by way of Submission (Guillotine). Frank Trig!
|
|
|
|
|
|
|
|
|
|
|
|
|
|
|
|
|
|
|
|
|
|
|
| S |
C
A |
G |
S |
C
B |
G |
|
S |
C |
G |
|
energy
A | B |
|
hype
A | B |
|
pop
A | B |
|
mgr
A | B |
|
FIGHT
RATING
100% |
|
|
|
|
|
|
|
Main event
|
Coming up we have a lightweight MMA rules bout between Clay Guida (ranked 0 p4p, 0 weight class) and Sheer Bum (ranked 0 p4p, 0 weight class). Sheer Bum acknowledges the crowd's support as he enters the cage.
 |
|
 |
| 170 cm
25
162 lbs
0 - 2 - 0 |
|
177 cm
18
161 lbs
0 - 0 - 0 |
BJJ Blue Belt
Brawler
Self confident |
|
BJJ Blue Belt
Brawler
Solid chin |
|
| |
|
Ladies and gentlemen. This fight is 3 rounds, in the lightweight division.
Introducing the fighter to my left, fighting out of the red corner.
With a record of
0 - 2 - 0, fighting out of Los Angeles, Clay Guida!
And introducing the fighter to my right, fighting out of the blue corner.
With a record of
0 - 0 - 0, fighting out of Los Angeles, Sheer Bum!
The judges for this bout are Timothy Bukovac, Don Winkell and Jack Bonds.
The bell rings for round one and we are underway!
Guida clinches up against the cage.
Guida jumps guard.
If this pace continues, the referee will definitely step in and force a standup.
Guida trying to keep a closed guard but Bum is proving a slippery customer.
Guida manages to land a sweep and now he's in mount on top!
Guida takes a little breather and maintains the position. The referee will be looking for him to stay active from such a dominant position though.
BOOM! Guida connects with a massive shot to the dome!
Guida scores with a couple of good head shots there.
Guida fakes a shot to the body and cracks his opponent in the head. Nice ground and pound there!
Guida has been looking to land a fair amount of strikes on the ground. He might be looking to soften his opponent up in order to work for a submission.
Fantastic stuff here - a very entertaining period of action, which has drawn cheers from the crowd.
Guida tucks in and makes sure he doesn't lose the dominant position.
That's one minute gone in the round.
Bum can't escape the position.
The fighters are pressed up against the cage, both looking to find a bit of space to work.
Guida jumps to the side looking to secure the arm triangle
. Ooooh, that looks tight
Bum is gargling but he's managed to escape! Nice work there by Bum and Guida has given up the dominant position trying to land that submission.
Guida landing strikes.
Bum tries to buck Guida off but Guida is having none of it.
The referee tells the fighters to keep busy.
Guida tries for an arm triangle. That looks pretty tight to me. Is this one over!?! Possibly, maybe, no Guida has let go of the choke. Obviously it wasn't as tight as we thought!
That's two minutes gone in the round.
Guida scoring with punches from side control.
Bum takes a couple of big shots there - the referee warns him that he has to defend himself better.
Guida trying to control the position but Bum is working away.
Guida laying and praying for a moment but Bum takes advantage and regains half guard.
Wooooo! Give it up for these two warriors! They are putting on a show!
Bum tries to push off, looking to stand up, but Guida manages to move to mount!
Bum is in a horrible position here. Guida smacks him with another shot as he tries to escape the position.
That's three minutes gone in the round.
Guida working for a guillotine from mount but Bum is in no mood to give up.
Bum tries to hold on but Guida postures up.
Bum is not a happy chappy
he wants out of there.
Bum is wriggling around trying to escape.
Guida controlling from mount.
Bum tries to lock up and control but Guida gives him a forearm to the face and pushes him away.
That's four minutes gone in the round.
Bum is in all sorts of trouble here.
Bum looks gassed!
Guida with the ground and pound from mount.
Guida lands a big shot there that rocks Bum but he's holding on and managing to survive for now.
Guida controlling his opponent.
Guida looking to ground and pound his opponent to a finish here.
Fantastic stuff here - a very entertaining period of action, which has drawn cheers from the crowd.
Guida working away from the top, dropping strikes.
As the round comes to an end the crowd are showing their appreciation for a great round of action.
Guida controlling from mount.
Bum takes a big shot to the head but keeps on trying to improve his position.
And thats the end of the round the fighters go back to their corners.
Clay Guida dominated that round.
The referee calls time. The cornermen exit stage left and we're back to business.
Guida darts in and clinches Bum up against the cage.
Guida jumps guard.
Bum stands and throws Guida's legs to the side, diving into side control.
Guida gets one leg under and gets the fight to half guard.
Bum is thwarting Guida's attempts to control the position.
Bum is trying to control the action in half guard but Guida is working away on the bottom, looking perhaps to get back to full guard.
Guida gets full guard.
Guida looking for submissions from the bottom here. Moving his hips around, possibly looking for an armbar.
Bum wants to control from the top but Guida keeps moving.
That's one minute gone in the round.
Guida throws some shots to the body, keeping his opponent honest.
There's a bit of a scramble here and now Guida is on top in guard.
Guida slips nicely into half guard.
Clay Guida overall seems to be getting the better of the ground position in the fight so far.
Guida prevents Bum from improving his position.
Guida prevents Bum from standing back up.
Bum is breathing heavily.
Guida lands strikes from half guard.
That's two minutes gone in the round.
Guida controlling the action here.
Guida landing with strikes to the body and head, softening up his opponent.
Bum regains full guard, whilst avoiding punches from Guida.
Bum preventing the ground and pound from doing any damage.
Guida controlling from the guard. I say controlling but really, he's stalling.
Guida trying to control but Bum is working from the bottom.
Guida stands up from guard. Let's bang!
That's three minutes gone in the round.
Guida drives through with a really nice takedown into side control.
Bum is looking for a sweep.
Guida stands up and beckons Bum to his feet.
Guida pushes Bum up against the cage in a clinch.
Bum tries to pull guard but Guida won't allow it.
Guida landing knees to the body. They look like they could hurt.
Bum is trying to break the clinch but Guida has him pressed against the cage.
A short body shot lands from Guida as the two fighters clinch.
Guida gets a trip takedown into half guard.
That's four minutes gone in the round.
Wooooo! Give it up for these two warriors! They are putting on a show!
Guida sitting and controlling from the half guard.
Bum is looking to regain full guard. He's left an arm up in the air though and Guida has latched onto it... Big trouble! Guida pivots for an armbar - it's in tight and it Bum is tapping in no time flat! Great counter grappling there from Guida!
Ladies and gentlemen, after 4:27 of round 2, we have a winner by way of Submission (Armbar). Clay Guida!
After winning the bout, Clay Guida thanked all his fans and promised he'd do even better in his next fight. The crowd seemed to love his humility.
|
|
|
|
|
|
|
|
|
|
|
|
|
|
|
|
|
|
|
|
|
|
|
| S |
C
A |
G |
S |
C
B |
G |
|
S |
C |
G |
|
energy
A | B |
|
hype
A | B |
|
pop
A | B |
|
mgr
A | B |
|
FIGHT
RATING
36% |
|
|
|
|
|
|
|
|
|
|

