 |
GFL 28 - Krakakos vs Lao PBP Commentary |
Undercard bout
|
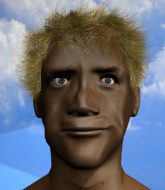
Coming up we have a light heavyweight MMA rules bout between Storm Chaser (ranked 0 p4p, 0 weight class) and Justin Kennedy (ranked 0 p4p, 0 weight class). Over to our ring announcer for the fighter introductions!
 |
|
 |
| 190 cm
18
220 lbs
1 - 2 - 0 |
|
180 cm
21
200 lbs
0 - 3 - 0 |
BJJ White Belt
Solid Muay Thai
Very strong |
|
BJJ Blue Belt
Decent boxing
Solid chin |
|
| |
|
Ladies and gentlemen. This fight is 3 rounds, in the light heavyweight division.
Introducing the fighter to my left, fighting out of the red corner.
With a record of
1 - 2 - 0, fighting out of Tokyo, Storm Chaser!
And introducing the fighter to my right, fighting out of the blue corner.
With a record of
0 - 3 - 0, fighting out of Tokyo, Justin Kennedy!
The judges for this bout are Ren Mimura, Yukihiro Shimada and Sosuke Kotani.

The bell rings for round one and we are underway!
Chaser shoots in for a double leg but Kennedy sprawls well. That's going to sap some energy.
Chaser shoots in for a takedown but Kennedy shows good takedown defense.
Kennedy tries to clinch but Chaser is having none of it.
Kennedy circles away from the clinch attempt.
Kennedy tries to clinch but Chaser is having none of it.
Chaser swats away the attempt to clinch by Kennedy.
Chaser throws a nice looking combination but Kennedy bobs and weaves to avoid any damage.

Chaser fakes with an overhand right and moves in to clinch with Kennedy, pushing him back against the cage.
Kennedy misses with a short punch on the inside.
Kennedy misses with a short punch on the inside.
Chaser tries to pull guard but Kennedy won't allow it.
That's three failed takedown attempts in the round for Storm Chaser. That's going to take a lot out of him.
An uppercut on the inside fails to land for Kennedy.
Chaser looking to stall.
Chaser blocks an uppercut.
Kennedy throws a head punch that misses.
Kennedy lands a right hand that snaps the head of Chaser backwards.
Kennedy doesn't land with the attempted body shot.

That's one minute gone in the round.
Kennedy tries a shoulder strike but it doesn't do any damage.
Kennedy throws a punch but it's blocked by Chaser.
An uppercut on the inside fails to land for Kennedy.
A frustrated look appears on Chaser's face as he tries to break the clinch.
Chaser misses with a knee strike.
Kennedy scores with a nice hook to the head.
Kennedy gets through Chaser's defenses to land a nice punch to the side of the head.
Chaser tries for a takedown. No joy.
A head punch on the inside from Kennedy fails to land.
Chaser with a knee to the head.
Kennedy looks gassed!
Still in the clinch, Kennedy scores with a nice short uppercut.
Chaser is trying to slow down the pace of the fight but Kennedy is keeping busy.
Chaser is trying to pull guard but Kennedy turns him against the cage and we stay in the clinch.
Chaser has a body lock and is looking for a takedown. Kennedy is bouncing around trying to prevent the takedown and somehow he has indeed managed to stay on his feet.
Kennedy doesn't land with the attempted body shot.
Kennedy lands with a short shot to the head.
Kennedy scores with a shoulder strike.
Chaser pushes off and fires off an elbow that misses, before clinching up again, against the cage.
Chaser connects with a nasty looking knee right to Kennedy's face.

That's two minutes gone in the round.
Chaser lands with a right to the head.
This is a great period of action - very entertaining stuff!
Chaser wants to strike at distance but he can't break free of the clinch.
Chaser wants to break free. God knows he wants to breaaaak freeee.
Kennedy swings wildly with an uppercut but Chaser uses good head movement to avoid it.
Chaser is trying to maintain a safe position but Kennedy gets an underhook and turns Chaser into the cage.
Chaser wants to take the fight to the mat but Kennedy manages to get underhooks and keep the fight in the clinch.
Kennedy misses with a hook from the clinch.
Kennedy tries a shoulder strike but it doesn't do any damage.
A head punch blocked on the inside by Chaser.
Kennedy misses with a hook from the clinch.
Chaser is trying to break the clinch but Kennedy is controlling him.
Chaser jumps guard but Kennedy turns him against the cage and keeps the fight standing.
Kennedy misses with some punches.
A nice right hand lands inside from Kennedy.
Chaser blocks an uppercut.
Chaser is trying to pull guard but Kennedy turns him against the cage and we stay in the clinch.
Kennedy has a couple of punches blocked by Chaser.
Kennedy throws a head punch that misses.

That's three minutes gone in the round.
Chaser lands an elbow just above Kennedy 's eye.

It looks like Justin Kennedy has been cut.

Chaser breaks the clinch.
Chaser tries to close the distance and clinch up but Kennedy swats him away and circles back towards the center.
Chaser tries to clinch up but Kennedy circles away and keeps his distance.
Chaser shoots in looking for a takedown but Kennedy manages to keep the fight standing, pushing Chaser's face into the canvas for good measure before circling away.
Kennedy slaps away a takedown attempt from Chaser, before circling back to the center of the mat.
Kennedy doesn't manage to clinch there - Chaser circles away.
Chaser fails with a takedown attempt.
Chaser fails to land the takedown.
Kennedy tries to clinch up.
Justin Kennedy seems to be the more aggressive standup fighter in this bout.

That's four minutes gone in the round.
A punch combination from Chaser misses.
Kennedy is looking to take this fight into the clinch.

Kennedy closes the distance and clinches.
Kennedy misses with a hook from the clinch.
Kennedy misses with a hook from the clinch.
Chaser jumps guard but Kennedy stands there with Chaser around his waist. Chaser gives up and drops back to his feet. We remain in the clinch.
Chaser is looking for a takedown.
Kennedy swings wildly with an uppercut but Chaser uses good head movement to avoid it.
Chaser tries a knee to the head but Kennedy blocks it.
As the round comes to an end the crowd are showing their appreciation for a great round of action.
Good anti-grappling being displayed by Kennedy as Chaser tries to tie him up.
Chaser tries to land a knee to the head but misses.
Kennedy swings wildly with an uppercut but Chaser uses good head movement to avoid it.
This has been an exciting period of action!
Chaser with an attempt at a knee that misses.
And thats the end of the round the fighters go back to their corners.
A close round but Justin Kennedy will probably get the nod.
The cut man is working on Justin Kennedy's cut.
The fighters get back to their feet, the hooter sounds and we're back to the action!

Kennedy tries to clinch up against the cage, rushing in the close the distance. Chaser manages to break the clinch and circles back to the middle of the mat.
Chaser tries to close the distance and clinch up against the cage but Kennedy paws at him with a jab and circles away.
Kennedy has managed to clinch.
Chaser blocks a punch to the side of the head.
Chaser tries to jump guard but he falls flat on his backside. Kennedy smiles and moves away.
Kennedy tries to clinch up
and Chaser counters with a nice leg kick.
Chaser tries to clinch there but Kennedy circles away.
Kennedy wants to clinch up but Chaser keeps it at a distance.
Kennedy wants to clinch up but Chaser keeps it at a distance.
Chaser tries to clinch but Kennedy moves out of range.
Chaser wants to clinch up but Kennedy keeps it at a distance.
Kennedy has Chaser up against the cage in a clinch.
Kennedy is breathing heavily.
A head punch blocked on the inside by Chaser.
That's one minute gone in the round.
Chaser is working for a takedown up against the cage. He can't get it on this occasion though.
Kennedy misses with a punch on the inside.
Chaser blocks a punch to the side of the head.
Kennedy throws a head punch that misses.
Chaser is trying to work for a single leg takedown but Kennedy pulls him back up using the underhooks.
That's three failed takedown attempts in the round for Storm Chaser. That's going to take a lot out of him.
Chaser misses the knee to the body. Nice hip positioning from Kennedy.
Chaser connects with a nasty looking knee right to Kennedy's face.
Kennedy misses with a short punch on the inside.
Kennedy swings wildly with an uppercut but Chaser uses good head movement to avoid it.
Chaser tries to pull guard but Kennedy holds him up against the cage and eventually Chaser drops back down to his feet.
Chaser wants to break the clinch but can't.
Kennedy fails to land with a short punch on the inside.
Chaser with the Thai clinch, lands a knee to the head.
A quick uppercut on the inside from Chaser.

Kennedy is rocked!
Chaser has the Thai clinch. He lands a big knee to the head that stumbles Kennedy - he's in trouble! Another big knee to the head from Chaser, and another! Kennedy is out on his feet - the ref jumps in to save him and ends the fight!
Ladies and gentlemen, after 2:55 of round 2, we have a winner by way of TKO (Knees). Storm Chaser!
|
|
|
|
|
|
|
|
|
|
|
|
|
|
|
|
|
|
|
|
|
|
|
| S |
C
A |
G |
S |
C
B |
G |
|
S |
C |
G |
|
energy
A | B |
|
hype
A | B |
|
pop
A | B |
|
mgr
A | B |
|
FIGHT
RATING
96% |
|
|
|
|
|
|
|
Undercard bout
|
|
|
|
Undercard bout
|
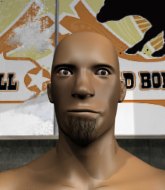
Coming up we have a heavyweight MMA rules bout between Kazuo Hanayama (ranked 0 p4p, 0 weight class) and Apachai Hopachai (ranked 0 p4p, 0 weight class). Apachai Hopachai has the better chin. Will he look to stand and bang today?
 |
|
 |
| 180 cm
24
251 lbs
2 - 3 - 0 |
|
191 cm
20
235 lbs
0 - 0 - 0 |
Decent wrestler
Excellent boxer
KO power |
|
BJJ White Belt
Good kicks
Good gas tank |
|
| |
|
Ladies and gentlemen. This fight is 3 rounds, in the heavyweight division.
Introducing the fighter to my left, fighting out of the red corner.
With a record of
2 - 3 - 0, fighting out of Tokyo, Kazuo Hanayama!
And introducing the fighter to my right, fighting out of the blue corner.
With a record of
0 - 0 - 0, fighting out of Tokyo, Apachai Hopachai!
The judges for this bout are Yuuki Gou, Shirou Masuda and Shigeki Sano.
The bell rings for round one and we are underway!
Hopachai tries to close the distance and clinch up against the cage but Hanayama paws at him with a jab and circles away.
Hopachai misses with a low kick.
Hopachai takes a shot to the eye socket. That's gotta hurt.
Hanayama moves into range and throws a combination. A nice jab followed by a hook to the body.
It looks like Apachai Hopachai has been cut.
Hopachai connects with a solid leg kick.
Hanayama checks the leg kick.
Hanayama lands a nice looking body shot.
The crowd are loving this. Great action here.
Hopachai throws a head kick that misses.
Hopachai throws out a leg kick but Hanayama moves out of range and Hopachai only half commits.
Hanayama fails to land with the punch combination there - jab, cross, hook, miss, miss, miss.
Hopachai takes a hook to the side of the head. I wonder if that's got his ears ringing.
That's one minute gone in the round.
Danga de danga de dang - Hanayama scores with a four punch combination!
Hanayama lands with a nice body punch.
Hanayama misses with a wild body shot.
Hanayama scores with a decent looking hook.
Hopachai gets his head snapped back by a nice shot there.
Hanayama throws a hook to the body but it doesn't connect.
Hopachai lands a nice leg kick that just misses Hanayama's sensitive parts.
Hanayama checks the leg kick.
That's two minutes gone in the round.
Hopachai throws a low kick but his opponent is out of range.
Well, he's not going to score with shots like that. A lazy body kick attempt from Hopachai.
Hopachai throws a head kick but Hanayama moves out of range.
Hopachai takes an uppercut right on the button but keeps his composure.
The crowd are loving this. Great action here.
Hanayama misses with a body shot.
Hopachai tries to close the distance and clinch up but Hanayama swats him away and circles back towards the center.
Hopachai takes a body punch but keeps moving.
A lazy left from Hanayama finds it's target.
A head kick misses from Hopachai.
Hopachai keeping a good distance there, avoiding the body shot.
That's three minutes gone in the round.
Hanayama digs a good hook to Hopachai's body.
Hanayama looks to score with a jab to the body but Hopachai is just out of range.
Hopachai wants to land a leg kick but Hanayama is out of range.
Hopachai throws a head kick that misses.
Hopachai uses some good footwork to avoid the body shot by Hanayama.
Hopachai pivots, looking for a leg kick but Hanayama is out of range and Hopachai settles back down.
Hanayama scores with a body shot.
Hopachai fails with an attempt to clinch.
Hopachai on the wrong end of a vicious looking body shot.
That's four minutes gone in the round.
Hanayama just misses with a punch to the body.
Hopachai keeping a good distance there, avoiding the body shot.
Hopachai is looking to take this fight into the clinch.
Hanayama keeps the fight on the outside.
Nice cross by Hanayama.
Hopachai throws a head kick that connects with a bit of head and a bit of hand.
Wooooo! Give it up for these two warriors! They are putting on a show!
The crowd are going absolutely nuts as the round comes to an end - what a fantastic round of action!
Hanayama lands with a right hand.
Hopachai on the wrong end of a vicious looking body shot.
And thats the end of the round the fighters go back to their corners.
Kazuo Hanayama dominated that round.
The cut man is working on Apachai Hopachai's cut.
That's time! Hanayama's corner gives him a slap on the ass as he gets ready to fight.
Hopachai throws a push kick but Hanayama slaps the foot to one side.
Hanayama is the aggressor but that punch slipped nicely by Hopachai.
Hopachai closes the distance and clinches.
Hanayama can't break the clinch.
Hopachai tries to land knees in the clinch but Hanayama avoids the damage to the body.

Hanayama gets a nice trip takedown into half guard.
Hopachai trying to control but Hanayama postures up.
Hanayama seems very keen to just sit and control from half guard but Hopachai does not like that idea so much and is remaining active off his back.
Hanayama takes a deep breath and rests his weight momentarily on top of his opponent, to control the position.
Hopachai trying to get back to full guard but Hanayama takes advantage of the position and moves to full mount!
Hanayama scores with a couple of good head shots there.
We get told so often about how wrestlers don't like to be on their backs. Let's see if Hopachai can do anything to dispel that myth.
That's one minute gone in the round.
Hanayama scoring with strikes but Hopachai is staying in there.
Hopachai is rocked!
Hopachai really doesn't want to stay on the ground with Hanayama. If he can't get it back to his feet, it's only a matter of time before he'll be tapping out.
Hanayama connects with a bit shot that sees Hopachai covering up! More strikes from Hanayama and the referee jumps in to stop the fight! Hanayama is our winner by TKO!
Ladies and gentlemen, after 1:33 of round 2, we have a winner by way of TKO (Strikes). Kazuo Hanayama!
Jumping up and down and very excited, Kazuo Hanayama waved his t-shirt featuring Steel Terror-Trition: Video Proven 160Q's logo in front of the cameras.
|
|
|
|
|
|
|
|
|
|
|
|
|
|
|
|
|
|
|
|
|
|
|
| S |
C
A |
G |
S |
C
B |
G |
|
S |
C |
G |
|
energy
A | B |
|
hype
A | B |
|
pop
A | B |
|
mgr
A | B |
|
FIGHT
RATING
88% |
|
|
|
|
|
|
|
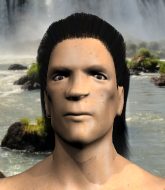
Undercard bout
|
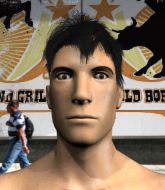
Coming up we have a light heavyweight MMA rules bout between Bucky Pluto (ranked 0 p4p, 0 weight class) and Hybrid Orthrus (ranked 0 p4p, 0 weight class). This should be a great matchup!
 |
|
 |
| 190 cm
27
216 lbs
6 - 4 - 0 |
|
188 cm
25
213 lbs
1 - 0 - 0 |
Decent wrestler
Solid Muay Thai
Cardio machine |
|
BJJ White Belt
Solid Muay Thai
Determined |
|
| |
|
Ladies and gentlemen. This fight is 3 rounds, in the light heavyweight division.
Introducing the fighter to my left, fighting out of the red corner.
With a record of
6 - 4 - 0, fighting out of Tokyo, Bucky Pluto!
And introducing the fighter to my right, fighting out of the blue corner.
With a record of
1 - 0 - 0, fighting out of Tokyo, Hybrid Orthrus!
The judges for this bout are Taro Takaoka, Yuuki Gou and Sosuke Kotani.
The bell rings for round one and we are underway!
Orthrus tries to move into range but Pluto moves to the side and lands with a nice right hand.
The fight stays on the outside here - Orthrus looks like he's thinking about clinching though.
Orthrus throws a series of punches but Pluto moves out of range.
Orthrus takes a punch right to his stomach. That took the wind out of him momentarily.
Pluto is moving around nicely and scores here with a single head shot.
The crowd cheering loudly, showing their appreciation for the quality fight we're seeing here.
Pluto avoids the head kick by Orthrus.

Pluto lands a left and a right that send Orthrus crashing to the mat, dazed. Pluto thinks about following him to the mat but decides to wave him back up to his feet!
Orthrus is rocked!
It looks like Hybrid Orthrus has been cut.
Pluto staying out of range there.
Pluto throws out a token jab with nothing on it.
A looping hook to the body misses from Pluto. Orthrus does a little dance to reset his feet.
Orthrus misses with a half-hearted attempt at a head kick.
Orthrus tries to clinch but Pluto moves away
and Pluto counters with a good, hard body kick but Orthrus shrugs it off.
Orthrus looks gassed!
Pluto ducks down and throws a hook to the body.
Orthrus takes a shot right to the liver - Bas would have been proud of that punch.
That's one minute gone in the round.
Orthrus walks into a stiff left hand from Pluto.
Orthrus on the wrong end of a decent looking cross there.
Pluto lands a big uppercut and this one is all over! His foe lies motionless on the canvas - a massive one punch knockout!
Ladies and gentlemen, after 1:19 of round 1, we have a winner by way of KO (Punch). Bucky Pluto!
|
|
|
|
|
|
|
|
|
|
|
|
|
|
|
|
|
|
|
|
|
|
|
| S |
C
A |
G |
S |
C
B |
G |
|
S |
C |
G |
|
energy
A | B |
|
hype
A | B |
|
pop
A | B |
|
mgr
A | B |
|
FIGHT
RATING
100% |
|
|
|
|
|
|
|
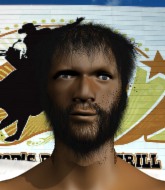
Undercard bout
|
Coming up we have a featherweight MMA rules bout between Igor I Got No Second Name (ranked 0 p4p, 0 weight class) and Frulegur Wiskeber (ranked 0 p4p, 0 weight class). I Got No Second Name comes to the cage accompanied by Van Helsing Theme Song. Frulegur Wiskeber told me before the fight that he's been watching a lot of DVDs so let's see if that helps him in this one! I can't wait to find out!
 |
|
 |
| 188 cm
29
143 lbs
6 - 7 - 0 |
|
173 cm
19
150 lbs
0 - 5 - 0 |
BJJ Brown Belt
Great elbows
Cardio machine |
|
BJJ White Belt
Excellent boxer
Determined |
|
| |
|
Ladies and gentlemen. This fight is 3 rounds, in the featherweight division.
Introducing the fighter to my left, fighting out of the red corner.
With a record of
6 - 7 - 0, fighting out of Tokyo, Igor I Got No Second Name!
And introducing the fighter to my right, fighting out of the blue corner.
With a record of
0 - 5 - 0, fighting out of Tokyo, Frulegur Wiskeber!
The judges for this bout are Ren Mimura, Shigeki Fujiwara and Kenichi Hosakawa.
The bell rings for round one and we are underway!
Wiskeber moves into range and throws a combination. A nice jab followed by a hook to the body.
I Got No Second Name leaves Wiskeber with his face pressed against the mat as he sprawls beautifully, defending against a solid takedown attempt.
I Got No Second Name moves out of range as Wiskeber strikes.
A really sloppy takedown attempt there from I Got No Second Name.
I Got No Second Name closes the distance and clinches up with Wiskeber, looking for a takedown. I Got No Second Name pushes Wiskeber against the cage but Wiskeber circles to the side and manages to break the clinch.
Wiskeber tries to land with a swinging hook to the body but I Got No Second Name was well out of range. Poor timing from Wiskeber.

Wiskeber shoots in looking for a single leg takedown. I Got No Second Name is trying to defend but Wiskeber finishes it well and ends up in half guard. Let's see if he can advance position further.
The referee is pacing around the two fighters - he looks like he's thinking about a standup.
I Got No Second Name moves his hips nicely and gets into full guard.

Wiskeber throws a sloppy strike and I Got No Second Name has hooked up an armbar on the loose arm! He's turned and extended fully! Wiskeber is forced to tap! Great BJJ from I Got No Second Name!
Ladies and gentlemen, after 1:57 of round 1, we have a winner by way of Submission (Armbar). Igor I Got No Second Name!
After winning the bout, Igor I Got No Second Name thanked all his fans and promised he'd do even better in his next fight. The crowd seemed to love his humility.
|
|
|
|
|
|
|
|
|
|
|
|
|
|
|
|
|
|
|
|
|
|
|
| S |
C
A |
G |
S |
C
B |
G |
|
S |
C |
G |
|
energy
A | B |
|
hype
A | B |
|
pop
A | B |
|
mgr
A | B |
|
FIGHT
RATING
38% |
|
|
|
|
|
|
|
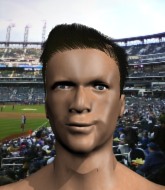
Co-main event
|
Coming up we have a bantamweight MMA rules bout between Ippo Makounchi (ranked 0 p4p, 0 weight class) and Norifumi Yamamoto (ranked 0 p4p, 0 weight class). Makounchi comes to the cage accompanied by rolling go. Norifumi Yamamoto told me before the fight that he's been watching a lot of DVDs so let's see if that helps him in this one! I can't wait to find out!
 |
|
 |
| 178 cm
18
139 lbs
1 - 2 - 1 |
|
160 cm
20
134 lbs
4 - 2 - 0 |
BJJ Blue Belt
Basic striking
Self confident |
|
BJJ Blue Belt
Counter striker
Knockout power |
|
| |
|
Ladies and gentlemen. This fight is 3 rounds, in the bantamweight division.
Introducing the fighter to my left, fighting out of the red corner.
With a record of
1 - 2 - 1, fighting out of Tokyo, Ippo Makounchi!
And introducing the fighter to my right, fighting out of the blue corner.
With a record of
4 - 2 - 0, fighting out of Tokyo, Norifumi Yamamoto!
The judges for this bout are Shigeki Fujiwara, Shigeki Sano and Yukihiro Yamamoto.
The bell rings for round one and we are underway!
Makounchi scores with a jab to the head.
Makounchi attempts a low kick but it misses it's target.
Makounchi thows a body shot but no joy.
Yamamoto will need to tighten up his combinations if he doesn't want to gas himself out, swinging at thin air.
Good work by Makounchi as he checks the leg kick.
Makounchi connects with a jab.
Yamamoto throws a series of punches but Makounchi avoids them all with ease.
Yamamoto avoids the body shot from Makounchi.
Makounchi misses with a body kick.
Yamamoto fakes a jab and throws a low kick but Makounchi checks it well.
No joy there for Makounchi, who threw a few shots but didn't land.
Yamamoto misses with a head kick.
Yamamoto misses with a looping right.
Yamamoto moves out of range as Makounchi throws a body kick.
Makounchi attempts a leg kick but it's missed by a good margin.
Ippo Makounchi seems to be the more aggressive standup fighter in this bout.
Yamamoto fails to land with the punch combination there - jab, cross, hook, miss, miss, miss.
No joy there for Yamamoto, who threw a few shots but didn't land.
Makounchi scores with a crisp jab that stopped Yamamoto in his tracks.
That's one minute gone in the round.
Makounchi fails to land with the punch combination there - jab, cross, hook, miss, miss, miss.
Yamamoto pulls out of a head kick attempt.
Yamamoto swings away but doesn't land with a series of punches.
Makounchi rushes forward with a series of wild hooks but Yamamoto moves out of range and avoids them all easily.
Makounchi avoids the head kick by Yamamoto.
Yamamoto misses with a jab and misses with a cross straight after too.
Makounchi slips a jab and a cross from Yamamoto.
Makounchi rushes forward with a series of wild hooks but Yamamoto moves out of range and avoids them all easily.
Makounchi connects with a right hand. Yamamoto shakes it off.
Makounchi slips a jab and a cross from Yamamoto.
Makounchi scores with a decent looking hook.
Makounchi is using his reach advantage well here, landing the more effective single shots from range.
Makounchi tests Yamamoto's chin there with a solid looking shot.
Makounchi digs a good body shot into Yamamoto's ribs.
Yamamoto blocks the body kick.
Makounchi feints a straight left to the body, then turns around with a flashy move and hits Yamamotos jaw with a dramatic spinning back fist!
Makounchi is breathing heavily.
That's two minutes gone in the round.
Makounchi uses good footwork to get in and out and land a nice right hand before Yamamoto has time to react.
Yamamoto throws a right and a left that Makounchi avoids nicely.
Makounchi throws a right and a left that Yamamoto avoids nicely.
Makounchi looks to land a combination but Yamamoto avoids it well.
Makounchi throws a combination but comes up with nothing but fresh air.
Yamamoto misses with a wild combination.
Makounchi looks to land a combination but Yamamoto avoids it well.
Yamamoto throws a head kick that misses.
Makounchi jabbing away but nothing is landing.
Yamamoto throws a nice looking combination but Makounchi bobs and weaves to avoid any damage.
Makounchi throws the kick towards the body but Yamamoto avoids it.
Fantastic stuff here - a very entertaining period of action, which has drawn cheers from the crowd.
Makounchi throws a body punch but Yamamoto moves out of range.
Yamamoto throws out a leg kick but Makounchi moves out of range and Yamamoto only half commits.
A leg kick checked by Makounchi.
Yamamoto throws a sloppy head kick and Makounchi moves out of range easily.
That's three minutes gone in the round.
Makounchi misses with a few strikes there.
Makounchi throws a combination but it was largely blocked by Yamamoto.
Yamamoto misses with a series of wild punches.
Makounchi avoids the head kick by Yamamoto.
Yamamoto pulls out of a head kick attempt.
Jab, cross, leg kick. Nice combination by Makounchi!
Yamamoto throws a series of punches but Makounchi moves out of range.
Makounchi dodges the punch combination from Yamamoto.
Yamamoto misses with a wild combination.
Makounchi misses with a series of wild punches.
Makounchi throws a series of punches but Yamamoto moves out of range.
That's four minutes gone in the round.
Makounchi fails to land with the punch combination there - jab, cross, hook, miss, miss, miss.
Yamamoto will need to tighten up his combinations if he doesn't want to gas himself out, swinging at thin air.
Yamamoto throws a combination but it was largely blocked by Makounchi.
A punch combination from Makounchi misses.
Makounchi avoids a punch combination nicely.
Yamamoto lunges in with swinging rights and lefts but Makounchi circles away quickly and effectively.
Yamamoto misses with a series of wild punches.
Yamamoto throws a shot from downtown. Makounchi moves away and avoids it.
The crowd applaud the fighters efforts here as the round comes to an end.
Yamamoto shapes like he's going to throw a leg kick but settles back down.
Makounchi throws a right and a left that both miss.
Makounchi is using his height advantage well here, landing a good percentage of his punches.
Makounchi scores with a hook.
And thats the end of the round the fighters go back to their corners.
That was a close round but I would say that Ippo Makounchi will probably get the nod.
OK. That's time! The bell goes and we're back to the action.
Makounchi lunges in with swinging rights and lefts but Yamamoto circles away quickly and effectively.
Makounchi throws a wild body kick that Yamamoto sees coming a mile off.
Sloppy strikes from Makounchi. Those never looked like landing.
Yamamoto throws a right and a left that both miss.
Yamamoto throws a right hand that Makounchi ducks under and follows up with a left that Makounchi also avoids with ease.
Some wild striking there from Makounchi.
Some wild striking there from Yamamoto.
Yamamoto tries to bum rush Makounchi with a series of wild strikes but Makounchi uses good footwork to avoid the assault.
Makounchi tried to score with a low kick but Yamamoto checks it.
Makounchi lands a jab, followed by a cross and another cross, as Yamamoto backs up against the cage.
Makounchi feints a jab promting Yamamoto to slip. Makounchi then demonstrates his capabilities by jabbing again. Yamamoto slips again and ducks right into an uppercut.
Makounchi really does look like a pencil wearing a pair of gloves. Let's hope he has a gameplan to suit that ridiculous body shape.
Yamamoto throws a combination but comes up with nothing but fresh air.
Ippo Makounchi is looking to throw some combinations by the looks of things.
Both fighters are absolutely exhausted here.
Makounchi blocks a head kick by Yamamoto.
We are yet to see a takedown attempt from Yamamoto in the fight. On paper you would think he is the more dominant ground fighter so let's see if these unusual tactics pay off.
That's one minute gone in the round.
Makounchi lands with a two punch combination before moving back out of range.
Makounchi connects with a lovely jab that went straight through the gap between Yamamoto's hands.
Yamamoto misses with a head kick.
Yamamoto misses with an uppercut. Makounchi saw that one coming.
Makounchi throws a combination but comes up with nothing but fresh air.
Makounchi throws a looping overhand right but Yamamoto ducks down to avoid it.
Yamamoto throws a sloppy head kick and Makounchi moves out of range easily.
Makounchi misses with a wild combination.
Makounchi slips a jab and a cross from Yamamoto.
Yamamoto throws a big shot that misses.
Yamamoto throws a right and a left that both miss.
Yamamoto misses with the combination.
Makounchi swinging wildly here.
That's two minutes gone in the round.
Yamamoto misses with a series of wild punches.
Yamamoto lands a jab followed by a nice looking cross.
Makounchi avoids a punch combination nicely.
Yamamoto ducks right into an uppercut from Makounchi.
Yamamoto throws a right and a left that both miss.
Sloppy strikes from Yamamoto. Those never looked like landing.
Ippo Makounchi is winning the standup battle so far.
Yamamoto pivots, looking for a leg kick but Makounchi is out of range and Yamamoto settles back down.
Makounchi uses good footwork to get in and out and land a nice right hand before Yamamoto has time to react.
Yamamoto lunges in with swinging rights and lefts but Makounchi circles away quickly and effectively.
Makounchi misses with a kick to the body.
Nice uppercut there from Makounchi.
That's three minutes gone in the round.
Makounchi looks to score with a combo but nothing lands.
Makounchi misses with the combination.
The fighters are going at a pretty good pace and they're both starting to sweat now.
Yamamoto misses with a head kick.
Makounchi misses with the combination.
Yamamoto tries to bum rush Makounchi with a series of wild strikes but Makounchi uses good footwork to avoid the assault.
Yamamoto throws a combination but comes up with nothing but fresh air.
Makounchi works the jab nicely.
Makounchi with a hook.
Yamamoto throws a nice looking combination but Makounchi bobs and weaves to avoid any damage.
Makounchi tries to bum rush Yamamoto with a series of wild strikes but Yamamoto uses good footwork to avoid the assault.
Makounchi dodges the punch combination from Yamamoto.
Makounchi thows a body shot but no joy.
That's four minutes gone in the round.
A clash of legs there as Makounchi blocks the low kick.
Yamamoto tries to land a leg kick but Makounchi saw it coming and moves away.
Makounchi misses with a two punch combination.
Yamamoto fails to land with a series of punches.
Makounchi misses with a kick to the body.
Yamamoto tries a switch kick but it misses it's target.
A swing and a miss from Yamamoto.
Yamamoto misses with a head kick.
Yamamoto moves forwards but Makounchi connects with a nice, crisp jab.
Makounchi throws a wild combination but nothing lands.
The crowd applaud the fighters efforts here as the round comes to an end.
Yamamoto misses with a jab and misses with a cross straight after too.
Yamamoto pulls out of a head kick attempt.
Makounchi is looking to land body kicks.
Makounchi lands with a two punch combination before moving back out of range.
And thats the end of the round the fighters go back to their corners.
A close second round but Norifumi Yamamoto will probably get the nod - 10:9.
The minute break is over - no more time for sponges and pep talks - back to the action! This is the final round!

Makounchi misses with a series of wild punches.
Yamamoto throws a two punch combo that lands nicely.
Makounchi swings away but doesn't land with a series of punches.
Makounchi rushes forward with a series of wild hooks but Yamamoto moves out of range and avoids them all easily.
Makounchi tries to bum rush Yamamoto with a series of wild strikes but Yamamoto uses good footwork to avoid the assault.
Sloppy strikes from Yamamoto. Those never looked like landing.
Yamamoto throws a low kick but Makounchi avoids it.
No joy there for Makounchi, who threw a few shots but didn't land.
Yamamoto swinging wildly here.
Yamamoto looks to land a combination but Makounchi avoids it well.
Makounchi ducks under a wild hook from Yamamoto.
Both fighters are breathing heavily.
Makounchi with a jab.
Yamamoto throws a head kick that misses.
That's one minute gone in the round.
Yamamoto throws a wild combination but nothing lands.
Yamamoto throws a combination but comes up with nothing but fresh air.
Makounchi throws a series of punches but Yamamoto moves out of range.
Yamamoto throws a head kick but Makounchi moves out of range.
Makounchi connects with a slap. Keep your fist closed son.
Makounchi misses with a double jab.
Yamamoto tries to bum rush Makounchi with a series of wild strikes but Makounchi uses good footwork to avoid the assault.
A decent looking cross lands there for Makounchi.
Decent striking displayed by Makounchi there.
Makounchi misses with an attempted mid kick.
Makounchi looks to score with a jab to the body but Yamamoto is just out of range.
A shot to the liver by Yamamoto. Beautiful body shot.
Makounchi misses with an attempted mid kick.
Yamamoto pushing out the jab but it's not landing.
That's two minutes gone in the round.
Yamamoto scores with a nice looking left hook and follows it up with an uppercut!
Makounchi looks to land a combination but Yamamoto avoids it well.
Yamamoto ducks under a wild hook from Makounchi.
A combination from Yamamoto does no damage.
Makounchi throws a right and a left that Yamamoto avoids nicely.
Yamamoto swinging wildly here.
Makounchi lands a jab.
Makounchi keeping his hands up high there, blocking the jab from Yamamoto.
Yamamoto takes a shot right to the bread basket.
Yamamoto tries to bum rush Makounchi with a series of wild strikes but Makounchi uses good footwork to avoid the assault.
Makounchi works Yamamoto's body with a nice hook.
A punch combination from Yamamoto misses.
That's three minutes gone in the round.
Makounchi fakes a head punch and goes low to the body. Nicely done.
Makounchi throws a right and a left that both miss.
Yamamoto misses with a looping right.
Yamamoto misses with a double jab.
Makounchi looking to throw a kick but he's pulled out of it.
Yamamoto misses with a half-hearted attempt at a head kick.
Yamamoto avoids a kick to the body.
Makounchi is looking to chop away at Yamamoto's legs.
Boom, another hit is landed. "You're gunna get knocked out" taunts Yamamoto, as that shot connected.
Yamamoto takes an uppercut right on the jaw but it doesn't phase him.
Makounchi throws a hard body shot but it just misses.
Makounchi ducks under an overhand right and circles away with a smile on his face.
Makounchi looks to score with a combo but nothing lands.
Yamamoto loads up on a big right hand but Makounchi slips the punch.
That's four minutes gone in the round.
Yamamoto misses with a head kick.
Makounchi lunges in with swinging rights and lefts but Yamamoto circles away quickly and effectively.
Yamamoto looks to score with a combo but nothing lands.
Makounchi throws a nice looking combination but Yamamoto bobs and weaves to avoid any damage.
Makounchi looks to score with a combo but nothing lands.
Makounchi showing good head movement there, avoiding the strikes from Yamamoto.
Makounchi throws a half hearted mid kick.
Yamamoto ducks under a wild hook from Makounchi.
Yamamoto will need to tighten up his combinations if he doesn't want to gas himself out, swinging at thin air.
The crowd applaud the fighters efforts here as the round comes to an end.
Yamamoto tries a head kick but it misses.
Makounchi moves out of range as Yamamoto throws a body kick.
Makounchi feints a jab promting Yamamoto to slip. Makounchi then demonstrates his capabilities by jabbing again. Yamamoto slips again and ducks right into an uppercut.
And that's the end of the fight!
I would just about give that final round to Norifumi Yamamoto.
I think Yamamoto has won this one but let's see whether the judges agree with me. Over to the ring announcer for the scorecards.
Ladies and gentlemen, after 3 rounds of action, we go to the scorecards for a decision.
Judge Shigeki Fujiwara scores the fight 30:29
Judge Shigeki Sano scores the fight 30:27
Judge Yukihiro Yamamoto scores the fight 28:29
In favor of your winner, by split decision... Ippo Makounchi!
Ippo Makounchi decided to thank the fans in attendance for making a great atmosphere. It seemed to go down pretty well.
|
|
|
|
|
|
|
|
|
|
|
|
|
|
|
|
|
|
|
|
|
|
|
| S |
C
A |
G |
S |
C
B |
G |
|
S |
C |
G |
|
energy
A | B |
|
hype
A | B |
|
pop
A | B |
|
mgr
A | B |
|
FIGHT
RATING
57% |
|
|
|
|
|
|
|
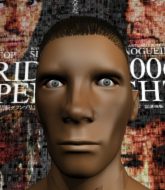
Main event
|
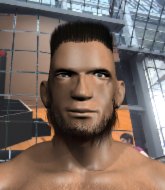
Coming up we have a light heavyweight MMA rules bout between Tomura Krakakos (ranked 0 p4p, 0 weight class) and Kung Lao (ranked 0 p4p, 0 weight class). Chooooooooon! I think Krakakos might be my favorite fighter, now he's come out to Cannabis. The atmosphere really building for this one as we go over to our ring announcer for the fighter introductions!
 |
|
 |
| 192 cm
27
220 lbs
12 - 2 - 0 |
|
192 cm
23
223 lbs
3 - 2 - 0 |
BJJ Purple Belt
Excellent boxer
Granite chin |
|
Good wrestler
Excellent MT
Good gas tank |
|
| |
|
Ladies and gentlemen. This fight is 5 rounds, for the light heavyweight championship of the world!
Introducing the champion to my left, fighting out of the red corner.
With a record of
12 - 2 - 0, fighting out of Tokyo, Tomura Krakakos!
And introducing the challenger to my right, fighting out of the blue corner.
With a record of
3 - 2 - 0, fighting out of Tokyo, Kung Lao!
The judges for this bout are Shigeki Fujiwara, Yuuki Gou and Yukihiro Shimada.
The bell rings for round one and we are underway!
A shot to the liver by Lao. Beautiful body shot.
Krakakos slips a jab and a cross from Lao.
A telegraphed right hand from Lao misses the target.
Krakakos tries to land with a swinging hook to the body but Lao was well out of range. Poor timing from Krakakos.
Krakakos throws a leg kick
and Lao counters with a three punch combination, finished off with a leg kick. Nice work.
Krakakos connects with a jab.
Lao avoids the body shot from Krakakos.
Lao misses with a wild body shot.
Krakakos throws an uppercut from half a mile away. Lao sees it coming and avoids it easily.
Krakakos blocks a jab.
Krakakos ducks under an overhand right and circles away with a smile on his face.
Krakakos misses with a hook.
Lao lands a high kick!
Fantastic stuff here - a very entertaining period of action, which has drawn cheers from the crowd.
Lao pivots, looking for a leg kick but Krakakos is out of range and Lao settles back down.
Lao takes a swing at Krakakos's ribcage but misses.
Krakakos misses with a looping left.
Lao misses with a looping left.
Lao throws a mid kick that lands with a slap.
That's one minute gone in the round.
Krakakos shuffles to his left behind two crisp jabs. Lao eats them both and turns towards Krakakos to reposition himself and eats a stinging right hand-left hook combo.
Krakakos swings wildly with a right hand that was never going to find it's target.
Krakakos pushing out the jab but it's not landing.
Lao slips under a jab from Krakakos.
Krakakos misses with an uppercut. Lao saw that one coming.
Lao drives through and clinches with Krakakos against the cage.
Krakakos has had enough of the clinch but Lao keeps him there for the moment.
Krakakos stalling.
Nice body punch from Lao - that landed with a thud.
Lao lands with a short head shot on the inside.
Lao misses with a body punch.
Krakakos blocks a punch to the side of the head.
Krakakos taking a breather.
Lao fails to land with a short punch on the inside.
Krakakos takes a shot to the head.
Krakakos blocks a couple of punches on the inside.
Wooooo! Give it up for these two warriors! They are putting on a show!
Krakakos swings wildly with an uppercut but Lao uses good head movement to avoid it.
Lao blocking some punches.
That's two minutes gone in the round.
Krakakos pushes Lao back against the cage and lands a hook to the side of the head.
Krakakos misses with a body punch.
Krakakos blocks a body shot from Lao.
Lao scores with an uppercut up the middle.
Lao throws a blind hook that connects with the side of Krakakoss head.
Lao lands a short shot on the inside that snaps the head of Krakakos backwards.
Krakakos lands a hook that snaps the head of Lao backwards.
Lao swings wildly with an uppercut but Krakakos uses good head movement to avoid it.
Lao throws a hook to the body. More of an arm punch but it's all scoring with the judges.
Krakakos blocks a body shot from Lao.
Lao lands punches inside but they're not really causing much damage.
Krakakos is trying to stall.
Krakakos misses with a hook from the clinch.
Lao tries to work over Krakakos's body with a swooping hook but it only glances the target.
Lao tries a shoulder strike but it doesn't do any damage.
That's three minutes gone in the round.
Lao misses with a body punch.
Krakakos tries to land a shot to the body but it's blocked.
Lao throws a punch but it's blocked by Krakakos.
A nice left hand lands by Lao.
Krakakos pressing his opponent against the cage.
A short right from Lao.
Lao has Krakakos pressed against the cage, preventing Krakakos from circling away and getting back to striking at range.
Lao struggles to land a body shot inside as Krakakos controls his hands.

Lao's corner calls for him to break the clinch, which he does.
Krakakos drops his hands momentarily and Lao takes advantage with a crisp shot to the head.
Krakakos waving his hands out in front of him, looking to distract Lao.
Krakakos looks shocked there as he takes a right hand to the temple.
Lao throws a looping overhand right but Krakakos ducks down to avoid it.
Lao digs a good body shot into Krakakos's ribs.
Lao looks for the body kick but Krakakos saw that one coming.
Lao smiles there as he lands a nice right hand right on the button.
That's four minutes gone in the round.
We've seen a great period of action over the last minute or so - credit to both fighters for going all out!
Lao moves away from the strike by Krakakos.
Krakakos lands a jab followed by a nice looking cross.
Krakakos misses with a hook. Lao ducked under it nicely.
Krakakos blocks a head kick by Lao.
Krakakos doesn't react quick enough there as he takes a shot to the body.
Lao lands a head kick. Krakakos smiles back at him and beckons him forward.
Lao lands a body shot.
A swing and a miss from Krakakos.
Krakakos is really head hunting here, hardly looking to strike to the body at all.
Krakakos tries to check the leg kick but that clearly hurt him.
Lao uses good footwork to avoid the strikes from Krakakos.
Nice body punch from Krakakos.
Krakakos takes a head kick and keeps coming.
The crowd are going absolutely nuts as the round comes to an end - what a fantastic round of action!
Krakakos tries a low kick but Lao avoids it.
Lao throws a series of strikes that have Krakakos backpedaling.
Lao scores with a nice body kick.
And thats the end of the round the fighters go back to their corners.
Kung Lao dominated that round.
The fighters' corners scream their final instructions, as the referee calls time. Here we go, back to the action!
Lao lands a body shot.
Lao misses with a wild body shot.
Lao is the aggressor but that punch slipped nicely by Krakakos.
A low kick from Krakakos is predictable there
and Lao counters with a nice low kick that buckles Krakakos's knee momentarily.
Good leg kick by Lao there. It's the ones that make that thud noise that hurt and that was an almighty thud.
Krakakos throws a hook but Lao avoids it easily.
Lao scores with a jab.
Lao misses with a double jab.
That kick from Krakakos tenderised Lao's leg. Lao is trying to keep his angry face on.
Lao scores with a crisp jab that stopped Krakakos in his tracks.
The crowd are loving this. Great action here.
Krakakos closes the distance and lands a one-two.
Krakakos throws a hook to the body but it doesn't connect.
Lao uses good head movement to avoid the hook from Krakakos.
Krakakos moves out of range of the body kick.
A head kick from Lao lands but Krakakos takes it in his stride.
Krakakos darts in trying to clinch
and Lao counters with a straight right hand.
That's one minute gone in the round.
Krakakos takes a thudding leg kick, right into the meat of the thigh.
Lao misses with the body kick
and Krakakos counters with a straight right hand.
Kung Lao seems to be getting the better of the standup.
Krakakos avoids a punch combination nicely.
Krakakos misses with a body kick.
Krakakos throws a lazy right hand but Lao sees it coming a mile off and sidesteps it easily.
Lao bobs and weaves and then throws a good body kick.
Krakakos throws a hook to the body but it doesn't connect.
Lao throws a shot to the body.
Krakakos throws a low kick, looking for Lao's leg but Lao calmly moves out of range.
Lao fakes a jab and scores with a low kick.
Both fighters are absolutely exhausted here.
Lao connects with a leg kick. Krakakos looked like he was expecting something else and didn't defend it.
The fans in attendance giving it up for the two fighters, who have really let it all hang out in the last minute or so!
Lao thumps Krakakos with a low kick.
That's two minutes gone in the round.
The fighters circling - Krakakos throws out the jab but it was never going to land.
Lao feints with a shoulder and throws a nice leg kick to Krakakos's calf.
Lao lands a jab to the head.
Lao moves into the clinch.
Lao is working Krakakos over against the cage.
Krakakos misses with the head strike.
Lao digs a right hand into Krakakos's ribs. Those have got to be taking their toll on Krakakos's gas tank.
Lao lands a body punch.
A short right from Lao.
Lao lands punches inside but they're not really causing much damage.
Lao lands a left hand.
Kung Lao seems to be working more effectively in the clinch in the fight so far.
Nice body punch from Lao - that landed with a thud.
Lao tries to throw a body punch but Krakakos avoids it by throwing Lao back against the cage.
Krakakos throws a head punch that misses.
Lao tried to land a shot to the body but connects with Krakakos's elbow.
Lao breaks the clinch and we return to the middle of the mat.
That's three minutes gone in the round.
Lao lands an overhand right.
A nice inside leg kick there by Lao. That's going to slow Krakakos down.
Krakakos lands a nice shot that snaps Lao's head back.
Lao keeps Krakakos at a distance using the push kick.
Lao has been the more effective fighter overall so far.
Lao fakes and then throws a beautiful body shot. Krakakos looks a bit winded and takes a step backwards to take a breath.
A solid leg kick lands there for Lao.
Lao fakes high and swings low for a body shot but Krakakos manages to avoid it.
Krakakos tries to check the leg kick but that clearly hurt him.
Lao connects with the punch.
Lao lands a nice hook to Krakakos's body. Krakakos takes it in his stride and looks to land his own strikes.
Wooooo! Give it up for these two warriors! They are putting on a show!
Crunch! Lao slams his shin into Krakakos's torso.
Krakakos steps to his left, right into the path of a big body kick from Lao. That one must have hurt.
Krakakos is hobbling a little on that front leg after taking quite a few leg kicks so far in this fight.
Lao paws at his opponent with the jab and then lunges in with a straight, right on the button.
Krakakos avoids the head kick by Lao.
Krakakos moves forwards but Lao connects with a nice, crisp jab.
That's four minutes gone in the round.
Krakakos looks to land a left hand but Lao moved out of range nicely.
Krakakos lands a nice hook to Lao's body. Lao takes it in his stride and looks to land his own strikes.
Krakakos throws a hard body shot but it just misses.
Lao scores with a straight right hand, right through his opponent's guard.
Lao uses decent footwork to sidestep a right hand from Krakakos.
Good shot there by Lao.
Krakakos lands a nice shot to the body.
Lao cracks the inside of Krakakos's front leg.
Lao lands with a kick to the temple. Krakakos shrugs as if to say "is that all you've got?"
Lao lands three nice shots there - that looked like it hurt!
Lao showing good head movement there, avoiding the strikes from Krakakos.
The crowd are going absolutely nuts as the round comes to an end - what a fantastic round of action!
Lao avoids a lazy jab quite easily.
Lao lands a really nice looking cross but Krakakos seems unphased.
And thats the end of the round the fighters go back to their corners.
Kung Lao showed his class in that round. I'd imagine he'll take it on all the scorecards.
That's time! Back to the action!
Lao throws a half hearted mid kick.
Lao uses good footwork to avoid the strikes from Krakakos.
Lao comes forward and lands a shot to the body, then darts back out of range.
Krakakos misses with a series of wild punches.
Lao throws a front kick that sends Krakakos stumbling back into the cage.
Lao fakes low and throws an overhand right that catches Krakakos on the side of the head.
Krakakos has his front leg slapped to the side - a nice low kick landing there from Lao.
Lao is pawing at Krakakos, trying to feel the distance before throwing out a cross that crashes into Krakakos's nose. Krakakos is badly hurt! Lao pounces, throwing wild strikes as both fighters end up on the ground! Krakakos tries desperately to hold on but Lao is relentless in his assault! As Krakakos receives an ever increasing number of unanswered strikes the referee pulls Lao away and this one is in the books!
Ladies and gentlemen, after 0:38 of round 3, we have a winner by way of TKO (Strikes). Kung Lao!
Kung Lao is the new light heavyweight champion!
An out of breath Kung Lao thanked his loyal fans in his post fight interview, giving them credit for his success over the course of his career.
|
|
|
|
|
|
|
|
|
|
|
|
|
|
|
|
|
|
|
|
|
|
|
| S |
C
A |
G |
S |
C
B |
G |
|
S |
C |
G |
|
energy
A | B |
|
hype
A | B |
|
pop
A | B |
|
mgr
A | B |
|
FIGHT
RATING
100% |
|
|
|
|
|
|
|
|
|
|
