 |
GFL 23 - Warriors PBP Commentary |
Undercard bout
|
|
|
|
Undercard bout
|
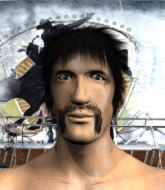
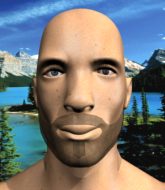
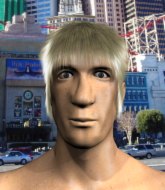
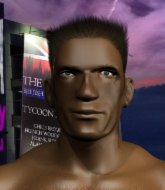
Coming up we have a bantamweight MMA rules bout between Kazumi Powok (ranked 0 p4p, 0 weight class) and Norifumi Yamamoto (ranked 0 p4p, 0 weight class). Powok comes to the cage accompanied by Now we are free - Lisa gerrard. Kazumi Powok has the better chin. Will he look to stand and bang today?
 |
|
 |
| 165 cm
25
130 lbs
1 - 0 - 0 |
|
160 cm
19
134 lbs
3 - 2 - 0 |
Good takedowns
Counter striker
Granite chin |
|
BJJ Blue Belt
Counter striker
Prefers standup |
|
| |
|
Ladies and gentlemen. This fight is 3 rounds, in the bantamweight division.
Introducing the fighter to my left, fighting out of the red corner.
With a record of
1 - 0 - 0, fighting out of Tokyo, Kazumi Powok!
And introducing the fighter to my right, fighting out of the blue corner.
With a record of
3 - 2 - 0, fighting out of Tokyo, Norifumi Yamamoto!
The judges for this bout are Shigeki Fujiwara, Yukihiro Yamamoto and Yasuomi Hirokawa.

The bell rings for round one and we are underway!
Yamamoto thows a body shot but no joy.
Powok with a poor takedown
letting Yamamoto counter with a right hand.
Yamamoto fails to land with the punch combination there - jab, cross, hook, miss, miss, miss.
Yamamoto looks to land a body kick but Powok moved away.
Powok with a lazy takedown attempt
and Yamamoto connects with a straight left hand counter down the middle.
Powok fails with a rather predictable takedown attempt.
That's three failed takedown attempts in the round for Kazumi Powok. That's going to take a lot out of him.
Yamamoto lands a two punch combo.
Fantastic stuff here - a very entertaining period of action, which has drawn cheers from the crowd.
Some wild striking there from Yamamoto.
Yamamoto looks to score with a combo but nothing lands.

That's one minute gone in the round.

Powok closes the distance and gets a trip takedown into side control. Yamamoto quickly recovers to half guard.
We may be looking at a referee standup if the pace doesn't pick up soon.

Powok seems to be working for a kimura but Yamamoto defends the submission attempt.
Yamamoto landing a few short strikes.
Powok is working for submissions here but there's nothing on.
The ref warns both fighters not to hold the cage as they work up against the meshing.
Powok is trying to work for a kimura. This could be trouble! No, Yamamoto has managed to free his arm - good work.
Yamamoto tries to kick Powok off but Powok keeps his base steady and stays in half guard.
Powok is working for a submission of some sort.

That's two minutes gone in the round.

Yamamoto manages to escape and get back to his feet!
Yamamoto tries a switch kick but it misses it's target.
Fantastic stuff here - a very entertaining period of action, which has drawn cheers from the crowd.
Yamamoto throws a wild combination but nothing lands.
Yamamoto stuffs the takedown attempt from Powok. Powok gets slowly back to his feet.
Yamamoto stuffs the takedown.
Powok gets his takedown attempt stuffed easily
and Yamamoto counters with a three punch combination, finished off with a leg kick. Nice work.

It looks like Kazumi Powok has been cut.

That's three minutes gone in the round.
Powok misses with a takedown attempt
and Yamamoto counters with a three punch combo that has Powok backing up. Powok nods at Yamamoto to acknowledge the strikes.
Powok slips a jab and a cross from Yamamoto.
No luck with that takedown attempt from Powok.
Yamamoto tries to bum rush Powok with a series of wild strikes but Powok uses good footwork to avoid the assault.
Yamamoto misses with a jab, cross combination.
Powok misses with a takedown
and Yamamoto counters with a three punch combination, finished off with a leg kick. Nice work.

That's four minutes gone in the round.
Powok with a poor takedown
and Yamamoto makes him pay by landing a nice hook to the body before moving out of range.
Powok is breathing heavily.
Powok with a poor takedown
and Yamamoto counters with a left and a right that stings Powok.
This has been an exciting period of action!
Powok doesn't succeed with the takedown
and Yamamoto counters with a left and a right... And another left! Powok is down! He's done! The ref dives in to save him and that's the end of the fight!
Ladies and gentlemen, after 4:28 of round 1, we have a winner by way of TKO (Strikes). Norifumi Yamamoto!
|
|
|
|
|
|
|
|
|
|
|
|
|
|
|
|
|
|
|
|
|
|
|
| S |
C
A |
G |
S |
C
B |
G |
|
S |
C |
G |
|
energy
A | B |
|
hype
A | B |
|
pop
A | B |
|
mgr
A | B |
|
FIGHT
RATING
41% |
|
|
|
|
|
|
|
Undercard bout
|
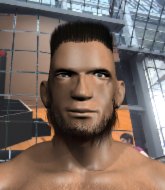
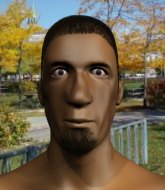
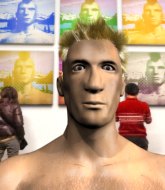
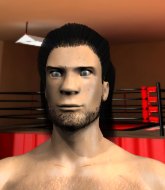
Coming up we have a heavyweight MMA rules bout between Jacob Bryan Batungbakal (ranked 0 p4p, 0 weight class) and Bobby Hill (ranked 0 p4p, 0 weight class). Jacob Bryan Batungbakal could well score a knockout today. He has the power to get to Bobby Hill's chin.
 |
|
 |
| 195 cm
29
265 lbs
6 - 5 - 0 |
|
203 cm
29
288 lbs
7 - 3 - 0 |
BJJ Brown Belt
Good knees
Granite chin |
|
BJJ Blue Belt
Good low kicks
Powerful |
|
| |
|
Ladies and gentlemen. This fight is 3 rounds, in the heavyweight division.
Introducing the fighter to my left, fighting out of the red corner.
With a record of
6 - 5 - 0, fighting out of Tokyo, Jacob Bryan Batungbakal!
And introducing the fighter to my right, fighting out of the blue corner.
With a record of
7 - 3 - 0, fighting out of Tokyo, Bobby Hill!
The judges for this bout are Sosuke Kotani, Yuuki Gou and Yasuomi Hirokawa.
The bell rings for round one and we are underway!
Batungbakal throws a head kick that misses.
Batungbakal tries to bum rush Hill with a series of wild strikes but Hill uses good footwork to avoid the assault.
Hill throws a right and a left that both miss.
A head kick misses from Batungbakal.
Batungbakal blocks the body kick.
Batungbakal tries a switch kick but it misses it's target.
Batungbakal keeping a good distance there, avoiding the body shot.
A head kick misses from Hill.
Batungbakal throws a head kick but Hill moves out of range.
Hill lands a leg kick and bounces back out of range.
Hill throws a right high kick that is partially blocked by Batungbakal.
It looks like Jacob Bryan Batungbakal has been cut.
This is a great period of action - very entertaining stuff!
Hill connects with a high kick.
Hill misses with a looping left.
Hill connects with a hook to the side of his opponent's head.
Batungbakal scores with a head kick.

It looks like Bobby Hill has been cut.
Batungbakal scores with a head kick. Hill tried to block it but didn't get his arm up in time.
Hill wants to slow Batungbakal down by chopping away at his legs.
Hill avoids the head kick by Batungbakal.
Batungbakal pulls out of a head kick attempt.
That's one minute gone in the round.
Hill misses with a head kick.
Hill moving in and out of range nicely, whilst landing the scoring shot.
Batungbakal tries a switch kick but it misses it's target.
Hill throws a leg kick which misses Batungbakal's front leg but catches the back leg as Batungbakal tries to avoid it.
Batungbakal tries a head kick but it misses.
Batungbakal avoids the body shot from Hill.
Batungbakal throws a head kick that misses.
Batungbakal looking to land some kicks to the body here.
Hill blocks a head kick by Batungbakal.
Batungbakal gets cracked there but stands up to it.
This is a great period of action - very entertaining stuff!
Batungbakal walks into a left hand.
Like a baseball bat into the meat of his leg there - nice leg kick by Batungbakal.
Hill tries to score with a low kick but Batungbakal moves his leg out of the way.
Hill lands with a thumping leg kick.
Batungbakal is breathing heavily.
Hill dips down and scores with a jab to the body.
Boom, another hit is landed. "You're gunna get knocked out" taunts Hill, as that shot connected.
That's two minutes gone in the round.
Hill lands a right hook to the body.
Hill lands a leg kick and bounces back out of range.
Hill comes forward and lands a shot to the body, then darts back out of range.

Hill lands a big head kick that sends Batungbakal tumbling to the mat! Hill takes a step backwards and waves Batungbakal back to his feet - he wants the finish!

Batungbakal is rocked!
Ohhhhhhhhhh, brutal head kick from Hill! This one is all over!
Ladies and gentlemen, after 2:23 of round 1, we have a winner by way of KO (Head Kick). Bobby Hill!
|
|
|
|
|
|
|
|
|
|
|
|
|
|
|
|
|
|
|
|
|
|
|
| S |
C
A |
G |
S |
C
B |
G |
|
S |
C |
G |
|
energy
A | B |
|
hype
A | B |
|
pop
A | B |
|
mgr
A | B |
|
FIGHT
RATING
100% |
|
|
|
|
|
|
|
Undercard bout
|
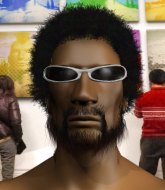
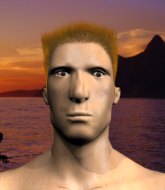
Coming up we have a lightweight MMA rules bout between Shinya Alkofer (ranked 0 p4p, 0 weight class) and Krisu Leepen (ranked 0 p4p, 0 weight class). Leepen has chosen The Prodigy - "Warriors Dance" as his entrance music. Both fighters will be looking to make this an exciting fight for the fans, I'm sure!
 |
|
 |
| 170 cm
19
160 lbs
3 - 1 - 0 |
|
176 cm
25
163 lbs
4 - 1 - 0 |
BJJ Purple Belt
Brawler
Big heart |
|
BJJ Blue Belt
Decent boxing
Enjoys gardening |
|
| |
|
Ladies and gentlemen. This fight is 3 rounds, in the lightweight division.
Introducing the fighter to my left, fighting out of the red corner.
With a record of
3 - 1 - 0, fighting out of Tokyo, Shinya Alkofer!
And introducing the fighter to my right, fighting out of the blue corner.
With a record of
4 - 1 - 0, fighting out of Tokyo, Krisu Leepen!
The judges for this bout are Ren Mimura, Hirohito Nitta and Yasuomi Hirokawa.
The bell rings for round one and we are underway!
Alkofer feints and then cracks Leepen's leading leg with a nice low kick. He's obviously looking to slow Leepen down.
Alkofer shoots and misses
and Leepen counters with a series of strikes. Alkofer will be more careful next time no doubt.

Leepen shoots in and bounces Alkofer off the cage to secure the takedown into guard.
We may be looking at a referee standup if the pace doesn't pick up soon.
Alkofer not looking particularly offensive just at the moment.
Alkofer keeping moving, preventing Leepen from controlling successfully.
The crowd are loving this. Great action here.
Alkofer wants to sweep here but Leepen controlling him for the moment.
The ref warns both fighters not to hold the cage as they work up against the meshing.
Alkofer is looking for a guillotine. You can't force these things though and Leepen defends well.
Leepen is in close to Alkofer's body, working some short punches and elbows.
Alkofer looking for a sweep. Not yet Alkofer, not yet.
Leepen with a nice head shot there.
Alkofer working for a triangle but Leepen defends it easily.
That's one minute gone in the round.
Leepen postures up to throw the ground and pound strikes but they don't connect.
Leepen is pushing down on Alkofer's leg trying to pass to half guard. Alkofer is fighting to maintain full guard but Leepen has managed to sneak the leg through.
Leepen looks to land a strike but Alkofer avoids it nicely and regains full guard.
Alkofer looking for submissions off his back, moving his hips, looking for an opening.
There's a bit of a scramble here and now Alkofer is on top in guard.
Alkofer trying to control but Leepen is working from the bottom.
That's two minutes gone in the round.
Leepen pushes Alkofer off and gets back to his feet.
A combination from Leepen does no damage.
A head kick misses from Alkofer.
Alkofer dives in and grabs Leepen's left leg, looking for a takedown. Leepen pushes down on Alkofer's head and hops out.
Krisu Leepen seems to be the more aggressive standup fighter in this bout.
Leepen feints and as Alkofer raises his hands in defense, Leepen changes levels and drives through with a takedown into guard.
This has been an exciting period of action!
Leepen trying to land body shots but he keeps hitting the mat.
Alkofer pulls Leepen in close to prevent any damage.
Alkofer controls Leepen momentarily but Leepen frees himself.
Leepen must be cautious of submissions here, given that his opponent has the superior Jiu Jitsu.
Alkofer looking for submissions from the bottom here. Moving his hips around, possibly looking for an armbar.
That's three minutes gone in the round.
Leepen trying to control but Alkofer is working from the bottom.
Alkofer trying to keep a closed guard but Leepen is proving a slippery customer.
Alkofer tries to land a sweep but no joy.
Alkofer avoiding any damage from the ground and pound.
Alkofer controls Leepen momentarily but Leepen frees himself.
Leepen throws an elbow that misses. Alkofer uses the momentum to reverse the position. He's now in Leepen's guard. Nice move by Alkofer!
Alkofer trying to control the position from guard on top but Leepen is wriggling around, looking for whatever he can.
That's four minutes gone in the round.
Leepen trying to strike from the bottom but really, it's not the best position to be doing that from!
Alkofer tries to free his leg and advance position but Leepen is retaining full guard.

Shinya Alkofer has forced the referee to step in and bring the fight back to the feet.
Leepen takes a swing at Alkofer's ribcage but misses.
Leepen throws a right and a left that Alkofer avoids nicely.
Leepen throws a series of punches but Alkofer moves out of range.
Leepen lands three nice shots there - that looked like it hurt!
As the round comes to an end the crowd are showing their appreciation for a great round of action.
Nice sprawl there from Leepen as Alkofer shoots in.
That's three failed takedown attempts in the round for Shinya Alkofer. That's going to take a lot out of him.
Leepen throws a combination but it was largely blocked by Alkofer.
Alkofer takes a punch to the jaw and another one to the bread basket.
And thats the end of the round the fighters go back to their corners.
Krisu Leepen dominated that round.
The corners get their ten second warning. Both fighters stand from their stools and stare eachother down, ready to get back to the action.

Alkofer fails with a takedown attempt.
Leepen stuffs a takedown. It's all about dictating where the fight takes place and Leepen wants it to stay on the feet.
Alkofer fails miserably with a takedown attempt.
That's three failed takedown attempts in the round for Shinya Alkofer. That's going to take a lot out of him.
Leepen throws a nice looking combination but Alkofer bobs and weaves to avoid any damage.
Alkofer looks for a takedown here. Will he get it? Leepen is fending him off so far but Alkofer persists. Nope, Leepen circles away and we're back to standing.
Leepen swings away but doesn't land with a series of punches.
Alkofer misses with a few strikes there.
Leepen looks to score with a combo but nothing lands.
Leepen swats away the attempt to clinch by Alkofer.
Leepen tries to bum rush Alkofer with a series of wild strikes but Alkofer uses good footwork to avoid the assault.
Leepen misses with a double jab.
Alkofer shoots in for a takedown but Leepen shows good takedown defense.
Alkofer checks a low kick. Bone on bone - not my idea of a good time.
That's one minute gone in the round.
Alkofer swinging wildly here.
Both fighters are absolutely exhausted here.
Alkofer closes the distance and clinches up with Leepen, looking for a takedown. Alkofer pushes Leepen against the cage but Leepen circles to the side and manages to break the clinch.
Leepen misses with a few strikes there.
Leepen fails to land with a series of punches.
Leepen misses with a combination
and Alkofer counters with a straight right hand.
Alkofer looks frustrated there after his takedown attempt is stuffed easily.
Alkofer darts in and lands a nice takedown into half guard.
Leepen wants to get back to his feet.
That's two minutes gone in the round.
Alkofer with a momentary lay and pray from half guard.
Alkofer missing with some ground and pound from the half guard.
Alkofer performing his best blanket impression for a moment.
Leepen wants to improve his position but Alkofer is controlling well.
Leepen wants to get back to his feet.
That's three minutes gone in the round.
The ref stands the fighters back up because Shinya Alkofer just wasn't active enough.
Alkofer tries to clinch up.
Alkofer shoots in for a takedown - he's clinched up with Leepen but Leepen pushes him off and we're back to square one.
Leepen throws a combination but comes up with nothing but fresh air.
Alkofer tries to close the distance and clinch but Leepen swats him to one side with an open hand palm strike and circles away.
Krisu Leepen seems to be getting the better of the standup.
Leepen throws a right hand that Alkofer ducks under and follows up with a left that Alkofer also avoids with ease.
Alkofer fails miserably with a takedown attempt.
Leepen misses the shot to the body.
No luck for Alkofer with that takedown attempt.
Alkofer stuffs a takedown. It's all about dictating where the fight takes place and Alkofer wants it to stay on the feet.
That's four minutes gone in the round.
Leepen throws a jab, cross combination which is slipped
and Alkofer counters with a good low kick that Leepen was not able to check.
Alkofer shoots in but Leepen avoids the takedown attempt easily.
Alkofer misses with a few strikes there.
Nice takedown defense from Leepen. No joy for Alkofer on that attempt.
Alkofer tries to close the distance and clinch up but Leepen swats him away and circles back towards the center.
Leepen misses with the combination.
Shinya Alkofer is looking to throw some combinations by the looks of things.
Alkofer looks shocked there as he takes a right hand to the temple.
Alkofer shoots in for a takedown. He's persisting with it as Leepen sprawls well. Leepen wins this battle and keeps the fight standing. Alkofer gets slowly back to his feet.
Leepen shoots in for a double leg but Alkofer sprawls well. That's going to sap some energy.
The crowd applaud the fighters efforts here as the round comes to an end.
Leepen catches Alkofer with a nice straight right. He seems pissed - ooooh, it's on now! On like donkey kong!
Alkofer closes this distance looking for a takedown but Leepen circles away.
And thats the end of the round the fighters go back to their corners.
That was a close second round but I would say that Shinya Alkofer will probably get the nod.
The referee calls time. The cornermen exit stage left and we're back to business. The crowd applaud as we get ready to start the final round!

Leepen misses with a body shot.
Alkofer scores a trip takedown into side control. Nice.
Alkofer is working Leepen over with some ground and pound from side control.

Alkofer decides to stand up, so the ref orders Leepen to his feet.

Leepen gets tackled into the cage by Alkofer. Alkofer maintains the clinch.
Leepen has double underhooks and is working for a body lock takedown. He's got it. The fighters land in half guard but Alkofer regains guard immediately.
Leepen throws a big right hand that misses.
Shinya Alkofer overall seems to be getting the better of the ground position in the fight so far.
Alkofer trying to control the position.
We've seen a great period of action over the last minute or so - credit to both fighters for going all out!
Leepen stands and steps away. Alkofer gets to his feet too and we're back to the striking game.
Both fighters are breathing heavily.
Jab, cross, leg kick. Nice combination by Leepen!
That's one minute gone in the round.
Leepen throws a series of punches but Alkofer avoids them all with ease.
Alkofer fails with a takedown attempt.
Alkofer avoids a punch combination nicely.
Alkofer looks frustrated there after his takedown attempt is stuffed easily.
Leepen swings away but doesn't land with a series of punches.
Leepen misses with a combination
and Alkofer counters with a leg kick.
Alkofer changes levels and drives through with a really nice takedown into side control. Leepen looks really pissed at himself for not defending that better.
A lull in the action here.
Alkofer lands a knee to the body and a forearm to the face.
That's two minutes gone in the round.
Alkofer tries for a kimura but Leepen is defending well.
Leepen tries to get back to half guard but can't.
Alkofer working the ground and pound.
This has been an exciting period of action!
Alkofer tries for an arm triangle. That looks pretty tight to me. Is this one over!?! Possibly, maybe, no Alkofer has let go of the choke. Obviously it wasn't as tight as we thought!
That's three minutes gone in the round.
Alkofer decides to take the fight back to the feet.
Leepen throws a wild combination but nothing lands.
Leepen throws the left hand but Alkofer avoids the punch easily.
Leepen avoids the clinch attempt nicely.
Leepen misses with the combination.
Alkofer throws a looping left and ducks down for a takedown. He's got his arms around Leepen's waist but Leepen gets an underhook and avoids the takedown by throwing Alkofer off to one side.
That's three failed takedown attempts in the round for Shinya Alkofer. That's going to take a lot out of him.
Alkofer throws a head kick that misses.
That's four minutes gone in the round.
Leepen throws a combination but it was largely blocked by Alkofer.
Leepen throws a wild combination but nothing lands.
Alkofer tries for a takedown but Leepen sees it coming a mile off and avoids it easily.
Alkofer is trying hard to land a takedown here. Leepen sprawls well and keeps this one on the feet.
Leepen misses with a series of wild punches.
Alkofer fakes an overhand right and shoots for a takedown. Leepen sprawls well initially but Alkofer persists and gets the takedown into half guard.
Leepen blocking the ground and pound attempt from Alkofer.
Alkofer stops Leepen from getting back to his feet.
Alkofer moves nicely into side control.
The fans in attendance giving it up for the two fighters, who have really let it all hang out in the last minute or so!
As the round comes to an end the crowd are showing their appreciation for a great round of action.
Alkofer scores with a couple of short elbows.
And that's the end of the fight!
Shinya Alkofer showed his dominance in that final round.
I think Alkofer has won this one but let's see what the judges have to say. Over to the ring announcer for the scorecards.
Ladies and gentlemen, after 3 rounds of action, we go to the scorecards for a decision.
Judge Ren Mimura scores the fight 29:28
Judge Hirohito Nitta scores the fight 29:28
Judge Yasuomi Hirokawa scores the fight 28:29
In favor of your winner, by split decision... Shinya Alkofer!
|
|
|
|
|
|
|
|
|
|
|
|
|
|
|
|
|
|
|
|
|
|
|
| S |
C
A |
G |
S |
C
B |
G |
|
S |
C |
G |
|
energy
A | B |
|
hype
A | B |
|
pop
A | B |
|
mgr
A | B |
|
FIGHT
RATING
70% |
|
|
|
|
|
|
|
Undercard bout
|
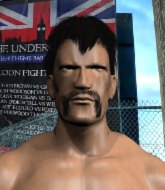
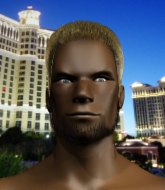
Coming up we have a lightweight MMA rules bout between Junior Pacquiao (ranked 0 p4p, 0 weight class) and Jason Grillz (ranked 0 p4p, 0 weight class). Pacquiao comes to the cage accompanied by Thunderstruck. Both fighters look pumped up here. Let's hope this is a good fight!
 |
|
 |
| 173 cm
27
160 lbs
14 - 7 - 0 |
|
173 cm
23
165 lbs
9 - 6 - 0 |
BJJ Purple Belt
Excellent boxer
Big right hand |
|
BJJ Purple Belt
Lethal high kicks
Good gas tank |
|
| |
|
Ladies and gentlemen. This fight is 3 rounds, in the lightweight division.
Introducing the fighter to my left, fighting out of the red corner.
With a record of
14 - 7 - 0, fighting out of Tokyo, Junior Pacquiao!
And introducing the fighter to my right, fighting out of the blue corner.
With a record of
9 - 6 - 0, fighting out of Tokyo, Jason Grillz!
The judges for this bout are Shigeki Sano, Tatsuya Matsuyama and Yasuomi Hirokawa.
The bell rings for round one and we are underway!
Grillz misses with a hook to the body
and Pacquiao counters with a quick right hand to the jaw.
Pacquiao takes one to the side of the head.
Grillz misses with a body shot. Nice footwork from Pacquiao.
Pacquiao closes the distance and takes a jab right on the nose as he does so.
Grillz lands with a hook. Pacquiao tried to avoid it but it clipped the top of his head.
Pacquiao throws a looping left and ducks down for a takedown. He's got his arms around Grillz's waist but Grillz gets an underhook and avoids the takedown by throwing Pacquiao off to one side.
Pacquiao staying out of range there.
Grillz lands with an overhand left.
A slow jab from Grillz misses its intended target.
That's one minute gone in the round.
Grillz misses with a body shot.
Grillz thows a left - swing and a miss!
Pacquiao cracks Grillz with an open hand slap.
Grillz thows a body shot but no joy.
Pacquiao takes one to the side of the head.
Pacquiao just misses with a punch to the body.
Grillz jabs Pacquiao to the body, keeping him at a distance.
Danga de danga de dang - Grillz scores with a four punch combination!
That's two minutes gone in the round.
Pacquiao shoots in but no luck this time.
Grillz stuffs a takedown. It's all about dictating where the fight takes place and Grillz wants it to stay on the feet.
That's three failed takedown attempts in the round for Junior Pacquiao. That's going to take a lot out of him.
A big left from Grillz misses.
Grillz throws a jab but it's blocked by Pacquiao.
Pacquiao avoids a lazy jab quite easily.
Grillz changes levels and scores with a jab to the body.
Grillz scores with a jab to the body.
Grillz throws a combination but comes up with nothing but fresh air.
That's three minutes gone in the round.
Grillz fakes low and throws an overhand right that catches Pacquiao on the side of the head.
Jason Grillz is looking to keep the fight on the feet at all costs.
Grillz misses with a hook
and Pacquiao counters with a nice uppercut.
Grillz tries to land with a swinging hook to the body but Pacquiao was well out of range. Poor timing from Grillz.
Grillz swinging wildly here.
Pacquiao lands the left hand.
Pacquiao looks to land a combination. Grillz sees it coming but can only parry a couple of the shots.
That's four minutes gone in the round.
Grillz lands an overhand right.
Grillz throws a jab but it's blocked by Pacquiao.
Pacquiao misses the shot to the body.
Grillz lands a right hook to the body.
Grillz fakes high and swings low for a body shot but Pacquiao manages to avoid it.
Pacquiao uses good footwork to get in and out, landing a nice hook.
The crowd applaud the fighters efforts here as the round comes to an end.
Grillz tries to land with a swinging hook to the body but Pacquiao was well out of range. Poor timing from Grillz.
Pacquiao missing with a left hand there. Grillz was out of range so wasted energy throwing that one.
And thats the end of the round the fighters go back to their corners.
Jason Grillz dominated that round.
The referee calls time. The cornermen exit stage left and we're back to business.
Grillz scores to the head and body with a nice combination!
Grillz misses with a straight right.
Grillz misses with a wild body shot.
Grillz is the aggressor but that punch slipped nicely by Pacquiao.
Grillz throws a looping overhand right but Pacquiao ducks down to avoid it.
Grillz throws a jab but it's blocked by Pacquiao.
Grillz throws a right and a left that both miss.
Jason Grillz seems to be getting the better of the standup.
Grillz throws a series of punches but Pacquiao moves out of range.
That's one minute gone in the round.
Grillz throws an uppercut from half a mile away. Pacquiao sees it coming and avoids it easily.
Jason Grillz seems to be the more aggressive standup fighter in this bout.
Pacquiao misses with a wild body shot.
Grillz throws a hook to the body but it doesn't connect.
Grillz misses with a straight right.
Pacquiao does a little shimmy and throws a leg kick. The leg kick missed by a considerable margin though, making him look a little bit silly for doing the shimmy.
A looping hook to the body misses from Grillz. Pacquiao does a little dance to reset his feet.
A swing and a miss from Grillz.
Pacquiao changes levels and looks for a double leg takedown. Grillz tries to avoid it but Pacquiao manages to keep hold of a leg and drag Grillz to the ground. Grillz escapes though and pops straight back up to his feet.
That's two minutes gone in the round.
Grillz digs a good hook to Pacquiao's body.
Grillz throws a lazy uppercut
and Pacquiao counters with a driving takedown into guard. Nice work there by Pacquiao.
Pacquiao is looking to advance position but Grillz has hit a scissor sweep - now he's on top in mount!
Pacquiao is desperately trying to improve his position but Grillz has a good base and remains in mount.
Fantastic stuff here - a very entertaining period of action, which has drawn cheers from the crowd.
Pacquiao tries to lock up and control but Grillz gives him a forearm to the face and pushes him away.
Pacquiao is in all sorts of trouble here.
Pacquiao tries to improve his position but instead Grillz has taken his back!
Pacquiao tries to break free.
That's three minutes gone in the round.
A bit of a pause in the action here. Grillz controlling the positon.
Pacquiao tries to break free.
Grillz biding his time, controlling Pacquiao.
Pacquiao rolls, trying to escape but Grillz keeps control of the position.
Pacquiao looking to control the position.
Pacquiao wants to control his opponent's hands but Grillz gets his hands free.
That's four minutes gone in the round.
Grillz biding his time, looking for the opening.
Let's hope that Grillz has the urge to step up the pace any second now because for the last 15 or 20 seconds he's just been holding on tight.
Pacquiao trying to control but not successfully.

The referee decides to stand the fighters back up.
Grillz throws a combination but comes up with nothing but fresh air.
The crowd applaud the fighters efforts here as the round comes to an end.
Grillz just misses with a punch to the body.
And thats the end of the round the fighters go back to their corners.
A close second round but Jason Grillz will probably get the nod - 10:9.
The fighters get back to their feet, the hooter sounds and we're back to the action! This is the final round!
Grillz misses with a jab, cross combination.
Pacquiao shoots in looking for a double leg takedown. Grillz defends it nicely.
Grillz tries to land with a swinging hook to the body but Pacquiao was well out of range. Poor timing from Grillz.
Grillz connects with a hook to the side of his opponent's head.
Grillz connects with a good right hand that stumbles Pacquiao. Pacquiao circles away out of range and recomposes himself.
Grillz with a jab.
That's one minute gone in the round.
Grillz throws a wild combination but nothing lands.
Grillz swings and misses with a hook to the body.
Grillz takes a solid shot to the body. That one hurt him but he's trying not to show it.
Pacquiao takes one on the chin but keeps coming.
Pacquiao goes for a spinning back kick but it misses.
Pacquiao slips a straight right by Grillz.
Grillz fakes high and swings low for a body shot but Pacquiao manages to avoid it.
Grillz misses with a left hand
and Pacquiao counters with a crisp hook to the side of the head.
Jason Grillz is fighting for a decision - hopefully he's judged it right and he's actually winning the fight.
That's two minutes gone in the round.
Pacquiao uses some good footwork to avoid the body shot by Grillz.
Grillz moves out of range of the strikes.
Grillz waving his hands out in front of him, looking to distract Pacquiao.
Pacquiao steps to the side to avoid the strikes from Grillz.
Pacquiao lands a nice hook to Grillz's body. Grillz takes it in his stride and looks to land his own strikes.
Grillz misses with a looping left.
Grillz tries to land with a swinging hook to the body but Pacquiao was well out of range. Poor timing from Grillz.
That's three minutes gone in the round.
Pacquiao throws a body kick but he was well out of range there.
Grillz fakes low and throws an overhand right that catches Pacquiao on the side of the head.
Grillz throws a looping overhand right but Pacquiao ducks down to avoid it.
Pacquiao on the wrong end of a nice jab.
Grillz throws a hard body shot but it just misses.
Pacquiao lands with a right hand.
Grillz works his jab well there, keeping his opponent at a distance.
That's four minutes gone in the round.
Grillz fakes high and swings low for a body shot but Pacquiao manages to avoid it.
Grillz throws a hard body shot but it just misses.
Grillz misses with a wild body shot.
Grillz misses with a body shot. Nice footwork from Pacquiao.
Junior Pacquiao has stepped it up - he knows he needs a finish here!

Grillz clinches with his opponent.
Grillz blocks an elbow strike.
Pacquiao drops down for a takedown but doesn't get it.
Pacquiao has had enough of the clinch and is looking to separate.
And that's the end of the fight!
Jason Grillz comfortably won the final round on my scorecard.
I've got Grillz winning every round here. Surely the decision will go his way and he'll pick up a well deserved decision victory. Over to the ring announcer for the scorecards.
Ladies and gentlemen, after 3 rounds of action, we go to the scorecards for a decision.
Judge Shigeki Sano scores the fight 27:30
Judge Tatsuya Matsuyama scores the fight 27:30
Judge Yasuomi Hirokawa scores the fight 27:30
In favor of your winner, by unanimous decision... Jason Grillz!
A victorious Jason Grillz thanked his army of followers in his post fight interview, telling people to make sure they follow him on Twitter.
|
|
|
|
|
|
|
|
|
|
|
|
|
|
|
|
|
|
|
|
|
|
|
| S |
C
A |
G |
S |
C
B |
G |
|
S |
C |
G |
|
energy
A | B |
|
hype
A | B |
|
pop
A | B |
|
mgr
A | B |
|
FIGHT
RATING
31% |
|
|
|
|
|
|
|
Co-main event
|
Coming up we have a lightweight MMA rules bout between Sim Salabim (ranked 0 p4p, 0 weight class) and Mark Gambacorto (ranked 0 p4p, 0 weight class). Well, the cameraman is lingering on a pretty young lady for a bit too long there. Keep your eyes on the fighters buddy or you'll miss the fighter intros!
 |
|
 |
| 180 cm
23
170 lbs
7 - 4 - 0 |
|
173 cm
24
168 lbs
4 - 2 - 0 |
Good wrestling
Excellent boxer
Cardio machine |
|
BJJ Purple Belt
Great elbows
Good gas tank |
|
| |
|
Ladies and gentlemen. This fight is 3 rounds, in the lightweight division.
Introducing the fighter to my left, fighting out of the red corner.
With a record of
7 - 4 - 0, fighting out of Tokyo, Sim Salabim!
And introducing the fighter to my right, fighting out of the blue corner.
With a record of
4 - 2 - 0, fighting out of Tokyo, Mark Gambacorto!
The judges for this bout are Shigeki Sano, Kenichi Hosakawa and Shirou Masuda.
The bell rings for round one and we are underway!
A looping hook to the body misses from Gambacorto. Salabim does a little dance to reset his feet.
Gambacorto tries to close the distance and clinch but Salabim swats him to one side with an open hand palm strike and circles away.
Salabim staying out of range there.
Salabim drops down and drives through with a powerful takedown into guard.
Salabim missing there with some ground and pound from the guard.
Salabim trying to land body shots but he keeps hitting the mat.
Gambacorto keeping full guard, as Salabim tries to pass.
Gambacorto utilising some decent striking defenses from the guard, preventing the ground and pound.
Salabim passes Gambacorto's left leg - he's now in half guard.
Salabim thows a wild elbow that connects with the canvas.
The ref warns both fighters not to hold the cage as they work up against the meshing.
Salabim lands strikes from half guard.
Gambacorto taking some punishment here, with Salabim in his half guard.
That's one minute gone in the round.
Salabim sitting in half guard, looking to land shots. Gambacorto defending well though.
Salabim working some ground and pound from close in. He's looking to maintain this position and strike for a while by the looks of things... although he'll probably advance to full mount in a minute now I've said that.
Gambacorto keeping his head moving to avoid the ground and pound.
Gambacorto is trying to get back to full guard.
Gambacorto is trying to stand up here but Salabim is controlling him well.
Salabim has been looking to land a fair amount of strikes on the ground. He might be looking to soften his opponent up in order to work for a submission.
Salabim drops an elbow to the side of Gambacorto's head.
Gambacorto avoiding damage under a succession of punches from Salabim.
Salabim wants to pass to mount but Gambacorto is defending the position.
Gambacorto is staying active underneath Salabim, who seems content to just control the action from this position.
Salabim trying to advance position but Gambacorto counters by regaining guard.
That's two minutes gone in the round.
Salabim wants to control from the top but Gambacorto keeps moving.
Salabim tries to free his leg and advance position but Gambacorto is retaining full guard.
Salabim is working hard here to advance position.
Salabim pushes down on Gambacorto's leg and manages to get into half guard.
Wooooo! Give it up for these two warriors! They are putting on a show!
Salabim throwing shots but Gambacorto is blocking nicely.
Gambacorto taking some punishment here, with Salabim in his half guard.
Gambacorto wants to control but Salabim is keeping busy.
Salabim thows a huge punch but Gambacorto dodges it nicely.
That's three minutes gone in the round.
Salabim thows a huge punch but Gambacorto dodges it nicely.
Ground and pound from Salabim.
Salabim seems to be taking a bit of a break to think of his next move. He lands a short punch in the meantime.
Salabim scoring with strikes to the body and head.
Salabim winds up and cracks Gambacorto with a swinging punch to the side of the head.
Gambacorto is trying to stand.
Salabim is keen to just control but Gambacorto is a slippery customer.
Gambacorto wants to control but Salabim is keeping busy.
The crowd are loving this. Great action here.
Salabim is scoring with some nice ground and pound from the dominant position.
Gambacorto is refusing to be controlled, as Salabim sits in half guard.
That's four minutes gone in the round.
Salabim passes to full mount!
Salabim with shots to the head and body - Gambacorto looks very uncomfortable down there.
Salabim punishing his opponent with strikes.
The crowd are going absolutely nuts as the round comes to an end - what a fantastic round of action!
Salabim thowing shots but they're missing.
Gambacorto is trying desperately to improve position.
And thats the end of the round the fighters go back to their corners.
Sim Salabim dominated that round.
The fighters' corners scream their final instructions, as the referee calls time. Here we go, back to the action!
Gambacorto pivots, looking for a leg kick but Salabim is out of range and Gambacorto settles back down.
Salabim dodges the punch combination from Gambacorto.
Gambacorto darts in trying to clinch
and Salabim counters with a straight punch to the midsection.
Salabim ducks down and throws a hook to the body but Gambacorto moves away.
Mark Gambacorto seems to be the more aggressive standup fighter in this bout.
Gambacorto throws a series of punches but Salabim avoids them all with ease.
Salabim misses with a double jab.
Salabim throws a right and a left that both miss.
Gambacorto takes a body punch but keeps moving.
Gambacorto lands a nice leg kick that just misses Salabim's sensitive parts.
Salabim shoots in but Gambacorto avoids the takedown attempt easily.
Salabim ducks down and throws a hook to the body but Gambacorto moves away.
Gambacorto forces Salabim back against the cage and clinches.
Gambacorto lands an elbow just above Salabim 's eye.
An uppercut on the inside fails to land for Gambacorto.
That's one minute gone in the round.
An uppercut on the inside fails to land for Salabim.
Salabim struggles to land a body shot inside as Gambacorto controls his hands.
Salabim avoiding damage as Gambacorto throws knees to the body.
Salabim on the defensive, avoiding the knees to the body.
Salabim misses with the head strike.
Gambacorto is trying to force a seperation but Salabim has the dominant position.
Gambacorto throws an elbow that misses.
Good anti-grappling being displayed by Salabim as Gambacorto tries to tie him up.
Salabim doesn't land with the attempted body shot.
With the fighters up against the cage, Gambacorto throws an elbow but misses.
Salabim displaying some good clinch control by pressing Gambacorto up against the cage.
Gambacorto lands with a short shot to the head.
Salabim fails to land with a short punch on the inside.
That's two minutes gone in the round.
Salabim lands a hook to the body. It's hard to tell if that hurt Gambacorto or not.
Gambacorto has a couple of punches blocked by Salabim.
Salabim blocking some punches.
Salabim changes levels and goes for a takedown here. Gambacorto fights it off and pushes away nicely.
Gambacorto fails to land with a series of punches.
Salabim feints and then dives in with a takedown. That was a long way out but the feint bought him enough time to close the distance and complete the takedown. Now we'll play guard for a bit and see who can get the better of that position.
We've seen a great period of action over the last minute or so - credit to both fighters for going all out!
Salabim wants to pass the guard but Gambacorto is keeping the position.
The fighters are pressed up against the cage, both looking to find a bit of space to work.
Gambacorto working a defensive guard but Salabim manages to pass into side control anyway.
Salabim tries to score with some ground and pound. Gambacorto controls his posture well this time though and the shots don't do any damage.
Salabim misses with the ground and pound.
That's three minutes gone in the round.
Gambacorto sneaks back into half guard.
Salabim has freed up his trapped foot and advances to mount.
Salabim raining down hammerfists from mount.
Gambacorto holding onto his opponent's waist for dear life, as Salabim tries to land some strikes to get him to release his grip.
Salabim lands a shot to the body, followed up by a shot to the exposed head of his trapped opponent.
Gambacorto in a bad spot here, taking shots to the head.
Wooooo! Give it up for these two warriors! They are putting on a show!
Salabim lands a nice shot to the head.
That's four minutes gone in the round.
Salabim connects with a couple of good shots from mount.
Salabim in mount throwing good strikes here, bouncing his opponent's head off the canvas.

Gambacorto is rocked!
Gambacorto holding onto his opponent's waist for dear life, as Salabim tries to land some strikes to get him to release his grip.
BOOM! Salabim connects with a massive shot to the dome!
Gambacorto is still in real trouble! Can Salabim finish him?
Salabim loads up on a couple of big shots to the head that have Gambacorto scrambling to escape. He can't get free though and several more unanswered shots from Salabim land to the head. The referee has no choice but to stop the fight. Salabim stands and salutes the crowd.
Ladies and gentlemen, after 4:47 of round 2, we have a winner by way of TKO (Strikes). Sim Salabim!
Sim Salabim managed to slip a mention for his sponsors, [JMFC] Arashi Fighting Nutrition Q160 Recovery, into his post fight interview.
|
|
|
|
|
|
|
|
|
|
|
|
|
|
|
|
|
|
|
|
|
|
|
| S |
C
A |
G |
S |
C
B |
G |
|
S |
C |
G |
|
energy
A | B |
|
hype
A | B |
|
pop
A | B |
|
mgr
A | B |
|
FIGHT
RATING
45% |
|
|
|
|
|
|
|
Main event
|
Coming up we have a lightweight MMA rules bout between Danny Bongderson (ranked 0 p4p, 0 weight class) and Aaron Stanfield (ranked 0 p4p, 0 weight class). Bongderson's ring entrance music is that housewives' favourite, Biggie Smalls feat DMC - My Downfall. The atmosphere really building for this one as we go over to our ring announcer for the fighter introductions!
 |
|
 |
| 176 cm
22
160 lbs
6 - 3 - 0 |
|
179 cm
22
164 lbs
10 - 1 - 0 |
BJJ Purple Belt
Excellent boxer
Cardio machine |
|
Good wrestler
Lethal high kicks
Granite chin |
|
| |
|
Ladies and gentlemen. This fight is 5 rounds, for the lightweight championship of the world!
Introducing the champion to my left, fighting out of the red corner.
With a record of
6 - 3 - 0, fighting out of Sydney, Danny Bongderson!
And introducing the challenger to my right, fighting out of the blue corner.
With a record of
10 - 1 - 0, fighting out of Tokyo, Aaron Stanfield!
The judges for this bout are Tatsuya Matsuyama, Ren Mimura and Sosuke Kotani.
The bell rings for round one and we are underway!
Stanfield with a jab.
Stanfield slips a jab from Bongderson.
Stanfield connects with a nice looking jab.
Bongderson dips down and scores with a jab to the body.
Bongderson attempts a low kick but it misses it's target.
Bongderson misses with a body shot.
Stanfield on the wrong end of a decent looking cross there.
It looks like Aaron Stanfield has been cut.
Stanfield tries a switch kick but it misses it's target.
Bongderson misses with a hook. Stanfield ducked under it nicely.
Stanfield slips a jab from Bongderson.
Stanfield moves in looking to clinch but Bongderson pushes him off.
Like a baseball bat into the meat of his leg there - nice leg kick by Bongderson.
Wooooo! Give it up for these two warriors! They are putting on a show!
Stanfield takes the fight into the clinch.
Stanfield can't get the takedown.
That's one minute gone in the round.
Stanfield struggles to land a body shot inside as Bongderson controls his hands.
Stanfield is working for a takedown up against the cage. He can't get it on this occasion though.
Nice body punch from Stanfield.
Stanfield doesn't land with the attempted body shot.
Stanfield has Bongderson pushed against the cage.
Stanfield using the Thai plumb to throw knees but Bongderson has his back arched nicely, preventing the strike.
An uppercut on the inside fails to land for Stanfield.
Bongderson is trying to break the clinch but Stanfield has him pressed against the cage.
Stanfield using the Thai plumb to throw knees but Bongderson has his back arched nicely, preventing the strike.
Stanfield presses Bongderson against the cage and delivers a mid-strength body shot.
Stanfield tries to throw a body punch but Bongderson avoids it by throwing Stanfield back against the cage.
That's two minutes gone in the round.
Stanfield struggles to land a body shot inside as Bongderson controls his hands.
Bongderson tries to circle away but Stanfield has him pinned against the cage.
Stanfield fails to land with a short punch on the inside.
Stanfield throws a punch but it's blocked by Bongderson.
Stanfield goes for a takedown in the clinch but Bongderson prevents it.
Danny Bongderson has stuffed three takedown attempts in the round now. That's going to take a lot out of Aaron Stanfield.
Stanfield misses with some punches.
Bongderson blocks a punch to the side of the head.
Stanfield tries to land knees in the clinch but Bongderson avoids the damage to the body.
Stanfield blocks a couple of punches on the inside.
Stanfield misses with a knee strike.

Bongderson pushes off and circles away, back to the middle of the mat.
Stanfield throws a series of punches but Bongderson moves out of range.
That's three minutes gone in the round.
Stanfield will have to do better than that with his takedown attempts.
Stanfield is the aggressor but that punch slipped nicely by Bongderson.
Bongderson staying out of range there.
Bongderson throws a decent looking leg kick but it doesn't land clean.
Stanfield throws the left hand but Bongderson avoids the punch easily.
Bongderson tries to land a leg kick but Stanfield saw it coming and moves away.
Stanfield bobs and weaves and throws out a fast jab that snaps Bongderson's head backwards.
Bongderson throws a jab but it's blocked by Stanfield.
Bongderson ducks under a wild hook from Stanfield.
Stanfield avoids a lazy jab quite easily.
Stanfield fakes with an overhand right and moves in to clinch with Bongderson, pushing him back against the cage.
Stanfield throws a punch but it's blocked by Bongderson.
That's four minutes gone in the round.
Stanfield tries a shoulder strike but it doesn't do any damage.
Stanfield is working for takedown but Bongderson is calmly controlling the position for now.
Bongderson is trying to work out of this bad position, with his back against the cage.
Stanfield stalling.
Stanfield wants to take the fight to the mat but Bongderson manages to get underhooks and keep the fight in the clinch.
Stanfield prevents Bongderson from breaking the clinch.
Stanfield is working hard here but doesn't seem to be able to control effectively, up against the cage.
Stanfield is trying to slow the pace down but that's a couple of times in a row that he's tried to get underhooks and Bongderson has denied him.
Stanfield wants a takedown but no success here.
As the round comes to an end the crowd are showing their appreciation for a great round of action.
Nice body punch from Stanfield - that landed with a thud.
Fantastic stuff here - a very entertaining period of action, which has drawn cheers from the crowd.
Stanfield working aggressively here.
Stanfield creates a bit of distance and throws an elbow that only just misses.
And thats the end of the round the fighters go back to their corners.
Aaron Stanfield dominated that round.
The cut man is working on Aaron Stanfield's cut.
Well, the break between rounds is over. Let's get back to the scrappin!
Stanfield looks to land a right hand but Bongderson moved out of range.
Bongderson waving his hands out in front of him, looking to distract Stanfield.
Bongderson throws out a loose jab but Stanfield uses good head movement to avoid it.
Bongderson misses with a straight left.
Bongderson misses with a right hand
and Stanfield counters with a one-two to the body.
Stanfield scores with a jab.
Stanfield throws a head kick that misses.
Bongderson throws a big shot that misses.
Stanfield is looking to clinch but Bongderson is avoiding it.
Stanfield connects with a high kick.
Bongderson misses with a straight right.
Bongderson throws a jab when Stanfield was well out of range.
Stanfield misses with a half-hearted attempt at a head kick.
That's one minute gone in the round.
Stanfield tries to clinch but Bongderson moves out of range.
Stanfield takes a jab on the nose there. A little bit of blood seems to be coming out. Hopefully that won't affect his breathing.
Stanfield looking to take his opponent's legs away with the low kicks.
A big left from Bongderson misses.
Stanfield takes a swing at Bongderson's ribcage but misses.
Stanfield tests Bongderson's chin there with a solid looking shot.
Stanfield throws an uppercut from half a mile away. Bongderson sees it coming and avoids it easily.
Bongderson scores with a jab to the jaw of his opponent.
A swing and a miss from Bongderson.
Bongderson is looking to chop away at Stanfield's legs.
Stanfield has a takedown stuffed.
That's two minutes gone in the round.
Stanfield tries to clinch there but Bongderson circles away.
A really sloppy takedown attempt there from Stanfield.
A big left from Stanfield misses.
Stanfield tries to close the distance and clinch but Bongderson swats him to one side with an open hand palm strike and circles away.
We've seen a great period of action over the last minute or so - credit to both fighters for going all out!
Bongderson moves out of range of the strikes.
Stanfield fails with a takedown attempt.
Danny Bongderson has stuffed three takedown attempts in the round now. That's going to take a lot out of Aaron Stanfield.
Bongderson misses with an uppercut. Stanfield saw that one coming.
Stanfield ducks under an overhand right and circles away with a smile on his face.
That's three minutes gone in the round.
Bongderson looks to land a right hand but Stanfield moved out of range.
Stanfield lands with a straight right. Bongderson didn't see that one coming.
Bongderson is the aggressor but that punch slipped nicely by Stanfield.
Stanfield tries to clinch but is not successful on this occasion.
Bongderson misses with a body shot. Nice footwork from Stanfield.
Aaron Stanfield seems to be the more aggressive standup fighter in this bout.
Bongderson fakes a jab and throws a low kick but Stanfield checks it well.
Stanfield tries to close the distance and clinch up against the cage but Bongderson paws at him with a jab and circles away.
Stanfield lands a jab to the nose.
Stanfield throws an uppercut from half a mile away. Bongderson sees it coming and avoids it easily.
Stanfield ducks right into an uppercut from Bongderson.
Bongderson throws out a loose jab but Stanfield uses good head movement to avoid it.
Stanfield comes forward and lands a shot to the body, then darts back out of range.
That's four minutes gone in the round.
Bongderson rushes in with a sloppy looking punch
and Stanfield holds on and brings the fighters into a clinch.
Stanfield swings away with an uppercut that misses.
Stanfield tried to land a shot to the body but connects with Bongderson's elbow.
Stanfield tries to land a shot to the body but it's blocked.
Stanfield working aggressively here.
Bongderson prevents a body shot from Stanfield.
The crowd cheering loudly, showing their appreciation for the quality fight we're seeing here.
Stanfield prevents Bongderson from breaking the clinch.
Stanfield leaning his opponent against the cage.
Stanfield tries to score a body lock takedown but Bongderson shows good agility there to stay on his feet.
As the round comes to an end the crowd are showing their appreciation for a great round of action.
Stanfield scores with an uppercut up the middle.
And thats the end of the round the fighters go back to their corners.
Aaron Stanfield showed his class in that round. I'd imagine he'll take it on all the scorecards.
The cut man is working on Aaron Stanfield's cut.
The minute break is over - no more time for sponges and pep talks - back to the action!
Stanfield has Bongderson up against the cage in a clinch.
Bongderson can't find room to land a body shot as Stanfield controls the action.
A head punch blocked on the inside by Bongderson.
Stanfield misses the knee to the body. Nice hip positioning from Bongderson.
Bongderson escapes the clinch and we're back to striking.
Stanfield steps to the side to avoid the strikes from Bongderson.
Bongderson takes a punch to the jaw and another one to the bread basket.
Bongderson lands an overhand left. A wild punch that just about connected.
Stanfield might want to mix his strikes up a bit more. He's just going for head shots at the moment and that can become a bit predictable.
Stanfield lands the left hand.
Stanfield fails to land with a series of punches.
Bongderson misses with a straight right.
Stanfield ducks under a wild hook from Bongderson.
That's one minute gone in the round.
Bongderson ducks under a wild hook from Stanfield.
Stanfield misses with an uppercut.
Bongderson lands a head shot.
Bongderson keeping his hands up high there, blocking the jab from Stanfield.
Stanfield lands a leg kick. The shin dug right into the meat of the thigh.
The fighters circling - Bongderson throws out the jab but it was never going to land.
Bongderson with a nice cross.
Stanfield is rocked!
Bongderson jabbing away but nothing is landing.
Stanfield is still on wobbly legs! Can Bongderson finish him?
Stanfield moves out of range of the strikes.
Danny Bongderson is winning the standup battle so far.
Bongderson throws a hook but Stanfield blocks it.
Stanfield throws a monster uppercut resembling something out of street fighter but it doesn't land.
Stanfield moves out of range of the strikes.
Danny Bongderson is looking to keep the fight on the feet at all costs.
We've seen a great period of action over the last minute or so - credit to both fighters for going all out!
A jab from Bongderson misses.
Bongderson throws a looping overhand right but Stanfield ducks down to avoid it.
Stanfield slips a straight right by Bongderson.
Stanfield slips under a jab.
Bongderson looks to throw the jab but Stanfield is out of range.
Bongderson throws an overhand right that lands on Stanfield's shoulder, as Stanfield tries to avoid the shot.
A big right from Bongderson misses.
Bongderson jabbing away but nothing is landing.
Nice defenses there by Stanfield.
Stanfield blocks a jab.
Stanfield avoids a lazy jab quite easily.
Bongderson looks to throw the jab but Stanfield is out of range.
That's two minutes gone in the round.
Bongderson lands with a jab that stuns his opponent. Stanfield is looking to close the distance but Bongderson sees it coming and throws a beautiful knee! Stanfield crumbles to the mat and that's all she wrote! Let's hope Stanfield is OK because that was naaaaaasty!
Ladies and gentlemen, after 2:06 of round 3, we have a winner by way of KO (Knee). Danny Bongderson!
Danny Bongderson retains his lightweight title!
Post fight, Danny Bongderson stared into the camera and said 'After i took this fight i was told Stanfield only re-signed with GFL to avenge his embarrassing title loss to me... now i have the belt back around my waist i'm sure he will scamper off into the night looking for cans to fight, not me baby!!!!! IM THE CHAMP AND HERE TO STAY!!! '.
|
|
|
|
|
|
|
|
|
|
|
|
|
|
|
|
|
|
|
|
|
|
|
| S |
C
A |
G |
S |
C
B |
G |
|
S |
C |
G |
|
energy
A | B |
|
hype
A | B |
|
pop
A | B |
|
mgr
A | B |
|
FIGHT
RATING
100% |
|
|
|
|
|
|
|
|
|
|

