 |
Infliction Hunger PBP Commentary |
Undercard bout
|
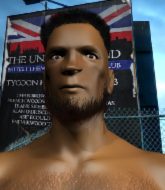
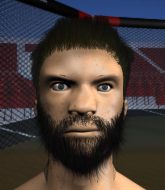
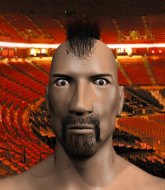
Coming up we have a super heavyweight MMA rules bout between Shawn White (ranked 0 p4p, 0 weight class) and Andre THE GIANT (ranked 0 p4p, 0 weight class). I can't wait for this one - let's get the fighter introductions out of the way and get this one started!
 |
|
 |
| 220 cm
22
285 lbs
0 - 1 - 0 |
|
225 cm
18
300 lbs
0 - 0 - 0 |
BJJ Blue Belt
Solid Muay Thai
Self confident |
|
BJJ Blue Belt
Brawler
Determined |
|
| |
|
Ladies and gentlemen. This fight is 3 rounds, in the super heavyweight division.
Introducing the fighter to my left, fighting out of the red corner.
With a record of
0 - 1 - 0, fighting out of Sydney, Shawn White!
And introducing the fighter to my right, fighting out of the blue corner.
With a record of
0 - 0 - 0, fighting out of Sydney, Andre THE GIANT!
The judges for this bout are Hugh Johnson, Steve Erwin and Damien Edna.

The bell rings for round one and we are underway!
White tries to close the distance and clinch but THE GIANT swats him to one side with an open hand palm strike and circles away.
White will have to do better than that with his takedown attempts.

THE GIANT closes the distance and clinches.
White's head jolts backwards as he takes an uppercut right on the button!
White throws a knee to the head but misses.
White keeps control of THE GIANT as he tries to wriggle out of the double underhooks.
White tries a knee to the head but he's missed.
White misses with a knee strike.
White tries to land a knee to the head but misses.
White fails to pull the fight into his guard.
White throws a knee to the head but misses.
White misses with a knee strike.
White prevents a takedown attempt there.
THE GIANT tries for a takedown but White manages to get underhooks.
THE GIANT wants to break the clinch but can't.
Still in the clinch, THE GIANT scores with a nice short uppercut.
White using the Thai plumb to throw knees but THE GIANT has his back arched nicely, preventing the strike.
White tries to land a knee to the head but THE GIANT blocks with his arms.

THE GIANT breaks the clinch and we return to the middle of the mat.
THE GIANT just misses with a punch to the body.
White closes the distance and presses his opponent up against the cage.
THE GIANT wants a takedown.
Shawn White has stuffed three takedown attempts in the round now. That's going to take a lot out of Andre THE GIANT.
White is trying to maintain a safe position but THE GIANT gets an underhook and turns White into the cage.
THE GIANT works for underhooks and lands a body shot in the process.
THE GIANT breaks the clinch.
A lazy left from White finds it's target.
White shoots in looking for a takedown. THE GIANT tries to sprawl out of it but White keeps driving through. The fighters are pinned against the cage. THE GIANT manages to get underhooks and after a bit of a struggle, circles away and we're back to standing.
White is breathing heavily.
THE GIANT fails with a takedown attempt.
THE GIANT tries for a takedown but White sees it coming a mile off and avoids it easily.
Wow, both these guys are really going for it!

That's one minute gone in the round.
THE GIANT shoots in for a takedown but doesn't get it.
THE GIANT keeps the fight on the outside.
THE GIANT fakes a jab and then connects with a hook.
THE GIANT throws a combination but comes up with nothing but fresh air.
White tries to clinch up.
THE GIANT stuffs the takedown attempt from White. White gets slowly back to his feet.
White tries to clinch but THE GIANT moves out of range.
THE GIANT circles away from the clinch attempt
and THE GIANT counters into the clinch. Nicely done.
White looking to throw knees to the head but THE GIANT is blocking nicely.
THE GIANT manages to break the clinch.
THE GIANT pushes White up against the cage in a clinch.
THE GIANT fails to pull guard.
White throws a vicious knee straight up the middle but THE GIANT blocks it with crossed arms.
THE GIANT breaks from the clinch.
White darts in trying to clinch
and THE GIANT counters by moving into the clinch. Good anticipation by THE GIANT.
White connects with a nasty looking knee right to THE GIANT's face.
Both guys are working to get underhooks.
White lands a knee to the head.
White with the Thai clinch. He's looking to land a big knee but he's not managed it this time.
THE GIANT breaks the clinch and we're back to striking at distance.
THE GIANT swats away the attempt to clinch by White.
THE GIANT stuffs the takedown attempt from White. White gets slowly back to his feet.

That's two minutes gone in the round.
THE GIANT keeps the fight on the outside.
White misses with a half-hearted attempt at a head kick.
White avoids a punch combination nicely.
THE GIANT wants to clinch.
THE GIANT circles away from the clinch attempt
and THE GIANT counters with a nice body shot.
Wooooo! Give it up for these two warriors! They are putting on a show!
THE GIANT tests White's chin there with a solid looking shot.

White is rocked!
Shawn White seems to be the more aggressive standup fighter in this bout.

THE GIANT shoots in for a takedown. He's got it... He's hoisted his opponent over his head and is carrying him over to the other end of the mat. The crowd roars in approval and THE GIANT slams his opponent to the mat. OH, that is naaaaaasty! He's out! THE GIANT lands a punch to his unconscious victim for good measure before the ref has time to call the fight.
Ladies and gentlemen, after 2:34 of round 1, we have a winner by way of KO (Slam). Andre THE GIANT!
|
|
|
|
|
|
|
|
|
|
|
|
|
|
|
|
|
|
|
|
|
|
|
| S |
C
A |
G |
S |
C
B |
G |
|
S |
C |
G |
|
energy
A | B |
|
hype
A | B |
|
pop
A | B |
|
mgr
A | B |
|
FIGHT
RATING
100% |
|
|
|
|
|
|
|
Undercard bout
|
|
|
|
Undercard bout
|
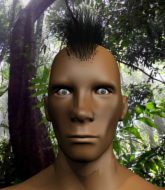
Coming up we have a heavyweight MMA rules bout between Eric Revenier (ranked 0 p4p, 0 weight class) and Arlet Singer (ranked 0 p4p, 0 weight class). Arlet Singer will no doubt be trying to keep this one on the feet, where he has a distinct advantage.
 |
|
 |
| 200 cm
22
250 lbs
1 - 0 - 0 |
|
203 cm
18
275 lbs
0 - 1 - 0 |
BJJ Purple Belt
Brawler
Granite chin |
|
BJJ White Belt
Decent boxing
Solid chin |
|
| |
|
Ladies and gentlemen. This fight is 3 rounds, in the heavyweight division.
Introducing the fighter to my left, fighting out of the red corner.
With a record of
1 - 0 - 0, fighting out of Sydney, Eric Revenier!
And introducing the fighter to my right, fighting out of the blue corner.
With a record of
0 - 1 - 0, fighting out of Sydney, Arlet Singer!
The judges for this bout are Hugh Johnson, Summer Carpenter and John Mangel.
The bell rings for round one and we are underway!
Singer scores with a nice one two combo and darts back out of range to avoid anything coming in the opposite direction.
Singer throws a combination but it was largely blocked by Revenier.
Singer lands a nice looking body shot.
Singer stalks Revenier and leaps in with a furious combination of punches. Uppercuts and crosses smash into Revenier's face. Revenier staggers backwards, shaken.
Fantastic stuff here - a very entertaining period of action, which has drawn cheers from the crowd.
Revenier wants to clinch.
Singer fails to land with a series of punches.
Singer stuns Revenier with a nice body shot, before stepping back out of range.
Singer forces Revenier back against the cage and clinches.
Revenier lands a knee to the head.
Singer wants to strike at distance but he can't break free of the clinch.
Singer is trying to break free.
Both guys are working to get underhooks.
Revenier misses with a knee strike.
Revenier tries to land a knee to the head but Singer blocks with his arms.
Revenier throws a vicious knee straight up the middle but Singer blocks it with crossed arms.
Revenier tries to land a knee to the head but misses.
Revenier is breathing heavily.
Singer wants to push off and get back to the center of the mat but Revenier has him pressed against the cage.
Revenier looking to throw knees to the head but Singer is blocking nicely.
Revenier tries a knee to the head but he's missed.
Singer breaks from the clinch.
Revenier tries to clinch but fails miserably
and Singer counters with a series of strikes that practically lifts Revenier off his feet! He tumbles backwards, his head bouncing off the mat - Singer follows up with more strikes before the ref can step in but Revenier was out before he hit the floor.
Ladies and gentlemen, after 0:45 of round 1, we have a winner by way of KO (Strikes). Arlet Singer!
|
|
|
|
|
|
|
|
|
|
|
|
|
|
|
|
|
|
|
|
|
|
|
| S |
C
A |
G |
S |
C
B |
G |
|
S |
C |
G |
|
energy
A | B |
|
hype
A | B |
|
pop
A | B |
|
mgr
A | B |
|
FIGHT
RATING
100% |
|
|
|
|
|
|
|
Undercard bout
|
Coming up we have a welterweight MMA rules bout between Jones Morris (ranked 0 p4p, 0 weight class) and Martin Keown (ranked 0 p4p, 0 weight class). There are an array of beautiful celebrities at ringside tonight! I wonder if any of them paid for their tickets.
 |
|
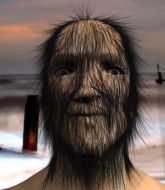 |
| 180 cm
20
176 lbs
0 - 1 - 0 |
|
160 cm
22
170 lbs
1 - 0 - 0 |
BJJ Blue Belt
Brawler
Cuts easily |
|
Good wrestler
Brawler
Solid chin |
|
| |
|
Ladies and gentlemen. This fight is 3 rounds, in the welterweight division.
Introducing the fighter to my left, fighting out of the red corner.
With a record of
0 - 1 - 0, fighting out of Sydney, Jones Morris!
And introducing the fighter to my right, fighting out of the blue corner.
With a record of
1 - 0 - 0, fighting out of Sydney, Martin Keown!
The judges for this bout are Hugh Johnson, Eliza Hachem and Steve Erwin.
The bell rings for round one and we are underway!
Keown drives through with a really nice takedown into side control.

Keown stands up and beckons Morris to his feet.
Morris connects with a vicious head kick that knocks Keown to the floor! Morris dives in looking for the finish!
Keown is rocked!
Morris prevents Keown from improving his position.
The fighters are pressed up against the cage, both looking to find a bit of space to work.

Morris is trying a forearm choke
I don't think that's going to do much at this level of the game.
The ref warns both fighters not to hold the cage as they work up against the meshing.
Morris is trying for a guillotine from the top but the pressure isn't in the right place so Keown is just riding it out for now. Morris eventually gives up the hold.
Keown really doesn't want to stay on the ground with Morris. If he can't get it back to his feet, it's only a matter of time before he'll be tapping out.
Keown kicks Morris off and gets back to his feet.
Keown scores with a nice takedown into half guard. Let's see what he's got on the ground.
The crowd are loving this. Great action here.
Keown prevents Morris from improving his position.
Morris is breathing heavily.
Keown seems to be working for a kimura but Morris defends the submission attempt.
That's one minute gone in the round.
Keown tries to stand but his hand is stuck under Morris.
Morris wants to get back to full guard.
Keown is looking for a kimura but he's never going to get it from there.
Keown is looking to stand up but he'll have to free his leg first. Instead, Morris manages to get to full guard.
Keown wants to stand but Morris has a closed guard, so he can't escape.
Keown gets to his feet - Morris follows without any prompting.
Keown closes the distance, clinches up and gets a nice trip takedown into side control. Very smooth.
Keown decides to take the fight back to the feet.
Keown fakes an overhand right and shoots for a takedown. Morris sprawls well initially but Keown persists and gets the takedown into half guard.
Morris is looking to regain full guard. Not this time though.
Morris is staying active underneath Keown, who seems content to just control the action from this position.
That's two minutes gone in the round.
The fighters are starting to perspire pretty heavily.
Morris is trying to stand up here but Keown is controlling him well.
Morris manages to get to full guard.
Keown must be cautious of submissions here, given that his opponent has the superior Jiu Jitsu.
Morris looking for a guillotine here but Keown defends easily.
The crowd are loving this. Great action here.
Morris looking for a guillotine here but Keown defends easily.
Morris will need to keep those long limbs tucked in whilst he's on the ground, to prevent any submissions.
Morris wants to get back to his feet but Keown is in a dominant position and won't allow it.
Morris working from the bottom, still in full guard. He's managed to get a loose triangle. Keown doesn't seem to be doing much to defend here, obviously he feels comfortable in the position. Keown manages to throw the legs off his shoulder and he's back into guard - no problem.
Morris keeping full guard, as Keown tries to pass.
Keown stands and steps away. Morris gets to his feet too and we're back to the striking game.

That's three minutes gone in the round.
Morris throws a combination. Keown tries to block but a couple of punches get through.
Keown blocks a head kick by Morris.
Keown closes the distance and looks for a trip takedown... aaaand he's got it - Keown lands in his opponent's guard.
Morris looking for submissions off his back, moving his hips, looking for an opening.
Both fighters really going for it on the ground here!
Morris keeping full guard, as Keown tries to pass.
Keown tries to stand but Morris is controlling from the bottom.
Keown stands up from Morris's guard - Keown perhaps looking for a knockout.
Morris lands with a kick to the temple. Keown shrugs as if to say "is that all you've got?"
Keown closes this distance looking for a takedown but Morris circles away.
Keown fails to land the takedown.
Wooooo! Give it up for these two warriors! They are putting on a show!
Morris stuffs the takedown attempt from Keown. Keown gets slowly back to his feet.
Jones Morris has stuffed three takedown attempts in the round now. That's going to take a lot out of Martin Keown.
Morris throws a head kick that Keown semi-blocks.

That's four minutes gone in the round.
Morris throws a sloppy head kick and Keown moves out of range easily.
Keown shoots in and bounces Morris off the cage to secure the takedown into guard.
Morris is looking for a triangle but Keown pushes his legs off easily.
Keown decides he's had enough of playing guard and decides to stand. Come on Morris, up you get!
Morris circles to his right before unloading a perfect head kick! Keown drops to the canvas, hurt badly! Morris follows Keown to the ground and unloads with a series of strikes that force the referee to step in and end the fight! This one is all over!
Ladies and gentlemen, after 4:29 of round 1, we have a winner by way of TKO (Strikes). Jones Morris!
|
|
|
|
|
|
|
|
|
|
|
|
|
|
|
|
|
|
|
|
|
|
|
| S |
C
A |
G |
S |
C
B |
G |
|
S |
C |
G |
|
energy
A | B |
|
hype
A | B |
|
pop
A | B |
|
mgr
A | B |
|
FIGHT
RATING
100% |
|
|
|
|
|
|
|
Undercard bout
|
|
|
|
Undercard bout
|
|
|
|
Undercard bout
|
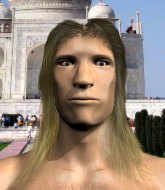
Coming up we have a lightweight MMA rules bout between Drake Monger (ranked 0 p4p, 0 weight class) and Tom Foolery (ranked 0 p4p, 0 weight class). There are an array of beautiful celebrities at ringside tonight! I wonder if any of them paid for their tickets.
 |
|
 |
| 168 cm
19
160 lbs
0 - 1 - 0 |
|
180 cm
22
155 lbs
1 - 0 - 0 |
BJJ Blue Belt
Brawler
KO power |
|
BJJ White Belt
Decent boxing
Solid chin |
|
| |
|
Ladies and gentlemen. This fight is 3 rounds, in the lightweight division.
Introducing the fighter to my left, fighting out of the red corner.
With a record of
0 - 1 - 0, fighting out of Sydney, Drake Monger!
And introducing the fighter to my right, fighting out of the blue corner.
With a record of
1 - 0 - 0, fighting out of Sydney, Tom Foolery!
The judges for this bout are Winston Howard, Steve Erwin and Eliza Hachem.
The bell rings for round one and we are underway!
Monger fails with a rather predictable takedown attempt.
Monger on the wrong end of a nice hook.

It looks like Drake Monger has been cut.
Foolery has managed to clinch.
Monger tries to score a body lock takedown but Foolery shows good agility there to stay on his feet.
Monger drops down looking for an ankle pick but Foolery pulls his leg out and moves away.
That's three failed takedown attempts in the round for Drake Monger. That's going to take a lot out of him.
Monger fails to land the takedown.
Monger misses with a takedown attempt. He shot from a bit too far out.
Foolery scores with a punch to the gut of his opponent.
Foolery closes the distance and clinches.
Foolery wants to strike at distance but he can't break free of the clinch.
Monger is trying to work for a single leg takedown but Foolery pulls him back up using the underhooks.
Foolery is clearly stalling here... Pick up the pace son.
Monger can't get the takedown.
Monger is breathing heavily.
Foolery has had enough of the clinch but Monger keeps him there for the moment.
Monger has Foolery pressed up against the cage and is working for takedown. Foolery manages to improve position though and keeps the fight standing.
Foolery wants to get back to striking at distance but Monger won't allow it.
Monger keeps control of Foolery as he tries to wriggle out of the double underhooks.
Foolery breaks the clinch and we return to the middle of the mat.
Foolery throws a monster overhand right that drops Monger! Foolery follows up with more strikes from mount and the fight is all over!
Ladies and gentlemen, after 0:59 of round 1, we have a winner by way of TKO (Strikes). Tom Foolery!
|
|
|
|
|
|
|
|
|
|
|
|
|
|
|
|
|
|
|
|
|
|
|
| S |
C
A |
G |
S |
C
B |
G |
|
S |
C |
G |
|
energy
A | B |
|
hype
A | B |
|
pop
A | B |
|
mgr
A | B |
|
FIGHT
RATING
74% |
|
|
|
|
|
|
|
Undercard bout
|
|
|
|
Co-main event
|
Coming up we have a featherweight MMA rules bout between Bane Baphomet (ranked 0 p4p, 0 weight class) and H Heinz Roosevelt (ranked 0 p4p, 0 weight class). H Heinz Roosevelt is the more experienced fighter, so let's see if that makes a difference tonight.
 |
|
 |
| 181 cm
22
145 lbs
1 - 0 - 0 |
|
170 cm
22
142 lbs
1 - 0 - 0 |
BJJ Blue Belt
Brawler
KO power |
|
BJJ White Belt
Brawler
Determined |
|
| |
|
Ladies and gentlemen. This fight is 3 rounds, in the featherweight division.
Introducing the fighter to my left, fighting out of the red corner.
With a record of
1 - 0 - 0, fighting out of Sydney, Bane Baphomet!
And introducing the fighter to my right, fighting out of the blue corner.
With a record of
1 - 0 - 0, fighting out of Sydney, H Heinz Roosevelt!
The judges for this bout are Damien Edna, Steve Erwin and John Mangel.
The bell rings for round one and we are underway!
Baphomet shoots in looking for a takedown. Roosevelt tries to sprawl out of it but Baphomet keeps driving through. The fighters are pinned against the cage. Roosevelt manages to get underhooks and after a bit of a struggle, circles away and we're back to standing.
Baphomet lands a left and a right that sends Roosevelt crashing to the canvas! Baphomet dives into mount looking to finish!
Roosevelt is rocked!
Roosevelt is trying to stand but he's just given Baphomet his back.
Roosevelt is still in real trouble! Can Baphomet finish him?
Roosevelt trying to get back to his feet but Baphomet is in full control for now.
Roosevelt seems to have recovered his senses.
A lull in the action here.
Roosevelt is trying to stand back up.
Roosevelt defending nicely against the rear naked choke attempt.
That's one minute gone in the round.
Baphomet struggling to land strikes to the head as Roosevelt covers up.
Roosevelt covering up well under a barage of strikes.
Roosevelt is trying to get back to his feet but Baphomet has full control of the position and if anything, Roosevelt has just worked his way into a worse spot.
The crowd hopeful of a finish here - Baphomet's supporters are on their feet, screaming for him to go for the rear naked choke.
Roosevelt is very frustrated here, being controlled quite effectively by Baphomet.
Roosevelt really doesn't want to stay on the ground with Baphomet. If he can't get it back to his feet, it's only a matter of time before he'll be tapping out.
Baphomet is looking for the choke from the back position but Roosevelt is controlling his hands well.
Baphomet looking for the RNC.
Baphomet is breathing heavily.
Roosevelt defends a rear naked choke attempt by controlling one of Baphomet's arms.
That's two minutes gone in the round.
Roosevelt is displaying good submission defense - not really looking in danger of submitting to the rear naked choke at the moment. That could change in an instant of course if Baphomet gets his way!
Roosevelt wants to get back to his feet.
Baphomet is looking to finish the fight by rear naked choke. Roosevelt knows exactly what he's got planned though, so he's defending well. Maybe a few strikes would soften Roosevelt for a finish.
Roosevelt covering up well and avoiding damage.
That's three minutes gone in the round.
Baphomet is remaining active here, looking for the choke. The more discerning members of the crowd will appreciate his efforts.
Roosevelt looking to stop the rear naked choke attempt by controlling the hands.
Baphomet working for a RNC but it's not happening just yet.
The referee is taking a good look at Roosevelt as he is on the wrong end of some big shots from Baphomet!
Baphomet is working really hard to secure the rear naked choke. Roosevelt defends successfully for a significant amount of time. Both fighters are looking very determined.
Baphomet working from the back looking to end the fight with a rear naked choke. Roosevelt is doing well to defend. Baphomet seems to have got his hand under the chin though and he's sunk the choke in! Roosevelt is forced to tap and this one is over!
Ladies and gentlemen, after 4:04 of round 1, we have a winner by way of Submission (RNC). Bane Baphomet!
|
|
|
|
|
|
|
|
|
|
|
|
|
|
|
|
|
|
|
|
|
|
|
| S |
C
A |
G |
S |
C
B |
G |
|
S |
C |
G |
|
energy
A | B |
|
hype
A | B |
|
pop
A | B |
|
mgr
A | B |
|
FIGHT
RATING
58% |
|
|
|
|
|
|
|
Main event
|
Coming up we have a bantamweight MMA rules bout between Bob Jam (ranked 0 p4p, 0 weight class) and Jesse Baird (ranked 0 p4p, 0 weight class). Bob Jam could well score a knockout today. He has the power to get to Jesse Baird's chin.
 |
|
 |
| 170 cm
19
130 lbs
0 - 0 - 0 |
|
160 cm
19
131 lbs
0 - 1 - 0 |
BJJ Blue Belt
Counter striker
Granite chin |
|
BJJ Blue Belt
Counter striker
Tends to cut |
|
| |
|
Ladies and gentlemen. This fight is 3 rounds, in the bantamweight division.
Introducing the fighter to my left, fighting out of the red corner.
With a record of
0 - 0 - 0, fighting out of Sydney, Bob Jam!
And introducing the fighter to my right, fighting out of the blue corner.
With a record of
0 - 1 - 0, fighting out of Sydney, Jesse Baird!
The judges for this bout are Skip Squint, John Mangel and Damien Edna.
The bell rings for round one and we are underway!
Baird slips a jab and a cross from Jam.
Baird looks really tired already! That doesn't bode well for a good, competitive fight!
Jam misses with a few strikes there.
Jam looks for a takedown. He's got it. We're now in half guard.
Jam throwing punches and elbows but they're not doing any damage.
Jam decides he's had enough of the ground and stands up.
Jam closes the distance and lands a one-two.
Jam throws a combination. Baird tries to block but a couple of punches get through.
Baird is rocked!
Jam feints and then dives in with a takedown. That was a long way out but the feint bought him enough time to close the distance and complete the takedown. Now we'll play guard for a bit and see who can get the better of that position.
Baird is still in real trouble! Can Jam finish him?
Jam sitting in guard here, content to control.
Baird seems to have recovered his senses.
That's one minute gone in the round.
Jam trying to control the position from guard on top but Baird is wriggling around, looking for whatever he can.
Jam stands up over Baird, holding his feet. He dives back in and lands a decent shot to the head.
Baird wants to get back to his feet but Jam is in a dominant position and won't allow it.
Jam stands up from Baird's guard - Jam perhaps looking for a knockout.
Jam drives through with a really nice takedown into side control.
A bit of a lull in the action. I'm sure it will pick up again soon... even if the ref has to physically pick them up and put them back on their feet.
Jam has been looking to land a fair amount of strikes on the ground. He might be looking to soften his opponent up in order to work for a submission.
Baird is trying to get back to his feet.
The fighters are pressed up against the cage, both looking to find a bit of space to work.
Jam is looking to take a break and control but Baird is keeping him honest, looking to work from the bottom.
That's two minutes gone in the round.
Baird is looking to work his way out of this bad position but Jam is controlling him well.
Jam lands some shots froms side control.
Baird tries to escape but Jam is in control.
Baird is being controlled here.
Baird is looking to work his way out of this bad position but Jam is controlling him well.

It looks like we're going to have a standup here. Neither fight is doing enough on the ground.
Jam scores with a takedown into Baird's guard.
Jam decides to stand up and beckons his opponent to follow.
Jam closes the distance, clinches up and gets a nice trip takedown into side control. Very smooth.
Jam tries to cartwheel into mount but he doesn't manage it.
Jam stands up and we're back to a striking position.
That's three minutes gone in the round.
An inside leg kick lands from Jam.
Jam with a body punch. A glancing blow.
Baird drops his hands momentarily and Jam takes advantage with a crisp shot to the head.
Jam pulls out of a head kick attempt.
Jam feints and as Baird raises his hands in defense, Jam changes levels and drives through with a takedown into guard.
Jam controls the pace of the fight for a moment.
Baird keeping moving, preventing Jam from controlling successfully.
Jam won't allow Baird to get back to his feet.
Jam wants to pass the guard but Baird is keeping the position.
That's four minutes gone in the round.
Jam won't allow Baird to get back to his feet.
Baird is using up a lot of energy trying to get back to his feet. Perhaps he should improve his position first.
Well, the referee has seen enough. Neither fighter is active enough on the ground so he's stood them back up.
Jam lands a beauty of a right hand that gets the crowd cheering.
Baird has his takedown stuffed
and Jam counters with a shoot takedown into half guard.
Jam wants to work for an arm triangle but Baird is really keeping half guard well and defending the submission attempt.
Baird kicks Jam off and gets back to his feet.
As the round comes to an end the crowd are showing their appreciation for a great round of action.
Baird slips a jab and a cross from Jam.
Jam will need to tighten up his combinations if he doesn't want to gas himself out, swinging at thin air.
And thats the end of the round the fighters go back to their corners.
Bob Jam dominated that round.
The referee calls time. The cornermen exit stage left and we're back to business.

Jam misses with a series of wild punches.
Jam scores to the head and body with a nice combination!
Baird dodges the punch combination from Jam.
No joy there for Jam, who threw a few shots but didn't land.
We've had a slow start to the round here - hopefully the action picks up.
Jam shoots in and gets a takedown into half guard. Jam showed some decent athleticism there.
Baird is breathing heavily.
Jam stands up and beckons Baird to join him on the feet.
That's one minute gone in the round.
Jam displaying good standup as he scores with a three punch combination.
Baird on the receiving end of a decent leg kick there by Jam. Jam obviously looking to wear him down.
Excellent takedown into side control there by Jam.
Jam tries to cartwheel into mount but he doesn't manage it.
Jam moves into full mount!
Jam won't let Baird get back to his feet... He wants to keep the fight where it is for now.
Bob Jam overall seems to be getting the better of the ground position in the fight so far.
That's two minutes gone in the round.
Jam in mount throwing good strikes here, bouncing his opponent's head off the canvas.
The fighters are starting to get a bit slippery now, which will make submissions a bit more difficult.
The referee warns Baird that he has to improve his position here as he takes two more clean shots to the head.
Jam sitting in mount, just looking to control for the moment.
Baird is squirming around, avoiding Jam's attempts to control the action.
Jam is really struggling to control Baird but he's trying to hold on to the position.
You get the feeling that Baird really doesn't like being in this position too much.
Jam pausing momentarily but resumes with a couple of decent strikes that do a bit of damage.
Baird really wants to buck Jam off and get back to his feet.
Baird is squirming around, avoiding Jam's attempts to control the action.
Baird is in a horrible position here, under a barrage of strikes, he's managing to avoid any damage.
That's three minutes gone in the round.
Baird is not a happy chappy
he wants out of there.
Jam swings around for an armbar and he's got it! Wow, that came out of nowhere! What a finish!
Ladies and gentlemen, after 3:29 of round 2, we have a winner by way of Submission (Armbar). Bob Jam!
|
|
|
|
|
|
|
|
|
|
|
|
|
|
|
|
|
|
|
|
|
|
|
| S |
C
A |
G |
S |
C
B |
G |
|
S |
C |
G |
|
energy
A | B |
|
hype
A | B |
|
pop
A | B |
|
mgr
A | B |
|
FIGHT
RATING
49% |
|
|
|
|
|
|
|
|
|
|
