 |
Rivals XXI: Freak vs. Agullana PBP Commentary |
Undercard bout
|
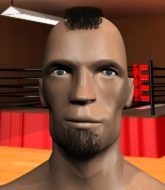
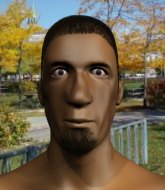
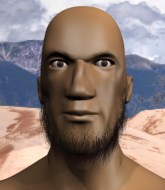
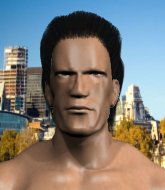
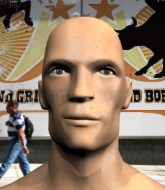
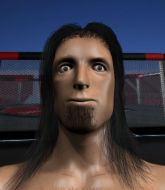
Coming up we have a light heavyweight MMA rules bout between Andrew Wiggin (ranked 0 p4p, 0 weight class) and Yugi Kantana (ranked 0 p4p, 0 weight class). Wiggin kept the crowd waiting but all that was forgotten when his ring entrance music started. The incomparable musical genius that is Rock Lobster. Man, I cannot wait for this one!
 |
|
 |
| 168 cm
25
210 lbs
0 - 0 - 0 |
|
190 cm
25
212 lbs
2 - 2 - 0 |
BJJ Blue Belt
Counter striker
Cuts easily |
|
BJJ Purple Belt
Decent boxing
Enjoys gardening |
|
| |
|
Ladies and gentlemen. This fight is 3 rounds, in the light heavyweight division.
Introducing the fighter to my left, fighting out of the red corner.
With a record of
0 - 0 - 0, fighting out of Tokyo, Andrew Wiggin!
And introducing the fighter to my right, fighting out of the blue corner.
With a record of
2 - 2 - 0, fighting out of Tokyo, Yugi Kantana!
The judges for this bout are Yuuki Gou, Ren Mimura and Hirohito Nitta.

The bell rings for round one and we are underway!
Wiggin misses with a jab, cross combination.
Kantana steps to the side to avoid the strikes from Wiggin.
Kantana lands with a right hand.

It looks like Andrew Wiggin has been cut.
Wiggin uses good footwork to get in and out and land a nice right hand before Kantana has time to react.
Yugi Kantana seems to be the more aggressive standup fighter in this bout.
Kantana closes the distance and clinches up with Wiggin, looking for a takedown. Kantana pushes Wiggin against the cage but Wiggin circles to the side and manages to break the clinch.
Kantana uses good footwork to get in and out and land a nice right hand before Wiggin has time to react.
Wiggin lands a leg kick and bounces back out of range.
This is a great period of action - very entertaining stuff!
Kantana misses with a takedown attempt - Wiggin sprawls well and throws a nice strike on the way out which just misses.
Kantana will need to tighten up his combinations if he doesn't want to gas himself out, swinging at thin air.
Kantana slips in close and lands a nice hook before moving back out of range.
Kantana lands a jab-cross combination.
Wiggin lunges in with an uppercut that skims his opponent's chin.

That's one minute gone in the round.
Wiggin dodges the punch combination from Kantana.
This fight brought to you by 5M nutrition - it's mmmmm tasty. Nice jab by Wiggin.
Kantana shoots in for a takedown. He's persisting with it as Wiggin sprawls well. Wiggin wins this battle and keeps the fight standing. Kantana gets slowly back to his feet.
Andrew Wiggin has stuffed three takedown attempts in the round now. That's going to take a lot out of Yugi Kantana.
Kantana looks gassed!
Wiggin moves into range and connects with a jab.
Kantana has his takedown stuffed
and Wiggin counters with a nice body kick.
Wiggin lunges in with an uppercut that skims his opponent's chin.
Wiggin misses with a few strikes there.
Wiggin scores with a nice strike.

That's two minutes gone in the round.
This is a great period of action - very entertaining stuff!
Kantana tries to close the distance and clinch up but Wiggin swats him away and circles back towards the center.
Wiggin lands a nice shot that snaps Kantana's head back.
and Wiggin counters with a massive uppercut that badly hurts Kantana! He's just covering up as Wiggin starts to tee off till the referee steps in and stops the fight!
Ladies and gentlemen, after 2:19 of round 1, we have a winner by way of TKO (Strikes). Andrew Wiggin!
Our winner, Andrew Wiggin, made sure he spent some time buttering up the crowd during his post fight interview, which will no doubt bring him a few more fans.
|
|
|
|
|
|
|
|
|
|
|
|
|
|
|
|
|
|
|
|
|
|
|
| S |
C
A |
G |
S |
C
B |
G |
|
S |
C |
G |
|
energy
A | B |
|
hype
A | B |
|
pop
A | B |
|
mgr
A | B |
|
FIGHT
RATING
53% |
|
|
|
|
|
|
|
Undercard bout
|
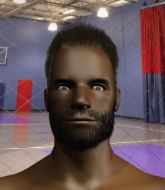
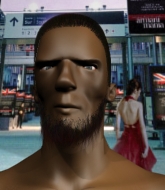
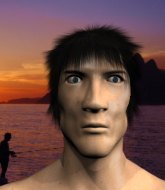
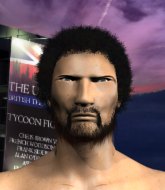
Coming up we have a light heavyweight MMA rules bout between Paul Harris (ranked 0 p4p, 0 weight class) and Milad Yakubi (ranked 0 p4p, 0 weight class). Yakubi has chosen Panjabi MC Feat. Jay Z - Beware as his entrance music. Paul Harris has the better chin. Will he look to stand and bang today?
 |
|
 |
| 173 cm
22
200 lbs
0 - 1 - 0 |
|
177 cm
20
221 lbs
1 - 0 - 0 |
Powerful takedowns
Basic striking
Very quick |
|
BJJ Brown Belt
Counter striker
Good gas tank |
|
| |
|
Ladies and gentlemen. This fight is 3 rounds, in the light heavyweight division.
Introducing the fighter to my left, fighting out of the red corner.
With a record of
0 - 1 - 0, fighting out of Tokyo, Paul Harris!
And introducing the fighter to my right, fighting out of the blue corner.
With a record of
1 - 0 - 0, fighting out of New York, Milad Yakubi!
The judges for this bout are Taro Takaoka, Shigeki Fujiwara and Shigeki Sano.
The bell rings for round one and we are underway!
Harris misses with a right hand
and Yakubi counters with a lovely shot to the body.
Yakubi throws a leg kick but Harris checks it.
Yakubi displaying good standup as he scores with a three punch combination.
Yakubi just misses with a punch to the body.
Yakubi scores with a hook.
We've seen a great period of action over the last minute or so - credit to both fighters for going all out!
Harris shoots in for a takedown. "I don't think so" says Yakubi as he avoids it easily.
Harris throws an uppercut from half a mile away. Yakubi sees it coming and avoids it easily.
A solid leg kick lands there for Yakubi.
Yakubi looks to score with a jab to the body but Harris is just out of range.
Harris throws a hook to the side of Yakubi's head but Yakubi sees it coming and ducks under it beautifully.
Yakubi uses decent footwork to sidestep a right hand from Harris.
Paul Harris seems to be the more aggressive standup fighter in this bout.
Yakubi looks to score with a jab to the body but Harris is just out of range.
Yakubi moves out of range of the strikes.
Yakubi throws a hard body shot but it just misses.
Yakubi is throwing a lot of body shots here, looking to wear down Harris rather than just go for the knockout.
Yakubi misses with a body shot.
Harris fails miserably with a takedown attempt.
That's one minute gone in the round.
Nice body punch from Yakubi.
Yakubi throws a head kick but Harris moves out of range.
Harris uses some good footwork to avoid the body shot by Yakubi.
Yakubi moves into range and connects with a jab.
Harris bobs and weaves well there to avoid the strikes.
Yakubi circles and sees the opportunity to plant his feet and throw a really nice straight left hand that drops Harris to the canvas! Harris doesn't know where he is but he's trying to survive - Yakubi keeps piling on the pressure and forces the referee to step in! This one is aaaaaall over!
Ladies and gentlemen, after 1:29 of round 1, we have a winner by way of TKO (Strikes). Milad Yakubi!
Milad Yakubi thanked the fans post fight for their support.
|
|
|
|
|
|
|
|
|
|
|
|
|
|
|
|
|
|
|
|
|
|
|
| S |
C
A |
G |
S |
C
B |
G |
|
S |
C |
G |
|
energy
A | B |
|
hype
A | B |
|
pop
A | B |
|
mgr
A | B |
|
FIGHT
RATING
79% |
|
|
|
|
|
|
|
Undercard bout
|
|
|
|
Undercard bout
|
|
|
|
Undercard bout
|
Coming up we have a light heavyweight MMA rules bout between Jeremy Stevens (ranked 0 p4p, 0 weight class) and Justin Ruiz (ranked 0 p4p, 0 weight class). Ruiz has chosen jukebox hero as his entrance music. Both fighters look fresh as a daisy as they make their way towards the cage.
 |
|
 |
| 192 cm
27
214 lbs
5 - 3 - 0 |
|
170 cm
25
205 lbs
2 - 0 - 0 |
Good takedowns
Counter striker
Experienced |
|
Decent wrestler
Counter striker
Granite chin |
|
| |
|
Ladies and gentlemen. This fight is 3 rounds, in the light heavyweight division.
Introducing the fighter to my left, fighting out of the red corner.
With a record of
5 - 3 - 0, fighting out of Tokyo, Jeremy Stevens!
And introducing the fighter to my right, fighting out of the blue corner.
With a record of
2 - 0 - 0, fighting out of Tokyo, Justin Ruiz!
The judges for this bout are Taro Takaoka, Yuuki Gou and Kenichi Hosakawa.
The bell rings for round one and we are underway!
Ruiz leaves Stevens with his face pressed against the mat as he sprawls beautifully, defending against a solid takedown attempt.
A telegraphed takedown attempt from Stevens is defended easily by Ruiz.

Ruiz has Stevens up against the cage in a clinch.
Ruiz effectively controlling the action here.
Stevens tries to pull guard but Ruiz forces him back to his feet, against the cage.
That's three failed takedown attempts in the round for Jeremy Stevens. That's going to take a lot out of him.

Ruiz lands a takedown into guard.
Stevens wants to stand up but Ruiz is controlling him.

Stevens is active off his back here, looking for submissions.
That's one minute gone in the round.
Ruiz distracts Stevens with his right hand and drops a big elbow with his other arm.
Ruiz stands up and looks to throw the legs aside to pass to side control. Stevens swivels though and keeps the full guard.
Ruiz got a little sloppy there for a moment and Stevens has worked his way into a loose triangle - can he finish it?! No, Ruiz has managed to get both his arms back between Stevens's legs - danger averted.
Ruiz won't allow Stevens to sweep him here.
Stevens is looking for a triangle but Ruiz pushes his legs off easily.
Ruiz stopping the sweep attempt from Stevens.
Ruiz with a flurry of punches that miss.
Stevens has his foot on Ruiz's thigh. He's trying to push off and get in position for a triangle, I think. Ruiz works his way back into a safe position though.
We've seen a great period of action over the last minute or so - credit to both fighters for going all out!
Ruiz trying to land body shots but he keeps hitting the mat.
Stevens wants to sweep here but Ruiz controlling him for the moment.
That's two minutes gone in the round.
Ruiz distracts Stevens with his right hand and drops a big elbow with his other arm.
It looks like Jeremy Stevens has been cut.
Ruiz is looking to work some ground and pound but Stevens has wrist control.
Stevens looking for a sweep. Not yet Stevens, not yet.
Ruiz tries to stand but Stevens is controlling from the bottom.
Stevens throwing his legs up looking for a triangle.
Ruiz pressing down on his opponent's thigh, looking to pass guard. Stevens is keeping the position for now.
Stevens escapes his hips to the side and looks to be working for an armbar. Ruiz gives him a little smile and shakes his head. No chance.
The fighters are starting to perspire pretty heavily.
Stevens looking for submissions from the bottom here. Moving his hips around, possibly looking for an armbar.
Stevens will need to keep those long limbs tucked in whilst he's on the ground, to prevent any submissions.
Stevens has his foot on Ruiz's thigh. He's trying to push off and get in position for a triangle, I think. Ruiz works his way back into a safe position though.

That's three minutes gone in the round.
Stevens looking for submissions off his back, moving his hips, looking for an opening.
Ruiz with a nice head shot there.
Stevens is looking for a triangle but Ruiz pushes his legs off easily.
Ruiz landing some decent shots from guard.

Ruiz stands and steps away. Stevens gets to his feet too and we're back to the striking game.
Horrible takedown by Stevens or perhaps it was just good defense by Ruiz which made him look bad.
Stevens doesn't succeed with the takedown
and Ruiz counters nicely by changing levels and landing a hook to the body.
Stevens is breathing heavily.
This is a great period of action - very entertaining stuff!
Ruiz lands a big right hook! Stevens looks hurt but is still standing! Ruiz lands a left jab and another right hook! This time Stevens falls down and Ruiz dives in with a huge hammer fist! Stevens's eyes roll back! The referee calls for the bell and Ruiz runs up the cage to celebrate with his fans!
Ladies and gentlemen, after 4:56 of round 1, we have a winner by way of KO (Punches). Justin Ruiz!
Justin Ruiz managed to slip a mention for his sponsors, Charlie Wang's Tattered Rags & 95% Laundry, into his post fight interview.
|
|
|
|
|
|
|
|
|
|
|
|
|
|
|
|
|
|
|
|
|
|
|
| S |
C
A |
G |
S |
C
B |
G |
|
S |
C |
G |
|
energy
A | B |
|
hype
A | B |
|
pop
A | B |
|
mgr
A | B |
|
FIGHT
RATING
64% |
|
|
|
|
|
|
|
Undercard bout
|
Coming up we have a lightweight MMA rules bout between Kotaro Fuma (ranked 0 p4p, 0 weight class) and Kazuhira Honda (ranked 0 p4p, 0 weight class). Honda is bobbing his head along to his entrance song: Zetsubou Billy - Maximum The Hormone. The key to victory for Kotaro Fuma has got to be keeping the fight on the feet.
 |
|
 |
| 169 cm
18
158 lbs
0 - 1 - 1 |
|
170 cm
18
155 lbs
2 - 1 - 0 |
BJJ White Belt
Counter striker
Intelligent |
|
BJJ Purple Belt
Brawler
Granite chin |
|
| |
|
Ladies and gentlemen. This fight is 3 rounds, in the lightweight division.
Introducing the fighter to my left, fighting out of the red corner.
With a record of
0 - 1 - 1, fighting out of Tokyo, Kotaro Fuma!
And introducing the fighter to my right, fighting out of the blue corner.
With a record of
2 - 1 - 0, fighting out of Tokyo, Kazuhira Honda!
The judges for this bout are Taro Takaoka, Yukihiro Yamamoto and Kenichi Hosakawa.
The bell rings for round one and we are underway!
Honda closes the distance and gets a trip takedown into side control. Fuma quickly recovers to half guard.
Fuma looks exhausted already! Oh dear, he should have come in in better shape than this!
Honda trying to control the pace.

Honda is looking for an arm triangle, whilst trying to pass to side control. Fuma doesn't seem that keen to cooperate though. No luck this time Honda.
Neither fighter is being very active at the moment, with Honda in particular looking to stall.
Honda's corner are shouting for him to control the position and he seems happy to oblige.
The ref warns both fighters not to hold the cage as they work up against the meshing.
That's one minute gone in the round.
Honda looking to pass the half guard. Not this time.
Honda stalling.

The ref stands the fighters back up. Kazuhira Honda was stalling too much, according to the referee.
Honda misses with a takedown attempt - Fuma sprawls well and throws a nice strike on the way out which just misses.
That's two minutes gone in the round.
Honda shoots in for a takedown and gets it.
Honda maintaining the dominant position here and is working for a kimura. He's locked it up! Fuma could be in real trouble here! He's trying to wriggle out but Honda has cracked it and Fuma is screaming in pain - he's tapped out! Great finish by Honda!
Ladies and gentlemen, after 2:38 of round 1, we have a winner by way of Submission (Kimura). Kazuhira Honda!
Kazuhira Honda was full of energy after the big win and talked about how he thinks he can do big things in this sport. The crowd were appreciative of his determination to succeed.
|
|
|
|
|
|
|
|
|
|
|
|
|
|
|
|
|
|
|
|
|
|
|
| S |
C
A |
G |
S |
C
B |
G |
|
S |
C |
G |
|
energy
A | B |
|
hype
A | B |
|
pop
A | B |
|
mgr
A | B |
|
FIGHT
RATING
33% |
|
|
|
|
|
|
|
Undercard bout
|
Coming up we have a light heavyweight MMA rules bout between Joe Satriani (ranked 0 p4p, 0 weight class) and Tony Montana (ranked 0 p4p, 0 weight class). Satriani comes to the cage accompanied by Live Free or Let Me Die. The crowd giving both fighters a great reception on their way into the arena. That's good to see.
 |
|
 |
| 195 cm
26
205 lbs
4 - 1 - 0 |
|
186 cm
25
216 lbs
0 - 1 - 0 |
BJJ Purple Belt
Solid Muay Thai
Very strong |
|
BJJ White Belt
Excellent boxer
Powerful |
|
| |
|
Ladies and gentlemen. This fight is 3 rounds, in the light heavyweight division.
Introducing the fighter to my left, fighting out of the red corner.
With a record of
4 - 1 - 0, fighting out of Tokyo, Joe Satriani!
And introducing the fighter to my right, fighting out of the blue corner.
With a record of
0 - 1 - 0, fighting out of Tokyo, Tony Montana!
The judges for this bout are Yukihiro Shimada, Yuuki Gou and Kenichi Hosakawa.
The bell rings for round one and we are underway!
Satriani closes the distance looking to clinch
and Montana counters with a straight right hand.
Satriani tries to clinch but is not successful on this occasion.
Satriani moves to clinch but Montana breaks away
and Montana counters with a right hand to the body.
Satriani tries to close the distance and clinch but Montana swats him to one side with an open hand palm strike and circles away.
Montana takes a kick to the side of the head.
Satriani tries to clinch
and Montana counters with a nice body shot.
Montana circles away from the clinch attempt
and Montana counters with a quick right hand to the jaw.
Satriani closes the distance but Montana moves to the side
and Montana counters with a good right hand that lands right on the jaw.

Satriani is rocked!
We've seen a great period of action over the last minute or so - credit to both fighters for going all out!
Montana closes the distance and lands a crisp combination that knocks Satriani out cold! Satriani corner are devastated, head in hands behind our commentary position. Poor guys.
Ladies and gentlemen, after 0:50 of round 1, we have a winner by way of KO (Punches). Tony Montana!
Tony Montana seemed lost for words in his post fight interview but he remembered to thank his fans and directed everyone to his website.
|
|
|
|
|
|
|
|
|
|
|
|
|
|
|
|
|
|
|
|
|
|
|
| S |
C
A |
G |
S |
C
B |
G |
|
S |
C |
G |
|
energy
A | B |
|
hype
A | B |
|
pop
A | B |
|
mgr
A | B |
|
FIGHT
RATING
100% |
|
|
|
|
|
|
|
Undercard bout
|
Coming up we have a heavyweight MMA rules bout between Simija Nomurokai (ranked 0 p4p, 0 weight class) and Hayato Warmaster (ranked 0 p4p, 0 weight class). Warmaster has chosen Final hour by LAMB OF GOD as his entrance music, which hasn't gone down very well with the crowd. Simija Nomurokai has the edge in experience - let's see if he can make that count tonight.
 |
|
 |
| 188 cm
23
265 lbs
3 - 0 - 0 |
|
195 cm
22
287 lbs
2 - 0 - 0 |
BJJ Purple Belt
Basic striking
Self confident |
|
Powerful takedowns
Basic striking
Powerful |
|
| |
|
Ladies and gentlemen. This fight is 3 rounds, in the heavyweight division.
Introducing the fighter to my left, fighting out of the red corner.
With a record of
3 - 0 - 0, fighting out of Tokyo, Simija Nomurokai!
And introducing the fighter to my right, fighting out of the blue corner.
With a record of
2 - 0 - 0, fighting out of Tokyo, Hayato Warmaster!
The judges for this bout are Shigeki Fujiwara, Sosuke Kotani and Yasuomi Hirokawa.
The bell rings for round one and we are underway!
Nomurokai throws a mid kick that lands with a slap.
An inside leg kick lands from Nomurokai.
A looping hook to the body misses from Nomurokai. Warmaster does a little dance to reset his feet.

Nomurokai darts in and clinches Warmaster up against the cage.

Nomurokai manages to break the clinch.
Nomurokai tries to close the distance and clinch up but Warmaster swats him away and circles back towards the center.
Nomurokai slaps away a takedown attempt from Warmaster, before circling back to the center of the mat.
Nomurokai misses with a head kick.
Warmaster shoots in for a takedown. "I don't think so" says Nomurokai as he avoids it easily.
Nomurokai throws a head kick that misses and slips in the process. He scrambles back to his feet and the fighters circle.
Warmaster fails with a takedown attempt.
Simija Nomurokai has stuffed three takedown attempts in the round now. That's going to take a lot out of Hayato Warmaster.
Nomurokai gets caught napping as Warmaster dives in and scores a takedown. Nomurokai manages to retain guard.
The referee is pacing around the two fighters - he looks like he's thinking about a standup.
Nomurokai has his foot on Warmaster's thigh. He's trying to push off and get in position for a triangle, I think. Warmaster works his way back into a safe position though.
This is a great period of action - very entertaining stuff!
Warmaster wants to control from the top but Nomurokai keeps moving.
Warmaster is trying to work a guillotine from the top, or something like that? Don't know how he thinks he's going to get a finish from there.
Warmaster controlling from the guard. I say controlling but really, he's stalling.
That's one minute gone in the round.
Warmaster looking to pass the guard.
Nomurokai thows some rabbit punches from the bottom but they don't do any damage.
Warmaster passes Nomurokai's left leg - he's now in half guard.
Nomurokai trying to control but Warmaster postures up.
Nomurokai tries to get to full guard but Warmaster has control of the leg.
Warmaster tries to pass to full mount but Nomurokai defends it.
Nomurokai wants to stand back up but Warmaster manages to pass into side control.
Warmaster tries for a kimura. Not really close to a finish though.
That's two minutes gone in the round.
Nomurokai is not content to let Warmaster control the position.
Warmaster thinks about going for a far side armbar but bails out and retains the dominant position instead.
The fighters are going at a pretty good pace and they're both starting to sweat now.
Nomurokai wants to get back to his feet.
Nomurokai can't do much from the bottom here.
Warmaster is trying to land an Americana. He has the arm isolated but Nomurokai is keeping cool and he's avoided the danger for now.
Warmaster is trying to get an arm triangle but Nomurokai is defending well.
That's three minutes gone in the round.
Nomurokai is looking to reverse the position.
Nomurokai manages to get one leg in to regain half guard.
Warmaster is trying a forearm choke
I don't think that's going to do much at this level of the game.
Nomurokai looks like he's trying to stand up.
The ref warns both fighters not to hold the cage as they work up against the meshing.
Nomurokai is looking to improve his position.
Nomurokai flails away from the bottom but he's not doing any damage.
Nomurokai is trying to stand.
Warmaster is looking for a kimura here.

That's four minutes gone in the round.
Warmaster works his foot free and advances to mount.
Nomurokai wants to hold on but Warmaster pushes him away.
Warmaster trying to control but he's not successful this time.
Nomurokai wants to try and get back to his feet.
Warmaster can't quite control the action as he would like just now, as Nomurokai is looking to escape.
As the round comes to an end the crowd are showing their appreciation for a great round of action.
Warmaster working for a guillotine from mount but Nomurokai is in no mood to give up.
This is a great period of action - very entertaining stuff!
Nomurokai is controlling an arm, preventing Warmaster from taking his back. Although keeping him in mount is no better to be honest.
And thats the end of the round the fighters go back to their corners.
A close round but Hayato Warmaster will probably get the nod.
OK. That's time! The bell goes and we're back to the action.

Warmaster shoots in for a takedown - he's clinched up with Nomurokai but Nomurokai pushes him off and we're back to square one.
Nomurokai rushes Warmaster and presses him up against the cage.
Nomurokai swings wildly with an uppercut but Warmaster uses good head movement to avoid it.
Nomurokai pushes off and circles away, back to the middle of the mat.
Warmaster looks to score with a combo but nothing lands.
Nomurokai lands with a head kick! That's gotta hurt.
Nomurokai tries to clinch there but Warmaster circles away.
Warmaster throws a hook but Nomurokai avoids it easily.
Nomurokai is looking to clinch but Warmaster is avoiding it.
A slapping body kick lands there for Nomurokai.
Warmaster is trying hard to land a takedown here. Nomurokai sprawls well and keeps this one on the feet.
Nomurokai lands a kick to the ribs of his opponent. Nice work there - in and out in a flash.
A slow jab from Nomurokai misses its intended target.
Nomurokai pushes Warmaster away with a front kick.
The crowd cheering loudly, showing their appreciation for the quality fight we're seeing here.
Warmaster defending well as Nomurokai loads up on a big left hand.
That's one minute gone in the round.
Warmaster misses with a body shot. Nice footwork from Nomurokai.
Nomurokai lands a head kick. Warmaster smiles back at him and beckons him forward.
Warmaster loads up on a big right hand but Nomurokai slips the punch.
A head kick misses from Nomurokai.
Warmaster shoots in for a takedown - he's clinched up with Nomurokai but Nomurokai pushes him off and we're back to square one.
Simija Nomurokai has stuffed three takedown attempts in the round now. That's going to take a lot out of Hayato Warmaster.
Nomurokai gets a clinch.
Nomurokai tries to land knees in the clinch but Warmaster avoids the damage to the body.
Warmaster is trying to work for a single leg takedown but Nomurokai pulls him back up using the underhooks.
Nomurokai scores a nice knee to the body.
Nomurokai breaks the clinch and we're back to striking at distance.
A head kick misses from Nomurokai.
A nice inside leg kick there by Nomurokai. That's going to slow Warmaster down.
A telegraphed takedown attempt from Warmaster is defended easily by Nomurokai.
Warmaster takes a shot to the nose. Hopefully that hasn't broken it.
That's two minutes gone in the round.
The crowd cheering loudly, showing their appreciation for the quality fight we're seeing here.
Nomurokai throws a head kick that misses.
Nomurokai tries to clinch but is not successful on this occasion.
Warmaster throws a looping left and ducks down for a takedown. He's got his arms around Nomurokai's waist but Nomurokai gets an underhook and avoids the takedown by throwing Warmaster off to one side.
A telegraphed takedown attempt from Warmaster is defended easily by Nomurokai.
Warmaster avoids the head kick by Nomurokai.
Warmaster with a lazy takedown attempt
and Nomurokai counters with a lovely straight right hand!
A good leg kick by Nomurokai.
Simija Nomurokai is winning the standup battle so far.
Nice sprawl there from Nomurokai as Warmaster shoots in.
Warmaster is breathing heavily.
Nomurokai lands a leg kick that knocks Warmaster off balance momentarily.
A head kick misses from Nomurokai.
Nomurokai is looking to take this fight into the clinch.
Nomurokai throws a head kick that misses and slips in the process. He scrambles back to his feet and the fighters circle.
Nomurokai tries a head kick but it misses.
Nomurokai tries to clinch but Warmaster is having none of it.
That's three minutes gone in the round.
Nomurokai gets caught flat footed, as Warmaster shoots in with a quick takedown into guard.
Nomurokai lands a beautiful switch and he's in full mount! That could spell trouble for Warmaster!
Nomurokai can't quite control the action as he would like just now, as Warmaster is looking to escape.
Warmaster slips a leg in and gets back to half guard.
Nomurokai is keen to just control but Warmaster is a slippery customer.
Warmaster is looking to sinch up a guillotine here but Nomurokai pulls his head out easily.
Warmaster actively working from the bottom here.
Nomurokai is keen to just control but Warmaster is a slippery customer.
Nomurokai passes to side control.
That's four minutes gone in the round.
Nomurokai trying to control the action but Warmaster is working from the bottom.
Warmaster sneaks back into half guard.
We've seen a great period of action over the last minute or so - credit to both fighters for going all out!
Nomurokai is working for a kimura but Warmaster is defending it quite comfortably.
Warmaster gets full guard.
Warmaster looking for submissions from the bottom here. Moving his hips around, possibly looking for an armbar.
The crowd are going absolutely nuts as the round comes to an end - what a fantastic round of action!
Nomurokai trying to control but Warmaster is working from the bottom.
Warmaster is looking for a triangle here but Nomurokai uses the submission attempt to pass into side control.
And thats the end of the round the fighters go back to their corners.
Simija Nomurokai dominated that second round.
The referee calls time. The cornermen exit stage left and we're back to business. Ladies and gentlemen, this is the final round!

Warmaster just misses with a punch to the body.
Warmaster tries to keep at a distance but Nomurokai has taken the fight into the clinch.
Nomurokai prevents the takedown attempt.
Warmaster wants a takedown but no success here.
Nomurokai pushes off and circles away, back to the middle of the mat.
Nomurokai closes the distance and clinches.
Nomurokai pressing his opponent against the cage.
Nomurokai pushes off and circles away, back to the middle of the mat.
Warmaster doesn't succeed with the takedown
and Nomurokai counters with a kick to the head that grazes his opponent. Warmaster is lucky that one didn't land flush.
Simija Nomurokai has stuffed three takedown attempts in the round now. That's going to take a lot out of Hayato Warmaster.
That's one minute gone in the round.
Nomurokai goes for a high kick. It partially lands.
Nomurokai slaps away a takedown attempt from Warmaster, before circling back to the center of the mat.
Thud! ouch! good body kick from Nomurokai - that will leave a mark!
Nomurokai tries a head kick but it misses.
Warmaster sees a low kick coming and goes to check it, but it's actually a body kick and it thuds into his unprotected ribs.
Nomurokai misses with a few strikes there.
A head kick misses from Nomurokai.
Nomurokai clinches.
Warmaster has developed a nice purple lump on his ribcage, as a result of some heavy body kicks from Nomurokai.
Warmaster goes for a takedown attempt but Nomurokai pushes him away and we're back to fighting at a distance.
Warmaster looks for a takedown but Nomurokai sprawls well.
Warmaster takes a big intake of breath there - he's definitely tired.
Nomurokai feints a straight left to the body, then turns around with a flashy move and hits Warmasters jaw with a dramatic spinning back fist!
Nomurokai lands a kick to the ribs of his opponent. Nice work there - in and out in a flash.
That's two minutes gone in the round.
Nomurokai closes the distance and pushes Warmaster back into the cage.
This is a great period of action - very entertaining stuff!
Warmaster takes an elbow to the forehead.
Nomurokai manages to break the clinch.
Nomurokai misses with a head kick.
That kick from Nomurokai tenderised Warmaster's leg. Warmaster is trying to keep his angry face on.
Warmaster fails with a takedown attempt.
Nomurokai tries to clinch but Warmaster moves out of range.
Nomurokai lands with a slapping head kick.
Warmaster closes the distance and clinches up with Nomurokai, looking for a takedown. Warmaster pushes Nomurokai against the cage but Nomurokai circles to the side and manages to break the clinch.
Nomurokai misses with a head kick.
Simija Nomurokai seems to be the more aggressive standup fighter in this bout.
A chopping leg kick lands by Nomurokai.
Warmaster gets the takedown into side control.
Warmaster tries for a kimura but Nomurokai is defending well.
Nomurokai wants to control but Warmaster postures up.
That's three minutes gone in the round.
Nomurokai is looking to regain half guard here but Warmaster keeps moving and retains side control.
Nomurokai manages to work his way to half guard, despite Warmaster's best efforts.
Nomurokai is trying to stand.
The fighters are pressed up against the cage, both looking to find a bit of space to work.
Nomurokai won't allow Warmaster to pass to mount.
Warmaster moves nicely into side control.
Warmaster wants to lay and pray for a moment but Nomurokai keeps working.
Nomurokai tries to work a leg under to get back to half guard but Warmaster wriggles his own leg back out and remains in side control.
Nomurokai is trying to get back to half guard. He's pushing on Warmaster's leg. He's managed it. Nice work.
Warmaster seems to be working for a kimura but Nomurokai defends the submission attempt.
That's four minutes gone in the round.
Nomurokai tries to roll over but Warmaster keeps him under control.
Hayato Warmaster has got the better of the ground game so far.
Warmaster is looking for a kimura. It's going to be difficult to finish that from half guard though and Nomurokai defends it well.
Warmaster wants to work for an arm triangle but Nomurokai is really keeping half guard well and defending the submission attempt.
Warmaster wants to lay and pray for a moment but Nomurokai keeps working.
This is a great period of action - very entertaining stuff!
As the round comes to an end the crowd are showing their appreciation for a great round of action.
Warmaster seems to be working for a kimura but Nomurokai defends the submission attempt.
Nomurokai tries to get to full guard but Warmaster has control of the leg.
And that's the end of the fight!
Simija Nomurokai showed his dominance in that final round.
I think Nomurokai has won this one but let's see what the judges have to say. Over to the ring announcer for the scorecards.
Ladies and gentlemen, after 3 rounds of action, we go to the scorecards for a decision.
Judge Shigeki Fujiwara scores the fight 29:28
Judge Sosuke Kotani scores the fight 29:28
Judge Yasuomi Hirokawa scores the fight 29:28
In favor of your winner, by unanimous decision... Simija Nomurokai!
Simija Nomurokai took to the microphone after his victory and thanked his sponsors, Hell's Kitchen Lab Corp (95% quick laundry) for their support in the buildup to the fight.
|
|
|
|
|
|
|
|
|
|
|
|
|
|
|
|
|
|
|
|
|
|
|
| S |
C
A |
G |
S |
C
B |
G |
|
S |
C |
G |
|
energy
A | B |
|
hype
A | B |
|
pop
A | B |
|
mgr
A | B |
|
FIGHT
RATING
81% |
|
|
|
|
|
|
|
Co-main event
|
Coming up we have a light heavyweight MMA rules bout between Dongmin Oh (ranked 0 p4p, 0 weight class) and Kyler Patel (ranked 0 p4p, 0 weight class). Patel has chosen Lupe Fiasco - The Champ Is Here as his entrance music. I'm sure you'll be fascinated to know that I was talking to some pointless Z list celebrity before the fight and he thought that Kyler Patel was going to win. Let's see if he was right.
 |
|
 |
| 186 cm
19
217 lbs
2 - 0 - 0 |
|
189 cm
19
222 lbs
6 - 1 - 0 |
BJJ White Belt
Excellent MT
Granite chin |
|
BJJ Blue Belt
Decent boxing
Solid chin |
|
| |
|
Ladies and gentlemen. This fight is 3 rounds, in the light heavyweight division.
Introducing the fighter to my left, fighting out of the red corner.
With a record of
2 - 0 - 0, fighting out of Tokyo, Dongmin Oh!
And introducing the fighter to my right, fighting out of the blue corner.
With a record of
6 - 1 - 0, fighting out of Tokyo, Kyler Patel!
The judges for this bout are Hirohito Nitta, Yukihiro Yamamoto and Yukihiro Shimada.
The bell rings for round one and we are underway!
Nice shot lands for Patel.
Oh blocks the body kick.
Patel wants to clinch up but Oh keeps it at a distance.
Oh chopping away at his opponent's legs.
Nice defenses there by Patel.
Patel tries to clinch up
and Oh counters with a leg kick.
Patel tries to score a power double leg takedown but Oh sees that one coming and sprawls well. That will dishearten Patel somewhat.
Kyler Patel seems to be the more aggressive standup fighter in this bout.
Oh tries to sprawl but Patel drives through with a takedown into half guard.
This has been an exciting period of action!
Patel wants to lay and pray for a moment but Oh keeps working.
Patel thumps the canvas. Not on purpose obviously - he just missed Oh's head.
That's one minute gone in the round.
Patel is working for submissions here but there's nothing on.
The ref warns both fighters not to hold the cage as they work up against the meshing.
Patel tries to pass to full mount but Oh defends it.
Patel is looking for a kimura but he's never going to get it from there.
Patel is pressing down on Oh's thigh, looking to free his foot. Oh is holding on for now.
Oh pushes Patel off looking to stand but Patel dives back in and keeps control.
Patel gets to his feet - back to striking we go!
That's two minutes gone in the round.
Patel uses good footwork to get in and out, landing a nice hook.
Oh throws a front kick that sends Patel stumbling back into the cage.
Patel looks gassed!
This is a great period of action - very entertaining stuff!
A telegraphed takedown attempt from Patel is defended easily by Oh.
Oh lands a nice looking body kick.
Oh getting the better of the striking in that exchange.
Oh feints with a shoulder and throws a nice leg kick to Patel's calf.
Oh throws a head kick that misses.
Patel stumbles momentarily as he takes a strong leg kick from Oh.
Patel has his front leg slapped to the side - a nice low kick landing there from Oh.
Oh lets loose with a powerful body kick. Patel will feel that in the morning.
That's three minutes gone in the round.
Oh lands a leg kick and bounces back out of range.
Dongmin Oh is looking to keep the fight on the feet at all costs.
Oh throws a nice outside leg kick.
Oh fakes high and swings low for a body shot but Patel manages to avoid it.
Patel takes a really solid shot there but just smiles back and shrugs his shoulders.
This is a great period of action - very entertaining stuff!
Patel gets hit by the mother of all head kicks and drops to the canvas in a crumpled heap! Woooow, the Internet is going to be talking about this one for weeks!
Ladies and gentlemen, after 3:25 of round 1, we have a winner by way of KO (Head Kick). Dongmin Oh!
Dongmin Oh decided to thank the fans in attendance for making a great atmosphere. It seemed to go down pretty well.
|
|
|
|
|
|
|
|
|
|
|
|
|
|
|
|
|
|
|
|
|
|
|
| S |
C
A |
G |
S |
C
B |
G |
|
S |
C |
G |
|
energy
A | B |
|
hype
A | B |
|
pop
A | B |
|
mgr
A | B |
|
FIGHT
RATING
60% |
|
|
|
|
|
|
|
Main event
|
Coming up we have a light heavyweight MMA rules bout between Siegfried Freak (ranked 0 p4p, 0 weight class) and Ryan Agullana (ranked 0 p4p, 0 weight class). These two fighters really are very evenly matched on the feet - it will be fascinating to see who can assert themselves in that aspect of the fight.
 |
|
 |
| 190 cm
20
210 lbs
4 - 0 - 0 |
|
172 cm
25
215 lbs
2 - 1 - 0 |
BJJ White Belt
Excellent boxer
KO power |
|
BJJ Blue Belt
Excellent boxer
Solid chin |
|
| |
|
Ladies and gentlemen. This fight is 5 rounds, for the light heavyweight championship of the world!
Introducing the champion to my left, fighting out of the red corner.
With a record of
4 - 0 - 0, fighting out of Tokyo, Siegfried Freak!
And introducing the challenger to my right, fighting out of the blue corner.
With a record of
2 - 1 - 0, fighting out of Tokyo, Ryan Agullana!
The judges for this bout are Ren Mimura, Yasuomi Hirokawa and Kenichi Hosakawa.
The bell rings for round one and we are underway!
Freak with a hook.
Freak scores with a jab. Agullana acknowledges it with a nod of the head.

It looks like Ryan Agullana has been cut.
Agullana with a poor takedown
and Freak counters with a straight punch to the midsection.
Freak connects with a good right hand that stumbles Agullana. Agullana circles away out of range and recomposes himself.
Freak lands a jab-cross combination.
Fantastic stuff here - a very entertaining period of action, which has drawn cheers from the crowd.
Freak connects with a lovely right hand, straight down the pipe.
Agullana tries for a takedown but Freak sees it coming a mile off and avoids it easily.

Oooooh!!! Freak has knocked Agullana down with a huge combo! Freak steps away and waves a wobbly Agullana back to his feet! This one might not go much longer!

Agullana is rocked!
Freak lands with a massive overhand right! Stick a fork in Agullana - he's out cold! Ermm... I think I just mixed my metaphors but yeah... That was a nice KO! Big win for Freak!
Ladies and gentlemen, after 0:33 of round 1, we have a winner by way of KO (Punch). Siegfried Freak!
Siegfried Freak retains his light heavyweight title!
Jumping up and down and very excited, Siegfried Freak waved his t-shirt featuring Hell's Kitchen Lab Corp (95% quick laundry)'s logo in front of the cameras.
|
|
|
|
|
|
|
|
|
|
|
|
|
|
|
|
|
|
|
|
|
|
|
| S |
C
A |
G |
S |
C
B |
G |
|
S |
C |
G |
|
energy
A | B |
|
hype
A | B |
|
pop
A | B |
|
mgr
A | B |
|
FIGHT
RATING
100% |
|
|
|
|
|
|
|
|
|
|

