 |
GFL 20 - Clay vs Sativa PBP Commentary |
Undercard bout
|
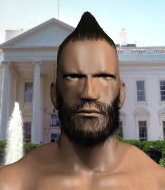
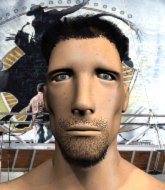
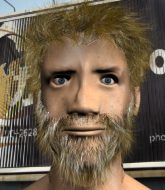
Coming up we have a bantamweight MMA rules bout between Mad Dog (ranked 0 p4p, 0 weight class) and Kazuya Takeda (ranked 0 p4p, 0 weight class). Over to our ring announcer for the fighter introductions!
 |
|
 |
| 170 cm
21
142 lbs
1 - 1 - 0 |
|
174 cm
19
135 lbs
5 - 2 - 0 |
Good takedowns
Brawler
Good chin |
|
BJJ Blue Belt
Good kicks
Solid chin |
|
| |
|
Ladies and gentlemen. This fight is 3 rounds, in the bantamweight division.
Introducing the fighter to my left, fighting out of the red corner.
With a record of
1 - 1 - 0, fighting out of Tokyo, Mad Dog!
And introducing the fighter to my right, fighting out of the blue corner.
With a record of
5 - 2 - 0, fighting out of Tokyo, Kazuya Takeda!
The judges for this bout are Shirou Masuda, Yukihiro Yamamoto and Shigeki Fujiwara.

The bell rings for round one and we are underway!
Takeda tries to land a front kick but Dog steps back. That was a bit too telegraphed.
A head kick misses from Takeda.
Takeda tries a head kick but it misses.

Dog throws the overhand right but ducks down into a quick takedown attempt. Takeda was covering up waiting for the punch and Dog finishes the takedown easily into guard.
If this pace continues, the referee will definitely step in and force a standup.
Dog trying to stand up but can't free himself from Takeda's guard.
Takeda working a defensive guard here.
Dogis looking to pass into half guard but Takeda pushes him away with his feet and jumps on top - now Takeda is in guard.
Dog has control of Takeda's left arm, preventing Takeda from doing any damage.

That's one minute gone in the round.
Takeda stopping the sweep attempt from Dog.
Takeda trying to control the position from guard on top but Dog is wriggling around, looking for whatever he can.

Dog is looking for a triangle but Takeda pushes his legs off easily.
Takeda must be cautious of submissions here, given that his opponent has the superior Jiu Jitsu.
Takeda trying to control but Dog is working from the bottom.

That's two minutes gone in the round.
Dog is trying to stand up but he's not managed so far.
Takeda avoids a guillotine attempt easily.
Dog looking to hit a scissor sweep but Takeda is one step ahead there.
Takeda wants to control from the top but Dog keeps moving.

That's three minutes gone in the round.
Dog is working from a closed guard but he's struggling to control his opponent.
Takeda trying to control the position from guard on top but Dog is wriggling around, looking for whatever he can.

Kazuya Takeda has forced the referee to step in and restart the fight on the feet.
Takeda tries to close the distance and clinch but Dog swats him to one side with an open hand palm strike and circles away.
Takeda throws a series of punches but Dog avoids them all with ease.
Takeda tries to clinch up.
Dog throws a looping left and ducks down for a takedown. He's got his arms around Takeda's waist but Takeda gets an underhook and avoids the takedown by throwing Dog off to one side.

Dog gets in close and instigates a clinch.
Takeda trying to land knees to the body.

That's four minutes gone in the round.
Takeda with the Thai clinch. He's looking to land a big knee but he's not managed it this time.
Dog avoiding damage as Takeda throws knees to the body.
Dog jumps guard but Takeda stands there with Dog around his waist. Dog gives up and drops back to his feet. We remain in the clinch.
Dog letting Takeda take a breather here.
Dog drags the fight down to the ground.
Dog keeping full guard, as Takeda tries to pass.
Dog is active off his back here, looking for submissions.
The crowd applaud the fighters efforts here as the round comes to an end.
Dog bucks up whilst keeping hold of a body lock, managing to reverse the position. Now he's in top in Takeda's guard.
The crowd are loving this. Great action here.
Dog pushing down on Takeda's thigh, trying to pass to half guard. He's managed it... Nice work.
And thats the end of the round the fighters go back to their corners.
Mad Dog dominated that round.
That's time! Back to the action!

Dog shoots in for a takedown but doesn't get it.
Well, he's not going to score with shots like that. A lazy body kick attempt from Takeda.
Takeda misses with a looping left.
Takeda throws a right and a left that Dog avoids nicely.
Dog misses with a takedown attempt - Takeda sprawls well and throws a nice strike on the way out which just misses.
Dog doesn't manage to clinch there - Takeda circles away.
Dog shoots in looking for a double leg takedown. Takeda defends it nicely.
That's three failed takedown attempts in the round for Mad Dog. That's going to take a lot out of him.
Takeda fakes with the hands and throws a leg kick but Dog is out of range.
Takeda is looking to take this fight into the clinch.
Dog misses with a takedown attempt. He shot from a bit too far out.
Nice takedown defense from Takeda. No joy for Dog on that attempt.
Dog fails miserably with a takedown attempt.
That's one minute gone in the round.
Dog has his front leg slapped to the side - a nice low kick landing there from Takeda.
Dog fails with the takedown.
Takeda lands with a nice low kick. That'll leave a bruise.
Takeda gets caught napping as Dog dives in and scores a takedown. Takeda manages to retain guard.
Takeda wants to sweep but no luck.
Dog wants to stand but Takeda is controlling his posture from full guard.
Dog being controlled here momentarily.
We get told so often about how wrestlers don't like to be on their backs. Let's see if Takeda can do anything to dispel that myth.
That's two minutes gone in the round.
Takeda keeping moving, preventing Dog from controlling successfully.

The ref stands the fighters back up because Mad Dog just wasn't active enough.
Dog moves out of range of the body kick.
Dog shoots in for a takedown. He's persisting with it as Takeda sprawls well. Takeda wins this battle and keeps the fight standing. Dog gets slowly back to his feet.
Takeda avoids the head kick by Dog.
Dog showing good head movement there, avoiding the strikes from Takeda.
Takeda shuffles to his left behind two crisp jabs. Dog eats them both and turns towards Takeda to reposition himself and eats a stinging right hand-left hook combo.
That's three minutes gone in the round.
Takeda throws a nice inside leg kick.
That kick from Dog tenderised Takeda's leg. Takeda is trying to keep his angry face on.
Takeda misses with a leg kick.
Dog connects with a crisp jab.
A nice leg kick lands there from Dog.
Dog fails with an attempt to clinch.
Takeda feints with a shoulder and throws a nice leg kick to Dog's calf.
Takeda avoids the clinch attempt nicely.
Takeda misses with a head kick.
Dog closes the distance but Takeda moves to the side
and Takeda counters with a thumping low kick.
Takeda throws a head kick that Dog semi-blocks.
Dog throws a right and a left that Takeda avoids nicely.
Nice body kick there by Takeda.
Takeda connects with an inside leg kick.
That's four minutes gone in the round.
Takeda throws a head kick that misses and slips in the process. He scrambles back to his feet and the fighters circle.
Mad Dog is looking to throw some combinations by the looks of things.
Takeda keeps Dog at a distance using the push kick.
Takeda throws a head kick that connects with a bit of head and a bit of hand.
Fantastic stuff here - a very entertaining period of action, which has drawn cheers from the crowd.
A punch combination from Takeda misses.
Takeda throws a solid leg kick but Dog takes the impact on his shin and smiles at Takeda.
Dog shoots in for a takedown - he's clinched up with Takeda but Takeda pushes him off and we're back to square one.
Takeda swats away the attempt to clinch by Dog.
Dog avoids a kick to the body.
Takeda throws a series of punches but Dog avoids them all with ease.
As the round comes to an end the crowd are showing their appreciation for a great round of action.
Dog has his head slapped from side to side by a 3 punch combination. That must have hurt him.
Dog shoots in and gets a takedown into half guard. Dog showed some decent athleticism there.
Dog is looking for a kimura but he's never going to get it from there.
And thats the end of the round the fighters go back to their corners.
A close second round but Kazuya Takeda will probably get the nod - 10:9.
The corners get their ten second warning. Both fighters stand from their stools and stare eachother down, ready to get back to the action. This is the final round!

Takeda walks forward and throws out a flicking leg kick. Dog checks it nicely though, as he moves to the side.
Dog looks for a takedown. He's got it. We're now in half guard.
Dog passes the half guard and he's now in mount! Big trouble for Takeda!
Dog trying to control but he's not successful this time.
Dog with the ground and pound from mount.
The fighters are pressed up against the cage, both looking to find a bit of space to work.
That's one minute gone in the round.
Takeda is desperately trying to get back to half guard.

Dog stands up from mount. Strange move.
A leg kick checked by Dog.
Takeda scores with a reasonable looking shot to the body. Dog doesn't seem bothered though.
Dog tries for a takedown but Takeda circles away easily
and Takeda counters with a leg kick.
Dog connects with the punch.
Takeda fakes and then throws a beautiful body shot. Dog looks a bit winded and takes a step backwards to take a breath.
Dog lands a jab. Then a cross. Then finally a nice hook to the body. Good work there by Dog.
Dog misses with a takedown attempt
and Takeda counters with a nice leg kick.
Takeda throws a quick head kick that skims the top of Dog's head.
Takeda dances in quickly and lands a nice inside leg kick on Dog. That did some damage!
Dog fails with the takedown.
That's three failed takedown attempts in the round for Mad Dog. That's going to take a lot out of him.
Both fighters are breathing heavily.
That's two minutes gone in the round.
Dog forces Takeda back against the cage and clinches.
The crowd cheering loudly, showing their appreciation for the quality fight we're seeing here.
Takeda tries a knee to the head but Dog blocks it.
Takeda tries to land a knee to the head but misses.
Takeda tries a knee to the head but he's missed.
Takeda trying to land knees to the body.
Dog is hobbling a little on that front leg after taking quite a few leg kicks so far in this fight.
Takeda keeps the fight in the clinch, despite Dog's efforts to push away.
Takeda lands a hook to the side of the head.
Takeda trying to land knees to the body.
Dog looks to throw an elbow but misses.

Dog breaks the clinch.
Takeda tries a switch kick but it misses it's target.
Takeda misses the shot to the body.
That's three minutes gone in the round.
Takeda misses with a series of wild punches.
Takeda throws a head kick that misses and slips in the process. He scrambles back to his feet and the fighters circle.
Takeda throws a head kick that half lands.
Dog throws a head kick that misses.
Dog shoots in with a lovely double leg takedown. Takeda manages to land in full guard to minimise the damage.
Dog gets to his feet - Takeda follows without any prompting.
Dog shoots in for a takedown - he's clinched up with Takeda but Takeda pushes him off and we're back to square one.
Takeda fails with an attempt to clinch.
Kazuya Takeda is looking to keep the fight on the feet at all costs.
Dog tries to clinch up against the cage, rushing in the close the distance. Takeda manages to break the clinch and circles back to the middle of the mat.
Dog throws a nice head kick!
That's four minutes gone in the round.
Takeda connects with a leg kick. Dog looked like he was expecting something else and didn't defend it.
Takeda throws a body kick the misses
so Dog counters with a double leg into guard. Good agility.
Mad Dog overall seems to be getting the better of the ground position in the fight so far.
This is a great period of action - very entertaining stuff!
Takeda utilising some decent striking defenses from the guard, preventing the ground and pound.
Dog won't allow Takeda to sweep him here.
Dog slows down the pace of the fight, as he sits in guard.
Dog decides to stand up and beckons his opponent to follow.
As the round comes to an end the crowd are showing their appreciation for a great round of action.
Takeda tries to clinch but Dog is having none of it.
Takeda cracks the inside of Dog's front leg.
And that's the end of the fight!
Mad Dog showed his dominance in that final round.
I think Dog has won this one but let's see what the judges have to say. Over to the ring announcer for the scorecards.
Ladies and gentlemen, after 3 rounds of action, we go to the scorecards for a decision.
Judge Shirou Masuda scores the fight 29:28
Judge Yukihiro Yamamoto scores the fight 29:28
Judge Shigeki Fujiwara scores the fight 29:28
In favor of your winner, by unanimous decision... Mad Dog!
|
|
|
|
|
|
|
|
|
|
|
|
|
|
|
|
|
|
|
|
|
|
|
| S |
C
A |
G |
S |
C
B |
G |
|
S |
C |
G |
|
energy
A | B |
|
hype
A | B |
|
pop
A | B |
|
mgr
A | B |
|
FIGHT
RATING
59% |
|
|
|
|
|
|
|
Undercard bout
|
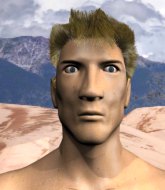
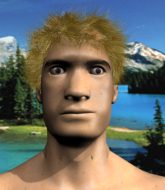
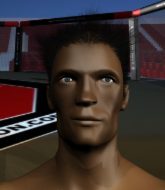
Coming up we have a middleweight MMA rules bout between Chika Haruka (ranked 0 p4p, 0 weight class) and Akira Shinsato (ranked 0 p4p, 0 weight class). Shinsato is bobbing his head along to his entrance song: Yoshi Story. Both fighters will be looking to make this an exciting fight for the fans, I'm sure!
 |
|
 |
| 169 cm
24
198 lbs
5 - 2 - 0 |
|
175 cm
31
187 lbs
7 - 6 - 0 |
BJJ Blue Belt
Basic striking
KO power |
|
BJJ Purple Belt
Good kicks
Powerful |
|
| |
|
Ladies and gentlemen. This fight is 3 rounds, in the middleweight division.
Introducing the fighter to my left, fighting out of the red corner.
With a record of
5 - 2 - 0, fighting out of Tokyo, Chika Haruka!
And introducing the fighter to my right, fighting out of the blue corner.
With a record of
7 - 6 - 0, fighting out of Tokyo, Akira Shinsato!
The judges for this bout are Kenichi Hosakawa, Taro Takaoka and Shigeki Fujiwara.
The bell rings for round one and we are underway!
Haruka tries to clinch but Shinsato is having none of it.
Shinsato circles away from the clinch attempt.
A slapping body kick lands there for Shinsato.
Haruka wants to clinch up but Shinsato keeps it at a distance.
Shinsato looks to score with a jab to the body but Haruka is just out of range.
Haruka showing good head movement there, avoiding the strikes from Shinsato.
Shinsato lands three nice shots there - that looked like it hurt!

It looks like Chika Haruka has been cut.
Shinsato motions for Haruka to come forward. Shinsato throws a leg kick but it misses it's target.
Haruka wants to clinch.
Shinsato will need to tighten up his combinations if he doesn't want to gas himself out, swinging at thin air.
The fans in attendance giving it up for the two fighters, who have really let it all hang out in the last minute or so!
Shinsato connects with a crisp jab.
Shinsato throws a leg kick which misses Haruka's front leg but catches the back leg as Haruka tries to avoid it.
Haruka doesn't manage to clinch there - Shinsato circles away.
Haruka gets a clinch.
Shinsato lands a right hand that snaps the head of Haruka backwards.
That's one minute gone in the round.
Stalling in the clinch from Shinsato.
Haruka misses with some punches.
A right hook to the body lands for Shinsato.
Shinsato effectively controlling the action here.
Haruka misses with some punches.
Shinsato avoiding damage.
Haruka working aggressively here.
Haruka is trying to stall.
Shinsato dictating the pace here, as the fighters clinch against the cage.
An uppercut to the body lands inside from Haruka.
Shinsato stalling.
Both guys are working to get underhooks.
The ref breaks the fighters up, due to lack of action by Akira Shinsato.
Shinsato throws a hook to the side of Haruka's head but Haruka sees it coming and ducks under it beautifully.
That's two minutes gone in the round.
Shinsato is the aggressor but that punch slipped nicely by Haruka.
Shinsato connects with the punch.
The crowd cheers as Shinsato lands an impressive looking overhand right. Haruka doesn't seem phased though.
The fans in attendance giving it up for the two fighters, who have really let it all hang out in the last minute or so!
Haruka tries to clinch but is not successful on this occasion.
Haruka tries to close the distance and clinch but Shinsato swats him to one side with an open hand palm strike and circles away.
Shinsato scores with a shot to the body.
Shinsato throws a jab to the body, straight down the pipe. Boom. That sent Haruka stumbling backwards but he manages to regain his composure quickly.
Haruka throws a wild combination but nothing lands.
Haruka takes a nice looking leg kick right on the meat of his thigh there.
Shinsato throws a jab to the body, straight down the pipe. Boom. That sent Haruka stumbling backwards but he manages to regain his composure quickly.
Shinsato scores with a nice looking left hook and follows it up with an uppercut!
Shinsato's corner calls for a 1-2. Shinsato obliges with the 1 part as he scores the single shot and moves back out of range.
Haruka tries to close the distance and clinch up but Shinsato swats him away and circles back towards the center.
A big right from Shinsato misses.
A slapping leg kick lands for Shinsato.
The fighters circling - Shinsato throws out the jab but it was never going to land.
That's three minutes gone in the round.
Shinsato shuffles to his left behind two crisp jabs. Haruka eats them both and turns towards Shinsato to reposition himself and eats a stinging right hand-left hook combo.
A punch combination from Haruka misses.
Haruka uses some good footwork to avoid the body shot by Shinsato.
Shinsato missing with a left hand there. Haruka was out of range so wasted energy throwing that one.
Shinsato scores with a sloppy punch to the body. Not much technique there but it did the business.
Haruka tries to close the distance and clinch but Shinsato swats him to one side with an open hand palm strike and circles away.
Shinsato circles away from the clinch attempt.
Shinsato with a nice looking leg kick. You could hear that one land in a back row.
Shinsato throws an uppercut from half a mile away. Haruka sees it coming and avoids it easily.
Haruka tries to clinch but Shinsato moves out of range.
A punch combination from Haruka misses.
Both fighters circling a little - Shinsato finishes the exchange with a kick to the body.
Haruka tries to clinch there but Shinsato circles away.
Haruka keeping a good distance there, avoiding the body shot.
Shinsato connects with a good right hand that stumbles Haruka. Haruka circles away out of range and recomposes himself.
That's four minutes gone in the round.
This is a great period of action - very entertaining stuff!
Haruka tries to clinch but is not successful on this occasion.
Haruka looks to clinch
and Shinsato counters with a three punch combo that has Haruka backing up. Haruka nods at Shinsato to acknowledge the strikes.
Haruka fails to land with the punch combination there - jab, cross, hook, miss, miss, miss.
Haruka is breathing heavily.
Haruka tries to clinch up

and Shinsato counters with a head kick that drops Haruka to the mat! Haruka scrambles across the canvas and gets back to his feet, still wobbly!

Haruka is rocked!
Haruka tries to clinch but fails miserably
and Shinsato counters with a huge left! Haruka is in big trouble! He's backing up but Shinsato isn't giving him chance to recover. Under a barage of punches the ref has to step in to save Haruka from any more damage. A dominating finish by Shinsato!
Ladies and gentlemen, after 4:30 of round 1, we have a winner by way of TKO (Strikes). Akira Shinsato!
|
|
|
|
|
|
|
|
|
|
|
|
|
|
|
|
|
|
|
|
|
|
|
| S |
C
A |
G |
S |
C
B |
G |
|
S |
C |
G |
|
energy
A | B |
|
hype
A | B |
|
pop
A | B |
|
mgr
A | B |
|
FIGHT
RATING
90% |
|
|
|
|
|
|
|
Undercard bout
|
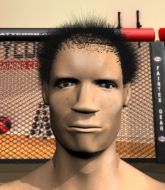
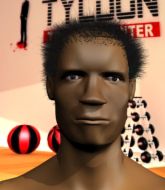
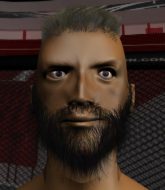
Coming up we have a lightweight MMA rules bout between Rick Grimes (ranked 0 p4p, 0 weight class) and Yoshi Doi (ranked 0 p4p, 0 weight class). Yoshi Doi has the eye of the tiger tonight.
 |
|
 |
| 170 cm
20
162 lbs
1 - 0 - 0 |
|
170 cm
23
155 lbs
3 - 3 - 0 |
Decent wrestler
Decent elbows
Granite chin |
|
BJJ Blue Belt
Brawler
Knockout power |
|
| |
|
Ladies and gentlemen. This fight is 3 rounds, in the lightweight division.
Introducing the fighter to my left, fighting out of the red corner.
With a record of
1 - 0 - 0, fighting out of Tokyo, Rick Grimes!
And introducing the fighter to my right, fighting out of the blue corner.
With a record of
3 - 3 - 0, fighting out of Tokyo, Yoshi Doi!
The judges for this bout are Yuuki Gou, Yukihiro Yamamoto and Shigeki Fujiwara.
The bell rings for round one and we are underway!
Doi tries to shoot in for a takedown. He's got hold of a leg but Grimes swivels and escapes.
Doi throws a wild body kick that Grimes sees coming a mile off.
Doi dives in and grabs Grimes's left leg, looking for a takedown. Grimes pushes down on Doi's head and hops out.
Doi throws a head kick that misses
enabling Grimes to counter with a crisp jab.
Doi fails to land the takedown.
Rick Grimes has stuffed three takedown attempts in the round now. That's going to take a lot out of Yoshi Doi.
Grimes feints and then cracks Doi's leading leg with a nice low kick. He's obviously looking to slow Doi down.
Doi will have to do better than that with his takedown attempts.
Grimes lands a lovely overhand right.

It looks like Yoshi Doi has been cut.
Grimes fails to land with a series of punches.
Doi shoots in for a takedown. He's persisting with it as Grimes sprawls well. Grimes wins this battle and keeps the fight standing. Doi gets slowly back to his feet.
Grimes changes levels and scores with a jab to the body.
Doi looks gassed!
Doi tries a head kick but it misses.
That's one minute gone in the round.
Grimes looks to land a combination. Doi sees it coming but can only parry a couple of the shots.
Doi has his front leg slapped to the side - a nice low kick landing there from Grimes.
Doi has his takedown stuffed
and Grimes counters with a lovely straight right hand!

Doi is rocked!
Grimes jabs away that one connects to the head of his opponent.
Doi is still on wobbly legs! Can Grimes finish him?
Doi shoots in looking for a takedown but Grimes manages to keep the fight standing, pushing Doi's face into the canvas for good measure before circling away.
Doi seems to have recovered his senses.
Grimes paws at his opponent with the jab and then lunges in with a straight, right on the button.
Yoshi Doi seems to be the more aggressive standup fighter in this bout.
Doi tries to check the leg kick but that clearly hurt him.
Grimes lands a beauty of a right hand that gets the crowd cheering.
This has been an exciting period of action!
Doi gets his takedown attempt stuffed easily
and Grimes counters with a right, left combo that wobbles Doi badly! Grimes follows up with a massive right hook, straight to the bridge of the nose that knocks Doi out cold! Oh wow, what a finish! Very reminiscent of Koscheck vs Yoshida as Grimes finished him against the cage.
Ladies and gentlemen, after 1:50 of round 1, we have a winner by way of KO (Punches). Rick Grimes!
|
|
|
|
|
|
|
|
|
|
|
|
|
|
|
|
|
|
|
|
|
|
|
| S |
C
A |
G |
S |
C
B |
G |
|
S |
C |
G |
|
energy
A | B |
|
hype
A | B |
|
pop
A | B |
|
mgr
A | B |
|
FIGHT
RATING
57% |
|
|
|
|
|
|
|
Undercard bout
|
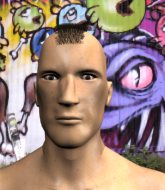
Coming up we have a lightweight MMA rules bout between Jake Sawa (ranked 0 p4p, 0 weight class) and Junior Pacquiao (ranked 0 p4p, 0 weight class). Pacquiao has chosen Thunderstruck as his entrance music, which hasn't gone down very well with the crowd. Pacquiao has a niggling injury. He would have liked to come in 100% fit but that's not always possible. Jake Sawa could well score a knockout today. He has the power to get to Junior Pacquiao's chin.
 |
|
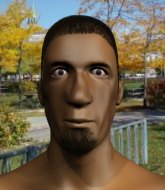 |
| 172 cm
22
153 lbs
3 - 1 - 0 |
|
173 cm
27
160 lbs
14 - 6 - 0 |
BJJ Brown Belt
Counter striker
KO power |
|
BJJ Purple Belt
Excellent boxer
Heavy handed |
|
| |
|
Ladies and gentlemen. This fight is 3 rounds, in the lightweight division.
Introducing the fighter to my left, fighting out of the red corner.
With a record of
3 - 1 - 0, fighting out of Tokyo, Jake Sawa!
And introducing the fighter to my right, fighting out of the blue corner.
With a record of
14 - 6 - 0, fighting out of Tokyo, Junior Pacquiao!
The judges for this bout are Tatsuya Matsuyama, Hirohito Nitta and Yuuki Gou.
The bell rings for round one and we are underway!
Sawa misses with the combination.
Sawa pulls out of a head kick attempt.
Pacquiao blocks the body kick.
Sawa looks to land a right hand but Pacquiao moved out of range.
Sawa throws a head kick that misses and slips in the process. He scrambles back to his feet and the fighters circle.
Pacquiao swings wildly with a hook that is half blocked by Sawa.
Sawa throws a hard body shot but it just misses.
Sawa avoids a lazy jab quite easily.
Pacquiao scores with a reasonable looking shot to the body. Sawa doesn't seem bothered though.
Sawa tries to land with a swinging hook to the body but Pacquiao was well out of range. Poor timing from Sawa.
Sawa shoots for a double leg takedown but Pacquiao sprawls well. He's pushed Sawa's face into the mat and manages to get back to his feet relatively easily.
Sawa misses with a few strikes there.
Pacquiao tries to clinch but Sawa moves out of range.
Pacquiao moves in looking to clinch but Sawa pushes him off.
That's one minute gone in the round.
Pacquiao throws a push kick but Sawa slaps the foot to one side.
Sawa tries a switch kick but it misses it's target.
A big left from Pacquiao misses.
Pacquiao slips under a jab from Sawa.
Sawa moves out of range as Pacquiao strikes.
Pacquiao scores with a punch to the head.
Pacquiao looks gassed!
Sawa blocks a head kick by Pacquiao.
Pacquiao throws a body punch but Sawa moves out of range.
Sawa is looking to land body kicks.
Pacquiao ducks low and lands a nice hook to the body of his opponent.
A leg kick checked by Pacquiao.
Pacquiao throws a half hearted mid kick.
Pacquiao lands a lovely overhand right.
That's two minutes gone in the round.
Sawa looks to land a body kick but Pacquiao moved away.
Sawa misses with a jab and misses with a cross straight after too.
Sawa misses with a takedown
and Pacquiao counters with a shot to the ribs. That looked like it hurt.
A telegraphed right hand from Sawa misses the target.
Well, he's not going to score with shots like that. A lazy body kick attempt from Pacquiao.
Pacquiao motions for Sawa to come forward. Pacquiao throws a leg kick but it misses it's target.
Sawa fails to land with the punch combination there - jab, cross, hook, miss, miss, miss.
A jab from Sawa misses.
Pacquiao blocks a head kick by Sawa.
Sawa tries a head kick but it misses.
Pacquiao keeping a good distance there, avoiding the body shot.
Sawa throws a series of punches but Pacquiao moves out of range.
That's three minutes gone in the round.
Pacquiao misses with a looping left.
Pacquiao gets caught on his heels momentarily as he allows Sawa to score an easy takedown into full guard.
The referee is pacing around the two fighters - he looks like he's thinking about a standup.
Sawa is pushing down on Pacquiao's leg trying to pass to half guard. Pacquiao is fighting to maintain full guard but Sawa has managed to sneak the leg through.
Sawa is thwarting Pacquiao's attempts to control the position.
Sawa trying to control from half guard but Pacquiao is working away.
Sawa is figuring out what he wants to do next.
Pacquiao is pressing down on Sawa's left leg trying to get back to full guard. He's managed it.
Sawa advances position into side control!
Sawa tries for an arm triangle. That looks pretty tight to me. Is this one over!?! Possibly, maybe, no Sawa has let go of the choke. Obviously it wasn't as tight as we thought!
Sawa moves into full mount!
That's four minutes gone in the round.
Fantastic stuff here - a very entertaining period of action, which has drawn cheers from the crowd.
Pacquiao defends a decent attempt at a guillotine from Sawa.
Pacquiao has given up his back. Will we see Sawa going for some submissions?
Sawa missing with strikes from the back.
Sawa looking for the choke but no joy.
Pacquiao is trying to defend against the choke here but Sawa has an arm under his chin. This one might not last much longer. Sawa Tightens the hold and Pacquiao taps out furiously! Sawa displays superior BJJ to win the fight.
Ladies and gentlemen, after 4:55 of round 1, we have a winner by way of Submission (RNC). Jake Sawa!
A victorious Jake Sawa thanked his army of followers in his post fight interview, telling people to make sure they follow him on Twitter.
|
|
|
|
|
|
|
|
|
|
|
|
|
|
|
|
|
|
|
|
|
|
|
| S |
C
A |
G |
S |
C
B |
G |
|
S |
C |
G |
|
energy
A | B |
|
hype
A | B |
|
pop
A | B |
|
mgr
A | B |
|
FIGHT
RATING
39% |
|
|
|
|
|
|
|
Co-main event
|
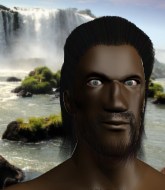
Coming up we have a welterweight MMA rules bout between Bronek Simson (ranked 0 p4p, 0 weight class) and Shadow Deathgrip (ranked 0 p4p, 0 weight class). Bronek Simson has the better chin. Will he look to stand and bang today?
 |
|
 |
| 183 cm
22
175 lbs
4 - 0 - 0 |
|
195 cm
26
180 lbs
8 - 3 - 0 |
BJJ Blue Belt
Brawler
Granite chin |
|
BJJ Purple Belt
Basic striking
Good gas tank |
|
| |
|
Ladies and gentlemen. This fight is 3 rounds, in the welterweight division.
Introducing the fighter to my left, fighting out of the red corner.
With a record of
4 - 0 - 0, fighting out of Tokyo, Bronek Simson!
And introducing the fighter to my right, fighting out of the blue corner.
With a record of
8 - 3 - 0, fighting out of Tokyo, Shadow Deathgrip!
The judges for this bout are Shirou Masuda, Yukihiro Yamamoto and Yasuomi Hirokawa.
The bell rings for round one and we are underway!
Simson tries to close the distance and clinch but Deathgrip swats him to one side with an open hand palm strike and circles away.
Deathgrip shoots in for a takedown but Simson shows good takedown defense there and keeps this one on the feet.
Deathgrip fails with a takedown attempt.
A momentary lapse in concentration from Deathgrip enables Simson to shoot in and score with a neat double leg. Deathgrip manages to secure a closed guard as the fighters hit the mat.

Deathgrip looking for submissions off his back, moving his hips, looking for an opening.
The ref warns both fighters not to hold the cage as they work up against the meshing.
Simson looking to sit in guard and control but Deathgrip gets the butterfly guard and sweeps. He's now in the guard on the top.
Deathgrip's corner is telling him to maintain position.
Deathgrip advances position into side control!
Simson knows he needs to get back to his feet asap. He's simply no match for Deathgrip on the ground.
Fantastic stuff here - a very entertaining period of action, which has drawn cheers from the crowd.
Simson struggling a bit here.
Deathgrip in side control, working for a kimura. He's got hold of an arm and he's torquing it... Simson is tapping! That's the end of the fight!
Ladies and gentlemen, after 1:18 of round 1, we have a winner by way of Submission (Kimura). Shadow Deathgrip!
Shadow Deathgrip very nearly forgot to thank [JMFC] Arashi Fighting Nutrition Q160 Recovery amongst all the excitement of his win but just as the interview came to a close, he screamed their name. Hopefully he'll get a few nice freebies in the mail as a thank you.
|
|
|
|
|
|
|
|
|
|
|
|
|
|
|
|
|
|
|
|
|
|
|
| S |
C
A |
G |
S |
C
B |
G |
|
S |
C |
G |
|
energy
A | B |
|
hype
A | B |
|
pop
A | B |
|
mgr
A | B |
|
FIGHT
RATING
50% |
|
|
|
|
|
|
|
Main event
|
Coming up we have a middleweight MMA rules bout between Curtis Clay (ranked 0 p4p, 0 weight class) and Cannabis Sativa (ranked 0 p4p, 0 weight class). Chooooooooon! I think Clay might be my favorite fighter, now he's come out to Atari Teenage Riot - Revolution Action . The crowd seem to be enjoying Sativa's choice of entrance music: Rasta say SMOKE. Cannabis Sativa has the better chin. Will he look to stand and bang today?
 |
|
 |
| 185 cm
22
200 lbs
8 - 1 - 0 |
|
194 cm
21
190 lbs
2 - 0 - 0 |
Powerful takedowns
Counter striker
Cardio machine |
|
Good wrestler
Great elbows
Good gas tank |
|
| |
|
Ladies and gentlemen. This fight is 3 rounds, for the middleweight championship of the world!
Introducing the champion to my left, fighting out of the red corner.
With a record of
8 - 1 - 0, fighting out of Tokyo, Curtis Clay!
And introducing the challenger to my right, fighting out of the blue corner.
With a record of
2 - 0 - 0, fighting out of Tokyo, Cannabis Sativa!
The judges for this bout are Shigeki Sano, Shirou Masuda and Yukihiro Shimada.
The bell rings for round one and we are underway!
Sativa misses with a leg kick.
Sativa throws a hook to the body but it doesn't connect.
A swing and a miss from Clay.
Sativa looks to throw the jab but Clay is out of range.
Sativa uses good footwork to get in and out and land a nice right hand before Clay has time to react.
It looks like Curtis Clay has been cut.
Sativa bobs and weaves and unloads with a good uppercut.
Clay shoots in for a takedown. "Ole!" shouts Sativa as he jumps to the side.
Clay slips a jab and a cross from Sativa.
Clay throws a combination but comes up with nothing but fresh air.
A big right from Clay misses.
Clay misses with a few strikes there.
Decent striking displayed by Sativa there.
Clay throws a hard body shot but it just misses.
A head kick misses from Sativa.
That's one minute gone in the round.
Clay throws a hook to the side of Sativa's head but Sativa sees it coming and ducks under it beautifully.
Sativa is looking to slow Clay down with leg kicks.
Sativa dodges the punch combination from Clay.
An inside leg kick lands from Sativa.
Clay jabbing away but nothing is landing.
Sativa avoids the body shot from Clay.
Sativa uses some good footwork to avoid the body shot by Clay.
Clay takes a hook to the side of the head. I wonder if that's got his ears ringing.
Clay walks forward, straight into a front kick from Sativa.
Sativa uses good footwork to avoid the strikes from Clay.
Cannabis Sativa is looking to keep the fight on the feet at all costs.
Sativa chopping away at his opponent's legs.
Sativa with a body punch. A glancing blow.
That's two minutes gone in the round.
Fantastic stuff here - a very entertaining period of action, which has drawn cheers from the crowd.
Sativa thumps Clay with a low kick.
Clay throws out a token jab with nothing on it.
Sativa tries to clinch up against the cage, rushing in the close the distance. Clay manages to break the clinch and circles back to the middle of the mat.
Clay thuds a left hand into Sativa's body.
Clay misses the shot to the body.
Sativa thumps Clay with a low kick.
Cannabis Sativa seems to be the more aggressive standup fighter in this bout.
Clay throws an uppercut from half a mile away. Sativa sees it coming and avoids it easily.
Clay thows a body shot but no joy.
Sativa staying out of range there.
Clay looks for a takedown but Sativa sprawls well.
Clay keeps the fight on the outside.

Sativa forces Clay back against the cage and clinches.
That's three minutes gone in the round.
Clay misses with a body punch.
Clay can't find room to land a body shot as Sativa controls the action.
Clay breaks the clinch.
Clay on the receiving end of a decent leg kick there by Sativa. Sativa obviously looking to wear him down.
An inside leg kick lands from Sativa.
Clay on the wrong end of a decent looking cross there.
Clay misses with a right hand
and Sativa counters with a good, hard body kick but Clay shrugs it off.
Nice defenses there by Sativa.
Clay throws a body punch but Sativa moves out of range.
A slapping leg kick lands for Sativa.
Sativa cracks Clay with a nice right hand that draws applause from the crowd.
The crowd are loving this. Great action here.
Sativa misses with a jab and misses with a cross straight after too.
Sativa fakes with an overhand right and moves in to clinch with Clay, pushing him back against the cage.
Sativa comes over the top with an elbow. That landed flush.
Clay swings wildly with an uppercut but Sativa uses good head movement to avoid it.
That's four minutes gone in the round.
Nice elbow from Sativa.
Sativa digs a right hand into Clay's ribs. Those have got to be taking their toll on Clay's gas tank.
Clay is trying to stall.
Sativa lands an elbow that stopped Clay in his tracks for a moment.
Curtis Clay's cut is getting worse.
Sativa stays in close to his opponent and throws a right hand to the body.
Clay breaks the clinch.
Sativa moves into the clinch successfully.
Sativa lands with a left to the head.
Clay is hobbling a little on that front leg after taking quite a few leg kicks so far in this fight.
Sativa scores with a nice hook to the head.
A nice right hand lands inside from Sativa.
Clay is rocked!
Sativa lands with a light punch inside.
Oh Clay is still all over the place! His legs are completely gone! Will he be able to recover?!!
An uppercut on the inside fails to land for Clay.
Clay blocking some punches.
Sativa stalling against the cage.
Sativa lands a damaging elbow.
Sativa lands a big right hand that drops Clay! The killer instinct kicks in and Sativa finishes his opponent with a series of strikes from mount. A dominating finish by Sativa!
Ladies and gentlemen, after 4:57 of round 1, we have a winner by way of TKO (Strikes). Cannabis Sativa!
Cannabis Sativa is the new middleweight champion!
|
|
|
|
|
|
|
|
|
|
|
|
|
|
|
|
|
|
|
|
|
|
|
| S |
C
A |
G |
S |
C
B |
G |
|
S |
C |
G |
|
energy
A | B |
|
hype
A | B |
|
pop
A | B |
|
mgr
A | B |
|
FIGHT
RATING
62% |
|
|
|
|
|
|
|
|
|
|
