 |
~T~ BOOM PBP Commentary |
Undercard bout
|
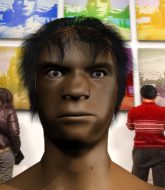
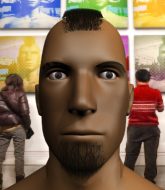
Coming up we have a heavyweight MMA rules bout between Matt Mitrione (ranked 0 p4p, 0 weight class) and John Bellingham (ranked 0 p4p, 0 weight class). Matt Mitrione has the better chin. Will he look to stand and bang today?
 |
|
 |
| 191 cm
26
275 lbs
2 - 0 - 0 |
|
210 cm
25
270 lbs
0 - 0 - 0 |
BJJ White Belt
Excellent boxer
Granite chin |
|
BJJ White Belt
Excellent boxer
Powerful |
|
| |
|
Ladies and gentlemen. This fight is 3 rounds, in the heavyweight division.
Introducing the fighter to my left, fighting out of the red corner.
With a record of
2 - 0 - 0, fighting out of Amsterdam, Matt Mitrione!
And introducing the fighter to my right, fighting out of the blue corner.
With a record of
0 - 0 - 0, fighting out of Los Angeles, John Bellingham!
The judges for this bout are Paul Aken, Nard Betker and Paulsen Ambrosius.

The bell rings for round one and we are underway!
Sloppy strikes from Mitrione. Those never looked like landing.
Mitrione throws a right and a left that Bellingham avoids nicely.
Bellingham wings a very wild body shot but it does the job and lands to the midsection.
Mitrione uses some good footwork to avoid the body shot by Bellingham.
Bellingham jabbing away but nothing is landing.
Bellingham lands a slapping body shot.
Fantastic stuff here - a very entertaining period of action, which has drawn cheers from the crowd.
Decent striking displayed by Bellingham there.
Mitrione checks a low kick from Bellingham.
Bellingham connects with a body shot.
Mitrione is breathing heavily.
Bellingham thows a body shot but no joy.
A punch combination from Bellingham misses.
Bellingham swings and misses with a hook to the body.

That's one minute gone in the round.
Bellingham looks to land a combination but Mitrione avoids it well.
Mitrione avoids the body shot from Bellingham.
Mitrione takes a shot to the nose. Hopefully that hasn't broken it.
Mitrione dodges the punch combination from Bellingham.
Mitrione throws a series of punches but Bellingham moves out of range.
Mitrione takes a punch right to his stomach. That took the wind out of him momentarily.
Bellingham misses the shot to the body.
Bellingham swings and misses with a hook to the body.

That's two minutes gone in the round.
Bellingham misses with a body shot. Nice footwork from Mitrione.
Bellingham missing with a left hand there. Mitrione was out of range so wasted energy throwing that one.
Mitrione takes one on the chin but keeps coming.

It looks like Matt Mitrione has been cut.
Fantastic stuff here - a very entertaining period of action, which has drawn cheers from the crowd.
Mitrione has his head snapped back a nice jab. A little nod from Mitrione there as he acknowledges the shot.
Mitrione misses with a wild combination.
Bellingham fakes high and swings low for a body shot but Mitrione manages to avoid it.
Mitrione misses with a double jab.
Nice body punch from Bellingham.

That's three minutes gone in the round.
Bellingham misses with a body shot. Nice footwork from Mitrione.
Bellingham throws an overhand right that lands on Mitrione's shoulder, as Mitrione tries to avoid the shot.
Bellingham misses with a low kick.
Bellingham uses good footwork to get in and out and land a nice right hand before Mitrione has time to react.
Bellingham swings widly with a right hand
and Mitrione counters with a left to the body.
Bellingham is throwing a lot of body shots here, looking to wear down Mitrione rather than just go for the knockout.
Bellingham misses the shot to the body.
Mitrione throws a jab, cross combination which is slipped
letting Bellingham counter with a right hand.
The crowd cheering loudly, showing their appreciation for the quality fight we're seeing here.
Mitrione ducks under an overhand right and circles away with a smile on his face.
Bellingham looks to score with a combo but nothing lands.

That's four minutes gone in the round.
Mitrione showing good head movement there, avoiding the strikes from Bellingham.
Bellingham throws a combination but it was largely blocked by Mitrione.
Bellingham misses with a hook
and Mitrione counters with a three punch combination, finished off with a leg kick. Nice work.
Bellingham misses with a body shot. Nice footwork from Mitrione.
Bellingham swings and misses with a shot to the body
and Mitrione counters with a quick right hand to the jaw.
Bellingham lands a jab to Mitrione's midsection.
The crowd are going absolutely nuts as the round comes to an end - what a fantastic round of action!
Bellingham misses with a body shot. Nice footwork from Mitrione.
Bellingham swings and misses with a hook to the body.
And thats the end of the round the fighters go back to their corners.
John Bellingham dominated that round.
The cut man is working on Matt Mitrione's cut.
The corners get their ten second warning. Both fighters stand from their stools and stare eachother down, ready to get back to the action.

Bellingham cracks Mitrione with a good shot that sees him stumbling back into the cage.
Bellingham looking to land some kicks to the body here.
Bellingham takes a swing at Mitrione's ribcage but misses.
Bellingham swings and misses with a shot to the body
and Mitrione counters with a lovely shot to the body.
Mitrione moves out of range of the strikes.
Bellingham swings wildly with a couple of big hooks
and Mitrione counters with a good right hand that lands right on the jaw.
Mitrione throws a series of punches but Bellingham moves out of range.
Bellingham pulls out of a head kick attempt.
Bellingham fakes with the hands and throws a leg kick but Mitrione is out of range.
Bellingham smiles there as he lands a nice right hand right on the button.
That's one minute gone in the round.
Mitrione keeping a good distance there, avoiding the body shot.
Mitrione misses with a jab and misses with a cross straight after too.
Mitrione slips under a jab.
Bellingham misses the shot to the body.
Bellingham has been the more effective fighter overall so far.
Mitrione uses good footwork to avoid the strikes from Bellingham.
Bellingham dips down and scores with a jab to the body.
Mitrione keeping his hands up high there, blocking the jab from Bellingham.
Bellingham throws a sloppy head kick
and Mitrione counters with a nice uppercut.
That's two minutes gone in the round.
Bellingham throws a hard body shot but it just misses.
Mitrione misses with a wild body shot.
Mitrione ducks under a wild hook from Bellingham.
Bellingham scores with a straight right hand, right through his opponent's guard.
Bellingham misses with a left hand
and Mitrione counters with a crisp hook to the side of the head.
Bellingham misses with a leg kick.
The crowd are loving this. Great action here.
Bellingham looks to score with a jab to the body but Mitrione is just out of range.
Mitrione falls off balance throwing a combination
and Bellingham counters with a left to the body.
That's three minutes gone in the round.
Nice straight punches there by Bellingham. You know Roy Jones Jr respects the hands of Bellingham.
Bellingham dips to his left and cracks Mitrione with an uppercut!
Mitrione keeping his hands up high there, blocking the jab from Bellingham.
Mitrione uses some good footwork to avoid the body shot by Bellingham.
John Bellingham seems to be getting the better of the standup.
Bellingham scores with a jab. Mitrione acknowledges it with a nod of the head.
This entire fight has taken place on the feet so far and you wonder whether Mitrione might be better served trying to take this one to the ground because he's losing the standup battle so far.

Bellingham lands a left and a right that send Mitrione crashing to the mat, dazed. Bellingham thinks about following him to the mat but decides to wave him back up to his feet!
Both fighters are absolutely exhausted here.
The fans in attendance giving it up for the two fighters, who have really let it all hang out in the last minute or so!
Bellingham swings widly with a right hand
and Mitrione counters with a nice body shot.
A head kick by Bellingham misses
and Mitrione counters with a nice body shot.
Mitrione misses with a few strikes there.
That's four minutes gone in the round.
A combination from Bellingham does no damage.
Mitrione tries to land with a swinging hook to the body but Bellingham was well out of range. Poor timing from Mitrione.
Bellingham thows a left - swing and a miss!
Bellingham misses with a shot to the body
and Mitrione counters with a left and a right that stings Bellingham.
Bellingham misses with a jab to the body
and Mitrione counters with a left and a right that stings Bellingham.
Mitrione on the wrong end of a nice hook.
The crowd are going absolutely nuts as the round comes to an end - what a fantastic round of action!
Bellingham throws a two punch combo that lands nicely.
Mitrione takes one on the chin but seems OK.
And thats the end of the round the fighters go back to their corners.
John Bellingham showed his class in that round. I'd imagine he'll take it on all the scorecards.
The cut man is working on Matt Mitrione's cut.
The fighters' corners scream their final instructions, as the referee calls time. Here we go, back to the action! And we move into the final round!

Mitrione looks frustrated there after his takedown attempt is stuffed easily.
Mitrione takes a punch right to his stomach. That took the wind out of him momentarily.
Bellingham throws the left hand but Mitrione avoids the punch easily.
Bellingham misses with a low kick.
Bellingham is using his reach advantage to land shots from outside his opponent's range.
Mitrione checks a low kick. Bone on bone - not my idea of a good time.
Mitrione uses good head movement to avoid the hook from Bellingham.
Bellingham throws a leg kick that misses.
A big left from Bellingham misses.
That's one minute gone in the round.
Mitrione tries to bum rush Bellingham with a series of wild strikes but Bellingham uses good footwork to avoid the assault.
Bellingham with a body punch. A glancing blow.
John Bellingham seems to be the more aggressive standup fighter in this bout.
Both fighters are breathing heavily.
Nice uppercut lands for Bellingham. That snapped Mitrione's head back.
No luck for Mitrione with that takedown attempt.
Bellingham throws a right and a left that Mitrione avoids nicely.
Bellingham loads up on a big right hand but Mitrione slips the punch.
Mitrione uses decent footwork to sidestep a right hand from Bellingham.
Bellingham throws a combination but it was largely blocked by Mitrione.
That's two minutes gone in the round.
Bellingham throws a right hand that misses
and Mitrione counters with a series of strikes. Bellingham will be more careful next time no doubt.
Mitrione takes one on the chin but keeps coming.
Fantastic stuff here - a very entertaining period of action, which has drawn cheers from the crowd.
Mitrione uses decent footwork to sidestep a right hand from Bellingham.
Bellingham jabbing away but nothing is landing.
John Bellingham is fighting for a decision - hopefully he's judged it right and he's actually winning the fight.
Bellingham jabs Mitrione to the body, keeping him at a distance.
Bellingham lands a jab followed by a nice looking cross.
A looping hook to the body misses from Bellingham. Mitrione does a little dance to reset his feet.
Bellingham cracks Mitrione with an open hand slap.
Matt Mitrione is looking to throw some combinations by the looks of things.
That's three minutes gone in the round.
A jab from Bellingham does it's job there.
Bellingham lands a body shot.
Bellingham throws a predictable looking body shot
and Mitrione counters with a crisp hook to the side of the head.
Bellingham just misses with a punch to the body.
Bellingham throws out a token jab with nothing on it.
Mitrione takes a shot right to the liver - Bas would have been proud of that punch.
Bellingham connects with the punch.
Bellingham is moving around nicely and scores here with a single head shot.
Bellingham throws a combination but comes up with nothing but fresh air.
That's four minutes gone in the round.
A punch combination from Mitrione misses.
Bellingham slips a jab and a cross from Mitrione.
Mitrione looks like he's developed a pretty tasty lump over his left eye. He'll need to avoid taking much more damage to that.
A combination from Mitrione does no damage.
Mitrione blocks a jab.
Bellingham getting the better of the striking in that exchange.
Matt Mitrione has stepped it up - he knows he needs a finish here!
Mitrione blocks a low kick nicely.
As the round comes to an end the crowd are showing their appreciation for a great round of action.
Mitrione checks a leg kick nicely.
Bellingham connects with a good right hand that stumbles Mitrione. Mitrione circles away out of range and recomposes himself.
And that's the end of the fight!
John Bellingham comfortably won the final round on my scorecard.
Well Bellingham has outworked and out performed his opponent in all aspects of the game today. He was simply too good and the decision should be no more than a formality. Over to the ring announcer for the scorecards.
Ladies and gentlemen, after 3 rounds of action, we go to the scorecards for a decision.
Judge Paul Aken scores the fight 27:30
Judge Nard Betker scores the fight 27:30
Judge Paulsen Ambrosius scores the fight 27:30
In favor of your winner, by unanimous decision... John Bellingham!
|
|
|
|
|
|
|
|
|
|
|
|
|
|
|
|
|
|
|
|
|
|
|
| S |
C
A |
G |
S |
C
B |
G |
|
S |
C |
G |
|
energy
A | B |
|
hype
A | B |
|
pop
A | B |
|
mgr
A | B |
|
FIGHT
RATING
81% |
|
|
|
|
|
|
|
Undercard bout
|
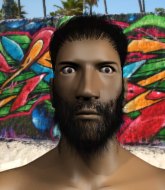
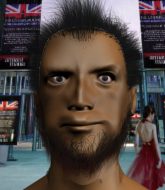
Coming up we have a light heavyweight MMA rules bout between Luke Graham (ranked 0 p4p, 0 weight class) and Butch Pain (ranked 0 p4p, 0 weight class). Over to our ring announcer for the fighter introductions!
 |
|
 |
| 185 cm
26
215 lbs
11 - 9 - 1 |
|
183 cm
19
208 lbs
0 - 0 - 0 |
BJJ White Belt
Solid boxing
Experienced |
|
BJJ White Belt
Decent boxing
Determined |
|
| |
|
Ladies and gentlemen. This fight is 3 rounds, in the light heavyweight division.
Introducing the fighter to my left, fighting out of the red corner.
With a record of
11 - 9 - 1, fighting out of Amsterdam, Luke Graham!
And introducing the fighter to my right, fighting out of the blue corner.
With a record of
0 - 0 - 0, fighting out of Amsterdam, Butch Pain!
The judges for this bout are Radbod Blank, Nard Betker and Daniel Blasius.
The bell rings for round one and we are underway!
Graham rushes forward with a series of wild hooks but Pain moves out of range and avoids them all easily.
Graham changes levels and scores with a jab to the body.

Graham moves into the clinch.
Graham has Pain pressed against the cage, preventing Pain from circling away and getting back to striking at range.
A shot in the inside from Graham.

Pain pushes off and circles away, back to the middle of the mat.
Graham keeps the fight on the outside.
Graham with a body punch. A glancing blow.
Pain tries to score a power double leg takedown but Graham sees that one coming and sprawls well. That will dishearten Pain somewhat.
Graham takes a really solid shot there but just smiles back and shrugs his shoulders.
Graham misses the shot to the body.
Graham rushes Pain and presses him up against the cage.
The fans in attendance giving it up for the two fighters, who have really let it all hang out in the last minute or so!
Graham is trying to break the clinch but Pain is controlling him.
Pain breaks the clinch and we return to the middle of the mat.
Butch Pain seems to be the more aggressive standup fighter in this bout.
That's one minute gone in the round.
Pain shoots in but no luck this time.
Graham has managed to clinch.
Pain is trying to break free.
Pain misses with a body punch.
A body shot lands from Graham.
Pain breaks the clinch.
Graham looks to score with a jab to the body but Pain is just out of range.
Graham drives through and clinches with Pain against the cage.
Pain is trying to slow down the pace of the fight but Graham is keeping busy.
Pain misses with a punch to the body.
Still in the clinch, Graham scores with a nice short uppercut.
Graham lands with a right to the head.
Pain looking to stall.
Still in the clinch, Graham scores with a nice short uppercut.
That's two minutes gone in the round.
Graham throws a hook to the body. More of an arm punch but it's all scoring with the judges.
A shot in the inside from Graham.
Graham tries to land a shot to the body but it's blocked.

Graham manages to break the clinch.
Fantastic stuff here - a very entertaining period of action, which has drawn cheers from the crowd.
Graham pushes forward with a 1-2 combination that forces Pain back to the cage. Graham follows up with a solid lead hook to the liver.
Pain dodges the punch combination from Graham.
Pain tries to clinch but Graham moves away
and Graham counters with a crisp hook to the side of the head.
Graham swings and misses with a hook to the body.
Pain takes a body punch but keeps moving.
Luke Graham is looking to keep the fight on the feet at all costs.
Pain wants to clinch up but Graham keeps it at a distance.
Graham lands a slapping body shot.
Pain looks gassed!
Pain shoots in for a takedown but doesn't get it.
Luke Graham has stuffed three takedown attempts in the round now. That's going to take a lot out of Butch Pain.
Graham connects with a body shot that sends Pain's belly button to the back.
Graham lands a head shot.
That's three minutes gone in the round.
Graham forces Pain back against the cage and clinches.
Graham tries a body shot but Pain blocks it.
Graham works for underhooks and lands a body shot in the process.
Pain is looking to control Graham's arms but Graham gets an underhook and turns him. Now Pain has his back to the cage.
Pain prevents a body shot from Graham.
A right hook to the body lands for Graham.
Graham tried to land a shot to the body but connects with Pain's elbow.
Graham tries to land a shot to the body but it's blocked.
Pain has had enough of the clinch but Graham keeps him there for the moment.
Graham lands a hook that snaps the head of Pain backwards.
Graham escapes the clinch and we're back to striking.
Graham connects with a lovely right hand, straight down the pipe.
Graham connects with a right hand. Pain shakes it off.
This has been an exciting period of action!
Graham thuds a left hand into Pain's body.
That's four minutes gone in the round.
Graham with a body punch. A glancing blow.
Pain takes a shot to the body in his stride.
Graham throws a nice hook to the body that draws an oooh from the crowd.
Graham cracks Pain with a good shot that sees him stumbling back into the cage.
Pain is trying desperately to land a takedown but Graham is having absolutely none of it. This is turning into a bit of a nightmare for Pain.
Graham connects with a good straight punch right through the guard and follows up with a right hook and a left hook! That last one sent Pain tumbling to the canvas! Graham pours on the pressure with more strikes and the referee has no hesitation diving in to stop the fight! Pain was done - good stoppage!
Ladies and gentlemen, after 4:26 of round 1, we have a winner by way of TKO (Punches). Luke Graham!
|
|
|
|
|
|
|
|
|
|
|
|
|
|
|
|
|
|
|
|
|
|
|
| S |
C
A |
G |
S |
C
B |
G |
|
S |
C |
G |
|
energy
A | B |
|
hype
A | B |
|
pop
A | B |
|
mgr
A | B |
|
FIGHT
RATING
57% |
|
|
|
|
|
|
|
Undercard bout
|
Coming up we have a light heavyweight MMA rules bout between Eddie Alvarez (ranked 0 p4p, 0 weight class) and Axl The Prototype (ranked 0 p4p, 0 weight class). Axl The Prototype will no doubt be looking to use his reach advantage to good effect.
 |
|
 |
| 178 cm
28
220 lbs
8 - 6 - 0 |
|
193 cm
20
205 lbs
2 - 3 - 0 |
Powerful takedowns
Counter striker
Very strong |
|
BJJ Blue Belt
Brawler
Solid chin |
|
| |
|
Ladies and gentlemen. This fight is 3 rounds, in the light heavyweight division.
Introducing the fighter to my left, fighting out of the red corner.
With a record of
8 - 6 - 0, fighting out of Amsterdam, Eddie Alvarez!
And introducing the fighter to my right, fighting out of the blue corner.
With a record of
2 - 3 - 0, fighting out of Amsterdam, Axl The Prototype!
The judges for this bout are Nard Betker, Saam Ante and Patrick Alders.
The bell rings for round one and we are underway!

Alvarez scores with a takedown into The Prototype's guard.
The Prototype wants to stand up but Alvarez is controlling him.
The fighters are pressed up against the cage, both looking to find a bit of space to work.
Alvarez sneaks a leg through and gets to half guard. That was like a knife through butter how easily he passed The Prototype's guard.

Alvarez looking for a kimura but he'll have to free his other leg if he wants to finish that. Perhaps he's just using it as a distraction technique.
That's one minute gone in the round.
Alvarez passes the half guard and he's now in mount! Big trouble for The Prototype!
The Prototype has given up his back, trying to stand up. Not clever.
That's two minutes gone in the round.
Alvarez tries to keep control of the position but The Prototype is staying busy.
The ref warns both fighters not to hold the cage as they work up against the meshing.
The Prototype controlling the position well but he knows he's in a bad position.
Alvarez is working for the choke. It looks like he might have got it... has he...? Yes! The Prototype is tapping out! This one is all over!
Ladies and gentlemen, after 3:55 of round 1, we have a winner by way of Submission (RNC). Eddie Alvarez!
|
|
|
|
|
|
|
|
|
|
|
|
|
|
|
|
|
|
|
|
|
|
|
| S |
C
A |
G |
S |
C
B |
G |
|
S |
C |
G |
|
energy
A | B |
|
hype
A | B |
|
pop
A | B |
|
mgr
A | B |
|
FIGHT
RATING
30% |
|
|
|
|
|
|
|
Co-main event
|
Coming up we have a welterweight MMA rules bout between Tyrone Hoost (ranked 0 p4p, 0 weight class) and Georges St Pierre (ranked 0 p4p, 0 weight class). This should be fireworks!
 |
|
 |
| 186 cm
22
183 lbs
4 - 1 - 0 |
|
178 cm
24
170 lbs
5 - 5 - 0 |
BJJ White Belt
Excellent MT
Very strong |
|
Good takedowns
Counter striker
Determined |
|
| |
|
Ladies and gentlemen. This fight is 3 rounds, in the welterweight division.
Introducing the fighter to my left, fighting out of the red corner.
With a record of
4 - 1 - 0, fighting out of Amsterdam, Tyrone Hoost!
And introducing the fighter to my right, fighting out of the blue corner.
With a record of
5 - 5 - 0, fighting out of Amsterdam, Georges St Pierre!
The judges for this bout are Aafke Stam, Albert Achterberg and Paul Aken.
The bell rings for round one and we are underway!
St Pierre tries for a takedown but Hoost sees it coming a mile off and avoids it easily.
St Pierre misses with a head kick.
St Pierre has his takedown stuffed
and Hoost counters with a nice uppercut.
Hoost displays good takedown defense there as he swats away a double leg from St Pierre.
Tyrone Hoost has stuffed three takedown attempts in the round now. That's going to take a lot out of Georges St Pierre.
St Pierre fails to land the takedown.
St Pierre swats away the attempt to clinch by Hoost.
A slapping body kick lands there for Hoost.
That's one minute gone in the round.
St Pierre shoots in but Hoost avoids the takedown attempt easily.
Hoost throws a head kick that connects with a bit of head and a bit of hand.

It looks like Georges St Pierre has been cut.
Hoost works his jab well there, keeping his opponent at a distance.
Hoost moves into range and lands a nice body kick.
St Pierre fakes high and shoots in for a takedown but Hoost avoids it really well and circles away.
St Pierre looks gassed!
Hoost has managed to clinch.
That's two minutes gone in the round.
The fans in attendance giving it up for the two fighters, who have really let it all hang out in the last minute or so!
Hoost landing knees to the head.
Hoost lands a knee to the head.

St Pierre is rocked!
Hoost connects with a knee to the head.
St Pierre is still on wobbly legs! Can Hoost finish him?
Hoost breaks from the clinch.
St Pierre shoots in looking for a takedown but Hoost manages to keep the fight standing, pushing St Pierre's face into the canvas for good measure before circling away.
Hoost moves into the clinch successfully.
Hoost escapes the clinch and we're back to striking.
St Pierre seems to have recovered his senses.
Hoost lands a big head kick that sends St Pierre to the canvas! Hoost follows up with strikes from the mount that forces the ref to step in and stop the fight!
Ladies and gentlemen, after 2:35 of round 1, we have a winner by way of TKO (Strikes). Tyrone Hoost!
|
|
|
|
|
|
|
|
|
|
|
|
|
|
|
|
|
|
|
|
|
|
|
| S |
C
A |
G |
S |
C
B |
G |
|
S |
C |
G |
|
energy
A | B |
|
hype
A | B |
|
pop
A | B |
|
mgr
A | B |
|
FIGHT
RATING
40% |
|
|
|
|
|
|
|
Main event
|
Coming up we have a lightweight MMA rules bout between Wanderlei Bustamante (ranked 0 p4p, 0 weight class) and Jerry Cox (ranked 0 p4p, 0 weight class). Bustamante kept the crowd waiting but all that was forgotten when his ring entrance music started. The incomparable musical genius that is Cryin' like a Bitch. These two fighters really are very evenly matched on the feet - it will be fascinating to see who can assert themselves in that aspect of the fight.
 |
|
 |
| 172 cm
25
155 lbs
9 - 2 - 0 |
|
185 cm
26
161 lbs
3 - 2 - 0 |
Powerful takedowns
Solid boxing
Cardio machine |
|
BJJ White Belt
Excellent boxer
Determined |
|
| |
|
Ladies and gentlemen. This fight is 3 rounds, in the lightweight division.
Introducing the fighter to my left, fighting out of the red corner.
With a record of
9 - 2 - 0, fighting out of Amsterdam, Wanderlei Bustamante!
And introducing the fighter to my right, fighting out of the blue corner.
With a record of
3 - 2 - 0, fighting out of Amsterdam, Jerry Cox!
The judges for this bout are Paulsen Ambrosius, Radbod Blank and Nard Betker.
The bell rings for round one and we are underway!
Cox jabbing away but nothing is landing.
Cox swings away but doesn't land with a series of punches.
Cox swings and misses with a hook to the body.
Bustamante manages to get an easy takedown there - catching Cox on his heels. He'll look to pass Cox's guard now, I'm sure.
We may be looking at a referee standup if the pace doesn't pick up soon.
Cox not looking particularly offensive just at the moment.
Cox wants to get back to his feet but Bustamante is in a dominant position and won't allow it.
Cox looking to sweep here. No luck so far.
Bustamante with a flurry of punches that miss.
Bustamante is looking to work some ground and pound but Cox has wrist control.
Hammerfist, elbow! yells Bustamante's corner. There ya go! There ya go!
Bustamante lands a couple of digs.
The ref warns both fighters not to hold the cage as they work up against the meshing.
Bustamante working in close now, lands a nice elbow to the side of Cox's head.
Fantastic stuff here - a very entertaining period of action, which has drawn cheers from the crowd.
Bustamante with a couple of shots to the head there. Not particularly brutal.
Bustamante drops back looking for a leg! Cox is in trouble here! The fighters roll with the hold and Cox manages to kick Bustamante off! Bustamante jumps back into Cox's guard.
Bustamante postures up to throw the ground and pound strikes but they don't connect.
That's one minute gone in the round.
Bustamante stands up over Cox, holding his feet. He dives back in and lands a decent shot to the head.
Cox really doesn't want to stay on the ground with Bustamante. If he can't get it back to his feet, it's only a matter of time before he'll be tapping out.
Bustamante passes Cox's right leg, so he's now in half guard.
Cox is trying to get back to full guard.
Bustamante controlling the action here.
Bustamante's ground tactics aren't going to win him many fans. Let's hope he's got fireworks for us if he gets back to his feet because he's not doing much on the ground.
Bustamante drops an elbow to the side of Cox's head.
Bustamante lands strikes from half guard.
Bustamante working the head and body with strikes.
Bustamante working some ground and pound from close in. He's looking to maintain this position and strike for a while by the looks of things... although he'll probably advance to full mount in a minute now I've said that.
Wooooo! Give it up for these two warriors! They are putting on a show!
Bustamante lands with a punch from half guard.
Cox is rocked!
Bustamante trying to control the action but Cox is working from the bottom.
Cox is still in real trouble! Can Bustamante finish him?
Bustamante lands a massive shot from half guard that has rocked Cox! More strikes land and this one is all over! Bustamante jumps to his feet and is applauded loudly by the crowd!
Ladies and gentlemen, after 2:59 of round 1, we have a winner by way of TKO (Strikes). Wanderlei Bustamante!
Post fight, Wanderlei Bustamante took to the microphone: 'I'd like to say thanks to all my fans, you guys are awesome! I'd also like to thank Cox for letting me beat his ass again... I hear training helps a little, maybe you should give it a shot. To ANY other fighters out there that want a shot at this belt I say BRING IT BITCHES!'.
|
|
|
|
|
|
|
|
|
|
|
|
|
|
|
|
|
|
|
|
|
|
|
| S |
C
A |
G |
S |
C
B |
G |
|
S |
C |
G |
|
energy
A | B |
|
hype
A | B |
|
pop
A | B |
|
mgr
A | B |
|
FIGHT
RATING
72% |
|
|
|
|
|
|
|
|
|
|

