 |
RCS 51 - RUSH ROYALTY 1 PBP Commentary |
Undercard bout
|
|
|
|
Undercard bout
|
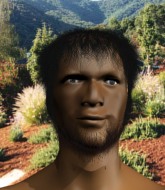
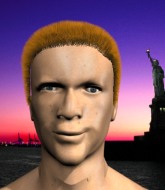
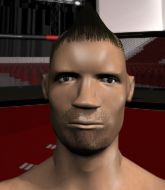
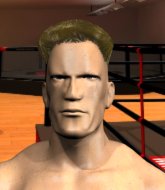
Coming up we have a lightweight MMA rules bout between Dookie Stainz (ranked 0 p4p, 0 weight class) and Mofo Jojo (ranked 0 p4p, 0 weight class). Mofo Jojo is the more experienced fighter, so let's see if that makes a difference tonight.
 |
|
 |
| 165 cm
19
155 lbs
1 - 1 - 0 |
|
165 cm
20
155 lbs
0 - 3 - 0 |
BJJ Blue Belt
Brawler
Good chin |
|
BJJ White Belt
Good kicks
Granite chin |
|
| |
|
Ladies and gentlemen. This fight is 3 rounds, in the lightweight division.
Introducing the fighter to my left, fighting out of the red corner.
With a record of
1 - 1 - 0, fighting out of Sydney, Dookie Stainz!
And introducing the fighter to my right, fighting out of the blue corner.
With a record of
0 - 3 - 0, fighting out of Sydney, Mofo Jojo!
The judges for this bout are Hugh Johnson, Steve Erwin and Damien Edna.

The bell rings for round one and we are underway!
Jojo checks a low kick from Stainz.
Stainz throws a head kick that connects with a bit of head and a bit of hand.
Stainz keeps the fight standing with a nice sprawl.
That kick from Jojo tenderised Stainz's leg. Stainz is trying to keep his angry face on.

Jojo shoots in for a takedown and gets it.
Stainz preventing any damage for now, controlling his opponent's head.

Stainz kicks off Jojo and gets to his feet.
This is a great period of action - very entertaining stuff!
Jojo scores to the head and body with a nice combination!
Stainz throws a half hearted mid kick.
Jojo swings away but doesn't land with a series of punches.

Stainz closes the distance and after a bit of a stuggle, scores a takedown into Jojo's guard.
Stainz postures up and lands some nice ground and pound.
Stainz is working the ground and pound from guard. He might want to try advancing position though to get more of an impact.
Jojo wants to stand but Stainz is controlling the position.

That's one minute gone in the round.
Jojo avoiding any damage from the ground and pound.
Stainz throws a big elbow that misses.
Stainz working from the guard for now, landing some ground and pound.
Jojo is looking to stand up but Stainz isn't so interested in that idea.
Stainz works over Jojo with some ground and pound from guard.
Stainz prevents Jojo from getting back to his feet.
Jojo is trying to control the position from the bottom.
Jojo looks gassed!
Stainz trying to pass the guard but can't manage it just yet.
Stainz postures up and scores with a shot to the body and a follow up elbow to the head.
Stainz won't allow Jojo to sweep him here.
Stainz passes Jojo's left leg - he's now in half guard.
Stainz has been looking to land a fair amount of strikes on the ground. He might be looking to soften his opponent up in order to work for a submission.

That's two minutes gone in the round.
Jojo is trying to defend against the ground and pound but Stainz scores with a couple of nice shots.
Jojo looks like he's trying to stand up.
Stainz lands a big shot. The thud that echoes around the arena is like music to the fans' ears.
Stainz is keeping good posture, landing some ground and pound.
The crowd cheering loudly, showing their appreciation for the quality fight we're seeing here.
Stainz landing with strikes to the body and head, softening up his opponent.
Stainz landing with strikes to the body and head, softening up his opponent.
Ground and pound from Stainz.
Jojo keeping his head moving to avoid the ground and pound.
Jojo is trying to stand back up but Stainz is controlling him
Stainz working over Jojo with some ground and pound. Jojo looks like he wants out of this position, which is understandable.
Jojo has hold of Stainz's hands but Stainz slips his arm to the side and lands an elbow.
Jojo wants to get back to full guard.
The fighters are pressed up against the cage, both looking to find a bit of space to work.
Stainz sitting in half guard, looking to land shots. Jojo defending well though.
The ref warns both fighters not to hold the cage as they work up against the meshing.

That's three minutes gone in the round.
Stainz landing with strikes to the body and head, softening up his opponent.
Stainz thows a huge punch but Jojo dodges it nicely.
Stainz working the head and body with strikes.
The referee walks around the fighters to get a better view of the action. Stainz lands a nice short elbow.
Jojo wants to get back to his feet.
Jojo wants to get back to full guard.

Stainz is thinking about going for an arm triangle but he can't free his leg.
Stainz thumps the canvas. Not on purpose obviously - he just missed Jojo's head.
Jojo trying to hold on to Stainz's head to control him but Stainz postures up.
Stainz stands up from half guard... He's had enough of that ground malarky for the time being.

That's four minutes gone in the round.
Jojo lands a pitter patter jab to the forehead of his opponent.
Jojo avoids the head kick by Stainz.
Wow, both these guys are really going for it!
Jojo fails in his attempt to clinch.
Jojo feints a jab promting Stainz to slip. Jojo then demonstrates his capabilities by jabbing again. Stainz slips again and ducks right into an uppercut.
We've seen a great period of action over the last minute or so - credit to both fighters for going all out!
Jojo looks frustrated there after his takedown attempt is stuffed easily.
No luck for Stainz with that takedown attempt.
A really sloppy takedown attempt there from Jojo.
Dookie Stainz has stuffed three takedown attempts in the round now. That's going to take a lot out of Mofo Jojo.
The crowd are going absolutely nuts as the round comes to an end - what a fantastic round of action!
Stainz throws a head kick that connects with a bit of head and a bit of hand.
Jojo wants to clinch but Stainz slips to the side
and Stainz counters with a nice single leg takedown and he's in Jojo's guard now.
And thats the end of the round the fighters go back to their corners.
Dookie Stainz dominated that round.
The minute break is over - no more time for sponges and pep talks - back to the action!

Stainz is looking to clinch.
A kick lands to the mid section there for Jojo.
Stainz throws a hard body shot but it just misses.
Jojo lands a leg kick that knocks Stainz off balance momentarily.
Dookie Stainz is looking to throw some combinations by the looks of things.
Jojo shoots in with a lovely double leg takedown. Stainz manages to land in full guard to minimise the damage.
Jojo throwing elbows and punches but not connecting, as Stainz works some decent striking defense from the bottom.
Jojo keeps in close for a moment and lands a decent shot to the side of Stainz's head.
Jojo pushing down on Stainz's thigh, trying to pass to half guard. He's managed it... Nice work.
Jojo working Stainz over with strikes.
Wooooo! Give it up for these two warriors! They are putting on a show!
Jojo is nestled in close to Stainz, controlling him well. He's worked in a nice elbow to the side of the head as well, for good measure.
Dookie Stainz overall seems to be getting the better of the ground position in the fight so far.
Jojo stops Stainz from getting back to his feet.
Both fighters are absolutely exhausted here.
Jojo working some ground and pound from close in. He's looking to maintain this position and strike for a while by the looks of things... although he'll probably advance to full mount in a minute now I've said that.
Jojo takes advantage of the dominant position to land a couple of big hammer fists.
Jojo blocks the strikes from Stainz.
That's one minute gone in the round.
Jojo throws a big elbow that misses, also allowing Stainz to regain full guard.
Jojo is working Stainz over from the guard. He should look to pass the guard and do a little more damage with these strikes.
Jojo is working the ground and pound from guard. He might want to try advancing position though to get more of an impact.
Stainz pulls Jojo in close to his closed guard and prevents Jojo from doing any damage or advancing position.
Jojo avoids a guillotine attempt easily.
Stainz throwing strikes off his back to little effect.
Stainz pushes Jojo off and gets back to his feet.

Jojo closes the distance and clinches.
That's two minutes gone in the round.
Stainz wants to break free but Jojo has control.

Jojo breaks the clinch and we're back to striking at distance.
A thudding body kick lands there by Jojo!
Mofo Jojo seems to be getting the better of the standup.
Stainz slips a jab and a cross from Jojo.
Jojo lands a jab-cross combination.
Wooooo! Give it up for these two warriors! They are putting on a show!
Jojo turns his hip over beautifully as he lands a nice leg kick.
Stainz lunges in with swinging rights and lefts but Jojo circles away quickly and effectively.
Jojo throws a right hand that Stainz ducks under and follows up with a left that Stainz also avoids with ease.
Nice takedown defense from Stainz. No joy for Jojo on that attempt.
Jojo goes for a spinning back kick but it misses.

Stainz moves into the clinch.
Jojo manages to break the clinch.
The fight stays on the outside here - Stainz looks like he's thinking about clinching though.
Stainz darts in and clinches Jojo up against the cage.
That's three minutes gone in the round.
Jojo escapes the clinch and we're back to striking.
Stainz throws a combination but it was largely blocked by Jojo.
Jojo throws a head kick that half lands.
Jojo fails with a takedown attempt.
Stainz goes to the watering hole and comes back with a big thumbs up from the judges as he scores a three punch combo.
Jojo dodges the punch combination from Stainz.
Jojo tries to clinch but Stainz moves out of range.
Stainz falls off balance throwing a combination
and Jojo counters with a body kick.
That kick from Jojo tenderised Stainz's leg. Stainz is trying to keep his angry face on.
Stainz gets off balance looking for a body kick
and Jojo counters with a left and a right that stings Stainz.
That's four minutes gone in the round.
Stainz misses with a half-hearted attempt at a head kick.
Stainz throws a right and a left that both miss.
Jojo shoots in with a lovely double leg takedown. Stainz manages to land in full guard to minimise the damage.
Stainz pushes Jojo off and scrambles back to his feet.
We've seen a great period of action over the last minute or so - credit to both fighters for going all out!
Stainz throws a right and a left that Jojo avoids nicely.
Jojo fakes the leg kick and cracks Stainz in the body.
Jojo tries a switch kick but it misses it's target.
Stainz darts in and lands a nice takedown into half guard.

Jojo makes some distance and scrambles quickly back to his feet. Nice work!
The crowd are going absolutely nuts as the round comes to an end - what a fantastic round of action!
Jojo misses with a few strikes there.
And thats the end of the round the fighters go back to their corners.
Mofo Jojo showed his class in that round. I'd imagine he'll take it on all the scorecards.
That's time! Stainz's corner gives him a slap on the ass as he gets ready to fight. Let's hear some noise people - this is the final round!

Jojo has his head slapped from side to side by a 3 punch combination. That must have hurt him.
Stainz throws a head kick but Jojo moves out of range.
Stainz is looking to clinch but Jojo is avoiding it.
Jojo shoots in for a takedown. "I don't think so" says Stainz as he avoids it easily.
Stainz fakes with an overhand right and moves in to clinch with Jojo, pushing him back against the cage.
Stainz scores with a shoulder strike.
Jojo manages to break the clinch.
Jojo tries to clinch but Stainz moves out of range.
Stainz shoots in for a takedown but doesn't get it.
Jojo scores with a nice one two combo and darts back out of range to avoid anything coming in the opposite direction.
Jojo plants his feet and lands a nice head kick!
Stainz throws a nice looking combination but Jojo bobs and weaves to avoid any damage.
Jojo tries to clinch but is not successful on this occasion.
Jojo lands with an overhand left.
Both fighters are breathing heavily.
Jojo jabs Stainz right on the nose. Stainz blinks but takes it well.
A left lands for Jojo.
That's one minute gone in the round.
Stainz dives in and scores a takedown into Jojo's guard.
Stainz passes Jojo's right leg, so he's now in half guard.
Ground and pound from Stainz.
Jojo is looking to regain full guard. Not this time though.
Stainz working the head and body with strikes.
Jojo trying to hold on to Stainz's head to control him but Stainz postures up.
Jojo gets full guard.
Jojo trying to control the position.
Stainz sneaks a leg through and gets to half guard. That was like a knife through butter how easily he passed Jojo's guard.
Jojo really doesn't want to stay on the ground with Stainz. If he can't get it back to his feet, it's only a matter of time before he'll be tapping out.
Stainz is nestled in close to Jojo, controlling him well. He's worked in a nice elbow to the side of the head as well, for good measure.
That's two minutes gone in the round.
Jojo trying to control from the bottom.
We've seen a great period of action over the last minute or so - credit to both fighters for going all out!
Stainz is nestled in close to Jojo, controlling him well. He's worked in a nice elbow to the side of the head as well, for good measure.
Stainz winds up and cracks Jojo with a swinging punch to the side of the head.
Stainz trying to mount his opponent but Jojo defends it.
Stainz throwing shots but Jojo is blocking nicely.
Stainz trying to pass the guard but Jojo defending well.
Jojo pushes Stainz off looking to stand but Stainz dives back in and keeps control.
Jojo punching from the bottom.
Stainz drops an elbow to the side of Jojo's head.
Stainz lands with a punch from half guard.
Jojo pushes Stainz off looking to stand but Stainz dives back in and keeps control.
Jojo is looking to get back to is feet but Stainz passes into side control.
That's three minutes gone in the round.
Stainz is putting a hurting on Jojo here, landing some big shots from side control.
Stainz scores with punches from side control.
Jojo dodges the ground and pound from Stainz.
Jojo is trying to control Stainz's posture but Stainz avoids it.
Jojo is working to avoid the ground and pound but Stainz connects with a decent elbow.
Stainz working hard here to secure a kimura but he's not really in the right position for it.
Stainz creates a bit of distance and throws down some hard shots.
That's four minutes gone in the round.
Stainz throwing ground and pound but whilst doing so, he forgets to control position and Jojo works his way back to half guard. Good composure under pressure.
Jojo looks like he's trying to stand up.
Stainz gets to his feet - back to striking we go!
Stainz throws a series of punches but Jojo moves out of range.
Jojo throws a head kick that misses.
Stainz throws a right and a left that Jojo avoids nicely.
As the round comes to an end the crowd are showing their appreciation for a great round of action.
A decent looking body kick lands there for Jojo.
A punch combination from Stainz misses.
Jojo throws a head kick that half lands.
Wooooo! Give it up for these two warriors! They are putting on a show!
Jojo works his jab well there, keeping his opponent at a distance.
And that's the end of the fight!
Dookie Stainz showed his dominance in that final round.
I think Stainz has won this one but let's see what the judges have to say. Over to the ring announcer for the scorecards.
Ladies and gentlemen, after 3 rounds of action, we go to the scorecards for a decision.
Judge Hugh Johnson scores the fight 29:28
Judge Steve Erwin scores the fight 29:28
Judge Damien Edna scores the fight 29:28
In favor of your winner, by unanimous decision... Dookie Stainz!
|
|
|
|
|
|
|
|
|
|
|
|
|
|
|
|
|
|
|
|
|
|
|
| S |
C
A |
G |
S |
C
B |
G |
|
S |
C |
G |
|
energy
A | B |
|
hype
A | B |
|
pop
A | B |
|
mgr
A | B |
|
FIGHT
RATING
100% |
|
|
|
|
|
|
|
Undercard bout
|
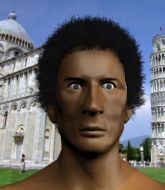
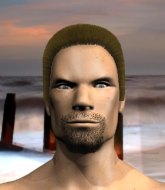
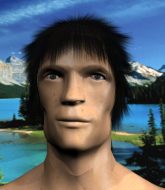
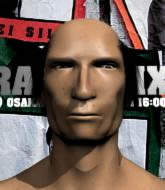
Coming up we have a lightweight MMA rules bout between Julio Martinez (ranked 0 p4p, 0 weight class) and Marti Pico (ranked 0 p4p, 0 weight class). The key to victory for Julio Martinez has got to be keeping the fight on the feet.
 |
|
 |
| 175 cm
18
158 lbs
1 - 1 - 0 |
|
173 cm
24
145 lbs
1 - 1 - 0 |
BJJ Blue Belt
Solid boxing
Big heart |
|
BJJ Purple Belt
Counter striker
Granite chin |
|
| |
|
Ladies and gentlemen. This fight is 3 rounds, in the lightweight division.
Introducing the fighter to my left, fighting out of the red corner.
With a record of
1 - 1 - 0, fighting out of Sydney, Julio Martinez!
And introducing the fighter to my right, fighting out of the blue corner.
With a record of
1 - 1 - 0, fighting out of Sydney, Marti Pico!
The judges for this bout are Damien Edna, Steve Erwin and Summer Carpenter.
The bell rings for round one and we are underway!
Martinez moves into range and throws a lovely three punch combination.
Pico dodges the punch combination from Martinez.
Martinez will need to tighten up his combinations if he doesn't want to gas himself out, swinging at thin air.
Martinez misses with the combination.
Pico takes one on the chin but seems OK.
Martinez looks to score with a combo but nothing lands.
Pico fails with the takedown.
Martinez misses with a double jab
and Pico counters with a nice double leg into half guard.
That's one minute gone in the round.
The referee wants the fighters to be more active or he's going to reset them on the feet.

Pico is trying a forearm choke
I don't think that's going to do much at this level of the game.
Martinez gets full guard.
Martinez escapes his hips to the side and looks to be working for an armbar. Pico gives him a little smile and shakes his head. No chance.
Martinez throws his legs up looking to secure a triangle. Oh, that looks pretty tight, I gotta say! Pico escapes and throws Martinez's legs to the side, diving into side control!
The fighters are pressed up against the cage, both looking to find a bit of space to work.
Pico has hold of Martinez's arm. He's looking for a kimura. Martinez seems comfortable defending it but Pico has shifted his position slighty and is cranking on the arm! Martinez is real pain and he's forced to tap out! Martinez is disgusted with himself for not defending it better but Pico couldn't care less - he's delighted!
Ladies and gentlemen, after 1:50 of round 1, we have a winner by way of Submission (Kimura). Marti Pico!
Marti Pico seemed lost for words in his post fight interview but he remembered to thank his fans and directed everyone to his website.
|
|
|
|
|
|
|
|
|
|
|
|
|
|
|
|
|
|
|
|
|
|
|
| S |
C
A |
G |
S |
C
B |
G |
|
S |
C |
G |
|
energy
A | B |
|
hype
A | B |
|
pop
A | B |
|
mgr
A | B |
|
FIGHT
RATING
44% |
|
|
|
|
|
|
|
Undercard bout
|
Coming up we have a middleweight MMA rules bout between Miles OToole (ranked 0 p4p, 0 weight class) and Alexandr Dyachenko (ranked 0 p4p, 0 weight class). Dyachenko has chosen DESERT STORM as his entrance music. Both these guys have solid standup skills and neither is particularly fantastic on the ground, so let's hope for a nice standup war!
 |
|
 |
| 185 cm
24
180 lbs
3 - 2 - 0 |
|
180 cm
25
185 lbs
0 - 0 - 0 |
BJJ Blue Belt
Solid boxing
Experienced |
|
BJJ White Belt
Excellent MT
Granite chin |
|
| |
|
Ladies and gentlemen. This fight is 3 rounds, in the middleweight division.
Introducing the fighter to my left, fighting out of the red corner.
With a record of
3 - 2 - 0, fighting out of Sydney, Miles OToole!
And introducing the fighter to my right, fighting out of the blue corner.
With a record of
0 - 0 - 0, fighting out of Sydney, Alexandr Dyachenko!
The judges for this bout are Winston Howard, Donatello Bradman and Eliza Hachem.
The bell rings for round one and we are underway!
OToole throws a jab, cross combination which is slipped
and Dyachenko counters with a leg kick that reverborates around the arena.
Dyachenko misses with a head kick.
Dyachenko has his hands up protecting his head but a hook from OToole finds it's way round the side to connect with Dyachenko's head.

OToole lands a big uppercut and Dyachenko crumbles to the floor! The ref thinks about stopping the fight but Dyachenko looks OK. OToole waves Dyachenko back to his feet!

It looks like Alexandr Dyachenko has been cut.
Fantastic stuff here - a very entertaining period of action, which has drawn cheers from the crowd.
Dyachenko scores with a head kick.
Dyachenko moves out of range as OToole strikes.
Dyachenko drops his hands momentarily and OToole takes advantage with a crisp shot to the head.
Miles OToole seems to be the more aggressive standup fighter in this bout.
Dyachenko loses concentration momentarily and OToole pounces with a three punch combo! Right, left, right! Dyachenko crashes face first to the mat, out cold! OToole finishes this one with a fantastically precise combo! Great stuff.
Ladies and gentlemen, after 0:26 of round 1, we have a winner by way of KO (Punches). Miles OToole!
Miles OToole gave a mention to ACME-Blood Red Q158 Always $30 in his post fight interview. That will please them (and hopefully generate some sales).
|
|
|
|
|
|
|
|
|
|
|
|
|
|
|
|
|
|
|
|
|
|
|
| S |
C
A |
G |
S |
C
B |
G |
|
S |
C |
G |
|
energy
A | B |
|
hype
A | B |
|
pop
A | B |
|
mgr
A | B |
|
FIGHT
RATING
100% |
|
|
|
|
|
|
|
Undercard bout
|
|
|
|
Co-main event
|
Coming up we have a lightweight MMA rules bout between Tom Lloyd (ranked 0 p4p, 0 weight class) and Johnny Smith (ranked 0 p4p, 0 weight class). Lloyd comes to the cage accompanied by The Hives - Tick Tick Boom. Smith has chosen Smoke the Fire as his entrance music. Over to our ring announcer for the fighter introductions!
 |
|
 |
| 175 cm
25
167 lbs
7 - 9 - 0 |
|
183 cm
24
163 lbs
10 - 8 - 0 |
BJJ Purple Belt
Excellent MT
Very strong |
|
BJJ Blue Belt
Counter striker
Granite chin |
|
| |
|
Ladies and gentlemen. This fight is 3 rounds, in the lightweight division.
Introducing the fighter to my left, fighting out of the red corner.
With a record of
7 - 9 - 0, fighting out of Sydney, Tom Lloyd!
And introducing the fighter to my right, fighting out of the blue corner.
With a record of
10 - 8 - 0, fighting out of Sydney, Johnny Smith!
The judges for this bout are Damien Edna, Steve Erwin and Hugh Johnson.
The bell rings for round one and we are underway!
Lloyd looks for a takedown. He's got it. We're now in half guard.
The referee wants the fighters to be more active or he's going to reset them on the feet.
Smith tries to roll over but Lloyd keeps him under control.
Lloyd trying to advance position but Smith counters by regaining guard.
Smith is pulling down on Lloyd's head to control his posture.
Hammerfist, elbow! yells Lloyd's corner. There ya go! There ya go!
Lloyd drops back looking for a heel hook - he quickly realises he's not going to get it but Smith manages to dive on top of him before he can escape and now Lloyd has Smith in his guard.
Smith is looking to stand up but Lloyd won't let him.
Smith must be cautious of submissions here, given that his opponent has the superior Jiu Jitsu.
Lloyd is trying to stand up but he's not managed so far.
That's one minute gone in the round.
Lloyd manages to land a sweep and now he's in mount on top!
Smith can't escape the position.
Lloyd avoids the attempt from Smith to control.
Lloyd tries to control but Smith wriggling away.
The crowd growing excited in anticipation of a finish here! Right on cue, Lloyd cracks his opponent with a massive right hand that draws loud cheers!
Lloyd throws an elbow from mount that misses. Lucky escape for Smith because Lloyd loaded up on that one.
Lloyd fakes a shot to the body and cracks his opponent in the head. Nice ground and pound there!
Lloyd with some aggressive grappling here. He's looking for submissions here, rather than waiting for the opportunity to counter.
Smith squirming around on the bottom, looking to escape.
Lloyd has been looking to land a fair amount of strikes on the ground. He might be looking to soften his opponent up in order to work for a submission.
That's two minutes gone in the round.
Smith tries to hold on but Lloyd postures up.
Lloyd wants to control the pace but Smith is squirming around nicely.
Lloyd landing punches.
We've seen a great period of action over the last minute or so - credit to both fighters for going all out!
Lloyd looking for a guillotine from mount but Smith is having none of it.
Lloyd scoring with strikes but Smith is staying in there.
Smith is writhing around trying to get back to his feet.
Lloyd fakes a shot to the body and cracks his opponent in the head. Nice ground and pound there!
Lloyd misses with a series of strikes from mount. He'll no doubt be working on his ground and pound when he gets back to the gym.
Smith is trying to escape but when you're mounted that's not too easy.
Lloyd looking for a guillotine from mount but Smith is having none of it.
That's three minutes gone in the round.
Lloyd looking for an armbar but decides to keep the dominant position instead.
Smith can't escape the position.
Lloyd raining down shots from the mount!
Lloyd looking to finish with strikes here!
Lloyd trying to control but Smith is having none of it.
Smith really trying hard to get back to half guard here.
The ref warns both fighters not to hold the cage as they work up against the meshing.
That's four minutes gone in the round.
Lloyd moves into side control, trying to work for a kimura. That looks painful! Will he finish!!?? No, Smith has worked his arm free - good work by Smith!
Lloyd prevents Smith from escaping the position.
Lloyd misses with the ground and pound.
Lloyd wants to work for a kimura but he's foiled early by Smith, who protects the arm well.
Lloyd decides to take the fight back to the feet.
The crowd cheering loudly, showing their appreciation for the quality fight we're seeing here.
Lloyd throws a head kick that half lands.
The crowd are going absolutely nuts as the round comes to an end - what a fantastic round of action!
Smith shoots in for a takedown. He's persisting with it as Lloyd sprawls well. Lloyd wins this battle and keeps the fight standing. Smith gets slowly back to his feet.
Smith gets caught napping as Lloyd dives in and scores a takedown. Smith manages to retain guard.
And thats the end of the round the fighters go back to their corners.
Tom Lloyd dominated that round.
The minute break is over - no more time for sponges and pep talks - back to the action!
Lloyd has his takedown stuffed
and Smith counters with an outside leg kick.
Lloyd fakes high and shoots in for a takedown but Smith avoids it really well and circles away.
Lloyd misses with a takedown attempt
and Smith counters with a driving takedown into guard. Nice work there by Smith.
That's three failed takedown attempts in the round for Tom Lloyd. That's going to take a lot out of him.
Smith is stalling in the full guard.
Smith trying to control but Lloyd is working from the bottom.
Smith with a flurry of punches that miss.
Lloyd is trying to control the position but Smith postures up.
Lloyd has butterfly guard. He's looking to stand up here. He pushes Smith off him and springs to his feet nicely. The crowd applauds.
Wooooo! Give it up for these two warriors! They are putting on a show!
Smith misses with a half-hearted attempt at a head kick.
Lloyd shoots in with a takedown attempt and he has Smith pinned against the cage. Smith gets the underhooks and manages to circle away.
That's one minute gone in the round.
Lloyd showing good head movement there, avoiding the strikes from Smith.
Both fighters are absolutely exhausted here.
Smith takes a swing at Lloyd's ribcage but misses.
Lloyd gets his takedown attempt stuffed easily
and Smith counters with a nice single leg takedown and he's in Lloyd's guard now.
Smith looking to sit in guard and control but Lloyd gets the butterfly guard and sweeps. He's now in the guard on the top.
Smith tries to land a sweep but no joy.
Lloyd is pushing down on Smith's leg trying to pass to half guard. Smith is fighting to maintain full guard but Lloyd has managed to sneak the leg through.
Smith is trying to control but can't.
Smith wants to get back to his feet.
Lloyd looking for a kimura but he'll have to free his other leg if he wants to finish that. Perhaps he's just using it as a distraction technique.
That's two minutes gone in the round.
The fans in attendance giving it up for the two fighters, who have really let it all hang out in the last minute or so!
Lloyd is thinking about going for an arm triangle but he can't free his leg.
Lloyd tries to pass to full mount but Smith defends it.
Lloyd wants to work for an arm triangle but Smith is really keeping half guard well and defending the submission attempt.
Lloyd is trying to work for a kimura. This could be trouble! No, Smith has managed to free his arm - good work.
That's three minutes gone in the round.
Smith kicks Lloyd off and gets back to his feet.
Lloyd shoots in but Smith avoids the takedown attempt easily.
Lloyd has his takedown stuffed
and Smith counters with a left and a right that stings Lloyd.
Smith fails to land with the punch combination there - jab, cross, hook, miss, miss, miss.
Smith fails with a takedown attempt.
Tom Lloyd is looking to throw some combinations by the looks of things.
Smith fails to land with the punch combination there - jab, cross, hook, miss, miss, miss.
Lloyd fails with the takedown.
Left hook, right uppercut from Smith.
That's four minutes gone in the round.
Some wild striking there from Smith.
Smith throws a chopping leg kick but Lloyd manages to avoid taking any serious damage.
Smith tries to bum rush Lloyd with a series of wild strikes but Lloyd uses good footwork to avoid the assault.
Smith is looking to clinch but Lloyd is avoiding it.
Smith displays good takedown defense there as he swats away a double leg from Lloyd.
Lloyd avoids a kick to the body.
Lloyd throws a head kick that misses and slips in the process. He scrambles back to his feet and the fighters circle.
Lloyd circles away from the clinch attempt.
Lloyd has his takedown stuffed
and Smith counters with a two punch combo.
The fans in attendance giving it up for the two fighters, who have really let it all hang out in the last minute or so!
As the round comes to an end the crowd are showing their appreciation for a great round of action.
Smith fails with a takedown attempt from distance.
Smith moves in looking to clinch but Lloyd pushes him off.
And thats the end of the round the fighters go back to their corners.
Johnny Smith showed his class in that round. I'd imagine he'll take it on all the scorecards.
OK. That's time! The bell goes and we're back to the action. Ladies and gentlemen, this is the final round!
No luck with that takedown attempt from Lloyd.
Smith looking to shoot here. He's gone for it and he's landed a takedown into mount! Oh, that's bad for Lloyd!
Smith goes for an armbar but Lloyd turns quickly into his guard - lovely anticipation from Lloyd.
Lloyd trying to control but Smith is working from the bottom.
Smith wants to stand and escape but Lloyd is having none of it.
Smith tries to land a sweep but no joy.
The fighters are pressed up against the cage, both looking to find a bit of space to work.
Smith takes a big intake of breath there - he's definitely tired.
Lloyd advances to half guard.
Smith misses with some strikes from the bottom.
Lloyd is looking for a kimura but he's never going to get it from there.
That's one minute gone in the round.
Smith missing with punches from the bottom.
Lloyd seems to be looking for submissions.
Smith gets back to full guard.
Lloyd stands up and looks to throw the legs aside to pass to side control. Smith swivels though and keeps the full guard.
Lloyd preventing the sweep.
Lloyd is trying to work a guillotine from the top, or something like that? Don't know how he thinks he's going to get a finish from there.
Lloyd looking to sit in guard and control but Smith gets the butterfly guard and sweeps. He's now in the guard on the top.
That's two minutes gone in the round.
Lloyd uses the cage to get back to his feet.
Smith tries to close the distance and clinch up but Lloyd swats him away and circles back towards the center.
Lloyd shoots in but Smith avoids the takedown attempt easily.
Smith throws a nice looking combination but Lloyd bobs and weaves to avoid any damage.
Smith throws a right and a left that both miss.
Lloyd shoots in but no luck this time.
That's three failed takedown attempts in the round for Tom Lloyd. That's going to take a lot out of him.
Smith looks to score with a combo but nothing lands.
Lloyd shoots in and scores a nice double leg takedown into half guard.
That's three minutes gone in the round.
Lloyd wants to lay and pray for a moment but Smith keeps working.
Lloyd wants to work for an arm triangle but Smith is really keeping half guard well and defending the submission attempt.
Smith trying to control here.
Lloyd is looking for an arm triangle, whilst trying to pass to side control. Smith doesn't seem that keen to cooperate though. No luck this time Lloyd.
Smith looks like he's trying to stand up.
That's four minutes gone in the round.
Smith tries to get to full guard but Lloyd has control of the leg.
Lloyd looking for a kimura but he'll have to free his other leg if he wants to finish that. Perhaps he's just using it as a distraction technique.
Smith is trying to get back to full guard.
The crowd applaud the fighters efforts here as the round comes to an end.
Lloyd is looking for a kimura but he's never going to get it from there.
And that's the end of the fight!
Tom Lloyd showed his dominance in that final round.
I think Lloyd has won this one but let's see what the judges have to say. Over to the ring announcer for the scorecards.
Ladies and gentlemen, after 3 rounds of action, we go to the scorecards for a decision.
Judge Damien Edna scores the fight 29:28
Judge Steve Erwin scores the fight 29:28
Judge Hugh Johnson scores the fight 29:28
In favor of your winner, by unanimous decision... Tom Lloyd!
After the big win, Tom Lloyd made sure to do all the important stuff like thanking his sponsors ACME-Blood Red Q158 Always $30 and telling the interviewer how much he loves him.
|
|
|
|
|
|
|
|
|
|
|
|
|
|
|
|
|
|
|
|
|
|
|
| S |
C
A |
G |
S |
C
B |
G |
|
S |
C |
G |
|
energy
A | B |
|
hype
A | B |
|
pop
A | B |
|
mgr
A | B |
|
FIGHT
RATING
76% |
|
|
|
|
|
|
|
Main event
|
Coming up we have a welterweight MMA rules bout between Mike Smith (ranked 0 p4p, 0 weight class) and Tom McGettigan (ranked 0 p4p, 0 weight class). McGettigan has chosen Knifeman - The Bronx as his entrance music. Over to our ring announcer for the fighter introductions!
 |
|
 |
| 172 cm
29
172 lbs
8 - 5 - 0 |
|
182 cm
28
170 lbs
11 - 4 - 0 |
Good wrestling
Counter striker
Granite chin |
|
BJJ White Belt
Good kicks
Powerful |
|
| |
|
Ladies and gentlemen. This fight is 3 rounds, in the welterweight division.
Introducing the fighter to my left, fighting out of the red corner.
With a record of
8 - 5 - 0, fighting out of Sydney, Mike Smith!
And introducing the fighter to my right, fighting out of the blue corner.
With a record of
11 - 4 - 0, fighting out of Sydney, Tom McGettigan!
The judges for this bout are Steve Erwin, Damien Edna and Skip Squint.
The bell rings for round one and we are underway!
Smith shoots in and drives through. McGettigan sprawls well.
Smith checks a low kick from McGettigan.
Nice defenses there by Smith.
McGettigan throws a jab but it's blocked by Smith.
McGettigan fakes with the hands and throws a leg kick but Smith is out of range.
Smith has a takedown stuffed.
McGettigan jabs away that one connects to the head of his opponent.
McGettigan attempts a leg kick but it's missed by a good margin.
McGettigan throws a lazy right hand but Smith sees it coming a mile off and sidesteps it easily.
Smith fakes high and swings low for a body shot but McGettigan manages to avoid it.
Smith fails with a takedown attempt.
That's three failed takedown attempts in the round for Mike Smith. That's going to take a lot out of him.
Smith avoids a lazy jab quite easily.
Tom McGettigan is looking to keep the fight on the feet at all costs.
That's one minute gone in the round.
Good shot there by McGettigan.
McGettigan lands an overhand right.
McGettigan just misses with a punch to the body.
McGettigan swings wildly with a right hand that was never going to find it's target.
Smith gets cracked with a nice right hand there by McGettigan.
McGettigan lands with an uppercut that bounces Smith off the cage and back into range.
McGettigan thows a body shot but no joy.
Smith slips a jab from McGettigan.
McGettigan misses with a looping left.
That's two minutes gone in the round.
McGettigan chopping away at his opponent's legs.
McGettigan pulls out of a head kick attempt.
Smith keeping his hands up high there, blocking the jab from McGettigan.
McGettigan stuffs a takedown. It's all about dictating where the fight takes place and McGettigan wants it to stay on the feet.
We've seen a great period of action over the last minute or so - credit to both fighters for going all out!
McGettigan pushing out the jab but it's not landing.
McGettigan throws a body kick but he wasn't in range.
McGettigan's corner calls for a 1-2. McGettigan obliges with the 1 part as he scores the single shot and moves back out of range.
A leg kick checked by Smith.
Smith avoids the body shot from McGettigan.
Smith moves out of range of the body kick.
That's three minutes gone in the round.
Smith ducks under a wild hook from McGettigan.
Smith needs to keep his hands up - McGettigan had a free shot at his head there.
McGettigan throws a right hand that misses
and Smith counters with a shoot takedown. McGettigan fights it but they end up in guard.
If this pace continues, the referee will definitely step in and force a standup.
Smith looking to pass the guard.
Smith throwing strikes from guard but McGettigan blocks nicely.
McGettigan wants to stand and escape but Smith is having none of it.
Smith tries to free his leg and advance position but McGettigan is retaining full guard.
Smith with a flurry of punches that miss.
That's four minutes gone in the round.
Smith postures up and scores with a shot to the body and a follow up elbow to the head.
Smith stands up over McGettigan, holding his feet. He dives back in and lands a decent shot to the head.
Fantastic stuff here - a very entertaining period of action, which has drawn cheers from the crowd.
Smith is looking to work some ground and pound but McGettigan has wrist control.
Smith working some ground and pound from guard but it's not doing any damage.
Smith has been looking to land a fair amount of strikes on the ground. He might be looking to soften his opponent up in order to work for a submission.
Smith drops back looking for a leg! McGettigan is in trouble here! The fighters roll with the hold and McGettigan manages to kick Smith off! Smith jumps back into McGettigan's guard.
McGettigan wants to stand up but Smith is controlling him.
As the round comes to an end the crowd are showing their appreciation for a great round of action.
McGettigan utilising some decent striking defenses from the guard, preventing the ground and pound.
And thats the end of the round the fighters go back to their corners.
Tom McGettigan dominated that round.
The fighters get back to their feet, the hooter sounds and we're back to the action!
McGettigan throws a jab when Smith was well out of range.
McGettigan throws a jab but it's blocked by Smith.
Smith uses some good footwork to avoid the body shot by McGettigan.
Smith takes a body punch that cleary hurt but he's trying not to show any weakness.
McGettigan scores with a reasonable looking shot to the body. Smith doesn't seem bothered though.
Smith moves forwards but McGettigan connects with a nice, crisp jab.
No luck with that takedown attempt from Smith.
McGettigan defends well against a solid takedown attempt from Smith.
McGettigan wants to slow Smith down by chopping away at his legs.
McGettigan takes a swing at Smith's ribcage but misses.
That's one minute gone in the round.
McGettigan throws a hook but Smith avoids it easily.
McGettigan misses with a double jab
and Smith counters with a takedown into full mount! That could mean trouble for McGettigan!
Smith won't let McGettigan get back to his feet... He wants to keep the fight where it is for now.
Smith fakes a shot to the body and cracks his opponent in the head. Nice ground and pound there!
Smith is landing with some decent strikes but McGettigan is trying to advance his position so the referee is letting the fight continue.
Smith trying to control but he's not successful this time.
Smith lands a nice shot to the head.
The crowd cheering loudly, showing their appreciation for the quality fight we're seeing here.
Smith controlling from mount.
That's two minutes gone in the round.
Smith in mount throwing good strikes here, bouncing his opponent's head off the canvas.
Smith prevents McGettigan from getting the reversal.
Smith lands a big elbow.
A nice elbow there by Smith.
The crowd growing excited in anticipation of a finish here! Right on cue, Smith cracks his opponent with a massive right hand that draws loud cheers!
Smith lands a shot to the body, followed up by a shot to the exposed head of his trapped opponent.

McGettigan is rocked!
Smith punishing his opponent with strikes.
McGettigan is still in real trouble! Can Smith finish him?
McGettigan is desperately trying to get back to half guard.
That's three minutes gone in the round.
Smith cracks McGettigan with a big head shot that has him covering up instantly! He's rolled onto his side and the referee has seen enough - this one is aaaaaaaaaaall over!
Ladies and gentlemen, after 3:19 of round 2, we have a winner by way of TKO (Strikes). Mike Smith!
Mike Smith seemed lost for words in his post fight interview but he remembered to thank his fans and directed everyone to his website.
|
|
|
|
|
|
|
|
|
|
|
|
|
|
|
|
|
|
|
|
|
|
|
| S |
C
A |
G |
S |
C
B |
G |
|
S |
C |
G |
|
energy
A | B |
|
hype
A | B |
|
pop
A | B |
|
mgr
A | B |
|
FIGHT
RATING
42% |
|
|
|
|
|
|
|
|
|
|
