 |
CC-VII Jones vs St Looy PBP Commentary |
Undercard bout
|
Coming up we have a featherweight MMA rules bout between Danger Ahead (ranked 0 p4p, 0 weight class) and Michael St Pierre (ranked 0 p4p, 0 weight class). Both fighters will be looking to make this an exciting fight for the fans, I'm sure!
 |
|
 |
| 175 cm
25
145 lbs
0 - 3 - 0 |
|
175 cm
18
150 lbs
0 - 6 - 0 |
BJJ Blue Belt
Excellent boxer
Very quick |
|
BJJ Blue Belt
Basic striking
Granite chin |
|
| |
|
Ladies and gentlemen. This fight is 3 rounds, in the featherweight division.
Introducing the fighter to my left, fighting out of the red corner.
With a record of
0 - 3 - 0, fighting out of Montreal, Danger Ahead!
And introducing the fighter to my right, fighting out of the blue corner.
With a record of
0 - 6 - 0, fighting out of Montreal, Michael St Pierre!
The judges for this bout are Elvis Blanc, Yves DeLean and Trevor Gratis.

The bell rings for round one and we are underway!
Ahead swings away but doesn't land with a series of punches.
Ahead throws a series of punches but St Pierre moves out of range.
Ahead misses with a two punch combination.

St Pierre instigates a clinch.

St Pierre breaks the clinch.
St Pierre closes the distance and clinches up with Ahead, looking for a takedown. St Pierre pushes Ahead against the cage but Ahead circles to the side and manages to break the clinch.
St Pierre moves into the clinch.
St Pierre pushes off and circles away, back to the middle of the mat.
St Pierre tries to clinch up against the cage, rushing in the close the distance. Ahead manages to break the clinch and circles back to the middle of the mat.
A punch combination from Ahead misses.
St Pierre fails with the takedown.
St Pierre misses with a takedown attempt. He shot from a bit too far out.
Danger Ahead has stuffed three takedown attempts in the round now. That's going to take a lot out of Michael St Pierre.
Ahead closes the distance and lands a one-two.
Ahead lunges in with swinging rights and lefts but St Pierre circles away quickly and effectively.
Ahead tries to bum rush St Pierre with a series of wild strikes but St Pierre uses good footwork to avoid the assault.
Ahead throws a combination. St Pierre tries to block but a couple of punches get through.
Ahead throws a series of strikes that have St Pierre backpedaling.

That's one minute gone in the round.
Ahead moves into range and throws a combination. A nice jab followed by a hook to the body.
Ahead lands a two punch combo.
A combination from Ahead does no damage.
A combination from Ahead does no damage.

Ahead gets caught on his heels momentarily as he allows St Pierre to score an easy takedown into full guard.

St Pierre gets to his feet and steps away from his opponent.
St Pierre rushes Ahead and pushes him back against the cage in a clinch.
St Pierre pushes off and circles away, back to the middle of the mat.
Ahead lands a glancing blow to the side of St Pierre's head.
St Pierre moves into range and clinches up with Ahead.
St Pierre scores a nice knee to the body.

That's two minutes gone in the round.
The crowd are loving this. Great action here.
Ahead wants to break the clinch but can't.
Ahead goes for a takedown in the clinch but St Pierre prevents it.
Ahead is breathing heavily.
St Pierre drops to a knee looking for a takedown but Ahead gets the underhooks and prevents it.
The referee is keeping an eye on St Pierre - much more stalling and he will separate the fighters.
St Pierre pushes off and circles away, back to the middle of the mat.
Ahead lands a jab to the head.
Ahead throws a right and a left that St Pierre avoids nicely.

That's three minutes gone in the round.
St Pierre changes levels and drives through with a really nice takedown into side control. Ahead looks really pissed at himself for not defending that better.
Ahead dodges the ground and pound from St Pierre.
Ahead is not content to let St Pierre control the position.
Sloppy strikes there by St Pierre.
St Pierre postures up a little and throws a couple of hammerfists but they don't connect properly.
St Pierre tries to cartwheel into mount but he doesn't manage it.
Sloppy strikes there by St Pierre.

That's four minutes gone in the round.
Ahead is not content to let St Pierre control the position.
The fighters are pressed up against the cage, both looking to find a bit of space to work.
St Pierre taking a breather here.
As the round comes to an end the crowd are showing their appreciation for a great round of action.

St Pierre tries for an arm triangle. That looks pretty tight to me. Is this one over!?! Possibly, maybe, no St Pierre has let go of the choke. Obviously it wasn't as tight as we thought!
And thats the end of the round the fighters go back to their corners.
Michael St Pierre dominated that round.
The fighters get back to their feet, the hooter sounds and we're back to the action!

Ahead throws a lazy right hand but St Pierre sees it coming a mile off and sidesteps it easily.
St Pierre moves forwards but Ahead connects with a nice, crisp jab.
Ahead throws a wild combination but nothing lands.
Ahead tries to keep at a distance but St Pierre has taken the fight into the clinch.
Stalling in the clinch from St Pierre.
St Pierre using the Thai plumb to throw knees but Ahead has his back arched nicely, preventing the strike.
St Pierre has Ahead pressed up against the cage. He's trying to work for a single leg takedown. St Pierre pulls back from the cage and twists to the side, sending Ahead tumbling to the mat - St Pierre dives into Ahead's guard.
St Pierre stands up and looks to throw the legs aside to pass to side control. Ahead swivels though and keeps the full guard.
That's one minute gone in the round.
St Pierre throws and elbow that misses. Ahead uses the momentum to reverse the position. He's now in St Pierre's guard. Nice move by Ahead!
St Pierre looking to control.
Ahead wants to stand and escape but instead St Pierre has hit a sweep and he's now on top in guard.
St Pierre stands up and looks to throw the legs aside to pass to side control. Ahead swivels though and keeps the full guard.
That's two minutes gone in the round.
St Pierre gets to his feet - Ahead follows without any prompting.
St Pierre gets a takedown into half guard.
Both fighters are absolutely exhausted here.
St Pierre is nestled in close to Ahead, controlling him well. He's worked in a nice elbow to the side of the head as well, for good measure.
St Pierre is looking for a kimura. It's going to be difficult to finish that from half guard though and Ahead defends it well.
St Pierre working some ground and pound from close in. He's looking to maintain this position and strike for a while by the looks of things... although he'll probably advance to full mount in a minute now I've said that.
That's three minutes gone in the round.
St Pierre is looking to take a break and control but Ahead is keeping him honest, looking to work from the bottom.
St Pierre with the ground and pound but Ahead uses the opportunity to regain guard.
Ahead keeping moving, preventing St Pierre from controlling successfully.
St Pierreis looking to pass into half guard but Ahead pushes him away with his feet and jumps on top - now Ahead is in guard.
That's four minutes gone in the round.
Ahead wanted to stand there but St Pierre had control of the position.
St Pierre is trying to control the position from the bottom.
St Pierre lands a beautiful switch and he's in full mount! That could spell trouble for Ahead!
St Pierre throws some wild stikes that Ahead manages to avoid easily.
The crowd applaud the fighters efforts here as the round comes to an end.
St Pierre looking to finish with strikes here!
St Pierre throwing strikes but Ahead uses the opportunity to regain half guard.
And thats the end of the round the fighters go back to their corners.
Michael St Pierre showed his class in that round. I'd imagine he'll take it on all the scorecards.
The corners get their ten second warning. Both fighters stand from their stools and stare eachother down, ready to get back to the action. This is the final round!

St Pierre misses with a takedown attempt. He shot from a bit too far out.
St Pierre wants to land a leg kick but Ahead is out of range.
Ahead tries to bum rush St Pierre with a series of wild strikes but St Pierre uses good footwork to avoid the assault.
Ahead misses with a two punch combination.
St Pierre changes levels and drives through with a really nice takedown into side control. Ahead looks really pissed at himself for not defending that better.
St Pierre is trying to land an Americana. He has the arm isolated but Ahead is keeping cool and he's avoided the danger for now.
Ahead stops St Pierre from passing to mount.
Ahead is trying to buck St Pierre off.
Both fighters are breathing heavily.
That's one minute gone in the round.
St Pierre throwing shots but missing, from side control.
Ahead wants to get back to his feet but St Pierre is dominant here and he's now got Ahead's back!
Ahead prevents St Pierre from getting a body triangle.
What can Ahead do to escape this position? He's going to have to figure it out pretty quick if he wants to stay in the fight!
St Pierre throwing wild punches that miss their target.
That's two minutes gone in the round.
St Pierre gets his hooks in and is throwing strikes.
St Pierre is working really hard to secure the rear naked choke. Ahead defends successfully for a significant amount of time. Both fighters are looking very determined.
St Pierre is looking to finish the fight by rear naked choke. Ahead knows exactly what he's got planned though, so he's defending well. Maybe a few strikes would soften Ahead for a finish.
St Pierre trying to control momentarily.
That's three minutes gone in the round.
St Pierre lands with a hammerfist to the side of Ahead's head.
St Pierre sinks in the hooks and is looking for the choke. He's got it! Ahead taps out!
Ladies and gentlemen, after 3:42 of round 3, we have a winner by way of Submission (RNC). Michael St Pierre!
|
|
|
|
|
|
|
|
|
|
|
|
|
|
|
|
|
|
|
|
|
|
|
| S |
C
A |
G |
S |
C
B |
G |
|
S |
C |
G |
|
energy
A | B |
|
hype
A | B |
|
pop
A | B |
|
mgr
A | B |
|
FIGHT
RATING
55% |
|
|
|
|
|
|
|
Undercard bout
|
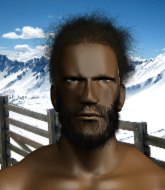
Coming up we have a light heavyweight MMA rules bout between Viktor Bellic (ranked 0 p4p, 0 weight class) and Troy Landry (ranked 0 p4p, 0 weight class). I'm sure you'll be fascinated to know that I was talking to some pointless Z list celebrity before the fight and he thought that Troy Landry was going to win. Let's see if he was right.
 |
|
 |
| 179 cm
21
215 lbs
0 - 2 - 0 |
|
185 cm
21
205 lbs
1 - 2 - 0 |
BJJ Blue Belt
Brawler
KO power |
|
BJJ Blue Belt
Good kicks
Heavy handed |
|
| |
|
Ladies and gentlemen. This fight is 3 rounds, in the light heavyweight division.
Introducing the fighter to my left, fighting out of the red corner.
With a record of
0 - 2 - 0, fighting out of Montreal, Viktor Bellic!
And introducing the fighter to my right, fighting out of the blue corner.
With a record of
1 - 2 - 0, fighting out of Montreal, Troy Landry!
The judges for this bout are Yves DeLean, Elvis Blanc and Robert Douchet.
The bell rings for round one and we are underway!
Bellic shoots in for a double leg but Landry sprawls well. That's going to sap some energy.
Viktor Bellic seems to be the more aggressive standup fighter in this bout.
Bellic fails miserably with a takedown attempt.
Landry tries to close the distance and clinch but Bellic swats him to one side with an open hand palm strike and circles away.
Landry feints and then dives in with a takedown. That was a long way out but the feint bought him enough time to close the distance and complete the takedown. Now we'll play guard for a bit and see who can get the better of that position.
Landry has gone for a leg lock! Bellic slips out almost immediately though and dives into Landry's guard.
Bellic tries to free his leg and advance position but Landry is retaining full guard.
The fighters are pressed up against the cage, both looking to find a bit of space to work.

Bellic drops back for a leg! It's a sloppy attempt though and Bellic jumps back into guard quickly, to retain the dominant position.
Bellic throwing strikes but missing.
Bellic landing some decent shots from guard.
Landry is looking to stand up but Bellic isn't so interested in that idea.
Bellic has been looking to land a fair amount of strikes on the ground. He might be looking to soften his opponent up in order to work for a submission.
That's one minute gone in the round.
Bellic trying to control but Landry is working from the bottom.
Bellic throwing strikes from guard but Landry blocks nicely.
Landry is working an open guard here, looking to improve his position. No doubt that will leave him open to counters but at least he's being more offensive.
Bellic slips effortlessly into side control - very nice.
Bellic trying to control the action but Landry is working from the bottom.
Sloppy strikes there by Bellic.
That's two minutes gone in the round.
Landry is looking to reverse the position.
Landry is trying to control Bellic's posture but Bellic avoids it.

Bellic decides to stand back up.

Bellic dives in and scores a takedown into Landry's guard.
Landry being controlled here, momentarily.
This has been an exciting period of action!
Bellic stops Landry from standing up.
Landry tries to land a sweep but no joy.
Landry is adopting a defensive guard.
Bellic stands and steps away. Landry gets to his feet too and we're back to the striking game.
That's three minutes gone in the round.
Landry looks for a takedown but Bellic sprawls well.
Landry looks gassed!
Nice sprawl there from Bellic as Landry shoots in.
Bellic looks frustrated there after his takedown attempt is stuffed easily.
That's three failed takedown attempts in the round for Viktor Bellic. That's going to take a lot out of him.
Bellic fails to land the takedown.
Bellic shoots in looking for a takedown. Landry tries to sprawl out of it but Bellic keeps driving through. The fighters are pinned against the cage. Landry manages to get underhooks and after a bit of a struggle, circles away and we're back to standing.
Bellic leaves Landry with his face pressed against the mat as he sprawls beautifully, defending against a solid takedown attempt.
Bellic closes the distance and clinches up, looking for a takedown. He shifts his weight and gets a nice trip into half guard.
Bellic looking for a kimura but he'll have to free his other leg if he wants to finish that. Perhaps he's just using it as a distraction technique.
The ref warns both fighters not to hold the cage as they work up against the meshing.
That's four minutes gone in the round.
Bellic tries to stand and escape but Landry is controlling the position.
Landry is trying to stand back up but Bellic is controlling him
Bellic throwing punches and elbows but they're not doing any damage.
Landry tries to get to full guard but Bellic has control of the leg.
As the round comes to an end the crowd are showing their appreciation for a great round of action.
Bellic seems to be looking for submissions.
Still in half guard, Bellic seems content to control.
And thats the end of the round the fighters go back to their corners.
Viktor Bellic dominated that round.
The minute break is over - no more time for sponges and pep talks - back to the action!
A momentary lapse in concentration from Landry enables Bellic to shoot in and score with a neat double leg. Landry manages to secure a closed guard as the fighters hit the mat.
Bellic is pushing down on Landry's leg trying to pass to half guard. Landry is fighting to maintain full guard but Bellic has managed to sneak the leg through.
Landry wants to control but Bellic is keeping busy.
Bellic is looking to take a break and control but Landry is keeping him honest, looking to work from the bottom.
Bellic passes the guard and advances to mount!
Bellic is standing up, even though he is in mount.
Landry looks for a takedown here. Will he get it? Bellic is fending him off so far but Landry persists. Nope, Bellic circles away and we're back to standing.
That's one minute gone in the round.
Bellic shoots in but no luck this time.
Landry scores with a kick to the midsection.
Both fighters are absolutely exhausted here.
Bellic looks frustrated there after his takedown attempt is stuffed easily.
Bellic misses with a takedown attempt. He shot from a bit too far out.
That's three failed takedown attempts in the round for Viktor Bellic. That's going to take a lot out of him.
Bellic gets tackled into the cage by Landry. Landry maintains the clinch.
Landry fails to pull the fight into his guard.
Bellic wants to break free. God knows he wants to breaaaak freeee.
Landry slowing the pace effectively.
Landry manages to break the clinch.
Landry ducks low and lands a nice hook to the body of his opponent.
Landry rushes Bellic and presses him up against the cage.
Landry fails to pull guard.
That's two minutes gone in the round.
Landry breaks the clinch and we return to the middle of the mat.
The crowd are loving this. Great action here.
Landry fails with a takedown attempt.
Bellic looks for a takedown but Landry sprawls well.
Landry clinches with his opponent.
Bellic missing with knees to the body.
Bellic tries to pull guard but Landry won't allow it.
Bellic prevents a takedown attempt there.

Bellic's corner calls for him to break the clinch, which he does.
Landry tries to score a power double leg takedown but Bellic sees that one coming and sprawls well. That will dishearten Landry somewhat.
Landry fakes a head shot and lands one to the body.
That's three minutes gone in the round.
A telegraphed takedown attempt from Bellic is defended easily by Landry.
Landry moves into range and clinches up with Bellic.
Bellic wants to break free. God knows he wants to breaaaak freeee.
Bellic is trying to break the clinch but Landry has him pressed against the cage.
Landry has managed to pull guard. Let's see whether he can work an aggressive guard. It will also be interesting to see what tactics Bellic uses from the top position.
Bellic preventing the sweep.
Landry working a defensive guard here.
Landry is looking for a triangle but Bellic pushes his legs off easily.
That's four minutes gone in the round.
Bellic trying to land body shots but he keeps hitting the mat.
Bellic throwing strikes from guard but Landry blocks nicely.
Bellic stops Landry from standing up.
Bellic stands up and waves to Landry to follow him.
Bellic shoots in and gets a takedown into Landry's guard.
The fans in attendance giving it up for the two fighters, who have really let it all hang out in the last minute or so!
As the round comes to an end the crowd are showing their appreciation for a great round of action.
Bellic is working the ground and pound from guard. He might want to try advancing position though to get more of an impact.
Bellic pressing down on his opponent's thigh, looking to pass guard. Landry is keeping the position for now.
Landry is working from a closed guard but he's struggling to control his opponent.
And thats the end of the round the fighters go back to their corners.
That was a close second round but I would say that Viktor Bellic will probably get the nod.
That's time! Back to the action! This is the final round!
Landry lunges in with swinging rights and lefts but Bellic circles away quickly and effectively.
Bellic fails with the takedown.
Bellic shoots in looking for a takedown but Landry manages to keep the fight standing, pushing Bellic's face into the canvas for good measure before circling away.
Landry is looking to clinch but Bellic is avoiding it.
Landry lands a jab.
Bellic looks for a takedown here. Will he get it? Landry is fending him off so far but Bellic persists. Nope, Landry circles away and we're back to standing.
That's three failed takedown attempts in the round for Viktor Bellic. That's going to take a lot out of him.
Landry looking to shoot here. He's gone for it and he's landed a takedown into mount! Oh, that's bad for Bellic!
Landry has his opponent pinned against the cage, landing some nasty ground and pound that is really making a bit of a mess out of Bellic's face.
The crowd cheering loudly, showing their appreciation for the quality fight we're seeing here.
Landry looking to finish Bellic with some ground and pound. This is bad for Bellic!
That's one minute gone in the round.
Landry raining down hammerfists from mount.
Both fighters are breathing heavily.
Landry is in the full mount, landing strikes.
Landry tries to control but Bellic wriggling away.
Landry content just to control the position here.
Landry unloading with bombs!
Landry can't quite control the action as he would like just now, as Bellic is looking to escape.
That's two minutes gone in the round.
Bellic is looking to get to half guard.
Landry landing strikes from the mount.
That's three minutes gone in the round.
Landry wants to control the pace but Bellic is squirming around nicely.
Bellic wants to hold on but Landry pushes him away.
Viktor Bellic overall seems to be getting the better of the ground position in the fight so far.
Bellic is in a bad position, trying to hold on for dear life but he is really struggling to maintain any sort of control.
Bellic gets back to half guard.
Landry sitting and controlling from the half guard.
If this pace continues, the referee will definitely step in and force a standup.

The ref stands the fighters back up. Troy Landry was stalling too much, according to the referee.
Landry lands with a two punch combination before moving back out of range.

It looks like Viktor Bellic has been cut.
Landry scores with a head kick.

Bellic is rocked!
That's four minutes gone in the round.
We've seen a great period of action over the last minute or so - credit to both fighters for going all out!
Landry tries to shoot in for a takedown. He's got hold of a leg but Bellic swivels and escapes.
Jab, cross, leg kick. Nice combination by Landry!
Bellic doesn't succeed with the takedown
and Landry counters with a big head kick but Bellic shrugs it off.
Bellic shoots in looking for a takedown. Landry tries to sprawl out of it but Bellic keeps driving through. The fighters are pinned against the cage. Landry manages to get underhooks and after a bit of a struggle, circles away and we're back to standing.
Bellic misses with a takedown
and Landry counters with a nice double leg into half guard.
Landry passes the guard and advances to mount!
Bellic wants to try and get back to his feet.
And that's the end of the fight!
Troy Landry comfortably won the final round on my scorecard.
I think Bellic has won this one but let's see what the judges have to say. Over to the ring announcer for the scorecards.
Ladies and gentlemen, after 3 rounds of action, we go to the scorecards for a decision.
Judge Yves DeLean scores the fight 29:28
Judge Elvis Blanc scores the fight 29:28
Judge Robert Douchet scores the fight 29:28
In favor of your winner, by unanimous decision... Viktor Bellic!
After the big win, Viktor Bellic made sure to do all the important stuff like thanking his sponsors Charlie Wang's Tattered Rags-$10 or less & Laundry and telling the interviewer how much he loves him.
|
|
|
|
|
|
|
|
|
|
|
|
|
|
|
|
|
|
|
|
|
|
|
| S |
C
A |
G |
S |
C
B |
G |
|
S |
C |
G |
|
energy
A | B |
|
hype
A | B |
|
pop
A | B |
|
mgr
A | B |
|
FIGHT
RATING
96% |
|
|
|
|
|
|
|
Undercard bout
|
|
|
|
Undercard bout
|
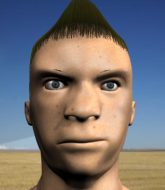
Coming up we have a featherweight MMA rules bout between Jackob Keen (ranked 0 p4p, 0 weight class) and Lenny Rodman (ranked 0 p4p, 0 weight class). Over to our ring announcer for the fighter introductions!
 |
|
 |
| 170 cm
18
152 lbs
0 - 0 - 0 |
|
180 cm
22
155 lbs
1 - 2 - 0 |
BJJ Blue Belt
Counter striker
Prefers standup |
|
BJJ White Belt
Excellent boxer
Granite chin |
|
| |
|
Ladies and gentlemen. This fight is 3 rounds, in the featherweight division.
Introducing the fighter to my left, fighting out of the red corner.
With a record of
0 - 0 - 0, fighting out of Montreal, Jackob Keen!
And introducing the fighter to my right, fighting out of the blue corner.
With a record of
1 - 2 - 0, fighting out of Montreal, Lenny Rodman!
The judges for this bout are Gregory Folan, Dillan Fox and Elvis Blanc.
The bell rings for round one and we are underway!
Keen tries to clinch but Rodman moves out of range.
Rodman pivots, looking for a leg kick but Keen is out of range and Rodman settles back down.
Keen tries to clinch up
and Rodman counters with a straight right hand.
Keen cracks Rodman with a hook to the jaw. Both fighters smile at eachother and high-five before getting back down to business.
Rodman rushes Keen and presses him up against the cage.
Keen tries to pull guard but Rodman won't allow it.
Rodman pulls Keen into guard.
Keen drops back for a leg! It's a sloppy attempt though and Keen jumps back into guard quickly, to retain the dominant position.
Keen drops back for a leg! It's a sloppy attempt though and Keen jumps back into guard quickly, to retain the dominant position.
Keen thinks about going for a leg but decides against it, in order to maintain the position.
Keen pushing down on Rodman's thigh, trying to pass to half guard. He's managed it... Nice work.
The ref warns both fighters not to hold the cage as they work up against the meshing.
That's one minute gone in the round.
Keen looking for a kimura but he'll have to free his other leg if he wants to finish that. Perhaps he's just using it as a distraction technique.
Keen seems to be working for a kimura but Rodman defends the submission attempt.
Keen is sneakily working for an arm triangle but Rodman sees it coming and defends easily.
Rodman really doesn't want to stay on the ground with Keen. If he can't get it back to his feet, it's only a matter of time before he'll be tapping out.
Rodman wants to get back to full guard.
Rodman looking for submissions from an awkward position here.
Keen is trying to work for a kimura but Rodman is defending well.
Rodman is defending against the submission attempts here by Keen.
That's two minutes gone in the round.
Rodman is looking to control Keen's leg but it's slowly edging free. Can Rodman avoid being mounted?
Rodman wants to get back to his feet.
Keen is working for a submission here. He's got hold of the far side arm and he's looking for a kimura. He's cranking on the arm and he's got it! Rodman is tapping out! Ouch, that looked like it hurt!
Ladies and gentlemen, after 2:47 of round 1, we have a winner by way of Submission (Kimura). Jackob Keen!
Jumping up and down and very excited, Jackob Keen waved his t-shirt featuring Charlie Wang's Tattered Rags-$10 or less & Laundry's logo in front of the cameras.
|
|
|
|
|
|
|
|
|
|
|
|
|
|
|
|
|
|
|
|
|
|
|
| S |
C
A |
G |
S |
C
B |
G |
|
S |
C |
G |
|
energy
A | B |
|
hype
A | B |
|
pop
A | B |
|
mgr
A | B |
|
FIGHT
RATING
42% |
|
|
|
|
|
|
|
Undercard bout
|
|
|
|
Undercard bout
|
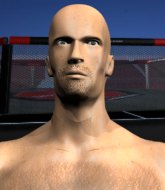
Coming up we have a light heavyweight MMA rules bout between Adam Wiggins (ranked 0 p4p, 0 weight class) and Tyler Durden (ranked 0 p4p, 0 weight class). The crowd seem to be enjoying Durden's choice of entrance music: Jeru da Damaja- Can't Stop The Prophet. These two fighters really are very evenly matched on the feet - it will be fascinating to see who can assert themselves in that aspect of the fight.
 |
|
 |
| 188 cm
22
205 lbs
1 - 2 - 1 |
|
186 cm
23
205 lbs
1 - 0 - 0 |
BJJ Blue Belt
Counter striker
Cuts easily |
|
BJJ Blue Belt
Counter striker
Granite chin |
|
| |
|
Ladies and gentlemen. This fight is 3 rounds, in the light heavyweight division.
Introducing the fighter to my left, fighting out of the red corner.
With a record of
1 - 2 - 1, fighting out of Montreal, Adam Wiggins!
And introducing the fighter to my right, fighting out of the blue corner.
With a record of
1 - 0 - 0, fighting out of Montreal, Tyler Durden!
The judges for this bout are Elvis Blanc, Ian Loll and William Peck.
The bell rings for round one and we are underway!
Durden uses good footwork to avoid the strikes from Wiggins.
Durden uses good footwork to get in and out, landing a nice hook.
Durden scores with a nice strike.
It looks like Adam Wiggins has been cut.
Tyler Durden seems to be the more aggressive standup fighter in this bout.
Durden wings a very wild body shot but it does the job and lands to the midsection.
Durden throws a body kick but he wasn't in range.
Durden tries to score with an inside leg kick but telegraphs it and Wiggins is able to avoid easily.
Durden throws a quick inside leg kick.
Donk. Durden catches Wiggins right on the button with a cross.
The fans in attendance giving it up for the two fighters, who have really let it all hang out in the last minute or so!
Durden cracks Wiggins with a right hand to the side of the head.
The sound of bone on bone echoes around the arena as Durden checks a leg kick.
That's one minute gone in the round.
Durden looks to land a right hand but Wiggins moved out of range.
Wiggins stuffs a takedown. It's all about dictating where the fight takes place and Wiggins wants it to stay on the feet.
Wiggins throws a sloppy head kick and Durden moves out of range easily.
Durden gets a takedown into half guard.
The ref warns both fighters not to hold the cage as they work up against the meshing.
Wiggins is looking for a sweep. Durden is wise to his cunning plan and keeps the top position.
Durden trying to control the action but Wiggins is working from the bottom.
That's two minutes gone in the round.
Durden is thinking about going for an arm triangle but he can't free his leg.
Durden missing with the ground and pound from half guard.
Wiggins looks like he's trying to stand up.
Durden wants to pass the guard but Wiggins is defending well.
The fighters are pressed up against the cage, both looking to find a bit of space to work.
That's three minutes gone in the round.
The referee calls for the fighters to work.
Durden is pressing down on Wiggins's thigh, looking to free his foot. Wiggins is holding on for now.
Durden perhaps working for something from half guard, or maybe not. It looks like he's just sitting there.
The ref stands the fighters back up, due to lack of action by Tyler Durden.
Durden is looking to chop away at Wiggins's legs.
Wiggins walks into a straight right hand from Durden.
Durden throws a leg kick but Wiggins sees it coming and checks it nicely.
That's four minutes gone in the round.
Horrible takedown by Wiggins or perhaps it was just good defense by Durden which made him look bad.
Wiggins plants his feet and lands a nice head kick!
Wiggins throws a body kick that digs right into the meat.
Durden uses some good footwork to avoid the body shot by Wiggins.
Durden scores with a nice head shot.
As the round comes to an end the crowd are showing their appreciation for a great round of action.
Wiggins throws a leg kick but Durden moved away.
Durden throws a sloppy head kick and Wiggins moves out of range easily.
And thats the end of the round the fighters go back to their corners.
Tyler Durden dominated that round.
The cut man is working on Adam Wiggins's cut.
That's the end of the round. The referee orders the cornermen out of the cage so we can get back down to business.
Wiggins moving in and out of range nicely, whilst landing the scoring shot.
Wiggins thumps Durden with a low kick.
Wiggins throws a right hand that Durden ducks under and follows up with a left that Durden also avoids with ease.
Ouch! a nice leg kick from Durden, right into the meat.
Durden misses the shot to the body.
Wiggins tries to clinch up but Durden circles away and keeps his distance.
Durden tests Wiggins's chin there with a solid looking shot.
Durden shoots in looking for a takedown. Wiggins tries to sprawl out of it but Durden keeps driving through. The fighters are pinned against the cage. Wiggins manages to get underhooks and after a bit of a struggle, circles away and we're back to standing.
That's one minute gone in the round.
Durden throws a jab when Wiggins was well out of range.
Wiggins throws a body kick that misses.
Wiggins ducks under a wild hook from Durden.
Wiggins tries to land with a swinging hook to the body but Durden was well out of range. Poor timing from Wiggins.
Durden pulls out of a head kick attempt.
That's two minutes gone in the round.
Well. There's a bit of a lull in the action here and the crowd are starting to get restless.
Durden lands with a good body shot.
Wiggins walks into a left hand.
Tyler Durden seems to be getting the better of the standup.
Durden shoots in for a takedown from distance. He catches Wiggins napping and manages to drive through into side control!
Durden prevents Wiggins from escaping the position.
Wiggins manages to land a sweep and he's now on top! Lovely Jiu Jitsu!
Durden is refusing to be controlled, as Wiggins sits in half guard.
Durden manages to escape and get back to his feet!
That's three minutes gone in the round.
Durden is looking for a takedown here. He's shot in and has managed to get it, finishing up in Wiggins's half guard.
Durden trying to advance position but Wiggins counters by regaining guard.
Wiggins is working an open guard here, looking to improve his position. No doubt that will leave him open to counters but at least he's being more offensive.
Durden gets to his feet. Wiggins looking to butt scoot but the ref puts an end to that. On your feet son!
That's four minutes gone in the round.
A slow jab from Wiggins misses its intended target.
Durden connects with a slap. Keep your fist closed son.
Durden gets a double leg takedown into Wiggins's guard.
Wiggins is looking to stand up but Durden isn't so interested in that idea.
Both fighters are absolutely exhausted here.
The fighters are starting to get a bit slippery now, which will make submissions a bit more difficult.
Durden stands and steps away. Wiggins gets to his feet too and we're back to the striking game.
The fans in attendance giving it up for the two fighters, who have really let it all hang out in the last minute or so!
As the round comes to an end the crowd are showing their appreciation for a great round of action.
Durden shoots in looking for a single leg takedown. Wiggins is trying to defend but Durden finishes it well and ends up in half guard. Let's see if he can advance position further.
Durden keeping composed on the top, looking to control the action.
And thats the end of the round the fighters go back to their corners.
Tyler Durden showed his class in that round. I'd imagine he'll take it on all the scorecards.
The cut man is working on Adam Wiggins's cut.
OK. That's time! The bell goes and we're back to the action. Let's hear some noise people - this is the final round!
Durden fakes the leg kick and cracks Wiggins in the body.
Wiggins goes for a spinning back kick but it misses.
A telegraphed takedown attempt from Durden is defended easily by Wiggins.
Durden throws a head kick that misses.
Durden scores with a jab to the body.
Wiggins throws a head kick that misses.
That's one minute gone in the round.
Wiggins throws the kick towards the body but Durden avoids it.
Durden throws the overhand right but ducks down into a quick takedown attempt. Wiggins was covering up waiting for the punch and Durden finishes the takedown easily into guard.
Wiggins keeping moving, preventing Durden from controlling successfully.
Wiggins is looking to stand up but Durden isn't so interested in that idea.
Durden scoring with some ground and pound.
That's two minutes gone in the round.
Durden being controlled here momentarily.
Tyler Durden has got the better of the ground game so far.
Durden trying to pass the guard but can't manage it just yet.
The referee wants the fighters to be more active or he's going to reset them on the feet.

The ref stands the fighters back up because Adam Wiggins just wasn't active enough.
Wiggins doesn't react quick enough there as he takes a shot to the body.
Both fighters are breathing heavily.
That's three minutes gone in the round.
Durden lets the fists fly and connects with a left straight followed by a right hook.
Crunch! Wiggins slams his shin into Durden's torso.
Durden slips in close and lands a nice hook before moving back out of range.
Wiggins closes the distance and clinches up with Durden, looking for a takedown. Wiggins pushes Durden against the cage but Durden circles to the side and manages to break the clinch.
Wiggins throws a leg kick but Durden checks it.
Tyler Durden is looking to throw some combinations by the looks of things.
The sound of bone on bone echoes around the arena as Wiggins checks a leg kick.
Wiggins connects with an inside leg kick.
Wiggins throws a decent looking leg kick but it doesn't land clean.
Tyler Durden is fighting for a decision - hopefully he's judged it right and he's actually winning the fight.
That's four minutes gone in the round.
Durden throws a front kick that sends Wiggins stumbling back into the cage.
Durden shoots in but Wiggins avoids the takedown attempt easily.
A nice combination there by Durden.
Wiggins moves out of range as Durden strikes.
The crowd applaud the fighters efforts here as the round comes to an end.
Durden stuffs the takedown.
Adam Wiggins has stepped it up - he knows he needs a finish here!
Durden drives through with a really nice takedown into side control.
And that's the end of the fight!
Tyler Durden comfortably won the final round on my scorecard.
Well Durden has outworked and out performed his opponent in all aspects of the game today. He was simply too good and the decision should be no more than a formality. Over to the ring announcer for the scorecards.
Ladies and gentlemen, after 3 rounds of action, we go to the scorecards for a decision.
Judge Elvis Blanc scores the fight 27:30
Judge Ian Loll scores the fight 27:30
Judge William Peck scores the fight 27:30
In favor of your winner, by unanimous decision... Tyler Durden!
|
|
|
|
|
|
|
|
|
|
|
|
|
|
|
|
|
|
|
|
|
|
|
| S |
C
A |
G |
S |
C
B |
G |
|
S |
C |
G |
|
energy
A | B |
|
hype
A | B |
|
pop
A | B |
|
mgr
A | B |
|
FIGHT
RATING
42% |
|
|
|
|
|
|
|
Undercard bout
|
Coming up we have a welterweight MMA rules bout between Dylan Howard (ranked 0 p4p, 0 weight class) and Tony Mann (ranked 0 p4p, 0 weight class). Howard comes into the arena with My Hero blaring out of the sound system. Tony Mann struggled to make weight for this fight. He only made it down to 171.2lbs at the first attempt and had to take the additional two hours to make the official bout weight. Let's see how much it's taken out of him. Both these guys have really solid chins. Will we see a standup war or will they both decide that a knockout is unlikely and try to win the fight elsewhere?
 |
|
 |
| 170 cm
23
180 lbs
2 - 2 - 0 |
|
176 cm
25
180 lbs
2 - 0 - 0 |
Decent wrestler
Basic striking
Granite chin |
|
BJJ Blue Belt
Decent boxing
Solid chin |
|
| |
|
Ladies and gentlemen. This fight is 3 rounds, in the welterweight division.
Introducing the fighter to my left, fighting out of the red corner.
With a record of
2 - 2 - 0, fighting out of Montreal, Dylan Howard!
And introducing the fighter to my right, fighting out of the blue corner.
With a record of
2 - 0 - 0, fighting out of Montreal, Tony Mann!
The judges for this bout are Yves DeLean, William Peck and Elvis Blanc.
The bell rings for round one and we are underway!
Howard closes the distance, clinches up and gets a nice trip takedown into side control. Very smooth.
The fighters are pressed up against the cage, both looking to find a bit of space to work.
Mann tries to slip a leg under to move to half guard but Howard presses down on the leg and jumps into full mount!
Howard connects with a couple of good shots from mount.
Howard scoring with some good ground and pound from mount here. Will he manage to finish Mann?
Howard landing strikes, looking to finish!
The crowd cheering loudly, showing their appreciation for the quality fight we're seeing here.
BOOM! Howard connects with a massive shot to the dome!
The referee warns Mann that he has to improve his position here as he takes two more clean shots to the head.
Howard controlling from the full mount.
Mann can't escape the position.
Howard working to secure an arm triangle but it's not happening for him just yet.
Howard postures up and cracks his opponent a couple of times before moving back into close ground control. Mann looks a forlorn figure.
Howard unloads with some vicious shots from mount and Mann wants out - he looks towards the referee who steps in to save him! Howard celebrates on the cage and the crowd goes wild!
Ladies and gentlemen, after 1:01 of round 1, we have a winner by way of TKO (Strikes). Dylan Howard!
A very excited looking Dylan Howard made sure he remembered to thank all the fans both in the arena and on the internet. He said all the coolest people spend all day on MMA websites, which got a big reaction.
|
|
|
|
|
|
|
|
|
|
|
|
|
|
|
|
|
|
|
|
|
|
|
| S |
C
A |
G |
S |
C
B |
G |
|
S |
C |
G |
|
energy
A | B |
|
hype
A | B |
|
pop
A | B |
|
mgr
A | B |
|
FIGHT
RATING
81% |
|
|
|
|
|
|
|
Undercard bout
|
|
|
|
Co-main event
|
|
|
|
Main event
|
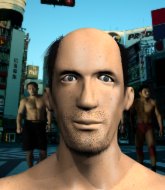
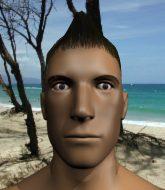
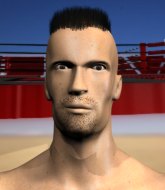
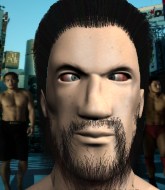
Coming up we have a featherweight MMA rules bout between Deon Jones (ranked 0 p4p, 0 weight class) and Marty St Looy (ranked 0 p4p, 0 weight class). Chooooooooon! I think Jones might be my favorite fighter, now he's come out to You Aint Stoppin Me. Both fighters will be looking to make this an exciting fight for the fans, I'm sure!
 |
|
 |
| 175 cm
24
155 lbs
2 - 0 - 0 |
|
168 cm
19
153 lbs
2 - 0 - 1 |
BJJ Blue Belt
Basic striking
Good chin |
|
BJJ Purple Belt
Counter striker
Determined |
|
| |
|
Ladies and gentlemen. This fight is 5 rounds, for the featherweight championship of the world!
Introducing the champion to my left, fighting out of the red corner.
With a record of
2 - 0 - 0, fighting out of Montreal, Deon Jones!
And introducing the challenger to my right, fighting out of the blue corner.
With a record of
2 - 0 - 1, fighting out of Montreal, Marty St Looy!
The judges for this bout are Ian Loll, William Peck and Elvis Blanc.
The bell rings for round one and we are underway!
St Looy shoots in for a takedown but Jones shows good takedown defense.
Jones tries to clinch up against the cage, rushing in the close the distance. St Looy manages to break the clinch and circles back to the middle of the mat.
Jones tries to clinch but St Looy moves away
and St Looy counters with a driving takedown into guard. Nice work there by St Looy.
We've had a lack of effective grappling in the last minute or so, which could well see a referee standup.
St Looy trying to control but Jones is working from the bottom.
St Looy is trying to work a guillotine from the top, or something like that? Don't know how he thinks he's going to get a finish from there.
St Looy sneaks a leg through and gets to half guard. That was like a knife through butter how easily he passed Jones's guard.
St Looy looking for a kimura but he'll have to free his other leg if he wants to finish that. Perhaps he's just using it as a distraction technique.
Jones is trying to stand up here but St Looy is controlling him well.
That's one minute gone in the round.
St Looy is trying a forearm choke
I don't think that's going to do much at this level of the game.
St Looy wants to take a breather but Jones is having none of it.
St Looy is thinking about going for an arm triangle but he can't free his leg.
Jones looks like he's trying to stand up.
Jones trying to control from the bottom.
That's two minutes gone in the round.
St Looy wants to pass the guard but Jones is defending well.
St Looy is working for submissions here but there's nothing on.
St Looy trying to control from half guard but Jones is working away.
The fighters are pressed up against the cage, both looking to find a bit of space to work.
Jones wants to get back to his feet.
Jones has no desire to be mounted, so is trying to control. St Looy is working away from the top position though.
St Looy trying to control from half guard but Jones is working away.
St Looy is looking for a kimura but Jones is holding onto that half guard position, so it's hard for St Looy to get the leverage.
That's three minutes gone in the round.
Jones avoiding damage under a succession of punches from St Looy.
St Looy wants to pass the guard but Jones is defending well.
St Looy looking for a kimura but he'll have to free his other leg if he wants to finish that. Perhaps he's just using it as a distraction technique.
St Looy is working for submissions here but there's nothing on.
Jones is refusing to be controlled, as St Looy sits in half guard.
That's four minutes gone in the round.
St Looy is trying to work for a kimura. This could be trouble! No, Jones has managed to free his arm - good work.
Jones keeps control of the position for the meantime.
Jones wants to get back to his feet.
The crowd applaud the fighters efforts here as the round comes to an end.
St Looy passes to full mount!
Jones really trying hard to get back to half guard here.
And thats the end of the round the fighters go back to their corners.
Marty St Looy dominated that round.
OK. That's time! The bell goes and we're back to the action.
The fight stays on the outside here - Jones looks like he's thinking about clinching though.
St Looy shoots in but Jones avoids the takedown attempt easily.
Jones decides to change it up a bit and drives through with a nice takedown into half guard.
St Looy trying to control here.
St Looy slips a foot under and gets full guard. Nice work.
St Looy controls Jones momentarily but Jones frees himself.
Jones throws a big right hand that misses.
That's one minute gone in the round.
Jones lands a couple of decent looking shots.
Jones trying to control the position from guard on top but St Looy is wriggling around, looking for whatever he can.
St Looy throwing his legs up looking for a triangle.
St Looy tries to land a sweep but no joy.
St Looy looking to control.
St Looy has a loose triangle. He'll be looking to tighten that up but Jones can see exactly what he's planning and manages to posture up and free himself.
St Looy has his foot on Jones's thigh. He's trying to push off and get in position for a triangle, I think. Jones works his way back into a safe position though.
The ref warns both fighters not to hold the cage as they work up against the meshing.
St Looy looking for a triangle here. Jones is fighting it but it looks tight! St Looy pulls the arm across and this one won't last much longer! Nope, Jones is tapping out - this one is all over!
Ladies and gentlemen, after 2:04 of round 2, we have a winner by way of Submission (Triangle Choke). Marty St Looy!
Marty St Looy is the new featherweight champion!
|
|
|
|
|
|
|
|
|
|
|
|
|
|
|
|
|
|
|
|
|
|
|
| S |
C
A |
G |
S |
C
B |
G |
|
S |
C |
G |
|
energy
A | B |
|
hype
A | B |
|
pop
A | B |
|
mgr
A | B |
|
FIGHT
RATING
47% |
|
|
|
|
|
|
|
|
|
|

