 |
What is it bro PBP Commentary |
Undercard bout
|
|
|
|
Undercard bout
|
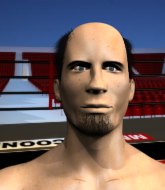
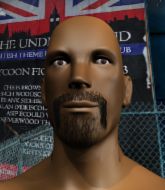
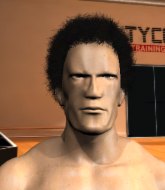
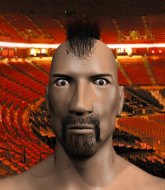
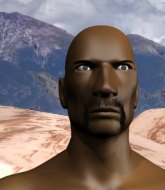
Coming up we have a heavyweight MMA rules bout between Ira Stein (ranked 0 p4p, 0 weight class) and Mega Star (ranked 0 p4p, 0 weight class). Mega Star will no doubt be looking to use his reach advantage to good effect.
 |
|
 |
| 198 cm
21
269 lbs
2 - 4 - 0 |
|
225 cm
18
228 lbs
0 - 1 - 0 |
BJJ White Belt
Excellent boxer
Granite chin |
|
Good wrestler
Brawler
Granite chin |
|
| |
|
Ladies and gentlemen. This fight is 3 rounds, in the heavyweight division.
Introducing the fighter to my left, fighting out of the red corner.
With a record of
2 - 4 - 0, fighting out of Amsterdam, Ira Stein!
And introducing the fighter to my right, fighting out of the blue corner.
With a record of
0 - 1 - 0, fighting out of Amsterdam, Mega Star!
The judges for this bout are Saam Ante, Daniel Blasius and Radbod Blank.

The bell rings for round one and we are underway!
Star misses with a body shot.
Stein looks exhausted already! Oh dear, he should have come in in better shape than this!
Star fails with the takedown.

Star moves into range and clinches up with Stein.

Star's corner calls for him to break the clinch, which he does.
Stein lands with a nice combination. Star backs away looking to recover.
Ira Stein seems to be the more aggressive standup fighter in this bout.
Stein takes a head kick and shrugs it off.
Stein uses good footwork to get in and out and land a nice right hand before Star has time to react.
Stein connects with a lovely jab that went straight through the gap between Star's hands.
Wooooo! Give it up for these two warriors! They are putting on a show!
Stein scores with a hook to the body. Star takes a step back and tries to catch his breath.
Star slips under a jab.
Star misses with a few strikes there.

Star shoots in and gets a takedown into half guard. Star showed some decent athleticism there.
The referee calls for the fighters to work.
Stein might be looking to lock onto one of his opponent's long limbs for a submission, whilst we're on the ground.

That's one minute gone in the round.
Star missing with the ground and pound from half guard.
Star trying to control the pace.
The fighters are trapped in the ropes so we're going to have a reposition here. The ref calls for a break and repositions the fighters in the center of the ring.

The ref calls for a clean break and stands the fighters back up. Mega Star wasn't active enough on the ground.
Star tries a head kick but it misses.
Star shoots in and scores a nice double leg takedown into half guard.
Star trying to pass the guard but Stein defending well.

That's two minutes gone in the round.
Stein is looking to improve his position.
Stein on his back here. We all know that wrestlers don't like being on their back so let's see if Stein tries to get out of the position.
Star trying to control the pace.
The referee is asking the fighters to pick up the pace.
Star tries to pass the half guard into mount. Stein knows what he's doing though and prevents the attempt.

That's three minutes gone in the round.
The ref calls for a clean break and stands the fighters back up. Mega Star wasn't active enough on the ground.
Stein lands an overhand left. A wild punch that just about connected.
Star slips a straight right by Stein.
Stein goes to the watering hole and comes back with a big thumbs up from the judges as he scores a three punch combo.
Star fails with a takedown attempt.
Stein stuffs the takedown.
Ira Stein has stuffed three takedown attempts in the round now. That's going to take a lot out of Mega Star.
Star fails to land with the punch combination there - jab, cross, hook, miss, miss, miss.

That's four minutes gone in the round.
Stein fails to land with a series of punches.
A nice leg kick lands there from Star.
Stein throws the left hand but Star avoids the punch easily.
Star ducks under a wild hook from Stein.
Star feints and then dives in with a takedown. That was a long way out but the feint bought him enough time to close the distance and complete the takedown. Now we'll play guard for a bit and see who can get the better of that position.
Star is taking a break and basically stalling. The referee will not allow him to do that for long.
The crowd cheering loudly, showing their appreciation for the quality fight we're seeing here.
Star advances to half guard.
As the round comes to an end the crowd are showing their appreciation for a great round of action.

Star stands up and beckons Stein to join him on the feet.
Star feints and as Stein raises his hands in defense, Star changes levels and drives through with a takedown into guard.
And thats the end of the round the fighters go back to their corners.
Mega Star dominated that round.
The referee calls time. The cornermen exit stage left and we're back to business.

Star looking to shoot here. He's gone for it and he's landed a takedown into mount! Oh, that's bad for Stein!
Star content just to control the position here.
Star is a painfully thin specimen of a man. You do wonder whether a good body kick would snap him clean in two.
Star lands a big elbow.
Star stands up from the dominant position, so we're back on the feet.
Both fighters are absolutely exhausted here.
Star ducks under a wild hook from Stein.
That's one minute gone in the round.
Star throws a sloppy head kick and Stein moves out of range easily.
Star drives through with a takedown into Stein's guard. Let's see what he can do from the top position.
Star tries to free his leg and advance position but Stein is retaining full guard.
Star with a flurry of punches that miss.
Star pushing down on Stein's thigh, trying to pass to half guard. He's managed it... Nice work.
Star looking to pass the half guard. Not this time.
Star performing his best blanket impression for a moment.
That's two minutes gone in the round.
Star stands up from half guard.
Star will have to do better than that with his takedown attempts.
Star is looking to take this fight into the clinch.
Star closes this distance looking for a takedown but Stein circles away.
Ira Stein is looking to keep the fight on the feet at all costs.
Star drops down and drives through with a powerful takedown into guard.
The fans in attendance giving it up for the two fighters, who have really let it all hang out in the last minute or so!
Star looking to control the position here, rather than advance.
That's three minutes gone in the round.
We must be close to a standup if these guys don't pick up the pace.
Star's corner are shouting for him to control the position and he seems happy to oblige.
OK we're going to have a standup here. Mega Star hasn't been effective enough on the ground and the referee wants a restart.
Star closes the distance and presses his opponent up against the ropes.
That's four minutes gone in the round.
The crowd are hurling abuse towards the fighters... You can hardly blame them though because there isn't a lot going on in the fight.
Star wants a takedown.
Ira Stein has stuffed three takedown attempts in the round now. That's going to take a lot out of Mega Star.
Star breaks the clinch and we're back to striking at distance.
Star fails miserably with a takedown attempt.
Stein paws at his opponent with the jab and then lunges in with a straight, right on the button.
Stein throws a poor cross that misses
and Star decides to take the opportunity to score a takedown. He's landed in Stein's guard.
Star looking to control the position here, rather than advance.
The ref stands the fighters back up, due to lack of action by Mega Star.
Stein tries to check the leg kick but that clearly hurt him.
And thats the end of the round the fighters go back to their corners.
Mega Star showed his class in that round. I'd imagine he'll take it on all the scorecards.
That's time! Back to the action! This is the final round!

Star is looking for a takedown here. He's shot in and has managed to get it, finishing up in Stein's half guard.
Star stalling.
Stein wants to improve his position but Star is controlling well.

Star is looking for a kimura. It's going to be difficult to finish that from half guard though and Stein defends it well.
Both fighters are breathing heavily.
That's one minute gone in the round.
Star performing his best blanket impression for a moment.
The ref stands the fighters back up, due to lack of action by Mega Star.
Stein misses with a hook. Star ducked under it nicely.
Star has closed the distance and engaged Stein in a clinch.
Star ties up his opponent against the ropes and manages to drag the fight down to the ground. Star no doubt will be looking to work submissions from his guard.
The fighters are tangled up in the ropes here. We might need a restart if the fighters can't break free themselves.
Star manages to sweep nicely, so he's now on top. Stein manages to get himself to full guard.
Ira Stein has stepped it up - he knows he needs a finish here!
That's two minutes gone in the round.
Star forces his way into half guard.
Star content to sit in half guard and control for a moment.
Star is working hard to pass the guard. He's done it - he's now in full mount! Trouble for Stein!
That's three minutes gone in the round.
Star postures up and cracks his opponent a couple of times before moving back into close ground control. Stein looks a forlorn figure.
Star controlling the position easily from mount.
Star has control of Stein's right arm, working for a kimura. It's a bit of a token attempt though and Stein regains control of the situation pretty easily.
That's four minutes gone in the round.
Star breaks from Stein's wrist control and lands an elbow.
Star controlling the pace for now.
Star cracks Stein with a nasty head shot there - the crowd let out an audible gasp there, as the noise reverberated around the arena.
And that's the end of the fight!
Mega Star comfortably won the final round on my scorecard.
Well Star has outworked and out performed his opponent in all aspects of the game today. He was simply too good and the decision should be no more than a formality. Over to the ring announcer for the scorecards.
Ladies and gentlemen, after 3 rounds of action, we go to the scorecards for a decision.
Judge Saam Ante scores the fight 27:30
Judge Daniel Blasius scores the fight 27:30
Judge Radbod Blank scores the fight 26:30
In favor of your winner, by unanimous decision... Mega Star!
|
|
|
|
|
|
|
|
|
|
|
|
|
|
|
|
|
|
|
|
|
|
|
| S |
C
A |
G |
S |
C
B |
G |
|
S |
C |
G |
|
energy
A | B |
|
hype
A | B |
|
pop
A | B |
|
mgr
A | B |
|
FIGHT
RATING
51% |
|
|
|
|
|
|
|
Undercard bout
|
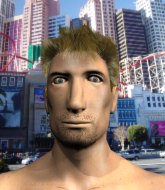
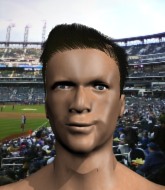
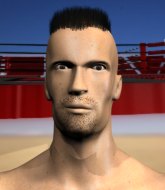
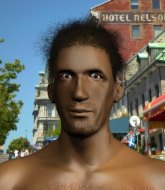
Coming up we have a welterweight MMA rules bout between Dmitri Matyushenko (ranked 0 p4p, 0 weight class) and Johny Bravo (ranked 0 p4p, 0 weight class). There are an array of beautiful celebrities at ringside tonight! I wonder if any of them paid for their tickets.
 |
|
 |
| 189 cm
25
185 lbs
1 - 0 - 0 |
|
190 cm
23
162 lbs
10 - 7 - 0 |
Good wrestling
Basic striking
Very strong |
|
Decent wrestler
Good kicks
Knockout power |
|
| |
|
Ladies and gentlemen. This fight is 3 rounds, in the welterweight division.
Introducing the fighter to my left, fighting out of the red corner.
With a record of
1 - 0 - 0, fighting out of Amsterdam, Dmitri Matyushenko!
And introducing the fighter to my right, fighting out of the blue corner.
With a record of
10 - 7 - 0, fighting out of Amsterdam, Johny Bravo!
The judges for this bout are Albert Achterberg, Saam Ante and Aafke Stam.
The bell rings for round one and we are underway!
Bravo closes the distance and clinches.
Bravo scores with a knee to the head.
A knee to the head by Bravo.
Bravo connects with a knee to the head.
Bravo lands punches inside but they're not really causing much damage.
Matyushenko takes a knee right on the jaw!
Bravo utilising his Muay Thai to score with a knee to the body.
Bravo tries a knee to the head but Matyushenko blocks it.
Matyushenko tries to score a body lock takedown but Bravo shows good agility there to stay on his feet.
Bravo lands a knee to the head there! That was nasty!
Bravo tries a knee to the head but he's missed.
That's one minute gone in the round.
Bravo unloads a knee to the mid-section.
Bravo scores with a shoulder strike.
Bravo lands with a left to the head.
Matyushenko looking for a takedown.
Bravo lands a good knee to the midsection. Matyushenko won't want to take too many of those.
A real battle for position is taking place between these two warriors.

Matyushenko is trying to trip Bravo. He has hold of a leg but Bravo is hopping around, keeping his balance for the moment. Matyushenko persists though and gets the takedown into guard.
The referee is asking the fighters to pick up the pace.
Bravo is trying to stand up but he's not managed so far.
Bravo is a painfully thin specimen of a man. You do wonder whether a good body kick would snap him clean in two.
Matyushenko postures up to throw the ground and pound strikes but they don't connect.
Matyushenko trying to control but Bravo is working from the bottom.
The fighters are trapped in the ropes so we're going to have a reposition here. The ref calls for a break and repositions the fighters in the center of the ring.
That's two minutes gone in the round.
Bravo wants to sweep here but Matyushenko controlling him for the moment.
Matyushenko working some ground and pound from guard but it's not doing any damage.
Matyushenko missing there with some ground and pound from the guard.
Matyushenko is looking to work some ground and pound but Bravo has wrist control.
Matyushenko has been looking to land a fair amount of strikes on the ground. He might be looking to soften his opponent up in order to work for a submission.
Matyushenko wants to control from the top but Bravo keeps moving.
We've seen a great period of action over the last minute or so - credit to both fighters for going all out!
Matyushenko with a flurry of punches that miss.
Matyushenko trying to control the position from guard on top but Bravo is wriggling around, looking for whatever he can.
That's three minutes gone in the round.
Matyushenko missing there with some ground and pound from the guard.
Matyushenko throwing strikes from guard but Bravo blocks nicely.
Matyushenko throwing shots from guard but he's hitting more mat than opponent.
Matyushenko thows a big elbow that misses.
A big thud reverberates around the arena there as Matyushenko accidentally thumps the mat. Hopefully he's not broken his hand.
Bravo avoiding any damage from the ground and pound.
Matyushenko looking to sit in guard and control but Bravo gets the butterfly guard and sweeps. He's now in the guard on the top.
Matyushenko wants to stand but Bravo is controlling the position.
That's four minutes gone in the round.
Bravo works a leg free and moves into half guard.
Matyushenko is trying to stand back up but Bravo is controlling him
Bravo is trying to control. Matyushenko wants to improve his position but can't escape this time.
Matyushenko wants to get back to his feet.
As the round comes to an end the crowd are showing their appreciation for a great round of action.
Bravo looks over to his corner - he wants some instructions but his corner are not responding.
Matyushenko tries to kick Bravo off but Bravo keeps his base steady and stays in half guard.
And thats the end of the round the fighters go back to their corners.
A close round but Johny Bravo will probably get the nod.
The fighters' corners scream their final instructions, as the referee calls time. Here we go, back to the action!
Matyushenko misses with a takedown attempt. He shot from a bit too far out.
Matyushenko stuffs the takedown attempt from Bravo. Bravo gets slowly back to his feet.
Matyushenko looks for a takedown but Bravo sprawls well.
Matyushenko fakes high and shoots in for a takedown but Bravo avoids it really well and circles away.
That's three failed takedown attempts in the round for Dmitri Matyushenko. That's going to take a lot out of him.
Bravo clinches up with Matyushenko and pushes him back against the ropes.
A knee to the head by Bravo.
Matyushenko has hold of a leg and is looking for a trip takedown. Bravo avoids it nicely though and we remain in the clinch.
Bravo creates a bit of space for himself and sneaks an elbow through Matyushenko's defenses.
A nice glancing elbow lands by Bravo.
That's one minute gone in the round.
Bravo crunches a lovely knee into Matyushenko's ribcage.
Matyushenko wants a takedown.
Both fighters are absolutely exhausted here.
Bravo lands a nice elbow from the clinch.
Bravo with a knee to the head.
Bravo connects with a knee to the head.
Bravo lands an uppercut.
Matyushenko is looking for a takedown up against the ropes. Bravo gets underhooks though and prevents the takedown attempt.
Bravo with the Thai clinch, lands a knee to the head.
Bravo lands an elbow inside.
Bravo lands a knee to the head there! That was nasty!

Matyushenko is rocked!
That's two minutes gone in the round.
Matyushenko can't get the takedown.
Bravo using the Thai clinch to land knees to the body.
Bravo scores with a knee to the head.
Oh Matyushenko is still all over the place! His legs are completely gone! Will he be able to recover?!!
Bravo lands a good knee to the midsection. Matyushenko won't want to take too many of those.
Johny Bravo seems to be working more effectively in the clinch in the fight so far.
Bravo working the clinch nicely. Matyushenko is working for position but Bravo cracks him with a big knee to the head! Matyushenko crumples up against the ropes and Bravo lands two more shots before the ref can save Matyushenko! This one is all over!
Ladies and gentlemen, after 2:28 of round 2, we have a winner by way of TKO (Knee & Punches). Johny Bravo!
|
|
|
|
|
|
|
|
|
|
|
|
|
|
|
|
|
|
|
|
|
|
|
| S |
C
A |
G |
S |
C
B |
G |
|
S |
C |
G |
|
energy
A | B |
|
hype
A | B |
|
pop
A | B |
|
mgr
A | B |
|
FIGHT
RATING
53% |
|
|
|
|
|
|
|
Undercard bout
|
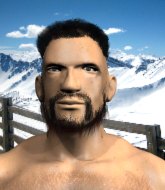
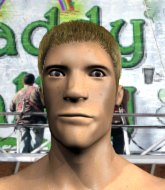
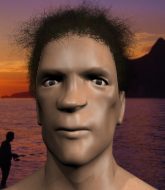
Coming up we have a light heavyweight MMA rules bout between Leonidas Sheynauvah (ranked 0 p4p, 0 weight class) and Kris Maccarinelli (ranked 0 p4p, 0 weight class). We have two fighters making their debuts here, so let's see who comes out of this one with their first professional victory.
 |
|
 |
| 190 cm
18
220 lbs
0 - 0 - 0 |
|
189 cm
25
200 lbs
0 - 0 - 0 |
BJJ White Belt
Excellent MT
Big right hand |
|
BJJ White Belt
Excellent boxer
Determined |
|
| |
|
Ladies and gentlemen. This fight is 3 rounds, in the light heavyweight division.
Introducing the fighter to my left, fighting out of the red corner.
With a record of
0 - 0 - 0, fighting out of Amsterdam, Leonidas Sheynauvah!
And introducing the fighter to my right, fighting out of the blue corner.
With a record of
0 - 0 - 0, fighting out of Amsterdam, Kris Maccarinelli!
The judges for this bout are Saam Ante, Albert Achterberg and Aafke Stam.
The bell rings for round one and we are underway!
Sheynauvah throws a head kick that misses and slips in the process. He scrambles back to his feet and the fighters circle.
Sheynauvah gets cracked with a nice right hand there by Maccarinelli.
Maccarinelli avoids the head kick by Sheynauvah.
Maccarinelli fakes low and throws an overhand right that catches Sheynauvah on the side of the head.
Sheynauvah throws a push kick but Maccarinelli slaps the foot to one side.
Maccarinelli connects with a jab and follows up with a big overhand right! Oh that's hurt Sheynauvah! He's out on his feet! Maccarinelli rushes in and drops Sheynauvah with another big right hand, forcing the referee to stop the fight!
Ladies and gentlemen, after 0:18 of round 1, we have a winner by way of TKO (Punches). Kris Maccarinelli!
|
|
|
|
|
|
|
|
|
|
|
|
|
|
|
|
|
|
|
|
|
|
|
| S |
C
A |
G |
S |
C
B |
G |
|
S |
C |
G |
|
energy
A | B |
|
hype
A | B |
|
pop
A | B |
|
mgr
A | B |
|
FIGHT
RATING
100% |
|
|
|
|
|
|
|
Undercard bout
|
|
|
|
Undercard bout
|
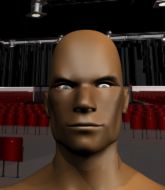
Coming up we have a middleweight MMA rules bout between Suporn Red Gym (ranked 0 p4p, 0 weight class) and Tyrone Spongebob (ranked 0 p4p, 0 weight class). Red Gym kept the crowd waiting but all that was forgotten when his ring entrance music started. The incomparable musical genius that is My time is now. These two fighters really are very evenly matched on the feet - it will be fascinating to see who can assert themselves in that aspect of the fight.
 |
|
 |
| 178 cm
21
189 lbs
4 - 3 - 0 |
|
189 cm
18
192 lbs
1 - 2 - 0 |
Good wrestling
Counter striker
KO power |
|
BJJ White Belt
Excellent MT
Prefers standup |
|
| |
|
Ladies and gentlemen. This fight is 3 rounds, in the middleweight division.
Introducing the fighter to my left, fighting out of the red corner.
With a record of
4 - 3 - 0, fighting out of Amsterdam, Suporn Red Gym!
And introducing the fighter to my right, fighting out of the blue corner.
With a record of
1 - 2 - 0, fighting out of Amsterdam, Tyrone Spongebob!
The judges for this bout are Radbod Blank, Albert Achterberg and Wagner Zegers.
The bell rings for round one and we are underway!
Spongebob displays good takedown defense there as he swats away a double leg from Red Gym.
Red Gym checks a leg kick nicely.
Spongebob defends well against a solid takedown attempt from Red Gym.
Red Gym blocks a head kick by Spongebob.
Red Gym checks a low kick. Bone on bone - not my idea of a good time.
A clash of legs there as Red Gym blocks the low kick.
Red Gym shoots in looking for a takedown but Spongebob manages to keep the fight standing, pushing Red Gym's face into the canvas for good measure before circling away.
That's three failed takedown attempts in the round for Suporn Red Gym. That's going to take a lot out of him.
Red Gym misses with a takedown attempt - Spongebob sprawls well and throws a nice strike on the way out which just misses.
Red Gym fakes a strike and closes the distance, dragging Spongebob to the ground. Red Gym is now in Spongebob's guard.
The referee claps his hands together and tells the fighters to work.
Red Gym postures up and scores with a shot to the body and a follow up elbow to the head.
Red Gym has been looking to land a fair amount of strikes on the ground. He might be looking to soften his opponent up in order to work for a submission.
Spongebob trying to control the position.
Spongebob really doesn't want to stay on the ground with Red Gym. If he can't get it back to his feet, it's only a matter of time before he'll be tapping out.
Red Gym scores with a decent looking elbow strike.
That's one minute gone in the round.
Spongebob had isolated an arm as going for a kimura. Red Gym defends it easily.
Spongebob trying to strike off his back.
Spongebob looking to control.
Red Gym connects with a couple of short punches.
Red Gym chips away with some ground and pound.
Spongebob looking for a guillotine here but Red Gym defends easily.
Red Gym arches his back and unloads with a massive left and a right! Spongebob's eyes roll back into his head, he's out cold! The ref dives in to stop the fight - wow, they were hard shots!
Ladies and gentlemen, after 1:51 of round 1, we have a winner by way of KO (Strikes). Suporn Red Gym!
|
|
|
|
|
|
|
|
|
|
|
|
|
|
|
|
|
|
|
|
|
|
|
| S |
C
A |
G |
S |
C
B |
G |
|
S |
C |
G |
|
energy
A | B |
|
hype
A | B |
|
pop
A | B |
|
mgr
A | B |
|
FIGHT
RATING
47% |
|
|
|
|
|
|
|
Undercard bout
|
Coming up we have a featherweight MMA rules bout between Andy Zab (ranked 0 p4p, 0 weight class) and PeeWee Herman (ranked 0 p4p, 0 weight class). PeeWee Herman is the more experienced fighter, so let's see if that makes a difference tonight.
 |
|
 |
| 164 cm
20
147 lbs
3 - 2 - 0 |
|
187 cm
24
150 lbs
9 - 12 - 0 |
BJJ Blue Belt
Excellent MT
Good chin |
|
BJJ Purple Belt
Decent boxing
Solid chin |
|
| |
|
Ladies and gentlemen. This fight is 3 rounds, in the featherweight division.
Introducing the fighter to my left, fighting out of the red corner.
With a record of
3 - 2 - 0, fighting out of Amsterdam, Andy Zab!
And introducing the fighter to my right, fighting out of the blue corner.
With a record of
9 - 12 - 0, fighting out of Amsterdam, PeeWee Herman!
The judges for this bout are Paulsen Ambrosius, Paul Aken and Nard Betker.
The bell rings for round one and we are underway!
Herman dives in and grabs Zab's left leg, looking for a takedown. Zab pushes down on Herman's head and hops out.
Zab misses with a body kick.
Nice takedown defense from Zab. No joy for Herman on that attempt.
Herman fails to land the takedown.
Andy Zab has stuffed three takedown attempts in the round now. That's going to take a lot out of PeeWee Herman.
Zab throws a body kick that misses.
Herman has a takedown stuffed.
Zab looking to land some kicks to the body here.
Herman dives in and grabs Zab's left leg, looking for a takedown. Zab pushes down on Herman's head and hops out.
Herman closes this distance looking for a takedown but Zab circles away.
Zab scores with a leg kick.
That's one minute gone in the round.
Herman dives in and grabs Zab's left leg, looking for a takedown. Zab pushes down on Herman's head and hops out.
Herman fails with a takedown attempt from distance.
Herman looks gassed!
Herman shoots in for a takedown but Zab shows good takedown defense.
Zab misses with a kick to the body.
Zab is looking to slow Herman down with leg kicks.
Herman takes a nasty kick to the mid section... That should keep him thinking. Does he try and block and risk a head kick landing?
Zab pulls out of a head kick attempt.
Herman takes a step back and watches a body kick go sailing past his mid section.
Ooooh, nice body kick lands from Zab. Herman shrugs it off though.
That's two minutes gone in the round.
Fantastic stuff here - a very entertaining period of action, which has drawn cheers from the crowd.
Zab feints with a shoulder and throws a nice leg kick to Herman's calf.
Herman moves out of range of the body kick.
Zab misses with an attempted mid kick.
A nice leg kick lands there from Zab.
Andy Zab is looking to keep the fight on the feet at all costs.
A solid body kick from Zab.
A head kick misses from Zab.
Zab throws a mid kick that lands with a slap.

Zab closes the distance and presses his opponent up against the ropes.
Herman managing to block the knees to the body from Zab.
Zab pressing his opponent against the ropes.
Herman has hold of a leg and is looking for a trip takedown. Zab avoids it nicely though and we remain in the clinch.
That's three minutes gone in the round.
Zab stalling here - the referee won't stand for too much of that.
Herman tries to pull guard but can't drag his opponent to the mat. Zab just stands there and leans against the ropes.
Herman is a painfully thin specimen of a man. You do wonder whether a good body kick would snap him clean in two.
Zab stalling here - the referee won't stand for too much of that.
Herman is trying to drag Zab to the mat but Zab just about manages to keep his footing. He used the ropes to his advantage there.
Zab utilising his Muay Thai to score with a knee to the body.
Herman tries to pull guard but can't drag his opponent to the mat. Zab just stands there and leans against the ropes.
Zab stalls.
Knees to the body from Zab.
That's four minutes gone in the round.
Zab crunches a lovely knee into Herman's ribcage.
Zab has Herman pushed against the ropes.
Herman tries for a takedown but Zab manages to get underhooks.

Zab breaks the clinch and we return to the middle of the mat.
A kick lands to the mid section there for Zab.
Fantastic stuff here - a very entertaining period of action, which has drawn cheers from the crowd.
Herman tries to check the leg kick but that clearly hurt him.
Herman takes a kick to the body and keeps moving.
Herman moves out of range as Zab throws a body kick.
The crowd are going absolutely nuts as the round comes to an end - what a fantastic round of action!
Herman misses with a takedown attempt. He shot from a bit too far out.
Zab bobs and weaves and then throws a good body kick.
And thats the end of the round the fighters go back to their corners.
Andy Zab dominated that round.
That's time! Zab's corner gives him a slap on the ass as he gets ready to fight.
That kick from Zab tenderised Herman's leg. Herman is trying to keep his angry face on.
Zab throws a push kick but Herman slaps the foot to one side.
No luck with that takedown attempt from Herman.
Zab lands a front kick.
Herman takes a head kick and keeps coming.

It looks like PeeWee Herman has been cut.
This has been an exciting period of action!
Zab looks to land a body kick but Herman moved away.
Herman has developed a nice purple lump on his ribcage, as a result of some heavy body kicks from Zab.

Zab lands a big head kick that sends Herman tumbling to the mat! Zab takes a step backwards and waves Herman back to his feet - he wants the finish!
Herman walks forward, straight into a front kick from Zab.
Zab throws a head kick that misses.
Herman is breathing heavily.
That's one minute gone in the round.
Zab circles to his right before unloading a perfect head kick! Herman drops to the canvas, hurt badly! Zab follows Herman to the ground and unloads with a series of strikes that force the referee to step in and end the fight! This one is all over!
Ladies and gentlemen, after 1:09 of round 2, we have a winner by way of TKO (Strikes). Andy Zab!
|
|
|
|
|
|
|
|
|
|
|
|
|
|
|
|
|
|
|
|
|
|
|
| S |
C
A |
G |
S |
C
B |
G |
|
S |
C |
G |
|
energy
A | B |
|
hype
A | B |
|
pop
A | B |
|
mgr
A | B |
|
FIGHT
RATING
100% |
|
|
|
|
|
|
|
Undercard bout
|
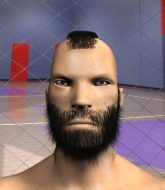
Coming up we have a light heavyweight MMA rules bout between Bobby Drysdale (ranked 0 p4p, 0 weight class) and Kevin Reabker (ranked 0 p4p, 0 weight class). Bobby Drysdale is staring across the ring at his opponent, tweaking his nipples... Tweaking his own nipples that is.
 |
|
 |
| 188 cm
21
205 lbs
9 - 3 - 0 |
|
187 cm
23
215 lbs
4 - 5 - 0 |
BJJ Brown Belt
Solid boxing
Granite chin |
|
BJJ Blue Belt
Brawler
Granite chin |
|
| |
|
Ladies and gentlemen. This fight is 3 rounds, in the light heavyweight division.
Introducing the fighter to my left, fighting out of the red corner.
With a record of
9 - 3 - 0, fighting out of Amsterdam, Bobby Drysdale!
And introducing the fighter to my right, fighting out of the blue corner.
With a record of
4 - 5 - 0, fighting out of Amsterdam, Kevin Reabker!
The judges for this bout are Aafke Stam, Radbod Blank and Paulsen Ambrosius.
The bell rings for round one and we are underway!
Drysdale shoots in looking for a takedown. Reabker tries to sprawl out of it but Drysdale keeps driving through. The fighters are pinned against the ropes. Reabker manages to get underhooks and after a bit of a struggle, circles away and we're back to standing.
Drysdale shoots in for a takedown. "Ole!" shouts Reabker as he jumps to the side.
Drysdale will have to do better than that with his takedown attempts.
That's three failed takedown attempts in the round for Bobby Drysdale. That's going to take a lot out of him.
Drysdale shoots in with a lovely double leg takedown. Reabker manages to land in full guard to minimise the damage.
Reabker managing to control the position.
Drysdale postures up.
Reabker pulls Drysdale in close to prevent any damage.
Drysdale tries to free his leg and advance position but Reabker is retaining full guard.
That's one minute gone in the round.
Drysdale is working hard here to advance position.
The ref calls for a clean break and stands the fighters back up. Kevin Reabker wasn't active enough on the ground.
Reabker tries to clinch up against the ropes, rushing in the close the distance. Drysdale manages to break the clinch and circles back to the middle of the mat.
Reabker is looking to score with low kicks.
Nice sprawl there from Reabker as Drysdale shoots in.
Drysdale shoots in looking for a takedown. Reabker tries to sprawl out of it but Drysdale keeps driving through. The fighters are pinned against the ropes. Reabker manages to get underhooks and after a bit of a struggle, circles away and we're back to standing.
No luck for Drysdale with that takedown attempt.
Drysdale shoots in for a takedown but doesn't get it.
That's two minutes gone in the round.
A head kick misses from Reabker.
Reabker fails to land the takedown.
Nice sprawl there from Drysdale as Reabker shoots in.
Drysdale will have to do better than that with his takedown attempts.
Reabker lands a nice shot to the body.
Reabker tries to shoot in for a takedown. He's got hold of a leg but Drysdale swivels and escapes.
Reabker shoots in looking for a takedown but Drysdale manages to keep the fight standing, pushing Reabker's face into the canvas for good measure before circling away.
Drysdale shoots in for a takedown but Reabker shows good takedown defense there and keeps this one on the feet.
Drysdale shoots in but no luck this time.
Reabker shoots in and scores a nice double leg takedown into half guard.
The fighters are tangled up in the ropes here. We might need a restart if the fighters can't break free themselves.
Reabker looks gassed!
The crowd are loving this. Great action here.
Reabker throwing shots but they're hitting the canvas more than the man.
That's three minutes gone in the round.
Drysdale blocking the ground and pound attempt from Reabker.
Reabker trying to control from half guard but Drysdale is working away.
Reabker wants to get back to his feet.
Reabker throwing punches and elbows but they're not doing any damage.

Drysdale looking to work for a kimura from the bottom.
Drysdale tries to roll over but Reabker keeps him under control.
That's four minutes gone in the round.
Reabker is trying to control the action in half guard but Drysdale is working away on the bottom, looking perhaps to get back to full guard.
Reabker throws a strike but Drysdale avoids it easily and moves to full guard.
Drysdale is working actively off his back, looking to secure an arm or perhaps work for a triangle.
Drysdale is looking for a triangle but Reabker pushes his legs off easily.
And thats the end of the round the fighters go back to their corners.
A close round but Kevin Reabker will probably get the nod.
Well, the break between rounds is over. Let's get back to the scrappin!
Reabker shoots in for a takedown but Drysdale shows good takedown defense.
Reabker shoots in for a takedown but Drysdale shows good takedown defense.
Reabker has Drysdale up against the ropes in a clinch.
Reabker lands a hook to the side of the head.
Reabker has Drysdale pressed up against the ropes and is working for takedown. Drysdale manages to improve position though and keeps the fight standing.
Bobby Drysdale has stuffed three takedown attempts in the round now. That's going to take a lot out of Kevin Reabker.
Reabker misses with a knee strike.
Drysdale is working for a takedown up against the ropes. He can't get it on this occasion though.
Drysdale is pressed up against the ropes. Reabker has hold of a leg and is looking to drag Drysdale down to the mat. Drysdale avoids the attempt though and has circled away. We're back to striking at a distance.
That's one minute gone in the round.
Nice sprawl there from Drysdale as Reabker shoots in.
Kevin Reabker is looking to throw some combinations by the looks of things.
Nice takedown defense from Reabker. No joy for Drysdale on that attempt.
Reabker clinches with his opponent.
Drysdale is pressed up against the ropes. Reabker has hold of a leg and is looking to drag Drysdale down to the mat. Drysdale avoids the attempt though and has circled away. We're back to striking at a distance.
Reabker is breathing heavily.
Drysdale tries to score a power double leg takedown but Reabker sees that one coming and sprawls well. That will dishearten Drysdale somewhat.
Reabker fails miserably with a takedown attempt.
Drysdale shoots for a double leg takedown but Reabker sprawls well. He's pushed Drysdale's face into the mat and manages to get back to his feet relatively easily.
Drysdale stuffs the takedown attempt from Reabker. Reabker gets slowly back to his feet.
Reabker tries to score a power double leg takedown but Drysdale sees that one coming and sprawls well. That will dishearten Reabker somewhat.
That's two minutes gone in the round.
A telegraphed takedown attempt from Reabker is defended easily by Drysdale.
Drysdale fails with a rather predictable takedown attempt.
Reabker fails with the takedown.
Drysdale dives in and grabs Reabker's left leg, looking for a takedown. Reabker pushes down on Drysdale's head and hops out.
Drysdale shoots in for a double leg but Reabker sprawls well. That's going to sap some energy.
Kevin Reabker seems to be getting the better of the standup.
Reabker changes levels and looks for a double leg takedown. Drysdale tries to avoid it but Reabker manages to keep hold of a leg and drag Drysdale to the ground. Drysdale escapes though and pops straight back up to his feet.
Reabker slaps away a takedown attempt from Drysdale, before circling back to the center of the mat.
That's three minutes gone in the round.
A telegraphed takedown attempt from Drysdale is defended easily by Reabker.
Reabker is looking to clinch.
Drysdale gets tackled into the ropes by Reabker. Reabker maintains the clinch.
Reabker breaks the clinch and we're back to striking at distance.
Drysdale fails with a takedown attempt.
Reabker closes the distance and scores a nice trip takedown into half guard. Drysdale did well to prevent Reabker getting side control.
Reabker is nestled in close to Drysdale, controlling him well. He's worked in a nice elbow to the side of the head as well, for good measure.
Drysdale looking for submissions off his back.
That's four minutes gone in the round.
Reabker thumps the canvas. Not on purpose obviously - he just missed Drysdale's head.
Reabker thumps the canvas. Not on purpose obviously - he just missed Drysdale's head.
Reabker really doesn't want to stay on the ground with Drysdale. If he can't get it back to his feet, it's only a matter of time before he'll be tapping out.
Drysdale is not content to let Reabker control the position.
Drysdale looking for submissions from an awkward position here.
The crowd applaud the fighters efforts here as the round comes to an end.
Reabker throwing shots but they're hitting the canvas more than the man.
And thats the end of the round the fighters go back to their corners.
Kevin Reabker showed his class in that round. I'd imagine he'll take it on all the scorecards.
OK. That's time! The bell goes and we're back to the action. This is the final round!
Drysdale shoots in for a takedown but doesn't get it.
Drysdale shoots for a takedown but Reabker saw that one coming a mile off and avoided it easily.
Reabker avoids the clinch attempt nicely.
Drysdale will have to do better than that with his takedown attempts.
That's three failed takedown attempts in the round for Bobby Drysdale. That's going to take a lot out of him.
Reabker fakes high and swings low for a body shot but Drysdale manages to avoid it.
Drysdale is trying hard to land a takedown here. Reabker sprawls well and keeps this one on the feet.
Drysdale misses with a takedown attempt. He shot from a bit too far out.
Drysdale looks for a takedown but Reabker sprawls well.
Reabker shoots in looking for a takedown but Drysdale manages to keep the fight standing, pushing Reabker's face into the canvas for good measure before circling away.
Both fighters are breathing heavily.
Drysdale shoots in and drives through. Reabker sprawls well.
Drysdale slaps away a takedown attempt from Reabker, before circling back to the center of the mat.
That's one minute gone in the round.
Reabker gets caught flat footed, as Drysdale shoots in with a quick takedown into guard.
Drysdale stands up and looks to throw the legs aside to pass to side control. Reabker swivels though and keeps the full guard.
Drysdale is pushing down on Reabker's leg trying to pass to half guard. Reabker is fighting to maintain full guard but Drysdale has managed to sneak the leg through.
Reabker wants to control but Drysdale is keeping busy.
Reabker kicks off Drysdale and gets to his feet.
Drysdale shoots in but doesn't get the takedown
and Reabker counters with a nice double leg into side control. Drysdale won't be happy with that.
That's two minutes gone in the round.
This is a great period of action - very entertaining stuff!
Reabker working the ground and pound but he's contacting the mat, not the fighter.
Drysdale prevents Reabker from improving position.
Reabker cracks Drysdale with an elbow. That is naaassty.
Drysdale regains half guard, as Reabker was trying to land strikes.
The fighters are battling for position here. Drysdale manages to regain full guard. Nice work.
Reabker throws and elbow that misses. Drysdale uses the momentum to reverse the position. He's now in Reabker's guard. Nice move by Drysdale!
That's three minutes gone in the round.
Drysdale looking to pass the guard.
Reabker wants to stand and escape but Drysdale is having none of it.
Drysdale is trying to work a guillotine from the top, or something like that? Don't know how he thinks he's going to get a finish from there.
Reabker keeping full guard, as Drysdale tries to pass.
Drysdale drops back looking for a leg! Reabker is in trouble here! The fighters roll with the hold and Reabker manages to kick Drysdale off! Drysdale jumps back into Reabker's guard.
That's four minutes gone in the round.
Reabker looking for a sweep. Not yet Reabker, not yet.
Drysdale advances position into side control!
Drysdale tries to advance to mount but can't.
As the round comes to an end the crowd are showing their appreciation for a great round of action.
Drysdale is looking to finish here, going for an Americana. Reabker knows the correct defense though, so he's OK.
And that's the end of the fight!
I would just about give that final round to Kevin Reabker.
Well Reabker has outworked and out performed his opponent in all aspects of the game today. He was simply too good and the decision should be no more than a formality. Over to the ring announcer for the scorecards.
Ladies and gentlemen, after 3 rounds of action, we go to the scorecards for a decision.
Judge Aafke Stam scores the fight 28:30
Judge Radbod Blank scores the fight 29:28
Judge Paulsen Ambrosius scores the fight 27:30
In favor of your winner, by split decision... Kevin Reabker!
|
|
|
|
|
|
|
|
|
|
|
|
|
|
|
|
|
|
|
|
|
|
|
| S |
C
A |
G |
S |
C
B |
G |
|
S |
C |
G |
|
energy
A | B |
|
hype
A | B |
|
pop
A | B |
|
mgr
A | B |
|
FIGHT
RATING
54% |
|
|
|
|
|
|
|
Co-main event
|
Coming up we have a middleweight MMA rules bout between Zakk Hari (ranked 0 p4p, 0 weight class) and Alistair Ubereem (ranked 0 p4p, 0 weight class). Ubereem comes into a darkened arena with his song building. CRO-MAGS - We Gotta Know kicks in, the lights come on and the crowd goes wild! What a showman! Zakk Hari has the better chin. Will he look to stand and bang today?
 |
|
 |
| 184 cm
23
185 lbs
5 - 1 - 0 |
|
195 cm
22
190 lbs
7 - 4 - 0 |
BJJ White Belt
Lethal high kicks
Insanely flexible |
|
BJJ Blue Belt
Good kicks
Heavy handed |
|
| |
|
Ladies and gentlemen. This fight is 5 rounds, for the middleweight championship of the world!
Introducing the champion to my left, fighting out of the red corner.
With a record of
5 - 1 - 0, fighting out of Amsterdam, Zakk Hari!
And introducing the challenger to my right, fighting out of the blue corner.
With a record of
7 - 4 - 0, fighting out of Amsterdam, Alistair Ubereem!
The judges for this bout are Albert Achterberg, Patrick Alders and Aafke Stam.
The bell rings for round one and we are underway!
Ubereem throws a feint and then finishes with a kick to the body.
Hari motions for Ubereem to come forward. Hari throws a leg kick but it misses it's target.
Ubereem fails with a takedown attempt.
Hari scores with a sloppy punch to the body. Not much technique there but it did the business.
Ubereem fails with an attempt to clinch.
Hari throws a body kick but he wasn't in range.
Ubereem throws a series of punches but Hari moves out of range.
Ubereem tries to clinch up.
Hari tries to land a body kick
and Ubereem counters with a nice leg kick.
Hari throws a head kick that misses
and Ubereem cracks him with a counter punch right on the button.

It looks like Zakk Hari has been cut.
That's one minute gone in the round.
Ubereem misses with a double jab.
Hari stuffs the takedown attempt from Ubereem. Ubereem gets slowly back to his feet.
Ubereem shoots in for a takedown but Hari shows good takedown defense.
Zakk Hari has stuffed three takedown attempts in the round now. That's going to take a lot out of Alistair Ubereem.
Hari looks to score with a jab to the body but Ubereem is just out of range.
Hari avoids the clinch attempt nicely.
Ubereem fails with a takedown attempt from distance.
A head kick from Hari lands but Ubereem takes it in his stride.
It looks like Alistair Ubereem has been cut.
Ubereem steps to his left, right into the path of a big body kick from Hari. That one must have hurt.
Hari connects with a right hand. Ubereem shakes it off.
That's two minutes gone in the round.
Fantastic stuff here - a very entertaining period of action, which has drawn cheers from the crowd.
Hari throws a sloppy head kick
and Ubereem decides to take the opportunity to score a takedown. He's landed in Hari's guard.
Hari working the defensive guard well to avoid strikes from Ubereem.
Hari not looking particularly offensive just at the moment.
Ubereem has the superior BJJ but he's also working some ground strikes into his gameplan.
Ubereem postures up in Hari's guard and throws a big left but Hari blocks it.
Ubereem looking to pass the guard.
Ubereem trying to control but Hari is working from the bottom.
Hari trying to control the position.
That's three minutes gone in the round.
Hari wants to get back to his feet but Ubereem is in a dominant position and won't allow it.
Ubereem working some ground and pound from guard but it's not doing any damage.
Ubereem works a leg free and moves into half guard.
Ubereem passes to side control.
Ubereem is looking to finish here, going for an Americana. Hari knows the correct defense though, so he's OK.
You can see the frustration on Hari's face, being in this tough position on the bottom.
That's four minutes gone in the round.
Ubereem works to advance to full mount. Hari defends for a few seconds but eventually he succumbs.
Hari tries to hold on but Ubereem postures up.
Ubereem content just to control the position here.
Ubereem wants to control the pace but Hari is squirming around nicely.
Hari knows he needs to get back to his feet asap. He's simply no match for Ubereem on the ground.
As the round comes to an end the crowd are showing their appreciation for a great round of action.
Ubereem cracks Hari with a nasty head shot there - the crowd let out an audible gasp there, as the noise reverberated around the arena.
And thats the end of the round the fighters go back to their corners.
Alistair Ubereem dominated that round.
Both fighters have cut men working on them during the interval.
The referee calls time. The cornermen exit stage left and we're back to business.
Ubereem tries to clinch there but Hari circles away.
Ubereem is moving around nicely and scores here with a single head shot.
Hari jabs away that one connects to the head of his opponent.
Ubereem will have to do better than that with his takedown attempts.
Ubereem tries to close the distance and clinch up against the ropes but Hari paws at him with a jab and circles away.
Hari throws a head kick that misses and slips in the process. He scrambles back to his feet and the fighters circle.
Ubereem shoots in with a takedown attempt and he has Hari pinned against the ropes. Hari gets the underhooks and manages to circle away.
A low kick from Ubereem misses
and Hari counters with a stiff right hand.
Hari tries to bum rush Ubereem with a series of wild strikes but Ubereem uses good footwork to avoid the assault.
Ubereem tries to shoot in for a takedown. He's got hold of a leg but Hari swivels and escapes.
Zakk Hari has stuffed three takedown attempts in the round now. That's going to take a lot out of Alistair Ubereem.
That's one minute gone in the round.
Ubereem ducks down and throws a hook to the body but Hari moves away.
Hari lands with a straight right. Ubereem didn't see that one coming.
Ubereem swings for the body but Hari moves out of range.
Ubereem blocks the body kick.
Ubereem misses with a takedown attempt. He shot from a bit too far out.
Alistair Ubereem seems to be the more aggressive standup fighter in this bout.
Hari leaves Ubereem with his face pressed against the mat as he sprawls beautifully, defending against a solid takedown attempt.
Ubereem shoots for a takedown but Hari saw that one coming a mile off and avoided it easily.
Hari lands a nice looking body shot.
That's two minutes gone in the round.
Ubereem has his takedown stuffed
letting Hari counter with a right hand.

Ubereem is rocked!
Ubereem is breathing heavily.
Hari closes the distance and lands a brutal uppercut that knocks Ubereem out! We're looking at the replay now - he was out before he hit the floor!
Ladies and gentlemen, after 2:22 of round 2, we have a winner by way of KO (Punch). Zakk Hari!
Zakk Hari retains his middleweight title!
|
|
|
|
|
|
|
|
|
|
|
|
|
|
|
|
|
|
|
|
|
|
|
| S |
C
A |
G |
S |
C
B |
G |
|
S |
C |
G |
|
energy
A | B |
|
hype
A | B |
|
pop
A | B |
|
mgr
A | B |
|
FIGHT
RATING
64% |
|
|
|
|
|
|
|
Main event
|
Coming up we have a welterweight MMA rules bout between Mike Anus (ranked 0 p4p, 0 weight class) and Vitruvius Pyrrus (ranked 0 p4p, 0 weight class). Anus's entrance music is Nick Diaz Rap Song. A fine choice. Vitruvius Pyrrus is staring across the ring at his opponent, tweaking his nipples.
 |
|
 |
| 190 cm
26
178 lbs
17 - 7 - 0 |
|
182 cm
23
180 lbs
8 - 6 - 0 |
Good wrestling
Excellent boxer
Very quick |
|
Decent wrestler
World class MT
Powerful |
|
| |
|
Ladies and gentlemen. This fight is 5 rounds, for the welterweight championship of the world!
Introducing the champion to my left, fighting out of the red corner.
With a record of
17 - 7 - 0, fighting out of Amsterdam, Mike Anus!
And introducing the challenger to my right, fighting out of the blue corner.
With a record of
8 - 6 - 0, fighting out of Amsterdam, Vitruvius Pyrrus!
The judges for this bout are Aafke Stam, Wagner Zegers and Radbod Blank.
The bell rings for round one and we are underway!
Anus blocks a low kick nicely.
A really sloppy takedown attempt there from Anus.
Pyrrus tries a head kick but it misses.
A head kick by Pyrrus misses
and Anus counters with a lovely straight right hand!
Anus takes a body kick right on the floating rib. Ouchie.
No luck for Anus with that takedown attempt.
Anus throws a monster uppercut resembling something out of street fighter but it doesn't land.
Pyrrus throws a body kick that misses.
Anus closes the distance and gets a double leg, slamming Pyrrus to the mat! Pyrrus manages to get full guard.
The referee is pacing around the two fighters - he looks like he's thinking about a standup.
Anus loading up with the ground and pound but he's missing more than he's landing in this flurry.
Anus working from the guard for now, landing some ground and pound.
That's one minute gone in the round.
Pyrrus wants to stand and escape but Anus is having none of it.
Anus is looking to work some ground and pound but Pyrrus has wrist control.
Anus working some ground and pound from guard but it's not doing any damage.
Anus trying to control the position from guard on top but Pyrrus is wriggling around, looking for whatever he can.
Anus throwing strikes from guard but Pyrrus blocks nicely.
Pyrrus keeping moving, preventing Anus from controlling successfully.
The fighters are trapped in the ropes so we're going to have a reposition here. The ref calls for a break and repositions the fighters in the center of the ring.
Anus lands a couple of decent looking shots.
That's two minutes gone in the round.
Anus is stalling in the full guard.
The fighters are tangled up in the ropes here. We might need a restart if the fighters can't break free themselves.
Pyrrus keeping moving, preventing Anus from controlling successfully.
Anus thows a big elbow that misses.
Anus is looking to work some ground and pound but Pyrrus has wrist control.
Anus controlling from the top position.
Anus has been looking to land a fair amount of strikes on the ground. He might be looking to soften his opponent up in order to work for a submission.
That's three minutes gone in the round.

The referee decides to stand the fighters back up, due to lack of activity on the part of Mike Anus.
Pyrrus lands with a thumping leg kick.
Anus lunges in with an uppercut that skims his opponent's chin.
Pyrrus throws a mid kick that lands with a slap.
Vitruvius Pyrrus is looking to keep the fight on the feet at all costs.
Pyrrus throws a half hearted mid kick.
Anus is looking to take this fight into the clinch.
Pyrrus does a little shimmy and throws a leg kick. The leg kick missed by a considerable margin though, making him look a little bit silly for doing the shimmy.
That's four minutes gone in the round.
Anus checks a low kick. Bone on bone - not my idea of a good time.
Pyrrus misses with a half-hearted attempt at a head kick.
Pyrrus throws a head kick that misses.
Pyrrus scores with a nice body kick.
Pyrrus connects with a leg kick. He turned his hip over nicely there.
Anus misses with a takedown attempt. He shot from a bit too far out.
That's three failed takedown attempts in the round for Mike Anus. That's going to take a lot out of him.
Pyrrus looks for the body kick but Anus saw that one coming.
The fighters circling - Pyrrus throws out the jab but it was never going to land.
The crowd applaud the fighters efforts here as the round comes to an end.
Anus takes a body kick right on the floating rib. Ouchie.
The crowd cheering loudly, showing their appreciation for the quality fight we're seeing here.
Anus swings and misses with a hook to the body.
Well, he's not going to score with shots like that. A lazy body kick attempt from Pyrrus.
And thats the end of the round the fighters go back to their corners.
Mike Anus dominated that round.
The fighters get back to their feet, the hooter sounds and we're back to the action!
Anus gets a takedown into half guard.
Anus thows a huge punch but Pyrrus dodges it nicely.
Pyrrus is trying to stand up here but Anus is controlling him well.
Anus is trying to control. Pyrrus wants to improve his position but can't escape this time.
Anus works his way into full mount!
Anus throws some wild stikes that Pyrrus manages to avoid easily.
That's one minute gone in the round.
Anus jumps to the side looking to secure the arm triangle
. Ooooh, that looks tight
Pyrrus is gargling but he's managed to escape! Nice work there by Pyrrus and Anus has given up the dominant position trying to land that submission.
Pyrrus dodges the ground and pound from Anus.
Anus sitting in side control, looking to soften his opponent up with elbows and hammerfists but Pyrrus is avoiding damage well and looking to escape the position.
Anus trying to control the action but Pyrrus is working from the bottom.
Anus working the ground and pound.
That's two minutes gone in the round.
Pyrrus is not content to let Anus control the position.
Anus scores with a couple of short elbows.
Anus tries to move to mount but Pyrrus blocks the move with his legs.
Anus grinds an elbow into Pyrrus's temple.
The crowd cheering loudly, showing their appreciation for the quality fight we're seeing here.
Anus tries to land with some ground and pound but misses.
That's three minutes gone in the round.
Pyrrus is not in a great position here, taking some shots.
The ground and pound from Anus seems to be hitting the mat more than his opponent.
Anus tries to land with some ground and pound but misses.
Mike Anus overall seems to be getting the better of the ground position in the fight so far.
Anus tries for a kimura. Not really close to a finish though.
Anus wants to control but Pyrrus is keeping him busy.
Anus looking to punish the body of his opponent here but Pyrrus is avoiding damage well.
That's four minutes gone in the round.
Anus throwing shots but missing, from side control.
Pyrrus is trying to escape and get back to his feet.
Anus is looking to take a break and control but Pyrrus is keeping him honest, looking to work from the bottom.
Pyrrus avoids any damage from the ground and pound of Anus.
The crowd applaud the fighters efforts here as the round comes to an end.
Anus looking to control but instead Pyrrus has slipped a leg in, to regain half guard.
And thats the end of the round the fighters go back to their corners.
Mike Anus dominated that second round.
OK. That's time! The bell goes and we're back to the action.
Anus fails with a takedown attempt from distance.
Anus shoots in for a takedown but Pyrrus shows good takedown defense there and keeps this one on the feet.
Anus shoots in for a takedown and gets it. Oh and he's advanced to full mount straight away.
Anus looking to control but Pyrrus is working nicely, looking to advance position himself.
Pyrrus in a bad spot here, taking shots to the head.
Anus thowing shots but they're missing.
Anus lands a heavy elbow.
That's one minute gone in the round.
Pyrrus avoids a series of strikes thrown by Anus.
Anus thuds his fist into the canvas! Oooouch!
Anus lands a heavy elbow.
Pyrrus is rocked!
Anus connects with a bit shot that sees Pyrrus covering up! More strikes from Anus and the referee jumps in to stop the fight! Anus is our winner by TKO!
Ladies and gentlemen, after 1:54 of round 3, we have a winner by way of TKO (Strikes). Mike Anus!
Mike Anus retains his welterweight title!
|
|
|
|
|
|
|
|
|
|
|
|
|
|
|
|
|
|
|
|
|
|
|
| S |
C
A |
G |
S |
C
B |
G |
|
S |
C |
G |
|
energy
A | B |
|
hype
A | B |
|
pop
A | B |
|
mgr
A | B |
|
FIGHT
RATING
80% |
|
|
|
|
|
|
|
|
|
|

