 |
PFA 30: Retribution PBP Commentary |
Undercard bout
|
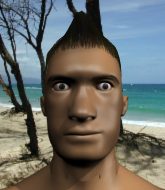
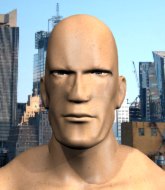
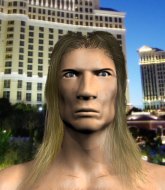
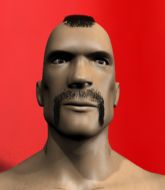
Coming up we have a middleweight MMA rules bout between Grande Mucho (ranked 0 p4p, 0 weight class) and Kyle Howe (ranked 0 p4p, 0 weight class). Mucho comes to the cage accompanied by You Dont Know - 50 Cent. Grande Mucho has the edge in experience - let's see if he can make that count tonight.
 |
|
 |
| 180 cm
27
197 lbs
12 - 12 - 0 |
|
178 cm
19
185 lbs
2 - 2 - 0 |
BJJ Purple Belt
Solid boxing
Very strong |
|
BJJ Blue Belt
Brawler
Determined |
|
| |
|
Ladies and gentlemen. This fight is 3 rounds, in the middleweight division.
Introducing the fighter to my left, fighting out of the red corner.
With a record of
12 - 12 - 0, fighting out of London, Grande Mucho!
And introducing the fighter to my right, fighting out of the blue corner.
With a record of
2 - 2 - 0, fighting out of London, Kyle Howe!
The judges for this bout are Colin Fotheringham, Richard Clark and Paul Tew.

The bell rings for round one and we are underway!
Howe misses with a hook. Mucho ducked under it nicely.
Howe misses with a combination

and Mucho counters with a shoot takedown. Howe fights it but they end up in guard.
Howe pulls Mucho in close to his closed guard and prevents Mucho from doing any damage or advancing position.
Mucho slips nicely into half guard.

Mucho seems like he's working for an arm triangle here. He's freed his trapped foot and he's rotating nicely. Howe is in big trouble! He's tapping out! This one is aaaaaaaaaaaall over!
Ladies and gentlemen, after 0:44 of round 1, we have a winner by way of Submission (Arm Triangle). Grande Mucho!
|
|
|
|
|
|
|
|
|
|
|
|
|
|
|
|
|
|
|
|
|
|
|
| S |
C
A |
G |
S |
C
B |
G |
|
S |
C |
G |
|
energy
A | B |
|
hype
A | B |
|
pop
A | B |
|
mgr
A | B |
|
FIGHT
RATING
58% |
|
|
|
|
|
|
|
Undercard bout
|
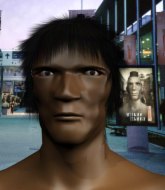
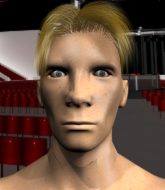
Coming up we have a welterweight MMA rules bout between Stephan Anton (ranked 0 p4p, 0 weight class) and Tayeb Taheri (ranked 0 p4p, 0 weight class). Stephan Anton is staring across the cage at his opponent, tweaking his nipples... Tweaking his own nipples that is.
 |
|
 |
| 174 cm
27
181 lbs
9 - 7 - 0 |
|
185 cm
22
180 lbs
6 - 6 - 0 |
BJJ Purple Belt
Solid boxing
Experienced |
|
BJJ Brown Belt
Counter striker
Determined |
|
| |
|
Ladies and gentlemen. This fight is 3 rounds, in the welterweight division.
Introducing the fighter to my left, fighting out of the red corner.
With a record of
9 - 7 - 0, fighting out of London, Stephan Anton!
And introducing the fighter to my right, fighting out of the blue corner.
With a record of
6 - 6 - 0, fighting out of London, Tayeb Taheri!
The judges for this bout are Colin Fotheringham, William Gold and Donald Grub.
The bell rings for round one and we are underway!
Taheri with a poor takedown
and Taheri takes a counter punch right on the button for his troubles.
Taheri dives in and grabs Anton's left leg, looking for a takedown. Anton pushes down on Taheri's head and hops out.
Anton throws a head kick that misses and slips in the process. He scrambles back to his feet and the fighters circle.
Taheri tries to close the distance and clinch up against the cage but Anton paws at him with a jab and circles away.
Anton swings away with a body shot that misses

and Taheri counters with a shoot takedown. Anton fights it but they end up in guard.
Anton wants to get back to his feet but Taheri is in a dominant position and won't allow it.
Anton trying desperately to get back to his feet here but he's not having any joy at all. He's going to tire himself out if he's not careful.
Taheri with a flurry of punches that miss.
Taheri wants to control from the top but Anton keeps moving.
Anton preventing the ground and pound from doing any damage.
We've seen a great period of action over the last minute or so - credit to both fighters for going all out!

Taheri drops back looking for a heel hook - he quickly realises he's not going to get it but Anton manages to dive on top of him before he can escape and now Taheri has Anton in his guard.

That's one minute gone in the round.
Taheri working for a triangle but Anton defends it easily.
Anton might be looking to lock onto one of his opponent's long limbs for a submission, whilst we're on the ground.
Taheri looking for a guillotine here but Anton defends easily.
Taheri throwing his legs up looking for a triangle.
Taheri looking to hit a scissor sweep but Anton is one step ahead there.
The fighters are pressed up against the cage, both looking to find a bit of space to work.
Taheri is active off his back here, looking for submissions.

Anton gets to his feet. Taheri looking to butt scoot but the ref puts an end to that. On your feet son!

That's two minutes gone in the round.
Anton throws a right and a left that both miss.
Anton misses with a body shot. Nice footwork from Taheri.
Taheri tries to clinch there but Anton circles away.
Anton just misses with a punch to the body.
Fantastic stuff here - a very entertaining period of action, which has drawn cheers from the crowd.
Taheri shoots in for a takedown but doesn't get it.
Stephan Anton has stuffed three takedown attempts in the round now. That's going to take a lot out of Tayeb Taheri.
Taheri decides to change it up a bit and drives through with a nice takedown into half guard.
Anton is looking to escape.
Taheri seems very keen to just sit and control from half guard but Anton does not like that idea so much and is remaining active off his back.
Taheri is trying for a guillotine from the top but the pressure isn't in the right place so Anton is just riding it out for now. Taheri eventually gives up the hold.
The fighters are going at a pretty good pace and they're both starting to sweat now.
Taheri is working hard to pass the guard. He's done it - he's now in full mount! Trouble for Anton!

That's three minutes gone in the round.
Taheri unloading with bombs!
Taheri trying to control but he's not successful this time.
Anton somehow manages to escape the mount and get back to his feet!
Horrible takedown by Taheri or perhaps it was just good defense by Anton which made him look bad.
Taheri avoids the head kick by Anton.
Taheri shoots for a takedown but Anton saw that one coming a mile off and avoided it easily.
Nice uppercut there from Anton.

That's four minutes gone in the round.
Anton misses with a half-hearted attempt at a head kick.
Taheri is trying hard to land a takedown here. Anton sprawls well and keeps this one on the feet.
Anton throws a head kick but Taheri moves out of range.
Anton throws a jab when Taheri was well out of range.
Taheri closes the distance and clinches up with Anton, looking for a takedown. Taheri pushes Anton against the cage but Anton circles to the side and manages to break the clinch.
Taheri fails with a takedown attempt.
Taheri looks gassed!
The sound of bone on bone echoes around the arena as Taheri checks a leg kick.
As the round comes to an end the crowd are showing their appreciation for a great round of action.
Anton throws a sloppy head kick and Taheri moves out of range easily.
And thats the end of the round the fighters go back to their corners.
Tayeb Taheri dominated that round.
The cut man is working on Stephan Anton's cut.
The minute break is over - no more time for sponges and pep talks - back to the action!

Taheri closes the distance and clinches up with Anton, looking for a takedown. Taheri pushes Anton against the cage but Anton circles to the side and manages to break the clinch.
Stephan Anton seems to be the more aggressive standup fighter in this bout.
Anton avoids the clinch attempt nicely.
Taheri shoots in for a takedown but Anton shows good takedown defense.
Taheri tries to grapple but his opponent circles
and Anton cracks him with a counter punch right on the button.

It looks like Tayeb Taheri has been cut.
Anton stuffs the takedown.
Stephan Anton has stuffed three takedown attempts in the round now. That's going to take a lot out of Tayeb Taheri.
Anton throws a head kick that half lands.
Taheri shoots in for a double leg but Anton sprawls well. That's going to sap some energy.

Anton throws a left that rocks Taheri and follows with a right that sends him tumbling to the canvas! Anton dives into side control, looking to finish! Can Taheri regain composure!

Taheri is rocked!
Taheri is breathing heavily.
The fans in attendance giving it up for the two fighters, who have really let it all hang out in the last minute or so!
Taheri wants to get back to his feet but Anton drags him back down.
Anton decides to stand up, so the ref orders Taheri to his feet.
That's one minute gone in the round.
Taheri misses with a takedown attempt. He shot from a bit too far out.
Anton misses with a head kick.
Anton lands a two punch combo.
Nice takedown defense from Anton. No joy for Taheri on that attempt.
Anton throws a leg kick but Taheri sees it coming and checks it nicely.
Anton misses with a jab, cross combination.
Anton throws a series of punches but Taheri moves out of range.
Taheri avoids the head kick by Anton.
Anton throws a head kick that misses.
That's two minutes gone in the round.
Anton lands a pitter patter jab to the forehead of his opponent.
Taheri shoots for a double leg takedown but Anton sprawls well. He's pushed Taheri's face into the mat and manages to get back to his feet relatively easily.
Taheri tries to clinch but Anton is having none of it.
Anton with a body punch. A glancing blow.
Taheri takes a body punch but keeps moving.
We've seen a great period of action over the last minute or so - credit to both fighters for going all out!
Anton avoids the clinch attempt nicely.
Anton scores with a hook to the body. Taheri takes a step back and tries to catch his breath.
Anton walks forward and throws out a flicking leg kick. Taheri checks it nicely though, as he moves to the side.
Taheri tries to clinch but Anton is having none of it.
That's three minutes gone in the round.
Anton rushes forward with a series of wild hooks but Taheri moves out of range and avoids them all easily.
Taheri takes a punch right to his stomach. That took the wind out of him momentarily.
Ouch! a nice leg kick from Anton, right into the meat.
Anton throws a push kick but Taheri slaps the foot to one side.
Taheri tries for a takedown but Anton circles away easily
and Anton counters with a head kick.
Anton pulls out of a head kick attempt.
Taheri misses with a takedown
and Anton counters with a head kick.
Taheri is still on wobbly legs! Can Anton finish him?
The fans in attendance giving it up for the two fighters, who have really let it all hang out in the last minute or so!
Anton will need to tighten up his combinations if he doesn't want to gas himself out, swinging at thin air.
Taheri seems to have recovered his senses.
That's four minutes gone in the round.
Anton fakes high and swings low for a body shot but Taheri manages to avoid it.
Anton is looking to wear down Taheri with body shots, infact he's throwing more body shots than head shots at the moment.
Taheri looks for a takedown here. Will he get it? Anton is fending him off so far but Taheri persists. Nope, Anton circles away and we're back to standing.
Anton rushes forward with a series of wild hooks but Taheri moves out of range and avoids them all easily.
Taheri tries to shoot in for a takedown. He's got hold of a leg but Anton swivels and escapes.
Stephan Anton is looking to keep the fight on the feet at all costs.
Anton misses with a head kick.
Anton pulls out of a head kick attempt.
The crowd are going absolutely nuts as the round comes to an end - what a fantastic round of action!
Anton defends well against a solid takedown attempt from Taheri.
Taheri dives in and grabs Anton's left leg, looking for a takedown. Anton pushes down on Taheri's head and hops out.
Anton looks to score with a jab to the body but Taheri is just out of range.
And thats the end of the round the fighters go back to their corners.
Stephan Anton dominated that second round.
Both fighters have cut men working on them during the interval.
The referee calls time. The cornermen exit stage left and we're back to business. This is the final round!

Taheri blocks a head kick by Anton.
A leg kick checked by Taheri.
A head kick misses from Anton.
Taheri changes levels and looks for a double leg takedown. Anton tries to avoid it but Taheri manages to keep hold of a leg and drag Anton to the ground. Anton escapes though and pops straight back up to his feet.
Taheri shoots in for a takedown but doesn't get it.
Anton throws the kick towards the body but Taheri avoids it.
Anton looking to take his opponent's legs away with the low kicks.
Stephan Anton is winning the standup battle so far.
Taheri ducks right into an uppercut from Anton.
Taheri takes a big intake of breath there - he's definitely tired.
Taheri on the wrong end of a nice hook.
Anton goes to the watering hole and comes back with a big thumbs up from the judges as he scores a three punch combo.
Anton throws a head kick but Taheri moves out of range.
That's one minute gone in the round.
A head kick misses from Anton.
Anton throws a sloppy head kick and Taheri moves out of range easily.
Taheri slips a jab and a cross from Anton.
Taheri fails miserably with a takedown attempt.
Stephan Anton has stuffed three takedown attempts in the round now. That's going to take a lot out of Tayeb Taheri.
Taheri changes levels and looks for a double leg takedown. Anton tries to avoid it but Taheri manages to keep hold of a leg and drag Anton to the ground. Anton escapes though and pops straight back up to his feet.
Taheri fails miserably with a takedown attempt.
Anton cracks Taheri with an open hand slap.
That's two minutes gone in the round.
Anton keeps the fight standing with a nice sprawl.
Taheri blocks a head kick by Anton.
Taheri moves out of range of the strikes.
Anton jabs Taheri right on the nose. Taheri blinks but takes it well.
Taheri is looking to take this fight into the clinch.
A really sloppy takedown attempt there from Taheri.
Taheri looks for a takedown but Anton sprawls well.
That's three minutes gone in the round.
Anton misses with a wild combination.
Taheri shoots in for a takedown but Anton shows good takedown defense.
Taheri with a lazy takedown attempt
and Anton counters with a kick to the head that grazes his opponent. Taheri is lucky that one didn't land flush.
That has opened up Tayeb Taheri's cut even more.
Anton with a nice looking leg kick. You could hear that one land in a back row.
A clash of legs there as Taheri blocks the low kick.
Anton scores with a sloppy punch to the body. Not much technique there but it did the business.
Anton swinging wildly here.
Stephan Anton is looking to throw some combinations by the looks of things.
Anton pulls out of a head kick attempt.
That's four minutes gone in the round.
Taheri tries to clinch there but Anton circles away.
Anton misses with a double jab.
Taheri tries to close the distance and clinch but Anton swats him to one side with an open hand palm strike and circles away.
Anton attempts a leg kick but it's missed by a good margin.
Taheri ducks under a wild hook from Anton.
Taheri closes the distance and clinches up, looking for a takedown. He shifts his weight and gets a nice trip into half guard.
Fantastic stuff here - a very entertaining period of action, which has drawn cheers from the crowd.
The crowd applaud the fighters efforts here as the round comes to an end.
Taheri throwing punches and elbows but they're not doing any damage.
Anton has one foot on Taheri's thigh - he pushes off and manages to get back to his feet.
Taheri shoots in for a takedown. "Ole!" shouts Anton as he jumps to the side.
And that's the end of the fight!
Stephan Anton showed his dominance in that final round.
I think Anton has won this one but let's see what the judges have to say. Over to the ring announcer for the scorecards.
Ladies and gentlemen, after 3 rounds of action, we go to the scorecards for a decision.
Judge Colin Fotheringham scores the fight 29:28
Judge William Gold scores the fight 29:28
Judge Donald Grub scores the fight 29:28
In favor of your winner, by unanimous decision... Stephan Anton!
|
|
|
|
|
|
|
|
|
|
|
|
|
|
|
|
|
|
|
|
|
|
|
| S |
C
A |
G |
S |
C
B |
G |
|
S |
C |
G |
|
energy
A | B |
|
hype
A | B |
|
pop
A | B |
|
mgr
A | B |
|
FIGHT
RATING
69% |
|
|
|
|
|
|
|
Undercard bout
|
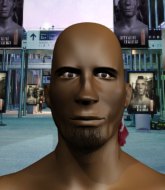
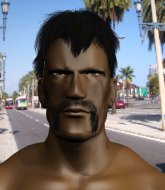
Coming up we have a heavyweight MMA rules bout between Otto Emperor (ranked 0 p4p, 0 weight class) and Hasim Bakalakadakastacka (ranked 0 p4p, 0 weight class). Otto Emperor has the better chin. Will he look to stand and bang today?
 |
|
 |
| 206 cm
20
282 lbs
1 - 2 - 0 |
|
193 cm
24
212 lbs
6 - 10 - 0 |
BJJ Purple Belt
Great elbows
Big heart |
|
Good takedowns
Counter striker
Determined |
|
| |
|
Ladies and gentlemen. This fight is 3 rounds, in the heavyweight division.
Introducing the fighter to my left, fighting out of the red corner.
With a record of
1 - 2 - 0, fighting out of London, Otto Emperor!
And introducing the fighter to my right, fighting out of the blue corner.
With a record of
6 - 10 - 0, fighting out of London, Hasim Bakalakadakastacka!
The judges for this bout are William Gold, James Atkins and Chris Edwards.
The bell rings for round one and we are underway!
Emperor lands a head kick!
It looks like Hasim Bakalakadakastacka has been cut.

Emperor clinches with his opponent.
Bakalakadakastacka avoiding damage as Emperor throws knees to the body.
Still in the clinch, Emperor scores with a nice short uppercut.
Emperor creates a bit of space for himself and sneaks an elbow through Bakalakadakastacka's defenses.
Bakalakadakastacka is rocked!
Bakalakadakastacka is pressed against the cage. Emperor pushes back and unleashes a big elbow that really hurts Bakalakadakastacka! Two more big strikes from Emperor and Bakalakadakastacka crumples to the mat and taps out furiously due to the strikes!
Ladies and gentlemen, after 0:26 of round 1, we have a winner by way of Submission (Strikes). Otto Emperor!
|
|
|
|
|
|
|
|
|
|
|
|
|
|
|
|
|
|
|
|
|
|
|
| S |
C
A |
G |
S |
C
B |
G |
|
S |
C |
G |
|
energy
A | B |
|
hype
A | B |
|
pop
A | B |
|
mgr
A | B |
|
FIGHT
RATING
97% |
|
|
|
|
|
|
|
Undercard bout
|
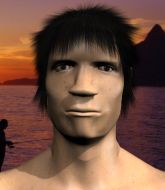
Coming up we have a welterweight MMA rules bout between Happy Gilmore (ranked 0 p4p, 0 weight class) and Oliver Strong (ranked 0 p4p, 0 weight class). Happy Gilmore has the better chin. Will he look to stand and bang today?
 |
|
 |
| 178 cm
29
181 lbs
15 - 11 - 0 |
|
180 cm
28
180 lbs
11 - 9 - 0 |
BJJ Purple Belt
Excellent boxer
Granite chin |
|
BJJ Purple Belt
Decent boxing
Powerful |
|
| |
|
Ladies and gentlemen. This fight is 3 rounds, in the welterweight division.
Introducing the fighter to my left, fighting out of the red corner.
With a record of
15 - 11 - 0, fighting out of London, Happy Gilmore!
And introducing the fighter to my right, fighting out of the blue corner.
With a record of
11 - 9 - 0, fighting out of London, Oliver Strong!
The judges for this bout are Chris Edwards, Andrew Berry and Donald Grub.
The bell rings for round one and we are underway!
Strong ducks down and throws a hook to the body but Gilmore moves away.
Strong moves away from the strike by Gilmore.
Gilmore throws a head kick that misses and slips in the process. He scrambles back to his feet and the fighters circle.
Gilmore ducks down and throws a hook to the body.
Strong throws a hook to the body but it doesn't connect.
Gilmore ducks down and throws a hook to the body but Strong moves away.
Happy Gilmore seems to be the more aggressive standup fighter in this bout.
Jab, jab by Gilmore - just one landing.
A nice combination there by Gilmore.
Wow, both these guys are really going for it!
Gilmore throws a solid leg kick but Strong takes the impact on his shin and smiles at Gilmore.
Gilmore tries to land a front kick but Strong steps back. That was a bit too telegraphed.
Gilmore scores with a punch to the gut of his opponent.
Strong checks a leg kick.
Nice defenses there by Strong.
Strong drops his hands and takes a jab to the jaw for his troubles.
Gilmore jabbing away but nothing is landing.
A decent looking cross lands there for Gilmore.
This has been an exciting period of action!
Gilmore swings wildly with a right hand that was never going to find it's target.
Gilmore ducks under a wild hook from Strong.
Strong misses with a body shot. Nice footwork from Gilmore.
Gilmore throws a solid leg kick but Strong takes the impact on his shin and smiles at Gilmore.
Strong throws a leg kick but Gilmore checks it.
That's one minute gone in the round.
Gilmore throws out a token jab with nothing on it.
Gilmore tries to score with an inside leg kick but telegraphs it and Strong is able to avoid easily.
Some wild striking there from Gilmore.
Strong throws a looping overhand right but Gilmore ducks down to avoid it.
Gilmore needs to keep his hands up - Strong had a free shot at his head there.
Gilmore tries to score with a leg kick but it misses it's target.
Strong takes a swing at Gilmore's ribcage but misses.
Gilmore motions for Strong to come forward. Gilmore throws a leg kick but it misses it's target.
Gilmore throws a monster uppercut resembling something out of street fighter but it doesn't land.
Gilmore connects with a single shot there.
Gilmore scores with a nice strike.
A looping hook to the body misses from Strong. Gilmore does a little dance to reset his feet.
Gilmore tries to land with a swinging hook to the body but Strong was well out of range. Poor timing from Gilmore.
Strong scores with a reasonable looking shot to the body. Gilmore doesn't seem bothered though.
Gilmore moving in and out of range nicely, whilst landing the scoring shot.
Gilmore pivots, looking for a leg kick but Strong is out of range and Gilmore settles back down.
Happy Gilmore is looking to keep the fight on the feet at all costs.
Strong moves out of range of the body kick.
Gilmore changes levels and scores with a jab to the body.
That's two minutes gone in the round.
Gilmore throws a leg kick but Strong sees it coming and checks it nicely.
Strong tries to land a leg kick but Gilmore saw it coming and moves away.
The crowd are loving this. Great action here.
Strong uses some good footwork to avoid the body shot by Gilmore.
A nice inside leg kick there by Gilmore. That's going to slow Strong down.
Gilmore tries to score with an inside leg kick but telegraphs it and Strong is able to avoid easily.
Gilmore throws a jab when Strong was well out of range.
Strong is throwing a lot of body shots here, looking to wear down Gilmore rather than just go for the knockout.
Strong takes an uppercut right on the jaw but it doesn't phase him.
Strong uses good footwork to avoid the strikes from Gilmore.
Gilmore misses the jab.
The crowd cheers as Strong lands an impressive looking overhand right. Gilmore doesn't seem phased though.
Gilmore throws a chopping leg kick but Strong manages to avoid taking any serious damage.
Gilmore throws a body kick but he was well out of range there.
Gilmore is breathing heavily.
Good leg kick by Gilmore there. It's the ones that make that thud noise that hurt and that was an almighty thud.
Strong defending well as Gilmore loads up on a big left hand.
A head kick misses from Gilmore.
Nice cross by Gilmore.
Gilmore throws a hard body shot but it just misses.
Gilmore takes a body punch that cleary hurt but he's trying not to show any weakness.
That's three minutes gone in the round.
Gilmore throws a head kick that misses.
Gilmore closes the distance and takes a jab right on the nose as he does so.
Gilmore misses with a body shot.
Strong lands a head shot.
Gilmore keeping a good distance there, avoiding the body shot.
Decent striking displayed by Strong there.
Strong scores with a sloppy punch to the body. Not much technique there but it did the business.
Strong lands a nice leg kick that just misses Gilmore's sensitive parts.
Gilmore stuffs the takedown attempt from Strong. Strong gets slowly back to his feet.
Strong's corner calls for a 1-2. Strong obliges with the 1 part as he scores the single shot and moves back out of range.
Strong swings for the body but Gilmore moves out of range.
A big right from Gilmore misses.
Strong checks a leg kick nicely.
Gilmore throws a shot from downtown. Strong moves away and avoids it.
Gilmore fakes high and swings low for a body shot but Strong manages to avoid it.
Gilmore staying out of range there.
That's four minutes gone in the round.
Strong scores with a jab.
Gilmore rushes forward with a series of wild hooks but Strong moves out of range and avoids them all easily.
We've seen a great period of action over the last minute or so - credit to both fighters for going all out!
Strong showing good head movement there, avoiding the strikes from Gilmore.
Gilmore tries to score with a low kick but Strong moves his leg out of the way.
Strong keeping a good distance there, avoiding the body shot.
Strong moves out of range of the body kick from Gilmore.
Strong has his head snapped back a nice jab. A little nod from Strong there as he acknowledges the shot.
Strong checks the leg kick.
Gilmore is really peppering his opponent's head with punches.
Gilmore takes a shot right to the bread basket.
A decent looking cross lands there for Strong.
Strong throws a hook to the body but it doesn't connect.
Strong throws a body punch but Gilmore moves out of range.
Gilmore wants to slow Strong down by chopping away at his legs.
The crowd are going absolutely nuts as the round comes to an end - what a fantastic round of action!
Strong defending well as Gilmore loads up on a big left hand.
Strong works his jab well there, keeping his opponent at a distance.
Gilmore looking to throw a kick but he's pulled out of it.
Gilmore takes a body punch but keeps moving.
And thats the end of the round the fighters go back to their corners.
Happy Gilmore dominated that round.
Well, the break between rounds is over. Let's get back to the scrappin!
Strong throws a body punch but Gilmore moves out of range.
Good work by Strong as he checks the leg kick.
Strong swings for the body but Gilmore moves out of range.
Gilmore scores with a sloppy punch to the body. Not much technique there but it did the business.
A jab from Gilmore misses.
Gilmore bobbing and weaving, closes the distance and lands a hook to the side of Strong's head.
Strong moves out of range of the body kick from Gilmore.
Happy Gilmore is winning the standup battle so far.
Gilmore throws an uppercut from half a mile away. Strong sees it coming and avoids it easily.
A punch lands to the side of Gilmore 's head but he takes it in his stride.
Strong misses with a body shot
and Gilmore counters with a nice body shot.
A looping hook to the body misses from Gilmore. Strong does a little dance to reset his feet.
Strong moves out of range of the strikes.
Strong drops his hands and takes a jab to the jaw for his troubles.
Gilmore scores with a jab to the body.
Gilmore misses with a body shot. Nice footwork from Strong.
Both fighters are absolutely exhausted here.
Strong throws a hard body shot but it just misses.
Gilmore throws out a loose jab but Strong uses good head movement to avoid it.
Gilmore misses with a body shot.
That's one minute gone in the round.
Strong scores with a nice right hand.
Strong looks to score with a jab to the body but Gilmore is just out of range.
Strong throws a lazy right hand but Gilmore sees it coming a mile off and sidesteps it easily.
Strong slips under a jab from Gilmore.
Strong checks a leg kick.
Gilmore pushing out the jab but it's not landing.
Strong jabs Gilmore to the body, keeping him at a distance.
Strong ducks under a wild hook from Gilmore.
Strong throws a leg kick but he was too far away and it doesn't land.
Gilmore is the aggressor but that punch slipped nicely by Strong.
Gilmore misses with a hook
and Strong counters with a lovely straight right hand!
Gilmore scores with a nice looking left hook and follows it up with an uppercut!
Gilmore misses with a straight right.
Strong fails with a takedown attempt from distance.
A telegraphed right hand from Gilmore misses the target.
A jab from Gilmore misses.
Strong misses with a body shot.
Gilmore on the wrong end of a nice hook.
That's two minutes gone in the round.
Strong throws a body punch but Gilmore moves out of range.
Strong connects with a body shot that sends Gilmore's belly button to the back.
This has been an exciting period of action!
Strong fakes a head punch and goes low to the body. Nicely done.
Gilmore slips under a jab.
Gilmore checks a leg kick.
Gilmore walks straight into an uppercut. Luckily it didn't land flush.
Gilmore misses with a body shot. Nice footwork from Strong.
Strong misses with a hook. Gilmore ducked under it nicely.
Gilmore lands a body shot.
Strong misses with a body shot. Nice footwork from Gilmore.
Strong swings for the body but Gilmore moves out of range.
Gilmore lands with a nice low kick. That'll leave a bruise.
Strong swings and misses with a hook to the body.
Strong fakes and then throws a beautiful body shot. Gilmore looks a bit winded and takes a step backwards to take a breath.
Gilmore throws a body kick but he wasn't in range.
Gilmore throws a head kick that misses and slips in the process. He scrambles back to his feet and the fighters circle.
That's three minutes gone in the round.
Gilmore throws a body punch but Strong moves out of range.
A punch lands to the side of Gilmore 's head but he takes it in his stride.
Gilmore throws an overhand right that lands on Strong's shoulder, as Strong tries to avoid the shot.
Gilmore looks to throw the jab but Strong is out of range.
Strong takes an uppercut right on the jaw but it doesn't phase him.
Strong fakes high and swings low for a body shot but Gilmore manages to avoid it.
Strong lands a right hook to the body.
Gilmore scores with a punch to the head.
Gilmore misses with a left hand
and Strong counters with a stiff right hand.
Strong swings for the body but Gilmore moves out of range.
Gilmore pulls out of a head kick attempt.
Gilmore uses some good footwork to avoid the body shot by Strong.
Strong misses with a hook.
Gilmore misses with a body shot.
Strong misses the shot to the body.
Strong displays some good footwork, moving neatly out of range as Gilmore throws out the jab.
Strong bobs and weaves well there to avoid the strikes.
That's four minutes gone in the round.
Strong lands a lovely overhand right.
Gilmore jabbing away but nothing is landing.
Gilmore throws the left hand but Strong avoids the punch easily.
Gilmore keeping a good distance there, avoiding the body shot.
Gilmore connects with a good right hand that stumbles Strong. Strong circles away out of range and recomposes himself.
Strong fakes a head punch and goes low to the body. Nicely done.
The fans in attendance giving it up for the two fighters, who have really let it all hang out in the last minute or so!
Strong shoots in for a takedown but Gilmore shows good takedown defense.
Strong thuds his right hand into Gilmore's forehead from close range. That could be painful for both fighters.
Gilmore throws a jab when Strong was well out of range.
Gilmore moves his head to the side to avoid a jab but walks straight into a cross.
A telegraphed right hand from Gilmore misses the target.
Strong dips down and scores with a jab to the body.
Gilmore lands a nice hook to Strong's body. Strong takes it in his stride and looks to land his own strikes.
As the round comes to an end the crowd are showing their appreciation for a great round of action.
Strong ducks under an overhand right and circles away with a smile on his face.
Gilmore loads up on a big right hand but Strong slips the punch.
Strong misses with a leg kick.
Gilmore misses the jab.
And thats the end of the round the fighters go back to their corners.
That was a close second round but I would say that Happy Gilmore will probably get the nod.
That's time! Back to the action! So, we enter the final round. Let's see if either fighter can bring us a finish, or whether we're going to the judges scorecards.
Strong ducks down and throws a hook to the body but Gilmore moves away.
Gilmore throws a right hand that Strong ducks under and follows up with a left that Strong also avoids with ease.
Gilmore throws a jab when Strong was well out of range.
Strong fails with a rather predictable takedown attempt.
Gilmore misses with a jab and misses with a cross straight after too.
A head kick by Gilmore misses
and Strong counters with a quick right hand to the jaw.
Strong attempts a low kick but it misses it's target.
Gilmore misses with a leg kick.
Strong slips under a jab.
Strong shoots in for a takedown but doesn't get it.
Strong ducks under an overhand right and circles away with a smile on his face.
Gilmore misses with a straight right.
Both fighters are breathing heavily.
Gilmore throws a body kick but he was well out of range there.
Strong moves out of range of the body kick.
Gilmore lands an overhand left. A wild punch that just about connected.
Gilmore uses some good footwork to avoid the body shot by Strong.
That's one minute gone in the round.
Strong tries to land with a swinging hook to the body but Gilmore was well out of range. Poor timing from Strong.
Gilmore throws a head kick that misses and slips in the process. He scrambles back to his feet and the fighters circle.
Nice sprawl there from Gilmore as Strong shoots in.
Happy Gilmore has stuffed three takedown attempts in the round now. That's going to take a lot out of Oliver Strong.
Strong ducks under an overhand right and circles away with a smile on his face.
Gilmore throws a monster uppercut resembling something out of street fighter but it doesn't land.
Gilmore throws a jab when Strong was well out of range.
Strong lands a right hook to the body.
Gilmore takes a thudding leg kick, right into the meat of the thigh.
Gilmore drops his hands momentarily and Strong takes advantage with a crisp shot to the head.
Gilmore swings and misses with a hook to the body.
Gilmore doesn't react quick enough there as he takes a shot to the body.
Gilmore takes a shot to the nose. Hopefully that hasn't broken it.
Strong avoids a lazy jab quite easily.
Good exchange - Gilmore coming out on top.
Strong staying out of range there.
Gilmore takes a solid shot to the body. That one hurt him but he's trying not to show it.
Gilmore swings wildly with a right hand that was never going to find it's target.
Oliver Strong has stepped it up - he knows he needs a finish here!
That's two minutes gone in the round.
Gilmore throws a hook but Strong blocks it.
Strong lands a lovely overhand right.
Strong connects with a nice looking jab.
Strong fakes a jab and then connects with a hook.
Gilmore digs a good hook to Strong's body.
Gilmore looks like he's developed a pretty tasty lump over his left eye. He'll need to avoid taking much more damage to that.
Wooooo! Give it up for these two warriors! They are putting on a show!
Strong lands with a shot to the body.
A jab from Strong finds it's way through Gilmore's defenses.
Strong digs a good hook to Gilmore's body.
Strong misses with a low kick as Gilmore jumps back.
Strong lunges in with an uppercut that skims his opponent's chin.
Gilmore lands the left hand.
Strong lands a nice looking body shot.
Gilmore walks into a left hand.
Strong uses good head movement to avoid the hook from Gilmore.
A looping hook to the body misses from Strong. Gilmore does a little dance to reset his feet.
Gilmore thows a left - swing and a miss!
That's three minutes gone in the round.
Strong looks to score with a jab to the body but Gilmore is just out of range.
Gilmore throws a monster uppercut resembling something out of street fighter but it doesn't land.
Strong throws a jab but it's blocked by Gilmore.
Gilmore scores with a jab to the jaw of his opponent.
Strong stooping low to avoid any incoming strikes and then lunges in with an uppercut come cross that lands flush.
Gilmore attempts a leg kick but it's missed by a good margin.
Strong finds nothing but air with that leg kick attempt.
Gilmore uses some good footwork to avoid the body shot by Strong.
Strong takes one on the chin but seems OK.
Gilmore scores with a punch to the gut of his opponent.
Strong avoids the body shot from Gilmore.
Strong misses the shot to the body.
Strong tries to land a leg kick but Gilmore saw it coming and moves away.
Gilmore connects with a lovely right hand, straight down the pipe.
Gilmore fakes a head punch and goes low to the body. Nicely done.
Gilmore loads up on a big right hand but Strong slips the punch.
That's four minutes gone in the round.
Nice defenses there by Strong.
Gilmore takes a punch right to his stomach. That took the wind out of him momentarily.
Strong smiles there as he lands a nice right hand right on the button.
Gilmore lands a head shot.
Gilmore closes the distance and takes a jab right on the nose as he does so.
Strong swings and misses with a hook to the body.
Gilmore lands a pitter patter jab to the forehead of his opponent.
Gilmore is moving around nicely and scores here with a single head shot.
Fantastic stuff here - a very entertaining period of action, which has drawn cheers from the crowd.
Gilmore avoids the body shot from Strong.
Strong throws an off balance right hand
enabling Gilmore to counter with a crisp jab.
Gilmore feints a jab promting Strong to slip. Gilmore then demonstrates his capabilities by jabbing again. Strong slips again and ducks right into an uppercut.
Gilmore throws a nice outside leg kick.
As the round comes to an end the crowd are showing their appreciation for a great round of action.
Strong lands the left hand.
Gilmore connects with a looping right hand.
Strong listening to his corner there, landing a nice uppercut.
And that's the end of the fight!
I would just about give that final round to Oliver Strong.
Well Gilmore has outscored his opponent in every aspect of the fight today. Only a scarily incompetent judge or two will keep him from a well deserved win... Over to the ring announcer for the scorecards.
Ladies and gentlemen, after 3 rounds of action, we go to the scorecards for a decision.
Judge Chris Edwards scores the fight 29:29
Judge Andrew Berry scores the fight 29:28
Judge Donald Grub scores the fight 28:29
The fight is ruled a draw!
|
|
|
|
|
|
|
|
|
|
|
|
|
|
|
|
|
|
|
|
|
|
|
| S |
C
A |
G |
S |
C
B |
G |
|
S |
C |
G |
|
energy
A | B |
|
hype
A | B |
|
pop
A | B |
|
mgr
A | B |
|
FIGHT
RATING
100% |
|
|
|
|
|
|
|
Undercard bout
|
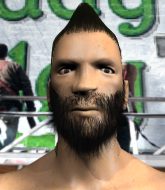
Coming up we have a middleweight MMA rules bout between Hugh Jorgan (ranked 0 p4p, 0 weight class) and Tom Wopat (ranked 0 p4p, 0 weight class). Hugh Jorgan could well score a knockout today. He has the power to get to Tom Wopat's chin.
 |
|
 |
| 189 cm
27
192 lbs
6 - 4 - 0 |
|
187 cm
26
190 lbs
8 - 11 - 0 |
BJJ Blue Belt
Excellent boxer
Very strong |
|
BJJ White Belt
Decent boxing
Knockout power |
|
| |
|
Ladies and gentlemen. This fight is 3 rounds, in the middleweight division.
Introducing the fighter to my left, fighting out of the red corner.
With a record of
6 - 4 - 0, fighting out of London, Hugh Jorgan!
And introducing the fighter to my right, fighting out of the blue corner.
With a record of
8 - 11 - 0, fighting out of London, Tom Wopat!
The judges for this bout are Andrew Berry, James Atkins and Paul Tew.
The bell rings for round one and we are underway!
Wopat walks into a left hand.
Wopat sees a low kick coming and goes to check it, but it's actually a body kick and it thuds into his unprotected ribs.
Wopat takes one on the chin but seems OK.
Wopat throws a series of punches but Jorgan moves out of range.
Wopat chopped to the floor by a nice leg kick but he springs right back up before Jorgan can pounce on him.
Wooooo! Give it up for these two warriors! They are putting on a show!
Wopat shakes his hands off, looking to compose himself, but takes a jab to the jaw whilst he does it.
Jorgan jabs Wopat to the body, keeping him at a distance.
Jorgan wings a very wild body shot but it does the job and lands to the midsection.
Wopat looks gassed!
Jorgan uses good footwork to get in and out and land a nice right hand before Wopat has time to react.
Wopat is rocked!
Wopat walks right into a perfectly timed right hook and goes down hard! He's out cold! The ref cradles Wopat limp body while Jorgan jumps on to the cage and waves to the roaring crowd. Wow that was just a brutal knockout!
Ladies and gentlemen, after 0:44 of round 1, we have a winner by way of KO (Punch). Hugh Jorgan!
|
|
|
|
|
|
|
|
|
|
|
|
|
|
|
|
|
|
|
|
|
|
|
| S |
C
A |
G |
S |
C
B |
G |
|
S |
C |
G |
|
energy
A | B |
|
hype
A | B |
|
pop
A | B |
|
mgr
A | B |
|
FIGHT
RATING
97% |
|
|
|
|
|
|
|
Undercard bout
|
Coming up we have a heavyweight MMA rules bout between Hugh Jerection (ranked 0 p4p, 0 weight class) and George Foreman (ranked 0 p4p, 0 weight class). Over to our ring announcer for the fighter introductions!
 |
|
 |
| 206 cm
27
260 lbs
7 - 2 - 0 |
|
200 cm
19
275 lbs
6 - 0 - 0 |
Good wrestling
Counter striker
Very strong |
|
BJJ White Belt
Excellent boxer
Good gas tank |
|
| |
|
Ladies and gentlemen. This fight is 3 rounds, in the heavyweight division.
Introducing the fighter to my left, fighting out of the red corner.
With a record of
7 - 2 - 0, fighting out of London, Hugh Jerection!
And introducing the fighter to my right, fighting out of the blue corner.
With a record of
6 - 0 - 0, fighting out of London, George Foreman!
The judges for this bout are Chris Edwards, Richard Clark and Paul Tew.
The bell rings for round one and we are underway!
Foreman misses with a jab and misses with a cross straight after too.
Foreman uses decent footwork to sidestep a right hand from Jerection.
George Foreman seems to be the more aggressive standup fighter in this bout.
Foreman looks to score with a jab to the body but Jerection is just out of range.
Foreman throws a right and a left that Jerection avoids nicely.
Foreman throws out a token jab with nothing on it.
Foreman avoids a kick to the body.
Jerection does a little shimmy and throws a leg kick. The leg kick missed by a considerable margin though, making him look a little bit silly for doing the shimmy.
Foreman lands a jab to the head.

It looks like Hugh Jerection has been cut.
Foreman keeping a good distance there, avoiding the body shot.
Jerection drops his hands for a split second and Foreman immediately capitalizes on the opportunity by smashing a powerful hook into Jerection face, sending his mouthguard sailing through the air, much to the delight of the crowd. Foreman follows up with a right hand that knocks Jerection into next week. He's out cold and this fight is over!
Ladies and gentlemen, after 0:42 of round 1, we have a winner by way of KO (Punches). George Foreman!
|
|
|
|
|
|
|
|
|
|
|
|
|
|
|
|
|
|
|
|
|
|
|
| S |
C
A |
G |
S |
C
B |
G |
|
S |
C |
G |
|
energy
A | B |
|
hype
A | B |
|
pop
A | B |
|
mgr
A | B |
|
FIGHT
RATING
57% |
|
|
|
|
|
|
|
Co-main event
|
Coming up we have a middleweight MMA rules bout between Hector Jiminez (ranked 0 p4p, 0 weight class) and Jaakko Jauhaja (ranked 0 p4p, 0 weight class). Jiminez comes to the cage accompanied by Big pun - Beware. Jauhaja is bouncing up and down as he enters the arena, backed by Onyx: SLAM. Hector Jiminez could well score a knockout today. He has the power to get to Jaakko Jauhaja's chin.
 |
|
 |
| 191 cm
22
203 lbs
10 - 4 - 0 |
|
195 cm
25
199 lbs
10 - 7 - 0 |
Good wrestling
World class boxer
Cardio machine |
|
Good wrestler
World class boxer
Powerful |
|
| |
|
Ladies and gentlemen. This fight is 3 rounds, in the middleweight division.
Introducing the fighter to my left, fighting out of the red corner.
With a record of
10 - 4 - 0, fighting out of Amsterdam, Hector Jiminez!
And introducing the fighter to my right, fighting out of the blue corner.
With a record of
10 - 7 - 0, fighting out of Helsinki, Jaakko Jauhaja!
The judges for this bout are James Atkins, Daniel Bishop and James Glass.
The bell rings for round one and we are underway!
Jauhaja closes the distance and takes a jab right on the nose as he does so.
Jauhaja takes a solid shot to the body. That one hurt him but he's trying not to show it.
Jiminez lunges in with an uppercut that skims his opponent's chin.
Jauhaja throws out a loose jab but Jiminez uses good head movement to avoid it.
Jauhaja tries to bum rush Jiminez with a series of wild strikes but Jiminez uses good footwork to avoid the assault.
A right-left combo lands from Jauhaja.
Fantastic stuff here - a very entertaining period of action, which has drawn cheers from the crowd.
Jauhaja takes a body punch but keeps moving.
Jiminez lands a body shot.
Jauhaja uses good head movement to avoid the hook from Jiminez.
Jiminez throws a body punch but Jauhaja moves out of range.
Jiminez connects with a crisp jab.
Jauhaja drops his hands and takes a jab to the jaw for his troubles.
Jauhaja is rocked!
Jauhaja throws the left hand but Jiminez avoids the punch easily.
Jauhaja is still on wobbly legs! Can Jiminez finish him?
Jauhaja misses with a half-hearted attempt at a head kick.
Jauhaja seems to have recovered his senses.
Jauhaja doesn't manage to clinch there - Jiminez circles away.
Jiminez lands a big uppercut and Jauhaja crumbles to the floor! The ref thinks about stopping the fight but Jauhaja looks OK. Jiminez waves Jauhaja back to his feet!
Jauhaja shoots in looking for a takedown. Jiminez tries to sprawl out of it but Jauhaja keeps driving through. The fighters are pinned against the cage. Jiminez manages to get underhooks and after a bit of a struggle, circles away and we're back to standing.
That's one minute gone in the round.
Today's fight clock is brought to you by... OOOH that's a huge shot by Jiminez! Jauhaja is in big trouble here - the ref steps in to save him and this one is all over!
Ladies and gentlemen, after 1:09 of round 1, we have a winner by way of TKO (Strikes). Hector Jiminez!
|
|
|
|
|
|
|
|
|
|
|
|
|
|
|
|
|
|
|
|
|
|
|
| S |
C
A |
G |
S |
C
B |
G |
|
S |
C |
G |
|
energy
A | B |
|
hype
A | B |
|
pop
A | B |
|
mgr
A | B |
|
FIGHT
RATING
100% |
|
|
|
|
|
|
|
Main event
|
Coming up we have a welterweight MMA rules bout between Sergio Garcia (ranked 0 p4p, 0 weight class) and Takero Yoshi (ranked 0 p4p, 0 weight class). Garcia's entrance music is Ensemble of the restless. A fine choice. Yoshi has chosen Gimme shelter - the rolling stones as his entrance music. Both fighters really staring eachother down here, as Takero Yoshi enters the cage!
 |
|
 |
| 181 cm
22
182 lbs
7 - 0 - 1 |
|
178 cm
25
170 lbs
16 - 9 - 0 |
Good wrestling
Excellent boxer
KO power |
|
Powerful takedowns
Decent boxing
Heavy handed |
|
| |
|
Ladies and gentlemen. This fight is 3 rounds, in the welterweight division.
Introducing the fighter to my left, fighting out of the red corner.
With a record of
7 - 0 - 1, fighting out of London, Sergio Garcia!
And introducing the fighter to my right, fighting out of the blue corner.
With a record of
16 - 9 - 0, fighting out of London, Takero Yoshi!
The judges for this bout are Colin Fotheringham, Andrew Berry and William Gold.
The bell rings for round one and we are underway!
Yoshi misses with a takedown attempt - Garcia sprawls well and throws a nice strike on the way out which just misses.
Garcia thows a body shot but no joy.
Yoshi fails with a takedown attempt.
Garcia thows a body shot but no joy.
Yoshi shoots in for a takedown and gets it. Oh and he's advanced to full mount straight away.
Yoshi throwing sloppy strikes here. Perhaps if he tightened up his striking from such a dominant position, he'd be able to finish easier.

Yoshi stands up from the dominant position. He obviously fancies his chances standing.
Yoshi throws a hook but Garcia blocks it.
Yoshi fails with a rather predictable takedown attempt.
Sergio Garcia has stuffed three takedown attempts in the round now. That's going to take a lot out of Takero Yoshi.
Yoshi has his takedown stuffed
and Garcia counters with an inside leg kick.
Jab, jab by Garcia - just one landing.
The crowd cheering loudly, showing their appreciation for the quality fight we're seeing here.
Garcia dances in quickly and lands a nice inside leg kick on Yoshi. That did some damage!
Garcia lands a beauty of a right hand that gets the crowd cheering.
Garcia swings for the body but Yoshi moves out of range.
That's one minute gone in the round.
Garcia stuffs the takedown.
Garcia cracks a nice hook into Yoshi's ribs.
Yoshi with a lazy takedown attempt
and Garcia counters with a solid body kick.
Yoshi looks gassed!
Garcia lands a leg kick and bounces back out of range.
Garcia works Yoshi's body with a nice hook.
Garcia is looking to wear down Yoshi with body shots, infact he's throwing more body shots than head shots at the moment.
A lazy left from Garcia finds it's target.
Garcia moves forwards but Yoshi connects with a nice, crisp jab.
Yoshi takes a jab on the nose there. A little bit of blood seems to be coming out. Hopefully that won't affect his breathing.
Yoshi fails with a takedown attempt from distance.
Garcia fakes and then throws a beautiful body shot. Yoshi looks a bit winded and takes a step backwards to take a breath.
The crowd are loving this. Great action here.
Yoshi gets his takedown attempt stuffed easily
and Garcia counters with a big head kick but Yoshi shrugs it off.
Garcia connects with the punch.
Yoshi shoots in but doesn't get the takedown
and Garcia connects with a straight left hand counter down the middle.
Garcia cracks a nice hook into Yoshi's ribs.
That's two minutes gone in the round.
Yoshi doesn't succeed with the takedown
and Garcia makes him pay by landing a nice hook to the body before moving out of range.
Jab, jab by Garcia - just one landing.
Garcia connects with an inside leg kick.
Garcia looks to land a combination. Yoshi sees it coming but can only parry a couple of the shots.
Yoshi misses with a takedown attempt
and Garcia counters with a good low kick that Yoshi was not able to check.
Garcia connects with a single shot there.
Garcia shoots in for a takedown! He's got it and he's managed to land in full mount! That's better than Garcia was expecting from the takedown attempt, I'm sure!
Garcia breaks from Yoshi's wrist control and lands an elbow.
Garcia is in the full mount, landing strikes.
Garcia with shots to the head and body - Yoshi looks very uncomfortable down there.
Garcia landing shots from mount.
Yoshi is rocked!
Garcia lands a big elbow.
Yoshi is still in real trouble! Can Garcia finish him?
Yoshi takes a big shot to the dome and his eyes have rolled back in his head! Garcia's killer instinct has kicked in as he finishes the fight with more strikes. Impressive finish.
Ladies and gentlemen, after 3:04 of round 1, we have a winner by way of TKO (Strikes). Sergio Garcia!
|
|
|
|
|
|
|
|
|
|
|
|
|
|
|
|
|
|
|
|
|
|
|
| S |
C
A |
G |
S |
C
B |
G |
|
S |
C |
G |
|
energy
A | B |
|
hype
A | B |
|
pop
A | B |
|
mgr
A | B |
|
FIGHT
RATING
80% |
|
|
|
|
|
|
|
|
|
|
