 |
PFA 17: Martial Law PBP Commentary |
Undercard bout
|
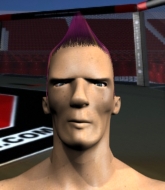
Coming up we have a heavyweight MMA rules bout between Hugh Jinside (ranked 0 p4p, 0 weight class) and Michael Wallace (ranked 0 p4p, 0 weight class). Wallace has chosen Godsmack - I Stand Alone as his entrance music. Both fighter's entrance songs getting the crowd jumping here.
 |
|
 |
| 195 cm
26
265 lbs
2 - 2 - 0 |
|
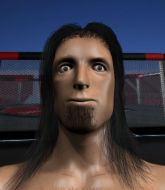
185 cm
18
244 lbs
0 - 3 - 0 |
BJJ Blue Belt
Solid boxing
Very strong |
|
BJJ Blue Belt
Counter striker
Intelligent |
|
| |
|
Ladies and gentlemen. This fight is 3 rounds, in the heavyweight division.
Introducing the fighter to my left, fighting out of the red corner.
With a record of
2 - 2 - 0, fighting out of London, Hugh Jinside!
And introducing the fighter to my right, fighting out of the blue corner.
With a record of
0 - 3 - 0, fighting out of London, Michael Wallace!
The judges for this bout are James Ackerman, Donald Grub and James Atkins.

The bell rings for round one and we are underway!
Wallace tries a head kick but it misses.
The fight stays on the outside here - Wallace looks like he's thinking about clinching though.
Wallace takes a shot to the body in his stride.
Wallace shoots in for a takedown but Jinside shows good takedown defense.
Wallace misses with a takedown

and Jinside counters with a nice shoot takedown that brings the fighters to the ground.

Jinside stands up from Wallace's guard - Jinside perhaps looking for a knockout.
Jinside cracks Wallace with a nasty uppercut that draws ooohs from the crowd and sends Wallace tumbling backwards onto the mat. He tries to recover but Jinside pounces and lands a hail of unanswered strikes that forces the referee to step in to end the fight! Wallace is not happy but he gave the referee no choice!
Ladies and gentlemen, after 0:31 of round 1, we have a winner by way of TKO (Strikes). Hugh Jinside!
|
|
|
|
|
|
|
|
|
|
|
|
|
|
|
|
|
|
|
|
|
|
|
| S |
C
A |
G |
S |
C
B |
G |
|
S |
C |
G |
|
energy
A | B |
|
hype
A | B |
|
pop
A | B |
|
mgr
A | B |
|
FIGHT
RATING
100% |
|
|
|
|
|
|
|
Undercard bout
|
Coming up we have a lightweight MMA rules bout between Benson Smooth (ranked 0 p4p, 0 weight class) and Chris Lappin (ranked 0 p4p, 0 weight class). This should be a great matchup!
 |
|
 |
| 175 cm
19
158 lbs
2 - 1 - 0 |
|
170 cm
25
165 lbs
5 - 8 - 0 |
Good wrestling
Counter striker
Very quick |
|
BJJ Blue Belt
Brawler
Knockout power |
|
| |
|
Ladies and gentlemen. This fight is 3 rounds, in the lightweight division.
Introducing the fighter to my left, fighting out of the red corner.
With a record of
2 - 1 - 0, fighting out of London, Benson Smooth!
And introducing the fighter to my right, fighting out of the blue corner.
With a record of
5 - 8 - 0, fighting out of London, Chris Lappin!
The judges for this bout are Andrew Berry, Chris Edwards and Paul Tew.
The bell rings for round one and we are underway!
Lappin tries to clinch but Smooth is having none of it.
Lappin throws an off balance right hand
and Smooth counters with a good right hand that lands right on the jaw.
Lappin drives through with a takedown into guard.
Lappin trying to control the position from guard on top but Smooth is wriggling around, looking for whatever he can.

Lappin has gone for a leg lock! Smooth slips out almost immediately though and dives into Lappin's guard.
Smooth throwing elbows and punches but not connecting, as Lappin works some decent striking defense from the bottom.
The ref warns both fighters not to hold the cage as they work up against the meshing.
Smooth scoring with some ground and pound.
Lappin wants to stand and escape but Smooth is having none of it.
Lappin striking from his own guard.

That's one minute gone in the round.
Smooth loading up with the ground and pound but he's missing more than he's landing in this flurry.
Lappin wants to get back to his feet but Smooth is in a dominant position and won't allow it.
Lappin utilising some decent striking defenses from the guard, preventing the ground and pound.
Smooth throws a big right hand that misses.
Smooth with a flurry of punches that miss.
Smooth would like to get this fight back to the feet but can't get free from the closed guard.
We get told so often about how wrestlers don't like to be on their backs. Let's see if Lappin can do anything to dispel that myth.
Smooth won't allow Lappin to get back to his feet.
Lappin pushes Smooth off and gets back to his feet.
Smooth is looking to clinch.
Lappin misses with an uppercut. Smooth saw that one coming.
Lappin rushes in with a sloppy looking punch
and Smooth counters with a nice shoot takedown that brings the fighters to the ground.

That's two minutes gone in the round.
Lappin wants to get back to his feet but Smooth passes into half guard.
Smooth is breathing heavily.
Lappin is looking to escape.
Smooth drops an elbow to the side of Lappin's head.
Lappin pushes Smooth off and gets back to his feet.
Smooth fails with the takedown
and Lappin decides to take the opportunity to score a takedown. He's landed in Smooth's guard.
The crowd cheering loudly, showing their appreciation for the quality fight we're seeing here.
Lappin has decided he wants to stand but the closed guard of Smooth is proving hard to escape from.
Smooth pushes Lappin off for just long enough to get back to his feet. Very athletic spring there.
Lappin misses with a left hand
and Smooth decides to take the opportunity to score a takedown. He's landed in Lappin's guard.

That's three minutes gone in the round.
Smooth wants to control from the top but Lappin keeps moving.
Smooth postures up and lands some nice ground and pound.
Lappin working the defensive guard well to avoid strikes from Smooth.
Lappin avoiding any damage from the ground and pound.
Lappin kicks Smooth off and gets to his feet.
Smooth gets his takedown attempt stuffed easily

and Lappin counters by clinching up.
Smooth tries for a takedown. No joy.
That's three failed takedown attempts in the round for Benson Smooth. That's going to take a lot out of him.

Lappin manages to break the clinch.
Smooth is looking for a takedown here. He's shot in and has managed to get it, finishing up in Lappin's half guard.
Lappin trying to control here.
Lappin is pressing down on Smooth's left leg trying to get back to full guard. He's managed it.

That's four minutes gone in the round.
Lappin scrambles and gets back to his feet.
Lappin scores with a takedown into Smooth's guard.
Lappin wants to control from the top but Smooth keeps moving.
Lappin tries to stand but Smooth is controlling from the bottom.
As the round comes to an end the crowd are showing their appreciation for a great round of action.
And thats the end of the round the fighters go back to their corners.
A close round but Chris Lappin will probably get the nod.
OK. That's time! The bell goes and we're back to the action.

Lappin rushes in with a sloppy looking punch
and Smooth counters with a nice shoot takedown that brings the fighters to the ground.
Lappin manages to escape and get back to his feet.
Lappin throws a lazy uppercut
and Smooth counters with a single leg into guard. Lappin didn't expect that.
Smooth with a nice head shot there.
Benson Smooth overall seems to be getting the better of the ground position in the fight so far.
Lappin is working an open guard here, looking to improve his position. No doubt that will leave him open to counters but at least he's being more offensive.
Lappin throwing his legs up looking for a triangle.
This has been an exciting period of action!
Smooth content to strike from guard, landing some decent shots.
Smooth wants to stand but Lappin is controlling his posture from full guard.
Lappin is working actively off his back, looking to secure an arm or perhaps work for a triangle.
Both fighters are absolutely exhausted here.
Smooth postures up and lands a big shot to Lappin's brow.
That's one minute gone in the round.
Smooth with a flurry of punches that miss.
Smooth throwing shots from guard but he's hitting more mat than opponent.
Lappin lands a beautiful switch and he's in full mount! That could spell trouble for Smooth!
Smooth is in a horrible position here, under a barrage of strikes, he's managing to avoid any damage.
Lappin throwing strikes here but Smooth is writhing around nicely and avoiding any serious damage.
Lappin trying to control but he's not successful this time.
That's two minutes gone in the round.
My god... these two guys really need to pick up the pace or everyone will leave to go get a beer.
Lappin throwing strikes here but Smooth is writhing around nicely and avoiding any serious damage.
Lappin looking to secure an arm triangle but Smooth defends it well.
Lappin throwing strikes here but Smooth is writhing around nicely and avoiding any serious damage.
Smooth avoids a series of strikes thrown by Lappin.
That's three minutes gone in the round.
Lappin throws some wild stikes that Smooth manages to avoid easily.
Lappin controlling the pace for now.
Lappin misses with a series of strikes from mount. He'll no doubt be working on his ground and pound when he gets back to the gym.
Lappin goes for an armbar but he's fallen flat on his backside there and now Smooth is on top in guard.
Smooth won't allow Lappin to sweep him here.
That's four minutes gone in the round.
The crowd are getting on the fighters' backs, as the pace has dropped off in the last minute or so.
Lappin is active off his back here, looking for submissions.
Lappin has his feet on Smooth's thighs here. He's pushed Smooth off and worked for a very quick armbar from the bottom! He's flipped onto his stomach and he's cranking hard on the arm! Smooth screams in pain and taps out! This one is all over!
Ladies and gentlemen, after 4:35 of round 2, we have a winner by way of Submission (Armbar). Chris Lappin!
|
|
|
|
|
|
|
|
|
|
|
|
|
|
|
|
|
|
|
|
|
|
|
| S |
C
A |
G |
S |
C
B |
G |
|
S |
C |
G |
|
energy
A | B |
|
hype
A | B |
|
pop
A | B |
|
mgr
A | B |
|
FIGHT
RATING
64% |
|
|
|
|
|
|
|
Undercard bout
|
Coming up we have a heavyweight MMA rules bout between Hugh Jerection (ranked 0 p4p, 0 weight class) and Leonard Hightower (ranked 0 p4p, 0 weight class). I'm sure you'll be fascinated to know that I was talking to some pointless Z list celebrity before the fight and he thought that Leonard Hightower was going to win. Let's see if he was right.
 |
|
 |
| 206 cm
26
260 lbs
4 - 1 - 0 |
|
192 cm
24
270 lbs
5 - 4 - 0 |
Good wrestling
Counter striker
Experienced |
|
BJJ Brown Belt
Basic striking
Knockout power |
|
| |
|
Ladies and gentlemen. This fight is 3 rounds, in the heavyweight division.
Introducing the fighter to my left, fighting out of the red corner.
With a record of
4 - 1 - 0, fighting out of London, Hugh Jerection!
And introducing the fighter to my right, fighting out of the blue corner.
With a record of
5 - 4 - 0, fighting out of London, Leonard Hightower!
The judges for this bout are Sam Margolis, Andrew Berry and Daniel Bishop.
The bell rings for round one and we are underway!
Hightower ducks under a wild hook from Jerection.
Hightower with a poor takedown
and Jerection cracks him with a counter punch right on the button.

It looks like Leonard Hightower has been cut.
Jerection fakes a right and follows up with a big left that drops Hightower to one knee - oooooh, he's wobbly! Hightower looks to clinch but Jerection throws him off and pummels him into the canvas! Hightower taps out under the strikes! The fight is over!
Ladies and gentlemen, after 0:09 of round 1, we have a winner by way of Submission (Strikes). Hugh Jerection!
|
|
|
|
|
|
|
|
|
|
|
|
|
|
|
|
|
|
|
|
|
|
|
| S |
C
A |
G |
S |
C
B |
G |
|
S |
C |
G |
|
energy
A | B |
|
hype
A | B |
|
pop
A | B |
|
mgr
A | B |
|
FIGHT
RATING
100% |
|
|
|
|
|
|
|
Undercard bout
|
Coming up we have a welterweight MMA rules bout between James Stephenson II (ranked 0 p4p, 0 weight class) and Dan Hazlehurst (ranked 0 p4p, 0 weight class). Hazlehurst comes into a darkened arena with his song building. Queen - The Show Must Go On kicks in, the lights come on and the crowd goes wild! What a showman! Both fighters look pumped up here. Let's hope this is a good fight!
 |
|
 |
| 177 cm
22
172 lbs
1 - 1 - 0 |
|
183 cm
25
180 lbs
4 - 6 - 0 |
BJJ Purple Belt
Solid Muay Thai
Cuts easily |
|
BJJ Blue Belt
Decent knees
Solid chin |
|
| |
|
Ladies and gentlemen. This fight is 3 rounds, in the welterweight division.
Introducing the fighter to my left, fighting out of the red corner.
With a record of
1 - 1 - 0, fighting out of London, James Stephenson II!
And introducing the fighter to my right, fighting out of the blue corner.
With a record of
4 - 6 - 0, fighting out of London, Dan Hazlehurst!
The judges for this bout are Paul Tew, William Gold and Colin Fotheringham.
The bell rings for round one and we are underway!
Stephenson II scores a trip takedown into side control. Nice.
Hazlehurst is sneaking out the side here. He's bucked Stephenson II off and has taken his back!
Stephenson II covering up well and avoiding damage.
Even with his hooks in, Hazlehurst manages to miss with strikes from the back.
Stephenson II avoids the strikes from Hazlehurst.
Stephenson II trying to control but not successfully.
Hazlehurst is remaining active here, looking for the choke. The more discerning members of the crowd will appreciate his efforts.
That's one minute gone in the round.
Hazlehurst is striking from the back but Stephenson II escapes and manages to recover to half guard.
Hazlehurst is looking for a kimura. It's going to be difficult to finish that from half guard though and Stephenson II defends it well.
Hazlehurst is looking for a kimura. It's going to be difficult to finish that from half guard though and Stephenson II defends it well.
That's two minutes gone in the round.
A lull in the action here being met with boos from the crowd.
Hazlehurst working the head and body with strikes.
Hazlehurst misses with a head shot. Stephenson II uses the momentum to regain guard.
Stephenson II is controlling Hazlehurst's posture.
Hazlehurst throwing strikes but missing.
That's three minutes gone in the round.
Hazlehurst throwing shots from guard but he's hitting more mat than opponent.
Hazlehurst chips away with some ground and pound.
Hazlehurst stands up and looks to throw the legs aside to pass to side control. Stephenson II swivels though and keeps the full guard.
Hazlehurst is looking to work some ground and pound but Stephenson II has wrist control.
Stephenson II tries to land a sweep but no joy.
That's four minutes gone in the round.
Neither fighter has done anything of merit for a good minute or two here and the crowd are not happy about it.
A big thud reverberates around the arena there as Hazlehurst accidentally thumps the mat. Hopefully he's not broken his hand.
Hazlehurst throws and elbow that misses. Stephenson II uses the momentum to reverse the position. He's now in Hazlehurst's guard. Nice move by Stephenson II!
The fighters are pressed up against the cage, both looking to find a bit of space to work.
Hazlehurst wants to sweep here but Stephenson II controlling him for the moment.
Hazlehurst lands a beautiful switch and he's in full mount! That could spell trouble for Stephenson II!
The crowd thankful this round is nearly over.
Stephenson II manages to regain half guard whilst avoiding the strikes.
And thats the end of the round the fighters go back to their corners.
A close round but Dan Hazlehurst will probably get the nod.
The referee calls time. The cornermen exit stage left and we're back to business.
Stephenson II shoots in and gets a takedown into half guard. Stephenson II showed some decent athleticism there.
Hazlehurst is looking to sinch up a guillotine here but Stephenson II pulls his head out easily.
Hazlehurst is not content to let Stephenson II control the position.
Hazlehurst wants to sweep but Stephenson II has passed to side control!
Hazlehurst is positioning himself to get back to half guard.
That's one minute gone in the round.
Hazlehurst is persisting with the attempt to improve his position.
Hazlehurst is looking to work his way out of this bad position but Stephenson II is controlling him well.
Hazlehurst is breathing heavily.
Hazlehurst tries to get back to half guard but can't.
That's two minutes gone in the round.
Neither fighter has done anything of merit for a good minute or two here and the crowd are not happy about it.
Stephenson II wants to lay and pray for a moment but Hazlehurst keeps working.
Stephenson II is pausing for a moment. What's he doing? It looks like he's clearing his nose. Oh dude! He's shot a load of snot all down Hazlehurst's shoulder. That is not cool.
Hazlehurst is trying to improve his position.
That's three minutes gone in the round.
Stephenson II trying to control the action but Hazlehurst is working from the bottom.
The referee wants the fighters to be more active or he's going to reset them on the feet.
Hazlehurst tries to improve position but can't.
That's four minutes gone in the round.
A few boos can be heard. I'm sure they will multiply if the fighters don't pick up the pace.
Stephenson II wants to lay and pray for a moment but Hazlehurst keeps working.
Hazlehurst tries to buck Stephenson II off but Stephenson II is having none of it.
Boooooooooooooooooooo!!! God, this has been a terrible round. Come on you two, sort yourselves out!
And thats the end of the round the fighters go back to their corners.
James Stephenson II dominated that second round.
The minute break is over - no more time for sponges and pep talks - back to the action! This is the final round!

Stephenson II throws a sloppy head kick and Hazlehurst moves out of range easily.
Hazlehurst circles away from the clinch attempt
and Hazlehurst counters with a nice uppercut.
A jab from Stephenson II does it's job there.
It looks like Dan Hazlehurst has been cut.
Stephenson II throws a lazy head kick
and Hazlehurst counters with a quick right hand to the jaw.
Stephenson II misses with a left hand
letting Hazlehurst counter with a right hand.
Stephenson II throws a sloppy head kick
and Stephenson II takes a counter punch right on the button for his troubles.
Stephenson II throws a sloppy head kick
and Hazlehurst cracks him with a counter punch right on the button.
A head kick by Stephenson II misses
and Hazlehurst counters with a straight right hand.
A head kick by Stephenson II misses
and Hazlehurst counters with a stiff right hand.
That's one minute gone in the round.
Hazlehurst shoots in and gets a takedown into Stephenson II's guard.
Both fighters are breathing heavily.
Hazlehurst postures up to throw the ground and pound strikes but they don't connect.
Hazlehurst drops back looking for a heel hook - he quickly realises he's not going to get it but Stephenson II manages to dive on top of him before he can escape and now Hazlehurst has Stephenson II in his guard.
There's a bit of a scramble here and now Hazlehurst is on top in guard.
Hazlehurst loading up with the ground and pound but he's missing more than he's landing in this flurry.
That's two minutes gone in the round.
Hazlehurst throwing strikes but missing.
Stephenson II utilising some decent striking defenses from the guard, preventing the ground and pound.
Hazlehurst thinks about going for a leg but decides against it, in order to maintain the position.
Hazlehurst in full guard, throwing the ground and pound. No damage this time.
That's three minutes gone in the round.
Hazlehurst lands a nice shot whilst sitting in his opponent's guard.
Hazlehurst throwing shots from guard but he's hitting more mat than opponent.
The ref warns both fighters not to hold the cage as they work up against the meshing.
Hazlehurst thows a big elbow that misses.
Hazlehurst postures up.
Hazlehurst throwing strikes but missing.
Hazlehurst loading up with the ground and pound but he's missing more than he's landing in this flurry.
That's four minutes gone in the round.
A lull in the action here being met with boos from the crowd.
Hazlehurst throwing shots from guard but he's hitting more mat than opponent.
Hazlehurst working some ground and pound from guard but it's not doing any damage.
Stephenson II preventing the ground and pound from doing any damage.
Stephenson II looking for a sweep. Not yet Stephenson II, not yet.
Hazlehurst working some ground and pound from guard but it's not doing any damage.
The crowd thankful this round is nearly over.
Hazlehurst chips away with some ground and pound.
Hazlehurst drops back looking for a heel hook - he quickly realises he's not going to get it but Stephenson II manages to dive on top of him before he can escape and now Hazlehurst has Stephenson II in his guard.
And that's the end of the fight!
Dan Hazlehurst comfortably won the final round on my scorecard.
I think Hazlehurst has won this one but let's see whether the judges agree with me. Over to the ring announcer for the scorecards.
Ladies and gentlemen, after 3 rounds of action, we go to the scorecards for a decision.
Judge Paul Tew scores the fight 28:29
Judge William Gold scores the fight 28:29
Judge Colin Fotheringham scores the fight 28:29
In favor of your winner, by unanimous decision... Dan Hazlehurst!
|
|
|
|
|
|
|
|
|
|
|
|
|
|
|
|
|
|
|
|
|
|
|
| S |
C
A |
G |
S |
C
B |
G |
|
S |
C |
G |
|
energy
A | B |
|
hype
A | B |
|
pop
A | B |
|
mgr
A | B |
|
FIGHT
RATING
23% |
|
|
|
|
|
|
|
Undercard bout
|
Coming up we have a light heavyweight MMA rules bout between Van Diesel (ranked 0 p4p, 0 weight class) and Hasim Bakalakadakastacka (ranked 0 p4p, 0 weight class). The key to victory for Van Diesel has got to be keeping the fight on the feet.
 |
|
 |
| 191 cm
18
213 lbs
1 - 0 - 0 |
|
193 cm
23
212 lbs
4 - 5 - 0 |
BJJ White Belt
Excellent boxer
Big heart |
|
Good takedowns
Counter striker
Determined |
|
| |
|
Ladies and gentlemen. This fight is 3 rounds, in the light heavyweight division.
Introducing the fighter to my left, fighting out of the red corner.
With a record of
1 - 0 - 0, fighting out of London, Van Diesel!
And introducing the fighter to my right, fighting out of the blue corner.
With a record of
4 - 5 - 0, fighting out of London, Hasim Bakalakadakastacka!
The judges for this bout are James Glass, Paul Tew and Colin Fotheringham.
The bell rings for round one and we are underway!
Diesel throws a right and a left that Bakalakadakastacka avoids nicely.
Bakalakadakastacka throws the overhand right but ducks down into a quick takedown attempt. Diesel was covering up waiting for the punch and Bakalakadakastacka finishes the takedown easily into guard.
Bakalakadakastacka thinks about going for a leg but decides against it, in order to maintain the position.
Bakalakadakastacka throws a strike but Diesel rolls with it and manages to sweep. Now he's in guard on top.
Bakalakadakastacka has his foot on Diesel's thigh. He's trying to push off and get in position for a triangle, I think. Diesel works his way back into a safe position though.
Diesel stays in close to Bakalakadakastacka's body and controls the position.
Bakalakadakastacka wants to sweep but no luck.
Bakalakadakastacka wriggles free and stands up.
Diesel stuffs the takedown attempt from Bakalakadakastacka. Bakalakadakastacka gets slowly back to his feet.
Diesel tries to grapple but his opponent circles
and Bakalakadakastacka counters with a head kick.
Van Diesel seems to be the more aggressive standup fighter in this bout.
That's one minute gone in the round.
No luck for Bakalakadakastacka with that takedown attempt.
Bakalakadakastacka takes a solid shot to the body. That one hurt him but he's trying not to show it.
Diesel closes the distance looking to clinch
and Bakalakadakastacka counters with a shoot takedown into half guard.
Diesel is trying to stand up here but Bakalakadakastacka is controlling him well.
Bakalakadakastacka is working for a submission of some sort.
That's two minutes gone in the round.
Bakalakadakastacka not landing any meaningful shots this time.
The ref warns both fighters not to hold the cage as they work up against the meshing.
Diesel is breathing heavily.
Bakalakadakastacka frees up his trapped foot and advances to mount.
The fighters are pressed up against the cage, both looking to find a bit of space to work.
Bakalakadakastacka is thinking about an arm triangle here, looking to tighten it up before moving to side control. Diesel can see it coming though and defends well with a couple of strikes to the head and some good arm positioning.
The crowd cheering loudly, showing their appreciation for the quality fight we're seeing here.
Bakalakadakastacka looking to finish with strikes here!
Bakalakadakastacka is working for a guillotine from mount but Diesel frees his head quite easily.
Bakalakadakastacka looks like he's working for a submission but he's not found anything just yet.
That's three minutes gone in the round.
Diesel is trying to escape but when you're mounted that's not too easy.
Diesel on his back here. We all know that wrestlers don't like being on their back so let's see if Diesel tries to get out of the position.
BOOM! Bakalakadakastacka connects with a massive shot to the dome!
Bakalakadakastacka looking to ground and pound but Diesel is blocking nicely.
Bakalakadakastacka looking to finish with strikes here!
Diesel defends a decent attempt at a guillotine from Bakalakadakastacka.
Bakalakadakastacka is working to isolate an arm here. It's a telegraphed submission attempt but he's gone for it anyway - and he's got it! Bakalakadakastacka extends the arm and Diesel is forced to tap!
Ladies and gentlemen, after 3:59 of round 1, we have a winner by way of Submission (Armbar). Hasim Bakalakadakastacka!
|
|
|
|
|
|
|
|
|
|
|
|
|
|
|
|
|
|
|
|
|
|
|
| S |
C
A |
G |
S |
C
B |
G |
|
S |
C |
G |
|
energy
A | B |
|
hype
A | B |
|
pop
A | B |
|
mgr
A | B |
|
FIGHT
RATING
65% |
|
|
|
|
|
|
|
Undercard bout
|
Coming up we have a lightweight MMA rules bout between Mark Jones (ranked 0 p4p, 0 weight class) and Giggs Hollowman (ranked 0 p4p, 0 weight class). The crowd seem to be enjoying Hollowman's choice of entrance music: Movado. These two fighters really are very evenly matched on the feet - it will be fascinating to see who can assert themselves in that aspect of the fight.
 |
|
 |
| 176 cm
26
164 lbs
4 - 2 - 0 |
|
173 cm
25
158 lbs
3 - 0 - 0 |
BJJ White Belt
Excellent MT
Experienced |
|
Decent wrestler
Counter striker
Granite chin |
|
| |
|
Ladies and gentlemen. This fight is 3 rounds, in the lightweight division.
Introducing the fighter to my left, fighting out of the red corner.
With a record of
4 - 2 - 0, fighting out of London, Mark Jones!
And introducing the fighter to my right, fighting out of the blue corner.
With a record of
3 - 0 - 0, fighting out of London, Giggs Hollowman!
The judges for this bout are Chris Edwards, Andrew Berry and William Gold.
The bell rings for round one and we are underway!
Jones moves into the clinch.
Jones misses with an elbow over the top.
Jones prevents the takedown attempt.
Jones throws an elbow but it misses.
Kneeeeees! The crowd are calling for knees to the body. Jones obliges.
Jones connects with a knee to the head.
Jones throws an elbow but it misses.
Jones landing knees to the head.
Jones pushes off and fires off an elbow that misses, before clinching up again, against the cage.
Jones pushes off and fires off an elbow that misses, before clinching up again, against the cage.
Jones comes over the top with an elbow. That landed flush.
Hollowman on the defensive, avoiding the knees to the body.
Hollowman managing to block the knees to the body from Jones.
Jones lands a knee to the body.
Kneeeeees! The crowd are calling for knees to the body. Jones obliges.
Kneeeeees! The crowd are calling for knees to the body. Jones obliges.
Jones looking to throw knees to the head but Hollowman is blocking nicely.
Jones effectively controlling the action here.
Kneeeeees! The crowd are calling for knees to the body. Jones obliges.
Jones lands a nice elbow from the clinch.
That's one minute gone in the round.
Jones using the Thai clinch to land knees to the body.
Jones lands a nice elbow.
Jones lands a glancing elbow in the clinch.
Jones pushes off an throws an elbow but Hollowman leans to the side and avoids it. We're back to clinching against the cage.
Jones lands a glancing elbow in the clinch.
Jones unloads a knee to the mid-section. Hollowman lets out a prehistoric sounding urrrrgh.
Hollowman managing to block the knees to the body from Jones.
Jones prevents a takedown attempt there.
Jones lands a damaging elbow.
Jones working Hollowman over with knees to the body.
Hollowman blocks an elbow strike from Jones.
Jones misses the knee to the body. Nice hip positioning from Hollowman.
The referee is keeping an eye on Jones - much more stalling and he will separate the fighters.
Hollowman is working for a takedown up against the cage. He can't get it on this occasion though.
Mark Jones has stuffed three takedown attempts in the round now. That's going to take a lot out of Giggs Hollowman.
Hollowman changes levels and goes for a takedown here. Jones fights it off and pushes away nicely.
Jones throws a jab, cross combination which is slipped
and Hollowman connects with a straight left hand counter down the middle.
Jones is breathing heavily.
That's two minutes gone in the round.
Jones has Hollowman up against the cage in a clinch.
Jones looking to throw knees to the head but Hollowman is blocking nicely.
Hollowman managing to block the knees to the body from Jones.
Hollowman blocks a knee to the body. He'll have a nicely bruised forearm in the morning.
Jones wants to stall.
Hollowman wants a takedown but no success here.
A real battle for position is taking place between these two warriors.
Jones with the Thai clinch. He's looking to land a big knee but he's not managed it this time.
Hollowman goes for a takedown attempt but Jones pushes him away and we're back to fighting at a distance.
Jones moves into the clinch.
That's three minutes gone in the round.
Hollowman wants a takedown but no success here.
Hollowman managing to block the knees to the body from Jones.
Hollowman has double underhooks and is working for a body lock takedown. He's got it. The fighters land in half guard but Jones regains guard immediately.
Jones is looking to stand back up... there's a bit of a scramble and Hollowman dives into side control.
Hollowman postures up a little and throws a couple of hammerfists but they don't connect properly.
That's four minutes gone in the round.
Hollowman decides to stand back up. Hollowman steps back and let's Jones get back to his feet.
Hollowman throws a hook to the side of Jones's head but Jones sees it coming and ducks under it beautifully.
Jones has closed the distance and engaged Hollowman in a clinch.
Hollowman is working for a takedown up against the cage. He can't get it on this occasion though.
Hollowman wants a takedown.
Good anti-grappling being displayed by Hollowman as Jones tries to tie him up.
Jones with an attempt at a knee that misses.
Hollowman avoids the elbow strike from Jones, against the cage.
Hollowman wants a takedown.
Hollowman on the defensive, avoiding the knees to the body.
Hollowman goes for a takedown in the clinch but Jones prevents it.
And thats the end of the round the fighters go back to their corners.
Mark Jones dominated that round.
That's time! Jones's corner gives him a slap on the ass as he gets ready to fight.
Hollowman rushes forward with a series of wild hooks but Jones moves out of range and avoids them all easily.
Jones drives through and clinches with Hollowman against the cage.
Jones missing with knees to the body.
A bit of stalling here from Jones.
Hollowman is trying to drag Jones to the mat but Jones just about manages to keep his footing. He used the cage to his advantage there.
Jones connects with a nasty looking knee right to Hollowman's face.
Hollowman drops down looking for an ankle pick but Jones pulls his leg out and moves away.
We've had a slow start to the round here - hopefully the action picks up.
Jones moves into the clinch.
Both fighters are absolutely exhausted here.
Hollowman drops to a knee looking for a takedown but Jones gets the underhooks and prevents it.
Mark Jones has stuffed three takedown attempts in the round now. That's going to take a lot out of Giggs Hollowman.
That's one minute gone in the round.
Jones tries a knee to the head but he's missed.
Hollowman being controlled against the cage.
Jones with an attempt at a knee that misses.
Hollowman is trying to work for a single leg takedown but Jones pulls him back up using the underhooks.
With the fighters up against the cage, Jones throws an elbow but misses.
Hollowman avoids a wild elbow strike from Jones.
Jones is working hard here but doesn't seem to be able to control effectively, up against the cage.
Jones looks to throw an elbow but misses.
Jones is trying to stall.
Maybe Jones would be better served going for some more strikes rather than trying to control so much.
Hollowman has double underhooks and is working for a body lock takedown. He's got it. The fighters land in half guard but Jones regains guard immediately.
That's two minutes gone in the round.
The fighters are starting to perspire pretty heavily.
Hollowman is intent on slowing down the pace of the fight, simply looking to control.
It looks like the ref is thinking about a standup.

OK we're going to have a standup here. Giggs Hollowman hasn't been effective enough on the ground and the referee wants a restart.
Hollowman scores with a nice takedown into half guard. Let's see what he's got on the ground.
Hollowman content to sit in half guard and control for a moment.
Hollowman stops Jones from getting back to his feet.
That's three minutes gone in the round.
The ref stands the fighters back up, due to lack of action by Giggs Hollowman.
Hollowman is looking for a takedown here. He's shot in and has managed to get it, finishing up in Jones's half guard.
Hollowman trying to mount his opponent but Jones defends it.
That's four minutes gone in the round.
Hollowman gets to his feet - back to striking we go!
Jones pushes Hollowman up against the cage in a clinch.
Jones trying to control the position but instead, Hollowman has worked for underhooks and has pushed Jones into the cage.
Hollowman tries for a takedown but Jones manages to get underhooks.
Jones tries a knee to the head but Hollowman blocks it.
And thats the end of the round the fighters go back to their corners.
Giggs Hollowman showed his class in that round. I'd imagine he'll take it on all the scorecards.
The referee calls time. The cornermen exit stage left and we're back to business. Let's hear some noise people - this is the final round!
Jones moves into range and clinches up with Hollowman.
Hollowman managing to block the knees to the body from Jones.
Hollowman looking for a takedown.
Jones looking to slow down the pace here.
Hollowman dodges an elbow strike from Jones.
Jones with an attempt at a knee that misses.
Kneeeeees! The crowd are calling for knees to the body. Jones obliges.
Jones creates a bit of distance and throws an elbow that only just misses.
Hollowman looking for a takedown.
Hollowman managing to block the knees to the body from Jones.
With the two fighters working up against the cage, Jones just misses with a elbow thrown towards Hollowman's brow.
We've had a slow start to the round here - hopefully the action picks up.
Nice elbow from Jones.
With the fighters up against the cage, Jones throws an elbow but misses.
Hollowman goes for a takedown attempt but Jones pushes him away and we're back to fighting at a distance.
Mark Jones has stuffed three takedown attempts in the round now. That's going to take a lot out of Giggs Hollowman.
Jones tries a head kick but it misses.
Both fighters are breathing heavily.
That's one minute gone in the round.
Hollowman cracks Jones with an open hand slap.
It looks like Mark Jones has been cut.
Mark Jones is looking to keep the fight on the feet at all costs.
Hollowman feints and as Jones raises his hands in defense, Hollowman changes levels and drives through with a takedown into guard.
Hollowman gets to his feet - Jones follows without any prompting.
Jones gets caught flat footed, as Hollowman shoots in with a quick takedown into guard.
Hollowman stands up from Jones's guard - Hollowman perhaps looking for a knockout.
The crowd are loving this. Great action here.
Jones gets to the clinch - let's see what his plan is here.
That's two minutes gone in the round.
Jones is trying to slow down the pace in the clinch, to catch his breath.
Nice elbow from Jones.
A knee to the head by Jones.
Jones gets double underhooks to prevent a takedown attempt from Hollowman.
Hollowman goes for a takedown in the clinch but Jones prevents it.
Jones tries to stall but Hollowman uses the opportunity to gain a better position.
Jones stops a takedown attempt from Hollowman.
Hollowman goes for a takedown attempt but Jones pushes him away and we're back to fighting at a distance.
Jones lands a leg kick. The shin dug right into the meat of the thigh.
That's three minutes gone in the round.
Jones clinches.
Jones pushes off an throws an elbow but Hollowman leans to the side and avoids it. We're back to clinching against the cage.
Hollowman tries to score a body lock takedown but Jones shows good agility there to stay on his feet.
Jones trying to stall but Hollowman improves his position.
Jones is looking to score with knees to the body. Maybe he'll change it up and go body then head. Hollowman is defending well for now.
Hollowman has Jones pressed up against the cage and is working for takedown. Jones manages to improve position though and keeps the fight standing.
Hollowman blocks a knee to the body. He'll have a nicely bruised forearm in the morning.
Hollowman looking for a takedown.
Hollowman takes an elbow to the temple.
Jones is looking to control Hollowman's arms but Hollowman gets an underhook and turns him. Now Jones has his back to the cage.
Jones tries to land a knee to the body but he is off balance and Hollowman avoids it.
Jones is trying to slow down the pace of the fight but Hollowman is keeping busy.
Hollowman changes levels and goes for a takedown here. Jones fights it off and pushes away nicely.
That's four minutes gone in the round.
The crowd are showing their displeasure at the lack of action as loud boos ring out around the arena.
Jones takes the fight into the clinch.
Jones looks to throw an elbow but misses.
Jones throws an elbow but it's blocked.
Jones pushes off and fires off an elbow that misses, before clinching up again, against the cage.
Jones throws a vicious knee straight up the middle but Hollowman blocks it with crossed arms.
Hollowman goes for a takedown in the clinch but Jones prevents it.
Jones prevents a takedown attempt there.
Jones lands an elbow inside.
And that's the end of the fight!
Giggs Hollowman comfortably won the final round on my scorecard.
I think Hollowman has won this one but let's see whether the judges agree with me. Over to the ring announcer for the scorecards.
Ladies and gentlemen, after 3 rounds of action, we go to the scorecards for a decision.
Judge Chris Edwards scores the fight 28:29
Judge Andrew Berry scores the fight 28:29
Judge William Gold scores the fight 28:29
In favor of your winner, by unanimous decision... Giggs Hollowman!
|
|
|
|
|
|
|
|
|
|
|
|
|
|
|
|
|
|
|
|
|
|
|
| S |
C
A |
G |
S |
C
B |
G |
|
S |
C |
G |
|
energy
A | B |
|
hype
A | B |
|
pop
A | B |
|
mgr
A | B |
|
FIGHT
RATING
43% |
|
|
|
|
|
|
|
Undercard bout
|
Coming up we have a light heavyweight MMA rules bout between Yeovil Tiger (ranked 0 p4p, 0 weight class) and Gus Taylor (ranked 0 p4p, 0 weight class). Tiger kept the crowd waiting but all that was forgotten when his ring entrance music started. The incomparable musical genius that is Delilah by Tom Jones. Yeovil Tiger has the better chin. Will he look to stand and bang today?
 |
|
 |
| 194 cm
27
211 lbs
10 - 7 - 0 |
|
177 cm
22
205 lbs
6 - 2 - 0 |
Good wrestling
Excellent boxer
Very quick |
|
BJJ Blue Belt
Counter striker
Knockout power |
|
| |
|
Ladies and gentlemen. This fight is 3 rounds, in the light heavyweight division.
Introducing the fighter to my left, fighting out of the red corner.
With a record of
10 - 7 - 0, fighting out of London, Yeovil Tiger!
And introducing the fighter to my right, fighting out of the blue corner.
With a record of
6 - 2 - 0, fighting out of London, Gus Taylor!
The judges for this bout are Richard Clark, James Glass and James Ackerman.
The bell rings for round one and we are underway!
Taylor slips under a jab from Tiger.
Tiger swings widly with a right hand
and Taylor connects with a straight left hand counter down the middle.
Tiger swings for the body but Taylor moves out of range.
Taylor defending well as Tiger loads up on a big left hand.
Tiger misses with a hook. Taylor ducked under it nicely.
Taylor keeping his hands up high there, blocking the jab from Tiger.
Tiger's corner calls for a 1-2. Tiger obliges with the 1 part as he scores the single shot and moves back out of range.
The fighters circling - Tiger throws out the jab but it was never going to land.
Tiger blocks a head kick by Taylor.
We've had a slow start to the round here - hopefully the action picks up.
Tiger thuds a left hand into Taylor's body.
Tiger throws a jab, cross combination which is slipped
and Taylor makes the exchange count by landing a cracking kick to the body. Tiger really felt that one!
Tiger misses with a two punch combination.
That's one minute gone in the round.
Taylor throws a body kick the misses
and Tiger counters with a quick right hand to the jaw.
Taylor throws a body kick, spinning off balance
and Tiger counters with a left to the body.
Taylor throws a body kick, spinning off balance
and Tiger cracks him with a counter punch right on the button.
A looping hook to the body misses from Tiger. Taylor does a little dance to reset his feet.
Tiger waving his hands out in front of him, looking to distract Taylor.
Taylor moves away from the strike by Tiger.
Taylor throws a lazy body kick
and Tiger counters with a left to the body.
Taylor looks gassed!
This has been an exciting period of action!
Nice cross by Tiger.
A shot to the body from Tiger misses
and Taylor counters with a leg kick that reverborates around the arena.
Tiger bobs and weaves and unloads with a good uppercut.
That's two minutes gone in the round.
Tiger steps in with a hook that catches Taylor right on the chin and knocks him to the floor! Tiger follows him down with more strikes and that's all she wrote! Taylor looks absolutely devastated.
Ladies and gentlemen, after 2:06 of round 1, we have a winner by way of TKO (Strikes). Yeovil Tiger!
|
|
|
|
|
|
|
|
|
|
|
|
|
|
|
|
|
|
|
|
|
|
|
| S |
C
A |
G |
S |
C
B |
G |
|
S |
C |
G |
|
energy
A | B |
|
hype
A | B |
|
pop
A | B |
|
mgr
A | B |
|
FIGHT
RATING
60% |
|
|
|
|
|
|
|
Undercard bout
|
Coming up we have a lightweight MMA rules bout between Paul Potts (ranked 0 p4p, 0 weight class) and Emil Hammer (ranked 0 p4p, 0 weight class). Emil Hammer acknowledges the crowd's support as he enters the cage.
 |
|
 |
| 175 cm
25
162 lbs
16 - 9 - 1 |
|
167 cm
29
163 lbs
13 - 10 - 1 |
BJJ Brown Belt
Solid boxing
Very quick |
|
BJJ Purple Belt
World class boxer
Heavy handed |
|
| |
|
Ladies and gentlemen. This fight is 3 rounds, in the lightweight division.
Introducing the fighter to my left, fighting out of the red corner.
With a record of
16 - 9 - 1, fighting out of London, Paul Potts!
And introducing the fighter to my right, fighting out of the blue corner.
With a record of
13 - 10 - 1, fighting out of London, Emil Hammer!
The judges for this bout are Andrew Berry, Paul Tew and James Glass.
The bell rings for round one and we are underway!
Hammer swinging wildly here.
Hammer throws a left and a right that both miss
enabling Potts to counter with a crisp jab.
It looks like Emil Hammer has been cut.
Hammer throws a combination but comes up with nothing but fresh air.
Hammer misses with a two punch combination.
Hammer fails to land with a series of punches.
Hammer tries to sprawl but Potts drives through with a takedown into half guard.

Hammer is rocked!
Potts is trying to work for a kimura but Hammer is defending well.
Potts wants to control but Hammer is keeping him busy.
Potts content to sit in half guard and control for a moment.
The fighters are pressed up against the cage, both looking to find a bit of space to work.
Hammer kicks off Potts and gets to his feet.
No luck with that takedown attempt from Potts.
Potts shoots in for a takedown but Hammer shows good takedown defense.
That's one minute gone in the round.
Potts has his takedown stuffed
and Hammer counters with a three punch combination, finished off with a leg kick. Nice work.
That's three failed takedown attempts in the round for Paul Potts. That's going to take a lot out of him.
Hammer throws a combination but it was largely blocked by Potts.
Potts misses with a takedown
and Hammer counters with a three punch combination, finished off with a leg kick. Nice work.
Potts with a lazy takedown attempt
and Hammer counters with a two punch combo.
Potts is breathing heavily.
Hammer goes to the watering hole and comes back with a big thumbs up from the judges as he scores a three punch combo.
Hammer closes the distance and lands a one-two.
Potts is rocked!
Hammer lands with a right that hurts Potts. Potts looks to clinch but Hammer throws a short knee that drops Potts. This one is all over!
Ladies and gentlemen, after 1:32 of round 1, we have a winner by way of TKO (Punch and Knee). Emil Hammer!
|
|
|
|
|
|
|
|
|
|
|
|
|
|
|
|
|
|
|
|
|
|
|
| S |
C
A |
G |
S |
C
B |
G |
|
S |
C |
G |
|
energy
A | B |
|
hype
A | B |
|
pop
A | B |
|
mgr
A | B |
|
FIGHT
RATING
100% |
|
|
|
|
|
|
|
Co-main event
|
Coming up we have a light heavyweight MMA rules bout between Divji Borec (ranked 0 p4p, 0 weight class) and Grande Mucho (ranked 0 p4p, 0 weight class). Borec kept the crowd waiting but all that was forgotten when his ring entrance music started. The incomparable musical genius that is Cannibal Corpse - I Will Kill You. Mucho has chosen You Dont Know - 50 Cent as his entrance music, which hasn't gone down very well with the crowd. Over to our ring announcer for the fighter introductions!
 |
|
 |
| 189 cm
29
224 lbs
15 - 7 - 0 |
|
180 cm
26
205 lbs
11 - 8 - 0 |
Good wrestling
Excellent boxer
Very quick |
|
BJJ Purple Belt
Decent boxing
Powerful |
|
| |
|
Ladies and gentlemen. This fight is 3 rounds, in the light heavyweight division.
Introducing the fighter to my left, fighting out of the red corner.
With a record of
15 - 7 - 0, fighting out of London, Divji Borec!
And introducing the fighter to my right, fighting out of the blue corner.
With a record of
11 - 8 - 0, fighting out of London, Grande Mucho!
The judges for this bout are Chris Edwards, William Gold and James Atkins.
The bell rings for round one and we are underway!
Mucho looks for a takedown. He's got it. We're now in half guard.
Borec regains full guard. Nicely done.
Mucho working some ground and pound from guard but it's not doing any damage.
Borec manages to sweep nicely, so he's now on top. Mucho manages to get himself to full guard.
The fighters are pressed up against the cage, both looking to find a bit of space to work.
Borec postures up and lands some nice ground and pound.
Mucho preventing the ground and pound from doing any damage.
Borec trying to land body shots but he keeps hitting the mat.
Mucho looking to control.
Borec keeps in close for a moment and lands a decent shot to the side of Mucho's head.
Borec throwing strikes but missing.
Borec stands up and looks to throw the legs aside to pass to side control. Mucho swivels though and keeps the full guard.
Mucho is working from a closed guard but he's struggling to control his opponent.
Borec slips effortlessly into side control - very nice.
Mucho is looking to regain half guard here but Borec keeps moving and retains side control.
That's one minute gone in the round.
Borec landing strikes.
Mucho really doesn't want to stay on the ground with Borec. If he can't get it back to his feet, it's only a matter of time before he'll be tapping out.
Borec lands a few punches from side control.
Borec lands a nice forearm strike.
Borec lands a knee to the body and a forearm to the face.
Borec working away.
Borec is putting a hurting on Mucho here, landing some big shots from side control.
A big shot lands for Borec! That's hurt Mucho! Will he recover? Borec fires away with more strikes and the referee has to step in to stop the fight!
Ladies and gentlemen, after 1:44 of round 1, we have a winner by way of TKO (Strikes). Divji Borec!
|
|
|
|
|
|
|
|
|
|
|
|
|
|
|
|
|
|
|
|
|
|
|
| S |
C
A |
G |
S |
C
B |
G |
|
S |
C |
G |
|
energy
A | B |
|
hype
A | B |
|
pop
A | B |
|
mgr
A | B |
|
FIGHT
RATING
91% |
|
|
|
|
|
|
|
Main event
|
Coming up we have a heavyweight MMA rules bout between Laht Nepphur (ranked 0 p4p, 0 weight class) and Gerald Young (ranked 0 p4p, 0 weight class). Gerald Young is the more experienced fighter, so let's see if that makes a difference tonight.
 |
|
 |
| 190 cm
23
268 lbs
6 - 0 - 0 |
|
198 cm
23
265 lbs
10 - 6 - 1 |
BJJ Brown Belt
Lethal high kicks
KO power |
|
Powerful takedowns
Good low kicks
Powerful |
|
| |
|
Ladies and gentlemen. This fight is 5 rounds, for the heavyweight championship of the world!
Introducing the champion to my left, fighting out of the red corner.
With a record of
6 - 0 - 0, fighting out of London, Laht Nepphur!
And introducing the challenger to my right, fighting out of the blue corner.
With a record of
10 - 6 - 1, fighting out of London, Gerald Young!
The judges for this bout are Andrew Berry, Sam Margolis and James Atkins.
The bell rings for round one and we are underway!
Nepphur tries for a takedown but Young sees it coming a mile off and avoids it easily.
Gerald Young seems to be the more aggressive standup fighter in this bout.
Nepphur cracks Young with a good jab.
It looks like Gerald Young has been cut.
Wow, both these guys are really going for it!
Nepphur clinches with his opponent.
Young wants to get back to striking at distance but Nepphur won't allow it.
Nepphur using the Thai plumb to throw knees but Young has his back arched nicely, preventing the strike.
Young breaks the clinch.
A head kick from Young lands but Nepphur takes it in his stride.
It looks like Laht Nepphur has been cut.
We've seen a great period of action over the last minute or so - credit to both fighters for going all out!
Young misses with a jab, cross combination.
Nepphur pulls out of a head kick attempt.
Young uses decent footwork to sidestep a right hand from Nepphur.
The fighters circle momentarily. Nepphur darts into range and connects with a nice straight punch.
Nepphur fakes a head punch and goes low to the body. Nicely done.
Young throws a body kick despite being completely out of range
and Nepphur counters with a left to the body.
Young looks gassed!
Nepphur throws a nice inside leg kick.
Nepphur lands with a straight right. Young didn't see that one coming.
Nepphur pounces like a tiger and cracks Young with a vicious hook! Young is down but not out! Nepphur follows up with more strikes forcing the ref to jump in and stop it!
Ladies and gentlemen, after 0:39 of round 1, we have a winner by way of TKO (Punches). Laht Nepphur!
Laht Nepphur retains his heavyweight title!
|
|
|
|
|
|
|
|
|
|
|
|
|
|
|
|
|
|
|
|
|
|
|
| S |
C
A |
G |
S |
C
B |
G |
|
S |
C |
G |
|
energy
A | B |
|
hype
A | B |
|
pop
A | B |
|
mgr
A | B |
|
FIGHT
RATING
100% |
|
|
|
|
|
|
|
|
|
|
