 |
WCP:New Beginnings PBP Commentary |
Undercard bout
|
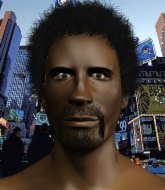
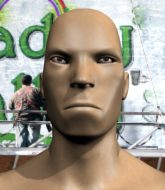
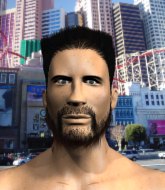
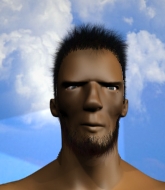
Coming up we have a lightweight MMA rules bout between Ronald Kray (ranked 0 p4p, 0 weight class) and Ste Passmoor (ranked 0 p4p, 0 weight class). Passmoor is bouncing up and down as he enters the arena, backed by Hammer Time. Ronald Kray has the better chin. Will he look to stand and bang today?
 |
|
 |
| 170 cm
23
158 lbs
4 - 1 - 0 |
|
181 cm
24
166 lbs
2 - 4 - 0 |
BJJ Blue Belt
Excellent boxer
Cuts easily |
|
BJJ Purple Belt
Good elbows
Knockout power |
|
| |
|
Ladies and gentlemen. This fight is 2 rounds, in the lightweight division.
Introducing the fighter to my left, fighting out of the red corner.
With a record of
4 - 1 - 0, fighting out of London, Ronald Kray!
And introducing the fighter to my right, fighting out of the blue corner.
With a record of
2 - 4 - 0, fighting out of London, Ste Passmoor!
The judges for this bout are Steven Brown, Andrew Berry and Chris Edwards.

The bell rings for round one and we are underway!
A jab from Kray misses.
A lazy left from Kray finds it's target.

It looks like Ste Passmoor has been cut.
Kray swings and misses with a hook to the body.
Kray lands a big right hand and follows it up with an uppercut. Oh and another big punch and a knee - Passmoor can't take much more of this! Another big shot to the jaw from Kray and Passmoor drops to the floor. Beaten and bloodied - he had enough there. A vicious beatdown by Kray.
Ladies and gentlemen, after 0:12 of round 1, we have a winner by way of TKO (Strikes). Ronald Kray!
|
|
|
|
|
|
|
|
|
|
|
|
|
|
|
|
|
|
|
|
|
|
|
| S |
C
A |
G |
S |
C
B |
G |
|
S |
C |
G |
|
energy
A | B |
|
hype
A | B |
|
pop
A | B |
|
mgr
A | B |
|
FIGHT
RATING
91% |
|
|
|
|
|
|
|
Undercard bout
|
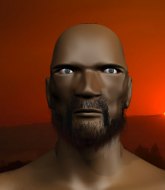
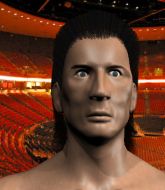
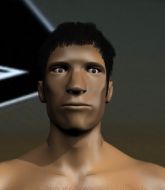
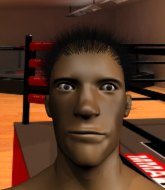
Coming up we have a lightweight MMA rules bout between Dave Mazinger (ranked 0 p4p, 0 weight class) and Jamie Horton (ranked 0 p4p, 0 weight class). The crowd seem to be enjoying Horton's choice of entrance music: Sorry, you're not a winner. Jamie Horton has the power to score a knockout today if he connects clean with Dave Mazinger's chin.
 |
|
 |
| 180 cm
21
164 lbs
3 - 1 - 0 |
|
179 cm
21
157 lbs
2 - 3 - 0 |
BJJ Purple Belt
Counter striker
Big heart |
|
BJJ Brown Belt
Basic striking
Solid chin |
|
| |
|
Ladies and gentlemen. This fight is 2 rounds, in the lightweight division.
Introducing the fighter to my left, fighting out of the red corner.
With a record of
3 - 1 - 0, fighting out of London, Dave Mazinger!
And introducing the fighter to my right, fighting out of the blue corner.
With a record of
2 - 3 - 0, fighting out of London, Jamie Horton!
The judges for this bout are Chris Edwards, James Ackerman and Daniel Bishop.
The bell rings for round one and we are underway!
Horton misses with a hook. Mazinger ducked under it nicely.
Mazinger lunges in with swinging rights and lefts but Horton circles away quickly and effectively.
Horton listening to his corner there, landing a nice uppercut.
Horton shoots in looking for a takedown. Mazinger tries to sprawl out of it but Horton keeps driving through. The fighters are pinned against the cage. Mazinger manages to get underhooks and after a bit of a struggle, circles away and we're back to standing.

The fight moves into the clinch position.

Horton is fighting off a takedown attempt but Mazinger is just too persistent for him and manages to trip Horton to the mat. Horton regains guard as soon as the fighters hit the mat.
Mazinger trying to control but Horton is working from the bottom.

Horton is working actively off his back, looking to secure an arm or perhaps work for a triangle.
Horton is looking to stand up but Mazinger isn't so interested in that idea.
Horton is doing well to control the posture of his opponent and prevent any damage.
Mazinger has to be careful here, sitting in the guard of a superior BJJ player.

That's one minute gone in the round.
Horton working for a triangle but Mazinger defends it easily.
Horton has his foot on Mazinger's thigh. He's trying to push off and get in position for a triangle, I think. Mazinger works his way back into a safe position though.
Horton is active off his back here, looking for submissions.
Mazinger trying to control but Horton is working from the bottom.
Horton looking to sweep here. No luck so far.
Horton is trying to control the position but Mazinger postures up.
Horton looking to control the pace of the fight rather than finish it.
Mazinger wants to control from the top but Horton keeps moving.

That's two minutes gone in the round.
My god... these two guys really need to pick up the pace or everyone will leave to go get a beer.
Mazinger tries to free his leg and advance position but Horton is retaining full guard.
Mazinger wants to control from the top but Horton keeps moving.

It looks like we're going to have a standup here. Neither fighter is doing enough on the ground.
Horton shoots in from a long way out. He's driving through with the takedown attempt and he eventually gets it, landing in Mazinger's guard.
Mazinger not looking particularly offensive just at the moment.
Mazinger is really struggling to control Horton but he's trying to hold on to the position.
Horton wants to control from the top but Mazinger keeps moving.
Horton pushes down on Mazinger's leg and manages to get into half guard.
Horton looks gassed!

That's three minutes gone in the round.
Mazinger trying to control from the bottom.
Horton throwing shots but they're hitting the canvas more than the man.
Mazinger actively working from the bottom here.
The referee has ruled that neither fighter is active enough on the ground and has stood them back up.
Horton misses with a takedown attempt - Mazinger sprawls well and throws a nice strike on the way out which just misses.
Jamie Horton seems to be the more aggressive standup fighter in this bout.
Mazinger fakes an overhand right and shoots for a takedown. Horton sprawls well initially but Mazinger persists and gets the takedown into half guard.
Horton trying to hold on to Mazinger's head to control him but Mazinger postures up.
Mazinger is trying to work for a kimura. This could be trouble! No, Horton has managed to free his arm - good work.

That's four minutes gone in the round.
Mazinger performing his best blanket impression for a moment.
Horton looking for submissions off his back.
The fighters are battling for position here. Horton manages to regain full guard. Nice work.
Mazinger trying to control but Horton is working from the bottom.
Horton looking to control the pace of the fight rather than finish it.
Horton is trying to control the position from the bottom.

That's five minutes gone in the round.
Mazinger sitting in guard, not really doing much.
Horton is working an open guard here, looking to improve his position. No doubt that will leave him open to counters but at least he's being more offensive.
Mazinger pressing down on his opponent's thigh, looking to pass guard. Horton is keeping the position for now.
Horton is throwing his legs up, looking for submissions. Mazinger is aware though and is defending well.
Mazinger drops back, looking for a kneebar! Horton looks panicked! The fighters roll across the mat, one looking to finish, one looking to escape. Horton looks to have wriggled free... Yes, he's got his leg free and he's dived into side control! Good work there from Horton!

That's six minutes gone in the round.
Neither fighter has done anything of merit for a good minute or two here and the crowd are not happy about it.
Horton is looking to finish here, going for an Americana. Mazinger knows the correct defense though, so he's OK.
Mazinger is looking to regain half guard here but Horton keeps moving and retains side control.
Mazinger wants to control but Horton postures up.
Mazinger is trying to improve his position.
Horton tries for an arm triangle. That looks pretty tight to me. Is this one over!?! Possibly, maybe, no Horton has let go of the choke. Obviously it wasn't as tight as we thought!
Mazinger manages to work his way to half guard, despite Horton's best efforts.

That's seven minutes gone in the round.
Horton throwing shots but Mazinger is blocking nicely.
Mazinger is trying to control but can't.
Mazinger actively working from the bottom here.
Horton trying to control from half guard but Mazinger is working away.
Mazinger trying to control from the bottom.
Mazinger blocking the ground and pound attempt from Horton.
Mazinger wants to control but Horton is keeping busy.
Well, the referee has seen enough. Neither fighter is active enough on the ground so he's stood them back up.
Horton shoots and misses
and Mazinger counters by clinching up.
Dave Mazinger has stuffed three takedown attempts in the round now. That's going to take a lot out of Jamie Horton.

That's eight minutes gone in the round.
There's not a lot going on here and the crowd are letting the fighters know they're not willing to tolerate a lack of action.
Mazinger gets underhooks to prevent Horton's takedown attempt.
Horton tries to take the fight to the ground by pulling guard but can't manage it.
Horton has a body lock and is looking for a takedown. Mazinger is bouncing around trying to prevent the takedown and somehow he has indeed managed to stay on his feet.
Mazinger pulls guard successfully.
Mazinger looking to hit a scissor sweep but Horton is one step ahead there.
Mazinger is working hard here to advance position.
Horton passes Mazinger's right leg, so he's now in half guard.
Horton is trying to control. Mazinger wants to improve his position but can't escape this time.
Horton trying to control the pace.
Mazinger looking to work for a kimura from the bottom.

That's nine minutes gone in the round.
Mazinger looking to work for a kimura from the bottom.
Horton not doing much here.
Horton is trying to work for a kimura. This could be trouble! No, Mazinger has managed to free his arm - good work.
Mazinger actively working from the bottom here.
And thats the end of the round the fighters go back to their corners.
Jamie Horton dominated that round.
The minute break is over - no more time for sponges and pep talks - back to the action! This is the final round!

Horton throws a front kick that sends Mazinger stumbling back into the cage.
Horton changes levels and drives through with a really nice takedown into side control. Mazinger looks really pissed at himself for not defending that better.
Mazinger is not content to let Horton control the position.
Mazinger sneaks back into half guard.
Horton is working for submissions here but there's nothing on.
Mazinger looking for submissions off his back.
Still in half guard, Horton seems content to control.
That's one minute gone in the round.
Mazinger tries to roll over but Horton keeps him under control.
The fighters are pressed up against the cage, both looking to find a bit of space to work.
Both fighters are absolutely exhausted here.
Mazinger works his way to full guard. Good work.
Mazinger throwing his legs up looking for a triangle.
Horton trying to control but Mazinger is working from the bottom.
There's a bit of a scramble here and now Mazinger is on top in guard.
Horton trying to keep a closed guard but Mazinger is proving a slippery customer.
Jamie Horton has got the better of the ground game so far.
Horton wants to stand but Mazinger is controlling the position.
That's two minutes gone in the round.
My god... these two guys really need to pick up the pace or everyone will leave to go get a beer.
Mazinger trying to control the position from guard on top but Horton is wriggling around, looking for whatever he can.
Horton is working from a closed guard but he's struggling to control his opponent.
Horton lands a beautiful switch and he's in full mount! That could spell trouble for Mazinger!
Horton looking to finish Mazinger with some ground and pound. This is bad for Mazinger!
Mazinger tries to hold on but Horton pushes him away.
Horton thowing shots but they're missing.
That's three minutes gone in the round.
Horton looking to secure an arm triangle but Mazinger defends it well.
Mazinger working to try and regain half guard.
Horton has hold of Mazinger's left arm, perhaps looking for a submission. The two fighters tussle over control of the isolated limb and Mazinger manages to get his arm back to his side and away from danger.
Horton wants to take his opponent's back but he's not managed it.
Mazinger slips a leg in and gets back to half guard.
Mazinger has no desire to be mounted, so is trying to control. Horton is working away from the top position though.
That's four minutes gone in the round.
The crowd are hurling abuse towards the fighters... You can hardly blame them though because there isn't a lot going on in the fight.
Mazinger looking for submissions off his back.
Horton seems content to maintain position for now, rather than mounting any offense.
Mazinger is looking to control Horton's leg but it's slowly edging free. Can Mazinger avoid being mounted?
That's five minutes gone in the round.
Horton thows a wild elbow that connects with the canvas.
Horton is trying to work for a kimura. This could be trouble! No, Mazinger has managed to free his arm - good work.
Horton is thwarting Mazinger's attempts to control the position.
Mazinger tries to roll over but Horton keeps him under control.
Mazinger is looking to control Horton's leg but it's slowly edging free. Can Mazinger avoid being mounted?
The referee has ruled that neither fighter is active enough on the ground and has stood them back up.
Horton tries to clinch but is not successful on this occasion.
That's six minutes gone in the round.
Neither fighter has done anything of merit for a good minute or two here and the crowd are not happy about it.
Mazinger shoots in but doesn't get the takedown
and Horton counters with a nice double leg into half guard.
Horton seems like he's working for an arm triangle here. He's freed his trapped foot and he's rotating nicely. Mazinger is in big trouble! He's tapping out! This one is aaaaaaaaaaaall over!
Ladies and gentlemen, after 6:30 of round 2, we have a winner by way of Submission (Arm Triangle). Jamie Horton!
|
|
|
|
|
|
|
|
|
|
|
|
|
|
|
|
|
|
|
|
|
|
|
| S |
C
A |
G |
S |
C
B |
G |
|
S |
C |
G |
|
energy
A | B |
|
hype
A | B |
|
pop
A | B |
|
mgr
A | B |
|
FIGHT
RATING
38% |
|
|
|
|
|
|
|
Undercard bout
|
Coming up we have a bantamweight MMA rules bout between Cesc Fabregas (ranked 0 p4p, 0 weight class) and Bennie Bishop (ranked 0 p4p, 0 weight class). Bennie Bishop has the better chin. Will he look to stand and bang today?
 |
|
 |
| 175 cm
22
145 lbs
3 - 2 - 0 |
|
172 cm
23
140 lbs
2 - 1 - 0 |
BJJ Purple Belt
Solid Muay Thai
Intelligent |
|
BJJ Blue Belt
Decent boxing
Good gas tank |
|
| |
|
Ladies and gentlemen. This fight is 2 rounds, in the bantamweight division.
Introducing the fighter to my left, fighting out of the red corner.
With a record of
3 - 2 - 0, fighting out of London, Cesc Fabregas!
And introducing the fighter to my right, fighting out of the blue corner.
With a record of
2 - 1 - 0, fighting out of London, Bennie Bishop!
The judges for this bout are Paul Tew, Sam Margolis and Andrew Berry.
The bell rings for round one and we are underway!
Fabregas uses good head movement to avoid the hook from Bishop.
Some wild striking there from Fabregas.
Bishop throws a looping overhand right but Fabregas ducks down to avoid it.
Some bone on bone action there as Bishop checks a low kick. Luckily it wasn't a particularly hard one.
Fabregas doesn't react quick enough there as he takes a shot to the body.
The crowd cheers as Bishop lands an impressive looking overhand right. Fabregas doesn't seem phased though.

Fabregas is rocked!
It looks like Cesc Fabregas has been cut.
Bishop throws out a token jab with nothing on it.
Oh Fabregas is still all over the place! His legs are completely gone! Will he be able to recover?!!
Fabregas avoids a lazy jab quite easily.
Bishop pushing out the jab but it's not landing.
Fabregas showing good head movement there, avoiding the strikes from Bishop.
Bishop throws a hook to the side of Fabregas's head but Fabregas sees it coming and ducks under it beautifully.
Bishop throws an uppercut from half a mile away. Fabregas sees it coming and avoids it easily.
Fabregas displays some good footwork, moving neatly out of range as Bishop throws out the jab.
Bishop misses with a looping right.
Bishop misses with a looping left.
Nice defenses there by Fabregas.
Bishop jabbing away but nothing is landing.
Bishop misses with a jab and misses with a cross straight after too.
Bishop misses with a hook. Fabregas ducked under it nicely.
Bishop jabbing away but nothing is landing.
That's one minute gone in the round.
Bishop lunges in with swinging rights and lefts but Fabregas circles away quickly and effectively.
Bishop throws a hook but Fabregas avoids it easily.
Bishop misses with a hook. Fabregas ducked under it nicely.
Bishop throws a hook but Fabregas blocks it.
Fabregas seems to have got his legs back now.
Bishop fakes high and swings low for a body shot but Fabregas manages to avoid it.
Bishop misses with a wild combination.
Fabregas throws a head kick but Bishop moves out of range.
Fabregas wants to clinch up but Bishop keeps it at a distance.
Fabregas throws a head kick that misses.
Fabregas takes a swing at Bishop's ribcage but misses.
Bishop throws the left hand but Fabregas avoids the punch easily.
Bishop lands with a big left! Fabregas is wobbled badly! Bishop comes in with a flurry of punches and drops Fabregas to the floor. The ref jumps in to save him from unneccessary punishment.
Ladies and gentlemen, after 1:45 of round 1, we have a winner by way of TKO (Punches). Bennie Bishop!
|
|
|
|
|
|
|
|
|
|
|
|
|
|
|
|
|
|
|
|
|
|
|
| S |
C
A |
G |
S |
C
B |
G |
|
S |
C |
G |
|
energy
A | B |
|
hype
A | B |
|
pop
A | B |
|
mgr
A | B |
|
FIGHT
RATING
57% |
|
|
|
|
|
|
|
Undercard bout
|
Coming up we have a bantamweight MMA rules bout between Spazzy Magee (ranked 0 p4p, 0 weight class) and Quiron James (ranked 0 p4p, 0 weight class). Quiron James will no doubt be trying to keep this one on the feet, where he has a distinct advantage.
 |
|
 |
| 170 cm
19
140 lbs
4 - 0 - 0 |
|
180 cm
23
140 lbs
2 - 1 - 0 |
BJJ Purple Belt
Basic striking
Inexperienced |
|
BJJ Blue Belt
Brawler
Determined |
|
| |
|
Ladies and gentlemen. This fight is 2 rounds, in the bantamweight division.
Introducing the fighter to my left, fighting out of the red corner.
With a record of
4 - 0 - 0, fighting out of Amsterdam, Spazzy Magee!
And introducing the fighter to my right, fighting out of the blue corner.
With a record of
2 - 1 - 0, fighting out of London, Quiron James!
The judges for this bout are James Ackerman, Sam Margolis and Paul Tew.
The bell rings for round one and we are underway!
James displays good takedown defense there as he swats away a double leg from Magee.
Magee avoids the body shot from James.
Magee shoots in with a takedown attempt and he has James pinned against the cage. James gets the underhooks and manages to circle away.
Magee will have to do better than that with his takedown attempts.
That's three failed takedown attempts in the round for Spazzy Magee. That's going to take a lot out of him.
Magee on the wrong end of an overhand right that came out of nowhere.
James scores with a big left there. The judges will like that one.
James connects with a good right hand that stumbles Magee. Magee circles away out of range and recomposes himself.
James displays good takedown defense there as he swats away a double leg from Magee.
James misses with a body shot. Nice footwork from Magee.
James lands a slapping body shot.
A right-left combo lands from James.
Magee is rocked!
James is looking for an opening here. He's unloaded a big left hand that catches Magee flush on the jaw and sends him tumbling to the canvas! Magee is out cold! James holds back from landing any unnecessary shots to his unconscious opponent, as the referee reacts slowly to the situation. A brutal knockout and then some excellent sportsmanship - this guy is my new favorite fighter!
Ladies and gentlemen, after 0:56 of round 1, we have a winner by way of KO (Punch). Quiron James!
|
|
|
|
|
|
|
|
|
|
|
|
|
|
|
|
|
|
|
|
|
|
|
| S |
C
A |
G |
S |
C
B |
G |
|
S |
C |
G |
|
energy
A | B |
|
hype
A | B |
|
pop
A | B |
|
mgr
A | B |
|
FIGHT
RATING
90% |
|
|
|
|
|
|
|
Undercard bout
|
Coming up we have a featherweight MMA rules bout between Zachary Watson (ranked 0 p4p, 0 weight class) and Christopher Faber (ranked 0 p4p, 0 weight class). Faber has chosen 2pac - California Love as his entrance music, which hasn't gone down very well with the crowd. Zachary Watson has the edge in experience - let's see if he can make that count tonight.
 |
|
 |
| 174 cm
23
150 lbs
4 - 1 - 0 |
|
168 cm
23
153 lbs
3 - 0 - 0 |
BJJ Purple Belt
Solid boxing
Good chin |
|
BJJ Purple Belt
Brawler
Powerful |
|
| |
|
Ladies and gentlemen. This fight is 3 rounds, in the featherweight division.
Introducing the fighter to my left, fighting out of the red corner.
With a record of
4 - 1 - 0, fighting out of London, Zachary Watson!
And introducing the fighter to my right, fighting out of the blue corner.
With a record of
3 - 0 - 0, fighting out of London, Christopher Faber!
The judges for this bout are Paul Tew, James Atkins and Chris Edwards.
The bell rings for round one and we are underway!
Jab, jab by Faber - just one landing.
Watson rushes forward with a series of wild hooks but Faber moves out of range and avoids them all easily.
Watson misses with a jab and misses with a cross straight after too.
Watson closes the distance and pushes Faber back into the cage.
Watson is stalling here.
Good anti-grappling being displayed by Faber as Watson tries to tie him up.
Faber lands a nice trip takedown into half guard.
Faber not landing any meaningful shots this time.
Watson is looking for a sweep. Faber is wise to his cunning plan and keeps the top position.
Watson blocking the ground and pound attempt from Faber.
Faber is nestled in close to Watson, controlling him well. He's worked in a nice elbow to the side of the head as well, for good measure.
The fighters are pressed up against the cage, both looking to find a bit of space to work.
Watson tries to roll over but Faber keeps him under control.
Faber is looking for a kimura. It's pretty deep but Watson still has the half guard so he's probably OK. Oh, Watson has exploded into a beautiful escape there and after a quick scramble, he's ended up in side control on top! Nice work!
Watson controlling the position from side mount.
That's one minute gone in the round.
Watson wants to control but Faber is keeping him busy.
Watson lands a knee to the body and a forearm to the face.
Faber is not content to let Watson control the position.
Faber is trying to get back to half guard.
Watson wants to control but Faber is keeping him busy.
Watson tries to move into full mount but can't pass Faber's legs.
That's two minutes gone in the round.
My god... these two guys really need to pick up the pace or everyone will leave to go get a beer.
Faber gets back to half guard.
Watson trying to control the pace.
Faber gets back to full guard.
Faber throwing his legs up looking for a triangle.
The fighters are starting to perspire pretty heavily.
Faber looking for a sweep. Not yet Faber, not yet.
Watson is taking a break and basically stalling. The referee will not allow him to do that for long.
Watson looking to sit in guard and control but Faber gets the butterfly guard and sweeps. He's now in the guard on the top.
That's three minutes gone in the round.
Faber passes into half guard.
Watson is working for an escape here. He's hooked one of Faber's legs and he's managed to sneak out and take Faber's back!
Faber breaks Watson's hooks off and manages to turn into his guard.
Watson looking to sweep here. No luck so far.
Faber tries to free his leg and advance position but Watson is retaining full guard.
Faber prevents Watson from getting back to his feet.
Faber landing with the ground and pound.
Watson manages to sweep nicely, so he's now on top. Faber manages to get himself to full guard.
That's four minutes gone in the round.
Watson looking to control the position here, rather than advance.
Watson wants to control from the top but Faber keeps moving.
A big thud reverberates around the arena there as Watson accidentally thumps the mat. Hopefully he's not broken his hand.
Watson trying to control the position from guard on top but Faber is wriggling around, looking for whatever he can.
Faber doesn't do any damage with a couple of strikes from the bottom.
Faber throwing strikes off his back to little effect.
And thats the end of the round the fighters go back to their corners.
Christopher Faber dominated that round.
The corners get their ten second warning. Both fighters stand from their stools and stare eachother down, ready to get back to the action.
Watson takes one on the button.
Watson scores with a punch to the gut of his opponent.
Faber tries to clinch but Watson moves out of range.
Faber shoots in but Watson avoids the takedown attempt easily.
Watson tries to close the distance and clinch but Faber swats him to one side with an open hand palm strike and circles away.
Watson lunges in with swinging rights and lefts but Faber circles away quickly and effectively.
Faber fails with a takedown attempt.
A really sloppy takedown attempt there from Faber.
Zachary Watson has stuffed three takedown attempts in the round now. That's going to take a lot out of Christopher Faber.
Faber closes the distance and clinches up with Watson, looking for a takedown. Faber pushes Watson against the cage but Watson circles to the side and manages to break the clinch.
Faber keeping a good distance there, avoiding the body shot.
Watson jabs Faber right on the nose. Faber blinks but takes it well.
Watson wants to clinch.
Faber feints and then dives in with a takedown. That was a long way out but the feint bought him enough time to close the distance and complete the takedown. Now we'll play guard for a bit and see who can get the better of that position.
That's one minute gone in the round.
Faber in full guard, throwing the ground and pound. No damage this time.
Faber is breathing heavily.
Watson working for a triangle but Faber defends it easily.
Watson is working the butterfly guard. He manages to land a nice scissor sweep and is now in half guard on the top. Nice move.
Watson blocks the strikes from Faber.
The ref warns both fighters not to hold the cage as they work up against the meshing.
Faber is defending against the submission attempts here by Watson.
Faber is looking to regain full guard. Not this time though.
That's two minutes gone in the round.
My god... these two guys really need to pick up the pace or everyone will leave to go get a beer.
Watson trying to control the action but Faber is working from the bottom.
Faber works his way to full guard. Good work.
Faber trying to strike from the bottom but really, it's not the best position to be doing that from!
Watson stopping the sweep attempt from Faber.
Watson not doing a lot at the moment. He'll have to show some more aggression or the fight will get stood up.
Watson trying to control the position from guard on top but Faber is wriggling around, looking for whatever he can.
That's three minutes gone in the round.
Faber thows some rabbit punches from the bottom but they don't do any damage.
Well, the referee has seen enough. Neither fighter is active enough on the ground so he's stood them back up.
Faber circles away from the clinch attempt
so Faber counters with a double leg into guard. Good agility.
Watson manages to sweep nicely, so he's now on top. Faber manages to get himself to full guard.
Faber is working actively off his back, looking to secure an arm or perhaps work for a triangle.
That's four minutes gone in the round.
Watson with a flurry of punches that miss.
Watson throwing elbows and punches but not connecting, as Faber works some decent striking defense from the bottom.
Watson slows down the pace of the fight, as he sits in guard.
Watson preventing the sweep.
Watson controlling from the guard. I say controlling but really, he's stalling.

Watson gets to his feet. Faber looking to butt scoot but the ref puts an end to that. On your feet son!
And thats the end of the round the fighters go back to their corners.
A close second round but Christopher Faber will probably get the nod - 10:9.
The fighters get back to their feet, the hooter sounds and we're back to the action! Let's get this one finished - here comes the final round!

Watson thows a body shot but no joy.
Watson closes the distance and clinches.
Watson goes for a takedown attempt but Faber pushes him away and we're back to fighting at a distance.
Faber tries for a takedown but Watson sees it coming a mile off and avoids it easily.
Faber tries to clinch up.
Watson looks to throw the jab but Faber is out of range.
Faber shoots in looking for a takedown. Watson tries to sprawl out of it but Faber keeps driving through. The fighters are pinned against the cage. Watson manages to get underhooks and after a bit of a struggle, circles away and we're back to standing.
Watson connects with a lovely right hand, straight down the pipe.
We've had a slow start to the round here - hopefully the action picks up.
Watson just misses with a punch to the body.
Faber shoots in with a lovely double leg takedown. Watson manages to land in full guard to minimise the damage.
Watson tries to land a sweep but no joy.
That's one minute gone in the round.
Watson looking for a guillotine here but Faber defends easily.
Watson wants to stand but Faber is controlling the position.
Both fighters are breathing heavily.
Faber throwing strikes but missing.
Watson looking for a sweep. Not yet Watson, not yet.
Faber is sitting in guard, working some ground and pound.
Watson tries to land a sweep but no joy.
Watson is working hard here to advance position.
That's two minutes gone in the round.
Well. There's a bit of a lull in the action here and the crowd are starting to get restless.
Faber stands up over Watson, holding his feet. He dives back in and lands a decent shot to the head.
Watson looking for a sweep. Not yet Watson, not yet.
Faber working from the guard for now, landing some ground and pound.
Faber drops back looking for a leg! Watson is in trouble here! The fighters roll with the hold and Watson manages to kick Faber off! Faber jumps back into Watson's guard.
Watson bucks up whilst keeping hold of a body lock, managing to reverse the position. Now he's in top in Faber's guard.
Faber keeping moving, preventing Watson from controlling successfully.
Faber is working an open guard here, looking to improve his position. No doubt that will leave him open to counters but at least he's being more offensive.
Christopher Faber is fighting for a decision here - he's started to take the cautious approach.
That's three minutes gone in the round.
Faber keeping full guard, as Watson tries to pass.
Faber trying to strike off his back.
Watson is in close to Faber's body, working some short punches and elbows.
Christopher Faber has got the better of the ground game so far.
Watson is looking to stand up but Faber won't let him.
Faber throws some sloppy strikes off his back.
Well, the referee has seen enough. Neither fighter is active enough on the ground so he's stood them back up.
Faber throws a looping left and ducks down for a takedown. He's got his arms around Watson's waist but Watson gets an underhook and avoids the takedown by throwing Faber off to one side.
Zachary Watson has stuffed three takedown attempts in the round now. That's going to take a lot out of Christopher Faber.
Watson wings a very wild body shot but it does the job and lands to the midsection.
Watson lands a jab to the head.
Watson is looking to wear down Faber with body shots, infact he's throwing more body shots than head shots at the moment.
Watson moves in looking to clinch but Faber pushes him off.
Watson scores with a punch to the gut of his opponent.
That's four minutes gone in the round.
Faber circles away from the clinch attempt.
Watson closes the distance and pushes Faber back into the cage.
Watson is pushing Faber up against the cage, for a bit of lean and pray action. Action being used the in the loosest possible sense of the word.
Zachary Watson has stepped it up - he knows he needs a finish here!
A short uppercut from Watson.
Faber tries for a takedown but Watson manages to get underhooks.
Watson is trying to slow down the pace in the clinch, to catch his breath.
Faber tries for a takedown. No joy.
Watson pulls guard effortlessly.
Faber preventing the sweep.
Watson trying to punch from his back but it's not doing any damage.
Faber scores with a decent looking elbow strike.
Watson had isolated an arm as going for a kimura. Faber defends it easily.
A big thud reverberates around the arena there as Faber accidentally thumps the mat. Hopefully he's not broken his hand.
And that's the end of the fight!
Zachary Watson showed his dominance in that final round.
I think Faber has won this one but let's see whether the judges agree with me. Over to the ring announcer for the scorecards.
Ladies and gentlemen, after 3 rounds of action, we go to the scorecards for a decision.
Judge Paul Tew scores the fight 28:29
Judge James Atkins scores the fight 28:29
Judge Chris Edwards scores the fight 29:29
In favor of your winner, by majority decision... Christopher Faber!
|
|
|
|
|
|
|
|
|
|
|
|
|
|
|
|
|
|
|
|
|
|
|
| S |
C
A |
G |
S |
C
B |
G |
|
S |
C |
G |
|
energy
A | B |
|
hype
A | B |
|
pop
A | B |
|
mgr
A | B |
|
FIGHT
RATING
53% |
|
|
|
|
|
|
|
Undercard bout
|
Coming up we have a featherweight MMA rules bout between Franco Canti (ranked 0 p4p, 0 weight class) and Carter Constance (ranked 0 p4p, 0 weight class). Canti comes to the cage accompanied by L.A. DA BOOMMAN - DEY ON MY. The key to victory for Franco Canti has got to be keeping the fight on the feet.
 |
|
 |
| 177 cm
21
150 lbs
4 - 1 - 0 |
|
158 cm
22
147 lbs
0 - 1 - 0 |
BJJ Blue Belt
Brawler
Granite chin |
|
BJJ Purple Belt
Basic striking
Determined |
|
| |
|
Ladies and gentlemen. This fight is 3 rounds, in the featherweight division.
Introducing the fighter to my left, fighting out of the red corner.
With a record of
4 - 1 - 0, fighting out of London, Franco Canti!
And introducing the fighter to my right, fighting out of the blue corner.
With a record of
0 - 1 - 0, fighting out of London, Carter Constance!
The judges for this bout are Colin Fotheringham, James Glass and Sam Margolis.
The bell rings for round one and we are underway!
Constance tries to clinch up but Canti circles away and keeps his distance.
Canti clinches up against the cage.
Canti displaying some good clinch control by pressing Constance up against the cage.
Canti jumps guard but Constance stands there with Canti around his waist. Canti gives up and drops back to his feet. We remain in the clinch.
Canti leaning against his opponent.

Constance pushes off and circles away, back to the middle of the mat.
Constance closes the distance but Canti moves to the side
and Canti counters with a crisp hook to the side of the head.
It looks like Carter Constance has been cut.
Canti connects with a jab.
Canti misses with a few strikes there.
Constance checks the leg kick nicely there.

Canti moves into range and throws a big uppercut. OH! Constance goes down! Can Canti finish him!?
Constance is rocked!
Canti drops back looking for a heel hook - he quickly realises he's not going to get it but Constance manages to dive on top of him before he can escape and now Canti has Constance in his guard.
Constance is still in real trouble! Can Canti finish him?
We've seen a great period of action over the last minute or so - credit to both fighters for going all out!
Constance trying to control the position from guard on top but Canti is wriggling around, looking for whatever he can.
Constance pressing down on his opponent's thigh, looking to pass guard. Canti is keeping the position for now.
Constance seems to have recovered his senses.
Canti has his foot on Constance's thigh. He's trying to push off and get in position for a triangle, I think. Constance works his way back into a safe position though.
That's one minute gone in the round.
Canti looking for submissions from the bottom here. Moving his hips around, possibly looking for an armbar.
Constance trying to control but Canti is working from the bottom.
Canti looking for submissions off his back, moving his hips, looking for an opening.
Constance is stalling in the full guard.
Canti is working actively off his back, looking to secure an arm or perhaps work for a triangle.
Constance drops back for a leg! It's a sloppy attempt though and Constance jumps back into guard quickly, to retain the dominant position.
Canti keeping moving, preventing Constance from controlling successfully.
Constance sneaks a leg through and gets to half guard. That was like a knife through butter how easily he passed Canti's guard.
Canti looking for submissions from an awkward position here.
Canti looking for submissions off his back.
That's two minutes gone in the round.
Canti avoiding damage under a succession of punches from Constance.
Constance thumps the canvas. Not on purpose obviously - he just missed Canti's head.
Canti blocking the ground and pound attempt from Constance.
The referee has ruled that neither fighter is active enough on the ground and has stood them back up.
Canti does a little shimmy and throws a leg kick. The leg kick missed by a considerable margin though, making him look a little bit silly for doing the shimmy.
Constance is looking for a takedown here. He's shot in and has managed to get it, finishing up in Canti's half guard.
Canti actively working from the bottom here.
Constance wants to take a breather but Canti is having none of it.
Constance is in a good position here but he's just trying to control... And he's not even managing to do that successfully.
Constance is thinking about going for an arm triangle but he can't free his leg.
Constance trying to pass the guard but Canti defending well.
That's three minutes gone in the round.
Canti looking for submissions off his back.
Canti actively working from the bottom here.
The ref warns both fighters not to hold the cage as they work up against the meshing.
Neither fighter is doing enough for the referee's liking and he's decided to stand them back up.
Constance takes a step back and watches a body kick go sailing past his mid section.
Constance tries to close the distance and clinch up but Canti swats him away and circles back towards the center.
Canti throws a shot to the body.
Constance misses with a hook to the body
and Canti counters with a straight right hand.
Constance checks a leg kick nicely.
Constance looks to clinch
and Canti counters with a shot to the ribs. That looked like it hurt.
Constance wants to clinch.
Constance closes the distance and presses his opponent up against the cage.
That's four minutes gone in the round.
Canti prevents the takedown attempt.
The pace slowing considerably in the clinch, as Constance takes a break from that fighting nonsense to think about the finer things in life.
Canti tries to pull guard but Constance won't allow it.
Canti manages to pull guard. Let's see whether he can land a sub off his back.
Constance trying to pass the guard but can't manage it just yet.
Canti tries to land a sweep but no joy.
Canti has a loose triangle. He'll be looking to tighten that up but Constance can see exactly what he's planning and manages to posture up and free himself.
Canti is active off his back here, looking for submissions.
Canti is breathing heavily.
Constance trying to pass the guard but can't manage it just yet.
The crowd applaud the fighters efforts here as the round comes to an end.
Constance is persisting with the attempt to improve his position.
Canti working for a triangle but Constance defends it easily.
And thats the end of the round the fighters go back to their corners.
Franco Canti dominated that round.
The cut man is working on Carter Constance's cut.
The fighters' corners scream their final instructions, as the referee calls time. Here we go, back to the action!
Canti throws a sloppy head kick and Constance moves out of range easily.
Canti takes a swing at Constance's ribcage but misses.
Canti swings and misses with a hook to the body.
Canti tries to clinch but Constance is having none of it.
Canti throws a jab to the body, straight down the pipe. Boom. That sent Constance stumbling backwards but he manages to regain his composure quickly.
A big right from Canti misses.
Canti has managed to clinch.
Constance drops down looking for an ankle pick but Canti pulls his leg out and moves away.
Some bone on bone action there as Constance checks a low kick. Luckily it wasn't a particularly hard one.
Constance shoots in from a long way out. He's driving through with the takedown attempt and he eventually gets it, landing in Canti's guard.
Both fighters really going for it on the ground here!
Constance trying to control the position from guard on top but Canti is wriggling around, looking for whatever he can.
Canti looks to be working for a triangle here. Oh, it looks like he might have it! Constance has picked Canti up and slammed him! Canti can't keep hold of the triangle and Constance manages to pass to side control!
The fighters are pressed up against the cage, both looking to find a bit of space to work.
That's one minute gone in the round.
Canti is moving his hips around well on the bottom and has managed to get back to half guard.
Constance drops an elbow to the side of Canti's head.
Constance passes to full mount!
Canti keeping his composure momentarily, calmly looking to get back to half guard.
Constance landing strikes from the mount.
Canti working to try and regain half guard.
Constance working for a submission but Canti is keeping him at bay.
Canti is looking to improve his position but Constance isn't that keen on the idea.
Constance tries to control but Canti wriggling away.
Canti is trying to escape the mount.
That's two minutes gone in the round.
Canti is working hard here to advance position.
Constance is working on an americana here. Ooh, that looks pretty nasty! Nope, Canti has managed to escape the submission attempt.
Canti is looking to improve his position but Constance isn't that keen on the idea.
Constance with shots to the head and body - Canti looks very uncomfortable down there.
Canti is looking to improve his position but Constance isn't that keen on the idea.
Canti is bucking up trying to escape but Constance cracks him with another couple of good strikes.
Constance landing strikes, looking to finish!
Canti tries to reverse the position but Constance maintains control.
Constance trying to control but Canti is having none of it.
That's three minutes gone in the round.
Canti can't escape the position.
Constance looking for an armbar but decides to keep the dominant position instead.
Canti sneaks a leg under to get to half guard.
Constance wants to take a breather but Canti is having none of it.
Constance is breathing heavily.
Canti is looking to sinch up a guillotine here but Constance pulls his head out easily.
Constance content to control rather than advance.
Canti looking for submissions off his back.
Canti keeping his head moving to avoid the ground and pound.
That's four minutes gone in the round.
There's not a lot going on here and the crowd are letting the fighters know they're not willing to tolerate a lack of action.
Canti looking for submissions from an awkward position here.
Canti actively working from the bottom here.
Canti looking for submissions from an awkward position here.
Neither fighter is doing enough for the referee's liking and he's decided to stand them back up.
Constance closes the distance and clinches.
Good anti-grappling being displayed by Constance as Canti tries to tie him up.
Canti tries to jump guard but he falls flat on his backside. Constance smiles and moves away.
Constance rushes Canti and pushes him back against the cage in a clinch.
Constance has a body lock and is looking for a takedown. Canti is bouncing around trying to prevent the takedown and somehow he has indeed managed to stay on his feet.
Constance has a body lock and is looking for a takedown. Canti is bouncing around trying to prevent the takedown and somehow he has indeed managed to stay on his feet.
Franco Canti has stuffed three takedown attempts in the round now. That's going to take a lot out of Carter Constance.
Both fighters working to control the clinch.
Canti is looking for a takedown up against the cage. Constance gets underhooks though and prevents the takedown attempt.
Canti fails to pull the fight into his guard.
Constance tries to land a knee to the body but he is off balance and Canti avoids it.
Canti lands with a good tight uppercut to the head.
And thats the end of the round the fighters go back to their corners.
Carter Constance showed his class in that round. I'd imagine he'll take it on all the scorecards.
The cut man is working on Carter Constance's cut.
That's time! Canti's corner gives him a slap on the ass as he gets ready to fight. This is the final round!
Constance lands with a nice low kick. That'll leave a bruise.
Canti uses some good footwork to avoid the body shot by Constance.
Franco Canti seems to be the more aggressive standup fighter in this bout.
Jab by Canti.
Canti lands with a cross.
Canti lands with a cross.
Canti fakes high and swings low for a body shot but Constance manages to avoid it.
Constance closes the distance and pushes Canti back into the cage.
Canti manages to pull guard.
Constance slips effortlessly into side control - very nice.
Constance grinds an elbow into Canti's temple.
Constance lands a knee to the body and follows it up with some ground and pound to the head. That will wear Canti down.
Constance scoring with punches and elbows.
Canti is looking to reverse the position.
Canti manages to work his way to half guard, despite Constance's best efforts.
That's one minute gone in the round.
Constance is looking to pass the guard... He's managed it - he's now in full mount!
Constance looks like he's working for a submission but he's not found anything just yet.
Constance takes a big intake of breath there - he's definitely tired.
Constance looking to secure an arm triangle but Canti defends it well.
Canti gets back to half guard.
Canti is looking to sinch up a guillotine here but Constance pulls his head out easily.
Canti actively working from the bottom here.
Constance is pressing down on Canti's thigh, looking to free his foot. Canti is holding on for now.
Constance seems very keen to just sit and control from half guard but Canti does not like that idea so much and is remaining active off his back.
That's two minutes gone in the round.
Constance lands strikes from half guard.
Constance moves into full mount! Canti won't be happy about that!
Constance jumps to side control looking for an arm triangle but Canti manages to avoid the submission attempt.
Canti is trying to get back to half guard.
Canti is trying to get back to half guard. He's pushing on Constance's leg. He's managed it. Nice work.
Canti looking for submissions from an awkward position here.
Canti is staying active underneath Constance, who seems content to just control the action from this position.
Canti looking for submissions off his back.
Constance tries to pass the half guard into mount. Canti knows what he's doing though and prevents the attempt.
That's three minutes gone in the round.
Constance is looking for a kimura. It's going to be difficult to finish that from half guard though and Canti defends it well.
Canti looking to work for a kimura from the bottom.
Canti looking to work for a kimura from the bottom.
Canti won't allow Constance to pass to mount.
Well, the referee has seen enough. Neither fighter is active enough on the ground so he's stood them back up.
Canti throws a body punch but Constance moves out of range.
Canti tries to land with a swinging hook to the body but Constance was well out of range. Poor timing from Canti.
Constance drives through and clinches with Canti against the cage.
Both fighters working to control the clinch.
Constance looking to throw knees to the head but Canti is blocking nicely.
That's four minutes gone in the round.
A few boos can be heard. I'm sure they will multiply if the fighters don't pick up the pace.
Constance working aggressively here.
Canti is using his height advantage well here, landing a good percentage of his punches.
Canti successfully pulls guard.
Canti has a loose triangle. He'll be looking to tighten that up but Constance can see exactly what he's planning and manages to posture up and free himself.
Canti keeping full guard, as Constance tries to pass.
Canti had isolated an arm as going for a kimura. Constance defends it easily.
Constance pushes down on Canti's leg and manages to get into half guard.
Canti looking for submissions off his back.
Constance has hold of the far side arm. He's working for the Kimura, can Canti defend it? Constance steps over the head and cranks it - Canti is tapping out! That was textbook stuff right there - nice submission victory for Constance!
Ladies and gentlemen, after 4:56 of round 3, we have a winner by way of Submission (Kimura). Carter Constance!
|
|
|
|
|
|
|
|
|
|
|
|
|
|
|
|
|
|
|
|
|
|
|
| S |
C
A |
G |
S |
C
B |
G |
|
S |
C |
G |
|
energy
A | B |
|
hype
A | B |
|
pop
A | B |
|
mgr
A | B |
|
FIGHT
RATING
78% |
|
|
|
|
|
|
|
Co-main event
|
Coming up we have a featherweight MMA rules bout between Ryan Oreily (ranked 0 p4p, 0 weight class) and Insano Baino (ranked 0 p4p, 0 weight class). Insano Baino will no doubt be trying to keep this one on the feet, where he has a distinct advantage.
 |
|
 |
| 175 cm
21
155 lbs
9 - 4 - 0 |
|
170 cm
21
145 lbs
1 - 1 - 0 |
Good takedowns
Solid boxing
Experienced |
|
BJJ White Belt
Excellent boxer
Solid chin |
|
| |
|
Ladies and gentlemen. This fight is 3 rounds, in the featherweight division.
Introducing the fighter to my left, fighting out of the red corner.
With a record of
9 - 4 - 0, fighting out of London, Ryan Oreily!
And introducing the fighter to my right, fighting out of the blue corner.
With a record of
1 - 1 - 0, fighting out of London, Insano Baino!
The judges for this bout are Paul Tew, Chris Edwards and James Atkins.
The bell rings for round one and we are underway!
Baino throws a nice looking combination but Oreily bobs and weaves to avoid any damage.
Oreily showing good head movement there, avoiding the strikes from Baino.
Oreily shoots in and scores a nice double leg takedown into half guard.
Oreily is keeping good posture, landing some ground and pound.
Oreily is trying to work for a kimura but Baino is defending well.
Oreily content to sit in half guard and control for a moment.
Oreily is looking for a kimura here.
That's one minute gone in the round.
Oreily is pressing down on Baino's thigh, looking to free his foot. Baino is holding on for now.
The fighters are pressed up against the cage, both looking to find a bit of space to work.
Oreily is trying to work for a kimura but Baino is defending well.
The ref warns both fighters not to hold the cage as they work up against the meshing.
Baino is trying to stand.
Baino is defending against the submission attempts here by Oreily.
Baino is looking to regain full guard. He's left an arm up in the air though and Oreily has latched onto it... Big trouble! Oreily pivots for an armbar - it's in tight and it Baino is tapping in no time flat! Great counter grappling there from Oreily!
Ladies and gentlemen, after 2:01 of round 1, we have a winner by way of Submission (Armbar). Ryan Oreily!
|
|
|
|
|
|
|
|
|
|
|
|
|
|
|
|
|
|
|
|
|
|
|
| S |
C
A |
G |
S |
C
B |
G |
|
S |
C |
G |
|
energy
A | B |
|
hype
A | B |
|
pop
A | B |
|
mgr
A | B |
|
FIGHT
RATING
37% |
|
|
|
|
|
|
|
Main event
|
Coming up we have a light heavyweight MMA rules bout between Nitram Eyricus (ranked 0 p4p, 0 weight class) and Ben Supko (ranked 0 p4p, 0 weight class). Eyricus comes to the cage accompanied by Eat You by Limp Bizkit. Supko has chosen Maracaybo as his entrance music. Ben Supko has the power to score a knockout today if he connects clean with Nitram Eyricus's chin.
 |
|
 |
| 184 cm
24
210 lbs
5 - 0 - 0 |
|
185 cm
23
214 lbs
9 - 6 - 0 |
BJJ Purple Belt
Counter striker
Big heart |
|
BJJ Blue Belt
Good kicks
Powerful |
|
| |
|
Ladies and gentlemen. This fight is 3 rounds, in the light heavyweight division.
Introducing the fighter to my left, fighting out of the red corner.
With a record of
5 - 0 - 0, fighting out of London, Nitram Eyricus!
And introducing the fighter to my right, fighting out of the blue corner.
With a record of
9 - 6 - 0, fighting out of London, Ben Supko!
The judges for this bout are Sam Margolis, James Glass and Andrew Berry.
The bell rings for round one and we are underway!
Supko moves into the clinch successfully.
Supko misses with a knee strike.
Supko lands with a left to the head.
Supko connects with a nasty looking knee right to Eyricus's face.
It looks like Nitram Eyricus has been cut.
Supko lands with a light punch inside.
Eyricus fails to pull the fight into his guard.
Eyricus tries to jump guard but he falls flat on his backside. Supko smiles and moves away.
Supko misses with a jab and misses with a cross straight after too.
Supko misses with a two punch combination.
Supko misses with an attempted mid kick.
Supko tries to close the distance and clinch but Eyricus swats him to one side with an open hand palm strike and circles away.
Supko throws a wild combination but nothing lands.
Eyricus shoots in and drives through. Supko sprawls well.
That's three failed takedown attempts in the round for Nitram Eyricus. That's going to take a lot out of him.
Supko lands a big head kick that sends Eyricus tumbling to the mat! Supko takes a step backwards and waves Eyricus back to his feet - he wants the finish!
Eyricus is rocked!
We've seen a great period of action over the last minute or so - credit to both fighters for going all out!
Supko rushes Eyricus and presses him up against the cage.
Oh Eyricus is still all over the place! His legs are completely gone! Will he be able to recover?!!
Supko is working Eyricus over with knees. Oh, he's thrown a big one to the head! Eyricus is out! One big shot and it's all over!
Ladies and gentlemen, after 1:03 of round 1, we have a winner by way of KO (Knee). Ben Supko!
|
|
|
|
|
|
|
|
|
|
|
|
|
|
|
|
|
|
|
|
|
|
|
| S |
C
A |
G |
S |
C
B |
G |
|
S |
C |
G |
|
energy
A | B |
|
hype
A | B |
|
pop
A | B |
|
mgr
A | B |
|
FIGHT
RATING
99% |
|
|
|
|
|
|
|
|
|
|
