 |
Convicted 4: Robbery PBP Commentary |
Undercard bout
|
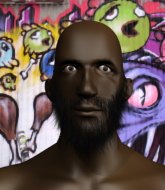
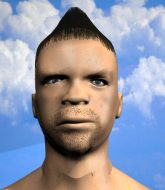
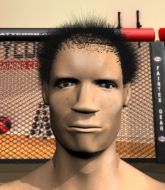
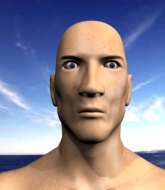
Coming up we have a light heavyweight MMA rules bout between Jeremiah Lord (ranked 0 p4p, 0 weight class) and B ER (ranked 0 p4p, 0 weight class). Lord's entrance music is you shit me to tears - the tennants. A fine choice. B ER will no doubt be trying to keep this one on the feet, where he has a distinct advantage.
 |
|
 |
| 181 cm
22
218 lbs
1 - 0 - 0 |
|
205 cm
22
220 lbs
0 - 1 - 0 |
Good wrestling
Basic striking
Granite chin |
|
BJJ White Belt
Great elbows
Solid chin |
|
| |
|
Ladies and gentlemen. This fight is 3 rounds, in the light heavyweight division.
Introducing the fighter to my left, fighting out of the red corner.
With a record of
1 - 0 - 0, fighting out of Los Angeles, Jeremiah Lord!
And introducing the fighter to my right, fighting out of the blue corner.
With a record of
0 - 1 - 0, fighting out of Los Angeles, B ER!
The judges for this bout are Jack Bonds, and Frank Antenori.

The bell rings for round one and we are underway!
Lord needs to keep his hands up - ER had a free shot at his head there.

It looks like Jeremiah Lord has been cut.

Lord looking for a takedown here - he's got it.

Lord drops back looking for a leg! ER is in trouble here! The fighters roll with the hold and ER manages to kick Lord off! Lord jumps back into ER's guard.
ER is trying to control the position but Lord postures up.
Lord thinks about going for a leg but decides against it, in order to maintain the position.
Lord thinks about going for a leg but decides against it, in order to maintain the position.
Lord drops back for a leg! It's a sloppy attempt though and Lord jumps back into guard quickly, to retain the dominant position.
Lord might be looking to lock onto one of his opponent's long limbs for a submission, whilst we're on the ground.
ER wants to stand and escape but Lord is having none of it.
Lord is trying to work a guillotine from the top, or something like that? Don't know how he thinks he's going to get a finish from there.
Lord is breathing heavily.
ER looking to hit a scissor sweep but Lord is one step ahead there.

That's one minute gone in the round.

The referee decides to stand the fighters back up.
ER works Lord's body with a nice hook.
Lord takes one to the chin there.
Lord walks into a stiff left hand from ER.
The crowd are loving this. Great action here.
ER scores with a punch to the head.
Wow, both these guys are really going for it!

ER sends Lord crashing to the mat with a devastating uppercut! ER is motioning to the referee to let Lord up. He wants to try and finish this one on the feet!

Lord is rocked!
Jeremiah Lord's cut is getting worse.
ER lands with a right and another and another! Lord is in big trouble! ER lands again and this time it's lights out for Lord! A quality knockout there for ER.
Ladies and gentlemen, after 1:24 of round 1, we have a winner by way of KO (Strikes). B ER!
|
|
|
|
|
|
|
|
|
|
|
|
|
|
|
|
|
|
|
|
|
|
|
| S |
C
A |
G |
S |
C
B |
G |
|
S |
C |
G |
|
energy
A | B |
|
hype
A | B |
|
pop
A | B |
|
mgr
A | B |
|
FIGHT
RATING
100% |
|
|
|
|
|
|
|
Undercard bout
|
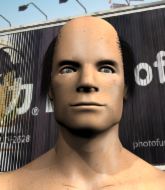
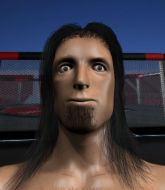
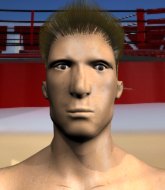
Coming up we have a welterweight MMA rules bout between Gustav Vasa (ranked 0 p4p, 0 weight class) and Pedro De Pacas (ranked 0 p4p, 0 weight class). Vasa's entrance music is Hem Till Svitjod. A fine choice. Gustav Vasa has the better chin. Will he look to stand and bang today?
 |
|
 |
| 178 cm
19
185 lbs
2 - 0 - 0 |
|
169 cm
18
169 lbs
0 - 2 - 0 |
BJJ Blue Belt
Basic striking
Cardio machine |
|
BJJ White Belt
Brawler
Tends to cut |
|
| |
|
Ladies and gentlemen. This fight is 3 rounds, in the welterweight division.
Introducing the fighter to my left, fighting out of the red corner.
With a record of
2 - 0 - 0, fighting out of Los Angeles, Gustav Vasa!
And introducing the fighter to my right, fighting out of the blue corner.
With a record of
0 - 2 - 0, fighting out of Los Angeles, Pedro De Pacas!
The judges for this bout are , Timothy Bukovac and .
The bell rings for round one and we are underway!

Vasa fakes with an overhand right and moves in to clinch with De Pacas, pushing him back against the cage.
Vasa with a knee to the head.
It looks like Pedro De Pacas has been cut.
Vasa lands a takedown into guard.
Vasa keeps in close for a moment and lands a decent shot to the side of De Pacas's head.
Vasa loads up on a big left hand. De Pacas felt that one! He's just covering up now, not defending himself intelligently - Vasa looks towards the ref and unloads with 3 more big shots and the ref has no choice but to stop the fight! De Pacas can't hide his disappointment, as Vasa celebrates the victory.
Ladies and gentlemen, after 0:28 of round 1, we have a winner by way of TKO (Strikes). Gustav Vasa!
|
|
|
|
|
|
|
|
|
|
|
|
|
|
|
|
|
|
|
|
|
|
|
| S |
C
A |
G |
S |
C
B |
G |
|
S |
C |
G |
|
energy
A | B |
|
hype
A | B |
|
pop
A | B |
|
mgr
A | B |
|
FIGHT
RATING
98% |
|
|
|
|
|
|
|
Undercard bout
|
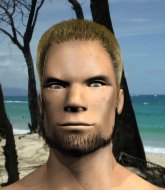
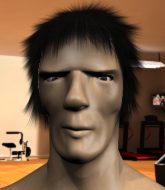
Coming up we have a welterweight MMA rules bout between Shane Miyagi (ranked 0 p4p, 0 weight class) and Jeremih Budden (ranked 0 p4p, 0 weight class). Miyagi kept the crowd waiting but all that was forgotten when his ring entrance music started. The incomparable musical genius that is Ready for war. Over to our ring announcer for the fighter introductions!
 |
|
 |
| 184 cm
25
170 lbs
7 - 6 - 0 |
|
179 cm
20
169 lbs
0 - 1 - 0 |
BJJ Purple Belt
Basic striking
Granite chin |
|
BJJ Blue Belt
Brawler
Determined |
|
| |
|
Ladies and gentlemen. This fight is 3 rounds, in the welterweight division.
Introducing the fighter to my left, fighting out of the red corner.
With a record of
7 - 6 - 0, fighting out of Los Angeles, Shane Miyagi!
And introducing the fighter to my right, fighting out of the blue corner.
With a record of
0 - 1 - 0, fighting out of Los Angeles, Jeremih Budden!
The judges for this bout are , Timothy Bukovac and .
The bell rings for round one and we are underway!
A telegraphed takedown attempt from Budden is defended easily by Miyagi.
Miyagi closes the distance and looks for a trip takedown... aaaand he's got it - Miyagi lands in his opponent's guard.
Budden looking to hit a scissor sweep but Miyagi is one step ahead there.
Miyagi is pushing down on Budden's leg trying to pass to half guard. Budden is fighting to maintain full guard but Miyagi has managed to sneak the leg through.
Miyagi perhaps working for something from half guard, or maybe not. It looks like he's just sitting there.
Miyagi prevents Budden from improving his position.
Miyagi is thwarting Budden's attempts to control the position.
Budden wants to get back to full guard.
The ref warns both fighters not to hold the cage as they work up against the meshing.
Miyagi trying to advance position but Budden counters by regaining guard.
Miyagi postures up to throw the ground and pound strikes but they don't connect.
That's one minute gone in the round.
Budden working a defensive guard here.
Miyagi stops Budden from standing up.
The referee has ruled that neither fighter is active enough on the ground and has stood them back up.
Miyagi is moving around nicely and scores here with a single head shot.
Miyagi misses with a wild combination.
Budden has his takedown stuffed
and Miyagi counters with a lovely straight right hand!
Budden with a lazy takedown attempt
and Miyagi counters with a straight punch to the midsection.
Shane Miyagi has stuffed three takedown attempts in the round now. That's going to take a lot out of Jeremih Budden.
Miyagi scores to the head and body with a nice combination!
Budden gets cracked there but stands up to it.
Miyagi rushes Budden and pushes him back against the cage in a clinch.
Miyagi trying to land knees to the body.
Miyagi has picked Budden up - he's going for a ride! Miyagi dumps his opponent to the mat with a thud and settles into half guard.
Budden keeping his head moving to avoid the ground and pound.
Budden is looking to escape.
Budden is refusing to be controlled, as Miyagi sits in half guard.
Nice strikes from Miyagi there.

That's two minutes gone in the round.
Ground and pound from Miyagi.
The crowd cheering loudly, showing their appreciation for the quality fight we're seeing here.
Miyagi lands with a punch from half guard.
Budden taking some punishment here, with Miyagi in his half guard.
Budden holds on for dear life, maintaining half guard for now.
Miyagi passes to full mount!
A nice elbow there by Miyagi.
BOOM! Miyagi connects with a massive shot to the dome!
A nice elbow there by Miyagi.
Miyagi looking to control and managing it successfully.
Miyagi with good strikes from the mount here!

That's three minutes gone in the round.
Budden is writhing around trying to get back to his feet.
Budden is in a horrible position here. Miyagi smacks him with another shot as he tries to escape the position.
Budden is desperately trying to get back to half guard.
Miyagi cracks Budden with a nasty head shot there - the crowd let out an audible gasp there, as the noise reverberated around the arena.
Budden is writhing around trying to get back to his feet.
Miyagi has been looking to land a fair amount of strikes on the ground. He might be looking to soften his opponent up in order to work for a submission.
Miyagi dominating with strikes here.
Miyagi avoids the attempt from Budden to control.

That's four minutes gone in the round.
Miyagi lands a big elbow.
Miyagi raining down shots from the mount!
A nice elbow there by Miyagi.
Miyagi breaks from Budden's wrist control and lands an elbow.
Miyagi working the ground and pound effectively.
Budden is rocked!
Miyagi working the ground and pound effectively.
Budden is still in real trouble! Can Miyagi finish him?
The fighters are pressed up against the cage, both looking to find a bit of space to work.
We've seen a great period of action over the last minute or so - credit to both fighters for going all out!
Miyagi lands a shot to the body, followed up by a shot to the exposed head of his trapped opponent.
As the round comes to an end the crowd are showing their appreciation for a great round of action.
Budden tries to lock up and control but Miyagi gives him a forearm to the face and pushes him away.
Budden seems to have recovered his senses.
Budden is desperately trying to get back to half guard.
Miyagi is looking to secure an arm. He's managed it! He's pivoting for an armbar - that looks tight! But Budden has managed to get out of it and now he's in a dominant position. Nice work from Budden!
And thats the end of the round the fighters go back to their corners.
Shane Miyagi dominated that round.
The referee calls time. The cornermen exit stage left and we're back to business.

Nice body kick there by Miyagi.
Shane Miyagi seems to be the more aggressive standup fighter in this bout.
Miyagi lands a jab.
Budden takes a jab on the nose. He smiles like he loves it and keeps coming.
Miyagi lands a lovely overhand right.
A left and a right from Miyagi both land. Nice combination.
Budden fails with the takedown
and Budden takes a counter punch right on the button for his troubles.
Jeremih Budden is looking to throw some combinations by the looks of things.
Miyagi tries to land with a swinging hook to the body but Budden was well out of range. Poor timing from Miyagi.
Budden showing good head movement there, avoiding the strikes from Miyagi.
Budden walks into a stiff left hand from Miyagi.
Budden has his takedown stuffed
and Miyagi counters with a shoot takedown. Budden fights it but they end up in guard.
Budden controls Miyagi momentarily but Miyagi frees himself.
That's one minute gone in the round.
Budden has momentary wrist control but Miyagi slips an elbow through the middle.
Miyagi is looking to work some ground and pound but Budden has wrist control.
Miyagi cracks Budden with a solid left hand.
Budden really doesn't want to stay on the ground with Miyagi. If he can't get it back to his feet, it's only a matter of time before he'll be tapping out.
A big thud reverberates around the arena there as Miyagi accidentally thumps the mat. Hopefully he's not broken his hand.
Miyagi trying to land body shots but he keeps hitting the mat.
Miyagi working some strikes from top position.
Miyagi is looking to work some ground and pound but Budden has wrist control.
Both fighters are absolutely exhausted here.
Miyagi tries to free his leg and advance position but Budden is retaining full guard.
Budden looks to be working for a triangle here. Oh, it looks like he might have it! Miyagi has picked Budden up and slammed him! Budden can't keep hold of the triangle and Miyagi manages to pass to side control!
Budden manages to work his way to half guard, despite Miyagi's best efforts.
Miyagi winds up and cracks Budden with a swinging punch to the side of the head.
Miyagi working over Budden with some ground and pound. Budden looks like he wants out of this position, which is understandable.
Miyagi throws a strike but Budden avoids it easily and moves to full guard.
That's two minutes gone in the round.

Budden pushes Miyagi off for just long enough to get back to his feet. Very athletic spring there.
Budden is looking to take this fight into the clinch.
Budden tries to clinch
and Miyagi counters with a stiff right hand.
Miyagi pushes Budden up against the cage in a clinch.
Budden is looking for a takedown up against the cage. Miyagi gets underhooks though and prevents the takedown attempt.
Shane Miyagi has stuffed three takedown attempts in the round now. That's going to take a lot out of Jeremih Budden.
Knees to the body from Miyagi.
Miyagi lands a shot to the body.
Miyagi turns his back and goes for a hip toss. It's a bit messy but it gets the job done and Miyagi manages to end up in side control.
Miyagi is looking for a kimura. He might have it! No, Budden has escaped the position, nice work there.
Budden avoids any damage from the ground and pound of Miyagi.
Budden explodes and escapes back to his feet! Nice escape there!
That's three minutes gone in the round.
Miyagi is looking to clinch.
Budden on the wrong end of a vicious looking body shot.
Budden tries to clinch but Miyagi moves out of range.
Budden misses with a low kick.
Budden steps to the side to avoid the strikes from Miyagi.
Miyagi shoots in looking for a single leg takedown. Budden is trying to defend but Miyagi finishes it well and ends up in half guard. Let's see if he can advance position further.
Budden trying to hold on to Miyagi's head to control him but Miyagi postures up.
Budden pushes Miyagi off looking to stand but Miyagi dives back in and keeps control.
Miyagi sitting in half guard, looking to land shots. Budden defending well though.
Budden works his way to full guard. Good work.
Miyagi is really dominating this fight. Is there anything that Budden can do to turn this around?
Miyagi with a flurry of punches that miss.
That's four minutes gone in the round.
Budden is looking to get back to his feet but can't, whilst Miyagi is controlling him.
Miyagi passes Budden's right leg, so he's now in half guard.
Miyagi tries to pass to full mount but Budden defends it.
Budden trying to control from the bottom.
Miyagi sitting in half guard, looking to land shots. Budden defending well though.
Budden trying to control from the bottom.
Budden wants to get back to his feet.
The crowd applaud the fighters efforts here as the round comes to an end.
It looks like we're going to have a standup here. Neither fighter is doing enough on the ground.
Miyagi comes forward and lands a shot to the body, then darts back out of range.
Miyagi thows a body shot but no joy.
Budden tries to clinch but Miyagi is having none of it.
And thats the end of the round the fighters go back to their corners.
Shane Miyagi dominated that second round.
Well, the break between rounds is over. Let's get back to the scrappin! This is the final round!

Miyagi scores with a straight right hand, right through his opponent's guard.
Nice shot lands for Miyagi.
Budden with a lazy takedown attempt
and Miyagi counters nicely by changing levels and landing a hook to the body.
Budden wants to clinch.
No luck for Budden with that takedown attempt.
Budden forces Miyagi back against the cage and clinches.

Miyagi breaks from the clinch.
Miyagi bobbing and weaving, closes the distance and lands a hook to the side of Budden's head.
Miyagi scores with a jab to the head.
Budden takes a big intake of breath there - he's definitely tired.
Budden takes one to the chin there.
Budden tries to close the distance and clinch up but Miyagi swats him away and circles back towards the center.
Nice body punch from Miyagi.
Budden walks into a left hand.
Miyagi takes the fight into the clinch.
That's one minute gone in the round.
Miyagi lands a left hand.
A hook to the body from Miyagi.
Budden tries to pull guard but Miyagi won't allow it.
Shane Miyagi has stuffed three takedown attempts in the round now. That's going to take a lot out of Jeremih Budden.
Budden takes a knee right on the jaw!
Budden trying to land knees to the body.
Miyagi has picked Budden up - he's going for a ride! Miyagi dumps his opponent to the mat with a thud and settles into half guard.
Miyagi looking for a kimura but he'll have to free his other leg if he wants to finish that. Perhaps he's just using it as a distraction technique.
Miyagi stops Budden from getting back to his feet.
Miyagi slips a nice elbow through Budden's hands, connecting with Budden's forehead.
Budden looks like he's trying to stand up.
That's two minutes gone in the round.
Nice strikes from Miyagi there.
Miyagi scores with a couple of good hammerfists.
Miyagi is looking for a kimura. It's going to be difficult to finish that from half guard though and Budden defends it well.
Budden keeps control of the position for the meantime.
Budden works his way to full guard. Good work.
Budden wants to sweep but no luck.
Miyagi postures up in Budden's guard and throws a big left but Budden blocks it.
Shane Miyagi overall seems to be getting the better of the ground position in the fight so far.
That's three minutes gone in the round.
Miyagi throwing strikes from guard but Budden blocks nicely.
Budden utilising some decent striking defenses from the guard, preventing the ground and pound.
Budden is looking for a guillotine. You can't force these things though and Miyagi defends well.
Miyagi works over Budden with some ground and pound from guard.
Miyagi postures up to throw the ground and pound strikes but they don't connect.
It looks like we're going to have a standup here. Neither fighter is doing enough on the ground.
Miyagi misses with a wild body shot.
The fight moves into the clinch position.
Budden misses with a knee to the head.
Miyagi scores with an uppercut up the middle.
Miyagi working on landing some head shots here - that one got through nicely.
That's four minutes gone in the round.
Well. There's a bit of a lull in the action here and the crowd are starting to get restless.
Miyagi connects with a nasty looking knee right to Budden's face.
Miyagi wants to break free but Budden has control.
Budden looking to throw knees to the head but Miyagi is blocking nicely.
Miyagi avoiding damage as Budden throws knees to the body.
A frustrated look appears on Miyagi's face as he tries to break the clinch.
Miyagi blocks an elbow strike from Budden.
Budden misses with an elbow strike.
Budden is trying desperately to land a takedown but Miyagi is having absolutely none of it. This is turning into a bit of a nightmare for Budden.
The two fighters are working to gain dominance in the clinch.
Budden with the Thai clinch. He's looking to land a big knee but he's not managed it this time.
Budden throws a nice elbow but it doesn't land.
An uppercut on the inside fails to land for Miyagi.
Budden misses with a knee to the head.
Nice body punch from Miyagi.
A shot in the inside from Miyagi.
Miyagi blocks the elbow strike.
Budden gets the body lock takedown. After a quick scramble, Miyagi regains guard.
Miyagi keeping moving, preventing Budden from controlling successfully.
Miyagi bucks up whilst keeping hold of a body lock, managing to reverse the position. Now he's in top in Budden's guard.
Jeremih Budden has stepped it up - he knows he needs a finish here!
Miyagi drops back for a leg! It's a sloppy attempt though and Miyagi jumps back into guard quickly, to retain the dominant position.
And that's the end of the fight!
Shane Miyagi showed his dominance in that final round.
Well Miyagi has outscored his opponent in every aspect of the fight today. Only a scarily incompetent judge or two will keep him from a well deserved win... Over to the ring announcer for the scorecards.
Ladies and gentlemen, after 3 rounds of action, we go to the scorecards for a decision.
Judge Percy O'Donnell scores the fight for Shane Miyagi!
Judge Timothy Bukovac scores the fight for Shane Miyagi!
Judge Suge Night scores the fight for Shane Miyagi!
Shane Miyagi wins by unanimous decision!
|
|
|
|
|
|
|
|
|
|
|
|
|
|
|
|
|
|
|
|
|
|
|
| S |
C
A |
G |
S |
C
B |
G |
|
S |
C |
G |
|
energy
A | B |
|
hype
A | B |
|
pop
A | B |
|
mgr
A | B |
|
FIGHT
RATING
58% |
|
|
|
|
|
|
|
Undercard bout
|
Coming up we have a heavyweight MMA rules bout between Leland Chapman (ranked 0 p4p, 0 weight class) and Lucho Manka (ranked 0 p4p, 0 weight class). Chapman comes to the cage accompanied by Dog the Bounty Hunter (Theme Song). Lucho Manka is staring across the cage at his opponent, tweaking his nipples.
 |
|
 |
| 190 cm
19
255 lbs
2 - 0 - 0 |
|
200 cm
23
230 lbs
0 - 2 - 0 |
BJJ Purple Belt
Solid boxing
KO power |
|
BJJ Brown Belt
Brawler
Powerful |
|
| |
|
Ladies and gentlemen. This fight is 3 rounds, in the heavyweight division.
Introducing the fighter to my left, fighting out of the red corner.
With a record of
2 - 0 - 0, fighting out of Los Angeles, Leland Chapman!
And introducing the fighter to my right, fighting out of the blue corner.
With a record of
0 - 2 - 0, fighting out of Los Angeles, Lucho Manka!
The judges for this bout are , and Timothy Bukovac.
The bell rings for round one and we are underway!
Manka shakes his hands off, looking to compose himself, but takes a jab to the jaw whilst he does it.
It looks like Lucho Manka has been cut.
Chapman tests Manka's chin there with a solid looking shot.
Manka will have to do better than that with his takedown attempts.
Manka shoots in but no luck this time.
Manka shoots for a takedown but Chapman saw that one coming a mile off and avoided it easily.
Leland Chapman has stuffed three takedown attempts in the round now. That's going to take a lot out of Lucho Manka.
Chapman lands a really nice looking cross but Manka seems unphased.
Manka tries to close the distance and clinch up against the cage but Chapman paws at him with a jab and circles away.
Jab from Chapman.
Manka looks for a takedown but Chapman sprawls well.
We've seen a great period of action over the last minute or so - credit to both fighters for going all out!
Manka shoots in for a takedown but Chapman shows good takedown defense there and keeps this one on the feet.
Chapman drops Manka with a straight left! Oh this is bad for Manka! Chapman dives in and starts dropping bombs - the referee has no choice but to step in and save him!
Ladies and gentlemen, after 0:38 of round 1, we have a winner by way of TKO (strikes). Leland Chapman!
|
|
|
|
|
|
|
|
|
|
|
|
|
|
|
|
|
|
|
|
|
|
|
| S |
C
A |
G |
S |
C
B |
G |
|
S |
C |
G |
|
energy
A | B |
|
hype
A | B |
|
pop
A | B |
|
mgr
A | B |
|
FIGHT
RATING
100% |
|
|
|
|
|
|
|
Undercard bout
|
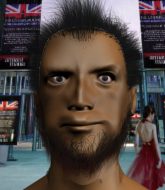
Coming up we have a light heavyweight MMA rules bout between Kiki Kazzaro (ranked 0 p4p, 0 weight class) and Won Low (ranked 0 p4p, 0 weight class). Kazzaro comes into the arena with Can't Be Touched blaring out of the sound system. Both fighter's entrance songs getting the crowd jumping here.
 |
|
 |
| 186 cm
20
197 lbs
4 - 3 - 0 |
|
193 cm
25
215 lbs
9 - 7 - 0 |
BJJ White Belt
Solid Muay Thai
Very quick |
|
BJJ Purple Belt
Decent boxing
Knockout power |
|
| |
|
Ladies and gentlemen. This fight is 3 rounds, in the light heavyweight division.
Introducing the fighter to my left, fighting out of the red corner.
With a record of
4 - 3 - 0, fighting out of Los Angeles, Kiki Kazzaro!
And introducing the fighter to my right, fighting out of the blue corner.
With a record of
9 - 7 - 0, fighting out of Los Angeles, Won Low!
The judges for this bout are , Frank Antenori and Timothy Bukovac.
The bell rings for round one and we are underway!
No luck with that takedown attempt from Low.
Kazzaro just misses with a punch to the body.
Low is looking for a takedown here. He's shot in and has managed to get it, finishing up in Kazzaro's half guard.
Low is thwarting Kazzaro's attempts to control the position.
Low is trying to work for a kimura. He's got his hands clasped together - this could be trouble! No, Kazzaro has managed to free his arm - good work.
Low lands a big shot. The thud that echoes around the arena is like music to the fans' ears.
Low trying to control from half guard but Kazzaro is working away.
Low thows a wild elbow that connects with the canvas.
Low is looking for an arm triangle, whilst trying to pass to side control. Kazzaro doesn't seem that keen to cooperate though. No luck this time Low.
Low looking to pass the half guard. Not this time.
That's one minute gone in the round.
Low wants to stand up but Kazzaro has a hold of him and won't allow it.
Low landing with strikes to the body and head, softening up his opponent.
Low thows a wild elbow that connects with the canvas.
Kazzaro trying to control from the bottom.
Low is trying to work for a kimura but Kazzaro is defending well.
Low looks gassed!
Kazzaro wants to get back to full guard.
That's two minutes gone in the round.
The crowd are getting on the fighters' backs, as the pace has dropped off in the last minute or so.
Low seems to be working for a kimura but Kazzaro defends the submission attempt.
Low is trying a forearm choke
I don't think that's going to do much at this level of the game.
Kazzaro trying to control here.
The fighters are starting to perspire pretty heavily.
Low is thinking about going for an arm triangle but he can't free his leg.
That's three minutes gone in the round.
Neither fighter is doing enough for the referee's liking and he's decided to stand them back up.
Kazzaro fails in his attempt to clinch.
Kazzaro plants his feet and lands a nice head kick!
Kazzaro tries to clinch but Low is having none of it.
Low shoots in for a takedown. "Ole!" shouts Kazzaro as he jumps to the side.
Low moves away from the strike by Kazzaro.
Kazzaro tries a switch kick but it misses it's target.
A head kick misses from Kazzaro.
Kazzaro throws a big shot that misses.
Kazzaro misses with a half-hearted attempt at a head kick.
Low feints and then dives in with a takedown. That was a long way out but the feint bought him enough time to close the distance and complete the takedown. Now we'll play guard for a bit and see who can get the better of that position.
The ref warns both fighters not to hold the cage as they work up against the meshing.
Low thows a big elbow that misses.
Low throwing strikes but missing.
That's four minutes gone in the round.
Low decides he's had enough of playing guard and decides to stand. Come on Kazzaro, up you get!
Low blocks a head kick by Kazzaro.
Low gets the takedown into side control.
Low working hard here to secure a kimura but he's not really in the right position for it.
Low is looking for a kimura. He might have it! No, Kazzaro has escaped the position, nice work there.
Low works to advance to full mount. Kazzaro defends for a few seconds but eventually he succumbs.
And thats the end of the round the fighters go back to their corners.
Won Low dominated that round.
That's time! Kazzaro's corner gives him a slap on the ass as he gets ready to fight.
Low shoots in for a takedown and gets it. Oh and he's advanced to full mount straight away.
Low has hold of Kazzaro's left arm, perhaps looking for a submission. The two fighters tussle over control of the isolated limb and Kazzaro manages to get his arm back to his side and away from danger.
Low looking for a guillotine from mount but Kazzaro is having none of it.
Kazzaro working to try and regain half guard.
Low with some aggressive grappling here. He's looking for submissions here, rather than waiting for the opportunity to counter.
Kazzaro knows he needs to get back to his feet asap. He's simply no match for Low on the ground.
Both fighters are absolutely exhausted here.
Low trying to control but Kazzaro is having none of it.
That's one minute gone in the round.
Low throws some shoulder strikes here and then postures up. Oh, he's gone for an armbar! Kazzaro has his hands clasped together but Low breaks the hold and Kazzaro is forced to tap! This one is aaaaaaaaaaall over! That was lightning fast by Low!
Ladies and gentlemen, after 1:30 of round 2, we have a winner by way of Submission (Armbar). Won Low!
|
|
|
|
|
|
|
|
|
|
|
|
|
|
|
|
|
|
|
|
|
|
|
| S |
C
A |
G |
S |
C
B |
G |
|
S |
C |
G |
|
energy
A | B |
|
hype
A | B |
|
pop
A | B |
|
mgr
A | B |
|
FIGHT
RATING
70% |
|
|
|
|
|
|
|
Undercard bout
|
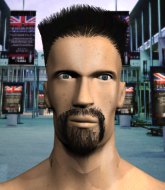
Coming up we have a light heavyweight MMA rules bout between Anatoliy Ivanov (ranked 0 p4p, 0 weight class) and Elijah Carr (ranked 0 p4p, 0 weight class). Ivanov kept the crowd waiting but all that was forgotten when his ring entrance music started. The incomparable musical genius that is The Terminator Theme Song. Both fighter's entrance songs getting the crowd jumping here.
 |
|
 |
| 186 cm
19
215 lbs
4 - 2 - 0 |
|
188 cm
19
220 lbs
4 - 2 - 0 |
BJJ Blue Belt
Solid Muay Thai
KO power |
|
BJJ Blue Belt
Counter striker
Granite chin |
|
| |
|
Ladies and gentlemen. This fight is 3 rounds, in the light heavyweight division.
Introducing the fighter to my left, fighting out of the red corner.
With a record of
4 - 2 - 0, fighting out of Los Angeles, Anatoliy Ivanov!
And introducing the fighter to my right, fighting out of the blue corner.
With a record of
4 - 2 - 0, fighting out of Los Angeles, Elijah Carr!
The judges for this bout are Jack Bonds, Frank Antenori and Timothy Bukovac.
The bell rings for round one and we are underway!
Ivanov missing with a left hand there. Carr was out of range so wasted energy throwing that one.
Ivanov takes a body punch that cleary hurt but he's trying not to show any weakness.
Carr rushes forward with a series of wild hooks but Ivanov moves out of range and avoids them all easily.
Carr slips under a jab from Ivanov.
Ivanov misses with a body kick.
Ivanov pushing out the jab but it's not landing.
Good standup being displayed there by Carr as he connects with a hook.
Crunch! Ivanov slams his shin into Carr's torso.
Carr looks gassed!
The crowd are loving this. Great action here.
A jab from Ivanov misses.
Ivanov walks straight into a jab right on the nose. That one stung - he's blinking and trying to clear his head.
Ivanov finds nothing but air with that leg kick attempt.
Ivanov throws out a token jab with nothing on it.
Carr slips a straight right by Ivanov.
Ivanov throws out a token jab with nothing on it.
Carr displays some good footwork, moving neatly out of range as Ivanov throws out the jab.
Carr tries to move into range but Ivanov moves to the side and lands with a nice right hand.
Ivanov cracks Carr with a big right hand that sends him to the floor! Carr looks wobbly but he's sprung back up to his feet straight away
can Ivanov finish him?
It looks like Elijah Carr has been cut.
That's one minute gone in the round.
Ivanov darts in and lands a big hook, right on the button! Carr's legs crumble underneath him as he falls to the canvas! The ref tackles Ivanov before he gets to land any more shots to his stricken foe.
Ladies and gentlemen, after 1:08 of round 1, we have a winner by way of KO (Punch). Anatoliy Ivanov!
|
|
|
|
|
|
|
|
|
|
|
|
|
|
|
|
|
|
|
|
|
|
|
| S |
C
A |
G |
S |
C
B |
G |
|
S |
C |
G |
|
energy
A | B |
|
hype
A | B |
|
pop
A | B |
|
mgr
A | B |
|
FIGHT
RATING
100% |
|
|
|
|
|
|
|
Undercard bout
|
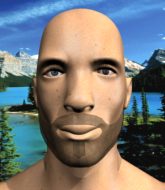
Coming up we have a heavyweight MMA rules bout between Cloud Strife (ranked 0 p4p, 0 weight class) and Craig Pollard (ranked 0 p4p, 0 weight class). Craig Pollard has the better chin. Will he look to stand and bang today?
 |
|
 |
| 195 cm
20
265 lbs
6 - 2 - 0 |
|
193 cm
21
254 lbs
6 - 6 - 0 |
BJJ Purple Belt
Basic striking
Experienced |
|
BJJ Purple Belt
Brawler
Granite chin |
|
| |
|
Ladies and gentlemen. This fight is 3 rounds, in the heavyweight division.
Introducing the fighter to my left, fighting out of the red corner.
With a record of
6 - 2 - 0, fighting out of Los Angeles, Cloud Strife!
And introducing the fighter to my right, fighting out of the blue corner.
With a record of
6 - 6 - 0, fighting out of Los Angeles, Craig Pollard!
The judges for this bout are Timothy Bukovac, and Jack Bonds.
The bell rings for round one and we are underway!
Pollard throws a hook but Strife blocks it.
Pollard swings wildly with a right hand that was never going to find it's target.
Strife feints and then dives in with a takedown. That was a long way out but the feint bought him enough time to close the distance and complete the takedown. Now we'll play guard for a bit and see who can get the better of that position.
Strife avoids a guillotine attempt easily.
Strife slows down the pace of the fight, as he sits in guard.
Strife looking to pass the guard.
Pollard is working actively from the bottom, looking for submissions. He's escaped his hips to the side and he's going for an armbar! Strife has his hands clasped together but Pollard extends an breaks Strife's desperate grasp, forcing a tap out due to armbar! Nice BJJ displayed there by Pollard.
Ladies and gentlemen, after 0:59 of round 1, we have a winner by way of Submission (Armbar). Craig Pollard!
|
|
|
|
|
|
|
|
|
|
|
|
|
|
|
|
|
|
|
|
|
|
|
| S |
C
A |
G |
S |
C
B |
G |
|
S |
C |
G |
|
energy
A | B |
|
hype
A | B |
|
pop
A | B |
|
mgr
A | B |
|
FIGHT
RATING
52% |
|
|
|
|
|
|
|
Undercard bout
|
Coming up we have a middleweight MMA rules bout between Darco Slammo (ranked 0 p4p, 0 weight class) and Zen Budha (ranked 0 p4p, 0 weight class). Budha has chosen Fight Club - Where is my Mind as his entrance music. On his way into the cage it seems that Darco Slammo has been attacked by a crazed fan! It looks like it might have been the just bleed guy! Luckily Darco Slammo seems to be OK! I thought that lunatic was in prison!?
 |
|
 |
| 179 cm
24
202 lbs
3 - 0 - 0 |
|
186 cm
25
195 lbs
6 - 2 - 0 |
Good wrestling
Counter striker
KO power |
|
BJJ Brown Belt
Counter striker
Determined |
|
| |
|
Ladies and gentlemen. This fight is 3 rounds, in the middleweight division.
Introducing the fighter to my left, fighting out of the red corner.
With a record of
3 - 0 - 0, fighting out of Los Angeles, Darco Slammo!
And introducing the fighter to my right, fighting out of the blue corner.
With a record of
6 - 2 - 0, fighting out of Los Angeles, Zen Budha!
The judges for this bout are Timothy Bukovac, Frank Antenori and .
The bell rings for round one and we are underway!
Horrible takedown by Budha or perhaps it was just good defense by Slammo which made him look bad.
Darco Slammo seems to be the more aggressive standup fighter in this bout.
No luck for Budha with that takedown attempt.
Slammo decides to change it up a bit and drives through with a nice takedown into half guard.
Slammo is keen to just control but Budha is a slippery customer.
Slammo thumps the canvas. Not on purpose obviously - he just missed Budha's head.
Budha wants to control but Slammo is keeping busy.
Budha wants to get back to full guard.
Neither fighter is being very active at the moment, with Slammo in particular looking to stall.
That's one minute gone in the round.
Budha looking to work for a kimura from the bottom.
Budha trying to control from the bottom.
It looks like we're going to have a standup here. Neither fighter is doing enough on the ground.
Slammo closes the distance and gets a double leg, slamming Budha to the mat! Budha manages to get full guard.
Slammo landing some decent shots from guard.
Slammo got a little sloppy there for a moment and Budha has worked his way into a loose triangle - can he finish it?! No, Slammo has managed to get both his arms back between Budha's legs - danger averted.
Slammo working in close now, lands a nice elbow to the side of Budha's head.
That's two minutes gone in the round.
Slammo lands a nice shot whilst sitting in his opponent's guard.
Slammo makes a bit of distance and scores with some ground and pound, still in guard.
Slammo is sitting in guard, working some ground and pound.
Slammo throwing strikes from guard but Budha blocks nicely.
Slammo throws a big right hand that misses.
Budha is looking to sinch up a triangle. Slammo throws the leg off to one side though and gets in tight to Budha's body to avoid the submission. Budha has instead reached around Slammo's neck and now has a guillotine! Oh, this is biiiig trouble! Budha arches his back and squeezes and forces the tap from his hapless opponent.
Ladies and gentlemen, after 2:54 of round 1, we have a winner by way of Submission (Guillotine). Zen Budha!
|
|
|
|
|
|
|
|
|
|
|
|
|
|
|
|
|
|
|
|
|
|
|
| S |
C
A |
G |
S |
C
B |
G |
|
S |
C |
G |
|
energy
A | B |
|
hype
A | B |
|
pop
A | B |
|
mgr
A | B |
|
FIGHT
RATING
46% |
|
|
|
|
|
|
|
Co-main event
|
Coming up we have a heavyweight MMA rules bout between Assis Civita (ranked 0 p4p, 0 weight class) and Brock Lesnar (ranked 0 p4p, 0 weight class). Lesnar is bouncing up and down as he enters the arena, backed by Here comes the Pain. Both fighters look fresh as a daisy as they make their way towards the cage.
 |
|
 |
| 195 cm
24
269 lbs
5 - 0 - 0 |
|
190 cm
22
230 lbs
3 - 0 - 0 |
BJJ Brown Belt
Solid boxing
Very strong |
|
BJJ White Belt
Brawler
Granite chin |
|
| |
|
Ladies and gentlemen. This fight is 3 rounds, in the heavyweight division.
Introducing the fighter to my left, fighting out of the red corner.
With a record of
5 - 0 - 0, fighting out of Los Angeles, Assis Civita!
And introducing the fighter to my right, fighting out of the blue corner.
With a record of
3 - 0 - 0, fighting out of Los Angeles, Brock Lesnar!
The judges for this bout are Jack Bonds, Frank Antenori and .
The bell rings for round one and we are underway!
Civita stuffs the takedown attempt from Lesnar. Lesnar gets slowly back to his feet.
Nice sprawl there from Civita as Lesnar shoots in.
Civita displays good takedown defense there as he swats away a double leg from Lesnar.
Assis Civita has stuffed three takedown attempts in the round now. That's going to take a lot out of Brock Lesnar.
Civita defends well against a solid takedown attempt from Lesnar.
Civita scores with the left hand. Lesnar knows he should have avoided that one.
It looks like Brock Lesnar has been cut.
Civita leaves Lesnar with his face pressed against the mat as he sprawls beautifully, defending against a solid takedown attempt.
Lesnar takes a jab on the nose. He smiles like he loves it and keeps coming.
Lesnar shoots in looking for a takedown. Civita tries to sprawl out of it but Lesnar keeps driving through. The fighters are pinned against the cage. Civita manages to get underhooks and after a bit of a struggle, circles away and we're back to standing.
Lesnar looks gassed!
Civita stuns Lesnar with a nice body shot, before stepping back out of range.
The crowd are loving this. Great action here.
Civita jabs Lesnar right on the nose. Lesnar blinks but takes it well.
Lesnar has his head snapped back a nice jab. A little nod from Lesnar there as he acknowledges the shot.
Civita lands a nice hook to Lesnar's body. Lesnar takes it in his stride and looks to land his own strikes.
Nice body punch from Civita.
Civita jabs Lesnar right on the nose. Lesnar blinks but takes it well.
That's one minute gone in the round.
Nice body punch from Civita.
Civita thuds a left hand into Lesnar's body.
Civita drops Lesnar with a big left hand! Lesnar is injured, injured bad! Civita jumps in and finished him with strikes! The fight is over!
Ladies and gentlemen, after 1:13 of round 1, we have a winner by way of TKO (Strikes). Assis Civita!
|
|
|
|
|
|
|
|
|
|
|
|
|
|
|
|
|
|
|
|
|
|
|
| S |
C
A |
G |
S |
C
B |
G |
|
S |
C |
G |
|
energy
A | B |
|
hype
A | B |
|
pop
A | B |
|
mgr
A | B |
|
FIGHT
RATING
100% |
|
|
|
|
|
|
|
Main event
|
Coming up we have a welterweight MMA rules bout between Homie Clown (ranked 0 p4p, 0 weight class) and Chris Whopp (ranked 0 p4p, 0 weight class). Homie Clown has the better chin. Will he look to stand and bang today?
 |
|
 |
| 178 cm
24
180 lbs
6 - 2 - 0 |
|
190 cm
24
180 lbs
6 - 2 - 0 |
BJJ Brown Belt
Solid boxing
KO power |
|
BJJ White Belt
Excellent MT
Knockout power |
|
| |
|
Ladies and gentlemen. This fight is 3 rounds, in the welterweight division.
Introducing the fighter to my left, fighting out of the red corner.
With a record of
6 - 2 - 0, fighting out of Los Angeles, Homie Clown!
And introducing the fighter to my right, fighting out of the blue corner.
With a record of
6 - 2 - 0, fighting out of Los Angeles, Chris Whopp!
The judges for this bout are , Jack Bonds and Frank Antenori.
The bell rings for round one and we are underway!
Whopp tries a head kick but it misses.
Clown blocks a head kick by Whopp.
Whopp is looking to slow Clown down with leg kicks.
Whopp thows a body shot but no joy.
Clown thows a body shot but no joy.
Clown scores with a punch to the head.
Clown missing with a left hand there. Whopp was out of range so wasted energy throwing that one.
Clown shoots in for a takedown and gets it. Oh and he's advanced to full mount straight away.
Clown tries to control but Whopp wriggling away.
Clown lands a nice shot to the head.
Whopp wriggling around on the bottom manages to avoid the strikes thrown by Clown.
Whopp takes a big shot to the dome and his eyes have rolled back in his head! Clown's killer instinct has kicked in as he finishes the fight with more strikes. Impressive finish.
Ladies and gentlemen, after 1:04 of round 1, we have a winner by way of TKO (Strikes). Homie Clown!
|
|
|
|
|
|
|
|
|
|
|
|
|
|
|
|
|
|
|
|
|
|
|
| S |
C
A |
G |
S |
C
B |
G |
|
S |
C |
G |
|
energy
A | B |
|
hype
A | B |
|
pop
A | B |
|
mgr
A | B |
|
FIGHT
RATING
59% |
|
|
|
|
|
|
|
|
|
|
