 |
D.E.C. 2: Downunder Brawl PBP Commentary |
Undercard bout
|
|
|
|
Undercard bout
|
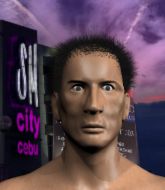
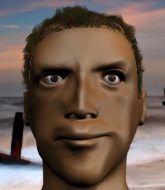
Coming up we have a light heavyweight MMA rules bout between Frank Thomas (ranked 0 p4p, 0 weight class) and Nick Earls (ranked 0 p4p, 0 weight class). Earls has chosen Tommy Gun as his entrance music. We have two fighters making their debuts here, so let's see who comes out of this one with their first professional victory.
 |
|
 |
| 193 cm
20
213 lbs
0 - 0 - 0 |
|
180 cm
18
215 lbs
0 - 0 - 0 |
BJJ White Belt
Basic striking
Good chin |
|
BJJ Blue Belt
Basic striking
Granite chin |
|
| |
|
Ladies and gentlemen. This fight is 3 rounds, in the light heavyweight division.
Introducing the fighter to my left, fighting out of the red corner.
With a record of
0 - 0 - 0, fighting out of Sydney, Frank Thomas!
And introducing the fighter to my right, fighting out of the blue corner.
With a record of
0 - 0 - 0, fighting out of Sydney, Nick Earls!
The judges for this bout are , and .

The bell rings for round one and we are underway!
Thomas misses with the combination.
Thomas doesn't manage to clinch there - Earls circles away.

Earls clinches with his opponent.

Thomas breaks the clinch and we return to the middle of the mat.
Earls tries to clinch but Thomas moves out of range.
Earls takes a body kick right on the floating rib. Ouchie.
Thomas fails to land the takedown.
Earls takes a nice looking leg kick right on the meat of his thigh there.
Left hook, right uppercut from Thomas.
A low kick from Earls is predictable there

so Thomas counters with a double leg into guard. Good agility.
This is a great period of action - very entertaining stuff!
Earls is working from a closed guard but he's struggling to control his opponent.

Earls looking for submissions off his back, moving his hips, looking for an opening.
Earls is looking for a triangle here but Thomas uses the submission attempt to pass into side control.
Earls looks gassed!
Thomas controlling the position.

That's one minute gone in the round.
Earls tries to work a leg under to get back to half guard but Thomas wriggles his own leg back out and remains in side control.
Earls sneaks a leg under to get back to half guard.
Thomas controlling the pace.
Thomas wants to control but Earls is keeping him busy.
Earls wants to improve his position but Thomas is controlling well.
The fighters are pressed up against the cage, both looking to find a bit of space to work.
Earls trying to control here but he's found himself mounted! Oh no!

That's two minutes gone in the round.
The crowd are hurling abuse towards the fighters... You can hardly blame them though because there isn't a lot going on in the fight.
Earls is writhing around trying to get back to his feet.
Earls tries to reverse the position but Thomas maintains control.
Thomas looking to control but Earls is working nicely, looking to advance position himself.
Earls keeping his composure momentarily, calmly looking to get back to half guard.
Earls is persisting with the attempt to improve his position.
Thomas controlling his opponent.

That's three minutes gone in the round.
Thomas's ground tactics aren't going to win him many fans. Let's hope he's got fireworks for us if he gets back to his feet because he's not doing much on the ground.
Earls should think about turning a few of those tyres round his middle into muscle if he wants people to take him seriously as an athlete.
Earls keeping his composure momentarily, calmly looking to get back to half guard.
Thomas controlling the position easily from mount.
Earls tries to lock up and control but Thomas gives him a forearm to the face and pushes him away.
Thomas will need to keep those long limbs tucked in whilst he's on the ground, to prevent any submissions.

That's four minutes gone in the round.
A few boos can be heard. I'm sure they will multiply if the fighters don't pick up the pace.
Earls working to try and regain half guard.
Earls is hanging on here. He's in a desperate position.
Thomas avoids the attempt from Earls to control.
Earls is trying desperately to improve position.
Thomas trying to control but he's not successful this time.
Thomas blocks Earls's feeble attempts to strike from the bottom.
And thats the end of the round the fighters go back to their corners.
Frank Thomas dominated that round.
The referee calls time. The cornermen exit stage left and we're back to business.

Nice sprawl there from Earls as Thomas shoots in.
Thomas tries to clinch up.
Thomas doesn't manage to clinch there - Earls circles away.
Thomas misses with a wild combination.
Thomas keeps the fight on the outside.
Earls tries to clinch but fails miserably
and Thomas counters with a nice body kick.
Thomas misses with the combination.
Earls moves into the clinch successfully.
Thomas wants to break free. God knows he wants to breaaaak freeee.
Earls is working for takedown but Thomas is calmly controlling the position for now.
Earls stalling.
Thomas wants to strike at distance but he can't break free of the clinch.
Earls keeps control of Thomas as he tries to wriggle out of the double underhooks.
Earls wants to stall.
Both fighters are absolutely exhausted here.
Thomas is trying to break free.
Thomas wants to get back to striking at distance but Earls won't allow it.
Earls stalling.
That's one minute gone in the round.
Earls receives a warning from the referee for stalling.
Earls misses with a body punch.
Earls is working for a takedown up against the cage. He can't get it on this occasion though.
Thomas wants a takedown.
Thomas has had enough of the clinch but Earls keeps him there for the moment.
Thomas breaks from the clinch.
Thomas misses with a body kick.
Earls misses with a half-hearted attempt at a head kick.
Earls throws a sloppy head kick and Thomas moves out of range easily.
Earls rushes Thomas and pushes him back against the cage in a clinch.
Thomas wants to push off and get back to the center of the mat but Earls has him pressed against the cage.
Some stalling of biblical proportions here from Earls.
Earls is trying to slow down the pace in the clinch, to catch his breath.
Earls keeps control of Thomas as he tries to wriggle out of the double underhooks.
The two fighters are working to gain dominance in the clinch.
Thomas is trying to break free.
Thomas wants to push off and get back to the center of the mat but Earls has him pressed against the cage.
Thomas is pressed up against the cage. Earls has hold of a leg and is looking to drag Thomas down to the mat. Thomas avoids the attempt though and has circled away. We're back to striking at a distance.
Frank Thomas has stuffed three takedown attempts in the round now. That's going to take a lot out of Nick Earls.
Thomas lands a jab, followed by a cross and another cross, as Earls backs up against the cage.

It looks like Nick Earls has been cut.
A head kick from Thomas lands but Earls takes it in his stride.
That's two minutes gone in the round.
Earls is looking to take this fight into the clinch.
Earls looks for a takedown but Thomas sprawls well.
Frank Thomas seems to be the more aggressive standup fighter in this bout.
Earls tries to clinch up but Thomas circles away and keeps his distance.
Earls tries to clinch there but Thomas circles away.
Earls moves out of range as Thomas throws a body kick.
Thomas tries a switch kick but it misses it's target.
Earls circles away from the clinch attempt
and Earls counters with a good, hard body kick but Thomas shrugs it off.
Earls swings away with a leg kick that misses.
Earls misses with a leg kick.
Thomas throws a body kick that sends a sickening thudding noise reverberating around the arena.
The fans in attendance giving it up for the two fighters, who have really let it all hang out in the last minute or so!
Earls drops down and drives through with a powerful takedown into guard.
Earls connects with a couple of short punches.
The ref warns both fighters not to hold the cage as they work up against the meshing.
Earls pressing down on his opponent's thigh, looking to pass guard. Thomas is keeping the position for now.
Thomas trying to control the position.
That's three minutes gone in the round.
Thomas keeping full guard, as Earls tries to pass.
Earls drops back for a leg but he's not going to get it - he lets go and Thomas dives on top into guard.
Earls had isolated an arm as going for an omaplata. Thomas is defending the submission well but is in a very vulnerable position. Earls Is leaning forward trying to finish the omaplata but decides to abandon it, and take Thomas's back instead.
Thomas preventing the rear naked choke attempt from Earls.
Thomas staying busy and making it hard for Earls to control.
That's four minutes gone in the round.
The crowd are hurling abuse towards the fighters... You can hardly blame them though because there isn't a lot going on in the fight.
Earls is staying calm and holding on to the back position, whilst working on a rear naked choke. Thomas is defending well though. Earls let's go of the attempt for now.
Earls wants to control but Thomas is keeping busy.
Thomas tries to break free.
Thomas knows he needs to get back to his feet asap. He's simply no match for Earls on the ground.
Thomas fending off the submission attempt from Earls.
You can see the frustration on Thomas's face
He knows he is in trouble unless he improves his position sooner rather than later.
Thomas trying to control the position but Earls manages to sink in the hooks.
Thomas showing good submission defense here.
And thats the end of the round the fighters go back to their corners.
That was a close second round but I would say that Frank Thomas will probably get the nod.
The cut man is working on Nick Earls's cut.
That's time! Thomas's corner gives him a slap on the ass as he gets ready to fight. So, we enter the final round. Let's see if either fighter can bring us a finish, or whether we're going to the judges scorecards.

Earls tries to clinch there but Thomas circles away.
Earls tries to clinch but Thomas moves away
and Thomas counters with a takedown into side control.
Earls is trying to improve his position.
You can see the frustration on Earls's face, being in this tough position on the bottom.
Earls is not content to let Thomas control the position.
Thomas wants to stand but Earls is controlling his arm.
Frank Thomas overall seems to be getting the better of the ground position in the fight so far.
Both fighters are breathing heavily.
You can see the frustration on Earls's face, being in this tough position on the bottom.
Earls manages to work his way to half guard, despite Thomas's best efforts.
That's one minute gone in the round.
Earls slips a foot under and gets full guard. Nice work.
Thomas wants to stand but Earls is controlling his posture from full guard.
Earls has a loose triangle. He'll be looking to tighten that up but Thomas can see exactly what he's planning and manages to posture up and free himself.
Thomas is looking to stand up but Earls won't let him.
Earls looking for a guillotine here but Thomas defends easily.
Thomas wants to stand but Earls has a closed guard, so he can't escape.
That's two minutes gone in the round.
There's not a lot going on here and the crowd are letting the fighters know they're not willing to tolerate a lack of action.
Earls looking to control.
Thomas won't allow Earls to sweep him here.
Earls looking for a guillotine here but Thomas defends easily.
Earls looking for submissions from the bottom but instead Thomas passes into side control.
Thomas controlling from side mount.
That's three minutes gone in the round.
Thomas tries to get to his feet but he's trapped momentarily.
Earls tries to improve position but can't.
Earls is sneaking out the side here. He's bucked Thomas off and has taken his back!
Earls has both hooks in and is working for a choke. Thomas is in real trouble here. Earls gets an arm under the chin and tightens the submission attempt... is this the end? Yes, Thomas is tapping out! Earls wins by rear naked choke!
Ladies and gentlemen, after 3:47 of round 3, we have a winner by way of Submission (RNC). Nick Earls!
|
|
|
|
|
|
|
|
|
|
|
|
|
|
|
|
|
|
|
|
|
|
|
| S |
C
A |
G |
S |
C
B |
G |
|
S |
C |
G |
|
energy
A | B |
|
hype
A | B |
|
pop
A | B |
|
mgr
A | B |
|
FIGHT
RATING
61% |
|
|
|
|
|
|
|
Undercard bout
|
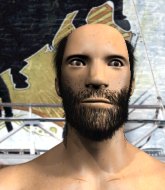
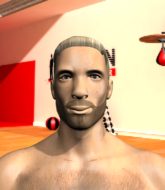
Coming up we have a heavyweight MMA rules bout between Jack Slater (ranked 0 p4p, 0 weight class) and Daley Bornstein (ranked 0 p4p, 0 weight class). We have two fighters making their debuts here, so let's see who comes out of this one with their first professional victory.
 |
|
 |
| 205 cm
19
273 lbs
0 - 0 - 0 |
|
190 cm
21
240 lbs
0 - 0 - 0 |
BJJ Blue Belt
Brawler
Cuts easily |
|
BJJ White Belt
Decent boxing
Granite chin |
|
| |
|
Ladies and gentlemen. This fight is 3 rounds, in the heavyweight division.
Introducing the fighter to my left, fighting out of the red corner.
With a record of
0 - 0 - 0, fighting out of Sydney, Jack Slater!
And introducing the fighter to my right, fighting out of the blue corner.
With a record of
0 - 0 - 0, fighting out of Sydney, Daley Bornstein!
The judges for this bout are , and .
The bell rings for round one and we are underway!
Slater on the wrong end of a nice hook.
It looks like Jack Slater has been cut.
Bornstein walks forward and throws a big overhand right! Slater drops to the floor like a sack of potatoes! Bornstein swarms on him with more punches until the referee wrestles him away from Slater's unconscious body! Wow, that was brutal!
Ladies and gentlemen, after 0:05 of round 1, we have a winner by way of TKO (Strikes). Daley Bornstein!
|
|
|
|
|
|
|
|
|
|
|
|
|
|
|
|
|
|
|
|
|
|
|
| S |
C
A |
G |
S |
C
B |
G |
|
S |
C |
G |
|
energy
A | B |
|
hype
A | B |
|
pop
A | B |
|
mgr
A | B |
|
FIGHT
RATING
100% |
|
|
|
|
|
|
|
Undercard bout
|
|
|
|
Undercard bout
|
Coming up we have a middleweight MMA rules bout between Max Rush (ranked 0 p4p, 0 weight class) and Helo San (ranked 0 p4p, 0 weight class). We have two fighters making their debuts here, so let's see who comes out of this one with their first professional victory.
 |
|
 |
| 187 cm
18
196 lbs
0 - 0 - 0 |
|
180 cm
20
184 lbs
0 - 0 - 0 |
BJJ Blue Belt
Counter striker
Granite chin |
|
BJJ White Belt
Brawler
Determined |
|
| |
|
Ladies and gentlemen. This fight is 3 rounds, in the middleweight division.
Introducing the fighter to my left, fighting out of the red corner.
With a record of
0 - 0 - 0, fighting out of Sydney, Max Rush!
And introducing the fighter to my right, fighting out of the blue corner.
With a record of
0 - 0 - 0, fighting out of Sydney, Helo San!
The judges for this bout are , and .
The bell rings for round one and we are underway!
San tries a switch kick but it misses it's target.
San misses with an attempted mid kick.
A head kick misses from San.
San is the aggressor but that punch slipped nicely by Rush.
San misses with a half-hearted attempt at a head kick.
San swings away but doesn't land with a series of punches.
San misses with a jab, cross combination.
A punch combination from San misses.
San misses with a head kick.
Rush closes the distance and clinches.
San trying to land knees to the body.
San lands an uppercut.
San misses the knee to the body. Nice hip positioning from Rush.
Rush avoiding damage as San throws knees to the body.
Rush tries to take the fight to the ground by pulling guard but can't manage it.
We've had a slow start to the round here - hopefully the action picks up.
Rush is trying to slow down the pace in the clinch, to catch his breath.
Rush avoiding damage as San throws knees to the body.
San can't find room to land a body shot as Rush controls the action.
San crunches a lovely knee into Rush's ribcage.
San looks gassed!
San lands a nice knee to the body.
Rush on the defensive, avoiding the knees to the body.
Rush on the defensive, avoiding the knees to the body.
That's one minute gone in the round.
Rush has picked San up - he's going for a ride! Rush dumps his opponent to the mat with a thud and settles into half guard.
Rush is looking for an arm triangle, whilst trying to pass to side control. San doesn't seem that keen to cooperate though. No luck this time Rush.
Rush is working for a submission of some sort.
San really doesn't want to stay on the ground with Rush. If he can't get it back to his feet, it's only a matter of time before he'll be tapping out.
Rush looking for a kimura but he'll have to free his other leg if he wants to finish that. Perhaps he's just using it as a distraction technique.
The fighters are pressed up against the cage, both looking to find a bit of space to work.
San won't allow Rush to pass to mount.
That's two minutes gone in the round.
Rush seems like he's working for an arm triangle here. He's freed his trapped foot and he's rotating nicely. San is in big trouble! He's tapping out! This one is aaaaaaaaaaaall over!
Ladies and gentlemen, after 2:51 of round 1, we have a winner by way of Submission (Arm Triangle). Max Rush!
|
|
|
|
|
|
|
|
|
|
|
|
|
|
|
|
|
|
|
|
|
|
|
| S |
C
A |
G |
S |
C
B |
G |
|
S |
C |
G |
|
energy
A | B |
|
hype
A | B |
|
pop
A | B |
|
mgr
A | B |
|
FIGHT
RATING
35% |
|
|
|
|
|
|
|
Undercard bout
|
Coming up we have a middleweight MMA rules bout between Perrin Jones (ranked 0 p4p, 0 weight class) and Trey Belk (ranked 0 p4p, 0 weight class). Jones comes to the cage accompanied by Dog The Nine. We have two fighters making their debuts here, so let's see who comes out of this one with their first professional victory.
 |
|
 |
| 190 cm
18
190 lbs
0 - 0 - 0 |
|
175 cm
18
190 lbs
0 - 0 - 0 |
BJJ Brown Belt
Brawler
Good chin |
|
BJJ Blue Belt
Brawler
Solid chin |
|
| |
|
Ladies and gentlemen. This fight is 3 rounds, in the middleweight division.
Introducing the fighter to my left, fighting out of the red corner.
With a record of
0 - 0 - 0, fighting out of Sydney, Perrin Jones!
And introducing the fighter to my right, fighting out of the blue corner.
With a record of
0 - 0 - 0, fighting out of Sydney, Trey Belk!
The judges for this bout are , and .
The bell rings for round one and we are underway!
Jones shoots in with a takedown attempt and he has Belk pinned against the cage. Belk gets the underhooks and manages to circle away.
Jones looks for a takedown but Belk sprawls well.
Belk gets a clinch.
Jones tries to take the fight to the ground by pulling guard but can't manage it.
That's three failed takedown attempts in the round for Perrin Jones. That's going to take a lot out of him.
Belk breaks the clinch and we return to the middle of the mat.
Belk stuffs the takedown attempt from Jones. Jones gets slowly back to his feet.
Belk lands a powerful looking uppercut that connected with his opponent's jaw.
Belk scores with a nice one two combo and darts back out of range to avoid anything coming in the opposite direction.
Belk stalks Jones and leaps in with a furious combination of punches. Uppercuts and crosses smash into Jones's face. Jones staggers backwards, shaken.
Jones looks frusrated there after his takedown attempt is stuffed easily.
Jones tries to shoot in for a takedown. He's got hold of a leg but Belk swivels and escapes.
Jones fails to land the takedown.
Jones is breathing heavily.
Belk darts in and clinches Jones up against the cage.
Belk breaks from the clinch.
Jones misses with a takedown attempt - Belk sprawls well and throws a nice strike on the way out which just misses.
Horrible takedown by Jones or perhaps it was just good defense by Belk which made him look bad.
Belk lands with an uppercut that bounces Jones off the cage and back into rage.
The crowd cheering loudly, showing their appreciation for the quality fight we're seeing here.
Jones has his head slapped from side to side by a 3 punch combination. That must have hurt him.
Belk with a body punch. A glancing blow.
That's one minute gone in the round.
Belk fakes a head punch and goes low to the body. Nicely done.
Jones dodges the punch combination from Belk.
Belk comes forward and lands a shot to the body, then darts back out of range.
A left and a right from Belk both land. Nice combination.
Belk moves into range and clinches up with Jones.
Jones is fighting off a takedown attempt but Belk is just too persistent for him and manages to trip Jones to the mat. Jones regains guard as soon as the fighters hit the mat.
Jones had isolated an arm as going for an omaplata. Belk is defending the submission well but is in a very vulnerable position. Jones Is leaning forward trying to finish the omaplata but decides to abandon it, and take Belk's back instead.
Jones working for a RNC but it's not happening just yet.
The fighters are pressed up against the cage, both looking to find a bit of space to work.
Fantastic stuff here - a very entertaining period of action, which has drawn cheers from the crowd.
Jones is working for the rear naked choke. He has one arm under the chin but Belk has hold of the other arm. A bit of a stalemate here.
Belk is defending well here and trying to improve his position.
Jones is remaining active here, looking for the choke. The more discerning members of the crowd will appreciate his efforts.
Belk turns into Jones and is now in his guard.
Belk thinks about going for a leg but decides against it, in order to maintain the position.
Jones lands a beautiful switch and he's in full mount! That could spell trouble for Belk!
That's two minutes gone in the round.
Jones is working for a guillotine from mount but Belk frees his head quite easily.
Jones blocks Belk's feeble attempts to strike from the bottom.
Jones looks like he's working for a submission but he's not found anything just yet.
Belk is desperately trying to get back to half guard.
Belk really doesn't want to stay on the ground with Jones. If he can't get it back to his feet, it's only a matter of time before he'll be tapping out.
Jones quickly switches position and commits to an armbar! It's a big risk for Jones but it's paid off an Belk is forced to tap! Nice work by Jones.
Ladies and gentlemen, after 2:49 of round 1, we have a winner by way of Submission (Armbar). Perrin Jones!
|
|
|
|
|
|
|
|
|
|
|
|
|
|
|
|
|
|
|
|
|
|
|
| S |
C
A |
G |
S |
C
B |
G |
|
S |
C |
G |
|
energy
A | B |
|
hype
A | B |
|
pop
A | B |
|
mgr
A | B |
|
FIGHT
RATING
100% |
|
|
|
|
|
|
|
Co-main event
|
|
|
|
Main event
|
Coming up we have a welterweight MMA rules bout between Andy Murray (ranked 0 p4p, 0 weight class) and Chance Chase (ranked 0 p4p, 0 weight class). Murray comes to the cage accompanied by Go Square Go. We have two fighters making their debuts here, so let's see who comes out of this one with their first professional victory.
 |
|
 |
| 191 cm
18
180 lbs
0 - 0 - 0 |
|
182 cm
18
170 lbs
0 - 0 - 0 |
BJJ Blue Belt
Basic striking
KO power |
|
BJJ Blue Belt
Basic striking
Solid chin |
|
| |
|
Ladies and gentlemen. This fight is 3 rounds, in the welterweight division.
Introducing the fighter to my left, fighting out of the red corner.
With a record of
0 - 0 - 0, fighting out of Sydney, Andy Murray!
And introducing the fighter to my right, fighting out of the blue corner.
With a record of
0 - 0 - 0, fighting out of Sydney, Chance Chase!
The judges for this bout are , and .
The bell rings for round one and we are underway!
Chase wants to clinch.
Murray scores with a slapping inside leg kick.
Nice takedown defense from Murray. No joy for Chase on that attempt.
Murray with a nice looking leg kick. You could hear that one land in a back row.
Murray swings and misses with a hook to the body.
Murray walks forward and throws out a flicking leg kick. Chase checks it nicely though, as he moves to the side.
An inside leg kick from Murray misses.
Chase scores with a takedown into Murray's guard.
Murray has his hands on Chase's head, controlling the position.
Chase is looking to stand up but Murray won't let him.
The fighters are pressed up against the cage, both looking to find a bit of space to work.
Chase is stalling in the full guard.
Chase trying to control but Murray is working from the bottom.
Murray lands a beautiful switch and he's in full mount! That could spell trouble for Chase!
That's one minute gone in the round.
Murray looking for an armbar but decides to keep the dominant position instead.
Chase is working to get back to half guard.
Chase bucks up and manages to get a nice reversal! He's in guard on the top - nicely done!
Chase throwing shots from guard but he's hitting more mat than opponent.
Murray is trying to keep Chase in close.
Murray has Chase pulled in close to control his posture.
Chase controlling from the top position.
Murray manages to land a sweep and now he's in mount on top!
That's two minutes gone in the round.
Murray takes a little breather and maintains the position. The referee will be looking for him to stay active from such a dominant position though.
Murray tries to control but Chase wriggling away.
Chase is in all sorts of trouble here.
Murray is trying to take his opponent's back.
The ref warns both fighters not to hold the cage as they work up against the meshing.
That's three minutes gone in the round.
Chase is just holding on here. Murray manages to take his back.
Good control from Murray.
Will Murray go for the finish here or will he try and keep control of the position?
Murray controlling well, preventing Chase from escaping the position.
Murray is not going to allow Chase to sit and survive in this position.
Chase looks gassed!
Chase is defending well here and trying to improve his position.
Murray has good solid back control here.
Chase manages to reverse the position and now he's in Murray's guard. Nice work there by Chase.
That's four minutes gone in the round.
The crowd are starting to boo a lack of action.
Chase being controlled here momentarily.
Chase trying to control but Murray is working from the bottom.
Murray looking to control.

The referee stands the fighters back up. Andy Murray just wasn't active enough from the dominant position.
Murray stuffs the takedown attempt from Chase. Chase gets slowly back to his feet.
Chase avoids the clinch attempt nicely.
Murray pushes Chase away with a front kick.
Chase avoids the head kick by Murray.
Murray waving his hands out infront of him, looking to distract Chase.
Chase shoots in for a takedown - he's clinched up with Murray but Murray pushes him off and we're back to square one.
Andy Murray has stuffed three takedown attempts in the round now. That's going to take a lot out of Chance Chase.
Murray lands a head kick!
Chase looking to shoot here. He's gone for it and he's landed a takedown into mount! Oh, that's bad for Murray!
Chase trying to control but he's not successful this time.
And thats the end of the round the fighters go back to their corners.
Andy Murray dominated that round.
That's time! Back to the action!
A left and a right from Chase both land. Nice combination.
It looks like Andy Murray has been cut.
Murray scores with a jab to the jaw.
Murray connects with a high kick.
An inside leg kick lands from Murray.
Murray swings away with a leg kick that misses.
Murray lands a head kick!
Chase shoots in for a takedown but Murray shows good takedown defense.
Chase moves out of range of the leg kick from Murray.
Murray buckles his opponent's knee momentarily with a nice leg kick.
Chase tries to shoot in for a takedown. He's got hold of a leg but Murray swivels and escapes.
Murray lands a jab to the head.
Chase fails with the takedown.
Andy Murray has stuffed three takedown attempts in the round now. That's going to take a lot out of Chance Chase.
Murray pulls out of a head kick attempt.
Chase looking to shoot here. He's gone for it and he's landed a takedown into mount! Oh, that's bad for Murray!
Murray can't escape the position.
Murray wants to control but Chase is having none of it.
Chase controlling the position easily from mount.
Both fighters are absolutely exhausted here.
That's one minute gone in the round.
Chase lands a shot to the body, followed up by a shot to the exposed head of his trapped opponent.
Chase content just to control the position here.
Murray is squirming around, avoiding Chase's attempts to control the action.
Chase avoids the attempt from Murray to control.
Chase pausing momentarily but resumes with a couple of decent strikes that do a bit of damage.
Murray wants to hold on but Chase pushes him away.
Murray sneaks a leg under to get to half guard.
Chase trying to control from half guard but Murray is working away.
That's two minutes gone in the round.
The two fighters exchange a few words. I couldn't hear what they were saying but maybe it's more fun if you make it up yourself. Chase connects with a nice short shot to Murray's temple.
Murray tries to roll over but Chase keeps him under control.
Still in half guard, Chase seems content to control.
Chase is trying to control the action in half guard but Murray is working away on the bottom, looking perhaps to get back to full guard.
Murray holds on for dear life, maintaining half guard for now.
Murray trying to control but Chase postures up.
Murray is in a bad position, trying to hold on for dear life but he is really struggling to maintain any sort of control.
Well, the referee has seen enough. Neither fighter is active enough on the ground so he's stood them back up.
Murray looking to land some kicks to the body here.
Chase misses with a jab and misses with a cross straight after too.
Andy Murray is looking to keep the fight on the feet at all costs.
Nice shot lands for Murray.
Chase takes a nice looking leg kick right on the meat of his thigh there.
Murray lands a nice leg kick that just misses Chase's sensitive parts.
Chase throws a wild combination but nothing lands.
Chase fails with a rather predictable takedown attempt.
That's three minutes gone in the round.
Chase looks for a takedown here. Will he get it? Murray is fending him off so far but Chase persists. Nope, Murray circles away and we're back to standing.
Murray fails in his attempt to clinch.
Murray walks forward and throws out a flicking leg kick. Chase checks it nicely though, as he moves to the side.
Chase fails to land with a series of punches.
Chase fails with the takedown.
Chase shoots in and bounces Murray off the cage to secure the takedown into guard.
Murray keeping full guard, as Chase tries to pass.

Chase decides he's had enough of playing guard and decides to stand. Come on Murray, up you get!
Chase checks a low kick from Murray.
Murray throws a decent looking leg kick but it doesn't land clean.
Murray throws a front kick aimed at Chase's knee but Chase avoids it well.
Chase fails with a takedown attempt from distance.
Murray doesn't manage to clinch there - Chase circles away.
That's four minutes gone in the round.
Chase feints and then dives in with a takedown. That was a long way out but the feint bought him enough time to close the distance and complete the takedown. Now we'll play guard for a bit and see who can get the better of that position.
Murray keeping moving, preventing Chase from controlling successfully.
Chase looking to pass the guard.
Murray working away from the bottom but not quite defensive enough there because Chase has passed into half guard!
Murray is looking to improve his position.
Murray is looking to control Chase's leg but it's slowly edging free. Can Murray avoid being mounted?
Murray controlling the leg, holding on to half guard.
Murray actively working from the bottom here.
And thats the end of the round the fighters go back to their corners.
Chance Chase showed his class in that round. I'd imagine he'll take it on all the scorecards.
The cut man is working on Andy Murray's cut.
The fighters' corners scream their final instructions, as the referee calls time. Here we go, back to the action! This is the final round!
Murray scores with a leg kick.
Chase checks a low kick from Murray.
Chance Chase is looking to throw some combinations by the looks of things.
Chase moves out of range of the leg kick from Murray.
Chase fails to land the takedown.
Murray misses with a body kick.
Chase throws a body punch but Murray moves out of range.
Murray throws a low kick but it's checked well by Chase.
Murray connects with a solid leg kick.
Chase throws a head kick but Murray moves out of range.
Murray chopping away at his opponent's legs.
Murray tries to work over Chase's front leg with a kick but Chase checks it.
Murray is looking to clinch but Chase is avoiding it.
Murray misses with a half-hearted attempt at a head kick.
We've had a slow start to the round here - hopefully the action picks up.
Murray waving his hands out infront of him, looking to distract Chase.
Murray tries a switch kick but it misses it's target.
Chase tries to check the leg kick but that clearly hurt him.
Murray keeps Chase at a distance using the push kick.
Chase takes a big intake of breath there - he's definitely tired.
Murray feints with a shoulder and throws a nice leg kick to Chase's calf.
Good leg kick by Murray there. It's the ones that make that thud noise that hurt and that was an almighty thud.
Chase will have to do better than that with his takedown attempts.
Murray avoids a punch combination nicely.
That's one minute gone in the round.
Murray throws a head kick that Chase semi-blocks.
Chase checks the leg kick nicely there.
Chase chopped to the floor by a nice leg kick but he springs right back up before Murray can pounce on him.
Murray goes for a high kick. It partially lands.
Murray swings and misses with a hook to the body.
Chase shoots in for a takedown. "I don't think so" says Murray as he avoids it easily.
Andy Murray has stuffed three takedown attempts in the round now. That's going to take a lot out of Chance Chase.
Murray wants to slow Chase down by chopping away at his legs.
Nice sprawl there from Murray as Chase shoots in.
Chase takes a thudding leg kick, right into the meat of the thigh.
Murray stuffs the takedown.
Murray throws a nice outside leg kick.
Chase tries to check the leg kick but that clearly hurt him.
Murray pivots, looking for a leg kick but Chase is out of range and Murray settles back down.
Chase takes a shot right to the bread basket.
Chase pivots as if he's going to throw a leg kick but stops half way.
Murray attempts a low kick but it misses it's target.
Murray tries a switch kick but it misses it's target.
Murray avoids a punch combination nicely.
Chase changes levels and drives through with a really nice takedown into side control. Murray looks really pissed at himself for not defending that better.
Chase scoring with punches from side control.
That's two minutes gone in the round.
Murray defending against the ground and pound.
Murray is trying to get back to half guard.
Chase tries for an arm triangle. That looks pretty tight to me. Is this one over!?! Possibly, maybe, no Chase has let go of the choke. Obviously it wasn't as tight as we thought!
Murray is not content to let Chase control the position.
Murray is sneaking out the side here. He's bucked Chase off and has taken his back!
Chase preventing the rear naked choke attempt from Murray.
Chase is defending well here and trying to improve his position.
A bit of a pause in the action here. Murray controlling the positon.
That's three minutes gone in the round.
Chase wants to control his opponent's hands but Murray gets his hands free.
Chase rolls, trying to escape but Murray keeps control of the position.
Chase is persisting with the attempt to improve his position.
Murray is not going to allow Chase to sit and survive in this position.
The crowd hopeful of a finish here - Murray's supporters are on their feet, screaming for him to go for the rear naked choke.
Chase is trying to break free.
Chase showing good submission defense here.
Chance Chase has got the better of the ground game so far.
Murray wants to control but Chase manages to buck him off and is now in Murray's guard! Nice work there by Chase!
That's four minutes gone in the round.
There's not a lot going on here and the crowd are letting the fighters know they're not willing to tolerate a lack of action.
It looks like we're going to have a standup here. Neither fight is doing enough on the ground.
Murray is looking to score with low kicks.
Chase throws a looping left and ducks down for a takedown. He's got his arms around Murray's waist but Murray gets an underhook and avoids the takedown by throwing Chase off to one side.
The sound of bone on bone echoes around the arena as Chase checks a leg kick.
An inside leg kick from Murray misses.
Chase throws the left hand but Murray avoids the punch easily.
Murray swings wildly with a right hand that was never going to find it's target.
Chase tries a head kick but it misses.
Murray does a little shimmy and throws a leg kick. The leg kick missed by a considerable margin though, making him look a little bit silly for doing the shimmy.
Murray throws a body kick but he wasn't in range.
Murray connects with a solid leg kick.
Nice body kick from Murray.
Chase circles away from the clinch attempt
and Chase counters with a nice single leg takedown and he's in Murray's guard now.
Murray working a defensive guard here.
Chase thows a big elbow that misses.
Chase is looking to advance position but Murray has hit a scissor sweep - now he's on top in mount!
Chase tries to hold on but Murray postures up.
And that's the end of the fight!
Andy Murray showed his dominance in that final round.
I think Murray has won this one but let's see what the judges have to say. Over to the ring announcer for the scorecards.
Ladies and gentlemen, after 3 rounds of action, we go to the scorecards for a decision.
Judge Andi Peters scores the fight 29:28
Judge Gordon Ramsey scores the fight 29:28
Judge Frank Skinner scores the fight 29:28
In favor of your winner, by unanimous decision... Andy Murray!
|
|
|
|
|
|
|
|
|
|
|
|
|
|
|
|
|
|
|
|
|
|
|
| S |
C
A |
G |
S |
C
B |
G |
|
S |
C |
G |
|
energy
A | B |
|
hype
A | B |
|
pop
A | B |
|
mgr
A | B |
|
FIGHT
RATING
55% |
|
|
|
|
|
|
|
|
|
|

