 |
DFC 1: Afterbirth PBP Commentary |
Undercard bout
|
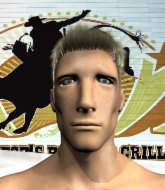
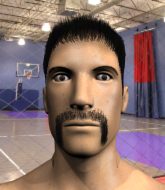
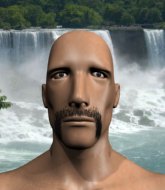
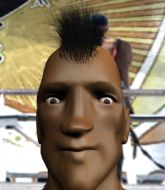
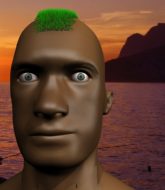
Coming up we have a welterweight MMA rules bout between Buck Naked (ranked 0 p4p, 0 weight class) and Derrick Coleman (ranked 0 p4p, 0 weight class). Chooooooooon! I think Naked might be my favorite fighter, now he's come out to Let's Get It On. Coleman has chosen Superstar by Lupe Fiasco as his entrance music. Derrick Coleman struggled to make weight for this fight. He only made it down to 172.9lbs at the first attempt and had to take the additional two hours to make the official bout weight. Let's see how much it's taken out of him. The key to victory for Buck Naked has got to be keeping the fight on the feet.
 |
|
 |
| 184 cm
18
177 lbs
0 - 0 - 0 |
|
178 cm
18
180 lbs
1 - 0 - 0 |
BJJ Blue Belt
Counter striker
Granite chin |
|
BJJ Blue Belt
Basic striking
Very confident |
|
| |
|
Ladies and gentlemen. This fight is 3 rounds, in the welterweight division.
Introducing the fighter to my left, fighting out of the red corner.
With a record of
0 - 0 - 0, fighting out of Las Vegas, Buck Naked!
And introducing the fighter to my right, fighting out of the blue corner.
With a record of
1 - 0 - 0, fighting out of Las Vegas, Derrick Coleman!
The judges for this bout are Wesley Smith, Chris Downing and Stewart Dunkirk.

The bell rings for round one and we are underway!
Coleman staying out of range there.

Coleman scores a takedown into full mount!
Coleman controlling the pace for now.
Naked wants to hold on but Coleman pushes him away.

That's one minute gone in the round.
Coleman content just to control the position here.
Naked regains half guard.
Still in half guard, Coleman seems content to control.

The ref stands the fighters back up, due to lack of action by Derrick Coleman.
Coleman misses with a takedown attempt. He shot from a bit too far out.
Coleman closes this distance looking for a takedown but Naked circles away.
Coleman looks gassed!
Naked stuffs the takedown.
Buck Naked has stuffed three takedown attempts in the round now. That's going to take a lot out of Derrick Coleman.

That's two minutes gone in the round.
Coleman looks for a takedown. He's got it. We're now in half guard.
Coleman is keen to just control but Naked is a slippery customer.
Naked wants to get back to full guard.
Naked trying to control here.
Coleman prevents Naked from improving his position.
Coleman keeping composed on the top, looking to control the action.
Naked makes his way to full guard. A much better position for Naked.

That's three minutes gone in the round.
Coleman trying to control the position from guard on top but Naked is wriggling around, looking for whatever he can.
Naked trying to control the position.
Coleman stays in close to Naked's body and controls the position.
Naked looking to sweep here. No luck so far.
Coleman sitting in guard, not really doing much.
Naked throwing strikes off his back to little effect.

That's four minutes gone in the round.
The crowd are getting on the fighters' backs, as the pace has dropped off in the last minute or so.
Coleman looking to control the position here, rather than advance.
Naked wants to stand and escape but Coleman is having none of it.
The crowd thankful this round is nearly over.
Coleman controlling from the guard. I say controlling but really, he's stalling.
Naked tries to land a sweep but no joy.
And thats the end of the round the fighters go back to their corners.
Derrick Coleman dominated that round.
The fighters get back to their feet, the hooter sounds and we're back to the action!

Coleman throws a body punch but Naked moves out of range.
Nice takedown defense from Naked. No joy for Coleman on that attempt.
Naked pulls out of a head kick attempt.
Naked has his takedown stuffed
and Coleman counters with a shoot takedown into half guard.
Well, if Coleman is going to just lie there, perhaps we should talk about what we're having for dinner tonight
I'm having a ham and pineapple pizza
Yum. Can't wait.
Naked trying to control here.
Well, if Coleman is going to just lie there, perhaps we should talk about what we're having for dinner tonight
I'm having a ham and pineapple pizza
Yum. Can't wait.
Coleman is breathing heavily.
Coleman looks to score some points with some ground and pound.
That's one minute gone in the round.
Naked tries to kick Coleman off but Coleman keeps his base steady and stays in half guard.
Coleman sitting and controlling from the half guard.
Naked wants to improve his position but Coleman is controlling well.
Coleman is looking to pass Naked's guard but actually Naked recovers to full guard.
Naked is working the butterfly guard. He manages to land a nice scissor sweep and is now in half guard on the top. Nice move.
That's two minutes gone in the round.
Well. There's a bit of a lull in the action here and the crowd are starting to get restless.
Coleman trying to control here.
Naked is looking to take a break and control but Coleman is keeping him honest, looking to work from the bottom.
Naked passes the guard and advances to mount!
Coleman is looking to improve his position but Naked isn't that keen on the idea.
That's three minutes gone in the round.
The ref warns both fighters not to hold the cage as they work up against the meshing.
Naked wants to control the pace but Coleman is squirming around nicely.
Coleman is looking to improve his position but Naked isn't that keen on the idea.
Coleman wants to hold on but Naked pushes him away.
That's four minutes gone in the round.
The crowd are hurling abuse towards the fighters... You can hardly blame them though because there isn't a lot going on in the fight.
Coleman regains half guard.
Coleman is looking to improve his position.
Coleman is looking to control Naked's leg but it's slowly edging free. Can Coleman avoid being mounted?
Coleman wants to get back to full guard.
The crowd thankful this round is nearly over.
Naked wants to stand up but Coleman is controlling the position.
Naked wants to lay and pray for a moment but Coleman keeps working.
And thats the end of the round the fighters go back to their corners.
Derrick Coleman showed his class in that round. I'd imagine he'll take it on all the scorecards.
The minute break is over - no more time for sponges and pep talks - back to the action! The crowd applaud as we get ready to start the final round!

Coleman throws a shot to the body.
Coleman throws a looping left and ducks down for a takedown. He's got his arms around Naked's waist but Coleman gets an underhook and avoids the takedown by throwing Coleman off to one side.
Derrick Coleman seems to be the more aggressive standup fighter in this bout.
Coleman shoots in with a takedown attempt and he has Naked pinned against the cage. Naked gets the underhooks and manages to circle away.
Naked doesn't manage to clinch there - Coleman circles away.
Coleman checks a low kick from Naked.
Coleman takes a thudding leg kick, right into the meat of the thigh.
Naked throws a head kick that lands with a deafening thwack! The crowd roars as Coleman stumbles backwards and falls to the mat. Naked follows into mount!

Coleman is rocked!

Naked stands up from the dominant position. He obviously fancies his chances standing.
Coleman is still on wobbly legs! Can Naked finish him?
Nice sprawl there from Naked as Coleman shoots in.
Buck Naked has stuffed three takedown attempts in the round now. That's going to take a lot out of Derrick Coleman.
Naked throws a head kick but Coleman moves out of range.
Coleman with a poor takedown
and Naked counters with a huge head kick that drops Coleman! The ref dives in to stop the fight and the crowd goes wild!
Ladies and gentlemen, after 1:02 of round 3, we have a winner by way of TKO (Strikes). Buck Naked!
|
|
|
|
|
|
|
|
|
|
|
|
|
|
|
|
|
|
|
|
|
|
|
| S |
C
A |
G |
S |
C
B |
G |
|
S |
C |
G |
|
energy
A | B |
|
hype
A | B |
|
pop
A | B |
|
mgr
A | B |
|
FIGHT
RATING
78% |
|
|
|
|
|
|
|
Undercard bout
|
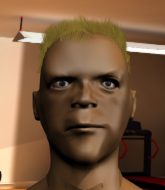
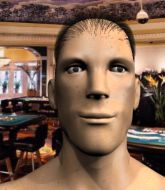
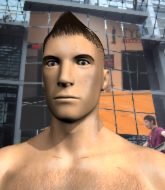
Coming up we have a middleweight MMA rules bout between Erik Orange (ranked 0 p4p, 0 weight class) and Jackson Wholequist (ranked 0 p4p, 0 weight class). Wholequist is bouncing up and down as he enters the arena, backed by 'Extreme Ways' by Moby. We have two fighters making their debuts here, so let's see who comes out of this one with their first professional victory.
 |
|
 |
| 187 cm
22
190 lbs
0 - 0 - 0 |
|
183 cm
19
190 lbs
0 - 0 - 0 |
BJJ Blue Belt
Brawler
Inexperienced |
|
BJJ Purple Belt
Counter striker
Tends to cut |
|
| |
|
Ladies and gentlemen. This fight is 3 rounds, in the middleweight division.
Introducing the fighter to my left, fighting out of the red corner.
With a record of
0 - 0 - 0, fighting out of Las Vegas, Erik Orange!
And introducing the fighter to my right, fighting out of the blue corner.
With a record of
0 - 0 - 0, fighting out of Las Vegas, Jackson Wholequist!
The judges for this bout are Chris Downing, Alan Glass and Gwen Towbar.
The bell rings for round one and we are underway!
Orange wants to clinch up but Wholequist keeps it at a distance.
Wholequist circles away from the clinch attempt.
Orange fails in his attempt to clinch.
Wholequist keeps the fight on the outside.

Orange moves into the clinch.
Orange is looking for a takedown up against the cage. Wholequist gets underhooks though and prevents the takedown attempt.
Wholequist jumps guard but Orange stands there with Wholequist around his waist. Wholequist gives up and drops back to his feet. We remain in the clinch.
Wholequist looking for a takedown.
Wholequist wants to strike at distance but he can't break free of the clinch.
Wholequist fails to pull guard.
Erik Orange has stuffed three takedown attempts in the round now. That's going to take a lot out of Jackson Wholequist.
Orange is pressed up against the cage. Wholequist has hold of a leg and is looking to drag Orange down to the mat. Wholequist avoids the attempt though and has circled away. We're back to striking at a distance.
Wholequist circles away from the clinch attempt.
Orange tries to clinch up but Wholequist circles away and keeps his distance.
We've had a slow start to the round here - hopefully the action picks up.
Orange tries to clinch but Wholequist moves out of range.
Orange lands a brutal head kick. Wholequist looks out on his feet and Orange throws more strikes until the ref is forced to stop the fight!
Ladies and gentlemen, after 0:50 of round 1, we have a winner by way of TKO (Kick and Punches). Erik Orange!
|
|
|
|
|
|
|
|
|
|
|
|
|
|
|
|
|
|
|
|
|
|
|
| S |
C
A |
G |
S |
C
B |
G |
|
S |
C |
G |
|
energy
A | B |
|
hype
A | B |
|
pop
A | B |
|
mgr
A | B |
|
FIGHT
RATING
36% |
|
|
|
|
|
|
|
Undercard bout
|
|
|
|
Undercard bout
|
|
|
|
Undercard bout
|
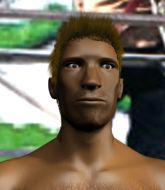
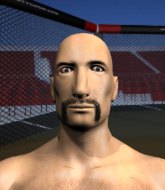
Coming up we have a lightweight MMA rules bout between Da Cougar (ranked 0 p4p, 0 weight class) and Alexander Lara (ranked 0 p4p, 0 weight class). The crowd seem to be enjoying Lara's choice of entrance music: 'I Stand Alone' by Godsmack. We have two fighters making their debuts here, so let's see who comes out of this one with their first professional victory.
 |
|
 |
| 178 cm
19
163 lbs
0 - 0 - 0 |
|
180 cm
20
160 lbs
0 - 0 - 0 |
BJJ Blue Belt
Basic striking
Good chin |
|
BJJ White Belt
Nice elbows
Inexperienced |
|
| |
|
Ladies and gentlemen. This fight is 3 rounds, in the lightweight division.
Introducing the fighter to my left, fighting out of the red corner.
With a record of
0 - 0 - 0, fighting out of Las Vegas, Da Cougar!
And introducing the fighter to my right, fighting out of the blue corner.
With a record of
0 - 0 - 0, fighting out of Las Vegas, Alexander Lara!
The judges for this bout are Frank Dennis, Tiny Johnson and Gwen Towbar.
The bell rings for round one and we are underway!
Lara misses with a wild combination.
Cougar throws a head kick that misses.
Cougar shoots in for a takedown and gets it.
Lara really doesn't want to stay on the ground with Cougar. If he can't get it back to his feet, it's only a matter of time before he'll be tapping out.
Cougar with a momentary lay and pray from half guard.
Cougar trying to control the action but Lara is working from the bottom.
The fighters are pressed up against the cage, both looking to find a bit of space to work.

Cougar is looking for an arm triangle, whilst trying to pass to side control. Lara doesn't seem that keen to cooperate though. No luck this time Cougar.
Cougar is thinking about going for an arm triangle but he can't free his leg.
Cougar seems very keen to just sit and control from half guard but Lara does not like that idea so much and is remaining active off his back.
That's one minute gone in the round.
Lara wants to get back to full guard.
Cougar throwing punches and elbows but they're not doing any damage.
Lara wants to control the action here but instead Cougar manages to pass to full mount!
Cougar can't quite control the action as he would like just now, as Lara is looking to escape.
Lara is really trying hard to get back to his feet.
Cougar working to secure an arm triangle but it's not happening for him just yet.
Lara is in all sorts of trouble here.
Cougar jumps to side control looking for an arm triangle but Lara manages to avoid the submission attempt.
Cougar stands up and we're back to a striking position.
Cougar is breathing heavily.
Lara swings wildly with a hook that is half blocked by Cougar.
That's two minutes gone in the round.
Lara misses with a jab, cross combination.
Cougar tries to clinch but Lara moves out of range.
Cougar closes the distance, clinches up and gets a nice trip takedown into side control. Very smooth.
Lara is looking for a sweep.
Cougar tries for an arm triangle. That looks pretty tight to me. Is this one over!?! Possibly, maybe, no Cougar has let go of the choke. Obviously it wasn't as tight as we thought!
Cougar tries for an arm triangle. That looks pretty tight to me. Is this one over!?! Possibly, maybe, no Cougar has let go of the choke. Obviously it wasn't as tight as we thought!
Lara is looking to regain half guard here but Cougar keeps moving and retains side control.
Cougar in side control, working for a kimura. He's got hold of an arm and he's torquing it... Lara is tapping! That's the end of the fight!
Ladies and gentlemen, after 3:04 of round 1, we have a winner by way of Submission (Kimura). Da Cougar!
|
|
|
|
|
|
|
|
|
|
|
|
|
|
|
|
|
|
|
|
|
|
|
| S |
C
A |
G |
S |
C
B |
G |
|
S |
C |
G |
|
energy
A | B |
|
hype
A | B |
|
pop
A | B |
|
mgr
A | B |
|
FIGHT
RATING
53% |
|
|
|
|
|
|
|
Undercard bout
|
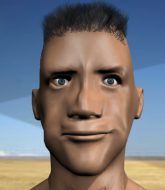
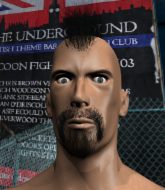
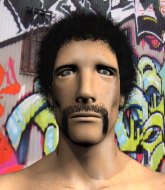
Coming up we have a bantamweight MMA rules bout between Tony Boy (ranked 0 p4p, 0 weight class) and Chris Mayo (ranked 0 p4p, 0 weight class). Mayo is bobbing his head along to his entrance song: Super Furry Animals - Golden Retriever. Tony Boy looks tired to me. Hopefully he has got enough gas left in the tank to put in a good performance.
 |
|
 |
| 150 cm
22
130 lbs
2 - 0 - 0 |
|
170 cm
20
142 lbs
2 - 0 - 0 |
Good takedowns
Basic striking
Intelligent |
|
BJJ Blue Belt
Brawler
Solid chin |
|
| |
|
Ladies and gentlemen. This fight is 3 rounds, in the bantamweight division.
Introducing the fighter to my left, fighting out of the red corner.
With a record of
2 - 0 - 0, fighting out of Las Vegas, Tony Boy!
And introducing the fighter to my right, fighting out of the blue corner.
With a record of
2 - 0 - 0, fighting out of Las Vegas, Chris Mayo!
The judges for this bout are Stewart Dunkirk, Chris Downing and Daniel Franklin.
The bell rings for round one and we are underway!
Mayo thows a left - swing and a miss!
Boy is pinned up against the cage taking some big shots here. The referee is looking closely deciding whether he should stop the fight.
Boy is rocked!
A big left from Mayo misses.
Oh Boy is still all over the place! His legs are completely gone! Will he be able to recover?!!
Mayo moves into range and throws a big uppercut. OH! Boy goes down! Can Mayo finish him!?
Mayo won't allow Boy to sweep him here.
Boy has a loose triangle. He'll be looking to tighten that up but Mayo can see exactly what he's planning and manages to posture up and free himself.
Mayo looking to control the position here, rather than advance.
Boy might be looking to lock onto one of his opponent's long limbs for a submission, whilst we're on the ground.
Mayo preventing the sweep.
Boy being controlled here, momentarily.
Boy seems to have got his legs back now.
Mayo passes Boy's left leg - he's now in half guard.
Well, if Mayo is going to just lie there, perhaps we should talk about what we're having for dinner tonight
I'm having a ham and pineapple pizza
Yum. Can't wait.
That's one minute gone in the round.
Boy is looking to improve his position.
Boy is breathing heavily.
Mayo takes advantage of the dominant position to land a couple of big hammer fists.
Ground and pound from Mayo.
Mayo winds up and cracks Boy with a swinging punch to the side of the head.
Boy tries to roll over but Mayo keeps him under control.
Boy is working for an escape here. He's hooked one of Mayo's legs and he's managed to sneak out and take Mayo's back!
The fighters are pressed up against the cage, both looking to find a bit of space to work.
Mayo is displaying good submission defense - not really looking in danger of submitting to the rear naked choke at the moment. That could change in an instant of course if Boy gets his way!
Boy doesn't have the hooks in and Mayo manages to turn into his guard.
Mayo must be cautious of submissions here, given that his opponent has the superior Jiu Jitsu.
That's two minutes gone in the round.
The crowd are showing their displeasure at the lack of action as loud boos ring out around the arena.
Mayo lands a nice shot whilst sitting in his opponent's guard.
Boy looking to sweep here. No luck so far.
Mayo thinks about going for a leg but decides against it, in order to maintain the position.
Mayo seems content to control from guard here. He's going to have to remain active though if he doesn't want to get stood back up.
Boy has a butterfly guard looking to sweep but Mayo has passed into side control.
Mayo scores with a couple of nice shots to the head there. The referee takes a look at Boy to see if he's OK.
Boy gives up the full mount - oops, sloppy defensive grappling there!
Boy is looking to regain half guard here but Mayo keeps moving and retains side control.
Mayo scores with punches from side control.
That's three minutes gone in the round.
Boy gets one leg under and gets the fight to half guard.
Boy tries to roll over but Mayo keeps him under control.
Boy has guillotine here! It looks pretty tight! Could this be all over! No, Mayo escapes and passes into side control at the same time. Nice work there by Mayo!
Mayo works a knee to the body and follows up with a nice elbow to the head.
Boy gets one leg under and gets the fight to half guard.
Boy moves his hips nicely and gets into full guard.
Boy is looking for a triangle but Mayo pushes his legs off easily.
Mayo trying to control the position from guard on top but Boy is wriggling around, looking for whatever he can.
Boy working for a triangle but Mayo defends it easily.
That's four minutes gone in the round.
Boy has an omoplata and is looking to use it perhaps as a submission or perhaps to transition. Mayo is in a bit of discomfort here, but he's managed to free himself and has dived into side control! That didn't work out too well for Boy.
Boy is positioning himself to get back to half guard.
Boy looking for a sweep but Mayo has passed into full mount! Oh no!
Boy can't escape the position.
And thats the end of the round the fighters go back to their corners.
Chris Mayo dominated that round.
That's the end of the interval. I'm sure that seemed a lot quicker than a minute for our two fighters! Back to the action.
Boy looking for a takedown here - he's got it.
Boy tries to free his leg and advance position but Mayo is retaining full guard.
Mayo lands an upkick as Boy stands over him.
Boy pressing down on his opponent's thigh, looking to pass guard. Mayo is keeping the position for now.
Mayo looking to hit a scissor sweep but Boy is one step ahead there.
Boy has gone for a leg lock! Mayo slips out almost immediately though and dives into Boy's guard.
Mayo is intent on slowing down the pace of the fight, simply looking to control.
Mayo tries to free his leg and advance position but Boy is retaining full guard.
Boy throws his legs up looking to secure a triangle. Oh, that looks pretty tight, I gotta say! Mayo escapes and throws Boy's legs to the side, diving into side control!
That's one minute gone in the round.
Mayo is looking to take a break and control but Boy is keeping him honest, looking to work from the bottom.
Both fighters are absolutely exhausted here.
Mayo scores with punches from side control.
Boy sneaks a leg under to get back to half guard.
Mayo looks to score some points with some ground and pound.
Mayo uses his free foot to push down on Boy's thigh. Eventually he works his other foot free and he's advanced to mount - this is trouble for Boy.
Boy working to try and regain half guard.
Mayo postures up and cracks his opponent a couple of times before moving back into close ground control. Boy looks a forlorn figure.
Mayo putting on the heat here with some good ground and pound!
Boy regains half guard.
The ref warns both fighters not to hold the cage as they work up against the meshing.
Boy gets back to full guard.
That's two minutes gone in the round.
Boy has thrown up a leg looking for a triangle. Mayo doesn't defend quickly enough and Boy has managed to lock this one up! Can Mayo escape?! NO! He's tapping out! Damn, that was a quick submission - congrats to Boy on a fantastic submission victory.
Ladies and gentlemen, after 2:25 of round 2, we have a winner by way of Submission (Triangle). Tony Boy!
|
|
|
|
|
|
|
|
|
|
|
|
|
|
|
|
|
|
|
|
|
|
|
| S |
C
A |
G |
S |
C
B |
G |
|
S |
C |
G |
|
energy
A | B |
|
hype
A | B |
|
pop
A | B |
|
mgr
A | B |
|
FIGHT
RATING
65% |
|
|
|
|
|
|
|
Undercard bout
|
|
|
|
Undercard bout
|
Coming up we have a middleweight MMA rules bout between Chris Otway (ranked 0 p4p, 0 weight class) and Rich Aces High (ranked 0 p4p, 0 weight class). Aces High has chosen Aces High as his entrance music, which hasn't gone down very well with the crowd. Well, I have no idea who's going to take this one!
 |
|
 |
| 176 cm
18
185 lbs
1 - 0 - 0 |
|
189 cm
20
189 lbs
0 - 0 - 0 |
BJJ Blue Belt
Basic striking
Granite chin |
|
BJJ Blue Belt
Nice elbows
Heavy handed |
|
| |
|
Ladies and gentlemen. This fight is 3 rounds, in the middleweight division.
Introducing the fighter to my left, fighting out of the red corner.
With a record of
1 - 0 - 0, fighting out of Las Vegas, Chris Otway!
And introducing the fighter to my right, fighting out of the blue corner.
With a record of
0 - 0 - 0, fighting out of Las Vegas, Rich Aces High!
The judges for this bout are Robert Twigg, Chris Downing and Alan Glass.
The bell rings for round one and we are underway!
A combination from Aces High does no damage.
Otway has a takedown stuffed.
Otway clinches with his opponent.
Otway turns his hips and lands a very nice judo throw into side control!
The fighters are pressed up against the cage, both looking to find a bit of space to work.
Otway cracks Aces High with a big right hand but Aces High just smiles back at him and invites him to have another go.
Otway tries to advance to mount but can't.
Otway is chipping away with strikes.
Aces High tries to escape but Otway is in control.
Otway working the ground and pound but Aces High is defending the strikes.
Otway throwing strikes but missing, from side control.
Aces High is not content to let Otway control the position.
Otway tries to move to mount but Aces High blocks the move with his legs.
That's one minute gone in the round.
Otway working away diligently from side control. Landing strikes effectively there - that will score him some points on the judges scorecards.
Otway trying to control the action but Aces High is working from the bottom.
Otway working the strikes but Aces High uses the opportunity to regain half guard.
It looks like we're going to have a standup here. Neither fight is doing enough on the ground.
Otway tries to clinch there but Aces High circles away.
Otway tries to clinch there but Aces High circles away.
Otway tries to clinch but is not successful on this occasion.
Otway tries to clinch there but Aces High circles away.
Otway falls off balance throwing a combination
and Aces High counters with a straight right hand.
That's two minutes gone in the round.
Aces High connects with a good right hand that stumbles Otway. Otway circles away out of range and recomposes himself.

It looks like Chris Otway has been cut.
Otway tries to clinch up

and Aces High counters with a left and a right that hurts Otway! He wobbles and falls to the floor - he's in big trouble! Aces High jumps into full mount!
Otway is rocked!
The ref warns both fighters not to hold the cage as they work up against the meshing.
Otway is breathing heavily.
Fantastic stuff here - a very entertaining period of action, which has drawn cheers from the crowd.
Otway is wriggling around trying to escape.
Aces High is looking to stand but Aces High has his arms wrapped tightly around him, looking to prevent the damage.
Otway is writhing around trying to get back to his feet.
Otway is trying to reverse the position but instead Aces High has taken his back - oops!
Will Aces High go for the finish here or will he try and keep control of the position?
Otway turns into Aces High and is now in his guard.
That's three minutes gone in the round.
Aces High controls Otway momentarily but Otway frees himself.
Aces High keeping moving, preventing Otway from controlling successfully.
Otway might be looking to lock onto one of his opponent's long limbs for a submission, whilst we're on the ground.
Well, the referee has seen enough. Neither fighter is active enough on the ground so he's stood them back up.
Otway fails with a rather predictable takedown attempt.
A clash of legs there as Otway blocks the low kick.
Aces High stuffs the takedown.
That's three failed takedown attempts in the round for Chris Otway. That's going to take a lot out of him.
Aces High throws a wild combination but nothing lands.
Otway clinches up with Aces High and pushes him back against the cage.
Otway taking a breather.
Aces High lands a hook that snaps the head of Otway backwards.
Aces High wants to stall.
Otway goes for a takedown attempt but Aces High pushes him away and we're back to fighting at a distance.
That's four minutes gone in the round.
The crowd are showing their displeasure at the lack of action as loud boos ring out around the arena.
Otway wants to clinch.
Otway closes the distance and looks for a trip takedown... aaaand he's got it - Otway lands in his opponent's guard.
Otway pushes down on Aces High's leg and manages to get into half guard.
Still in half guard, Otway seems content to control.
The crowd applaud the fighters efforts here as the round comes to an end.
Otway is keen to just control but Aces High is a slippery customer.
Otway tries to pass the half guard into mount. Aces High knows what he's doing though and prevents the attempt.
And thats the end of the round the fighters go back to their corners.
A close round but Rich Aces High will probably get the nod.
The cut man is working on Chris Otway's cut.
That's the end of the interval. I'm sure that seemed a lot quicker than a minute for our two fighters! Back to the action.
Otway is looking to clinch but Aces High is avoiding it.
Otway tries to clinch there but Aces High circles away.
Otway tries to clinch but Aces High is having none of it.
Otway clinches with his opponent.
A head punch on the inside from Otway fails to land.
Otway holding his opponent close, against the cage.
Aces High wants to break the clinch but can't.
Otway can't get the takedown.
Otway stalling.
Aces High can't break the clinch.
Otway blocks an uppercut.
We've had a slow start to the round here - hopefully the action picks up.
Aces High misses with the head strike.
Aces High wants to strike at distance but he can't break free of the clinch.
Otway misses with some punches.
Otway misses with a hook to the ribs.
A quick uppercut on the inside from Aces High.
Otway is working for a takedown up against the cage. He can't get it on this occasion though.
Otway tries to land a shot to the body but it's blocked.
Both fighters are absolutely exhausted here.
Otway stalling against the cage.
Aces High tries to break the clinch but Otway is controlling the position.
That's one minute gone in the round.

Aces High breaks the clinch and we return to the middle of the mat.
Otway doesn't manage to clinch there - Aces High circles away.
Rich Aces High is looking to throw some combinations by the looks of things.
Otway tries to clinch but Aces High moves away
and Aces High counters with a one-two to the body.
A nice combination there by Aces High.
Otway blocks a low kick nicely.
Otway shoots in but no luck this time.
That's three failed takedown attempts in the round for Chris Otway. That's going to take a lot out of him.
Aces High rushes forward with a series of wild hooks but Otway moves out of range and avoids them all easily.
Otway moves in looking to clinch but Aces High pushes him off.
Aces High scores with a reasonable looking shot to the body. Otway doesn't seem bothered though.
Aces High is moving around nicely and scores here with a single head shot.
Aces High swings away but doesn't land with a series of punches.
Aces High avoids the clinch attempt nicely.
Aces High keeping a good distance there, avoiding the body shot.
Aces High is using his reach advantage to land shots from outside his opponent's range.
That's two minutes gone in the round.
Otway misses with a hook to the body
letting Aces High counter with a right hand.
Otway goes to the watering hole and comes back with a big thumbs up from the judges as he scores a three punch combo.Otway tries to clinch but Aces High is having none of it.
Otway bobs and weaves into range and then changes levels and scores with a nice takedown into side control.
Otway wants to control but Aces High is keeping him busy.
Otway tries to move into full mount but can't pass Aces High's legs.
Otway happy to just control the position for now.
Otway throwing shots but missing, from side control.
Otway works to advance to full mount. Aces High defends for a few seconds but eventually he succumbs.
That's three minutes gone in the round.
The referee warns Aces High that he has to improve his position here as he takes two more clean shots to the head.
Otway with a couple of short strikes.
Otway controlling the pace for now.
Otway pausing momentarily but resumes with a couple of decent strikes that do a bit of damage.
Otway landing strikes, looking to finish!
Otway controlling from the full mount.
Otway is giving the impression that he's looking to ground and pound but he switches suddenly into a beautiful far side armbar! Aces High is forced to tap! Great finish!
Ladies and gentlemen, after 4:01 of round 2, we have a winner by way of Submission (Armbar). Chris Otway!
|
|
|
|
|
|
|
|
|
|
|
|
|
|
|
|
|
|
|
|
|
|
|
| S |
C
A |
G |
S |
C
B |
G |
|
S |
C |
G |
|
energy
A | B |
|
hype
A | B |
|
pop
A | B |
|
mgr
A | B |
|
FIGHT
RATING
46% |
|
|
|
|
|
|
|
Co-main event
|
Coming up we have a light heavyweight MMA rules bout between benny paul (ranked 0 p4p, 0 weight class) and Seth West (ranked 0 p4p, 0 weight class). The fight MMA fans around the world have waited their entire lives for!
 |
|
 |
| 182 cm
18
205 lbs
0 - 0 - 0 |
|
182 cm
18
205 lbs
0 - 1 - 0 |
BJJ Blue Belt
Basic striking
Cuts easily |
|
BJJ Blue Belt
Basic striking
Granite chin |
|
| |
|
Ladies and gentlemen. This fight is 3 rounds, in the light heavyweight division.
Introducing the fighter to my left, fighting out of the red corner.
With a record of
0 - 0 - 0, fighting out of Las Vegas, benny paul!
And introducing the fighter to my right, fighting out of the blue corner.
With a record of
0 - 1 - 0, fighting out of Las Vegas, Seth West!
The judges for this bout are Daniel Franklin, George Francis and Cecil Peabody.
The bell rings for round one and we are underway!
West moves in looking to clinch but paul pushes him off.
paul misses with a takedown attempt. He shot from a bit too far out.
paul shoots in but no luck this time.
West stuffs the takedown attempt from paul. paul gets slowly back to his feet.
That's three failed takedown attempts in the round for benny paul. That's going to take a lot out of him.
West shoots in and gets a takedown into half guard. West showed some decent athleticism there.
West stalling.
West thows a huge punch but paul dodges it nicely.
paul trying to control here.
West takes a deep breath and rests his weight momentarily on top of his opponent, to control the position.
West seems to be working for a kimura but paul defends the submission attempt.
paul is not content to let West control the position.
West thows a huge punch but paul dodges it nicely.
That's one minute gone in the round.
paul tries to get to full guard but West has control of the leg.
The referee decides to stand the fighters back up.
West circles away from the clinch attempt.
paul with a lazy takedown attempt
and West counters with a nice single leg takedown and he's in paul's guard now.
paul tries to land a sweep but no joy.
paul is breathing heavily.
West is just sitting in guard, looking to avoid any submissions.
A big thud reverberates around the arena there as West accidentally thumps the mat. Hopefully he's not broken his hand.
West has the superior BJJ but he's also working some ground strikes into his gameplan.
paul can't do much from the bottom at the moment, as West controls the pace.
paul controls West momentarily but West frees himself.
That's two minutes gone in the round.
West landing with the ground and pound.
West pressing down on his opponent's thigh, looking to pass guard. paul is keeping the position for now.
West trying to control the position from guard on top but paul is wriggling around, looking for whatever he can.
Neither fighter is doing enough for the referee's liking and he's decided to stand them back up.
A head kick misses from paul.
paul gets the takedown into side control.
paul thinks about going for a far side armbar but bails out and retains the dominant position instead.
West manages to get back to half guard.
West makes his way to full guard. A much better position for West.
West is doing well to control the posture of his opponent and prevent any damage.
West looking to try and escape his hips here, looking for a submission. It looks like he's going for a triangle but paul is defending well. West quickly switches to an armbar and extends the arm! paul has no choice but to tap, to a very quick submission! Wow, that was lightning fast! West celebrates on the cage, with the crowd.
Ladies and gentlemen, after 3:01 of round 1, we have a winner by way of Submission (Armbar). Seth West!
|
|
|
|
|
|
|
|
|
|
|
|
|
|
|
|
|
|
|
|
|
|
|
| S |
C
A |
G |
S |
C
B |
G |
|
S |
C |
G |
|
energy
A | B |
|
hype
A | B |
|
pop
A | B |
|
mgr
A | B |
|
FIGHT
RATING
52% |
|
|
|
|
|
|
|
Main event
|
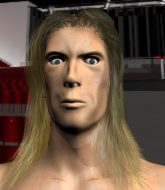
Coming up we have a heavyweight MMA rules bout between Samiro Kahric (ranked 0 p4p, 0 weight class) and Z Mann (ranked 0 p4p, 0 weight class). Kahric comes into the arena with B00M blaring out of the sound system. The fight MMA fans around the world have waited their entire lives for!
 |
|
 |
| 192 cm
18
220 lbs
1 - 2 - 0 |
|
193 cm
22
255 lbs
0 - 0 - 0 |
BJJ White Belt
Counter striker
Granite chin |
|
BJJ Blue Belt
Basic striking
Solid chin |
|
| |
|
Ladies and gentlemen. This fight is 3 rounds, in the heavyweight division.
Introducing the fighter to my left, fighting out of the red corner.
With a record of
1 - 2 - 0, fighting out of Las Vegas, Samiro Kahric!
And introducing the fighter to my right, fighting out of the blue corner.
With a record of
0 - 0 - 0, fighting out of Las Vegas, Z Mann!
The judges for this bout are Chris Downing, Alan Glass and George Francis.
The bell rings for round one and we are underway!
Kahric tries to clinch but Mann is having none of it.
Mann slips a jab and a cross from Kahric.
Mann circles away from the clinch attempt.
Mann closes the distance, clinches up and gets a nice trip takedown into side control. Very smooth.
Kahric is looking for a sweep.
Mann has hold of Kahric's arm here. He's working for an Americana. It looks like he might have it! Kahric tries to escape but he's just digging himself in deeper - Mann cranks the arm and Kahric screams in pain! The ref makes a decision and ends the fight before the tap - no complains from Kahric, who is just happy to have his arm attached to his body.
Ladies and gentlemen, after 0:38 of round 1, we have a winner by way of Submission (Americana). Z Mann!
|
|
|
|
|
|
|
|
|
|
|
|
|
|
|
|
|
|
|
|
|
|
|
| S |
C
A |
G |
S |
C
B |
G |
|
S |
C |
G |
|
energy
A | B |
|
hype
A | B |
|
pop
A | B |
|
mgr
A | B |
|
FIGHT
RATING
46% |
|
|
|
|
|
|
|
|
|
|

