 |
HTF: Crossing the Line PBP Commentary |
Undercard bout
|
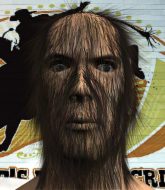
Coming up we have a super heavyweight MMA rules bout between Brad East (ranked 0 p4p, 0 weight class) and Sylwester Warshawski (ranked 0 p4p, 0 weight class). Warshawski has chosen Juicy Pen as his entrance music, which hasn't gone down very well with the crowd. I'm sure you'll be fascinated to know that I was talking to some pointless Z list celebrity before the fight and he thought that Sylwester Warshawski was going to win. Let's see if he was right.
 |
|
 |
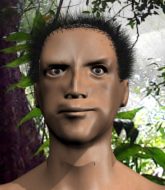
| 188 cm
20
294 lbs
5 - 4 - 0 |
|
185 cm
22
213 lbs
0 - 0 - 0 |
BJJ Purple Belt
Basic striking
Granite chin |
|
BJJ Blue Belt
Counter striker
Intelligent |
|
| |
|
Ladies and gentlemen. This fight is 3 rounds, for the super heavyweight championship of the world!
Introducing the champion to my left, fighting out of the red corner.
With a record of
5 - 4 - 0, fighting out of Tokyo, Brad East!
And introducing the challenger to my right, fighting out of the blue corner.
With a record of
0 - 0 - 0, fighting out of Tokyo, Sylwester Warshawski!
The judges for this bout are Shirou Masuda, Hirohito Nitta and Kenichi Hosakawa.

The bell rings for round one and we are underway!
Warshawski throws a series of punches but East moves out of range.

East scores a trip takedown into side control. Nice.
Warshawski throws a few strikes from the bottom but East takes advantage and mounts!
Warshawski swinging wildly from the bottom but he's not landing.
East blocks Warshawski's feeble attempts to strike from the bottom.
Warshawski is desperately trying to improve his position but East has a good base and remains in mount.
East dominating with strikes here.

Warshawski is rocked!

It looks like Sylwester Warshawski has been cut.
East drops a big elbow. That's hurt Warshawski! More shots from East and the ref steps in! The fight is over!
Ladies and gentlemen, after 0:47 of round 1, we have a winner by way of TKO (Strikes). Brad East!
Brad East is the new super heavyweight champion!
|
|
|
|
|
|
|
|
|
|
|
|
|
|
|
|
|
|
|
|
|
|
|
| S |
C
A |
G |
S |
C
B |
G |
|
S |
C |
G |
|
energy
A | B |
|
hype
A | B |
|
pop
A | B |
|
mgr
A | B |
|
FIGHT
RATING
96% |
|
|
|
|
|
|
|
Undercard bout
|
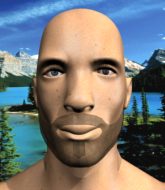
Coming up we have a super heavyweight MMA rules bout between Yushin Tai (ranked 0 p4p, 0 weight class) and Roman Santana (ranked 0 p4p, 0 weight class). Santana has chosen Killer in me as his entrance music. Well, the cameraman is lingering on a pretty young lady for a bit too long there. Keep your eyes on the fighters buddy or you'll miss the fighter intros!
 |
|
 |
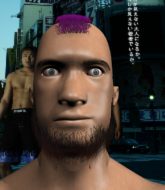
| 165 cm
18
155 lbs
1 - 3 - 0 |
|
184 cm
22
170 lbs
0 - 3 - 0 |
BJJ Purple Belt
Counter striker
Cuts easily |
|
BJJ Blue Belt
Counter striker
Solid chin |
|
| |
|
Ladies and gentlemen. This fight is 3 rounds, in the super heavyweight division.
Introducing the fighter to my left, fighting out of the red corner.
With a record of
1 - 3 - 0, fighting out of Tokyo, Yushin Tai!
And introducing the fighter to my right, fighting out of the blue corner.
With a record of
0 - 3 - 0, fighting out of Tokyo, Roman Santana!
The judges for this bout are Shigeki Sano, Sosuke Kotani and Yuuki Gou.
The bell rings for round one and we are underway!
Santana feints with a shoulder and throws a nice leg kick to Tai's calf.
Jeez, both these guys look absolutely knackered already, that's not a good sign!
Santana stuffs the takedown.
Excellent takedown into side control there by Santana.

Santana tries for a kimura. Not really close to a finish though.
Santana working hard here to secure a kimura but he's not really in the right position for it.
The fighters are tangled up in the ropes here. We might need a restart if the fighters can't break free themselves.
Santana is looking to finish here, going for an Americana. Tai knows the correct defense though, so he's OK.
Tai can't do much from the bottom here.

That's one minute gone in the round.
Santana is looking to finish here, going for an Americana. Tai knows the correct defense though, so he's OK.
Santana working hard here to secure a kimura but he's not really in the right position for it.
Santana looking for an arm triangle but it's way too loose to do anything.
Santana working hard here to secure a kimura but he's not really in the right position for it.

That's two minutes gone in the round.
Neither fighter has done anything of merit for a good minute or two here and the crowd are not happy about it.
The fighters are starting to get a bit slippery now, which will make submissions a bit more difficult.
Tai manages to work his way to half guard, despite Santana's best efforts.
Santana is working for a kimura but Tai is defending it quite comfortably.
Tai looking for submissions off his back.
The fighters are trapped in the ropes so we're going to have a reposition here. The ref calls for a break and repositions the fighters in the center of the ring.
Tai is doing well to control the position and prevent Santana from advancing to side control.
Santana is sneakily working for an arm triangle but Tai sees it coming and defends easily.

That's three minutes gone in the round.
Tai is looking to improve his position.
Santana seems to be working for a kimura but Tai defends the submission attempt.
Santana is thinking about going for an arm triangle but he can't free his leg.
Tai actively working from the bottom here.

The referee has ruled that neither fighter is active enough on the ground and has stood them back up.
Santana misses with a kick to the body.
Santana throws a head kick that misses.

That's four minutes gone in the round.
There's not a lot going on here and the crowd are letting the fighters know they're not willing to tolerate a lack of action.
Tai tries for a takedown but Santana circles away easily
and Santana counters with a shoot takedown. Tai fights it but they end up in guard.
Santana avoids a guillotine attempt easily.
Santana thinks about going for a leg but decides against it, in order to maintain the position.
Santana is trying to work a guillotine from the top, or something like that? Don't know how he thinks he's going to get a finish from there.
Santana thinks about going for a leg but decides against it, in order to maintain the position.
And thats the end of the round the fighters go back to their corners.
Roman Santana dominated that round.
Well, the break between rounds is over. Let's get back to the scrappin!

Santana misses with a takedown
so Tai counters with a double leg into guard. Good agility.
Santana has his foot on Tai's thigh. He's trying to push off and get in position for a triangle, I think. Tai works his way back into a safe position though.
Santana is looking to sweep but instead, Tai has passed into half guard.
Tai is looking for a kimura here.
Santana actively working from the bottom here.
Both fighters are absolutely exhausted here.
Santana with the active half guard here but Tai passes nicely into side control.
Tai is looking for a kimura. He might have it! No, Santana has escaped the position, nice work there.
That's one minute gone in the round.
Tai trying to control the position but Santana is working away.
Santana is sneaking out the side here. He's bucked Tai off and has taken his back!
Santana is remaining active here, looking for the choke. The more discerning members of the crowd will appreciate his efforts.
Tai tries to escape the position - he's now mounted. Is that better or worse? Hard to tell!
Tai manages to regain half guard. Good work.
Tai is defending against the submission attempts here by Santana.
That's two minutes gone in the round.
Santana is thwarting Tai's attempts to control the position.
Santana is sneakily working for an arm triangle but Tai sees it coming and defends easily.
The fighters are battling for position here. Tai manages to regain full guard. Nice work.
Santana sneaks a leg through and gets to half guard. That was like a knife through butter how easily he passed Tai's guard.
Santana looking for a kimura but he'll have to free his other leg if he wants to finish that. Perhaps he's just using it as a distraction technique.
Tai might be looking to lock onto one of his opponent's long limbs for a submission, whilst we're on the ground.
The fighters are battling for position here. Tai manages to regain full guard. Nice work.
That's three minutes gone in the round.
Tai wants to sweep but no luck.
Santana pushes down on Tai's leg and manages to get into half guard.
Santana is trying to work for a kimura. He's got his hands clasped together - this could be trouble! No, Tai has managed to free his arm - good work.
Both fighters really going for it on the ground here!
The fighters are battling for position here. Tai manages to regain full guard. Nice work.
Santana drops back for a leg! It's a sloppy attempt though and Santana jumps back into guard quickly, to retain the dominant position.
Santana won't allow Tai to get back to his feet.
Tai looking for a sweep. Not yet Tai, not yet.
Santana must be cautious of submissions here, given that his opponent has the superior Jiu Jitsu.
Santana is holding a leg here, probably looking for an ankle lock - he drops back and goes for it! Tai is in trouble! Is it all over??? No! Tai has escaped and now he's on top!
That's four minutes gone in the round.
Santana has his foot on Tai's thigh. He's trying to push off and get in position for a triangle, I think. Tai works his way back into a safe position though.
Santana has a loose triangle. He'll be looking to tighten that up but Tai can see exactly what he's planning and manages to posture up and free himself.
Santana has a loose triangle. He'll be looking to tighten that up but Tai can see exactly what he's planning and manages to posture up and free himself.
Santana has his foot on Tai's thigh. He's trying to push off and get in position for a triangle, I think. Tai works his way back into a safe position though.
Santana keeping full guard, as Tai tries to pass.
Tai thinks about going for a leg but decides against it, in order to maintain the position.
Roman Santana has got the better of the ground game so far.
Santana working for a triangle but Tai defends it easily.
And thats the end of the round the fighters go back to their corners.
Yushin Tai dominated that second round.
Well, the break between rounds is over. Let's get back to the scrappin! This is the final round!

Tai shoots in but doesn't get the takedown
and Santana decides to take the opportunity to score a takedown. He's landed in Tai's guard.
Tai looking to control.
Tai keeping full guard, as Santana tries to pass.
Santana is pushing down on Tai's leg trying to pass to half guard. Tai is fighting to maintain full guard but Santana has managed to sneak the leg through.
Tai gets full guard.
Santana drops back, looking for a kneebar! Tai looks panicked! The fighters roll across the mat, one looking to finish, one looking to escape. Tai looks to have wriggled free... Yes, he's got his leg free and he's dived into side control! Good work there from Tai!
Santana parries the strikes from Tai easily there. Tai is wary of posturing up too much because it might enable Santana to escape.
Both fighters are breathing heavily.
Santana is looking for a sweep.
Santana is persisting with the attempt to improve his position.
That's one minute gone in the round.
Tai works to advance to full mount. Santana defends for a few seconds but eventually he succumbs.
Tai is working to isolate an arm here. It's a telegraphed submission attempt but he's gone for it anyway - and he's got it! Tai extends the arm and Santana is forced to tap!
Ladies and gentlemen, after 1:37 of round 3, we have a winner by way of Submission (Armbar). Yushin Tai!
|
|
|
|
|
|
|
|
|
|
|
|
|
|
|
|
|
|
|
|
|
|
|
| S |
C
A |
G |
S |
C
B |
G |
|
S |
C |
G |
|
energy
A | B |
|
hype
A | B |
|
pop
A | B |
|
mgr
A | B |
|
FIGHT
RATING
100% |
|
|
|
|
|
|
|
Undercard bout
|
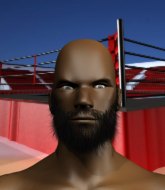
Coming up we have a super heavyweight MMA rules bout between Daniel Kindbom (ranked 0 p4p, 0 weight class) and Peter Johnz (ranked 0 p4p, 0 weight class). Peter Johnz is staring across the ring at his opponent, tweaking his nipples.
 |
|
 |
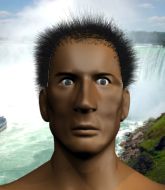
| 183 cm
23
170 lbs
2 - 7 - 0 |
|
177 cm
18
184 lbs
3 - 5 - 0 |
BJJ Blue Belt
Brawler
Experienced |
|
BJJ Blue Belt
Brawler
Determined |
|
| |
|
Ladies and gentlemen. This fight is 3 rounds, in the super heavyweight division.
Introducing the fighter to my left, fighting out of the red corner.
With a record of
2 - 7 - 0, fighting out of Tokyo, Daniel Kindbom!
And introducing the fighter to my right, fighting out of the blue corner.
With a record of
3 - 5 - 0, fighting out of Tokyo, Peter Johnz!
The judges for this bout are Ren Mimura, Sosuke Kotani and Taro Takaoka.
The bell rings for round one and we are underway!
Johnz tries to clinch there but Kindbom circles away.
Johnz lands a kick to the ribs of his opponent. Nice work there - in and out in a flash.
Kindbom is breathing heavily.
Johnz with a nice looking leg kick. You could hear that one land in a back row.
Johnz pivots as if he's going to throw a leg kick but stops half way.
Johnz scores with a push kick.
The crowd cheering loudly, showing their appreciation for the quality fight we're seeing here.
Kindbom takes a step back and watches a body kick go sailing past his mid section.
Johnz scores with a kick to the body.
Johnz lets loose with a powerful body kick. Kindbom will feel that in the morning.
Johnz is looking to clinch but Kindbom is avoiding it.
Kindbom circles away from the clinch attempt.

Johnz has closed the distance and engaged Kindbom in a clinch.
Kindbom takes a knee right on the jaw!
Kindbom drops to a knee looking for a takedown but Johnz gets the underhooks and prevents it.
Johnz tries to land a knee to the head but misses.
Johnz tries to land a knee to the head but Kindbom blocks with his arms.
That's one minute gone in the round.
Johnz using the Thai plumb to throw knees but Kindbom has his back arched nicely, preventing the strike.
Kindbom can't get the takedown.
Johnz is looking to break free of the clinch but Kindbom has double underhooks.
Johnz wants to get back to striking at distance but Kindbom won't allow it.
Kindbom is trying to drag Johnz to the mat but Johnz just about manages to keep his footing. He used the ropes to his advantage there.
That's three failed takedown attempts in the round for Daniel Kindbom. That's going to take a lot out of him.
Johnz wants to strike at distance but he can't break free of the clinch.
Johnz wants to push off and get back to the center of the mat but Kindbom has him pressed against the ropes.
Kindbom has hold of one of Johnz's legs. Johnz is fighting the takedown attempt but Kindbom gets the trip and lands the takedown into guard.
That's two minutes gone in the round.
Kindbom stops Johnz from standing up.
Johnz is working the butterfly guard. He manages to land a nice scissor sweep and is now in half guard on the top. Nice move.
The fighters are tangled up in the ropes here. We might need a restart if the fighters can't break free themselves.
Johnz is trying to control. Kindbom wants to improve his position but can't escape this time.
Kindbom trying to control but Johnz postures up.
Kindbom is refusing to be controlled, as Johnz sits in half guard.
Johnz wants to stand up but Kindbom is controlling the position.
That's three minutes gone in the round.
Johnz is trying for a guillotine from the top but the pressure isn't in the right place so Kindbom is just riding it out for now. Johnz eventually gives up the hold.
Johnz wants to stand up but Kindbom manages to regain full guard.
The referee decides to stand the fighters back up.
Kindbom tries to shoot in for a takedown. He's got hold of a leg but Johnz swivels and escapes.
That's four minutes gone in the round.
There's not a lot going on here and the crowd are letting the fighters know they're not willing to tolerate a lack of action.
Johnz misses with a body kick.
Johnz is looking to clinch but Kindbom is avoiding it.
Nice sprawl there from Johnz as Kindbom shoots in.
Kindbom has a nice red mark on his side after a thudding body kick by Johnz.
Johnz scores with a spinning back kick!
Johnz lands with an uppercut that bounces Kindbom off the ropes and back into rage.
A really sloppy takedown attempt there from Kindbom.
Kindbom misses with a hook. Johnz ducked under it nicely.
Johnz feints with a shoulder and throws a nice leg kick to Kindbom's calf.
Johnz tries to clinch but Kindbom moves out of range.
As the round comes to an end the crowd are showing their appreciation for a great round of action.
Kindbom avoids the clinch attempt nicely.
Kindbom fails with a rather predictable takedown attempt.
Kindbom tries for a takedown but Johnz sees it coming a mile off and avoids it easily.
And thats the end of the round the fighters go back to their corners.
Peter Johnz dominated that round.
The minute break is over - no more time for sponges and pep talks - back to the action!
Johnz wants to clinch.
Kindbom will have to do better than that with his takedown attempts.
Johnz fails with an attempt to clinch.
Johnz bobs and weaves and then throws a good body kick.
Kindbom steps to his left, right into the path of a big body kick from Johnz. That one must have hurt.
Johnz tries to clinch but is not successful on this occasion.
Johnz tries to clinch up but Kindbom circles away and keeps his distance.
A kick lands to the mid section there for Johnz.
Johnz is looking to clinch.
Johnz is looking to take this fight into the clinch.
Kindbom on the wrong end of a decent looking cross there.
Both fighters are absolutely exhausted here.
This fight brought to you by 5M nutrition - it's mmmmm tasty. Nice jab by Johnz.
Kindbom misses with a series of wild punches.
Peter Johnz seems to be getting the better of the standup.
That's one minute gone in the round.
Johnz is looking to clinch.
Johnz doesn't manage to clinch there - Kindbom circles away.
Johnz tries to close the distance and clinch up but Kindbom swats him away and circles back towards the center.
Johnz is looking to clinch but Kindbom is avoiding it.
Kindbom drives through with a takedown into guard.
Kindbom postures up as if he's going to throw some strikes but drops back for an ankle! Johnz is in big trouble! He looks ready to tap! But no, he's escaped and dives on top of Kindbom, into his guard.
Johnz avoids a guillotine attempt easily.
Johnz would like to get this fight back to the feet but can't get free from the closed guard.
That's two minutes gone in the round.
Johnz preventing the sweep.
Kindbom is working hard here to advance position.
Kindbom is trying to control the position from the bottom.
Kindbom seems keen to control Johnz's posture.
That's three minutes gone in the round.
Kindbom lands a beautiful switch and he's in full mount! That could spell trouble for Johnz!
Kindbom trying to control but Johnz is having none of it.
Johnz swinging wildly from the bottom but he's not landing.
Johnz wants to improve position but instead he's given up his back.
That's four minutes gone in the round.
A few boos can be heard. I'm sure they will multiply if the fighters don't pick up the pace.
Kindbom is looking to finish the fight by rear naked choke. Johnz knows exactly what he's got planned though, so he's defending well. Maybe a few strikes would soften Johnz for a finish.
Kindbom looking for the choke from the back.
Kindbom trying desperately to keep hold of the dominant position.
Kindbom is looking for a rear naked choke here but Johnz reverses the position brilliantly into Kindbom's guard!
Johnz wants to stand but Kindbom has a closed guard, so he can't escape.
And thats the end of the round the fighters go back to their corners.
That was a close second round but I would say that Daniel Kindbom will probably get the nod.
That's the end of the interval. I'm sure that seemed a lot quicker than a minute for our two fighters! Back to the action. This is the final round!
Kindbom drives through with a takedown into guard.
Kindbom wants to control from the top but Johnz keeps moving.
Johnz keeping full guard, as Kindbom tries to pass.
Kindbom thows a big elbow that misses.
Both fighters are breathing heavily.
Kindbom stops Johnz from standing up.
Johnz is trying to control the position but Kindbom postures up.
That's one minute gone in the round.
Kindbom tries to free his leg and advance position but Johnz is retaining full guard.
Johnz is looking to stand up but Kindbom isn't so interested in that idea.
Neither fighter is doing enough for the referee's liking and he's decided to stand them back up.
Johnz looking to land some kicks to the body here.
Johnz fails with an attempt to clinch.
Peter Johnz is looking to keep the fight on the feet at all costs.
Johnz dodges the punch combination from Kindbom.
Johnz feints and then cracks Kindbom's leading leg with a nice low kick. He's obviously looking to slow Kindbom down.
Johnz lands with a thumping leg kick.
Kindbom blocks the body kick.
Kindbom will be looking to protect his midsection after taking some solid kicks to the body.
Johnz throws a body kick but he was well out of range there.
Kindbom shoots in for a takedown and gets it.
Kindbom is looking for a kimura but he's never going to get it from there.
That's two minutes gone in the round.
Johnz wants to get back to his feet.
The fighters are trapped in the ropes so we're going to have a reposition here. The ref calls for a break and repositions the fighters in the center of the ring.
Kindbom is looking for a kimura but Johnz is holding onto that half guard position, so it's hard for Kindbom to get the leverage.
Kindbom is working for a submission of some sort.
Kindbom not throwing his punches with enough precision this time.
That's three minutes gone in the round.
Kindbom keeping composed on the top, looking to control the action.
Johnz is looking to escape.
Kindbom wants to free his trapped foot but Johnz is holding on for dear life with his legs.
Johnz avoiding damage under a succession of punches from Kindbom.
Kindbom seems very keen to just sit and control from half guard but Johnz does not like that idea so much and is remaining active off his back.
Kindbom throwing shots but they're hitting the canvas more than the man.
That's four minutes gone in the round.
A lull in the action here being met with boos from the crowd.
The referee has ruled that neither fighter is active enough on the ground and has stood them back up.
Johnz is looking to clinch but Kindbom is avoiding it.
Johnz loads up on a big right hand but Kindbom slips the punch.
Kindbom misses with a takedown attempt - Johnz sprawls well and throws a nice strike on the way out which just misses.
Kindbom fails with a rather predictable takedown attempt.
Johnz doesn't manage to clinch there - Kindbom circles away.
Kindbom blocks a low kick nicely.
Kindbom gets in close and instigates a clinch.
Kindbom tightens his grip and picks Johnz up, before dumping him to the ground. Johnz manages to land in guard.
Johnz controls Kindbom momentarily but Kindbom frees himself.
Kindbom wants to stand but Johnz is controlling his posture from full guard.
And that's the end of the fight!
Daniel Kindbom showed his dominance in that final round.
I think Kindbom has won this one but let's see what the judges have to say. Over to the ring announcer for the scorecards.
Ladies and gentlemen, after 3 rounds of action, we go to the scorecards for a decision.
Judge Ren Mimura scores the fight 29:29
Judge Sosuke Kotani scores the fight 28:29
Judge Taro Takaoka scores the fight 29:29
The fight is ruled a majority draw!
|
|
|
|
|
|
|
|
|
|
|
|
|
|
|
|
|
|
|
|
|
|
|
| S |
C
A |
G |
S |
C
B |
G |
|
S |
C |
G |
|
energy
A | B |
|
hype
A | B |
|
pop
A | B |
|
mgr
A | B |
|
FIGHT
RATING
63% |
|
|
|
|
|
|
|
Undercard bout
|
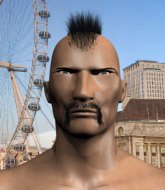
Coming up we have a super heavyweight MMA rules bout between Yusuke Hurameshi (ranked 0 p4p, 0 weight class) and Ratto Macfedries (ranked 0 p4p, 0 weight class). Hurameshi comes to the ring accompanied by What's Up People!!!. Yusuke Hurameshi has the better chin. Will he look to stand and bang today?
 |
|
 |
| 168 cm
18
145 lbs
2 - 1 - 0 |
|
193 cm
19
205 lbs
5 - 13 - 0 |
BJJ Blue Belt
Counter striker
Good chin |
|
BJJ White Belt
Solid Muay Thai
Knockout power |
|
| |
|
Ladies and gentlemen. This fight is 3 rounds, in the super heavyweight division.
Introducing the fighter to my left, fighting out of the red corner.
With a record of
2 - 1 - 0, fighting out of Tokyo, Yusuke Hurameshi!
And introducing the fighter to my right, fighting out of the blue corner.
With a record of
5 - 13 - 0, fighting out of Tokyo, Ratto Macfedries!
The judges for this bout are Yuuki Gou, Yasuomi Hirokawa and Yukihiro Shimada.
The bell rings for round one and we are underway!
Hurameshi shoots in looking for a takedown. Macfedries tries to sprawl out of it but Hurameshi keeps driving through. The fighters are pinned against the ropes. Macfedries manages to get underhooks and after a bit of a struggle, circles away and we're back to standing.
Macfedries stuffs the takedown.
Hurameshi changes levels and looks for a double leg takedown. Macfedries tries to avoid it but Hurameshi manages to keep hold of a leg and drag Macfedries to the ground. Macfedries escapes though and pops straight back up to his feet.
That's three failed takedown attempts in the round for Yusuke Hurameshi. That's going to take a lot out of him.
Hurameshi closes this distance looking for a takedown but Macfedries circles away.
Macfedries tries a head kick but it misses.
We've had a slow start to the round here - hopefully the action picks up.
Macfedries throws a head kick that misses.
Hurameshi shoots in for a takedown - he's clinched up with Macfedries but Macfedries pushes him off and we're back to square one.
That's one minute gone in the round.
Macfedries tries to keep at a distance but Hurameshi has taken the fight into the clinch.

Macfedries breaks the clinch and we're back to striking at distance.
Macfedries tries a switch kick but it misses it's target.
Macfedries throws a wild body kick that Hurameshi sees coming a mile off.
Hurameshi tries for a takedown but Macfedries sees it coming a mile off and avoids it easily.
Hurameshi is breathing heavily.
Hurameshi moves out of range of the leg kick from Macfedries.
Hurameshi throws a body kick but he wasn't in range.
That's two minutes gone in the round.
My god... these two guys really need to pick up the pace or everyone will leave to go get a beer.
Macfedries misses with a wild body shot.
Macfedries tries to clinch but Hurameshi is having none of it.
Hurameshi closes this distance looking for a takedown but Macfedries circles away.
Macfedries cracks Hurameshi with a good shot that sees him stumbling back into the ropes.
Hurameshi shoots in and drives through. Macfedries sprawls well.

A head kick lands from Macfedries that sends Hurameshi to the canvas. Hurameshi tries to scramble back to his feet but Macfedries brings him back down into side control.
Hurameshi is rocked!
It looks like Yusuke Hurameshi has been cut.
That's three minutes gone in the round.
Macfedries wants to stand but Hurameshi has his arm trapped.
Hurameshi tries to wriggle free to get back to his feet but he's given up his back! Oops.
Hurameshi tries to escape the position.
Hurameshi covering up well under a barage of strikes.
Hurameshi looking very determined here, making life difficult for Macfedries.
Macfedries missing with strikes from the back.
Hurameshi might be looking to lock onto one of his opponent's long limbs for a submission, whilst we're on the ground.
That's four minutes gone in the round.
The crowd are hurling abuse towards the fighters... You can hardly blame them though because there isn't a lot going on in the fight.
Macfedries throwing sloppy strikes.
Hurameshi is very frustrated here, being controlled quite effectively by Macfedries.
The fighters are trapped in the ropes so we're going to have a reposition here. The ref calls for a break and repositions the fighters in the center of the ring.
Hurameshi is trying to break free.
Macfedries tries to get the hooks in deep but Hurameshi pushed the leg off.
Macfedries throws a big right hand but he misses and hits the mat. Ouch.
Macfedries trying to control momentarily.
Macfedries punches the canvas rather than the man.
Hurameshi staying busy and making it hard for Macfedries to control.
And thats the end of the round the fighters go back to their corners.
Ratto Macfedries dominated that round.
The cut man is working on Yusuke Hurameshi's cut.
The fighters' corners scream their final instructions, as the referee calls time. Here we go, back to the action!
Macfedries throws a head kick that misses.
Yusuke Hurameshi seems to be the more aggressive standup fighter in this bout.
Hurameshi avoids the head kick by Macfedries.
Hurameshi throws a leg kick that is checked
and Macfedries counters with a solid body kick.
This is turning into a torrid day at the office for Hurameshi. He's trying desperately to land a takedown but he's failing miserably and getting slapped silly on the feet to compound his misery.
Macfedries throws a head kick that lands with a deafening thwack! The crowd roars as Hurameshi stumbles backwards and falls to the mat. Macfedries follows into mount!
Oh Hurameshi is still in real trouble! Will he be able to recover?!!
The crowd are loving this. Great action here.
Macfedries is going olschool here, as he tries to force Hurameshi to tap using a forearm choke. This isn't 1993 though, so Hurameshi shrugs it off.
Hurameshi seems to have got his legs back now.
Hurameshi is working to get back to half guard.
Macfedries jumps to side control looking for an arm triangle but Hurameshi manages to avoid the submission attempt.
Both fighters are absolutely exhausted here.
That's one minute gone in the round.
Hurameshi tries to buck Macfedries off but Macfedries is having none of it.

Macfedries stands up and beckons Hurameshi to his feet.
Ratto Macfedries seems to be getting the better of the standup.
Macfedries throws a head kick but Hurameshi moves out of range.
Hurameshi blocks a head kick by Macfedries.
Macfedries misses with a half-hearted attempt at a head kick.
That's two minutes gone in the round.
Well. There's a bit of a lull in the action here and the crowd are starting to get restless.
Macfedries throws a sloppy head kick and Hurameshi moves out of range easily.
Hurameshi fails with a takedown attempt.
Macfedries tries a head kick but it misses.
Macfedries throws a couple of head shots and lands with the final one - a decent hook, which struck Hurameshi on the side of the head.
That's three minutes gone in the round.
Macfedries throws a body kick that misses.
Macfedries pulls out of a head kick attempt.
Macfedries misses with a jab and misses with a cross straight after too.
Both fighters are looking to counter, which isn't making for the most exciting fight in the world.
Macfedries pulls out of a head kick attempt.
A head kick misses from Macfedries.
That's four minutes gone in the round.
There's not a lot going on here and the crowd are letting the fighters know they're not willing to tolerate a lack of action.
Hurameshi has a takedown stuffed.
Macfedries connects with a high kick.
Macfedries misses with a head kick.
Macfedries moves in looking to clinch but Hurameshi pushes him off.
Macfedries misses with a head kick.
And thats the end of the round the fighters go back to their corners.
Ratto Macfedries showed his class in that round. I'd imagine he'll take it on all the scorecards.
The cut man is working on Yusuke Hurameshi's cut.
The corners get their ten second warning. Both fighters stand from their stools and stare eachother down, ready to get back to the action. This is the final round!
Hurameshi shoots in for a takedown - he's clinched up with Macfedries but Macfedries pushes him off and we're back to square one.
Yusuke Hurameshi is looking to throw some combinations by the looks of things.
Hurameshi blocks a head kick by Macfedries.
Macfedries throws a head kick that misses and slips in the process. He scrambles back to his feet and the fighters circle.
Macfedries is looking to clinch.
We've had a slow start to the round here - hopefully the action picks up.
Hurameshi avoids the head kick by Macfedries.
Both fighters are breathing heavily.
Macfedries misses with a straight right.
That's one minute gone in the round.
Macfedries tries to close the distance and clinch up but Hurameshi swats him away and circles back towards the center.
Macfedries tries to close the distance and clinch up but Hurameshi swats him away and circles back towards the center.
Hurameshi takes a kick to the side of the head.
No luck for Hurameshi with that takedown attempt.
Macfedries clinches.
That's two minutes gone in the round.
Macfedries lands a knee to the head there! That was nasty!
Macfedries escapes the clinch and we're back to striking.
Hurameshi blocks a head kick by Macfedries.
Macfedries throws a head kick that misses and slips in the process. He scrambles back to his feet and the fighters circle.
Macfedries misses with a head kick.
Hurameshi misses with a takedown attempt. He shot from a bit too far out.
That's three failed takedown attempts in the round for Yusuke Hurameshi. That's going to take a lot out of him.
Macfedries lands a head shot.
That's three minutes gone in the round.
Macfedries throws a nice looking combination but Hurameshi bobs and weaves to avoid any damage.
Hurameshi blocks a head kick by Macfedries.
Macfedries goes for a high kick. It partially lands.
The fight stays on the outside here - Macfedries looks like he's thinking about clinching though.
Hurameshi shoots in but Macfedries avoids the takedown attempt easily.
That's four minutes gone in the round.
There's not a lot going on here and the crowd are letting the fighters know they're not willing to tolerate a lack of action.
Macfedries lands a head kick that stumbles Hurameshi and the fighters go to the mat.
Yusuke Hurameshi has stepped it up - he knows he needs a finish here!
Macfedries is looking to work some ground and pound but Hurameshi has wrist control.
Hurameshi looking for submissions from the bottom here. Moving his hips around, possibly looking for an armbar.
Hurameshi wants to sweep but no luck.
And that's the end of the fight!
Ratto Macfedries comfortably won the final round on my scorecard.
Well Macfedries has outworked and out performed his opponent in all aspects of the game today. He was simply too good and the decision should be no more than a formality. Over to the ring announcer for the scorecards.
Ladies and gentlemen, after 3 rounds of action, we go to the scorecards for a decision.
Judge Yuuki Gou scores the fight 26:30
Judge Yasuomi Hirokawa scores the fight 26:30
Judge Yukihiro Shimada scores the fight 26:30
In favor of your winner, by unanimous decision... Ratto Macfedries!
|
|
|
|
|
|
|
|
|
|
|
|
|
|
|
|
|
|
|
|
|
|
|
| S |
C
A |
G |
S |
C
B |
G |
|
S |
C |
G |
|
energy
A | B |
|
hype
A | B |
|
pop
A | B |
|
mgr
A | B |
|
FIGHT
RATING
42% |
|
|
|
|
|
|
|
Undercard bout
|
|
|
|
Undercard bout
|
|
|
|
Undercard bout
|
|
|
|
Undercard bout
|
|
|
|
Co-main event
|
|
|
|
Main event
|
|
|
|
|
|
|

