 |
New Years Bash PBP Commentary |
Undercard bout
|
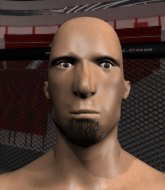
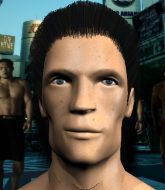
Coming up we have a heavyweight MMA rules bout between Jeff Kennedy (ranked 0 p4p, 0 weight class) and Fedorr Emiliaanenko (ranked 0 p4p, 0 weight class). Jeff Kennedy has the better chin. Will he look to stand and bang today?
 |
|
 |
| 200 cm
23
270 lbs
5 - 0 - 0 |
|
186 cm
20
232 lbs
2 - 0 - 0 |
BJJ White Belt
Solid boxing
Granite chin |
|
BJJ Blue Belt
Brawler
Determined |
|
| |
|
Ladies and gentlemen. This fight is 3 rounds, in the heavyweight division.
Introducing the fighter to my left, fighting out of the red corner.
With a record of
5 - 0 - 0, fighting out of Montreal, Jeff Kennedy!
And introducing the fighter to my right, fighting out of the blue corner.
With a record of
2 - 0 - 0, fighting out of Montreal, Fedorr Emiliaanenko!
The judges for this bout are Gregory Folan, Ian Loll and William Peck.

The bell rings for round one and we are underway!
Kennedy stuffs the takedown.

Kennedy instigates a clinch.
Kennedy gets through Emiliaanenko's defenses to land a nice punch to the side of the head.

Kennedy escapes the clinch and we're back to striking.
Emiliaanenko tries to keep at a distance but Kennedy has taken the fight into the clinch.
Kennedy lands with a good tight uppercut to the head.
Kennedy pushes off and circles away, back to the middle of the mat.
The fight moves into the clinch position.
Kennedy lands a hook that snaps the head of Emiliaanenko backwards.
Kennedy lands a hook to the side of the head.
Emiliaanenko tries to pull guard but Kennedy won't allow it.
A nice left hand lands by Kennedy.
Kennedy throws a blind hook that connects with the side of Emiliaanenkos head.
Kennedy breaks from the clinch.
Kennedy lands with a right and another and another! Emiliaanenko is in big trouble! Kennedy lands again and this time it's lights out for Emiliaanenko! A quality knockout there for Kennedy.
Ladies and gentlemen, after 0:36 of round 1, we have a winner by way of KO (Strikes). Jeff Kennedy!
|
|
|
|
|
|
|
|
|
|
|
|
|
|
|
|
|
|
|
|
|
|
|
| S |
C
A |
G |
S |
C
B |
G |
|
S |
C |
G |
|
energy
A | B |
|
hype
A | B |
|
pop
A | B |
|
mgr
A | B |
|
FIGHT
RATING
100% |
|
|
|
|
|
|
|
Undercard bout
|
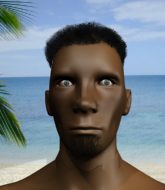
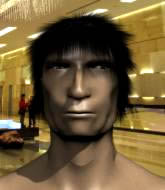
Coming up we have a light heavyweight MMA rules bout between Edmund Dorrance (ranked 0 p4p, 0 weight class) and Chuck Lidell (ranked 0 p4p, 0 weight class). Over to our ring announcer for the fighter introductions!
 |
|
 |
| 187 cm
18
220 lbs
0 - 1 - 0 |
|
184 cm
22
205 lbs
0 - 1 - 1 |
BJJ White Belt
Excellent MT
Granite chin |
|
Good takedowns
Excellent boxer
Solid chin |
|
| |
|
Ladies and gentlemen. This fight is 3 rounds, in the light heavyweight division.
Introducing the fighter to my left, fighting out of the red corner.
With a record of
0 - 1 - 0, fighting out of Montreal, Edmund Dorrance!
And introducing the fighter to my right, fighting out of the blue corner.
With a record of
0 - 1 - 1, fighting out of Montreal, Chuck Lidell!
The judges for this bout are Alec Ball, William Peck and Dillan Fox.
The bell rings for round one and we are underway!
Dorrance tries to clinch but Lidell moves out of range.
Lidell avoids the clinch attempt nicely.
Dorrance tries to clinch up.
Dorrance takes one to the chin there.
Lidell darts in trying to clinch
and Dorrance counters by clinching up.
We've had a slow start to the round here - hopefully the action picks up.
Dorrance lands a nice elbow.
Lidell gets double underhooks to prevent a takedown attempt from Dorrance.
The two fighters are working to gain dominance in the clinch.
Dorrance misses with a knee strike.
Dorrance misses with a knee to the head.
Dorrance landing some nice looking knees to the body.

That's one minute gone in the round.
Dorrance throws a head punch that misses.
Lidell tries to score a body lock takedown but Dorrance shows good agility there to stay on his feet.
Dorrance tries to land a knee to the head but Lidell blocks with his arms.
Dorrance tries a knee to the head but he's missed.
Dorrance is trying to slow down the pace in the clinch, to catch his breath.
Lidell takes a knee right on the jaw!
Dorrance with an attempt at a knee that misses.
Dorrance lands a nice knee to the body.

Dorrance pulls guard successfully.
Lidell stands up and looks to throw the legs aside to pass to side control. Dorrance swivels though and keeps the full guard.
Dorrance is pulling down on Lidell's head. It's preventing any offense from Lidell, at least for the moment.
Lidell pressing down on his opponent's thigh, looking to pass guard. Dorrance is keeping the position for now.

That's two minutes gone in the round.
Dorrance is looking to get back to his feet but can't, whilst Lidell is controlling him.
Lidell wants to control from the top but Dorrance keeps moving.
The ref warns both fighters not to hold the cage as they work up against the meshing.
Dorrance keeping full guard, as Lidell tries to pass.
Lidell looks gassed!

Dorrance wriggles free and stands up.
Dorrance clinches but Lidell breaks the clinch
so Lidell counters with a double leg into guard. Good agility.
Dorrance is trying to stand up but he's not managed so far.

That's three minutes gone in the round.
Dorrance keeping moving, preventing Lidell from controlling successfully.
Dorrance striking off his back but it's not causing Lidell any problems.
Dorrance pushes Lidell off for just long enough to get back to his feet. Very athletic spring there.
Lidell rushes forward with a series of wild hooks but Dorrance moves out of range and avoids them all easily.
Dorrance explodes with a nice body kick and back out of range. Nice work.

That's four minutes gone in the round.
Dorrance throws a head kick that misses.
Dorrance moves into the clinch.
Dorrance landing knees to the head.
We've seen a great period of action over the last minute or so - credit to both fighters for going all out!
Dorrance looking for a takedown.
Dorrance connects with a nasty looking knee right to Lidell's face.
Dorrance connects with a knee to the head.
Dorrance unloads a knee to the mid-section. Lidell lets out a prehistoric sounding urrrrgh.
Dorrance unloads a knee to the mid-section. Lidell lets out a prehistoric sounding urrrrgh.
Dorrance connects with a knee to the head.
Dorrance leaning against his opponent.
As the round comes to an end the crowd are showing their appreciation for a great round of action.
Dorrance crunches a lovely knee into Lidell's ribcage.
Lidell stops a takedown attempt from Dorrance.
That's three failed takedown attempts in the round for Edmund Dorrance. That's going to take a lot out of him.
Dorrance lands a nice knee to the body.
Dorrance lands an elbow that stopped Lidell in his tracks for a moment.
Lidell blocks a punch to the side of the head.
And thats the end of the round the fighters go back to their corners.
Edmund Dorrance dominated that round.
Well, the break between rounds is over. Let's get back to the scrappin!

Dorrance fails in his attempt to clinch.
Dorrance is looking to clinch.
Lidell lands a nice shot to the body.
Dorrance tries a head kick but it misses.
Dorrance scores with a nice body kick.
Dorrance tries for a takedown but Lidell circles away easily
and Lidell connects with a straight left hand counter down the middle.
That's one minute gone in the round.
Dorrance shoots in for a takedown. "Ole!" shouts Lidell as he jumps to the side.
Both fighters are absolutely exhausted here.
Dorrance clinches but Lidell breaks the clinch
and Lidell counters with a crisp hook to the side of the head.
Dorrance moves in looking to clinch but Lidell pushes him off.
Dorrance tries to close the distance and clinch up against the cage but Lidell paws at him with a jab and circles away.
Dorrance wants to clinch up but Lidell keeps it at a distance.
That's two minutes gone in the round.
The crowd are hurling abuse towards the fighters... You can hardly blame them though because there isn't a lot going on in the fight.
Lidell avoids the clinch attempt nicely.
Dorrance tries to clinch there but Lidell circles away.
Dorrance throws an uppercut from half a mile away. Lidell sees it coming and avoids it easily.
Dorrance closes the distance looking to clinch
and Lidell counters with a lovely straight right hand!
The fight stays on the outside here - Dorrance looks like he's thinking about clinching though.
That's three minutes gone in the round.
Lidell avoids the clinch attempt nicely.
Dorrance has taken the fight to the clinch.
Dorrance tries for a takedown but Lidell manages to get underhooks.
That's three failed takedown attempts in the round for Edmund Dorrance. That's going to take a lot out of him.
Dorrance tries for a takedown but Lidell manages to get underhooks.
Dorrance escapes the clinch and we're back to striking.
Dorrance tries to close the distance and clinch up but Lidell swats him away and circles back towards the center.
Dorrance pulls out of a head kick attempt.
Dorrance lands with a kick to the temple. Lidell shrugs as if to say "is that all you've got?"
That's four minutes gone in the round.
Dorrance closes the distance and clinches up with Lidell, looking for a takedown. Dorrance pushes Lidell against the cage but Lidell circles to the side and manages to break the clinch.
Dorrance dodges the punch combination from Lidell.
Dorrance keeps Lidell at a distance using the push kick.
Dorrance tries to close the distance and clinch up against the cage but Lidell paws at him with a jab and circles away.
Dorrance fails in his attempt to clinch.
Dorrance tries to close the distance and clinch up but Lidell swats him away and circles back towards the center.
And thats the end of the round the fighters go back to their corners.
Edmund Dorrance dominated that second round.
That's the end of the round. The referee orders the cornermen out of the cage so we can get back down to business. And we move into the final round!

Look low, kick high! Dorrance uses the oldest trick in the book to send Lidell tumbling to the canvas, in a truly brutal knockout! Dorrance is absolutely delighted - when Lidell wakes up, I doubt he'll be quite so happy!
Ladies and gentlemen, after 0:05 of round 3, we have a winner by way of KO (Head Kick). Edmund Dorrance!
|
|
|
|
|
|
|
|
|
|
|
|
|
|
|
|
|
|
|
|
|
|
|
| S |
C
A |
G |
S |
C
B |
G |
|
S |
C |
G |
|
energy
A | B |
|
hype
A | B |
|
pop
A | B |
|
mgr
A | B |
|
FIGHT
RATING
0% |
|
|
|
|
|
|
|
Undercard bout
|
Coming up we have a middleweight MMA rules bout between Semi Silva (ranked 0 p4p, 0 weight class) and Lemec Pacool (ranked 0 p4p, 0 weight class). Lemec Pacool is the more experienced fighter, so let's see if that makes a difference tonight.
 |
|
 |
| 190 cm
23
185 lbs
2 - 0 - 0 |
|
182 cm
19
185 lbs
1 - 2 - 0 |
BJJ Purple Belt
Solid boxing
Granite chin |
|
BJJ Blue Belt
Brawler
Determined |
|
| |
|
Ladies and gentlemen. This fight is 3 rounds, in the middleweight division.
Introducing the fighter to my left, fighting out of the red corner.
With a record of
2 - 0 - 0, fighting out of Montreal, Semi Silva!
And introducing the fighter to my right, fighting out of the blue corner.
With a record of
1 - 2 - 0, fighting out of Montreal, Lemec Pacool!
The judges for this bout are Robert Douchet, Ian Loll and Trevor Gratis.
The bell rings for round one and we are underway!
Pacool tries to clinch but is not successful on this occasion.
Silva scores with a jab to the jaw of his opponent.

It looks like Lemec Pacool has been cut.
Silva drops down and drives through with a powerful takedown into guard.
Pacool trying to strike off his back.
Pacool throwing some rather feeble looking strikes off his back.
Pacool really doesn't want to stay on the ground with Silva. If he can't get it back to his feet, it's only a matter of time before he'll be tapping out.
Silva controls the pace of the fight for a moment.
Pacool throwing some rather feeble looking strikes off his back.
Silva forces his way into half guard.
Silva with a momentary lay and pray from half guard.
Pacool tries to strike from the bottom but it doesn't land.
Pacool throws a strike from the bottom but Silva passes into side control!
Silva lands a few punches from side control.
Pacool striking from the bottom but nothing landed.
Pacool tries to get back to half guard but can't.
The ref warns both fighters not to hold the cage as they work up against the meshing.
Pacool sneaks back into half guard.
Silva lands with an elbow from half guard - that looked like it hurt.
That's one minute gone in the round.
Silva is taking a breather. Pacool says something to him but it's hard to make out. Perhaps he's telling him to get on with it and actually do something.
Silva has freed up his trapped foot and advances to mount.
Pacool looks gassed!
Pacool throwing punches from his back but nothing is landing.
Silva has been looking to land a fair amount of strikes on the ground. He might be looking to soften his opponent up in order to work for a submission.
Pacool is looking to get to half guard.
Silva controlling his opponent.
That's two minutes gone in the round.

Silva looking to isolate an arm here. Pacool doesn't see it coming and as Silva extends the arm, he's forced to tap out! Nice submission by Silva!
Ladies and gentlemen, after 2:38 of round 1, we have a winner by way of Submission (Armbar). Semi Silva!
|
|
|
|
|
|
|
|
|
|
|
|
|
|
|
|
|
|
|
|
|
|
|
| S |
C
A |
G |
S |
C
B |
G |
|
S |
C |
G |
|
energy
A | B |
|
hype
A | B |
|
pop
A | B |
|
mgr
A | B |
|
FIGHT
RATING
63% |
|
|
|
|
|
|
|
Undercard bout
|
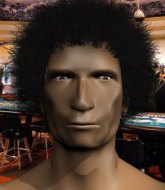
Coming up we have a heavyweight MMA rules bout between Big D (ranked 0 p4p, 0 weight class) and Warren Sap (ranked 0 p4p, 0 weight class). D comes to the cage accompanied by Nine Inch Nails - The Great Destroyer. Big D could well score a knockout today. He has the power to get to Warren Sap's chin.
 |
|
 |
| 192 cm
22
270 lbs
4 - 0 - 0 |
|
190 cm
19
265 lbs
5 - 3 - 0 |
BJJ Purple Belt
Brawler
KO power |
|
BJJ Blue Belt
Brawler
Knockout power |
|
| |
|
Ladies and gentlemen. This fight is 3 rounds, for the heavyweight championship of the world!
Introducing the champion to my left, fighting out of the red corner.
With a record of
4 - 0 - 0, fighting out of Montreal, Big D!
And introducing the challenger to my right, fighting out of the blue corner.
With a record of
5 - 3 - 0, fighting out of Montreal, Warren Sap!
The judges for this bout are Dillan Fox, Alec Ball and Elvis Blanc.
The bell rings for round one and we are underway!
Sap bobs and weaves into range and then changes levels and scores with a nice takedown into side control.
Sap scores with a couple of nice shots to the head there. The referee takes a look at D to see if he's OK.
Sap landing strikes.
D is trying to buck Sap off.
D is sneaking out the side here. He's bucked Sap off and has taken his back!
Sap trying to get back to his feet but D is in full control for now.
D is looking for a rear naked choke here but Sap reverses the position brilliantly into D's guard!
D manages to land a sweep and now he's in mount on top!
D jumps to the side looking to secure the arm triangle
. Ooooh, that looks tight
Sap is gargling but he's managed to escape! Nice work there by Sap and D has given up the dominant position trying to land that submission.
D creates a bit of distance and throws down some hard shots.
We get told so often about how wrestlers don't like to be on their backs. Let's see if Sap can do anything to dispel that myth.
Wooooo! Give it up for these two warriors! They are putting on a show!
Sap tries to bench press D off him but D keeps the position.
That's one minute gone in the round.
D prevents Sap from escaping the position.
Sap is trying to get back to half guard. He's pushing on D's leg. He's managed it. Nice work.
D throwing shots but they're hitting the canvas more than the man.
Sap wants to get back to his feet.
Sap is staying active underneath D, who seems content to just control the action from this position.
D is looking for a kimura. It's going to be difficult to finish that from half guard though and Sap defends it well.
D is breathing heavily.
Sap pushes D off looking to stand but D dives back in and keeps control.

The referee decides to stand the fighters back up.
D takes a punch to the jaw and another one to the bread basket.
D shoots and misses
and Sap counters with a shoot takedown. D fights it but they end up in guard.
Wooooo! Give it up for these two warriors! They are putting on a show!
Sap pressing down on his opponent's thigh, looking to pass guard. D is keeping the position for now.
Sap really doesn't want to stay on the ground with D. If he can't get it back to his feet, it's only a matter of time before he'll be tapping out.
D keeping moving, preventing Sap from controlling successfully.
Sap landing some decent shots from guard.
Sap must be cautious of submissions here, given that his opponent has the superior Jiu Jitsu.
That's two minutes gone in the round.
Sap content to strike from guard, landing some decent shots.
D lands some strikes from the bottom.
Sap stands up over D, holding his feet. He dives back in and lands a decent shot to the head.
D has been looking to land a fair amount of strikes on the ground. He might be looking to soften his opponent up in order to work for a submission.
Sap pushes down on D's leg and manages to get into half guard.
Sap winds up and cracks D with a swinging punch to the side of the head.
Sap lands with an elbow from half guard - that looked like it hurt.
Both fighters really going for it on the ground here!
Sap decides to stand up.
Sap decides to change it up a bit and drives through with a nice takedown into half guard.
Sap prevents D from improving his position.
The fighters are pressed up against the cage, both looking to find a bit of space to work.
That's three minutes gone in the round.
Sap working over D with some ground and pound. D looks like he wants out of this position, which is understandable.
The two fighters exchange a few words. I couldn't hear what they were saying but maybe it's more fun if you make it up yourself. Sap connects with a nice short shot to D's temple.
Sap seems very keen to just sit and control from half guard but D does not like that idea so much and is remaining active off his back.
D missing with punches from the bottom.
Sap takes advantage of the dominant position to land a couple of big hammer fists.
Sap lands a big shot. The thud that echoes around the arena is like music to the fans' ears.
D gets back to full guard.
The ref warns both fighters not to hold the cage as they work up against the meshing.
D looking to hit a scissor sweep but Sap is one step ahead there.
Sap working in close now, lands a nice elbow to the side of D's head.
That's four minutes gone in the round.
D looking for submissions from the bottom here. Moving his hips around, possibly looking for an armbar.
Sap working in close now, lands a nice elbow to the side of D's head.
D tries to land a sweep but no joy.
Sap gets to his feet and steps away from his opponent.
Sap gets a takedown into half guard.
Sap passes the half guard and he's now in mount! Big trouble for D!
Sap scores with a couple of good head shots there.
As the round comes to an end the crowd are showing their appreciation for a great round of action.
Sap in mount throwing good strikes here, bouncing his opponent's head off the canvas.
And thats the end of the round the fighters go back to their corners.
Warren Sap dominated that round.
The fighters' corners scream their final instructions, as the referee calls time. Here we go, back to the action!
D shoots and misses
and Sap counters with a one-two to the body.
Sap darts in and lands a nice takedown into half guard.
Sap tries to pass the half guard into mount. D knows what he's doing though and prevents the attempt.
Sap passes the guard and advances to mount!
D tries to lock up and control but Sap gives him a forearm to the face and pushes him away.
D tries to reverse the position but Sap maintains control.
Sap is still in mount, landing shots to his trapped opponent. D can't stay in a position like this for much longer.
Sap lands a nice shot to the head.
Sap avoids the attempt from D to control.
Both fighters are absolutely exhausted here.
D taking shots to the head.
That's one minute gone in the round.
Sap fakes a shot to the body and cracks his opponent in the head. Nice ground and pound there!
D is wriggling around trying to escape.
Sap with a couple of short strikes.
D is working to get back to half guard.
Sap landing strikes, looking to finish!
D is squirming around, avoiding Sap's attempts to control the action.
Sap scoring with strikes but D is staying in there.
Sap is in the full mount, landing strikes.
D keeping his composure momentarily, calmly looking to get back to half guard.
A nice elbow there by Sap.
Sap landing strikes from the mount.
That's two minutes gone in the round.
D is wriggling around trying to escape.
Sap lands with some vicious ground and pound - can D hang on?
A nice elbow there by Sap.
D can't escape the position.
BOOM! Sap connects with a massive shot to the dome!
D is wriggling around trying to escape.
Sap working the ground and pound effectively.
Sap prevents D from getting the reversal.
That's three minutes gone in the round.
D takes a big shot to the head but keeps on trying to improve his position.
Sap lands a couple of nice shots there from mount.
The referee warns D that he has to improve his position here as he takes two more clean shots to the head.
D in a bad spot here, taking shots to the head.
Sap working D over with strikes here.
A nice elbow there by Sap.
D tries to get back to half guard but can't.
Sap unloading with bombs!
Sap scoring with strikes but D is staying in there.
D swinging wildly from the bottom but he's not landing.
Sap fakes a shot to the body and cracks his opponent in the head. Nice ground and pound there!
D throwing punches from his back but nothing is landing.
Sap with the ground and pound from mount.
D is trying to escape the mount.
That's four minutes gone in the round.
D is working hard here to advance position.
Sap can't quite control the action as he would like just now, as D is looking to escape.
D throwing punches from his back but nothing is landing.
Sap lands with some strikes.
The crowd growing excited in anticipation of a finish here! Right on cue, Sap cracks his opponent with a massive right hand that draws loud cheers!
D is desperately trying to improve his position but Sap has a good base and remains in mount.
Sap lands with some strikes.
The crowd applaud the fighters efforts here as the round comes to an end.
D wants to get back to his feet.
Sap looking to ground and pound his opponent to a finish here.
And thats the end of the round the fighters go back to their corners.
Warren Sap showed his class in that round. I'd imagine he'll take it on all the scorecards.
The fighters' corners scream their final instructions, as the referee calls time. Here we go, back to the action! And we move into the final round!
Sap shoots in and bounces D off the cage to secure the takedown into guard.
Warren Sap has got the better of the ground game so far.
Sap chips away with some ground and pound.
Sap distracts D with his right hand and drops a big elbow with his other arm.
Sap working in close now, lands a nice elbow to the side of D's head.
D wants to sweep but no luck.
D has an active guard here but Sap has managed to pass into half guard.
Ground and pound from Sap.
Both fighters are breathing heavily.
Sap looks towards his corner to check for any instructions. The corner give him nothing to work with, so he cracks D with a short hammerfist. I guess that's as good as any advice he could get in this position.
Sap controlling the action here.
Sap is keeping good posture, landing some ground and pound.
That's one minute gone in the round.
D is trying to get back to full guard.
Sap drops an elbow to the side of D's head.
Sap looks towards his corner to check for any instructions. The corner give him nothing to work with, so he cracks D with a short hammerfist. I guess that's as good as any advice he could get in this position.
Sap winds up and cracks D with a swinging punch to the side of the head.
Sap scores with a couple of good hammerfists.
D with the active half guard here but Sap passes nicely into side control.
Sap connects with a decent looking elbow from side control that caused D some visible discomfort.
D takes a nasty elbow to the side of the head.
Sap working the head with strikes.
Sap has had enough of the ground for now and decides to stand.
That's two minutes gone in the round.
Sap lands with a nice body punch.
D shoots and misses
and Sap counters nicely by changing levels and landing a hook to the body.
Nice body punch from Sap.
D has his takedown stuffed
and Sap counters with a stiff right hand.
Sap has been the more effective fighter overall so far.
Sap looking for a takedown here - he's got it.
D will have to put a bit more behind his punches if he's going to do any damage from this position.
D lands a beautiful switch and he's in full mount! That could spell trouble for Sap!
Sap can't escape the position.
Sap is persisting with the attempt to improve his position.
D looking for an armbar but decides to keep the dominant position instead.
Warren Sap is fighting for a decision here - he's started to take the cautious approach.
That's three minutes gone in the round.
D postures up and cracks his opponent a couple of times before moving back into close ground control. Sap looks a forlorn figure.
D working for a guillotine from mount but Sap is in no mood to give up.
Sap regains half guard.
D working some ground and pound from close in. He's looking to maintain this position and strike for a while by the looks of things... although he'll probably advance to full mount in a minute now I've said that.
Sap makes his way to full guard. A much better position for Sap.
D working some ground and pound from guard but it's not doing any damage.
There's a bit of a scramble here and now Sap is on top in guard.
That's four minutes gone in the round.
Sap's corner is telling him to maintain position.
D lands a couple of shots from the bottom.
D looking for submissions from the bottom here. Moving his hips around, possibly looking for an armbar.
Sap trying to pass the guard but can't manage it just yet.
D keeping moving, preventing Sap from controlling successfully.
Sap being controlled here momentarily.
D keeping moving, preventing Sap from controlling successfully.
Big D has stepped it up - he knows he needs a finish here!
D is looking to sinch up a triangle. Sap throws the leg off to one side though and gets in tight to D's body to avoid the submission. D has instead reached around Sap's neck and now has a guillotine! Oh, this is biiiig trouble! D arches his back and squeezes and forces the tap from his hapless opponent.
Ladies and gentlemen, after 4:58 of round 3, we have a winner by way of Submission (Guillotine). Big D!
Big D retains his heavyweight title!
|
|
|
|
|
|
|
|
|
|
|
|
|
|
|
|
|
|
|
|
|
|
|
| S |
C
A |
G |
S |
C
B |
G |
|
S |
C |
G |
|
energy
A | B |
|
hype
A | B |
|
pop
A | B |
|
mgr
A | B |
|
FIGHT
RATING
0% |
|
|
|
|
|
|
|
Undercard bout
|
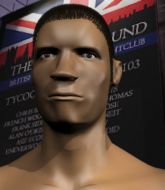
Coming up we have a heavyweight MMA rules bout between Bruce Banner (ranked 0 p4p, 0 weight class) and Marcus Jones (ranked 0 p4p, 0 weight class). Banner comes to the cage accompanied by Animal I've Become. I can't wait for this one - let's get the fighter introductions out of the way and get this one started!
 |
|
 |
| 225 cm
22
270 lbs
3 - 0 - 0 |
|
170 cm
23
275 lbs
2 - 1 - 0 |
BJJ White Belt
Solid boxing
Cuts easily |
|
BJJ Purple Belt
Decent boxing
Heavy handed |
|
| |
|
Ladies and gentlemen. This fight is 3 rounds, in the heavyweight division.
Introducing the fighter to my left, fighting out of the red corner.
With a record of
3 - 0 - 0, fighting out of Montreal, Bruce Banner!
And introducing the fighter to my right, fighting out of the blue corner.
With a record of
2 - 1 - 0, fighting out of Montreal, Marcus Jones!
The judges for this bout are Elvis Blanc, Trevor Gratis and Alec Ball.
The bell rings for round one and we are underway!
Jones slips under a jab from Banner.
Jones takes a shot to the eye socket. That's gotta hurt.
Banner jabs at Jones's body.
Wow, both these guys are really going for it!
Jones scores with a reasonable looking shot to the body. Banner doesn't seem bothered though.
Jones misses with a series of wild punches.
Jones throws a looping overhand right but Banner ducks down to avoid it.
Jones swings for the body but Banner moves out of range.
Banner lands a glancing blow to the side of Jones's head.
Fantastic stuff here - a very entertaining period of action, which has drawn cheers from the crowd.
Jones tries to land with a swinging hook to the body but Banner was well out of range. Poor timing from Jones.
Banner swings wildly with a couple of big hooks

and Jones counters with a beautiful punch that sends Banner to the canvas!
It looks like Bruce Banner has been cut.
Jones works a leg free and moves into half guard.
Banner wants to get back to his feet.
Jones seems like he's working for an arm triangle here. He's freed his trapped foot and he's rotating nicely. Banner is in big trouble! He's tapping out! This one is aaaaaaaaaaaall over!
Ladies and gentlemen, after 0:53 of round 1, we have a winner by way of Submission (Arm Triangle). Marcus Jones!
|
|
|
|
|
|
|
|
|
|
|
|
|
|
|
|
|
|
|
|
|
|
|
| S |
C
A |
G |
S |
C
B |
G |
|
S |
C |
G |
|
energy
A | B |
|
hype
A | B |
|
pop
A | B |
|
mgr
A | B |
|
FIGHT
RATING
100% |
|
|
|
|
|
|
|
Undercard bout
|
Coming up we have a lightweight MMA rules bout between George Pierres (ranked 0 p4p, 0 weight class) and Darren Burns (ranked 0 p4p, 0 weight class). I'm sure you'll be fascinated to know that I was talking to some pointless Z list celebrity before the fight and he thought that Darren Burns was going to win. Let's see if he was right.
 |
|
 |
| 185 cm
20
155 lbs
1 - 0 - 0 |
|
182 cm
22
155 lbs
2 - 1 - 0 |
BJJ Blue Belt
Brawler
Self confident |
|
BJJ Blue Belt
Brawler
Very confident |
|
| |
|
Ladies and gentlemen. This fight is 3 rounds, in the lightweight division.
Introducing the fighter to my left, fighting out of the red corner.
With a record of
1 - 0 - 0, fighting out of Montreal, George Pierres!
And introducing the fighter to my right, fighting out of the blue corner.
With a record of
2 - 1 - 0, fighting out of Montreal, Darren Burns!
The judges for this bout are Dillan Fox, Robert Douchet and William Peck.
The bell rings for round one and we are underway!
Pierres has his hands up protecting his head but a hook from Burns finds it's way round the side to connect with Pierres's head.
A left and a right from Burns both land. Nice combination.
Burns tries to clinch up.
Pierres closes the distance and presses his opponent up against the cage.
Burns trying to land knees to the body.
Burns scores with an uppercut up the middle.
Pierres tries for a takedown but Burns manages to get underhooks.
Burns tries to land a knee to the head but Pierres blocks with his arms.
Pierres trying to land knees to the body.
Burns tries a knee to the head but Pierres blocks it.
Burns with an attempt at a knee that misses.
Burns misses the knee to the body. Nice hip positioning from Pierres.
Burns stops a takedown attempt from Pierres.
Burns throws a vicious knee straight up the middle but Pierres blocks it with crossed arms.
Burns tries a knee to the head but he's missed.
Pierres has double underhooks and is working for a body lock takedown. He's got it. The fighters land in half guard but Burns regains guard immediately.
Burns looking for submissions from the bottom here. Moving his hips around, possibly looking for an armbar.
Pierres trying to control but Burns is working from the bottom.
Burns trying to control the position.
That's one minute gone in the round.
Pierres drops back for a leg! It's a sloppy attempt though and Pierres jumps back into guard quickly, to retain the dominant position.
Burns is working actively off his back, looking to secure an arm or perhaps work for a triangle.
Burns working for a triangle but Pierres defends it easily.
Burns looks gassed!
Pierres is stalling in the full guard.
Burns is trying to control the position from the bottom.
That's two minutes gone in the round.
The crowd are hurling abuse towards the fighters... You can hardly blame them though because there isn't a lot going on in the fight.
Pierres pushes down on Burns's leg and manages to get into half guard.
Pierres wants to lay and pray for a moment but Burns keeps working.
Pierres is trying for a guillotine from the top but the pressure isn't in the right place so Burns is just riding it out for now. Pierres eventually gives up the hold.
The fighters are starting to get a bit slippery now, which will make submissions a bit more difficult.
Pierres is trying to work for a kimura. He's got his hands clasped together - this could be trouble! No, Burns has managed to free his arm - good work.
Burns actively working from the bottom here.
Burns tries to kick Pierres off but Pierres keeps his base steady and stays in half guard.
That's three minutes gone in the round.
Burns looking for submissions from an awkward position here.
Burns moves his hips nicely and gets into full guard.
Pierres thinks about going for a leg but decides against it, in order to maintain the position.
Burns lands a couple of shots from the bottom.
Burns throwing his legs up looking for a triangle.
Pierres decides to stand up and beckons his opponent to follow.
That's four minutes gone in the round.
Burns has managed to clinch.
A knee to the head by Burns.
With the fighters up against the cage, Burns throws an elbow but misses.
Burns connects with a nasty looking knee right to Pierres's face.
Pierres is looking for a takedown up against the cage. Burns gets underhooks though and prevents the takedown attempt.
That's three failed takedown attempts in the round for George Pierres. That's going to take a lot out of him.
Pierres is working on a single leg takedown against the cage. Burns can't fight it off and eventually Pierres manages to take the fight to the floor. Burns looks annoyed but at least he's managed to land in guard.
The fighters are pressed up against the cage, both looking to find a bit of space to work.
Pierres trying to control the position from guard on top but Burns is wriggling around, looking for whatever he can.
Burns uses the cage to get back to his feet.
Burns closes the distance looking to clinch
and Pierres counters with a nice shoot takedown that brings the fighters to the ground.
And thats the end of the round the fighters go back to their corners.
That was a close round but I would say that George Pierres will probably get the nod.
OK. That's time! The bell goes and we're back to the action.
Burns looks to clinch
and Pierres counters with a nice double leg into half guard.
Pierres is thinking about going for an arm triangle but he can't free his leg.
Burns is staying active underneath Pierres, who seems content to just control the action from this position.
Burns is looking to sinch up a gullotine here but Pierres pulls his head out easily.
Burns looking for submissions off his back.
Pierres is looking for a kimura here.
Both fighters are absolutely exhausted here.
Burns wants to get back to full guard.
That's one minute gone in the round.
Pierres is looking to take a break and control but Burns is keeping him honest, looking to work from the bottom.
Well, the referee has seen enough. Neither fighter is active enough on the ground so he's stood them back up.
Burns tries to clinch but fails miserably
and Pierres counters by moving into the clinch.
Burns with the Thai clinch, lands a knee to the head.
Burns is stalling here. The referee will be looking to step in if he doesn't pick up the pace.
Burns is trying to slow down the pace of the fight but Pierres is keeping busy.
Pierres tries to pull guard but Burns holds him up against the cage and eventually Pierres drops back down to his feet.
Burns stalling.
Pierres blocks a knee to the body. He'll have a nicely bruised forearm in the morning.
Pierres manages to pull guard.
Burns stands up and looks to throw the legs aside to pass to side control. Pierres swivels though and keeps the full guard.
That's two minutes gone in the round.
The crowd are showing their displeasure at the lack of action as loud boos ring out around the arena.
Burns throws and elbow that misses. Pierres uses the momentum to reverse the position. He's now in Burns's guard. Nice move by Pierres!
Pierres wants to control from the top but Burns keeps moving.
Burns looking for a guillotine here but Pierres defends easily.
Burns escapes his hips to the side and looks to be working for an armbar. Pierres gives him a little smile and shakes his head. No chance.
Burns keeping moving, preventing Pierres from controlling successfully.
That's three minutes gone in the round.
Burns is working an open guard so Pierres takes the opportunity to get back to his feet.
Burns is looking to clinch but Pierres is avoiding it.
Burns wants to clinch up but Pierres keeps it at a distance.
Pierres has a takedown stuffed.
George Pierres is looking to throw some combinations by the looks of things.
Burns clinches up against the cage.
Burns looking to slow down the pace here.
Nice elbow from Burns.
Burns unloads a knee to the mid-section. Pierres lets out a prehistoric sounding urrrrgh.
Burns tries to land a knee to the head but misses.
Pierres gets control of Burns's arms and successfully pulls guard. Pierres will no doubt be looking for submissions off his back.
Pierres really does look like a pencil wearing a pair of gloves. Let's hope he has a gameplan to suit that ridiculous body shape.
Burns slips nicely into half guard.
Burns lands a big shot. The thud that echoes around the arena is like music to the fans' ears.
That's four minutes gone in the round.
Burns blocks the strikes from Pierres.
Burns is looking for a kimura. It's going to be difficult to finish that from half guard though and Pierres defends it well.
Pierres wants to control but Burns is keeping busy and won't allow it.
Pierres wants to get back to full guard.
Pierres wants to control but Burns is keeping busy and won't allow it.
Burns tries to stand but his arm is trapped.
Neither fighter is doing enough for the referee's liking and he's decided to stand them back up.
Burns wants to clinch
so Pierres counters with a double leg into guard. Good agility.
Burns is active off his back here, looking for submissions.
Burns has a loose triangle. He'll be looking to tighten that up but Pierres can see exactly what he's planning and manages to posture up and free himself.
And thats the end of the round the fighters go back to their corners.
George Pierres dominated that second round.
That's the end of the interval. I'm sure that seemed a lot quicker than a minute for our two fighters! Back to the action. And we move into the final round!
Burns wants to clinch
and Pierres counters by moving into the clinch. Good anticipation by Pierres.
Pierres misses with a punch on the inside.
Pierres avoiding damage as Burns throws knees to the body.
Burns lands a knee to the head.
Burns effectively controlling the action here.
Burns has had enough of the clinch but Pierres keeps him there for the moment.
Pierres's corner calls for him to break the clinch, which he does.
Burns fakes an overhand right and shoots for a takedown. Pierres sprawls well initially but Burns persists and gets the takedown into half guard.
Pierres gets back to full guard.
Pierres escapes his hips to the side and looks to be working for an armbar. Burns gives him a little smile and shakes his head. No chance.
Burns wanted to stand there but Pierres had control of the position.
That's one minute gone in the round.
Pierres is looking for a triangle but Burns pushes his legs off easily.
Both fighters are breathing heavily.
Burns gets to his feet and steps away from his opponent.
Pierres decides to change it up a bit and drives through with a nice takedown into half guard.
Burns tries to get to full guard but Pierres has control of the leg.
Pierres looks to score some points with some ground and pound.
Burns is refusing to be controlled, as Pierres sits in half guard.
Burns is in trouble now - Pierres has advanced to mount!
The ref warns both fighters not to hold the cage as they work up against the meshing.
Burns can't escape the position.
Burns is persisting with the attempt to improve his position.
That's two minutes gone in the round.
Pierres looking for a guillotine from mount but Burns is having none of it.
Burns squirming around on the bottom, looking to escape.
Pierres connects with a couple of good shots from mount.
Pierres moves into side control, trying to work for a kimura. That looks painful! Will he finish!!?? No, Burns has worked his arm free - good work by Burns!
Pierres working away.
Burns is looking to reverse the position.
Pierres is looking for a kimura. He might have it! No, Burns has escaped the position, nice work there.
Pierres is trying to get an arm triangle but Burns is defending well.
Darren Burns has stepped it up - he knows he needs a finish here!
That's three minutes gone in the round.
Burns sneaks a leg under to get back to half guard.
The fighters are battling for position here. Burns manages to regain full guard. Nice work.
Burns preventing the ground and pound from doing any damage.
Burns looking for submissions from the bottom but instead Pierres passes into half guard.
Burns actively working from the bottom here.
Pierres slows the pace down in half guard.
That's four minutes gone in the round.
Pierres sitting in half guard, looking to land shots. Burns defending well though.
Burns looking for submissions from an awkward position here.
Pierres is looking for a kimura but Burns is holding onto that half guard position, so it's hard for Pierres to get the leverage.
Pierres drops an elbow to the side of Burns's head.
Pierres is working for a submission of some sort.
Burns is working for an escape here. He's hooked one of Pierres's legs and he's managed to sneak out and take Pierres's back!
George Pierres is fighting for a decision here - he's started to take the cautious approach.
Burns gets his hands free as Pierres looks to control.
And that's the end of the fight!
That was a close round. You could make an argument for either fighter but I would give it to George Pierres.
Well I reckon that's a shut out for Pierres, winning every round. Will the judges agree? They are the ones who matter, even if they are often depressingly incompetent. Over to the ring announcer for the scorecards.
Ladies and gentlemen, after 3 rounds of action, we go to the scorecards for a decision.
Judge Dillan Fox scores the fight 30:27
Judge Robert Douchet scores the fight 28:29
Judge William Peck scores the fight 30:27
In favor of your winner, by split decision... George Pierres!
|
|
|
|
|
|
|
|
|
|
|
|
|
|
|
|
|
|
|
|
|
|
|
| S |
C
A |
G |
S |
C
B |
G |
|
S |
C |
G |
|
energy
A | B |
|
hype
A | B |
|
pop
A | B |
|
mgr
A | B |
|
FIGHT
RATING
62% |
|
|
|
|
|
|
|
Co-main event
|
Coming up we have a welterweight MMA rules bout between Keijo Sardiini (ranked 0 p4p, 0 weight class) and Jesse St Pierre (ranked 0 p4p, 0 weight class). Keijo Sardiini has the better chin. Will he look to stand and bang today?
 |
|
 |
| 185 cm
22
175 lbs
3 - 2 - 0 |
|
183 cm
22
170 lbs
2 - 2 - 0 |
BJJ Blue Belt
Counter striker
Experienced |
|
BJJ Blue Belt
Brawler
Determined |
|
| |
|
Ladies and gentlemen. This fight is 3 rounds, in the welterweight division.
Introducing the fighter to my left, fighting out of the red corner.
With a record of
3 - 2 - 0, fighting out of Montreal, Keijo Sardiini!
And introducing the fighter to my right, fighting out of the blue corner.
With a record of
2 - 2 - 0, fighting out of Montreal, Jesse St Pierre!
The judges for this bout are Ian Loll, Gregory Folan and Elvis Blanc.
The bell rings for round one and we are underway!
St Pierre changes levels and looks for a double leg takedown. Sardiini tries to avoid it but St Pierre manages to keep hold of a leg and drag Sardiini to the ground. Sardiini escapes though and pops straight back up to his feet.
Sardiini digs a good hook to St Pierre's body.
St Pierre looks frustrated there after his takedown attempt is stuffed easily.
Sardiini clobbers St Pierre with an overhand right that has the crowd gasping. That made a horrendous noise.
It looks like Jesse St Pierre has been cut.
A good leg kick by Sardiini.
St Pierre looks gassed!
The crowd are loving this. Great action here.
St Pierre slips under a jab from Sardiini.
Sardiini feints and then winds up with a huge right hand that connects perfectly and sends St Pierre sprawling to the canvas! St Pierre rolls over backwards and springs off the cage and manages to regain his footing - how acrobatic! Oh, he's still wobbly - can Sardiini finish him?!

St Pierre is rocked!
Sardiini moves into the clinch.
St Pierre is still on wobbly legs! Can Sardiini finish him?
St Pierre takes an elbow to the forehead.
St Pierre blocks a knee to the body. He'll have a nicely bruised forearm in the morning.
St Pierre seems to have recovered his senses.
Sardiini prevents a takedown attempt there.
Keijo Sardiini has stuffed three takedown attempts in the round now. That's going to take a lot out of Jesse St Pierre.
Sardiini lands with a quick shot inside that doesn't really do much damage.
Sardiini lands a nice knee to the body.
Sardiini makes some space for himself and lands an uppercut.
Stalling in the clinch from Sardiini.
Sardiini missing with knees to the body.
Sardiini lands a hook that snaps the head of St Pierre backwards.
That's one minute gone in the round.
Sardiini content to slow the pace in the clinch.
Sardiini lands an elbow that stopped St Pierre in his tracks for a moment.
Sardiini gets an overhook and lands an elbow to the side of the head.
That has opened up Jesse St Pierre's cut even more.
Sardiini working some nice short punches in the clinch.
Sardiini lands an elbow inside.
St Pierre dodges an elbow strike from Sardiini.
Sardiini pushes St Pierre back against the cage and lands a hook to the side of the head.
Nice elbow from Sardiini.
Sardiini lands with a good tight uppercut to the head.
Sardiini lands with a right to the head.
The cut above Jesse St Pierre's eye is starting to cause him problems now.
Sardiini just leaning against St Pierre, taking a breather.
Sardiini comes over the top with an elbow. That landed flush.
Sardiini stalls.
St Pierre wants a takedown.
Sardiini throws an elbow that misses.
Sardiini misses with a knee to the head.
Sardiini throws a vicious knee straight up the middle but St Pierre blocks it with crossed arms.
That's two minutes gone in the round.
Sardiini creates a bit of space for himself and sneaks an elbow through St Pierre's defenses.
Sardiini misses with a knee to the head.
Sardiini lands an elbow that stopped St Pierre in his tracks for a moment.
Come on Sardiini - let's have some action - none of this stalling nonsense.
Still in the clinch, Sardiini scores with a nice short uppercut.
A short uppercut from Sardiini.
Jesse St Pierre's cut is absolute horrible now. This looks like something out of a horror film with blood covering both fighters.
Sardiini is trying to maintain a safe position but St Pierre gets an underhook and turns Sardiini into the cage.
The fighters are pressed against the cage, as the pace of the fight slows.
Sardiini tries a knee to the head but St Pierre blocks it.
St Pierre jumps guard but his hands slip and he falls flat on his back. Well, he's made himself look a right mug there, as Sardiini walks away with a smile on his face. St Pierre gets slowly back to his feet and shakes his head.
Sardiini rushes forward with a series of wild hooks but St Pierre moves out of range and avoids them all easily.
St Pierre looks frustrated there after his takedown attempt is stuffed easily.
Sardiini scores with a jab to the body.
That's three minutes gone in the round.
St Pierre takes one on the chin but seems OK.
Sardiini swings wildly with a hook that is half blocked by St Pierre.
The referee calls the doctor in to look at Jesse St Pierre's cut. Oh no, the doctor has called an end to the bout!
Ladies and gentlemen, after 3:18 of round 1, we have a winner by way of TKO (Cut). Keijo Sardiini!
|
|
|
|
|
|
|
|
|
|
|
|
|
|
|
|
|
|
|
|
|
|
|
| S |
C
A |
G |
S |
C
B |
G |
|
S |
C |
G |
|
energy
A | B |
|
hype
A | B |
|
pop
A | B |
|
mgr
A | B |
|
FIGHT
RATING
82% |
|
|
|
|
|
|
|
Main event
|
Coming up we have a light heavyweight MMA rules bout between Hank Hall (ranked 0 p4p, 0 weight class) and Johnny Chace (ranked 0 p4p, 0 weight class). I'm sure you'll be fascinated to know that I was talking to some pointless Z list celebrity before the fight and he thought that Johnny Chace was going to win. Let's see if he was right.
 |
|
 |
| 185 cm
20
197 lbs
3 - 0 - 0 |
|
185 cm
22
210 lbs
3 - 1 - 0 |
BJJ White Belt
Solid boxing
Granite chin |
|
BJJ White Belt
Decent boxing
Prefers standup |
|
| |
|
Ladies and gentlemen. This fight is 5 rounds, for the light heavyweight championship of the world!
Introducing the champion to my left, fighting out of the red corner.
With a record of
3 - 0 - 0, fighting out of Montreal, Hank Hall!
And introducing the challenger to my right, fighting out of the blue corner.
With a record of
3 - 1 - 0, fighting out of Montreal, Johnny Chace!
The judges for this bout are Yves DeLean, Elvis Blanc and Gregory Folan.
The bell rings for round one and we are underway!
Chace lands a with a good body shot.
Chace throws a right and a left that Hall avoids nicely.
Hall dips down and scores with a jab to the body.
Hall misses the shot to the body.
Chace throws a series of punches but Hall moves out of range.
Chace bobs and weaves and unloads with a good uppercut.
It looks like Hank Hall has been cut.
Chace misses with a straight left.
Chace throws a hard body shot but it just misses.
Chace lunges in with swinging rights and lefts but Hall circles away quickly and effectively.
Hall dips to his left and cracks Chace with an uppercut!
The fans in attendance giving it up for the two fighters, who have really let it all hang out in the last minute or so!
Chace moves out of range of the body kick from Hall.
Chace drops Hall with a left and a right! Oh, Hall is hurt - Chace dives into side control looking to finish!
Hall tries to escape but Chace is in control.
Chace controls the position from side control.
Hall wants to get back to his feet.
That's one minute gone in the round.
A lull in the action here as Chace stalls from top position.
Hall on his back here. We all know that wrestlers don't like being on their back so let's see if Hall tries to get out of the position.
Hall is trying to stand back up. He's worked his way up against the cage but Chace has just dragged him back down to the mat.
That's two minutes gone in the round.
The crowd are hurling abuse towards the fighters... You can hardly blame them though because there isn't a lot going on in the fight.
Neither fighter is doing enough for the referee's liking and he's decided to stand them back up.
Jab, cross, leg kick. Nice combination by Hall!
Chace throws a jab but it's blocked by Hall.
Hall cracks Chace with a hook to the jaw. Both fighters smile at eachother and high-five before getting back down to business.
It looks like Johnny Chace has been cut.
Hall blocks a jab.
Chace takes a big uppercut there. He seems a bit wobbly but no, he's OK.
Wow, both these guys are really going for it!
Chace drops his hands and takes a jab to the jaw for his troubles.
Chace is rocked!
Hall ducks down and throws a big overhand right - it lands flush on the jaw, knocking Chace out cold! The fight is over!
Ladies and gentlemen, after 2:45 of round 1, we have a winner by way of KO (Punch). Hank Hall!
Hank Hall retains his light heavyweight title!
|
|
|
|
|
|
|
|
|
|
|
|
|
|
|
|
|
|
|
|
|
|
|
| S |
C
A |
G |
S |
C
B |
G |
|
S |
C |
G |
|
energy
A | B |
|
hype
A | B |
|
pop
A | B |
|
mgr
A | B |
|
FIGHT
RATING
97% |
|
|
|
|
|
|
|
|
|
|

