 |
Cage Legends 18 PBP Commentary |
Undercard bout
|
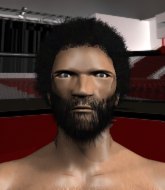
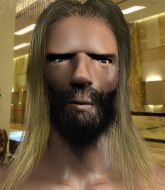
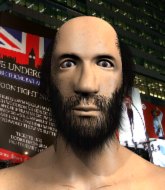
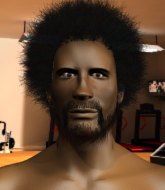
Coming up we have a middleweight MMA rules bout between Robert Bardugo (ranked 0 p4p, 0 weight class) and Ronin Samurai (ranked 0 p4p, 0 weight class). Ronin Samurai told me before the fight that he's been watching a lot of DVDs so let's see if that helps him in this one! I can't wait to find out!
 |
|
 |
| 185 cm
22
185 lbs
0 - 2 - 0 |
|
195 cm
21
190 lbs
0 - 1 - 0 |
BJJ White Belt
Solid boxing
Cuts easily |
|
BJJ Purple Belt
Basic striking
Granite chin |
|
| |
|
Ladies and gentlemen. This fight is 3 rounds, in the middleweight division.
Introducing the fighter to my left, fighting out of the red corner.
With a record of
0 - 2 - 0, fighting out of London, Robert Bardugo!
And introducing the fighter to my right, fighting out of the blue corner.
With a record of
0 - 1 - 0, fighting out of London, Ronin Samurai!
The judges for this bout are Donald Grub, Paul Tew and Andrew Berry.

The bell rings for round one and we are underway!
Bardugo lets the fists fly and connects with a left straight followed by a right hook.
Samurai avoids the body shot from Bardugo.

Samurai shoots in for a takedown and gets it. Let's see what he's got on the mat.
Bardugo pulls Samurai in close to prevent any damage.
Samurai pressing down on his opponent's thigh, looking to pass guard. Bardugo is keeping the position for now.
Samurai works a leg free and moves into half guard.
Samurai wants to free his trapped foot but Bardugo is holding on for dear life with his legs.
Bardugo is trying to stand up here but Samurai is controlling him well.
Samurai is looking to pass the guard... He's managed it - he's now in full mount!
Bardugo squirming around on the bottom, looking to escape.
Samurai pushing the pace here, looking to move to his opponents back and work for a finish.

That's one minute gone in the round.
Bardugo is trying to get back to his feet but can't.

Samurai working for a submission but Bardugo is keeping him at bay.
Samurai with some aggressive grappling here. He's looking for submissions here, rather than waiting for the opportunity to counter.
Samurai looks gassed!
Bardugo tries to buck Samurai off but he can't manage it.
Samurai looking for a guillotine from mount but Bardugo is having none of it.
Samurai jumps to side control looking for an arm triangle but Bardugo manages to avoid the submission attempt.
The fighters are pressed up against the cage, both looking to find a bit of space to work.
Bardugo is looking to work his way out of this bad position but Samurai is controlling him well.

That's two minutes gone in the round.
A lull in the action here being met with boos from the crowd.
Bardugo tries to bench press Samurai off him but Samurai keeps the position.
Samurai wants to work for a kimura but he's foiled early by Bardugo, who protects the arm well.
Bardugo is trying to escape and get back to his feet.

Neither fighter is doing enough for the referee's liking and he's decided to stand them back up.
Samurai shoots for a takedown but Bardugo saw that one coming a mile off and avoided it easily.
Samurai tries to close the distance and clinch up against the cage but Bardugo paws at him with a jab and circles away.
Samurai closes the distance and clinches up with Bardugo, looking for a takedown. Samurai pushes Bardugo against the cage but Bardugo circles to the side and manages to break the clinch.
Samurai will have to do better than that with his takedown attempts.
Robert Bardugo has stuffed three takedown attempts in the round now. That's going to take a lot out of Ronin Samurai.
Bardugo's corner calls for a 1,2 combination and Bardugo duly obliges.

That's three minutes gone in the round.
No luck for Samurai with that takedown attempt.
Bardugo swings away but doesn't land with a series of punches.
Samurai shoots in from a long way out. He's driving through with the takedown attempt and he eventually gets it, landing in Bardugo's guard.
Bardugo is looking to stand up but Samurai isn't so interested in that idea.
Samurai drops back looking for a leg! Bardugo is in trouble here! The fighters roll with the hold and Bardugo manages to kick Samurai off! Samurai jumps back into Bardugo's guard.
Bardugo keeping full guard, as Samurai tries to pass.
Samurai drops back for a leg! It's a sloppy attempt though and Samurai jumps back into guard quickly, to retain the dominant position.

That's four minutes gone in the round.
Samurai advances position into side control!
Samurai tries for an arm triangle. That looks pretty tight to me. Is this one over!?! Possibly, maybe, no Samurai has let go of the choke. Obviously it wasn't as tight as we thought!
Samurai looking for an arm triangle but it's way too loose to do anything.
Samurai tries for a kimura. Not really close to a finish though.
Samurai looking for an arm triangle but it's way too loose to do anything.
And thats the end of the round the fighters go back to their corners.
Ronin Samurai dominated that round.
The referee calls time. The cornermen exit stage left and we're back to business.

Bardugo connects with a lovely right hand, straight down the pipe.
No joy there for Bardugo, who threw a few shots but didn't land.
Samurai is looking to clinch but Bardugo is avoiding it.
Bardugo misses with a body shot. Nice footwork from Samurai.
Bardugo swings and misses with a hook to the body.
Bardugo misses with a jab, cross combination.
Bardugo keeps the fight standing with a nice sprawl.
Samurai showing good head movement there, avoiding the strikes from Bardugo.
We've had a slow start to the round here - hopefully the action picks up.
Samurai shoots in and drives through. Bardugo sprawls well.

Samurai takes the fight into the clinch.
Samurai is working for a takedown up against the cage. He can't get it on this occasion though.
Robert Bardugo has stuffed three takedown attempts in the round now. That's going to take a lot out of Ronin Samurai.
Both fighters are absolutely exhausted here.
Bardugo wants to strike at distance but he can't break free of the clinch.
Bardugo tries to break the clinch but Samurai is controlling the position.
That's one minute gone in the round.
Samurai drops down for a takedown but doesn't get it.
Bardugo prevents the takedown attempt.
Samurai is working for a takedown up against the cage. He can't get it on this occasion though.
Samurai wants a takedown but no success here.
Bardugo wants to get back to striking at distance but Samurai won't allow it.
Samurai turns his back and goes for a hip toss. It's a bit messy but it gets the job done and Samurai manages to end up in side control.
Samurai tries for a kimura. Not really close to a finish though.
Samurai tries to move to mount but Bardugo blocks the move with his legs.
Bardugo is trying to buck Samurai off.
Bardugo trying desperately to get back to his feet here but he's not having any joy at all. He's going to tire himself out if he's not careful.
That's two minutes gone in the round.
Bardugo is trying to control Samurai's posture but Samurai avoids it.
Bardugo knows he needs to get back to his feet asap. He's simply no match for Samurai on the ground.
Samurai tries for a kimura but Bardugo is defending well.
Samurai working away.
Samurai looking for an arm triangle but it's way too loose to do anything.
Bardugo wants to get back to his feet but Samurai drags him back down.
That's three minutes gone in the round.
Samurai advances to full mount.
Bardugo wants to get back to his feet.
Bardugo tries to hold on but Samurai postures up.
Samurai jumps to side control looking for an arm triangle but Bardugo manages to avoid the submission attempt.
Samurai working hard here to secure a kimura but he's not really in the right position for it.
Samurai working hard here to secure a kimura but he's not really in the right position for it.
That's four minutes gone in the round.
Samurai tries for a kimura. Not really close to a finish though.
Bardugo can't do much from the bottom here.
Bardugo is looking to regain half guard here but Samurai keeps moving and retains side control.
Bardugo on his back here. We all know that wrestlers don't like being on their back so let's see if Bardugo tries to get out of the position.
Samurai is in a dominant position here, looking for a kimura. Bardugo looks calm but he's in trouble here. Samurai gets his leg over his opponent's head and yanks on the arm. Bardugo is tapping like a morse code operator on the titanic! SOS! SOS! Samurai lets go of the hold and Bardugo can pop his arm back in it's socket.
Ladies and gentlemen, after 4:55 of round 2, we have a winner by way of Submission (Kimura). Ronin Samurai!
|
|
|
|
|
|
|
|
|
|
|
|
|
|
|
|
|
|
|
|
|
|
|
| S |
C
A |
G |
S |
C
B |
G |
|
S |
C |
G |
|
energy
A | B |
|
hype
A | B |
|
pop
A | B |
|
mgr
A | B |
|
FIGHT
RATING
43% |
|
|
|
|
|
|
|
Undercard bout
|
|
|
|
Undercard bout
|
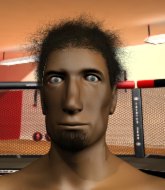
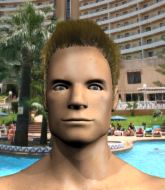
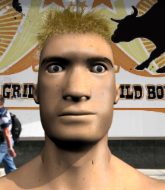
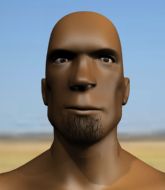
Coming up we have a lightweight MMA rules bout between Dan Cardy (ranked 0 p4p, 0 weight class) and Jesus Jordan (ranked 0 p4p, 0 weight class). Jordan has chosen Also Sprach Zarathustra as his entrance music, which hasn't gone down very well with the crowd. Both fighters look fresh as a daisy as they make their way towards the cage.
 |
|
 |
| 175 cm
20
155 lbs
2 - 5 - 0 |
|
175 cm
20
161 lbs
2 - 1 - 0 |
BJJ Blue Belt
Counter striker
Experienced |
|
BJJ Blue Belt
Brawler
Likes ground |
|
| |
|
Ladies and gentlemen. This fight is 3 rounds, in the lightweight division.
Introducing the fighter to my left, fighting out of the red corner.
With a record of
2 - 5 - 0, fighting out of London, Dan Cardy!
And introducing the fighter to my right, fighting out of the blue corner.
With a record of
2 - 1 - 0, fighting out of London, Jesus Jordan!
The judges for this bout are James Glass, Sam Margolis and Paul Tew.
The bell rings for round one and we are underway!
Cardy feints and then dives in with a takedown. That was a long way out but the feint bought him enough time to close the distance and complete the takedown. Now we'll play guard for a bit and see who can get the better of that position.
Cardy pressing down on his opponent's thigh, looking to pass guard. Jordan is keeping the position for now.

Jordan kicks Cardy off and gets to his feet.
Cardy is looking to clinch.
Jordan misses with a takedown
and Cardy counters with a shoot takedown into half guard.
Cardy is working for a kimura but Jordan is defending it quite comfortably.
Cardy is tying to control. Jordan wants to improve his position but can't escape this time.
Cardy wants to pass to mount but Jordan is defending the position.
Jordan wants to get back to his feet.
Cardy is looking for a kimura but Jordan is holding onto that half guard position, so it's hard for Cardy to get the leverage.
That's one minute gone in the round.
Jordan is defending against the submission attempts here by Cardy.
Cardy wants to take a breather but Jordan is having none of it.
Cardy trying to mount his opponent but Jordan defends it.
It looks like we're going to have a standup here. Neither fight is doing enough on the ground.
Jordan scores a trip takedown into side control. Nice.
Jordan happy to just control the position for now.
Jordan working the ground and pound but Cardy is defending the strikes.
That's two minutes gone in the round.
Cardy is looking to reverse the position.
Cardy is breathing heavily.
Cardy trying to remain calm as Jordan controls from the top position.
Let's hope that Jordan has the urge to step up the pace any second now because for the last 15 or 20 seconds he's just been holding on tight.
Jordan decides to stand back up.
Jordan shoots and misses
and Cardy counters with a shoot takedown into half guard.
Cardy thows a huge punch but Jordan dodges it nicely.
Jordan is trying to get back to full guard.
The fighters are pressed up against the cage, both looking to find a bit of space to work.
Jordan makes his way to full guard. A much better position for Jordan.
That's three minutes gone in the round.
Cardy seems content to control from guard here. He's going to have to remain active though if he doesn't want to get stood back up.
Jordan wriggles free and stands up.
Cardy scores with a nice takedown into half guard. Let's see what he's got on the ground.
Cardy trying to control from half guard but Jordan is working away.
Cardy controlling the action here.
Cardy is working for a kimura but Jordan is defending it quite comfortably.
That's four minutes gone in the round.
Jordan keeping his head moving to avoid the ground and pound.
Cardy seems to be working for a kimura but Jordan defends the submission attempt.
Jordan trying to control but Cardy postures up.
Cardy is looking to advance position but Jordan won't allow it.
And thats the end of the round the fighters go back to their corners.
Dan Cardy dominated that round.
The referee calls time. The cornermen exit stage left and we're back to business.
Jordan misses with a wild combination.
Jordan misses with a takedown
and Cardy counters with a body kick that stops Jordan in his tracks momentarily.
Cardy takes the fight into the clinch.
Cardy lands a body shot in the clinch.
Cardy tries a knee to the head but Jordan blocks it.

Cardy escapes the clinch and we're back to striking.
Cardy takes the fight into the clinch.
Jordan stops a takedown attempt from Cardy.
Jordan is working for takedown but Cardy is calmly controlling the position for now.
Both fighters are absolutely exhausted here.
Cardy leaning against his opponent.
Cardy pulls guard.
That's one minute gone in the round.
Jordan wants to control from the top but Cardy keeps moving.
Cardy tries to land a sweep but no joy.
Cardy is working hard here to advance position.
Cardy is trying to keep Jordan in close.
Jordan is posturing up here but Cardy has hold of an arm and he's gone for an armbar! Jordan tries to roll out but it's too tight and Jordan has to tap! Slick submission there by Cardy!
Ladies and gentlemen, after 1:57 of round 2, we have a winner by way of Submission (Armbar). Dan Cardy!
|
|
|
|
|
|
|
|
|
|
|
|
|
|
|
|
|
|
|
|
|
|
|
| S |
C
A |
G |
S |
C
B |
G |
|
S |
C |
G |
|
energy
A | B |
|
hype
A | B |
|
pop
A | B |
|
mgr
A | B |
|
FIGHT
RATING
59% |
|
|
|
|
|
|
|
Undercard bout
|
|
|
|
Undercard bout
|
Coming up we have a featherweight MMA rules bout between Blue Spoka (ranked 0 p4p, 0 weight class) and Uchi Mata (ranked 0 p4p, 0 weight class). Uchi Mata is the more experienced fighter, so let's see if that makes a difference tonight.
 |
|
 |
| 175 cm
20
155 lbs
0 - 0 - 0 |
|
169 cm
22
155 lbs
0 - 2 - 0 |
BJJ Blue Belt
Basic striking
Granite chin |
|
BJJ Blue Belt
Basic striking
Granite chin |
|
| |
|
Ladies and gentlemen. This fight is 3 rounds, in the featherweight division.
Introducing the fighter to my left, fighting out of the red corner.
With a record of
0 - 0 - 0, fighting out of London, Blue Spoka!
And introducing the fighter to my right, fighting out of the blue corner.
With a record of
0 - 2 - 0, fighting out of London, Uchi Mata!
The judges for this bout are James Glass, Chris Edwards and William Gold.
The bell rings for round one and we are underway!
Mata moves into the clinch.
Spoka taking a break, stalling in the clinch.
Spoka prevents Mata from breaking the clinch.
Mata breaks the clinch and we return to the middle of the mat.
Spoka shoots in and bounces Mata off the cage to secure the takedown into guard.
Mata controls Spoka momentarily but Spoka frees himself.
Spoka is intent on slowing down the pace of the fight, simply looking to control.
Spoka prevents Mata from getting back to his feet.
Mata looking for a guillotine here but Spoka defends easily.
Mata lands a beautiful switch and he's in full mount! That could spell trouble for Spoka!
Spoka can't escape the position.
That's one minute gone in the round.
Mata is working for a guillotine from mount but Spoka frees his head quite easily.
Spoka is looking to improve his position but Mata isn't that keen on the idea.
Mata working away from the top, dropping strikes.
Spoka keeping his composure momentarily, calmly looking to get back to half guard.
Spoka tries to lock up and control but Mata gives him a forearm to the face and pushes him away.
Spoka can't escape the position.
Mata lands with some vicious ground and pound - can Spoka hang on?
Spoka is trying desperately to improve position.
Mata is in full mount, looking to secure a guillotine but Spoka is surviving well by controlling Mata's body position as best he can.
Mata thowing shots but they're missing.
That's two minutes gone in the round.
A lull in the action here being met with boos from the crowd.
Mata goes for an armbar but he's not got it
Spoka turns into him and now he's in Mata's guard.
Mata looks gassed!
Spoka trying to land body shots but he keeps hitting the mat.
Mata keeping moving, preventing Spoka from controlling successfully.
The ref warns both fighters not to hold the cage as they work up against the meshing.
Mata looking to sweep using the butterfly guard but Spoka puts pay to that idea as he passes nicely into half guard.
Mata is on the bottom, trying to hold on to half guard. He's throwing a few small shots here, to keep his opponent honest.
Spoka is looking for a kimura here.
Mata trying to get back to full guard but Spoka takes advantage of the position and moves to full mount!
That's three minutes gone in the round.
Spoka prevents Mata from getting the reversal.
Spoka controlling the position easily from mount.
Spoka with some aggressive grappling here. He's looking for submissions here, rather than waiting for the opportunity to counter.
Mata wants to control but Spoka is having none of it.
Spoka looking to control and managing it successfully.
Spoka blocks Mata's feeble attempts to strike from the bottom.
Mata is trying to escape the mount.
Spoka can't quite control the action as he would like just now, as Mata is looking to escape.
That's four minutes gone in the round.
Well. There's a bit of a lull in the action here and the crowd are starting to get restless.
Mata is looking to get to half guard.
Spoka looking to control but Mata is working nicely, looking to advance position himself.
Mata is trying to escape but when you're mounted that's not too easy.
Spoka goes for an armbar but he's not got it
Mata turns into him and now he's in Spoka's guard.
Spoka looking to control.
Mata thows a big elbow that misses.
Mata trying to control but Spoka is working from the bottom.
And thats the end of the round the fighters go back to their corners.
That was a close round but I would say that Blue Spoka will probably get the nod.
The minute break is over - no more time for sponges and pep talks - back to the action!
Mata misses with the combination.
Spoka throws a two punch combo that lands nicely.
Mata pulls out of a head kick attempt.
Mata wants to land a leg kick but Spoka is out of range.
Uchi Mata seems to be the more aggressive standup fighter in this bout.
Mata sees a low kick coming and goes to check it, but it's actually a body kick and it thuds into his unprotected ribs.
Mata avoids a punch combination nicely.
Spoka fails in his attempt to clinch.
Mata misses with a body shot.
Some bone on bone action there as Mata checks a low kick. Luckily it wasn't a particularly hard one.
Mata ducks down and throws a hook to the body.
Spoka fails with the takedown.
Mata closes the distance and clinches.
Mata is breathing heavily.
Mata has had enough of the clinch but Spoka keeps him there for the moment.
Mata wants to break the clinch but can't.
Mata is trying to break free.
Mata can't break the clinch.
Mata wants to push off and get back to the center of the mat but Spoka has him pressed against the cage.
That's one minute gone in the round.
Mata breaks the clinch.
Spoka closes the distance and looks for a trip takedown... aaaand he's got it - Spoka lands in his opponent's guard.
Spoka trying to control but Mata is working from the bottom.
Mata striking off his back but it's not causing Spoka any problems.
Spoka is trying to work a guillotine from the top, or something like that? Don't know how he thinks he's going to get a finish from there.
Spoka postures up and lands some nice ground and pound.
Mata keeping moving, preventing Spoka from controlling successfully.
Spoka advances to half guard.
Mata slips a foot under and gets full guard. Nice work.
Mata keeping moving, preventing Spoka from controlling successfully.
That's two minutes gone in the round.
Mata has a loose triangle. He'll be looking to tighten that up but Spoka can see exactly what he's planning and manages to posture up and free himself.
Spoka trying to control but Mata is working from the bottom.
Both fighters really going for it on the ground here!
Spoka forces his way into half guard.
Spoka trying to control the action but Mata is working from the bottom.
Spoka passes to side control.
Spoka trying to control the action but Mata is working from the bottom.
Mata throws his opponent off and manages to get back to his feet! Nicely done!
That's three minutes gone in the round.
Mata throws a hook to the body but it doesn't connect.
Mata walks forward and throws out a flicking leg kick. Spoka checks it nicely though, as he moves to the side.
Spoka throws a series of punches but Mata moves out of range.
Mata rushes forward with a series of wild hooks but Spoka moves out of range and avoids them all easily.
Wow, both these guys are really going for it!
Spoka lands with an overhand left.
Spoka misses with a takedown attempt - Mata sprawls well and throws a nice strike on the way out which just misses.
Spoka feints and then dives in with a takedown. That was a long way out but the feint bought him enough time to close the distance and complete the takedown. Now we'll play guard for a bit and see who can get the better of that position.
Spoka stands up and looks to throw the legs aside to pass to side control. Mata swivels though and keeps the full guard.
Spoka slips effortlessly into side control - very nice.
A bit of a lull in the action here.
The fighters are pressed up against the cage, both looking to find a bit of space to work.
Mata tries to improve position but can't.
Spoka working hard here to secure a kimura but he's not really in the right position for it.
That's four minutes gone in the round.
Mata wants to get back to his feet but Spoka drags him back down.
Spoka tries for a kimura. Not really close to a finish though.
Mata looks to move to half guard but instead Spoka has passed into mount! Damn!
Mata wants to get back to his feet.
The crowd applaud the fighters efforts here as the round comes to an end.
Spoka lands with some vicious ground and pound - can Mata hang on?
Spoka wants to control the pace but Mata is squirming around nicely.
And thats the end of the round the fighters go back to their corners.
Blue Spoka dominated that second round.
OK. That's time! The bell goes and we're back to the action. This is the final round!

Spoka throws a series of strikes that have Mata backpedaling.
Spoka swinging wilding here.
Spoka with a hook.
Spoka swinging wilding here.
Mata walks into a jab.
A left and a right from Spoka both land. Nice combination.
Spoka scores with the left hand. Mata knows he should have avoided that one.
Spoka swings away but doesn't land with a series of punches.
Spoka moves out of range of the body kick.
Mata takes a shot right to the liver - Bas would have been proud of that punch.
Spoka displays some good footwork, moving neatly out of range as Mata throws out the jab.
Mata on the wrong end of a nice hook.
Mata throws a right and a left that Spoka avoids nicely.
Spoka tries for a takedown but Mata sees it coming a mile off and avoids it easily.
Spoka lands a pitter patter jab to the forehead of his opponent.
Mata throws a sloppy head kick and Spoka moves out of range easily.
Spoka throws a series of strikes that have Mata backpedaling.
Both fighters are breathing heavily.
That's one minute gone in the round.
Mata pulls out of a head kick attempt.
Mata misses with a takedown attempt. He shot from a bit too far out.
Blue Spoka is looking to throw some combinations by the looks of things.
Spoka shoots in for a takedown and gets it.
Spoka passes to full mount!
Mata is wriggling around trying to escape.
Spoka trying to control but he's not successful this time.
Spoka controlling from mount.
Spoka looking to secure an arm triangle but Mata defends it well.
Spoka is looking to secure an arm. He's managed it! He's pivoting for an armbar - that looks tight! But Mata has managed to get out of it and now he's in a dominant position. Nice work from Mata!
That's two minutes gone in the round.
Mata working in close now, lands a nice elbow to the side of Spoka's head.
Blue Spoka overall seems to be getting the better of the ground position in the fight so far.
Mata lands a couple of digs.
Spoka looking to sweep here. No luck so far.
Mata trying to control but Spoka is working from the bottom.
Mata would like to get this fight back to the feet but can't get free from the closed guard.
Mata tries to free his leg and advance position but Spoka is retaining full guard.
Spoka not looking particularly offensive just at the moment.
Mata throwing elbows and punches but not connecting, as Spoka works some decent striking defense from the bottom.
That's three minutes gone in the round.
Well, the referee has seen enough. Neither fighter is active enough on the ground so he's stood them back up.
Spoka lands a two punch combo.
Mata takes a really solid shot there but just smiles back and shrugs his shoulders.
Mata takes a punch to the jaw and another one to the bread basket.
Mata walks straight into an uppercut. Luckily it didn't land flush.
Mata pulls out of a head kick attempt.
Spoka tests Mata's chin there with a solid looking shot.
Spoka closes the distance and presses his opponent up against the cage.
Spoka looking for a takedown.
Spoka drops down for a takedown but doesn't get it.
That's three failed takedown attempts in the round for Blue Spoka. That's going to take a lot out of him.
Mata unloads a knee to the mid-section. Spoka lets out a prehistoric sounding urrrrgh.
Spoka looking for a takedown.
Mata breaks the clinch and we return to the middle of the mat.
Mata takes a body punch that cleary hurt but he's trying not to show any weakness.
Spoka throws a right hand that Mata ducks under and follows up with a left that Mata also avoids with ease.
Spoka shoots in for a takedown but Mata shows good takedown defense.
Spoka shoots in for a takedown but doesn't get it.
That's four minutes gone in the round.
Spoka takes a shot right to the bread basket.
Mata throws a jab to the body, straight down the pipe. Boom. That sent Spoka stumbling backwards but he manages to regain his composure quickly.
Spoka avoids the head kick by Mata.
A punch combination from Spoka misses.
Mata throws a head kick that looked like it stung.
Mata tries a switch kick but it misses it's target.
Mata needs to keep his hands up - Spoka had a free shot at his head there.
Mata misses with a double jab
and Spoka counters with a three punch combination, finished off with a leg kick. Nice work.
Spoka throws a hook but Mata avoids it easily.
Mata scores with a punch to the gut of his opponent.
Mata closes the distance and takes a jab right on the nose as he does so.
Spoka looks shocked there as he takes a right hand to the temple.
Spoka tries a head kick but it misses.
Uchi Mata has stepped it up - he knows he needs a finish here!
The crowd applaud the fighters efforts here as the round comes to an end.
Mata throws a leg kick that is checked
and Spoka counters with a single leg into guard. Mata didn't expect that.
We've seen a great period of action over the last minute or so - credit to both fighters for leaving it all in the cage!
Spoka drops back for a leg! It's a sloppy attempt though and Spoka jumps back into guard quickly, to retain the dominant position.
Mata throws a couple of shots from the bottom but they don't land.
And that's the end of the fight!
Blue Spoka showed his dominance in that final round.
Well I reckon that's a shut out for Spoka, winning every round. Will the judges agree? They are the ones who matter, even if they are often depressingly incompetent. Over to the ring announcer for the scorecards.
Ladies and gentlemen, after 3 rounds of action, we go to the scorecards for a decision.
Judge James Glass scores the fight 30:27
Judge Chris Edwards scores the fight 30:27
Judge William Gold scores the fight 30:27
In favor of your winner, by unanimous decision... Blue Spoka!
|
|
|
|
|
|
|
|
|
|
|
|
|
|
|
|
|
|
|
|
|
|
|
| S |
C
A |
G |
S |
C
B |
G |
|
S |
C |
G |
|
energy
A | B |
|
hype
A | B |
|
pop
A | B |
|
mgr
A | B |
|
FIGHT
RATING
64% |
|
|
|
|
|
|
|
Undercard bout
|
|
|
|
Undercard bout
|
Coming up we have a lightweight MMA rules bout between Liam Woods (ranked 0 p4p, 0 weight class) and Pete Sproles (ranked 0 p4p, 0 weight class). Sproles has chosen can't be touched -Roy Jones Jr as his entrance music. Liam Woods had real problems making weight for this fight. After initially coming in at 156.4lbs, he had two hours to make the official fight weight. He made it but it will have taken a lot out of him to cut those extra few pounds. Over to our ring announcer for the fighter introductions!
 |
|
 |
| 179 cm
21
165 lbs
0 - 1 - 0 |
|
174 cm
18
160 lbs
1 - 1 - 0 |
BJJ Blue Belt
Basic striking
Cuts easily |
|
BJJ Blue Belt
Brawler
Very confident |
|
| |
|
Ladies and gentlemen. This fight is 3 rounds, in the lightweight division.
Introducing the fighter to my left, fighting out of the red corner.
With a record of
0 - 1 - 0, fighting out of London, Liam Woods!
And introducing the fighter to my right, fighting out of the blue corner.
With a record of
1 - 1 - 0, fighting out of London, Pete Sproles!
The judges for this bout are Sam Margolis, Paul Tew and James Glass.
The bell rings for round one and we are underway!
Sproles wants to clinch up but Woods keeps it at a distance.
Sproles has taken the fight to the clinch.
Woods tries for a takedown. No joy.
Sproles is trying to stall.
Sproles escapes the clinch and we're back to striking.
Woods fails with a takedown attempt from distance.
Woods avoids the clinch attempt nicely.
Woods avoids the clinch attempt nicely.
Woods is pinned up against the cage taking some big shots here. The referee is looking closely deciding whether he should stop the fight.

It looks like Liam Woods has been cut.
Pete Sproles seems to be the more aggressive standup fighter in this bout.
Sproles waving his hands out infront of him, looking to distract Woods.
Sproles tries to close the distance and clinch up but Woods swats him away and circles back towards the center.
Sproles tries to shoot in for a takedown. He's got hold of a leg but Woods swivels and escapes.
Woods fakes with an overhand right and moves in to clinch with Sproles, pushing him back against the cage.
Sproles escapes the clinch and we're back to striking.
Sproles takes the fight into the clinch.
Sproles on the defensive, avoiding the knees to the body.
Sproles wants to get back to striking at distance but Woods won't allow it.
Woods blocks the elbow strike.
Sproles lands with a right to the head.
Sproles manages to break the clinch.
Woods swats away the attempt to clinch by Sproles.
Sproles moves into the clinch successfully.
Sproles lands an elbow inside.
Woods blocks the elbow strike.
That's one minute gone in the round.
Sproles is pressed up against the cage. Woods has hold of a leg and is looking to drag Sproles down to the mat. Sproles avoids the attempt though and has circled away. We're back to striking at a distance.
That's three failed takedown attempts in the round for Liam Woods. That's going to take a lot out of him.
Woods misses with a takedown attempt. He shot from a bit too far out.
Woods keeps the fight on the outside.
Sproles throws a right and a left that Woods avoids nicely.
Sproles throws a head kick that misses and slips in the process. He scrambles back to his feet and the fighters circle.
Sproles clinches up against the cage.
Sproles has managed to pull guard. Let's see whether he can work an aggressive guard. It will also be interesting to see what tactics Woods uses from the top position.
Sproles managing to control the position.
Woods preventing the sweep.
The ref warns both fighters not to hold the cage as they work up against the meshing.
That's two minutes gone in the round.
Sproles pulls Woods in to control the position.
Woods wants to control from the top but Sproles keeps moving.
Sproles wants to stand but Woods is controlling the position.
Woods trying to control the position from guard on top but Sproles is wriggling around, looking for whatever he can.
Sproles wants to stand but Woods is controlling the position.
That's three minutes gone in the round.
Sproles managing to control the position.
The fighters are starting to get a bit slippery now, which will make submissions a bit more difficult.
Woods missing there with some ground and pound from the guard.
It looks like we're going to have a standup here. Neither fight is doing enough on the ground.
No luck for Woods with that takedown attempt.
Woods is breathing heavily.
Sproles scores with a nice takedown into half guard. Let's see what he's got on the ground.
Sproles controlling the pace.
That's four minutes gone in the round.
Sproles trying to control from half guard but Woods is working away.
Sproles stands, ready to strike. The ref makes him back up and allows Woods to get to his feet.
Woods stuffs the takedown attempt from Sproles. Sproles gets slowly back to his feet.
Woods closes the distance and looks for a trip takedown... aaaand he's got it - Woods lands in his opponent's guard.
Woods trying to control the position from guard on top but Sproles is wriggling around, looking for whatever he can.
And thats the end of the round the fighters go back to their corners.
Pete Sproles dominated that round.
The cut man is working on Liam Woods's cut.
The minute break is over - no more time for sponges and pep talks - back to the action!
The fight moves into the clinch position.
Sproles manages to break the clinch.
Sproles wants to clinch but Woods slips to the side
and Woods counters with a driving takedown into guard. Nice work there by Woods.
Sproles working a defensive guard but Woods manages to pass into side control anyway.
Woods working away.
Sproles is looking to work his way out of this bad position but Woods is controlling him well.
Sproles tries to work a leg under to get back to half guard but Woods wriggles his own leg back out and remains in side control.
Both fighters are absolutely exhausted here.
Sproles wants to control but Woods postures up.
That's one minute gone in the round.
Sproles tries to wriggle free to get back to his feet but he's given up his back! Oops.
Sproles is trying to get back to his feet but he's not managed it yet.
Woods looking for the choke from the back.
Sproles is trying to get back to his feet. He's worked up on to his knees and now he's on his feet with his head on the canvas, trying to shake Woods off. It looks like it's working - Woods slides off, much to his dismay, and we're back to standing! Sproles displaying calm under pressure there.
That's two minutes gone in the round.
Well. There's a bit of a lull in the action here and the crowd are starting to get restless.
Sproles is looking to clinch.
Sproles shoots in for a takedown and gets it. Oh and he's advanced to full mount straight away.
Sproles content just to control the position here.
Sproles trying to control but Woods is having none of it.
That's three minutes gone in the round.
That's four minutes gone in the round.
The crowd are starting to boo a lack of action.
Despite being in the dominant position, Pete Sproles just isn't active enough and the referee decides to stand the fighters back up.
Woods shoots in for a takedown but doesn't get it.
Sproles tries to bum rush Woods with a series of wild strikes but Woods uses good footwork to avoid the assault.
Sproles wants to clinch
and Woods counters with a shoot takedown into half guard.
Sproles moves into full guard.
Sproles pulls Woods in close to prevent any damage.
Liam Woods overall seems to be getting the better of the ground position in the fight so far.
There's a bit of a scramble here and now Sproles is on top in guard.
And thats the end of the round the fighters go back to their corners.
That was a close second round but I would say that Liam Woods will probably get the nod.
The cut man is working on Liam Woods's cut.
That's time! Woods's corner gives him a slap on the ass as he gets ready to fight. This is the final round!
Sproles shoots for a double leg takedown but Woods sprawls well. He's pushed Sproles's face into the mat and manages to get back to his feet relatively easily.
Woods shoots in with a takedown attempt and he has Sproles pinned against the cage. Sproles gets the underhooks and manages to circle away.
Sproles tries to close the distance and clinch up but Woods swats him away and circles back towards the center.
Sproles clinches up against the cage.
Sproles landing knees to the body. They look like they could hurt.
Sproles manages to break the clinch.
Sproles tries to clinch there but Woods circles away.
Sproles has managed to clinch.
Sproles leaning his opponent against the cage.
Sproles manages to break the clinch.
Sproles tries a switch kick but it misses it's target.
Sproles darts in and clinches Woods up against the cage.
Sproles breaks from the clinch.
Wow, both these guys are really going for it!
Both fighters are breathing heavily.
Nice takedown defense from Woods. No joy for Sproles on that attempt.
Sproles shoots in for a double leg but Woods sprawls well. That's going to sap some energy.
Liam Woods has stuffed three takedown attempts in the round now. That's going to take a lot out of Pete Sproles.
Sproles tries to clinch up.
Liam Woods is looking to throw some combinations by the looks of things.
That's one minute gone in the round.
Woods lets loose with a powerful body kick. Sproles will feel that in the morning.
Sproles rushes Woods and pushes him back against the cage in a clinch.
Sproles scores a nice knee to the body.
The fighters are pressed against the cage, as the pace of the fight slows.
Woods misses the knee to the body. Nice hip positioning from Sproles.
Woods stops a takedown attempt from Sproles.
Sproles breaks from the clinch.
Woods forces Sproles back against the cage and clinches.
Sproles gets an overhook and lands an elbow to the side of the head.
Good body shot from Sproles.
Sproles pulls guard successfully.
Woods decides he's had enough of playing guard and decides to stand. Come on Sproles, up you get!
Woods tries to shoot in for a takedown. He's got hold of a leg but Sproles swivels and escapes.
Sproles misses with a series of wild punches.
Sproles closes the distance but Woods moves to the side
and Woods counters with a nice double leg into half guard.
Sproles pushes Woods off but Woods dives into side control.
That's two minutes gone in the round.
Sproles wants to escape from the position here - easier said than done!
Woods wants to control but Sproles is keeping him busy.
Both fighters take a look at the clock.
Woods trying to control the action but Sproles is working from the bottom.
That's three minutes gone in the round.
Sproles sneaks back into half guard.
Woods is working for a kimura from half guard. He's really concentrating on the hold and it's allowed Sproles to slip a leg under and get back to full guard.
That's four minutes gone in the round.
Neither fighter has done anything of merit for a good minute or two here and the crowd are not happy about it.
Sproles is looking to stand up but Woods isn't so interested in that idea.
Sproles trying to keep a closed guard but Woods is proving a slippery customer.
Woods working some ground and pound from guard but it's not doing any damage.
Woods stops Sproles from standing up.
And that's the end of the fight!
I would just about give that final round to Pete Sproles.
I think Sproles has won this one but let's see whether the judges agree with me. Over to the ring announcer for the scorecards.
Ladies and gentlemen, after 3 rounds of action, we go to the scorecards for a decision.
Judge Sam Margolis scores the fight 28:29
Judge Paul Tew scores the fight 29:29
Judge James Glass scores the fight 29:29
The fight is ruled a majority draw!
|
|
|
|
|
|
|
|
|
|
|
|
|
|
|
|
|
|
|
|
|
|
|
| S |
C
A |
G |
S |
C
B |
G |
|
S |
C |
G |
|
energy
A | B |
|
hype
A | B |
|
pop
A | B |
|
mgr
A | B |
|
FIGHT
RATING
47% |
|
|
|
|
|
|
|
Undercard bout
|
|
|
|
Co-main event
|
Coming up we have a welterweight MMA rules bout between Joe Raclef (ranked 0 p4p, 0 weight class) and Kata Guruma (ranked 0 p4p, 0 weight class). Joe Raclef had real problems making weight for this fight. After initially coming in at 172.6lbs, he had two hours to make the official fight weight. He made it but it will have taken a lot out of him to cut those extra few pounds. Joe Raclef looks tired to me. Hopefully he has got enough gas left in the tank to put in a good performance.
 |
|
 |
| 175 cm
20
180 lbs
1 - 1 - 0 |
|
178 cm
22
180 lbs
1 - 1 - 0 |
BJJ White Belt
Brawler
Cuts easily |
|
BJJ Blue Belt
Basic striking
Determined |
|
| |
|
Ladies and gentlemen. This fight is 3 rounds, in the welterweight division.
Introducing the fighter to my left, fighting out of the red corner.
With a record of
1 - 1 - 0, fighting out of London, Joe Raclef!
And introducing the fighter to my right, fighting out of the blue corner.
With a record of
1 - 1 - 0, fighting out of London, Kata Guruma!
The judges for this bout are James Atkins, Steven Brown and James Ackerman.
The bell rings for round one and we are underway!
Raclef fails with a takedown attempt from distance.
Guruma thuds his shin into the meat of Raclef's side.
Guruma lands with a head kick! That's gotta hurt.
Raclef doesn't manage to clinch there - Guruma circles away.
Guruma lands with a thumping leg kick.
Guruma scores a takedown into full mount!
Raclef on his back here. We all know that wrestlers don't like being on their back so let's see if Raclef tries to get out of the position.
Raclef is trying to stand.
Guruma scores with a couple of good head shots there.
Guruma scoring with strikes but Raclef is staying in there.
Guruma unloads with some shots from mount but Raclef bucks and avoids them well.
Guruma is landing with some decent strikes but Raclef is trying to advance his position so the referee is letting the fight continue.
Guruma throws some wild stikes that Raclef manages to avoid easily.
Raclef is breathing heavily.
Raclef defends a decent attempt at a guillotine from Guruma.
The crowd growing excited in anticipation of a finish here! Right on cue, Guruma cracks his opponent with a massive right hand that draws loud cheers!
That's one minute gone in the round.
Guruma throwing sloppy strikes here. Perhaps if he tightened up his striking from such a dominant position, he'd be able to finish easier.
Guruma looking to ground and pound his opponent to a finish here.
Guruma quickly switches position and commits to an armbar! It's a big risk for Guruma but it's paid off an Raclef is forced to tap! Nice work by Guruma.
Ladies and gentlemen, after 1:32 of round 1, we have a winner by way of Submission (Armbar). Kata Guruma!
|
|
|
|
|
|
|
|
|
|
|
|
|
|
|
|
|
|
|
|
|
|
|
| S |
C
A |
G |
S |
C
B |
G |
|
S |
C |
G |
|
energy
A | B |
|
hype
A | B |
|
pop
A | B |
|
mgr
A | B |
|
FIGHT
RATING
75% |
|
|
|
|
|
|
|
Main event
|
Coming up we have a lightweight MMA rules bout between Patrick Young (ranked 0 p4p, 0 weight class) and Sean McMillan (ranked 0 p4p, 0 weight class). Well, I have no idea who's going to take this one!
 |
|
 |
| 185 cm
19
160 lbs
3 - 2 - 0 |
|
170 cm
19
165 lbs
1 - 0 - 0 |
BJJ Blue Belt
Brawler
Prefers standup |
|
BJJ Blue Belt
Basic striking
Determined |
|
| |
|
Ladies and gentlemen. This fight is 3 rounds, in the lightweight division.
Introducing the fighter to my left, fighting out of the red corner.
With a record of
3 - 2 - 0, fighting out of London, Patrick Young!
And introducing the fighter to my right, fighting out of the blue corner.
With a record of
1 - 0 - 0, fighting out of London, Sean McMillan!
The judges for this bout are Sam Margolis, William Gold and Paul Tew.
The bell rings for round one and we are underway!
McMillan throws a series of punches but Young avoids them all with ease.
Young takes a shot to the body in his stride.
Young blocks a low kick nicely.
Patrick Young seems to be the more aggressive standup fighter in this bout.
Young cracks McMillan with a big right hand and McMillan goes down!

McMillan is rocked!
Young knows he needs to get back to his feet asap. He's simply no match for McMillan on the ground.
McMillan wants to sweep but no luck.
McMillan is persisting with the attempt to improve his position.
The fighters are pressed up against the cage, both looking to find a bit of space to work.
Young wanted to stand there but McMillan had control of the position.
The ref warns both fighters not to hold the cage as they work up against the meshing.
McMillan working a defensive guard here.
McMillan being controlled here, momentarily.
Young stopping the sweep attempt from McMillan.
Young would like to get this fight back to the feet but can't get free from the closed guard.
Young has to be careful here, sitting in the guard of a superior BJJ player.
That's one minute gone in the round.
The referee decides to stand the fighters back up.
McMillan fails with the takedown.
Young misses with a half-hearted attempt at a head kick.
Young lands with a nice low kick. That'll leave a bruise.
McMillan looks gassed!
Young with a body punch. A glancing blow.
Young misses the body punch
and McMillan counters nicely by changing levels and landing a hook to the body.
A head kick by Young - that's a beauty! McMillan is out but he's somehow still standing... he's going... going... gone. Like a drunk walking down the middle of the road, the inevitable face plant follows and the delayed knockout arrives. Even Young can't help but laugh at the bizarre end to this one!
Ladies and gentlemen, after 1:28 of round 1, we have a winner by way of KO (Head Kick). Patrick Young!
|
|
|
|
|
|
|
|
|
|
|
|
|
|
|
|
|
|
|
|
|
|
|
| S |
C
A |
G |
S |
C
B |
G |
|
S |
C |
G |
|
energy
A | B |
|
hype
A | B |
|
pop
A | B |
|
mgr
A | B |
|
FIGHT
RATING
97% |
|
|
|
|
|
|
|
|
|
|
