 |
AFC 11 PBP Commentary |
Undercard bout
|
|
|
|
Undercard bout
|
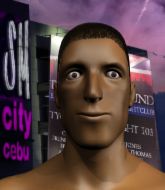
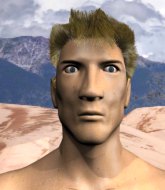
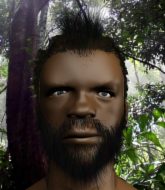
Coming up we have a light heavyweight MMA rules bout between Wahoo McDaniel (ranked 0 p4p, 0 weight class) and Patrik Smythe (ranked 0 p4p, 0 weight class). McDaniel's entrance music is War Dance. A fine choice. Smythe is bobbing his head along to his entrance song: 10 000 Fists by Disturbed. Wahoo McDaniel had real problems making weight for this fight. After initially coming in at 206.2lbs, he had two hours to make the official fight weight. He made it but it will have taken a lot out of him to cut those extra few pounds. We have two fighters making their debuts here, so let's see who comes out of this one with their first professional victory.
 |
|
 |
| 186 cm
22
219 lbs
0 - 0 - 0 |
|
182 cm
18
200 lbs
0 - 0 - 0 |
BJJ White Belt
Good knees
Granite chin |
|
BJJ Blue Belt
Brawler
Determined |
|
| |
|
Ladies and gentlemen. This fight is 3 rounds, in the light heavyweight division.
Introducing the fighter to my left, fighting out of the red corner.
With a record of
0 - 0 - 0, fighting out of Montreal, Wahoo McDaniel!
And introducing the fighter to my right, fighting out of the blue corner.
With a record of
0 - 0 - 0, fighting out of Montreal, Patrik Smythe!
The judges for this bout are Dillan Fox, Yves DeLean and Trevor Gratis.

The bell rings for round one and we are underway!
The fight stays on the outside here - Smythe looks like he's thinking about clinching though.
Smythe tries to clinch but McDaniel moves out of range.
Smythe slips a jab and a cross from McDaniel.
Smythe misses with an attempted mid kick.
McDaniel throws a big shot that misses.
Smythe tries to clinch up.
Wow, both these guys are really going for it!
McDaniel ducks down and throws a hook to the body.
Smythe looks gassed!
McDaniel lands an overhand left. A wild punch that just about connected.

Smythe is rocked!

It looks like Patrik Smythe has been cut.
McDaniel throws a monster overhand right that drops Smythe! McDaniel follows up with more strikes from mount and the fight is all over!
Ladies and gentlemen, after 0:24 of round 1, we have a winner by way of TKO (Strikes). Wahoo McDaniel!
|
|
|
|
|
|
|
|
|
|
|
|
|
|
|
|
|
|
|
|
|
|
|
| S |
C
A |
G |
S |
C
B |
G |
|
S |
C |
G |
|
energy
A | B |
|
hype
A | B |
|
pop
A | B |
|
mgr
A | B |
|
FIGHT
RATING
100% |
|
|
|
|
|
|
|
Undercard bout
|
|
|
|
Undercard bout
|
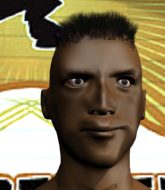
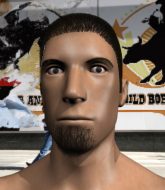
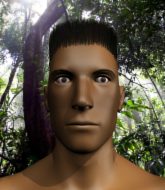
Coming up we have a welterweight MMA rules bout between Salvatore Bonnano (ranked 0 p4p, 0 weight class) and Justin Jackson (ranked 0 p4p, 0 weight class). Salvatore Bonnano has the edge in experience - let's see if he can make that count tonight.
 |
|
 |
| 173 cm
21
168 lbs
0 - 1 - 0 |
|
173 cm
21
174 lbs
1 - 1 - 0 |
BJJ Blue Belt
Brawler
Prefers ground |
|
BJJ Blue Belt
Basic striking
Tends to cut |
|
| |
|
Ladies and gentlemen. This fight is 3 rounds, in the welterweight division.
Introducing the fighter to my left, fighting out of the red corner.
With a record of
0 - 1 - 0, fighting out of Montreal, Salvatore Bonnano!
And introducing the fighter to my right, fighting out of the blue corner.
With a record of
1 - 1 - 0, fighting out of Montreal, Justin Jackson!
The judges for this bout are Ian Loll, Gregory Folan and Steve Smith.
The bell rings for round one and we are underway!
Bonnano looks for a takedown here. Will he get it? Jackson is fending him off so far but Bonnano persists. Nope, Jackson circles away and we're back to standing.
Jackson moves into range and throws a lovely three punch combination.
Bonnano fails to land the takedown.

Jackson closes the distance and clinches.
Jackson tries a knee to the head but he's missed.
Bonnano tries to stall but Jackson uses the opportunity to gain a better position.
Bonnano wants to get back to striking at distance but Jackson won't allow it.
Jackson lands a damaging elbow.

Bonnano breaks the clinch and we're back to striking at distance.
Jackson closes the distance and clinches.

Jackson is working on a single leg takedown against the cage. Bonnano can't fight it off and eventually Jackson manages to take the fight to the floor. Bonnano looks annoyed but at least he's managed to land in guard.

Bonnano working for a triangle but Jackson defends it easily.
Jackson throws a big right hand that misses.
Bonnano has a loose triangle. He'll be looking to tighten that up but Jackson can see exactly what he's planning and manages to posture up and free himself.
Bonnano wants to get back to his feet but Jackson is in a dominant position and won't allow it.

That's one minute gone in the round.
Bonnano can't keep his opponent in guard - Jackson advances to half guard, no doubt looking to mount.
Neither fighter is being very active at the moment, with Jackson in particular looking to stall.
Jackson trying to pass the guard but Bonnano defending well.
Jackson working Bonnano over with strikes.
Bonnano wants to improve his position but Jackson is controlling well.
Jackson is keeping good posture, landing some ground and pound.
Bonnano is trying to stand up here but Jackson is controlling him well.
Jackson is working for a kimura but Bonnano is defending it quite comfortably.
Bonnano is breathing heavily.
Jackson is taking a breather. Bonnano says something to him but it's hard to make out. Perhaps he's telling him to get on with it and actually do something.

That's two minutes gone in the round.
Jackson scores with a couple of good hammerfists.
Jackson content to control rather than advance.
Bonnano wants to control but Jackson is keeping busy and won't allow it.
Jackson takes a deep breath and rests his weight momentarily on top of his opponent, to control the position.
Bonnano is pressing down on Jackson's left leg trying to get back to full guard. He's managed it.
Jackson is in close to Bonnano's body, working some short punches and elbows.
Jackson throwing strikes from guard but Bonnano blocks nicely.
Bonnano keeping moving, preventing Jackson from controlling successfully.
Bonnano wants to sweep here but Jackson controlling him for the moment.
Jackson controlling from the top position.
Bonnano keeping moving, preventing Jackson from controlling successfully.

That's three minutes gone in the round.
Bonnano keeping full guard, as Jackson tries to pass.
Bonnano is looking to get back to his feet but can't, whilst Jackson is controlling him.

The referee decides to stand the fighters back up.
A nice combination there by Jackson.
Bonnano looks for a takedown but Jackson sprawls well.
That's three failed takedown attempts in the round for Salvatore Bonnano. That's going to take a lot out of him.
Jackson scores with a nice one two combo and darts back out of range to avoid anything coming in the opposite direction.
Bonnano misses with a double jab.
Bonnano shoots in but Jackson avoids the takedown attempt easily.
Bonnano swings away but doesn't land with a series of punches.
Jackson lands a right hook to the body.
Bonnano moves in looking to clinch but Jackson pushes him off.
A good leg kick by Jackson.
Bonnano misses with a two punch combination.
Jackson on the wrong end of a nice hook.
It looks like Justin Jackson has been cut.
Jackson is pinned up against the cage taking some big shots here. The referee is looking closely deciding whether he should stop the fight.

That's four minutes gone in the round.
Jackson misses with a combination
and Bonnano counters with a good right hand that lands right on the jaw.
Jackson is rocked!
Bonnano closes the distance looking for a takedown. Jackson stuffs it but Bonnano still has hold of him. Bonnano picks Jackson up in a fireman's lift! The crowd roars in approval. Bonnano slams Jackson to the floor and that's really hurt Jackson - he doesn't know where he is! Bonnano throws a couple of strikes and the referee steps in to save him! This one is in the books!
Ladies and gentlemen, after 4:11 of round 1, we have a winner by way of TKO (Strikes). Salvatore Bonnano!
|
|
|
|
|
|
|
|
|
|
|
|
|
|
|
|
|
|
|
|
|
|
|
| S |
C
A |
G |
S |
C
B |
G |
|
S |
C |
G |
|
energy
A | B |
|
hype
A | B |
|
pop
A | B |
|
mgr
A | B |
|
FIGHT
RATING
67% |
|
|
|
|
|
|
|
Undercard bout
|
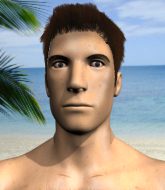
Coming up we have a welterweight MMA rules bout between Mik Vik (ranked 0 p4p, 0 weight class) and Cataphractarius Provocatores (ranked 0 p4p, 0 weight class). Vik comes to the cage accompanied by Who let the dogs out. Rumors backstage are that the fighters have been paid to keep it standing but we know that would never happen in MMA!
 |
|
 |
| 183 cm
21
175 lbs
1 - 0 - 0 |
|
188 cm
22
179 lbs
0 - 0 - 0 |
BJJ Blue Belt
Improved boxing
Granite chin |
|
BJJ White Belt
Good kicks
Powerful |
|
| |
|
Ladies and gentlemen. This fight is 3 rounds, in the welterweight division.
Introducing the fighter to my left, fighting out of the red corner.
With a record of
1 - 0 - 0, fighting out of Montreal, Mik Vik!
And introducing the fighter to my right, fighting out of the blue corner.
With a record of
0 - 0 - 0, fighting out of Montreal, Cataphractarius Provocatores!
The judges for this bout are Gregory Folan, Elvis Blanc and Yves DeLean.
The bell rings for round one and we are underway!
Vik swats away the attempt to clinch by Provocatores.
Provocatores rushes Vik and pushes him back against the cage in a clinch.
Vik successfully pulls guard.
Provocatores stopping the sweep attempt from Vik.
Vik wants to improve his position but instead Provocatores has moved into half guard.
Vik is working on a guillotine. He's managed to get to full guard and he's really squeezing tight! Provocatores is tapping! Great win for Vik!
Ladies and gentlemen, after 0:32 of round 1, we have a winner by way of Submission (Guillotine). Mik Vik!
|
|
|
|
|
|
|
|
|
|
|
|
|
|
|
|
|
|
|
|
|
|
|
| S |
C
A |
G |
S |
C
B |
G |
|
S |
C |
G |
|
energy
A | B |
|
hype
A | B |
|
pop
A | B |
|
mgr
A | B |
|
FIGHT
RATING
48% |
|
|
|
|
|
|
|
Undercard bout
|
|
|
|
Undercard bout
|
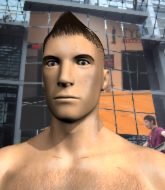
Coming up we have a lightweight MMA rules bout between Morgan Kismet (ranked 0 p4p, 0 weight class) and Matthew McPain (ranked 0 p4p, 0 weight class). Matthew McPain is the more experienced fighter, so let's see if that makes a difference tonight.
 |
|
 |
| 175 cm
18
158 lbs
0 - 0 - 0 |
|
175 cm
22
163 lbs
1 - 0 - 0 |
BJJ Blue Belt
Counter striker
Good chin |
|
BJJ Blue Belt
Basic striking
Fast |
|
| |
|
Ladies and gentlemen. This fight is 3 rounds, in the lightweight division.
Introducing the fighter to my left, fighting out of the red corner.
With a record of
0 - 0 - 0, fighting out of Montreal, Morgan Kismet!
And introducing the fighter to my right, fighting out of the blue corner.
With a record of
1 - 0 - 0, fighting out of Montreal, Matthew McPain!
The judges for this bout are Trevor Gratis, Alec Ball and Ian Loll.
The bell rings for round one and we are underway!
Kismet tries to shoot in for a takedown. He's got hold of a leg but McPain swivels and escapes.
McPain misses with a looping right.
Kismet will have to do better than that with his takedown attempts.
Kismet scores a trip takedown into side control. Nice.
Kismet is looking to finish here, going for an Americana. McPain knows the correct defense though, so he's OK.
McPain is looking to reverse the position.
Kismet is trying to land an Americana. He has the arm isolated but McPain is keeping cool and he's avoided the danger for now.
McPain manages to land a sweep and he's now on top! Lovely Jiu Jitsu!
McPain prevents Kismet from improving his position.
McPain wants to work for an arm triangle but Kismet is really keeping half guard well and defending the submission attempt.
Kismet punching from the bottom.
McPain lands with a punch from half guard.
McPain seems to be taking a bit of a break to think of his next move. He lands a short punch in the meantime.
McPain moves into full mount! Kismet won't be happy about that!
Kismet keeping his composure momentarily, calmly looking to get back to half guard.
That's one minute gone in the round.
McPain fails to take his opponent's back.
The ref warns both fighters not to hold the cage as they work up against the meshing.
Kismet keeping his composure momentarily, calmly looking to get back to half guard.
McPain is thinking about an arm triangle here, looking to tighten it up before moving to side control. Kismet can see it coming though and defends well with a couple of strikes to the head and some good arm positioning.
Kismet tries to reverse the position but McPain maintains control.
McPain controlling from the full mount.
McPain jumps to side control looking for an arm triangle but Kismet manages to avoid the submission attempt.
Kismet tries to improve position but can't.
McPain tries to advance to mount but Kismet denies him.
The fighters are pressed up against the cage, both looking to find a bit of space to work.
Kismet is trying to get back to half guard. He's pushing on McPain's leg. He's managed it. Nice work.
Kismet is breathing heavily.
Kismet is looking to regain full guard. Not this time though.
McPain wants to pass to mount but Kismet is defending the position.
That's two minutes gone in the round.
The crowd are showing their displeasure at the lack of action as loud boos ring out around the arena.
Kismet wants to control but McPain is keeping busy.
Kismet looking for submissions off his back.
McPain is trying to work for a kimura but Kismet is defending well.
McPain prevents Kismet from improving his position.
McPain looking for a kimura but he'll have to free his other leg if he wants to finish that. Perhaps he's just using it as a distraction technique.
Kismet regains full guard. Nicely done.
Kismet looking for a guillotine here but McPain defends easily.
McPain drops back for a leg! It's a sloppy attempt though and McPain jumps back into guard quickly, to retain the dominant position.
That's three minutes gone in the round.
McPain passes into half guard.
McPain is trying for a guillotine from the top but the pressure isn't in the right place so Kismet is just riding it out for now. McPain eventually gives up the hold.
McPain is trying for a kimura here. Kismet looks like he's in a lot of pain... and he's tapping out! McPain wins by kimura!
Ladies and gentlemen, after 3:36 of round 1, we have a winner by way of Submission (Kimura). Matthew McPain!
|
|
|
|
|
|
|
|
|
|
|
|
|
|
|
|
|
|
|
|
|
|
|
| S |
C
A |
G |
S |
C
B |
G |
|
S |
C |
G |
|
energy
A | B |
|
hype
A | B |
|
pop
A | B |
|
mgr
A | B |
|
FIGHT
RATING
61% |
|
|
|
|
|
|
|
Undercard bout
|
Coming up we have a featherweight MMA rules bout between Bongani Jengo (ranked 0 p4p, 0 weight class) and Herbert West (ranked 0 p4p, 0 weight class). Jengo's ring entrance music is that housewives' favourite, Même Pas Fatigué. Herbert West acknowledges the crowd's support as he enters the cage.
 |
|
 |
| 169 cm
18
152 lbs
0 - 1 - 0 |
|
172 cm
20
153 lbs
2 - 0 - 0 |
BJJ Blue Belt
Counter striker
Good in bed |
|
BJJ Blue Belt
Basic striking
Very confident |
|
| |
|
Ladies and gentlemen. This fight is 3 rounds, in the featherweight division.
Introducing the fighter to my left, fighting out of the red corner.
With a record of
0 - 1 - 0, fighting out of Montreal, Bongani Jengo!
And introducing the fighter to my right, fighting out of the blue corner.
With a record of
2 - 0 - 0, fighting out of Montreal, Herbert West!
The judges for this bout are Yves DeLean, Ian Loll and Alec Ball.
The bell rings for round one and we are underway!
West shoots in for a takedown and gets it.
West is nestled in close to Jengo, controlling him well. He's worked in a nice elbow to the side of the head as well, for good measure.
West is figuring out what he wants to do next.
West throwing shots but Jengo is blocking nicely.
Jengo punching from the bottom.
West is looking for a kimura here.
West looking for a kimura but he'll have to free his other leg if he wants to finish that. Perhaps he's just using it as a distraction technique.
Jengo tries to get to full guard but West has control of the leg.
That's one minute gone in the round.
Jengo is trying to control but West passes into side control!
Jengo can't do much from the bottom here.
West throws a knee to the body but it doesn't do much damage.
The referee has ruled that neither fighter is active enough on the ground and has stood them back up.
West looking for a takedown here - he's got it.
West stands up and looks to throw the legs aside to pass to side control. Jengo swivels though and keeps the full guard.
Jengo trying to control the position.
West wants to control from the top but Jengo keeps moving.
West pushing down on Jengo's thigh, trying to pass to half guard. He's managed it... Nice work.
Jengo looks like he's trying to stand up.
Jengo actively working from the bottom here.
That's two minutes gone in the round.
The fighters are starting to perspire pretty heavily.
West wants to pass to mount but Jengo is defending the position.
Jengo is looking to regain full guard. Not this time though.
It looks like we're going to have a standup here. Neither fight is doing enough on the ground.
West moves out of range as Jengo strikes.
West tries for a takedown but Jengo sees it coming a mile off and avoids it easily.
West doesn't manage to clinch there - Jengo circles away.
Good standup being displayed there by Jengo as he connects with a hook.
A big left from Jengo misses.
Jengo throws a lazy right hand but West sees it coming a mile off and sidesteps it easily.
West defending well as Jengo loads up on a big left hand.
Jengo lunges in with an uppercut that skims his opponent's chin.
West bobs and weaves into range and then changes levels and scores with a nice takedown into side control.
Jengo is trying to get back to his feet.
Jengo is looking for a sweep.
West landing a few strikes.
That's three minutes gone in the round.
West tries for a kimura. Not really close to a finish though.
West looks gassed!
West thinks about going for a far side armbar but bails out and retains the dominant position instead.
West is looking to finish here, going for an Americana. Jengo knows the correct defense though, so he's OK.
Jengo gets back to half guard.
West wants to pass to mount but Jengo is defending the position.
West seems to be working for a kimura but Jengo defends the submission attempt.
Jengo on the receiving end of some nice ground and pound.
The ref warns both fighters not to hold the cage as they work up against the meshing.
That's four minutes gone in the round.
The crowd are starting to boo a lack of action.
West is looking for the mount but instead finds himself back in full guard.
West connects with a couple of short punches.
West tries to free his leg and advance position but Jengo is retaining full guard.
West content to strike from guard, landing some decent shots.
Jengo tries to land a sweep but no joy.
West trying to control the position from guard on top but Jengo is wriggling around, looking for whatever he can.
West has gone for a leg lock! Jengo slips out almost immediately though and dives into West's guard.
Jengo stopping the sweep attempt from West.
West keeping moving, preventing Jengo from controlling successfully.
West wants to sweep here but Jengo controlling him for the moment.
And thats the end of the round the fighters go back to their corners.
Herbert West dominated that round.
The referee calls time. The cornermen exit stage left and we're back to business.

West moves out of range of the body kick from Jengo.
A really sloppy takedown attempt there from West.
Jengo scores with the left hand. West knows he should have avoided that one.
Jengo misses with a straight right.
Jengo lands a glancing blow to the side of West's head.
Jengo misses with a looping right.
Jengo connects with a good right hand that stumbles West. West circles away out of range and recomposes himself.
West wants to clinch.
Jengo looks to land a combination but West avoids it well.
West shoots in for a takedown and gets it. Oh and he's advanced to full mount straight away.
West swings around for an armbar but it's a sloppy attempt and Jengo is now in West's guard. A big mistake from West there, giving up the dominant position!
West keeping moving, preventing Jengo from controlling successfully.
That's one minute gone in the round.
West bucks up whilst keeping hold of a body lock, managing to reverse the position. Now he's in top in Jengo's guard.
West is breathing heavily.
Jengo looking to sweep here. No luck so far.
Jengo looking for submissions off his back, moving his hips, looking for an opening.
West pushes down on Jengo's leg and manages to get into half guard.
Jengo moves into full guard.
There's a bit of a scramble here and now Jengo is on top in guard.
West has a loose triangle. He'll be looking to tighten that up but Jengo can see exactly what he's planning and manages to posture up and free himself.
Jengo trying to control but West is working from the bottom.
West manages to sweep nicely, so he's now on top. Jengo manages to get himself to full guard.
That's two minutes gone in the round.
West is sitting in guard, working some ground and pound.
West drops back looking for a leg! Jengo is in trouble here! The fighters roll with the hold and Jengo manages to kick West off! West jumps back into Jengo's guard.
West passes easily into side control. Nice work.
West is putting a hurting on Jengo here, landing some big shots from side control.
You can see the frustration on Jengo's face, being in this tough position on the bottom.
Jengo sneaks a leg under to get back to half guard.
Herbert West has got the better of the ground game so far.
Jengo wants to get back to his feet.
West is tying to control. Jengo wants to improve his position but can't escape this time.
Jengo wants to improve his position but West is controlling well.
Jengo throws a strike from the bottom that misses.
That's three minutes gone in the round.
West is trying a forearm choke
I don't think that's going to do much at this level of the game.
Well, the referee has seen enough. Neither fighter is active enough on the ground so he's stood them back up.
Jengo misses with a two punch combination.
Jengo throws a right and a left that both miss.
Jengo throws a leg kick but West moved away.
Jengo jabs West right on the nose. West blinks but takes it well.
Jengo misses with a double jab.
Jengo throws a head kick that misses.
West showing good head movement there, avoiding the strikes from Jengo.
West shoots in for a takedown. "I don't think so" says Jengo as he avoids it easily.
Jengo swings wildly with a right hand that was never going to find it's target.
Jengo throws a hook to the side of West's head but West sees it coming and ducks under it beautifully.
West has a takedown stuffed.
Bongani Jengo has stuffed three takedown attempts in the round now. That's going to take a lot out of Herbert West.
That's four minutes gone in the round.
The crowd are starting to boo a lack of action.
West tries to clinch but is not successful on this occasion.
Jengo keeps the fight on the outside.
West shoots in from a long way out. He's driving through with the takedown attempt and he eventually gets it, landing in Jengo's guard.
West stops Jengo from standing up.
Jengo lands a beautiful switch and he's in full mount! That could spell trouble for West!
Jengo fails to advance to West's back.
Jengo goes for an armbar but West turns quickly into his guard - lovely anticipation from West.
West postures up and scores with a shot to the body and a follow up elbow to the head.
West passes into half guard.
Jengo is looking to improve his position.
And thats the end of the round the fighters go back to their corners.
Herbert West showed his class in that round. I'd imagine he'll take it on all the scorecards.
Well, the break between rounds is over. Let's get back to the scrappin! This is the final round!

West shoots in for a takedown and gets it.
Jengo trying to hold on to West's head to control him but West postures up.
Jengo pushes West off looking to stand but West dives back in and keeps control.
Jengo holds on for dear life, maintaining half guard for now.
Jengo is trying to stand.
Jengo wants to improve his position but West is controlling well.
West is thwarting Jengo's attempts to control the position.
Jengo manages to get to full guard.
Jengo manages to sweep nicely, so he's now on top. West manages to get himself to full guard.
West takes a big intake of breath there - he's definitely tired.
That's one minute gone in the round.
West looking to hit a scissor sweep but Jengo is one step ahead there.
Jengo trying to control the position from guard on top but West is wriggling around, looking for whatever he can.
West looking for submissions from the bottom but instead Jengo passes into side control.
The fighters are pressed up against the cage, both looking to find a bit of space to work.
Jengo tries for a kimura. Not really close to a finish though.
Jengo tries for a kimura but West is defending well.
West tries to buck Jengo off but Jengo is having none of it.
That's two minutes gone in the round.
Jengo tries for an arm triangle. That looks pretty tight to me. Is this one over!?! Possibly, maybe, no Jengo has let go of the choke. Obviously it wasn't as tight as we thought!

Jengo stands up and beckons West to his feet.
West shakes his hands off, looking to compose himself, but takes a jab to the jaw whilst he does it.
Jengo misses with a series of wild punches.
Jengo keeps his opponent at a distance with a nice jab.
West tries to clinch up but Jengo circles away and keeps his distance.
West takes a shot right to the bread basket.
Jengo misses with a hook.
Jengo throws a hook to the side of West's head but West sees it coming and ducks under it beautifully.
A leg kick checked by West.
Jengo misses with the combination.
That's three minutes gone in the round.
Jengo swats away the attempt to clinch by West.
West decides to change it up a bit and drives through with a nice takedown into half guard.
West is working for a submission of some sort.
West is keen to just control but Jengo is a slippery customer.
Jengo punching from the bottom.
Jengo wants to control but West passes into side.
Jengo tries to buck West off but West is having none of it.
Jengo is trying to get back to half guard. He's pushing on West's leg. He's managed it. Nice work.
Jengo tries to get to full guard but West has control of the leg.
West looking to pass the half guard. Not this time.
That's four minutes gone in the round.
West is scoring with some nice ground and pound from the dominant position.
Jengo is not content to let West control the position.
Jengo has no desire to be mounted, so is trying to control. West is working away from the top position though.
Jengo actively working from the bottom here.
The referee has ruled that neither fighter is active enough on the ground and has stood them back up.
West looks for a takedown but Jengo sprawls well.
Jengo throws a two punch combo that lands nicely.
Bongani Jengo has stepped it up - he knows he needs a finish here!
West shoots in for a takedown! He's got it and he's managed to land in full mount! That's better than West was expecting from the takedown attempt, I'm sure!
Jengo manages to regain half guard. Good work.
Jengo punching from the bottom.
And that's the end of the fight!
Bongani Jengo showed his dominance in that final round.
I think West has won this one but let's see whether the judges agree with me. Over to the ring announcer for the scorecards.
Ladies and gentlemen, after 3 rounds of action, we go to the scorecards for a decision.
Judge Yves DeLean scores the fight 28:29
Judge Ian Loll scores the fight 28:29
Judge Alec Ball scores the fight 28:29
In favor of your winner, by unanimous decision... Herbert West!
|
|
|
|
|
|
|
|
|
|
|
|
|
|
|
|
|
|
|
|
|
|
|
| S |
C
A |
G |
S |
C
B |
G |
|
S |
C |
G |
|
energy
A | B |
|
hype
A | B |
|
pop
A | B |
|
mgr
A | B |
|
FIGHT
RATING
61% |
|
|
|
|
|
|
|
Co-main event
|
Coming up we have a bantamweight MMA rules bout between Biggie Smalls (ranked 0 p4p, 0 weight class) and Tyson Travis (ranked 0 p4p, 0 weight class). Travis has chosen Represent - Hed PE as his entrance music. Tyson Travis has the power to score a knockout today if he connects clean with Biggie Smalls's chin.
 |
|
 |
| 175 cm
22
140 lbs
1 - 0 - 0 |
|
184 cm
20
130 lbs
1 - 1 - 0 |
Good wrestling
Counter striker
Cuts easily |
|
BJJ Blue Belt
Decent boxing
Tends to cut |
|
| |
|
Ladies and gentlemen. This fight is 3 rounds, in the bantamweight division.
Introducing the fighter to my left, fighting out of the red corner.
With a record of
1 - 0 - 0, fighting out of Montreal, Biggie Smalls!
And introducing the fighter to my right, fighting out of the blue corner.
With a record of
1 - 1 - 0, fighting out of Montreal, Tyson Travis!
The judges for this bout are Steve Smith, Robert Douchet and Elvis Blanc.
The bell rings for round one and we are underway!
Smalls avoids the clinch attempt nicely.
Travis shoots in for a takedown but doesn't get it.
Travis throws a right and a left that Smalls avoids nicely.
Travis darts in and out, connecting with a jab.
Travis doesn't manage to clinch there - Smalls circles away.
A combination from Travis does no damage.
Smalls tries to keep at a distance but Travis has taken the fight into the clinch.
Travis lands an uppercut.
Travis can't break the clinch.
Stalling in the clinch from Travis.
Smalls keeps control of Travis as he tries to wriggle out of the double underhooks.
Travis breaks the clinch and we return to the middle of the mat.
Travis swinging wilding here.
Smalls moves his head to the side to avoid a jab but walks straight into a cross.
Travis wants to clinch up but Smalls keeps it at a distance.
Smalls rushes in with a sloppy looking punch
and Travis counters with a quick right hand to the jaw.
Travis throws a body kick that digs right into the meat.
Travis moves into range and lands a nice leg kick.
That's one minute gone in the round.
Travis fails to land with the punch combination there - jab, cross, hook, miss, miss, miss.
Travis tries to clinch but is not successful on this occasion.
Smalls keeps the fight on the outside.
Travis fails in his attempt to clinch.
Smalls fails miserably with a takedown attempt.
Travis is looking to clinch but Smalls is avoiding it.
Travis tries to clinch up but Smalls circles away and keeps his distance.
Smalls scores a trip takedown into side control. Nice.
Travis takes an elbow right on the bridge of the nose and winces in pain.
Travis bucks up and tries to throw Smalls off but instead Smalls has got his back!
Smalls has the hooks sunk in and you can see the will to fight slowly draining out of Travis's body.
Smalls knows he needs to get back to his feet asap. He's simply no match for Travis on the ground.
Smalls is punishing Travis with strikes - can he finish him?!
That's two minutes gone in the round.
Travis turns into Smalls and is now in his guard.
Travis thows a big elbow that misses.
The ref warns both fighters not to hold the cage as they work up against the meshing.
Travis slips nicely into half guard.
Travis throwing shots but Smalls is blocking nicely.
Travis seems to have lost interest with the ground game and is thinking about standing back up.
Smalls manages to get to full guard.
Travis tries to stand but Smalls is controlling from the bottom.
Travis looks gassed!
Smalls utilising some decent striking defenses from the guard, preventing the ground and pound.
Travis is a painfully thin specimen of a man. You do wonder whether a good body kick would snap him clean in two.
Travis preventing the sweep.
Travis has decided he wants to stand but the closed guard of Smalls is proving hard to escape from.
Travis loading up with the ground and pound but he's missing more than he's landing in this flurry.
That's three minutes gone in the round.
It looks like we're going to have a standup here. Neither fight is doing enough on the ground.
Travis throws a one two combo.
Travis throws a good cross that connects.
Travis is looking to clinch.
Travis has managed to clinch.
Smalls drops down for a takedown but doesn't get it.
Travis is pressed up against the cage. Smalls has hold of a leg and is looking to drag Travis down to the mat. Travis avoids the attempt though and has circled away. We're back to striking at a distance.
That's three failed takedown attempts in the round for Biggie Smalls. That's going to take a lot out of him.
Travis gets caught flat footed, as Smalls shoots in with a quick takedown into guard.
Travis is looking to stand up but Smalls isn't so interested in that idea.
Travis bucks up whilst keeping hold of a body lock, managing to reverse the position. Now he's in top in Smalls's guard.
Travis wants to control from the top but Smalls keeps moving.
That's four minutes gone in the round.
The fighters are starting to get a bit slippery now, which will make submissions a bit more difficult.
Travis in full guard, throwing the ground and pound. No damage this time.
Travis wants to stand but Smalls is controlling his posture from full guard.
Travis scoring with punches to the head and body.
Smalls looking to hit a scissor sweep but Travis is one step ahead there.
Travis trying to stand up but can't free himself from Smalls's guard.
Travis decides to stand up and beckons his opponent to follow.
The fight stays on the outside here - Travis looks like he's thinking about clinching though.
And thats the end of the round the fighters go back to their corners.
A close round but Tyson Travis will probably get the nod.
The minute break is over - no more time for sponges and pep talks - back to the action!
Travis wants to clinch.
Travis throws a series of punches but Smalls moves out of range.
Travis tries to clinch there but Smalls circles away.
Travis tries to clinch there but Smalls circles away.
Travis wants to clinch up but Smalls keeps it at a distance.
A nice leg kick lands there from Travis.
Travis doesn't manage to clinch there - Smalls circles away.
Smalls keeps the fight on the outside.
Smalls fails with an attempt to clinch.
We've had a slow start to the round here - hopefully the action picks up.
Smalls takes a shot to the body in his stride.
Travis moves in looking to clinch but Smalls pushes him off.
Smalls tries to clinch but Travis is having none of it.
Travis doesn't succeed with the takedown
and Smalls counters with a takedown into side control.
Travis is breathing heavily.
Travis tries to improve position but can't.
That's one minute gone in the round.
Travis is trying to get back to his feet.
Travis is trying to get back to half guard.
Smalls in side control, just content to control the action for now.
Smalls tries to advance to mount but Travis denies him.
Travis has the superior BJJ but he's also working some ground strikes into his gameplan.
Travis wings away with a couple of strikes but they don't land.
That's two minutes gone in the round.
A lull in the action here being met with boos from the crowd.
Smalls controls the position.
Smalls's ground tactics aren't going to win him many fans. Let's hope he's got fireworks for us if he gets back to his feet because he's not doing much on the ground.
Smalls has had enough of the ground for now and decides to stand.
Travis looks to land a combination but Smalls avoids it well.
Smalls circles away from the clinch attempt
and Smalls counters with a shoot takedown. Travis fights it but they end up in guard.
That's three minutes gone in the round.
Travis looking for a sweep. Not yet Travis, not yet.
Travis wants to stand and escape but Smalls is having none of it.
Travis wants to sweep but no luck.
Travis pushes Smalls off and gets back to his feet.
Travis fails in his attempt to clinch.
Smalls fails miserably with a takedown attempt.
Travis has Smalls up against the cage in a clinch.
Travis escapes the clinch and we're back to striking.
Travis tries to clinch but Smalls is having none of it.
Travis lands a jab. Then a cross. Then finally a nice hook to the body. Good work there by Travis.
Travis fails to land the takedown.
Travis fails in his attempt to clinch.
Travis works over Smalls's head and body with a nice combination.
Biggie Smalls is looking to throw some combinations by the looks of things.
That's four minutes gone in the round.
Smalls cracks Travis with a good shot that sees him stumbling back into the cage.
Travis scores with a nice one two combo and darts back out of range to avoid anything coming in the opposite direction.
Travis throws a nice inside leg kick.
Travis clinches but Smalls breaks the clinch
and Smalls counters with a nice double leg into half guard.
This has been an exciting period of action!
Travis misses with some strikes from the bottom.
Travis is trying to maintain the position but Smalls is very close to passing his half guard.
The referee calls for the fighters to work.
As the round comes to an end the crowd are showing their appreciation for a great round of action.
Travis wants to get back to full guard.
Smalls frees up his trapped foot and advances to mount.
And thats the end of the round the fighters go back to their corners.
Biggie Smalls dominated that second round.
That's the end of the round. The referee orders the cornermen out of the cage so we can get back down to business. This is the final round!
Smalls fails with a takedown attempt from distance.
Smalls avoids the clinch attempt nicely.
Smalls circles away from the clinch attempt.
Travis moves in looking to clinch but Smalls pushes him off.
Travis gets to the clinch - let's see what his plan is here.
A nice right hand lands inside from Travis.
Smalls gets underhooks to prevent Travis's takedown attempt.
Smalls can't get the takedown.
Smalls has a body lock and is looking for a takedown. Travis is bouncing around trying to prevent the takedown and somehow he has indeed managed to stay on his feet.
That's three failed takedown attempts in the round for Biggie Smalls. That's going to take a lot out of him.
A nice right hand lands inside from Travis.
Travis can't break the clinch.
Travis gets through Smalls's defenses to land a nice punch to the side of the head.
Travis missing with knees to the body.
We've had a slow start to the round here - hopefully the action picks up.
Smalls misses with a hook from the clinch.
Smalls is trying to slow down the pace in the clinch, to catch his breath.
Travis looking to stall.
Travis takes a big intake of breath there - he's definitely tired.
Smalls keeps control of Travis as he tries to wriggle out of the double underhooks.
Travis connects with a knee to the head.
Smalls is working for a takedown up against the cage. He can't get it on this occasion though.
Travis drags the fight down to the ground.
That's one minute gone in the round.
Travis doesn't do any damage with a couple of strikes from the bottom.
Smalls is taking a break and basically stalling. The referee will not allow him to do that for long.
Travis keeping full guard, as Smalls tries to pass.
Smalls won't allow Travis to sweep him here.
The fighters are pressed up against the cage, both looking to find a bit of space to work.
Travis wants to stand but Smalls is controlling the position.
Smalls is in close to Travis's body, working some short punches and elbows.
Travis wants to stand up but Smalls is controlling him.
The referee has ruled that neither fighter is active enough on the ground and has stood them back up.
Smalls throws a sloppy body shot
and Travis counters with a straight right hand.
Travis clinches up with Smalls and pushes him back against the cage.
Travis is pressed up against the cage. Smalls has hold of a leg and is looking to drag Travis down to the mat. Travis avoids the attempt though and has circled away. We're back to striking at a distance.
That's two minutes gone in the round.
Travis looking to shoot here. He's gone for it and he's landed a takedown into mount! Oh, that's bad for Smalls!
Travis lands with some vicious ground and pound - can Smalls hang on?
Smalls is rocked!
It looks like Biggie Smalls has been cut.
Travis scoring with strikes but Smalls is staying in there.
Oh Smalls is still all over the place! His legs are completely gone! Will he be able to recover?!!
Travis is working to isolate an arm here. It's a choreographed submission attempt but he's gone for it anyway - and he's got it! Travis extends the arm and Smalls is forced to tap!
Ladies and gentlemen, after 2:36 of round 3, we have a winner by way of Submission (Armbar). Tyson Travis!
|
|
|
|
|
|
|
|
|
|
|
|
|
|
|
|
|
|
|
|
|
|
|
| S |
C
A |
G |
S |
C
B |
G |
|
S |
C |
G |
|
energy
A | B |
|
hype
A | B |
|
pop
A | B |
|
mgr
A | B |
|
FIGHT
RATING
100% |
|
|
|
|
|
|
|
Main event
|
Coming up we have a middleweight MMA rules bout between Yuyu Hakusho (ranked 0 p4p, 0 weight class) and Harry Balzonya (ranked 0 p4p, 0 weight class). Harry Balzonya struggled to make weight for this fight. He only made it down to 187.8lbs at the first attempt and had to take the additional two hours to make the official bout weight. Let's see how much it's taken out of him. Over to our ring announcer for the fighter introductions!
 |
|
 |
| 186 cm
22
184 lbs
3 - 0 - 0 |
|
192 cm
22
193 lbs
0 - 1 - 0 |
BJJ Blue Belt
Basic striking
Big heart |
|
BJJ Blue Belt
Brawler
Likes ground |
|
| |
|
Ladies and gentlemen. This fight is 3 rounds, in the middleweight division.
Introducing the fighter to my left, fighting out of the red corner.
With a record of
3 - 0 - 0, fighting out of Montreal, Yuyu Hakusho!
And introducing the fighter to my right, fighting out of the blue corner.
With a record of
0 - 1 - 0, fighting out of Montreal, Harry Balzonya!
The judges for this bout are Elvis Blanc, William Peck and Dillan Fox.
The bell rings for round one and we are underway!
Balzonya takes a shot right to the liver - Bas would have been proud of that punch.
Balzonya shoots in for a takedown - he's clinched up with Hakusho but Hakusho pushes him off and we're back to square one.
Balzonya looks gassed!
Hakusho swings away but doesn't land with a series of punches.
Hakusho lands a lovely overhand right.
Balzonya steps to the side to avoid the strikes from Hakusho.
Hakusho gets to the clinch - let's see what his plan is here.
Balzonya trying to stall but Hakusho improves his position.
Hakusho tries to land a knee to the head but misses.
Balzonya lands a nice looking hook to the body, against the cage.
Balzonya tries to break the clinch but Hakusho is controlling the position.
Balzonya trying to stall but Hakusho improves his position.
Balzonya blocks a couple of punches on the inside.
Hakusho goes for a takedown attempt but Balzonya pushes him away and we're back to fighting at a distance.
Hakusho has taken the fight to the clinch.
Hakusho connects with a knee to the head.
Hakusho breaks the clinch and we return to the middle of the mat.
Hakusho clinches with his opponent.
Hakusho breaks the clinch.
Balzonya closes this distance looking for a takedown but Hakusho circles away.
Balzonya takes a solid shot to the body. That one hurt him but he's trying not to show it.
Hakusho darts in and clinches Balzonya up against the cage.
That's one minute gone in the round.
Hakusho misses with some punches.
A short left from Hakusho.
Balzonya gets double underhooks to prevent a takedown attempt from Hakusho.
The referee calls for Balzonya to work.
Balzonya looking to slow down the pace here.
Hakusho misses with a knee to the head.
Balzonya is trying to trip Hakusho. He has hold of a leg but Hakusho is hopping around, keeping his balance for the moment. Balzonya persists though and gets the takedown into guard.
Hakusho controls Balzonya momentarily but Balzonya frees himself.
There's a bit of a scramble here and now Hakusho is on top in guard.
Hakusho preventing the sweep.
Balzonya can't keep his opponent in guard - Hakusho advances to half guard, no doubt looking to mount.
Hakusho missing with some ground and pound from the half guard.
Hakusho works his way into full mount!
The ref warns both fighters not to hold the cage as they work up against the meshing.
Hakusho looking to control but Balzonya is working nicely, looking to advance position himself.
That's two minutes gone in the round.
Hakusho is working on an americana here. Ooh, that looks pretty nasty! Nope, Balzonya has managed to escape the submission attempt.
Balzonya tries to reverse the position but Hakusho maintains control.
Hakusho trying to control but he's not successful this time.
Balzonya sneaks a leg under to get to half guard.
Balzonya trying to control but Hakusho postures up.
Hakusho wants to free his trapped foot but Balzonya is holding on for dear life with his legs.
Balzonya really doesn't want to stay on the ground with Hakusho. If he can't get it back to his feet, it's only a matter of time before he'll be tapping out.
Hakusho wants to lay and pray for a moment but Balzonya keeps working.
Balzonya is looking to control Hakusho's leg but it's slowly edging free. Can Balzonya avoid being mounted?
The fighters are pressed up against the cage, both looking to find a bit of space to work.
That's three minutes gone in the round.
Hakusho is working for submissions here but there's nothing on.
Hakusho is looking for a kimura but Balzonya is holding onto that half guard position, so it's hard for Hakusho to get the leverage.
Hakusho is trying to control the action in half guard but Balzonya is working away on the bottom, looking perhaps to get back to full guard.
Hakusho trying to mount his opponent but Balzonya defends it.
Well, the referee has seen enough. Neither fighter is active enough on the ground so he's stood them back up.
Hakusho lands a nice looking body shot.
The fight moves into the clinch position.
Balzonya swings away with an uppercut that misses.
Hakusho jumps into guard, dragging Balzonya to the mat.
Hakusho is actively looking for submissions from his back. He's worked himself a little space on the bottom and seems to be going for a triangle. No, he's switched into an armbar! That was slick! Balzonya rolls with it to try and escape but Hakusho cranks on the arm and Balzonya is forced to tap out! This one is aaaaaaaaall over!
Ladies and gentlemen, after 3:58 of round 1, we have a winner by way of Submission (Armbar). Yuyu Hakusho!
|
|
|
|
|
|
|
|
|
|
|
|
|
|
|
|
|
|
|
|
|
|
|
| S |
C
A |
G |
S |
C
B |
G |
|
S |
C |
G |
|
energy
A | B |
|
hype
A | B |
|
pop
A | B |
|
mgr
A | B |
|
FIGHT
RATING
54% |
|
|
|
|
|
|
|
|
|
|

