 |
Infliction Ultimate #23 PBP Commentary |
Undercard bout
|
|
|
|
Undercard bout
|
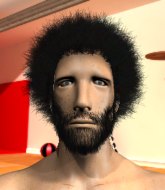
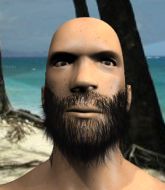
Coming up we have a light heavyweight MMA rules bout between Lyoto Tachia (ranked 0 p4p, 0 weight class) and Milton Howzer (ranked 0 p4p, 0 weight class). Lyoto Tachia could well score a knockout today. He has the power to get to Milton Howzer's chin.
 |
|
 |
| 186 cm
21
217 lbs
1 - 0 - 0 |
|
225 cm
22
205 lbs
1 - 0 - 0 |
BJJ Blue Belt
Counter striker
Self confident |
|
BJJ Blue Belt
Solid Muay Thai
Determined |
|
| |
|
Ladies and gentlemen. This fight is 3 rounds, in the light heavyweight division.
Introducing the fighter to my left, fighting out of the red corner.
With a record of
1 - 0 - 0, fighting out of Sydney, Lyoto Tachia!
And introducing the fighter to my right, fighting out of the blue corner.
With a record of
1 - 0 - 0, fighting out of Sydney, Milton Howzer!
The judges for this bout are John Mangel, Winston Howard and Steve Erwin.

The bell rings for round one and we are underway!
Howzer changes levels and looks for a double leg takedown. Tachia tries to avoid it but Howzer manages to keep hold of a leg and drag Tachia to the ground. Tachia escapes though and pops straight back up to his feet.
Tachia throws a wild combination but nothing lands.
Tachia throws an uppercut from half a mile away. Howzer sees it coming and avoids it easily.
Howzer fails miserably with a takedown attempt.
Tachia circles away from the clinch attempt.
Tachia attempts a low kick but it misses it's target.

Howzer clinches with his opponent.
Howzer gets double underhooks to prevent a takedown attempt from Tachia.
Howzer is looking for a takedown up against the cage. Tachia gets underhooks though and prevents the takedown attempt.
Lyoto Tachia has stuffed three takedown attempts in the round now. That's going to take a lot out of Milton Howzer.
We've had a slow start to the round here - hopefully the action picks up.
Howzer misses with a hook from the clinch.

Tachia jumps guard.

Tachia manages to escape and get back to his feet.
Tachia circles away from the clinch attempt.
Howzer shoots for a double leg takedown but Tachia sprawls well. He's pushed Howzer's face into the mat and manages to get back to his feet relatively easily.

That's one minute gone in the round.
Tachia misses with a body shot. Nice footwork from Howzer.
Howzer misses with a jab, cross combination.
Howzer avoids a kick to the body.
Tachia rushes Howzer and pushes him back against the cage in a clinch.
Tachia jumps guard and drags Howzer to the mat. He's obviously going to be looking for submissions off his back.
Tachia seems keen to control Howzer's posture.
Howzer sneaks a leg through and gets to half guard. That was like a knife through butter how easily he passed Tachia's guard.
Tachia kicks Howzer off and gets back to his feet.
Howzer wants to clinch but Tachia slips to the side
and Tachia counters with a lovely straight right hand!
Tachia throws a hard body shot but it just misses.
Howzer misses with a takedown attempt
and Tachia connects with a straight left hand counter down the middle.

That's two minutes gone in the round.
Tachia clinches up with Howzer and pushes him back against the cage.
Howzer is a painfully thin specimen of a man. You do wonder whether a good body kick would snap him clean in two.
Tachia wants a takedown.
Tachia tries for a takedown but Howzer manages to get underhooks.
Tachia has hold of a leg and is looking for a trip takedown. Howzer avoids it nicely though and we remain in the clinch.
Tachia gets double underhooks to prevent a takedown attempt from Howzer.
Howzer wants to break free but Tachia has control.
Howzer wants to get back to striking at distance but Tachia won't allow it.
Tachia tries to pull guard but can't drag his opponent to the mat. Howzer just stands there and leans against the cage.
Tachia tries for a takedown. No joy.
Tachia tries to pull guard but Howzer holds him up against the cage and eventually Tachia drops back down to his feet.
Tachia is breathing heavily.
Howzer working on landing some head shots here - that one got through nicely.
Tachia is working for a takedown up against the cage. He can't get it on this occasion though.
Tachia tries to pull guard but can't drag his opponent to the mat. Howzer just stands there and leans against the cage.
Tachia is trying to trip Howzer. He has hold of a leg but Howzer is hopping around, keeping his balance for the moment. Tachia persists though and gets the takedown into guard.
Tachia preventing the sweep.

That's three minutes gone in the round.

Howzer has managed to work for a loose triangle. I think Tachia should be able to defend this one pretty easily though. Oh, Howzer has tightened it up now! Tachia should have reacted faster there - he's in big trouble and yes, he's tapped out! This one is all over!
Ladies and gentlemen, after 3:21 of round 1, we have a winner by way of Submission (Triangle). Milton Howzer!
|
|
|
|
|
|
|
|
|
|
|
|
|
|
|
|
|
|
|
|
|
|
|
| S |
C
A |
G |
S |
C
B |
G |
|
S |
C |
G |
|
energy
A | B |
|
hype
A | B |
|
pop
A | B |
|
mgr
A | B |
|
FIGHT
RATING
0% |
|
|
|
|
|
|
|
Undercard bout
|
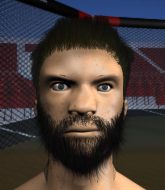
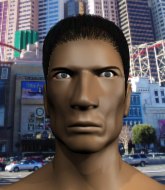
Coming up we have a middleweight MMA rules bout between Magic Johnson (ranked 0 p4p, 0 weight class) and Luke Skywalker (ranked 0 p4p, 0 weight class). Luke Skywalker is the more experienced fighter, so let's see if that makes a difference tonight.
 |
|
 |
| 183 cm
22
185 lbs
1 - 1 - 0 |
|
187 cm
20
195 lbs
1 - 3 - 0 |
BJJ Blue Belt
Basic striking
Big heart |
|
BJJ Blue Belt
Brawler
Granite chin |
|
| |
|
Ladies and gentlemen. This fight is 3 rounds, in the middleweight division.
Introducing the fighter to my left, fighting out of the red corner.
With a record of
1 - 1 - 0, fighting out of Sydney, Magic Johnson!
And introducing the fighter to my right, fighting out of the blue corner.
With a record of
1 - 3 - 0, fighting out of Sydney, Luke Skywalker!
The judges for this bout are Winston Howard, Damien Edna and Steve Erwin.
The bell rings for round one and we are underway!
Johnson is looking to clinch.
Johnson throws a head kick that connects with a bit of head and a bit of hand.

It looks like Luke Skywalker has been cut.
Johnson is looking to clinch but Skywalker is avoiding it.
A head kick misses from Johnson.
Johnson misses with a half-hearted attempt at a head kick.
Skywalker misses with a body shot.
Skywalker keeps the fight on the outside.
Johnson throws a head kick that Skywalker semi-blocks.
Johnson showing good head movement there, avoiding the strikes from Skywalker.
Skywalker changes levels and looks for a double leg takedown. Johnson tries to avoid it but Skywalker manages to keep hold of a leg and drag Johnson to the ground. Johnson escapes though and pops straight back up to his feet.
Johnson wants to clinch up but Skywalker keeps it at a distance.
Skywalker shoots in looking for a takedown. Johnson tries to sprawl out of it but Skywalker keeps driving through. The fighters are pinned against the cage. Johnson manages to get underhooks and after a bit of a struggle, circles away and we're back to standing.
A head kick misses from Johnson.
Johnson tries a switch kick but it misses it's target.
Johnson gets to the clinch - let's see what his plan is here.
Johnson prevents a takedown attempt there.
Magic Johnson has stuffed three takedown attempts in the round now. That's going to take a lot out of Luke Skywalker.
Johnson prevents a takedown attempt there.
Johnson is pressed up against the cage. Skywalker has hold of a leg and is looking to drag Johnson down to the mat. Johnson avoids the attempt though and has circled away. We're back to striking at a distance.
Johnson throws a head kick that Skywalker semi-blocks.
Johnson wants to clinch up but Skywalker keeps it at a distance.
Johnson gets to the clinch - let's see what his plan is here.
Johnson lands a glancing elbow in the clinch.
Johnson throws a vicious knee straight up the middle but Skywalker blocks it with crossed arms.
That's one minute gone in the round.
Johnson will no doubt start fighting again in a minute but for now he's just having a little rest, leaning Skywalker up against the cage.
Johnson prevents the takedown attempt.
Johnson with the Thai clinch. He's looking to land a big knee but he's not managed it this time.
Johnson prevents a takedown attempt there.
Skywalker looks gassed!
Skywalker takes an elbow to the temple.
Johnson lands a knee to the head.
Johnson tries a knee to the head but he's missed.
Johnson using the Thai plumb to throw knees but Skywalker has his back arched nicely, preventing the strike.
Johnson lands a knee to the head.
Johnson landing knees to the body.

Johnson breaks the clinch.
Johnson tries to clinch there but Skywalker circles away.
Johnson avoids a kick to the body.
Skywalker shoots in for a takedown but doesn't get it.
Johnson clinches up against the cage.
Johnson manages to break the clinch.
Johnson scores with a decent looking hook.
Johnson is looking to clinch but Skywalker is avoiding it.
Johnson lands with a kick to the temple. Skywalker shrugs as if to say "is that all you've got?"
Johnson gets in close and instigates a clinch.
Johnson comes over the top with an elbow. That landed flush.
Johnson landing knees to the head.
Skywalker drops down looking for an ankle pick but Johnson pulls his leg out and moves away.
Johnson closes the distance and clinches.
That's two minutes gone in the round.
Johnson tries a knee to the head but Skywalker blocks it.
Johnson gets double underhooks to prevent a takedown attempt from Skywalker.
Johnson throws an elbow but it's blocked.
Johnson tries a knee to the head but he's missed.
Skywalker digs a right hand into Johnson's ribs. Those have got to be taking their toll on Johnson's gas tank.
Johnson tries a knee to the head but he's missed.
Skywalker lands a hook that snaps the head of Johnson backwards.
Skywalker blocks a punch to the side of the head.
Skywalker is working for a takedown up against the cage. He can't get it on this occasion though.
Johnson lands with a quick shot inside that doesn't really do much damage.
Skywalker lands a right hand.
The crowd are loving this. Great action here.
Skywalker gets the body lock takedown. After a quick scramble, Johnson regains guard.
Skywalker is pushing down on Johnson's leg trying to pass to half guard. Johnson is fighting to maintain full guard but Skywalker has managed to sneak the leg through.
Skywalker is trying a forearm choke
I don't think that's going to do much at this level of the game.
Skywalker is trying a forearm choke
I don't think that's going to do much at this level of the game.
Skywalker takes advantage of the dominant position to land a couple of big hammer fists.
Johnson is looking to improve his position.
That's three minutes gone in the round.
Johnson actively working from the bottom here.
Skywalker works his way into side control.
Skywalker moves into full mount!
Skywalker has control of Johnson's right arm, working for a kimura. It's a bit of a token attempt though and Johnson regains control of the situation pretty easily.
Johnson working to try and regain half guard.
The crowd growing excited in anticipation of a finish here! Right on cue, Skywalker cracks his opponent with a massive right hand that draws loud cheers!
Both fighters really going for it on the ground here!
Skywalker prevents Johnson from getting the reversal.
Johnson manages to regain half guard. Good work.
Skywalker seems to be working for a kimura but Johnson defends the submission attempt.

That's four minutes gone in the round.
Johnson actively working from the bottom here.
Skywalker stalling.
Johnson slips a foot under and gets full guard. Nice work.
Johnson keeping full guard, as Skywalker tries to pass.
Johnson has a loose triangle. He'll be looking to tighten that up but Skywalker can see exactly what he's planning and manages to posture up and free himself.
Skywalker wants to control from the top but Johnson keeps moving.
As the round comes to an end the crowd are showing their appreciation for a great round of action.
Johnson bucks up whilst keeping hold of a body lock, managing to reverse the position. Now he's in top in Skywalker's guard.
Skywalker utilising some decent striking defenses from the guard, preventing the ground and pound.
Johnson postures up in Skywalker's guard and throws a big left but Skywalker blocks it.
Johnson stands and throws Skywalker's legs to the side, diving into side control.
And thats the end of the round the fighters go back to their corners.
Magic Johnson dominated that round.
The cut man is working on Luke Skywalker's cut.
That's time! Back to the action!

Skywalker decides to change it up a bit and drives through with a nice takedown into half guard.
Skywalker throwing shots but Johnson is blocking nicely.
The fighters are pressed up against the cage, both looking to find a bit of space to work.
Johnson wants to improve his position but Skywalker is controlling well.
Skywalker trying to control from half guard but Johnson is working away.
Johnson makes his way to full guard. A much better position for Johnson.
Skywalker lands a nice shot whilst sitting in his opponent's guard.
Johnson looking for a guillotine here but Skywalker defends easily.
Skywalker working in close now, lands a nice elbow to the side of Johnson's head.
Skywalker won't allow Johnson to sweep him here.
Skywalker stands up and looks to throw the legs aside to pass to side control. Johnson swivels though and keeps the full guard.
Skywalker avoids a guillotine attempt easily.
Skywalker scoring with some ground and pound.
Both fighters are absolutely exhausted here.
That's one minute gone in the round.
Skywalker preventing the sweep.
Skywalker drops back looking for a leg! Johnson is in trouble here! The fighters roll with the hold and Johnson manages to kick Skywalker off! Skywalker jumps back into Johnson's guard.
Skywalker avoids a guillotine attempt easily.
Johnson manages to land a sweep and now he's in mount on top!
Skywalker tries to hold on but Johnson postures up.
Johnson is dominating on the ground here - he's now on his opponent's back, looking to sink in the hooks. Skywalker is in real trouble.
Skywalker defends a rear naked choke attempt by controlling one of Johnson's arms.
Skywalker tries to escape the position - he's now mounted. Is that better or worse? Hard to tell!
Johnson works his way to his opponent's back.
That's two minutes gone in the round.
Johnson is looking for the choke from the back position but Skywalker is controlling his hands well.
Skywalker manages to reverse the position and now he's in Johnson's guard. Nice work there by Skywalker.
Skywalker trying to control but Johnson is working from the bottom.
Skywalker is in a good position here but he's just trying to control... And he's not even managing to do that successfully.
Johnson has a loose triangle. He'll be looking to tighten that up but Skywalker can see exactly what he's planning and manages to posture up and free himself.
Skywalker trying to control the position from guard on top but Johnson is wriggling around, looking for whatever he can.
Johnson working away from the bottom but not quite defensive enough there because Skywalker has passed into half guard!
Skywalker lands strikes from half guard.
Johnson looking to work for a kimura from the bottom.
Johnson tries to get to full guard but Skywalker has control of the leg.
Johnson is defending against the submission attempts here by Skywalker.
That's three minutes gone in the round.
Johnson has hold of Skywalker's hands but Skywalker slips his arm to the side and lands an elbow.
Johnson tries to get to full guard but Skywalker has control of the leg.
Skywalker passes the half guard and he's now in mount! Big trouble for Johnson!
Johnson is trying to escape the mount.
Johnson wants to improve position but instead he's given up his back.
Johnson is in bad spot here.
Johnson defending nicely against the rear naked choke attempt.
Johnson tries to escape the position - he's now mounted. Is that better or worse? Hard to tell!
Johnson is squirming around, avoiding Skywalker's attempts to control the action.
Johnson slips a leg in and gets back to half guard.
That's four minutes gone in the round.
Johnson regains full guard. Nicely done.
Johnson has a loose triangle. He'll be looking to tighten that up but Skywalker can see exactly what he's planning and manages to posture up and free himself.
Skywalker stands and throws Johnson's legs to the side, diving into side control.
Johnson is sneaking out the side here. He's bucked Skywalker off and has taken his back!
Johnson looking to break Skywalker's wrist control so he can sink in the choke. Skywalker remaining controlled and patient though - he really has to keep calm otherwise Johnson will wrap this one up with the rear naked choke!
Johnson working for a RNC but it's not happening just yet.
Johnson working for a choke but Skywalker reverses nicely into Johnson 's guard.
Skywalker forces his way into half guard.
Johnson is refusing to be controlled, as Skywalker sits in half guard.
Skywalker keeping composed on the top, looking to control the action.
Skywalker is looking for a kimura but he's never going to get it from there.
And thats the end of the round the fighters go back to their corners.
Luke Skywalker showed his class in that round. I'd imagine he'll take it on all the scorecards.
The cut man is working on Luke Skywalker's cut.
The minute break is over - no more time for sponges and pep talks - back to the action! This is the final round!

Skywalker avoids the clinch attempt nicely.
Skywalker throws a series of punches but Johnson avoids them all with ease.
Johnson moves in looking to clinch but Skywalker pushes him off.
Skywalker misses with a kick to the body.
Skywalker circles away from the clinch attempt.
Johnson scores with a head kick.
A jab from Johnson finds it's way through Skywalker's defenses.
Johnson tries to close the distance and clinch up but Skywalker swats him away and circles back towards the center.
Johnson tries to close the distance and clinch up against the cage but Skywalker paws at him with a jab and circles away.
A head kick from Johnson lands but Skywalker takes it in his stride.
Luke Skywalker is looking to throw some combinations by the looks of things.
Skywalker doesn't manage to clinch there - Johnson circles away.
Johnson tries to clinch but Skywalker moves out of range.
Johnson dodges the punch combination from Skywalker.
Johnson is looking to take this fight into the clinch.
Johnson clinches.
Skywalker tries to pull guard but can't drag his opponent to the mat. Johnson just stands there and leans against the cage.
A knee to the head by Johnson.
Johnson using the Thai clinch to land knees to the body.
Skywalker has double underhooks and is working for a body lock takedown. He's got it. The fighters land in half guard but Johnson regains guard immediately.
Johnson looking for a guillotine here but Skywalker defends easily.
Skywalker won't allow Johnson to sweep him here.
Both fighters are breathing heavily.
That's one minute gone in the round.
Johnson throwing his legs up looking for a triangle.
Johnson escapes his hips to the side and looks to be working for an armbar. Skywalker gives him a little smile and shakes his head. No chance.
There's a bit of a scramble here and now Johnson is on top in guard.
The ref warns both fighters not to hold the cage as they work up against the meshing.
Johnson thinks about going for a leg but decides against it, in order to maintain the position.
Johnson trying to stand up but can't free himself from Skywalker's guard.
Johnson is trying to work a guillotine from the top, or something like that? Don't know how he thinks he's going to get a finish from there.
Johnson is trying to work a guillotine from the top, or something like that? Don't know how he thinks he's going to get a finish from there.
Johnson is looking to advance position but Skywalker has hit a scissor sweep - now he's on top in mount!
That's two minutes gone in the round.
My god... these two guys really need to pick up the pace or everyone will leave to go get a beer.
Johnson keeping his composure momentarily, calmly looking to get back to half guard.
Luke Skywalker has got the better of the ground game so far.
Johnson gets back to half guard.
Johnson is trying to get back to full guard.
Johnson is looking to sinch up a gullotine here but Skywalker pulls his head out easily.
Johnson is looking to improve his position.
Skywalker is pressing down on Johnson's thigh, looking to free his foot. Johnson is holding on for now.
Johnson moves his hips nicely and gets into full guard.
Skywalker distracts Johnson with his right hand and drops a big elbow with his other arm.
Skywalker wants to control from the top but Johnson keeps moving.
Johnson wants to sweep here but Skywalker controlling him for the moment.
That's three minutes gone in the round.
Skywalker is pushing down on Johnson's leg trying to pass to half guard. Johnson is fighting to maintain full guard but Skywalker has managed to sneak the leg through.
Skywalker is tying to control. Johnson wants to improve his position but can't escape this time.
Skywalker might have to switch it up a bit here because his efforts to control Johnson kaven't been going to plan, at least at the current moment in time.
Johnson looking for submissions off his back.
Skywalker passes to full mount!
Johnson is looking to get to half guard.
Johnson wants to improve position but instead he's given up his back.
Skywalker is hanging on to Johnson's back as he tries to escape.
Johnson defending nicely against the rear naked choke attempt.
Johnson tries to break free.
Johnson rolls and manages to get back to half guard. Nicely done.
Skywalker wants to pass to mount but Johnson is defending the position.
That's four minutes gone in the round.
The fighters are battling for position here. Johnson manages to regain full guard. Nice work.
Johnson wants to sweep but no luck.
Johnson has his foot on Skywalker's thigh. He's trying to push off and get in position for a triangle, I think. Skywalker works his way back into a safe position though.
Skywalker trying to land body shots but he keeps hitting the mat.
Johnson is active off his back here, looking for submissions.
Johnson is working an open guard so Skywalker takes the opportunity to get back to his feet.
Skywalker throws a right and a left that Johnson avoids nicely.
Skywalker takes a head kick and keeps coming.
Skywalker misses with a two punch combination.
Johnson throws a head kick that misses.
Skywalker misses with a jab and misses with a cross straight after too.
Johnson lands with an uppercut that bounces Skywalker off the cage and back into rage.
Johnson darts in and clinches Skywalker up against the cage.
Skywalker just leaning against Johnson, taking a breather.
Skywalker drops down looking for an ankle pick but Johnson pulls his leg out and moves away.
The fighters circle momentarily. Johnson darts into range and connects with a nice straight punch.
Skywalker misses with the combination.
Johnson tries to clinch up.
And that's the end of the fight!
Magic Johnson showed his dominance in that final round.
I think Johnson has won this one but let's see what the judges have to say. Over to the ring announcer for the scorecards.
Ladies and gentlemen, after 3 rounds of action, we go to the scorecards for a decision.
Judge Winston Howard scores the fight 29:28
Judge Damien Edna scores the fight 29:28
Judge Steve Erwin scores the fight 29:28
In favor of your winner, by unanimous decision... Magic Johnson!
|
|
|
|
|
|
|
|
|
|
|
|
|
|
|
|
|
|
|
|
|
|
|
| S |
C
A |
G |
S |
C
B |
G |
|
S |
C |
G |
|
energy
A | B |
|
hype
A | B |
|
pop
A | B |
|
mgr
A | B |
|
FIGHT
RATING
85% |
|
|
|
|
|
|
|
Undercard bout
|
|
|
|
Undercard bout
|
Coming up we have a featherweight MMA rules bout between Diablo Sanchez (ranked 0 p4p, 0 weight class) and Jake Williams (ranked 0 p4p, 0 weight class). Jake Williams is staring across the cage at his opponent, tweaking his nipples.
 |
|
 |
| 180 cm
22
145 lbs
1 - 1 - 0 |
|
175 cm
22
145 lbs
1 - 0 - 0 |
BJJ Purple Belt
Brawler
Big heart |
|
BJJ Blue Belt
Brawler
Granite chin |
|
| |
|
Ladies and gentlemen. This fight is 3 rounds, in the featherweight division.
Introducing the fighter to my left, fighting out of the red corner.
With a record of
1 - 1 - 0, fighting out of Sydney, Diablo Sanchez!
And introducing the fighter to my right, fighting out of the blue corner.
With a record of
1 - 0 - 0, fighting out of Sydney, Jake Williams!
The judges for this bout are Summer Carpenter, Bruno Hogan and Eliza Hachem.
The bell rings for round one and we are underway!
Sanchez shoots in but no luck this time.
Williams connects with a crisp jab.
Sanchez closes the distance and gets a double leg, slamming Williams to the mat! Williams manages to get full guard.
Sanchez lands a nice shot whilst sitting in his opponent's guard.
Williams utilising some decent striking defenses from the guard, preventing the ground and pound.
Sanchez won't allow Williams to get back to his feet.
The fighters are pressed up against the cage, both looking to find a bit of space to work.
Williams is using up a lot of energy trying to get back to his feet. Perhaps he should improve his position first.

The referee has ruled that neither fighter is active enough on the ground and has stood them back up.
Williams scores with a decent looking hook.
Sanchez darts in and lands a nice takedown into half guard.
Sanchez working over Williams with some ground and pound. Williams looks like he wants out of this position, which is understandable.
Sanchez missing with some ground and pound from the half guard.
Sanchez lands a big shot. The thud that echoes around the arena is like music to the fans' ears.
Sanchez sitting in half guard, looking to land shots. Williams defending well though.
Sanchez landing with strikes to the body and head, softening up his opponent.
This is a great period of action - very entertaining stuff!
Sanchez stops Williams from getting back to his feet.
Sanchez has been looking to land a fair amount of strikes on the ground. He might be looking to soften his opponent up in order to work for a submission.
Williams looks gassed!
That's one minute gone in the round.
Williams looking for submissions from an awkward position here.
The referee walks around the fighters to get a better view of the action. Sanchez lands a nice short elbow.
Williams really doesn't want to stay on the ground with Sanchez. If he can't get it back to his feet, it's only a matter of time before he'll be tapping out.
Williams pushes Sanchez off looking to stand but Sanchez dives back in and keeps control.
Sanchez scoring with strikes to the body and head.
Williams is looking for a sweep. Sanchez is wise to his cunning plan and keeps the top position.
Williams wants to get back to his feet.
It looks like we're going to have a standup here. Neither fight is doing enough on the ground.
Williams shoots in and bounces Sanchez off the cage to secure the takedown into guard.
Williams would like to get this fight back to the feet but can't get free from the closed guard.
Williams throwing elbows and punches but not connecting, as Sanchez works some decent striking defense from the bottom.
Williams decides to stand up and beckons his opponent to follow.
Sanchez circles away from the clinch attempt.
Williams tries to clinch but Sanchez is having none of it.
Williams has his takedown stuffed
so Sanchez counters with a double leg into guard. Good agility.
That's two minutes gone in the round.
The crowd are loving this. Great action here.
Williams wants to get back to his feet but Sanchez is in a dominant position and won't allow it.
The fighters are starting to get a bit slippery now, which will make submissions a bit more difficult.
Sanchez scoring with punches to the head and body.
Sanchez postures up and lands a big shot to Williams's brow.
Sanchez is working the ground and pound from guard. He might want to try advancing position though to get more of an impact.
Sanchez makes a bit of distance and scores with some ground and pound, still in guard.
Williams trying to punch from his back but it's not doing any damage.
Williams looking to hit a scissor sweep but Sanchez is one step ahead there.
Sanchez is pushing down on Williams's leg trying to pass to half guard. Williams is fighting to maintain full guard but Sanchez has managed to sneak the leg through.
Sanchez working some ground and pound from close in. He's looking to maintain this position and strike for a while by the looks of things... although he'll probably advance to full mount in a minute now I've said that.
Williams on the receiving end of some nice ground and pound.
Sanchez lands with an elbow from half guard - that looked like it hurt.
Sanchez working over Williams with some ground and pound. Williams looks like he wants out of this position, which is understandable.
Ground and pound from Sanchez.
Williams has hold of Sanchez's hands but Sanchez slips his arm to the side and lands an elbow.
Both fighters really going for it on the ground here!
Sanchez scoring with strikes to the body and head.
Sanchez moves nicely into side control.
Sanchez really does look like a pencil wearing a pair of gloves. Let's hope he has a gameplan to suit that ridiculous body shape.
That's three minutes gone in the round.
Williams wants to escape from the position here - easier said than done!
Williams takes a big shot right to the temple there but he's taken it well.
Williams wants to get back to his feet.
Sanchez lands some shots froms side control.
Williams can't do much from the bottom here.
Williams dodges the ground and pound from Sanchez.
Sanchez lands an elbow.
Williams sneaks out the side door and pushes Sanchez away - he's back to his feet. The crowd show their appreciation for the escape.
Williams moves in looking to clinch but Sanchez pushes him off.
Williams with a poor takedown
and Sanchez counters with a takedown into full mount! That could mean trouble for Williams!
Sanchez avoids the attempt from Williams to control.
Sanchez pausing momentarily but resumes with a couple of decent strikes that do a bit of damage.
Fantastic stuff here - a very entertaining period of action, which has drawn cheers from the crowd.
Sanchez putting on the heat here with some good ground and pound!

Williams is rocked!
Sanchez lands a big elbow - Williams is in trouble! More strikes from the mount and Williams is forced to tap out!
Ladies and gentlemen, after 4:18 of round 1, we have a winner by way of Submission (Strikes). Diablo Sanchez!
|
|
|
|
|
|
|
|
|
|
|
|
|
|
|
|
|
|
|
|
|
|
|
| S |
C
A |
G |
S |
C
B |
G |
|
S |
C |
G |
|
energy
A | B |
|
hype
A | B |
|
pop
A | B |
|
mgr
A | B |
|
FIGHT
RATING
100% |
|
|
|
|
|
|
|
Undercard bout
|
Coming up we have a heavyweight MMA rules bout between Max Caschera (ranked 0 p4p, 0 weight class) and Fred Patterson (ranked 0 p4p, 0 weight class). Caschera's entrance music is Crimson King by Demons & Wizards limited edition. A fine choice. Both these guys have really solid chins. Will we see a standup war or will they both decide that a knockout is unlikely and try to win the fight elsewhere?
 |
|
 |
| 175 cm
22
250 lbs
6 - 1 - 0 |
|
180 cm
22
230 lbs
4 - 0 - 0 |
BJJ Purple Belt
Basic striking
Granite chin |
|
BJJ Purple Belt
Counter striker
Granite chin |
|
| |
|
Ladies and gentlemen. This fight is 3 rounds, for the heavyweight championship of the world!
Introducing the champion to my left, fighting out of the red corner.
With a record of
6 - 1 - 0, fighting out of Sydney, Max Caschera!
And introducing the challenger to my right, fighting out of the blue corner.
With a record of
4 - 0 - 0, fighting out of Sydney, Fred Patterson!
The judges for this bout are John Mangel, Winston Howard and Eliza Hachem.
The bell rings for round one and we are underway!
Caschera feints and as Patterson raises his hands in defense, Caschera changes levels and drives through with a takedown into guard.
Caschera throws a big right hand that misses.
Caschera pressing down on his opponent's thigh, looking to pass guard. Patterson is keeping the position for now.
Patterson working for a triangle but Caschera defends it easily.
Caschera lands a couple of digs.
Caschera avoids a guillotine attempt easily.
Caschera is working Patterson over from the guard. He should look to pass the guard and do a little more damage with these strikes.
Caschera throwing strikes from guard but Patterson blocks nicely.
The ref warns both fighters not to hold the cage as they work up against the meshing.
Caschera lands a couple of elbows.
Patterson looking for a sweep. Not yet Patterson, not yet.
Caschera decides he's had enough of playing guard and decides to stand. Come on Patterson, up you get!
Patterson should think about turning a few of those tyres round his middle into muscle if he wants people to take him seriously as an athlete.
Caschera scores with a nice body kick.
Max Caschera seems to be the more aggressive standup fighter in this bout.
Caschera ducks down and throws a hook to the body but Patterson moves away.
Caschera walks into a left hand.
Caschera tries to close the distance and clinch up against the cage but Patterson paws at him with a jab and circles away.
That's one minute gone in the round.
Patterson takes a shot right to the liver - Bas would have been proud of that punch.
Caschera feints and as Patterson raises his hands in defense, Caschera changes levels and drives through with a takedown into guard.
Caschera is in close to Patterson's body, working some short punches and elbows.
Patterson trying to keep a closed guard but Caschera is proving a slippery customer.
Patterson looks gassed!
Caschera looking to pass the guard.
Caschera gets to his feet and steps away from his opponent.
Caschera shoots in for a takedown and gets it. Let's see what he's got on the mat.
Patterson looking for submissions from the bottom but instead Caschera passes into side control.
Patterson manages to get one leg in to regain half guard.
Caschera looks towards his corner to check for any instructions. The corner give him nothing to work with, so he cracks Patterson with a short hammerfist. I guess that's as good as any advice he could get in this position.
The fighters are battling for position here. Patterson manages to regain full guard. Nice work.
Caschera stands up and waves to Patterson to follow him.
Caschera gets the takedown into side control.
That's two minutes gone in the round.
This has been an exciting period of action!
Patterson tries to get back to half guard but can't.
Caschera wants to stand but Patterson is controlling his arm.
Caschera working the ground and pound from side control.
Patterson is sneaking out the side here. He's bucked Caschera off and has taken his back!
Patterson working from the back looking to end the fight with a rear naked choke. Caschera is doing well to defend. Patterson seems to have got his hand under the chin though and he's sunk the choke in! Caschera is forced to tap and this one is over!
Ladies and gentlemen, after 2:35 of round 1, we have a winner by way of Submission (RNC). Fred Patterson!
Fred Patterson is the new heavyweight champion!
|
|
|
|
|
|
|
|
|
|
|
|
|
|
|
|
|
|
|
|
|
|
|
| S |
C
A |
G |
S |
C
B |
G |
|
S |
C |
G |
|
energy
A | B |
|
hype
A | B |
|
pop
A | B |
|
mgr
A | B |
|
FIGHT
RATING
78% |
|
|
|
|
|
|
|
Undercard bout
|
Coming up we have a middleweight MMA rules bout between Nate Walker (ranked 0 p4p, 0 weight class) and Fran Einhorn (ranked 0 p4p, 0 weight class). This should be a great matchup!
 |
|
 |
| 187 cm
22
185 lbs
5 - 0 - 0 |
|
182 cm
22
182 lbs
5 - 1 - 0 |
BJJ Purple Belt
Brawler
Self confident |
|
BJJ Purple Belt
Good kicks
Knockout power |
|
| |
|
Ladies and gentlemen. This fight is 3 rounds, for the middleweight championship of the world!
Introducing the champion to my left, fighting out of the red corner.
With a record of
5 - 0 - 0, fighting out of Sydney, Nate Walker!
And introducing the challenger to my right, fighting out of the blue corner.
With a record of
5 - 1 - 0, fighting out of Sydney, Fran Einhorn!
The judges for this bout are Summer Carpenter, Skip Squint and Winston Howard.
The bell rings for round one and we are underway!
Walker tries to close the distance and clinch up but Einhorn swats him away and circles back towards the center.
Walker fails with a takedown attempt from distance.
Walker shoots in for a takedown and gets it.
Walker stalling away here and it's allowed Einhorn to slip out his trapped foot and regain full guard.
Einhorn is looking to stand up but Walker isn't so interested in that idea.
Walker stands up and looks to throw the legs aside to pass to side control. Einhorn swivels though and keeps the full guard.
Einhorn is working actively off his back, looking to secure an arm or perhaps work for a triangle.
Einhorn is working for submissions here. He's thrown up his legs looking for a tringle but Walker frees his head nicely. Oh but Einhorn has switched to an armbar! Walker is tapping furiously! Lovely submission there!
Ladies and gentlemen, after 0:51 of round 1, we have a winner by way of Submission (Triangle Armbar). Fran Einhorn!
Fran Einhorn is the new middleweight champion!
|
|
|
|
|
|
|
|
|
|
|
|
|
|
|
|
|
|
|
|
|
|
|
| S |
C
A |
G |
S |
C
B |
G |
|
S |
C |
G |
|
energy
A | B |
|
hype
A | B |
|
pop
A | B |
|
mgr
A | B |
|
FIGHT
RATING
59% |
|
|
|
|
|
|
|
Undercard bout
|
Coming up we have a lightweight MMA rules bout between Tom Foolery (ranked 0 p4p, 0 weight class) and Sultan Seama (ranked 0 p4p, 0 weight class). Tom Foolery has the better chin. Will he look to stand and bang today?
 |
|
 |
| 180 cm
22
155 lbs
4 - 1 - 1 |
|
210 cm
22
155 lbs
6 - 0 - 0 |
BJJ White Belt
Improved boxing
Good chin |
|
BJJ Purple Belt
Brawler
Knockout power |
|
| |
|
Ladies and gentlemen. This fight is 3 rounds, for the lightweight championship of the world!
Introducing the champion to my left, fighting out of the red corner.
With a record of
4 - 1 - 1, fighting out of Sydney, Tom Foolery!
And introducing the challenger to my right, fighting out of the blue corner.
With a record of
6 - 0 - 0, fighting out of Sydney, Sultan Seama!
The judges for this bout are Eliza Hachem, Hugh Johnson and Skip Squint.
The bell rings for round one and we are underway!
A nice leg kick lands there from Foolery.
Seama keeping a good distance there, avoiding the body shot.
Foolery slips under a jab from Seama.
Foolery throws a left that rocks Seama and follows with a right that sends him tumbling to the canvas! Foolery dives into side control, looking to finish! Can Seama regain composure!
Seama is rocked!
Seama tries to buck Foolery off but Foolery is having none of it.
Seama is still in real trouble! Can Foolery finish him?
Seama seems to have recovered his senses.
Foolery has had enough of the ground for now and decides to stand.
Foolery works Seama's body with a nice hook.
The crowd cheering loudly, showing their appreciation for the quality fight we're seeing here.
Foolery misses with a body shot.
Seama is a painfully thin specimen of a man. You do wonder whether a good body kick would snap him clean in two.
Foolery connects with a crisp jab.
Seama on the receiving end of a decent leg kick there by Foolery. Foolery obviously looking to wear him down.
Seama throws a hook but Foolery blocks it.
Some wild striking there from Foolery.
Seama walks straight into an uppercut. Luckily it didn't land flush.
A combination from Foolery does no damage.
Foolery throws an overhand right that drops Seama like a sack of potatoes! Foolery dives in to finish the fight with more strikes and this one is all over!
Ladies and gentlemen, after 0:58 of round 1, we have a winner by way of TKO (Strikes). Tom Foolery!
Tom Foolery retains his lightweight title!
|
|
|
|
|
|
|
|
|
|
|
|
|
|
|
|
|
|
|
|
|
|
|
| S |
C
A |
G |
S |
C
B |
G |
|
S |
C |
G |
|
energy
A | B |
|
hype
A | B |
|
pop
A | B |
|
mgr
A | B |
|
FIGHT
RATING
100% |
|
|
|
|
|
|
|
Co-main event
|
Coming up we have a light heavyweight MMA rules bout between Sebastian Abigor (ranked 0 p4p, 0 weight class) and Shachlo Popyachtsa (ranked 0 p4p, 0 weight class). Man, I cannot wait for this one!
 |
|
 |
| 195 cm
22
205 lbs
5 - 0 - 0 |
|
190 cm
22
200 lbs
4 - 1 - 0 |
BJJ Purple Belt
Brawler
Experienced |
|
BJJ Purple Belt
Decent boxing
Solid chin |
|
| |
|
Ladies and gentlemen. This fight is 3 rounds, for the light heavyweight championship of the world!
Introducing the champion to my left, fighting out of the red corner.
With a record of
5 - 0 - 0, fighting out of Sydney, Sebastian Abigor!
And introducing the challenger to my right, fighting out of the blue corner.
With a record of
4 - 1 - 0, fighting out of Sydney, Shachlo Popyachtsa!
The judges for this bout are Steve Erwin, John Mangel and Hugh Johnson.
The bell rings for round one and we are underway!
Popyachtsa tries to close the distance and clinch up but Abigor swats him away and circles back towards the center.
Abigor throws an overhand right that lands on Popyachtsa's shoulder, as Popyachtsa tries to avoid the shot.
Popyachtsa moves out of range of the strikes.
The fighters circling - Abigor throws out the jab but it was never going to land.
Abigor takes a shot right to the liver - Bas would have been proud of that punch.
Abigor throws a lazy right hand but Popyachtsa sees it coming a mile off and sidesteps it easily.
Nice shot lands for Abigor.
Abigor tests Popyachtsa's chin there with a solid looking shot.
Abigor misses with a body shot.
Popyachtsa blocks a jab.
Sebastian Abigor seems to be the more aggressive standup fighter in this bout.
Abigor throws an overhand right that lands on Popyachtsa's shoulder, as Popyachtsa tries to avoid the shot.
Abigor misses with a series of wild punches.
Abigor misses with a jab and misses with a cross straight after too.
Abigor throws a hook to the body but it doesn't connect.
Popyachtsa steps to the side to avoid the strikes from Abigor.
A really sloppy takedown attempt there from Abigor.
Popyachtsa tries to clinch there but Abigor circles away.
That's one minute gone in the round.
Popyachtsa fakes high and swings low for a body shot but Abigor manages to avoid it.
Abigor shoots in for a takedown and gets it.
Popyachtsa is looking for a sweep. Abigor is wise to his cunning plan and keeps the top position.
The ref warns both fighters not to hold the cage as they work up against the meshing.
Popyachtsa trying to control from the bottom.
Abigor wants to work for an arm triangle but Popyachtsa is really keeping half guard well and defending the submission attempt.
Abigor frees up his trapped foot and advances to mount.
Abigor is breathing heavily.
Popyachtsa working to try and regain half guard.
Popyachtsa slips a leg in and gets back to half guard.
Popyachtsa gets full guard.
Popyachtsa is trying to control the position from the bottom.
That's two minutes gone in the round.
Popyachtsa is active off his back here, looking for submissions.
Popyachtsa looking to sweep here. No luck so far.
Popyachtsa throws his legs up looking for a submission but Abigor uses it to pass to side control.
Popyachtsa tries to bench press Abigor off him but Abigor keeps the position.
Abigor working away.
Popyachtsa is trying to escape and get back to his feet.
Popyachtsa tries to bench press Abigor off him but Abigor keeps the position.
Neither fighter is doing enough for the referee's liking and he's decided to stand them back up.
A choreographed right hand from Abigor misses the target.
Abigor fails to land with a series of punches.
Abigor looks to land a body kick but Popyachtsa moved away.
Abigor swats away the attempt to clinch by Popyachtsa.
That's three minutes gone in the round.
Abigor throws a jab but it's blocked by Popyachtsa.
Popyachtsa keeping a good distance there, avoiding the body shot.
Popyachtsa moves out of range of the strikes.
Popyachtsa slips a jab and a cross from Abigor.
Popyachtsa lands a jab to Abigor's midsection.
Popyachtsa forces Abigor back against the cage and clinches.
Abigor breaks the clinch.
Abigor jabs away that one connects to the head of his opponent.
Abigor darts in and lands a nice takedown into half guard.
Abigor prevents Popyachtsa from standing back up.
Popyachtsa wants to get back to full guard.
Abigor looking to pass the half guard. Not this time.
Abigor passes to full mount!
Abigor with some aggressive grappling here. He's looking for submissions here, rather than waiting for the opportunity to counter.
That's four minutes gone in the round.
Abigor landing shots from mount.
Abigor with some aggressive grappling here, looking for the finish.
Popyachtsa really trying hard to get back to half guard here.
Popyachtsa is persisting with the attempt to improve his position.
Abigor with some aggressive grappling here, looking for the finish.
Popyachtsa is working to get back to half guard.
Abigor pushing the pace here, looking to move to his opponents back and work for a finish.
Abigor looking to secure an arm triangle but Popyachtsa defends it well.
Popyachtsa wants to hold on but Abigor pushes him away.
Abigor trying to control but Popyachtsa is having none of it.
And thats the end of the round the fighters go back to their corners.
That was a close round but I would say that Sebastian Abigor will probably get the nod.
OK. That's time! The bell goes and we're back to the action.
Abigor works his jab well there, keeping his opponent at a distance.
Abigor throws a hook but Popyachtsa avoids it easily.
Abigor drops down and drives through with a powerful takedown into guard.
Popyachtsa working a defensive guard here.
Abigor stands up and looks to throw the legs aside to pass to side control. Popyachtsa swivels though and keeps the full guard.
Popyachtsa looking to hit a scissor sweep but Abigor is one step ahead there.
Popyachtsa keeping moving, preventing Abigor from controlling successfully.
Popyachtsa is active off his back here, looking for submissions.
Popyachtsa working for a triangle but Abigor defends it easily.
Both fighters are absolutely exhausted here.
Popyachtsa keeping moving, preventing Abigor from controlling successfully.
That's one minute gone in the round.
Popyachtsa controls Abigor momentarily but Abigor frees himself.
Popyachtsa lands a beautiful switch and he's in full mount! That could spell trouble for Abigor!
Abigor tries to get back to half guard but can't.
Abigor regains half guard.
Abigor wants to control but Popyachtsa is keeping busy.
Popyachtsa moves into full mount! Abigor won't be happy about that!
Popyachtsa trying to control but Abigor is having none of it.
That's two minutes gone in the round.
Popyachtsa content just to control the position here.
Abigor tries to lock up and control but Popyachtsa gives him a forearm to the face and pushes him away.
Popyachtsa wants to control the pace but Abigor is squirming around nicely.
Popyachtsa stands up from mount. Strange move.
Popyachtsa misses with a looping left.
Popyachtsa misses with a right hand
so Abigor counters with a double leg into guard. Good agility.
Abigor trying to control the position from guard on top but Popyachtsa is wriggling around, looking for whatever he can.
Abigor stopping the sweep attempt from Popyachtsa.
Popyachtsa pulls Abigor in close to his closed guard and prevents Abigor from doing any damage or advancing position.
That's three minutes gone in the round.
Abigor wants to pass the guard but Popyachtsa is keeping the position.
Popyachtsa looking for submissions off his back, moving his hips, looking for an opening.
Abigor gets to his feet and steps away from his opponent.
Abigor works Popyachtsa's body with a nice hook.
Abigor closes the distance and gets a double leg, slamming Popyachtsa to the mat! Popyachtsa manages to get full guard.
Popyachtsa keeping full guard, as Abigor tries to pass.
Popyachtsa looking to sweep here. No luck so far.
Abigor postures up.
Popyachtsa has a loose triangle. He'll be looking to tighten that up but Abigor can see exactly what he's planning and manages to posture up and free himself.
Abigor wants to control from the top but Popyachtsa keeps moving.
That's four minutes gone in the round.
Popyachtsa has his foot on Abigor's thigh. He's trying to push off and get in position for a triangle, I think. Abigor works his way back into a safe position though.
Abigor prevents Popyachtsa from getting back to his feet.
The fighters are pressed up against the cage, both looking to find a bit of space to work.
The referee decides to stand the fighters back up.
Popyachtsa misses with a lunging right hand
and Abigor cracks him with a counter punch right on the button.
Abigor goes for a spinning back kick but it misses.
Popyachtsa throws a lazy uppercut
and Abigor counters with a takedown into side control.
Wooooo! Give it up for these two warriors! They are putting on a show!
Popyachtsa wants to control but Abigor postures up.
Abigor is working for what looks like an arm triangle here. Popyachtsa is trying to escape and Abigor transitions quickly into an armbar! He's slapped it on tight and Popyachtsa is forced to tap! Nice work there by Abigor! Very nice indeed!
Ladies and gentlemen, after 4:45 of round 2, we have a winner by way of Submission (Armbar). Sebastian Abigor!
Sebastian Abigor retains his light heavyweight title!
|
|
|
|
|
|
|
|
|
|
|
|
|
|
|
|
|
|
|
|
|
|
|
| S |
C
A |
G |
S |
C
B |
G |
|
S |
C |
G |
|
energy
A | B |
|
hype
A | B |
|
pop
A | B |
|
mgr
A | B |
|
FIGHT
RATING
41% |
|
|
|
|
|
|
|
Main event
|
Coming up we have a super heavyweight MMA rules bout between Jason Orton (ranked 0 p4p, 0 weight class) and Victor Gapuz (ranked 0 p4p, 0 weight class). Orton's ring entrance music is that housewives' favourite, Voices. Victor Gapuz looks lathargic as he enters the arena. Wake up son, you're about to have a fight!
 |
|
 |
| 225 cm
18
295 lbs
5 - 1 - 0 |
|
225 cm
22
300 lbs
4 - 1 - 0 |
BJJ White Belt
Improved boxing
KO power |
|
BJJ White Belt
Excellent boxer
Determined |
|
| |
|
Ladies and gentlemen. This fight is 3 rounds, for the super heavyweight championship of the world!
Introducing the champion to my left, fighting out of the red corner.
With a record of
5 - 1 - 0, fighting out of Sydney, Jason Orton!
And introducing the challenger to my right, fighting out of the blue corner.
With a record of
4 - 1 - 0, fighting out of Sydney, Victor Gapuz!
The judges for this bout are Damien Edna, Eliza Hachem and Skip Squint.
The bell rings for round one and we are underway!
Gapuz thows a body kick. Orton tries to catch it but that hurt him.
Orton connects with a nice cross there... Gapuz is looking wobbly and Orton recognises it - he's rushed in and lands two more brutal shots that send Gapuz to the canvas, out cold! A brutal finish to the fight - Orton jumps onto the cage to celebrate with the crowd!
Ladies and gentlemen, after 0:05 of round 1, we have a winner by way of KO (Punches). Jason Orton!
Jason Orton retains his super heavyweight title!
|
|
|
|
|
|
|
|
|
|
|
|
|
|
|
|
|
|
|
|
|
|
|
| S |
C
A |
G |
S |
C
B |
G |
|
S |
C |
G |
|
energy
A | B |
|
hype
A | B |
|
pop
A | B |
|
mgr
A | B |
|
FIGHT
RATING
65% |
|
|
|
|
|
|
|
|
|
|
