 |
DEF XXXII PBP Commentary |
Undercard bout
|
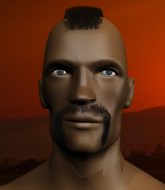
Coming up we have a welterweight MMA rules bout between Frank Craddock (ranked 0 p4p, 0 weight class) and Bob pickerins (ranked 0 p4p, 0 weight class). Rumors backstage are that the fighters have been paid to keep it standing but we know that would never happen in MMA!
 |
|
 |
| 185 cm
25
175 lbs
3 - 4 - 0 |
|
174 cm
19
170 lbs
2 - 1 - 0 |
BJJ Blue Belt
Brawler
Experienced |
|
BJJ White Belt
Decent boxing
Granite chin |
|
| |
|
Ladies and gentlemen. This fight is 3 rounds, in the welterweight division.
Introducing the fighter to my left, fighting out of the red corner.
With a record of
3 - 4 - 0, fighting out of London, Frank Craddock!
And introducing the fighter to my right, fighting out of the blue corner.
With a record of
2 - 1 - 0, fighting out of London, Bob pickerins!
The judges for this bout are Sam Margolis, Steven Brown and Chris Edwards.

The bell rings for round one and we are underway!
pickerins lands with a precision combination! Left, right, uppercut and Craddock falls flat on his face, eyes wide open but he's out!
Ladies and gentlemen, after 0:05 of round 1, we have a winner by way of KO (Punches). Bob pickerins!
|
|
|
|
|
|
|
|
|
|
|
|
|
|
|
|
|
|
|
|
|
|
|
| S |
C
A |
G |
S |
C
B |
G |
|
S |
C |
G |
|
energy
A | B |
|
hype
A | B |
|
pop
A | B |
|
mgr
A | B |
|
FIGHT
RATING
13% |
|
|
|
|
|
|
|
Undercard bout
|
Coming up we have a welterweight MMA rules bout between Carlos Carter (ranked 0 p4p, 0 weight class) and Chuck Morris (ranked 0 p4p, 0 weight class). Fingers crossed for an exciting fight - I'm sure both fighters are looking for a nice under the table bonus!
 |
|
 |
| 180 cm
24
170 lbs
6 - 2 - 0 |
|
172 cm
20
176 lbs
3 - 3 - 0 |
BJJ Blue Belt
Basic striking
Experienced |
|
BJJ Blue Belt
Basic striking
Very confident |
|
| |
|
Ladies and gentlemen. This fight is 3 rounds, in the welterweight division.
Introducing the fighter to my left, fighting out of the red corner.
With a record of
6 - 2 - 0, fighting out of London, Carlos Carter!
And introducing the fighter to my right, fighting out of the blue corner.
With a record of
3 - 3 - 0, fighting out of London, Chuck Morris!
The judges for this bout are James Atkins, Paul Tew and Andrew Berry.
The bell rings for round one and we are underway!
Carter shoots in for a takedown. "I don't think so" says Morris as he avoids it easily.

Carter moves into the clinch successfully.
A body shot lands from Morris.
Morris with the Thai clinch, lands a knee to the head.
Nice body punch from Carter.
Morris jumps guard but Carter stands there with Morris around his waist. Morris gives up and drops back to his feet. We remain in the clinch.
Morris blocks a body shot from Carter.
Morris gets through Carter's defenses to land a nice punch to the side of the head.
Carter goes for a body shot but it's blocked.
Carter throws an elbow but it misses.
Carter has had enough of the clinch but Morris keeps him there for the moment.
Carter struggles to land a body shot inside as Morris controls his hands.
Carter misses with a shot to the kidneys.
Morris will no doubt start fighting again in a minute but for now he's just having a little rest, leaning Carter up against the cage.
Morris lands a glancing elbow in the clinch.
Carter digs a right hand underneath Morris's ribcage. Morris let out a lung full of air as it connected.
Carter is looking to break free of the clinch but Morris has double underhooks.
Carter lands a body shot in the clinch.
Carter drops down for a takedown but doesn't get it.
Morris letting Carter take a breather here.

That's one minute gone in the round.
Morris tries a knee to the head but Carter blocks it.
Carter misses the knee to the body. Nice hip positioning from Morris.
Carter lands a body punch in the clinch.
Morris holding his opponent close, against the cage.
Carter is trying to work out of this bad position, with his back against the cage.
Morris blocks a body shot from Carter.
Morris on the defensive, avoiding the knees to the body.
Morris wants to break the clinch but can't.
Morris stalling.
Morris lands a knee to the head.
A hook to the body from Morris.
Carter stalling against the cage.
Carter misses the knee to the body. Nice hip positioning from Morris.
Morris misses with a knee strike.
Morris wants to stall.
Carter tries to throw a body punch but Morris avoids it by throwing Carter back against the cage.
The referee calls for Morris to work.
Carter wants to get back to striking at distance but Morris won't allow it.

That's two minutes gone in the round.
Neither fighter has done anything of merit for a good minute or two here and the crowd are not happy about it.
Carter looking for a takedown.
That's three failed takedown attempts in the round for Carlos Carter. That's going to take a lot out of him.
Carter wants to get back to striking at distance but Morris won't allow it.
Morris creates a bit of distance and throws an elbow that only just misses.

Carter breaks the clinch and we're back to striking at distance.
Morris scoring well with a low kick there.
Carter is breathing heavily.
Morris misses with a wild body shot.
Morris uses good footwork to avoid the strikes from Carter.
Morris throws a wild combination but nothing lands.
Morris rushes Carter and presses him up against the cage.
Morris prevents a body shot from Carter.
Morris gets through Carter's defenses to land a nice punch to the side of the head.
Carter dodges an elbow strike from Morris.
Carter wants to strike at distance but he can't break free of the clinch.
Carter wants to break free but Morris has control.
Morris tries to stall but Carter uses the opportunity to gain a better position.
Morris wants to strike at distance but he can't break free of the clinch.
Carter stalling in the clinch.
Morris using the Thai clinch to land knees to the body.
Carter wants to break free but Morris has control.
Morris's corner are urging him to control the action in the clinch for a moment, rather than mount any serious offense. I'm sure the crowd appreciate those instructions... not.
Carter misses with a shot to the kidneys.

That's three minutes gone in the round.
Morris misses the knee to the body. Nice hip positioning from Carter.
Morris is trying to stall.
Carter is trying to slow down the pace in the clinch, to catch his breath.
Carter content to slow the pace in the clinch.
Morris lands a left hand that snaps the head of Carter backwards.
Carter breaks the clinch.
Morris fails with the takedown.
Carter swats away the attempt to clinch by Morris.
Morris throws a low kick but his opponent is out of range.
Morris shoots in for a double leg but Carter sprawls well. That's going to sap some energy.
Carter misses with a wild body shot.
Morris avoids a lazy jab quite easily.
Carter takes a shot to the nose. Hopefully that hasn't broken it.
Carter uses some good footwork to avoid the body shot by Morris.

Carter fakes an overhand right and shoots for a takedown. Morris sprawls well initially but Carter persists and gets the takedown into half guard.
Carter tries to stand and escape but Morris is controlling the position.
Morris is looking to regain full guard. Not this time though.

That's four minutes gone in the round.
Carter trying to control from half guard but Morris is working away.
Carter is keeping good posture, landing some ground and pound.
Morris wants to control but Carter passes into side.
Carter tries to move into full mount but can't pass Morris's legs.
Morris taking a bit of punishment here - Carter scoring with strikes.

Carter tries for a kimura. Not really close to a finish though.
Morris is not content to let Carter control the position.
The fighters are going at a pretty good pace and they're both starting to sweat now.
Carter works to advance to full mount. Morris defends for a few seconds but eventually he succumbs.
And thats the end of the round the fighters go back to their corners.
Carlos Carter dominated that round.
The fighters get back to their feet, the hooter sounds and we're back to the action!

Carter moves into range and clinches up with Morris.
Carter throws an elbow that misses.
Morris with the Thai clinch. He's looking to land a big knee but he's not managed it this time.
Carter trying to land knees to the body.
Morris is trying to break free.
Morris misses with a knee strike.
Morris misses with a shot to the kidneys.
Morris tries a knee to the head but Carter blocks it.
Carter breaks the clinch and we return to the middle of the mat.
Morris misses with a half-hearted attempt at a head kick.
Carter closes the distance and clinches.
Morris stalling in the clinch but Carter improves position.
Carter escapes the clinch and we're back to striking.
Morris tries for a takedown but Carter sees it coming a mile off and avoids it easily.
Carter shoots in for a takedown and gets it. Oh and he's advanced to full mount straight away.
Carter lands a nice shot to the head.
Morris is working to get back to half guard.
Morris is writhing around trying to get back to his feet.
Morris is breathing heavily.
Carter sitting in mount, just looking to control for the moment.
A nice elbow there by Carter.
That's one minute gone in the round.
Morris defends a decent attempt at a guillotine from Carter.
The fighters are pressed up against the cage, both looking to find a bit of space to work.
Morris taking shots to the head.
Carter lands with some vicious ground and pound - can Morris hang on?
Carter lands a heavy elbow.
Morris tries to hold on but Carter postures up.
Carter lands a couple of nice shots there from mount.
Morris is wriggling around trying to escape.
Carter lands a shot to the body, followed up by a shot to the exposed head of his trapped opponent.
Carter pausing momentarily but resumes with a couple of decent strikes that do a bit of damage.
Morris regains half guard.
That's two minutes gone in the round.
Carter is trying to get back to his feet now but his leg is trapped.
Carter prevents Morris from improving his position.
Carter working over Morris with some ground and pound. Morris looks like he wants out of this position, which is understandable.
Morris is trying to defend against the ground and pound but Carter scores with a couple of nice shots.
Carter working over Morris with some ground and pound. Morris looks like he wants out of this position, which is understandable.
Carter working the head and body with strikes.
Carter working some ground and pound from close in. He's looking to maintain this position and strike for a while by the looks of things... although he'll probably advance to full mount in a minute now I've said that.
Carter is scoring with some nice ground and pound from the dominant position.
Carter looks to score some points with some ground and pound.

Morris is rocked!
Nice strikes from Carter there.
Morris is still in real trouble! Can Carter finish him?
Morris is doing well to avoid being mounted. He's controlling the position at the moment.
Carter is looking to take a break and control but Morris is keeping him honest, looking to work from the bottom.
That's three minutes gone in the round.
Carter working over Morris with some ground and pound. Morris looks like he wants out of this position, which is understandable.
Carter working over Morris with some ground and pound. Morris looks like he wants out of this position, which is understandable.
Morris seems to have recovered his senses.
Morris wants to improve his position but Carter is controlling well.
Carter wants to control but Morris is keeping him busy.
Morris holds on for dear life, maintaining half guard for now.
Morris is looking to control Carter's leg but it's slowly edging free. Can Morris avoid being mounted?
Morris is trying to get back to full guard.
Carter thows a huge punch but Morris dodges it nicely.
Carter thows a huge punch but Morris dodges it nicely.

The referee decides to stand the fighters back up.
Morris tries a head kick but it misses.
Morris shoots for a takedown but Carter saw that one coming a mile off and avoided it easily.
Jab, jab by Morris - just one landing.
Well, he's not going to score with shots like that. A lazy body kick attempt from Carter.
That's four minutes gone in the round.
The crowd are showing their displeasure at the lack of action as loud boos ring out around the arena.
Carter shoots in for a takedown and gets it.
Morris trying to hold on to Carter's head to control him but Carter postures up.
Morris controlling the position well.
Morris actively working from the bottom here.
Carter is stalling here. Morris is in no mood to hang around though. He's locked up a kimura from the bottom! Carter seems to be keeping calm but he's forced to roll out of the hold and Morris has ended up in side control on the top. Nice work.
Morris wants to lay and pray for a moment but Carter keeps working.
Carter is looking for a sweep.
And thats the end of the round the fighters go back to their corners.
Carlos Carter dominated that second round.
That's the end of the round. The referee orders the cornermen out of the cage so we can get back down to business. This is the final round!

Carter steps to the side to avoid the strikes from Morris.
Carter closes the distance and takes a jab right on the nose as he does so.
Morris gets a takedown into half guard.
Carter is looking to improve his position.
Carter wants to get back to his feet.
Morris looks to score some points with some ground and pound.
Morris is trying for a guillotine from the top but the pressure isn't in the right place so Carter is just riding it out for now. Morris eventually gives up the hold.
Carter has no desire to be mounted, so is trying to control. Morris is working away from the top position though.
Both fighters are breathing heavily.
Morris sitting in half guard, looking to land shots. Carter defending well though.
That's one minute gone in the round.
Carter is trying to get back to full guard.
Morris controlling the pace.
Well, the referee has seen enough. Neither fighter is active enough on the ground so he's stood them back up.
Carter throws an off balance right hand
and Morris counters nicely by changing levels and landing a hook to the body.
Morris misses with a few strikes there.
Carter misses with a half-hearted attempt at a head kick.
Carter fakes an overhand right and shoots for a takedown. Morris sprawls well initially but Carter persists and gets the takedown into half guard.
Morris is not content to let Carter control the position.
Carter lands with an elbow from half guard - that looked like it hurt.
Carlos Carter overall seems to be getting the better of the ground position in the fight so far.

Carter decides to return to a standing position.
Carter closes the distance and clinches.
Carter softening up his opponent with strikes, against the cage.
Carter jumps guard.
That's two minutes gone in the round.
Carter is looking to stand up but Morris isn't so interested in that idea.
Carter bucks up whilst keeping hold of a body lock, managing to reverse the position. Now he's in top in Morris's guard.
Carter tries to stand but Morris is controlling from the bottom.
Carter pushing down on Morris's thigh, trying to pass to half guard. He's managed it... Nice work.
Carter is working hard to pass the guard. He's done it - he's now in full mount! Trouble for Morris!
Morris tries to get back to half guard but can't.
The ref warns both fighters not to hold the cage as they work up against the meshing.
Carter breaks from Morris's wrist control and lands an elbow.
Carter lands a nice shot to the head.
Carter scores with a couple of good head shots there.
Fantastic stuff here - a very entertaining period of action, which has drawn cheers from the crowd.
Carter postures up and cracks his opponent a couple of times before moving back into close ground control. Morris looks a forlorn figure.
Carter cracks Morris with a big head shot that has him covering up instantly! He's rolled onto his side and the referee has seen enough - this one is aaaaaaaaaaall over!
Ladies and gentlemen, after 3:01 of round 3, we have a winner by way of TKO (Strikes). Carlos Carter!
|
|
|
|
|
|
|
|
|
|
|
|
|
|
|
|
|
|
|
|
|
|
|
| S |
C
A |
G |
S |
C
B |
G |
|
S |
C |
G |
|
energy
A | B |
|
hype
A | B |
|
pop
A | B |
|
mgr
A | B |
|
FIGHT
RATING
75% |
|
|
|
|
|
|
|
Undercard bout
|
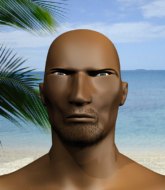
Coming up we have a heavyweight MMA rules bout between Aljo Stajerski (ranked 0 p4p, 0 weight class) and Rod Bayer (ranked 0 p4p, 0 weight class). Stajerski comes into the arena with ACAB blaring out of the sound system. Aljo Stajerski could well score a knockout today. He has the power to get to Rod Bayer's chin.
 |
|
 |
| 201 cm
18
274 lbs
2 - 0 - 0 |
|
200 cm
22
266 lbs
2 - 2 - 0 |
BJJ Purple Belt
Basic striking
Granite chin |
|
BJJ White Belt
Decent boxing
Solid chin |
|
| |
|
Ladies and gentlemen. This fight is 3 rounds, in the heavyweight division.
Introducing the fighter to my left, fighting out of the red corner.
With a record of
2 - 0 - 0, fighting out of London, Aljo Stajerski!
And introducing the fighter to my right, fighting out of the blue corner.
With a record of
2 - 2 - 0, fighting out of London, Rod Bayer!
The judges for this bout are Chris Edwards, Colin Fotheringham and Sam Margolis.
The bell rings for round one and we are underway!
Stajerski throws a looping left and ducks down for a takedown. He's got his arms around Bayer's waist but Bayer gets an underhook and avoids the takedown by throwing Stajerski off to one side.
Bayer drives through with a really nice takedown into side control.
Bayer tries to get to his feet but he's trapped momentarily.
Bayer is looking to take a break and control but Stajerski is keeping him honest, looking to work from the bottom.
Stajerski regains half guard.
Bayer prevents Stajerski from improving his position.
Stajerski is working hard here to advance position.
Stajerski slips a foot under and gets full guard. Nice work.
Bayer trying to stand up but can't free himself from Stajerski's guard.
That's one minute gone in the round.
Bayer postures up.
Bayer is looking to stand up but Stajerski won't let him.
Stajerski tries to strike from the bottom.
The referee has ruled that neither fighter is active enough on the ground and has stood them back up.
Stajerski doesn't succeed with the takedown
and Bayer counters with a stiff right hand.
Wow, both these guys are really going for it!
Stajerski defending well as Bayer loads up on a big left hand.
Some wild striking there from Bayer.
Stajerski with a poor takedown
and Bayer decides to take the opportunity to score a takedown. He's landed in Stajerski's guard.
That's three failed takedown attempts in the round for Aljo Stajerski. That's going to take a lot out of him.
Stajerski is breathing heavily.
Stajerski trying to control the position.
The fighters are pressed up against the cage, both looking to find a bit of space to work.
Stajerski is working actively off his back, looking to secure an arm or perhaps work for a triangle.
Bayer is looking to stand up but Stajerski won't let him.
That's two minutes gone in the round.
Stajerski is working from a closed guard but he's struggling to control his opponent.
Stajerski is looking for a triangle but Bayer pushes his legs off easily.
The fighters are starting to get a bit slippery now, which will make submissions a bit more difficult.
Stajerski is working the butterfly guard. He manages to land a nice scissor sweep and is now in half guard on the top. Nice move.
The fans in attendance giving it up for the two fighters, who have really let it all hang out in the last minute or so!
Stajerski seems to be looking for submissions.
Stajerski trying to control the action but Bayer is working from the bottom.
That's three minutes gone in the round.
Stajerski is working for a submission here. He's got hold of the far side arm and he's looking for a kimura. He's cranking on the arm and he's got it! Bayer is tapping out! Ouch, that looked like it hurt!
Ladies and gentlemen, after 3:22 of round 1, we have a winner by way of Submission (Kimura). Aljo Stajerski!
|
|
|
|
|
|
|
|
|
|
|
|
|
|
|
|
|
|
|
|
|
|
|
| S |
C
A |
G |
S |
C
B |
G |
|
S |
C |
G |
|
energy
A | B |
|
hype
A | B |
|
pop
A | B |
|
mgr
A | B |
|
FIGHT
RATING
57% |
|
|
|
|
|
|
|
Undercard bout
|
Coming up we have a light heavyweight MMA rules bout between Superfoxi Silverfish (ranked 0 p4p, 0 weight class) and You Submit (ranked 0 p4p, 0 weight class). Silverfish comes to the cage accompanied by LOK - Taftamanabag. Both fighters will be looking to make this an exciting fight for the fans, I'm sure!
 |
|
 |
| 178 cm
18
210 lbs
2 - 1 - 0 |
|
195 cm
22
214 lbs
1 - 2 - 0 |
BJJ Blue Belt
Brawler
Big heart |
|
BJJ Brown Belt
Brawler
Very confident |
|
| |
|
Ladies and gentlemen. This fight is 3 rounds, in the light heavyweight division.
Introducing the fighter to my left, fighting out of the red corner.
With a record of
2 - 1 - 0, fighting out of London, Superfoxi Silverfish!
And introducing the fighter to my right, fighting out of the blue corner.
With a record of
1 - 2 - 0, fighting out of London, You Submit!
The judges for this bout are Colin Fotheringham, Andrew Berry and Sam Margolis.
The bell rings for round one and we are underway!
Submit tries to bum rush Silverfish with a series of wild strikes but Silverfish uses good footwork to avoid the assault.
Oh, that's a big right hand from Submit and Silverfish goes tumbling to the canvas! Submit follows him to the ground and looks to finish from half guard.
Silverfish is rocked!
Silverfish throws a strike from the bottom that misses.
Oh Silverfish is still in real trouble! Will he be able to recover?!!
Submit stands, ready to strike. The ref makes him back up and allows Silverfish to get to his feet.
Silverfish is looking to clinch.
Submit cracks Silverfish with a nasty uppercut that draws ooohs from the crowd and sends Silverfish tumbling backwards onto the mat. He tries to recover but Submit pounces and lands a hail of unanswered strikes that forces the referee to step in to end the fight! Silverfish is not happy but he gave the referee no choice!
Ladies and gentlemen, after 0:21 of round 1, we have a winner by way of TKO (Strikes). You Submit!
|
|
|
|
|
|
|
|
|
|
|
|
|
|
|
|
|
|
|
|
|
|
|
| S |
C
A |
G |
S |
C
B |
G |
|
S |
C |
G |
|
energy
A | B |
|
hype
A | B |
|
pop
A | B |
|
mgr
A | B |
|
FIGHT
RATING
100% |
|
|
|
|
|
|
|
Undercard bout
|
Coming up we have a light heavyweight MMA rules bout between Max Dillan (ranked 0 p4p, 0 weight class) and Fucke Keith (ranked 0 p4p, 0 weight class). Keith has chosen Tool as his entrance music, which hasn't gone down very well with the crowd. Over to our ring announcer for the fighter introductions!
 |
|
 |
| 190 cm
21
210 lbs
4 - 1 - 0 |
|
190 cm
23
215 lbs
6 - 2 - 0 |
Good wrestling
Brawler
Big heart |
|
BJJ Purple Belt
Counter striker
Granite chin |
|
| |
|
Ladies and gentlemen. This fight is 3 rounds, in the light heavyweight division.
Introducing the fighter to my left, fighting out of the red corner.
With a record of
4 - 1 - 0, fighting out of London, Max Dillan!
And introducing the fighter to my right, fighting out of the blue corner.
With a record of
6 - 2 - 0, fighting out of London, Fucke Keith!
The judges for this bout are Andrew Berry, James Ackerman and James Atkins.
The bell rings for round one and we are underway!
Keith shoots in for a takedown. "I don't think so" says Dillan as he avoids it easily.
Keith avoids a punch combination nicely.
Keith swats away the attempt to clinch by Dillan.
Keith throws a looping left and ducks down for a takedown. He's got his arms around Dillan's waist but Dillan gets an underhook and avoids the takedown by throwing Keith off to one side.
Dillan misses with the combination.
A punch combination from Dillan misses.
Keith shoots in but Dillan avoids the takedown attempt easily.
Max Dillan has stuffed three takedown attempts in the round now. That's going to take a lot out of Fucke Keith.
Keith avoids the clinch attempt nicely.
We've had a slow start to the round here - hopefully the action picks up.
Dillan darts in and clinches Keith up against the cage.
The two fighters are working to gain dominance in the clinch.
Keith tries for a takedown but Dillan manages to get underhooks.
That's one minute gone in the round.
Dillan lands a nice trip takedown into half guard.
It looks like Dillan is going to stand back up.
Dillan stands up from half guard... He's had enough of that ground malarky for the time being.
Dillan fakes with an overhand right and moves in to clinch with Keith, pushing him back against the cage.
Keith tries a shoulder strike but it doesn't do any damage.
Keith tries for a takedown. No joy.
Keith working on landing some head shots here - that one got through nicely.
Keith lands a shoulder strike that jolts his opponent's head backwards.
Dillan looking for a takedown.
Dillan tightens his grip and picks Keith up, before dumping him to the ground. Keith manages to land in guard.
Dillan wants to stand but Keith is controlling his posture from full guard.
Keith escapes his hips to the side and looks to be working for an armbar. Dillan gives him a little smile and shakes his head. No chance.
That's two minutes gone in the round.
Keith looking for submissions from the bottom but instead Dillan passes into half guard.
This has been an exciting period of action!
Keith gets full guard.
Keith had isolated an arm as going for an omaplata. Dillan is defending the submission well but is in a very vulnerable position. Keith Is leaning forward trying to finish the omaplata but decides to abandon it, and take Dillan's back instead.
Keith looks gassed!
Dillan is trying to get back to his feet but he's not managed it yet.
Keith trying to control.
Dillan won't enjoy being in this position. Keith looking for the choke. Oh... he's slipped the arm under the neck - Dillan is tapping - it's over boys! Keith picks up the submission victory!
Ladies and gentlemen, after 3:04 of round 1, we have a winner by way of Submission (RNC). Fucke Keith!
|
|
|
|
|
|
|
|
|
|
|
|
|
|
|
|
|
|
|
|
|
|
|
| S |
C
A |
G |
S |
C
B |
G |
|
S |
C |
G |
|
energy
A | B |
|
hype
A | B |
|
pop
A | B |
|
mgr
A | B |
|
FIGHT
RATING
53% |
|
|
|
|
|
|
|
Undercard bout
|
Coming up we have a middleweight MMA rules bout between Micheal Biselton (ranked 0 p4p, 0 weight class) and Franco Baresi (ranked 0 p4p, 0 weight class). Franco Baresi has the better chin. Will he look to stand and bang today?
 |
|
 |
| 188 cm
22
190 lbs
4 - 2 - 0 |
|
184 cm
22
195 lbs
4 - 2 - 0 |
Good takedowns
Brawler
Experienced |
|
BJJ Purple Belt
Brawler
Knockout power |
|
| |
|
Ladies and gentlemen. This fight is 3 rounds, in the middleweight division.
Introducing the fighter to my left, fighting out of the red corner.
With a record of
4 - 2 - 0, fighting out of London, Micheal Biselton!
And introducing the fighter to my right, fighting out of the blue corner.
With a record of
4 - 2 - 0, fighting out of London, Franco Baresi!
The judges for this bout are Daniel Bishop, James Glass and James Atkins.
The bell rings for round one and we are underway!
Biselton shoots for a takedown but Baresi saw that one coming a mile off and avoided it easily.
Biselton closes the distance and gets a double leg, slamming Baresi to the mat! Baresi manages to get full guard.
Baresi is edging up against the cage. He's using the cage to get back to his feet. Nice work there - the fighters are clinched.
Biselton tries to jump guard but he falls flat on his backside. Baresi smiles and moves away.
Biselton slips under a jab.
Biselton shoots in but no luck this time.
That's three failed takedown attempts in the round for Micheal Biselton. That's going to take a lot out of him.
Baresi misses with a few strikes there.
Biselton shoots in but no luck this time.
Nice takedown defense from Baresi. No joy for Biselton on that attempt.
Biselton scores with a nice takedown into half guard. Let's see what he's got on the ground.
Biselton not landing any meaningful shots this time.
Baresi is trying to get back to full guard.
Baresi blocking the ground and pound attempt from Biselton.
That's one minute gone in the round.
Biselton wants to pass to mount but Baresi is defending the position.
Biselton wants to work for an arm triangle but Baresi is really keeping half guard well and defending the submission attempt.
Biselton not landing any meaningful shots this time.
Biselton is looking for a kimura but he's never going to get it from there.
Biselton is breathing heavily.
The referee has ruled that neither fighter is active enough on the ground and has stood them back up.
Biselton just misses with a punch to the body.
That's two minutes gone in the round.
My god... these two guys really need to pick up the pace or everyone will leave to go get a beer.
Baresi rushes forward with a series of wild hooks but Biselton moves out of range and avoids them all easily.
Baresi drops down and drives through with a powerful takedown into guard.
The ref warns both fighters not to hold the cage as they work up against the meshing.
Biselton looking to control.
The fighters are pressed up against the cage, both looking to find a bit of space to work.
Biselton avoiding any damage from the ground and pound.
Biselton looking to sweep here. No luck so far.
Baresi stands up and looks to throw the legs aside to pass to side control. Biselton swivels though and keeps the full guard.
Baresi is holding a leg here, probably looking for an ankle lock - he drops back and goes for it! Biselton is in trouble! Is it all over??? No! Biselton has escaped and now he's on top!
Baresi keeping moving, preventing Biselton from controlling successfully.
That's three minutes gone in the round.
Biselton looking to sit in guard and control but Baresi gets the butterfly guard and sweeps. He's now in the guard on the top.
Baresi stands up from Biselton's guard - Baresi perhaps looking for a knockout.
Baresi moves into the clinch successfully.
Baresi drags the fight down to the ground.
That's four minutes gone in the round.
Biselton wants to control from the top but Baresi keeps moving.
Biselton postures up to throw the ground and pound strikes but they don't connect.
Biselton passes into half guard.
Biselton is trying a forearm choke
I don't think that's going to do much at this level of the game.
Biselton thows a wild elbow that connects with the canvas.
And thats the end of the round the fighters go back to their corners.
A close round but Franco Baresi will probably get the nod.
Well, the break between rounds is over. Let's get back to the scrappin!
Baresi will need to tighten up his combinations if he doesn't want to gas himself out, swinging at thin air.
Biselton doesn't succeed with the takedown
and Baresi counters with a nice uppercut.
Baresi pushes Biselton away with a front kick.
Biselton fails with the takedown
and Baresi counters with a nice single leg takedown and he's in Biselton's guard now.
Baresi trying to control the position from guard on top but Biselton is wriggling around, looking for whatever he can.
Baresi pressing down on his opponent's thigh, looking to pass guard. Biselton is keeping the position for now.
Baresi avoids a guillotine attempt easily.
Both fighters are absolutely exhausted here.
Biselton has a closed guard, preventing Baresi from standing up.
That's one minute gone in the round.
Biselton trying to control the position.
Biselton has a loose triangle. He'll be looking to tighten that up but Baresi can see exactly what he's planning and manages to posture up and free himself.
Baresi looking to pass the guard.
Biselton wants to sweep here but Baresi controlling him for the moment.
That's two minutes gone in the round.
The crowd are hurling abuse towards the fighters... You can hardly blame them though because there isn't a lot going on in the fight.
Baresi avoids a guillotine attempt easily.
Biselton tries to land a sweep but no joy.
Biselton keeping moving, preventing Baresi from controlling successfully.
Biselton is looking for a triangle but Baresi pushes his legs off easily.
That's three minutes gone in the round.
Biselton looking for submissions off his back, moving his hips, looking for an opening.
Biselton looking for submissions off his back, moving his hips, looking for an opening.
Baresi wants to pass the guard but Biselton is keeping the position.
Biselton looking for a sweep. Not yet Biselton, not yet.
Biselton is working actively off his back, looking to secure an arm or perhaps work for a triangle.
Micheal Biselton overall seems to be getting the better of the ground position in the fight so far.
That's four minutes gone in the round.
Biselton lands a beautiful switch and he's in full mount! That could spell trouble for Baresi!
Biselton throwing sloppy strikes here. Perhaps if he tightened up his striking from such a dominant position, he'd be able to finish easier.
Biselton looking to isolate an arm here. Baresi doesn't see it coming and as Biselton extends the arm, he's forced to tap out! Nice submission by Biselton!
Ladies and gentlemen, after 4:57 of round 2, we have a winner by way of Submission (Armbar). Micheal Biselton!
|
|
|
|
|
|
|
|
|
|
|
|
|
|
|
|
|
|
|
|
|
|
|
| S |
C
A |
G |
S |
C
B |
G |
|
S |
C |
G |
|
energy
A | B |
|
hype
A | B |
|
pop
A | B |
|
mgr
A | B |
|
FIGHT
RATING
33% |
|
|
|
|
|
|
|
Undercard bout
|
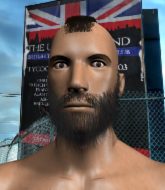
Coming up we have a heavyweight MMA rules bout between Stan Tayolor (ranked 0 p4p, 0 weight class) and Leka Luu (ranked 0 p4p, 0 weight class). Over to our ring announcer for the fighter introductions!
 |
|
 |
| 194 cm
23
245 lbs
4 - 2 - 0 |
|
195 cm
18
270 lbs
4 - 1 - 0 |
BJJ Purple Belt
Solid Muay Thai
Granite chin |
|
BJJ Blue Belt
Brawler
Powerful |
|
| |
|
Ladies and gentlemen. This fight is 3 rounds, in the heavyweight division.
Introducing the fighter to my left, fighting out of the red corner.
With a record of
4 - 2 - 0, fighting out of London, Stan Tayolor!
And introducing the fighter to my right, fighting out of the blue corner.
With a record of
4 - 1 - 0, fighting out of London, Leka Luu!
The judges for this bout are James Atkins, Donald Grub and Daniel Bishop.
The bell rings for round one and we are underway!
Luu on the wrong end of a nice hook.
Tayolor drops his hands and takes a jab to the jaw for his troubles.
A big left from Luu misses.
Tayolor is looking to take this fight into the clinch.
Luu rushes Tayolor and pushes him back against the cage in a clinch.
Luu misses the knee to the body. Nice hip positioning from Tayolor.
Tayolor tries to land a knee to the head but misses.
Tayolor with a knee to the head.
Tayolor missing with knees to the body.
Luu digs a right hand into Tayolor's ribs. Those have got to be taking their toll on Tayolor's gas tank.
Luu misses with a knee strike.
Tayolor tries a knee to the head but Luu blocks it.
Luu with the Thai clinch, lands a knee to the head.
Tayolor is breathing heavily.
This has been an exciting period of action!
Nice elbow from Luu.
Luu lands an elbow that stopped Tayolor in his tracks for a moment.

It looks like Stan Tayolor has been cut.
Luu lands an elbow inside.
Tayolor using the Thai plumb to throw knees but Luu has his back arched nicely, preventing the strike.
Tayolor with the Thai clinch. He's looking to land a big knee but he's not managed it this time.
Luu lands a knee to the head.
Tayolor is rocked!
Luu has Tayolor pressed against the cage. He pushes Tayolor back and as he springs towards him off the cage, Luu throws a beautiful elbow that sends Tayolor crashing to the floor! Luu piles on the pressure with more strikes! Tayolor is flailing away but he's not defending himself and the referee steps in to stop the fight!
Ladies and gentlemen, after 0:42 of round 1, we have a winner by way of TKO (Strikes). Leka Luu!
|
|
|
|
|
|
|
|
|
|
|
|
|
|
|
|
|
|
|
|
|
|
|
| S |
C
A |
G |
S |
C
B |
G |
|
S |
C |
G |
|
energy
A | B |
|
hype
A | B |
|
pop
A | B |
|
mgr
A | B |
|
FIGHT
RATING
100% |
|
|
|
|
|
|
|
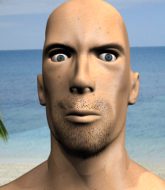
Undercard bout
|
Coming up we have a middleweight MMA rules bout between Oleg Osbourne (ranked 0 p4p, 0 weight class) and Beowulf MacDougal (ranked 0 p4p, 0 weight class). Osbourne comes to the cage accompanied by Dropkick Murphys - Warriors Code. MacDougal has chosen The Gael by Albannach as his entrance music. Both fighters will be looking to make this an exciting fight for the fans, I'm sure!
 |
|
 |
| 180 cm
20
192 lbs
4 - 2 - 0 |
|
180 cm
19
185 lbs
2 - 2 - 0 |
BJJ Blue Belt
Brawler
Granite chin |
|
BJJ Blue Belt
Basic striking
Very confident |
|
| |
|
Ladies and gentlemen. This fight is 3 rounds, in the middleweight division.
Introducing the fighter to my left, fighting out of the red corner.
With a record of
4 - 2 - 0, fighting out of London, Oleg Osbourne!
And introducing the fighter to my right, fighting out of the blue corner.
With a record of
2 - 2 - 0, fighting out of London, Beowulf MacDougal!
The judges for this bout are Donald Grub, Chris Edwards and James Atkins.
The bell rings for round one and we are underway!
Osbourne throws a right hand that MacDougal ducks under and follows up with a left that MacDougal also avoids with ease.
Osbourne gets the takedown into side control.
Osbourne has had enough of the ground for now and decides to stand.
MacDougal with a poor takedown
and Osbourne counters with a right hand to the body.
Osbourne digs a good hook to MacDougal's body.
Osbourne shoots in for a takedown and gets it.
MacDougal looks gassed!
We've seen a great period of action over the last minute or so - credit to both fighters for leaving it all in the cage!
It looks like Osbourne is going to stand back up.
Osbourne wants to work for an arm triangle but MacDougal is really keeping half guard well and defending the submission attempt.
MacDougal is looking for a sweep. Osbourne is wise to his cunning plan and keeps the top position.
MacDougal actively working from the bottom here.
Osbourne working over MacDougal with some ground and pound. MacDougal looks like he wants out of this position, which is understandable.
Well, if Osbourne is going to just lie there, perhaps we should talk about what we're having for dinner tonight
I'm having a ham and pineapple pizza
Yum. Can't wait.
MacDougal tries to roll over but Osbourne keeps him under control.
Osbourne has been looking to land a fair amount of strikes on the ground. He might be looking to soften his opponent up in order to work for a submission.
Osbourne uses his free foot to push down on MacDougal's thigh. Eventually he works his other foot free and he's advanced to mount - this is trouble for MacDougal.
That's one minute gone in the round.
Osbourne is standing up out of mount! Strange tactic there - he must really want this one on the feet!
Osbourne misses with a double jab.
Decent striking displayed by Osbourne there.
Osbourne closes the distance and looks for a trip takedown... aaaand he's got it - Osbourne lands in his opponent's guard.
Osbourne is pushing down on MacDougal's leg trying to pass to half guard. MacDougal is fighting to maintain full guard but Osbourne has managed to sneak the leg through.
Osbourne is keen to just control but MacDougal is a slippery customer.
MacDougal is looking to regain full guard. Not this time though.
The ref warns both fighters not to hold the cage as they work up against the meshing.
MacDougal is looking to sinch up a gullotine here but Osbourne pulls his head out easily.
MacDougal looking for submissions off his back.
Osbourne trying to pass the guard but MacDougal defending well.
MacDougal trying to control here.
MacDougal actively working from the bottom here.
That's two minutes gone in the round.
MacDougal looking for submissions off his back.
It looks like we're going to have a standup here. Neither fight is doing enough on the ground.
Osbourne throws a combination. MacDougal tries to block but a couple of punches get through.
MacDougal is rocked!
Osbourne ducks low and lands a nice hook to the body of his opponent.
This has been an exciting period of action!
Osbourne misses with a double jab.
Osbourne lands a jab-cross combination.
MacDougal is still on wobbly legs! Can Osbourne finish him?
MacDougal doesn't succeed with the takedown
and Osbourne counters with a shoot takedown. MacDougal fights it but they end up in guard.
Osbourne avoids a guillotine attempt easily.
Osbourne wants to pass the guard but MacDougal is keeping the position.
Osbourne trying to control the position from guard on top but MacDougal is wriggling around, looking for whatever he can.
MacDougal working for a triangle but Osbourne defends it easily.
MacDougal wants to sweep but no luck.
MacDougal seems to have recovered his senses.
That's three minutes gone in the round.
Osbourne is holding a leg here, probably looking for an ankle lock - he drops back and goes for it! MacDougal is in trouble! Is it all over??? No! MacDougal has escaped and now he's on top!
Osbourne wants to sweep but no luck.
MacDougal passes easily into side control. Nice work.
Osbourne is trying to get back to half guard.
MacDougal is looking to finish here, going for an Americana. Osbourne knows the correct defense though, so he's OK.
Osbourne can't do much from the bottom here.
MacDougal tries to advance to mount but Osbourne denies him.
That's four minutes gone in the round.
The crowd are starting to boo a lack of action.
MacDougal thinks about going for a far side armbar but bails out and retains the dominant position instead.
MacDougal thinks about going for a far side armbar but bails out and retains the dominant position instead.
Osbourne is trying to get back to half guard.
MacDougal thinks about going for a far side armbar but bails out and retains the dominant position instead.
MacDougal tries for an arm triangle. That looks pretty tight to me. Is this one over!?! Possibly, maybe, no MacDougal has let go of the choke. Obviously it wasn't as tight as we thought!
The fighters are pressed up against the cage, both looking to find a bit of space to work.
As the round comes to an end the crowd are showing their appreciation for a great round of action.
Osbourne sneaks back into half guard.
MacDougal trying to pass the guard but Osbourne defending well.
And thats the end of the round the fighters go back to their corners.
Oleg Osbourne dominated that round.
That's the end of the round. The referee orders the cornermen out of the cage so we can get back down to business.
MacDougal tries for a takedown but Osbourne circles away easily
and Osbourne counters with a nice body shot.
Osbourne looks to score with a combo but nothing lands.
MacDougal gets his takedown attempt stuffed easily
and Osbourne counters with a left to the body.
Osbourne lands with a shot to the body.
Oleg Osbourne is looking to throw some combinations by the looks of things.
Osbourne with a body punch. A glancing blow.
Osbourne closes the distance, clinches up and gets a nice trip takedown into side control. Very smooth.
Osbourne thinks about going for a far side armbar but bails out and retains the dominant position instead.
MacDougal is positioning himself to get back to half guard.
MacDougal manages to get one leg in to regain half guard.
Osbourne is trying for a guillotine from the top but the pressure isn't in the right place so MacDougal is just riding it out for now. Osbourne eventually gives up the hold.
MacDougal wants to improve his position but Osbourne is controlling well.
Both fighters are absolutely exhausted here.
That's one minute gone in the round.
MacDougal gets full guard.
Osbourne trying to control but MacDougal is working from the bottom.
MacDougal has a loose triangle. He'll be looking to tighten that up but Osbourne can see exactly what he's planning and manages to posture up and free himself.
MacDougal is looking for a triangle but Osbourne pushes his legs off easily.
MacDougal is working actively off his back, looking to secure an arm or perhaps work for a triangle.
MacDougal looking for a guillotine here but Osbourne defends easily.
Osbourne slips effortlessly into side control - very nice.
Osbourne advances to full mount.
That's two minutes gone in the round.
Osbourne is standing up out of mount! Strange tactic there - he must really want this one on the feet!
Osbourne throws a wild combination but nothing lands.
MacDougal shoots for a double leg takedown but Osbourne sprawls well. He's pushed MacDougal's face into the mat and manages to get back to his feet relatively easily.
Oleg Osbourne has stuffed three takedown attempts in the round now. That's going to take a lot out of Beowulf MacDougal.
MacDougal has a takedown stuffed.
MacDougal fails with a takedown attempt from distance.
A punch combination from Osbourne misses.
MacDougal looks for a takedown. He's got it. We're now in half guard.
Osbourne gets full guard.
Osbourne is looking for a triangle but MacDougal pushes his legs off easily.
Fantastic stuff here - a very entertaining period of action, which has drawn cheers from the crowd.
Osbourne is active off his back here, looking for submissions.
Osbourne has control of MacDougal's left arm, preventing MacDougal from doing any damage.
Oleg Osbourne overall seems to be getting the better of the ground position in the fight so far.
Osbourne looking for submissions off his back, moving his hips, looking for an opening.
MacDougal drops back for a leg but he's not going to get it - he lets go and Osbourne dives on top into guard.
That's three minutes gone in the round.
Osbourne pushes down on MacDougal's leg and manages to get into half guard.
The fighters are battling for position here. MacDougal manages to regain full guard. Nice work.
MacDougal manages to land a sweep and now he's in mount on top!
Osbourne has given up his back here. Will MacDougal look for the submission or keep pounding away?
Osbourne tries to escape but MacDougal has the hooks in and won't let him break free.
Osbourne preventing the rear naked choke attempt from MacDougal.
MacDougal patiently working for the choke. Which fighter will keep their nerve here?
Osbourne turns into MacDougal and is now in his guard.
MacDougal manages to sweep nicely, so he's now on top. Osbourne manages to get himself to full guard.
MacDougal is trying to work a guillotine from the top, or something like that? Don't know how he thinks he's going to get a finish from there.
Osbourne is working actively off his back, looking to secure an arm or perhaps work for a triangle.
That's four minutes gone in the round.
MacDougal forces his way into half guard.
Osbourne gets back to full guard.
Osbourne is working an open guard here, looking to improve his position. No doubt that will leave him open to counters but at least he's being more offensive.
MacDougal must be cautious of submissions here, given that his opponent has the superior Jiu Jitsu.
Osbourne bucks up whilst keeping hold of a body lock, managing to reverse the position. Now he's in top in MacDougal's guard.
Osbourne trying to control but MacDougal is working from the bottom.
Osbourne is trying to work a guillotine from the top, or something like that? Don't know how he thinks he's going to get a finish from there.
MacDougal is working the butterfly guard. He manages to land a nice scissor sweep and is now in half guard on the top. Nice move.
Fantastic stuff here - a very entertaining period of action, which has drawn cheers from the crowd.
As the round comes to an end the crowd are showing their appreciation for a great round of action.
Osbourne moves his hips nicely and gets into full guard.
MacDougal advances to half guard.
And thats the end of the round the fighters go back to their corners.
Oleg Osbourne dominated that second round.
That's the end of the interval. I'm sure that seemed a lot quicker than a minute for our two fighters! Back to the action. This is the final round!
Osbourne lands a with a good body shot.
Oleg Osbourne is winning the standup battle so far.
Osbourne displaying good standup as he scores with a three punch combination.
Nice body punch from Osbourne.
Osbourne bobs and weaves into range and then changes levels and scores with a nice takedown into side control.
Osbourne tries for a kimura. Not really close to a finish though.
MacDougal manages to get one leg in to regain half guard.
Osbourne is looking for a kimura but MacDougal is holding onto that half guard position, so it's hard for Osbourne to get the leverage.
MacDougal gets back to full guard.
MacDougal is working actively off his back, looking to secure an arm or perhaps work for a triangle.
Osbourne wants to control from the top but MacDougal keeps moving.
Osbourne passes MacDougal's right leg, so he's now in half guard.
This has been an exciting period of action!
Osbourne uses his free foot to push down on MacDougal's thigh. Eventually he works his other foot free and he's advanced to mount - this is trouble for MacDougal.
Both fighters are breathing heavily.
Osbourne landing strikes, looking to finish!
That's one minute gone in the round.
Osbourne goes for an armbar but he's fallen flat on his backside there and now MacDougal is on top in guard.
MacDougal forces his way into half guard.
Osbourne moves into full guard.
Osbourne throwing his legs up looking for a triangle.
Osbourne working from the bottom, still in full guard. He's managed to get a loose triangle. MacDougal doesn't seem to be doing much to defend here, obviously he feels comfortable in the position. MacDougal manages to throw the legs off his shoulder and he's back into guard - no problem.
Osbourne is trying to control the position but MacDougal postures up.
Osbourne lands a beautiful switch and he's in full mount! That could spell trouble for MacDougal!
Osbourne looks like he's working for a submission but he's not found anything just yet.
Osbourne looking for an armbar but decides to keep the dominant position instead.
That's two minutes gone in the round.
A nice elbow there by Osbourne.
MacDougal is in all sorts of trouble here.
Osbourne get's back to his feet.
This has been an exciting period of action!
MacDougal shoots in for a takedown and gets it. Oh and he's advanced to full mount straight away.
MacDougal is looking to secure an arm. He's managed it! He's pivoting for an armbar - that looks tight! But Osbourne has managed to get out of it and now he's in a dominant position. Nice work from Osbourne!
Osbourne avoids a guillotine attempt easily.
MacDougal had isolated an arm as going for an omaplata. Osbourne is defending the submission well but is in a very vulnerable position. MacDougal Is leaning forward trying to finish the omaplata but decides to abandon it, and take Osbourne's back instead.
Osbourne breaks MacDougal's hooks off and manages to turn into his guard.
Osbourne looking to pass the guard.
MacDougal looking for submissions off his back, moving his hips, looking for an opening.
That's three minutes gone in the round.
MacDougal is looking for a triangle but Osbourne pushes his legs off easily.
Osbourne gets to his feet and steps away from his opponent.
MacDougal fails with the takedown
and Osbourne counters with a nice shoot takedown that brings the fighters to the ground.
Osbourne gets to his feet. MacDougal looking to butt scoot but the ref puts an end to that. On your feet son!
Osbourne is looking to wear down MacDougal with body shots, infact he's throwing more body shots than head shots at the moment.
MacDougal tries for a takedown but Osbourne circles away easily
and Osbourne counters with a straight punch to the midsection.
Osbourne thuds a left hand into MacDougal's body.
We've seen a great period of action over the last minute or so - credit to both fighters for leaving it all in the cage!
Osbourne throws a right and a left that both miss.
Osbourne misses with a head kick.
Osbourne lands with a two punch combination before moving back out of range.
Osbourne misses with a two punch combination.
MacDougal misses with a takedown
and Osbourne connects with a straight left hand counter down the middle.
Oleg Osbourne has stuffed three takedown attempts in the round now. That's going to take a lot out of Beowulf MacDougal.
Osbourne bobs and weaves into range and then changes levels and scores with a nice takedown into side control.
MacDougal is looking for a sweep.
Osbourne working the body and head with strikes.
Osbourne trying to control the position but MacDougal is working away.
MacDougal gets back to half guard.
That's four minutes gone in the round.
Osbourne is trying to work for a kimura but MacDougal is defending well.
MacDougal is looking for a sweep. Osbourne is wise to his cunning plan and keeps the top position.
Osbourne trying to mount his opponent but MacDougal defends it.
Osbourne wants to advance to full mount but MacDougal doesn't think that's going to happen and regains full guard instead.
Osbourne looking to pass the guard.
MacDougal tries to land a sweep but no joy.
Osbourne wants to control from the top but MacDougal keeps moving.
MacDougal looks to be working for a triangle here. Oh, it looks like he might have it! Osbourne has picked MacDougal up and slammed him! MacDougal can't keep hold of the triangle and Osbourne manages to pass to side control!
Beowulf MacDougal has stepped it up - he knows he needs a finish here!
The crowd are going absolutely nuts as the round comes to an end - what a fantastic round of action!
Osbourne decides to take the fight back to the feet.
Osbourne closes the distance and gets a double leg, slamming MacDougal to the mat! MacDougal manages to get full guard.
MacDougal throws some sloppy strikes off his back.
And that's the end of the fight!
Oleg Osbourne showed his dominance in that final round.
Well Osbourne has outscored his opponent in every aspect of the fight today. Only a scarily incompetent judge or two will keep him from a well deserved win... Over to the ring announcer for the scorecards.
Ladies and gentlemen, after 3 rounds of action, we go to the scorecards for a decision.
Judge Donald Grub scores the fight 30:27
Judge Chris Edwards scores the fight 30:27
Judge James Atkins scores the fight 30:27
In favor of your winner, by unanimous decision... Oleg Osbourne!
|
|
|
|
|
|
|
|
|
|
|
|
|
|
|
|
|
|
|
|
|
|
|
| S |
C
A |
G |
S |
C
B |
G |
|
S |
C |
G |
|
energy
A | B |
|
hype
A | B |
|
pop
A | B |
|
mgr
A | B |
|
FIGHT
RATING
100% |
|
|
|
|
|
|
|
Co-main event
|
Coming up we have a welterweight MMA rules bout between Captain Planet (ranked 0 p4p, 0 weight class) and Mike Hawk (ranked 0 p4p, 0 weight class). The crowd seem to be enjoying Hawk's choice of entrance music: Everytime I Die. Buckle up people - heeeeeeeeeere we go!
 |
|
 |
| 174 cm
20
180 lbs
2 - 1 - 0 |
|
178 cm
21
179 lbs
4 - 0 - 0 |
Good takedowns
Brawler
Good chin |
|
BJJ Purple Belt
Brawler
Granite chin |
|
| |
|
Ladies and gentlemen. This fight is 3 rounds, in the welterweight division.
Introducing the fighter to my left, fighting out of the red corner.
With a record of
2 - 1 - 0, fighting out of London, Captain Planet!
And introducing the fighter to my right, fighting out of the blue corner.
With a record of
4 - 0 - 0, fighting out of London, Mike Hawk!
The judges for this bout are Daniel Bishop, Paul Tew and Colin Fotheringham.
The bell rings for round one and we are underway!
Planet shoots in for a takedown - he's clinched up with Hawk but Hawk pushes him off and we're back to square one.
Hawk shoots in for a takedown! He's got it and he's managed to land in full mount! That's better than Hawk was expecting from the takedown attempt, I'm sure!
Hawk unloads with some shots from mount but Planet bucks and avoids them well.
Planet is squirming around, avoiding Hawk's attempts to control the action.
The fighters are pressed up against the cage, both looking to find a bit of space to work.
Planet working to try and regain half guard.
Hawk sitting in mount, just looking to control for the moment.
Planet working to try and regain half guard.
Hawk stands up from the dominant position, so we're back on the feet.
Planet doesn't succeed with the takedown
and Hawk counters with a shoot takedown into half guard.
Hawk decides he's had enough of the ground and stands up.
That's one minute gone in the round.
Planet scores with a straight right hand, right through his opponent's guard.
A bone on bone clash there as Hawk blocks the leg kick.
Planet shoots and misses
and Hawk counters with a nice single leg takedown and he's in Planet's guard now.
That's three failed takedown attempts in the round for Captain Planet. That's going to take a lot out of him.
Hawk drops back for a leg! It's a sloppy attempt though and Hawk jumps back into guard quickly, to retain the dominant position.
Hawk looks gassed!
Hawk avoids a guillotine attempt easily.
Planet looking to hit a scissor sweep but Hawk is one step ahead there.
Hawk drops back for a leg! It's a sloppy attempt though and Hawk jumps back into guard quickly, to retain the dominant position.
Planet wants to sweep but no luck.
Planet looking for a guillotine here but Hawk defends easily.
Hawk must be cautious of submissions here, given that his opponent has the superior Jiu Jitsu.
Hawk wants to control from the top but Planet keeps moving.
That's two minutes gone in the round.
Hawk is pushing down on Planet's leg trying to pass to half guard. Planet is fighting to maintain full guard but Hawk has managed to sneak the leg through.
Hawk stalling.
Hawk moves into full mount! Planet won't be happy about that!
Planet keeping his composure momentarily, calmly looking to get back to half guard.
Hawk is standing up out of mount! Strange tactic there - he must really want this one on the feet!
This has been an exciting period of action!
Planet throws a couple of head shots and lands with the final one - a decent hook, which struck Hawk on the side of the head.
Hawk scores a trip takedown into side control. Nice.
Hawk is looking to take a break and control but Planet is keeping him honest, looking to work from the bottom.
Planet is looking to reverse the position.
Planet regains half guard.
That's three minutes gone in the round.
Planet actively working from the bottom here.
Planet is working for an escape here. He's hooked one of Hawk's legs and he's managed to sneak out and take Hawk's back!
Planet working for a RNC but it's not happening just yet.
Planet working for a choke but Hawk reverses nicely into Planet 's guard.
The ref warns both fighters not to hold the cage as they work up against the meshing.
Hawk slips effortlessly into side control - very nice.
Planet tries to work a leg under to get back to half guard but Hawk wriggles his own leg back out and remains in side control.
Hawk is looking to take a break and control but Planet is keeping him honest, looking to work from the bottom.
Hawk takes a little break here. Planet wants to take advantage but he is being controlled well.
Planet manages to land a sweep and he's now on top! Lovely Jiu Jitsu!
That's four minutes gone in the round.
Planet prevents Hawk from standing back up.
Planet is working for a kimura but Hawk is defending it quite comfortably.
Hawk trying to control here.
Hawk gets full guard.
Planet avoids a guillotine attempt easily.
Planet is trying to work a guillotine from the top, or something like that? Don't know how he thinks he's going to get a finish from there.
Hawk looking for submissions from the bottom here. Moving his hips around, possibly looking for an armbar.
As the round comes to an end the crowd are showing their appreciation for a great round of action.
Planet thinks about going for a leg but decides against it, in order to maintain the position.
Hawk is working the butterfly guard. He manages to land a nice scissor sweep and is now in half guard on the top. Nice move.
Planet is trying to get back to full guard.
And thats the end of the round the fighters go back to their corners.
Mike Hawk dominated that round.
That's the end of the round. The referee orders the cornermen out of the cage so we can get back down to business.
Planet avoids a kick to the body.
Planet tries to clinch up.
Planet misses with a few strikes there.
Planet works over Hawk's head and body with a nice combination.
Planet misses with a takedown attempt
and Hawk counters with a takedown into side control.
Hawk wants to control but Planet is keeping him busy.
Planet sneaks a leg under to get back to half guard.
Planet actively working from the bottom here.
Planet is trying to get back to full guard.
Hawk lands with a punch from half guard.
Planet is trying to get back to full guard.
Both fighters are absolutely exhausted here.
Hawk tries to pass to full mount but Planet defends it.
Neither fighter is being very active at the moment, with Hawk in particular looking to stall.
Planet moves his hips nicely and gets into full guard.
That's one minute gone in the round.
Hawk preventing the sweep.
Hawk forces his way into half guard.
Hawk seems very keen to just sit and control from half guard but Planet does not like that idea so much and is remaining active off his back.
Hawk decides to stand and escape the position.
Hawk swats away the attempt to clinch by Planet.
Hawk looks to score with a jab to the body but Planet is just out of range.
Hawk fails to land the takedown.
Planet shoots in but doesn't get the takedown
and Hawk counters with a nice double leg into guard.
Planet keeping full guard, as Hawk tries to pass.
Planet looking for submissions off his back, moving his hips, looking for an opening.
Hawk wants to control from the top but Planet keeps moving.
That's two minutes gone in the round.
Planet looking for a sweep. Not yet Planet, not yet.
Planet has his foot on Hawk's thigh. He's trying to push off and get in position for a triangle, I think. Hawk works his way back into a safe position though.
Planet escapes his hips to the side and looks to be working for an armbar. Hawk gives him a little smile and shakes his head. No chance.
Hawk trying to control but Planet is working from the bottom.
Hawk looking to pass the guard.
Planet being controlled here, momentarily.
Hawk slips effortlessly into side control - very nice.
Hawk wants to control but Planet is keeping him busy.
Planet manages to work his way to half guard, despite Hawk's best efforts.
The fans in attendance giving it up for the two fighters, who have really let it all hang out in the last minute or so!
Hawk wants to work for an arm triangle but Planet is really keeping half guard well and defending the submission attempt.
Planet gets back to full guard.
That's three minutes gone in the round.
Hawk preventing the sweep.
Planet throwing his legs up looking for a triangle.
Hawk stands up from guard. Let's bang!
Planet tries to bum rush Hawk with a series of wild strikes but Hawk uses good footwork to avoid the assault.
Hawk looking to shoot here. He's gone for it and he's landed a takedown into mount! Oh, that's bad for Planet!
Hawk is working on an americana here. Ooh, that looks pretty nasty! Nope, Planet has managed to escape the submission attempt.
Hawk throws some wild stikes that Planet manages to avoid easily.
Planet is desperately trying to get back to half guard.
Hawk looks like he's working for a submission but he's not found anything just yet.
That's four minutes gone in the round.
Hawk thowing strikes but they're hitting the gloves, not doing any damage.
Planet is desperately trying to improve his position but Hawk has a good base and remains in mount.
Planet tries to improve his position but instead Hawk has taken his back!
Planet manages to reverse the position and now he's in Hawk's guard. Nice work there by Planet.
Hawk wants to stand up but Planet is controlling him.
Well, the referee has seen enough. Neither fighter is active enough on the ground so he's stood them back up.
Planet darts in and out, connecting with a jab.
Planet gets his takedown attempt stuffed easily
and Hawk counters with a single leg into guard. Planet didn't expect that.
That's three failed takedown attempts in the round for Captain Planet. That's going to take a lot out of him.
We've seen a great period of action over the last minute or so - credit to both fighters for leaving it all in the cage!
Hawk is taking a break and basically stalling. The referee will not allow him to do that for long.
Planet tries to land a sweep but no joy.
As the round comes to an end the crowd are showing their appreciation for a great round of action.
Hawk passes into half guard.
Planet is looking to regain full guard. Not this time though.
Planet wants to sweep but Hawk has passed to side control!
And thats the end of the round the fighters go back to their corners.
Mike Hawk showed his class in that round. I'd imagine he'll take it on all the scorecards.
That's time! Back to the action! The crowd applaud as we get ready to start the final round!
Hawk clinches with his opponent.
Hawk manages to break the clinch.
Planet fails with the takedown
and Hawk counters with a shoot takedown into half guard.
Planet wants to get back to full guard.
Hawk thows a wild elbow that connects with the canvas.
Planet is trying to get back to full guard.
Planet looking for submissions from an awkward position here.
Planet is trying to get back to full guard.
Hawk is looking to take a break and control but Planet is keeping him honest, looking to work from the bottom.
Both fighters are breathing heavily.
Planet is looking for a sweep. Hawk is wise to his cunning plan and keeps the top position.
It looks like we're going to have a standup here. Neither fight is doing enough on the ground.
Hawk gets the takedown into side control.
Hawk stands up and we're back to a striking position.
Hawk fails with a takedown attempt.
Captain Planet is looking to throw some combinations by the looks of things.
That's one minute gone in the round.
Planet throws a jab but it's blocked by Hawk.
Hawk drives through with a really nice takedown into side control.
Planet is not content to let Hawk control the position.
Hawk is pausing for a moment. What's he doing? It looks like he's clearing his nose. Oh dude! He's shot a load of snot all down Planet's shoulder. That is not cool.
Planet tries to work a leg under to get back to half guard but Hawk wriggles his own leg back out and remains in side control.
Hawk grinds an elbow into Planet's temple.
Planet regains half guard.
Hawk is tying to control. Planet wants to improve his position but can't escape this time.
Hawk is looking for a kimura but Planet is holding onto that half guard position, so it's hard for Hawk to get the leverage.
Planet actively working from the bottom here.
Hawk is working for a submission of some sort.
Planet gets full guard.
That's two minutes gone in the round.
Hawk is trying to work a guillotine from the top, or something like that? Don't know how he thinks he's going to get a finish from there.
Planet has managed to work for a loose triangle. I think Hawk should be able to defend this one pretty easily though. Oh, Planet has tightened it up now! Hawk should have reacted faster there - he's in big trouble and yes, he's tapped out! This one is all over!
Ladies and gentlemen, after 2:31 of round 3, we have a winner by way of Submission (Triangle). Captain Planet!
|
|
|
|
|
|
|
|
|
|
|
|
|
|
|
|
|
|
|
|
|
|
|
| S |
C
A |
G |
S |
C
B |
G |
|
S |
C |
G |
|
energy
A | B |
|
hype
A | B |
|
pop
A | B |
|
mgr
A | B |
|
FIGHT
RATING
100% |
|
|
|
|
|
|
|
Main event
|
Coming up we have a welterweight MMA rules bout between Yoshi Suzuki (ranked 0 p4p, 0 weight class) and Calton Cole (ranked 0 p4p, 0 weight class). Both these fighters are unbeaten, so somebody's 0 has got to go!Yoshi Suzuki has the better chin. Will he look to stand and bang today?
 |
|
 |
| 176 cm
19
172 lbs
5 - 0 - 0 |
|
186 cm
22
179 lbs
5 - 0 - 0 |
BJJ Blue Belt
Basic striking
Granite chin |
|
BJJ Brown Belt
Counter striker
Very confident |
|
| |
|
Ladies and gentlemen. This fight is 5 rounds, for the welterweight championship of the world!
Introducing the champion to my left, fighting out of the red corner.
With a record of
5 - 0 - 0, fighting out of London, Yoshi Suzuki!
And introducing the challenger to my right, fighting out of the blue corner.
With a record of
5 - 0 - 0, fighting out of London, Calton Cole!
The judges for this bout are Steven Brown, William Gold and Daniel Bishop.
The bell rings for round one and we are underway!
Suzuki closes the distance, clinches up and gets a nice trip takedown into side control. Very smooth.
Suzuki controlling from side mount.
The fighters are pressed up against the cage, both looking to find a bit of space to work.
Suzuki goes for an armbar! This could be all over! Wait, no, Cole rolls with the submission and now he's on top in Suzuki's guard! Nice work there by Cole!
Suzuki throws his legs up looking to secure a triangle. Oh, that looks pretty tight, I gotta say! Cole escapes and throws Suzuki's legs to the side, diving into side control!
Suzuki stops Cole from passing to mount.
Suzuki regains half guard.
That's one minute gone in the round.
Suzuki trying to control here.
Suzuki gets back to full guard.
Suzuki throws his legs up looking for a submission but Cole uses it to pass to side control.
Suzuki wants to control but Cole postures up.
Suzuki is looking for a sweep.
Suzuki is looking to slip a leg under and get half guard but Cole is one step ahead and moves to full mount!
Suzuki keeping his composure momentarily, calmly looking to get back to half guard.
Suzuki tries to improve his position but instead Cole has taken his back!
That's two minutes gone in the round.
The crowd are showing their displeasure at the lack of action as loud boos ring out around the arena.
Cole not allowing Suzuki to control his hands.
Suzuki is breathing heavily.
Cole has his opponent's back and is working for the choke.
I really don't envy Suzuki right now.
Suzuki breaks Cole's hooks off and manages to turn into his guard.
Suzuki drops back for a leg but he's not going to get it - he lets go and Cole dives on top into guard.
Suzuki is looking for a triangle here but Cole uses the submission attempt to pass into side control.
Suzuki wings away with a couple of strikes but they don't land.
That's three minutes gone in the round.
Suzuki tries to bench press Cole off him but Cole keeps the position.
Cole is working to tighten is grip on Suzuki's neck. He's isolated an arm and is working for an arm triangle. Suzuki has recognised the danger and is trying to turn with the submission but Cole is really squeezing tight and eventually Suzuki passes out! Cole breaks the hold and jumps onto the cage to celebrate! Submission of the night, I'd say!
Ladies and gentlemen, after 3:30 of round 1, we have a winner by way of Submission (Arm Triangle). Calton Cole!
Calton Cole is the new welterweight champion!
|
|
|
|
|
|
|
|
|
|
|
|
|
|
|
|
|
|
|
|
|
|
|
| S |
C
A |
G |
S |
C
B |
G |
|
S |
C |
G |
|
energy
A | B |
|
hype
A | B |
|
pop
A | B |
|
mgr
A | B |
|
FIGHT
RATING
49% |
|
|
|
|
|
|
|
|
|
|

