 |
DFL 2 - Shattered PBP Commentary |
Undercard bout
|
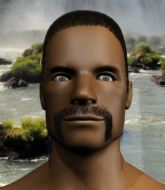
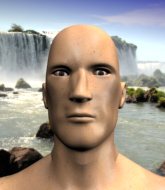
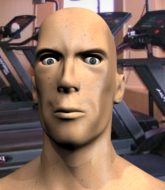
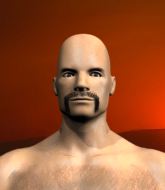
Coming up we have a heavyweight MMA rules bout between Dick Solomon (ranked 0 p4p, 0 weight class) and Lou Cifer Jr (ranked 0 p4p, 0 weight class). Chooooooooon! I think Solomon might be my favorite fighter, now he's come out to Rohff - 94. Over to our ring announcer for the fighter introductions!
 |
|
 |
| 190 cm
22
240 lbs
1 - 0 - 1 |
|
200 cm
18
264 lbs
1 - 1 - 0 |
BJJ Blue Belt
Counter striker
Cuts easily |
|
Good wrestler
Counter striker
Very confident |
|
| |
|
Ladies and gentlemen. This fight is 3 rounds, in the heavyweight division.
Introducing the fighter to my left, fighting out of the red corner.
With a record of
1 - 0 - 1, fighting out of Helsinki, Dick Solomon!
And introducing the fighter to my right, fighting out of the blue corner.
With a record of
1 - 1 - 0, fighting out of Helsinki, Lou Cifer Jr!
The judges for this bout are Tarja Halkonen, Marco Blurström and Ben Zyskovitsi.

The bell rings for round one and we are underway!
Solomon throws a head kick that misses.
Solomon misses the shot to the body.
Cifer Jr on the wrong end of a vicious looking body shot.
Cifer Jr wants to slow Solomon down by chopping away at his legs.
Cifer Jr shoots in but Solomon avoids the takedown attempt easily.

Cifer Jr changes levels and drives through with a really nice takedown into side control. Solomon looks really pissed at himself for not defending that better.
Solomon regains half guard, as Cifer Jr was trying to land strikes.
Cifer Jr looking to pass the half guard. Not this time.
Solomon keeping control of the position.
Solomon wants to get back to full guard.

That's one minute gone in the round.
Cifer Jr not throwing his punches with enough precision this time.
Cifer Jr is trying to control the action in half guard but Solomon is working away on the bottom, looking perhaps to get back to full guard.
Cifer Jr trying to pass the guard but Solomon defending well.
Solomon blocking the ground and pound attempt from Cifer Jr.

It looks like we're going to have a standup here. Neither fight is doing enough on the ground.
Cifer Jr shoots in for a takedown and gets it. Let's see what he's got on the mat.
Solomon controls Cifer Jr momentarily but Cifer Jr frees himself.
Cifer Jr must be cautious of submissions here, given that his opponent has the superior Jiu Jitsu.
Cifer Jr with a nice head shot there.
Solomon has momentary wrist control but Cifer Jr slips an elbow through the middle.
Solomon keeping full guard, as Cifer Jr tries to pass.
Cifer Jr really doesn't want to stay on the ground with Solomon. If he can't get it back to his feet, it's only a matter of time before he'll be tapping out.
Cifer Jr looks gassed!

That's two minutes gone in the round.
Solomon is trying to control the position from the bottom.
Solomon is working an open guard here, looking to improve his position. No doubt that will leave him open to counters but at least he's being more offensive.
Solomon looking to control.
The ref warns both fighters not to hold the cage as they work up against the meshing.
Solomon keeping full guard, as Cifer Jr tries to pass.
Solomon is doing well to control the posture of his opponent and prevent any damage.
Solomon is working from a closed guard but he's struggling to control his opponent.
Well, the referee has seen enough. Neither fighter is active enough on the ground so he's stood them back up.
Cifer Jr shoots in for a takedown. "I don't think so" says Solomon as he avoids it easily.

That's three minutes gone in the round.
Solomon connects with a good right hand that stumbles Cifer Jr. Cifer Jr circles away out of range and recomposes himself.
Solomon tries a switch kick but it misses it's target.
Solomon scores with a kick to the midsection.
Solomon throws a head kick that misses.
Cifer Jr shoots in for a takedown but doesn't get it.
Dick Solomon has stuffed three takedown attempts in the round now. That's going to take a lot out of Lou Cifer Jr.
Cifer Jr closes the distance and clinches up with Solomon, looking for a takedown. Cifer Jr pushes Solomon against the cage but Solomon circles to the side and manages to break the clinch.
A slapping body kick lands there for Solomon.
No luck for Cifer Jr with that takedown attempt.
Cifer Jr shoots in for a takedown! He's got it and he's managed to land in full mount! That's better than Cifer Jr was expecting from the takedown attempt, I'm sure!
Cifer Jr lands with some strikes.

Solomon is rocked!

It looks like Dick Solomon has been cut.

That's four minutes gone in the round.
Cifer Jr dominating with strikes here.
Oh Solomon is still in real trouble! Will he be able to recover?!!
Dick Solomon's cut is getting worse.
This has been an exciting period of action!
Cifer Jr is trying to stand up but he's being controlled by his opponent.
The crowd applaud the fighters efforts here as the round comes to an end.
Cifer Jr is using up a lot of energy trying to get back to his feet. Perhaps he should improve his position first.
And thats the end of the round the fighters go back to their corners.
Lou Cifer Jr dominated that round.
The cut man is working on Dick Solomon's cut.
The minute break is over - no more time for sponges and pep talks - back to the action!

Cifer Jr closes this distance looking for a takedown but Solomon circles away.
Solomon seems to have got his legs back now.
Solomon doesn't manage to clinch there - Cifer Jr circles away.
Cifer Jr shoots in for a takedown. "I don't think so" says Solomon as he avoids it easily.
Solomon pulls out of a head kick attempt.
Solomon throws a head kick that misses.
Cifer Jr tries to shoot in for a takedown. He's got hold of a leg but Solomon swivels and escapes.
Dick Solomon has stuffed three takedown attempts in the round now. That's going to take a lot out of Lou Cifer Jr.
Cifer Jr shoots in with a takedown attempt and he has Solomon pinned against the cage. Solomon gets the underhooks and manages to circle away.
We've had a slow start to the round here - hopefully the action picks up.
Solomon scores with a push kick.
Cifer Jr circles away from the clinch attempt.
Both fighters are absolutely exhausted here.
That's one minute gone in the round.
Cifer Jr fails in his attempt to clinch.
Cifer Jr scores with a nice takedown into half guard. Let's see what he's got on the ground.
Solomon wants to improve his position but Cifer Jr is controlling well.
Cifer Jr thumps the canvas. Not on purpose obviously - he just missed Solomon's head.

Cifer Jr seems to be working for a kimura but Solomon defends the submission attempt.
Cifer Jr thows a wild elbow that connects with the canvas.
Cifer Jr wants to stand but Solomon has hold of a leg and an arm, so he's trapped for now.
Cifer Jr tries to pass the half guard into mount. Solomon knows what he's doing though and prevents the attempt.
Solomon avoiding damage under a succession of punches from Cifer Jr.
That's two minutes gone in the round.
A few boos can be heard. I'm sure they will multiply if the fighters don't pick up the pace.
Solomon wants to control but Cifer Jr is keeping busy and won't allow it.
The referee has ruled that neither fighter is active enough on the ground and has stood them back up.
A head kick misses from Solomon.
Cifer Jr shoots in and drives through. Solomon sprawls well.
Cifer Jr throws a front kick aimed at Solomon's knee but Solomon avoids it well.
Cifer Jr shoots in for a takedown but Solomon shows good takedown defense.
Cifer Jr throws a series of punches but Solomon moves out of range.
Cifer Jr shoots in looking for a takedown. Solomon tries to sprawl out of it but Cifer Jr keeps driving through. The fighters are pinned against the cage. Solomon manages to get underhooks and after a bit of a struggle, circles away and we're back to standing.
Cifer Jr has his head slapped from side to side by a 3 punch combination. That must have hurt him.
Cifer Jr looks for a takedown here. Will he get it? Solomon is fending him off so far but Cifer Jr persists. Nope, Solomon circles away and we're back to standing.
That's three minutes gone in the round.
Cifer Jr changes levels and drives through with a really nice takedown into side control. Solomon looks really pissed at himself for not defending that better.
Solomon taking punishment in the form of punches.
Jeez, Dick Solomon's cut is really nasty now. The referee must be thinking about getting that checked.
The referee calls the doctor in to look at Dick Solomon's cut. Oh no, the doctor has called an end to the bout!
Ladies and gentlemen, after 3:32 of round 2, we have a winner by way of TKO (Cut). Lou Cifer Jr!
|
|
|
|
|
|
|
|
|
|
|
|
|
|
|
|
|
|
|
|
|
|
|
| S |
C
A |
G |
S |
C
B |
G |
|
S |
C |
G |
|
energy
A | B |
|
hype
A | B |
|
pop
A | B |
|
mgr
A | B |
|
FIGHT
RATING
51% |
|
|
|
|
|
|
|
Undercard bout
|
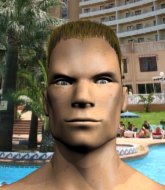
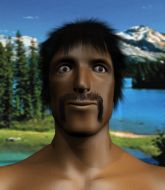
Coming up we have a lightweight MMA rules bout between Pyyno Janis (ranked 0 p4p, 0 weight class) and Bear Grey (ranked 0 p4p, 0 weight class). Pyyno Janis has a significant reach advantage - let's see if he can make it count.
 |
|
 |
| 181 cm
22
157 lbs
0 - 0 - 0 |
|
168 cm
22
155 lbs
0 - 1 - 0 |
BJJ Blue Belt
Improved boxing
Self confident |
|
BJJ Blue Belt
Basic striking
Tends to cut |
|
| |
|
Ladies and gentlemen. This fight is 3 rounds, in the lightweight division.
Introducing the fighter to my left, fighting out of the red corner.
With a record of
0 - 0 - 0, fighting out of Helsinki, Pyyno Janis!
And introducing the fighter to my right, fighting out of the blue corner.
With a record of
0 - 1 - 0, fighting out of Helsinki, Bear Grey!
The judges for this bout are Ben Zyskovitsi, Tarja Halkonen and Anni Minnemäki.
The bell rings for round one and we are underway!
Grey looking to shoot here. He's gone for it and he's landed a takedown into mount! Oh, that's bad for Janis!
Grey avoids the attempt from Janis to control.
Grey lands a heavy elbow.
Janis is rocked!
Janis is desperately trying to improve his position but Grey has a good base and remains in mount.
Janis is working hard here to advance position.
Janis is trying to get to the cage to help him get back to his feet.
The ref warns both fighters not to hold the cage as they work up against the meshing.
Janis working to try and regain half guard.
Grey wants to control the pace but Janis is squirming around nicely.
Janis wants to hold on but Grey pushes him away.
Grey lands with some strikes.
That's one minute gone in the round.
A nice elbow there by Grey.
Oh Janis is still in real trouble! Will he be able to recover?!!
Grey tucks in and makes sure he doesn't lose the dominant position.
Grey working the ground and pound effectively.
Grey lands a big elbow.
Grey looking to control but Janis is working nicely, looking to advance position himself.
Janis tries to hold on but Grey postures up.
Janis takes a big shot to the head but keeps on trying to improve his position.
Grey punching from mount but Janis doing a good job of avoiding damage.
Grey avoids the attempt from Janis to control.
Janis tries to get back to half guard but can't.
That's two minutes gone in the round.
Janis takes a big shot to the head but keeps on trying to improve his position.
Janis tries to reverse the position but Grey maintains control.
Grey scoring with strikes but Janis is staying in there.
Janis is breathing heavily.
Grey lands a heavy elbow.
Grey cracks Janis with a nasty head shot there - the crowd let out an audible gasp there, as the noise reverberated around the arena.
Grey breaks from Janis's wrist control and lands an elbow.
The referee warns Janis that he has to improve his position here as he takes two more clean shots to the head.
The crowd are loving this. Great action here.
Janis is wriggling around trying to escape.
That's three minutes gone in the round.
Janis tries to lock up and control but Grey gives him a forearm to the face and pushes him away.
Grey sitting in mount, just looking to control for the moment.
Grey trying to control but Janis is having none of it.
The fighters are pressed up against the cage, both looking to find a bit of space to work.
Janis is desperately trying to improve his position but Grey has a good base and remains in mount.
Janis seems to have got his legs back now.
Janis is squirming around, avoiding Grey's attempts to control the action.
Janis is bucking up trying to escape but Grey cracks him with another couple of good strikes.
That's four minutes gone in the round.
A lull in the action here being met with boos from the crowd.
Janis is in a horrible position here. Grey smacks him with another shot as he tries to escape the position.
Grey prevents Janis from getting the reversal.
Grey punishing his opponent with strikes.
Grey content just to control the position here.
Grey looking to control but Janis is working nicely, looking to advance position himself.
Grey scores with a couple of good head shots there.
The crowd applaud the fighters efforts here as the round comes to an end.
Janis is writhing around trying to get back to his feet.
Janis tries to get back to half guard but can't.
And thats the end of the round the fighters go back to their corners.
Bear Grey dominated that round.
The fighters' corners scream their final instructions, as the referee calls time. Here we go, back to the action!
Janis lets the fists fly and connects with a left straight followed by a right hook.
It looks like Bear Grey has been cut.
Grey tries a head kick but it misses.
Janis will need to tighten up his combinations if he doesn't want to gas himself out, swinging at thin air.
Janis catches Grey with a nice straight right. He seems pissed - ooooh, it's on now! On like donkey kong!
Grey is rocked!
Janis throws an overhand right that has Grey reeling! Janis follows up with a more punches and Grey is out cold! This one is all over!
Ladies and gentlemen, after 0:20 of round 2, we have a winner by way of KO (Punches). Pyyno Janis!
|
|
|
|
|
|
|
|
|
|
|
|
|
|
|
|
|
|
|
|
|
|
|
| S |
C
A |
G |
S |
C
B |
G |
|
S |
C |
G |
|
energy
A | B |
|
hype
A | B |
|
pop
A | B |
|
mgr
A | B |
|
FIGHT
RATING
100% |
|
|
|
|
|
|
|
Undercard bout
|
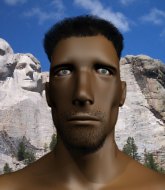
Coming up we have a super heavyweight MMA rules bout between Vince Buckner (ranked 0 p4p, 0 weight class) and Little Dong (ranked 0 p4p, 0 weight class). Both these guys are coming into the fight with injuries so let's see if that has a bearing on the fight. Little Dong has the better chin. Will he look to stand and bang today?
 |
|
 |
| 198 cm
20
275 lbs
1 - 1 - 0 |
|
210 cm
22
300 lbs
2 - 0 - 0 |
BJJ Blue Belt
Basic striking
Cuts easily |
|
Good wrestler
Brawler
Determined |
|
| |
|
Ladies and gentlemen. This fight is 3 rounds, in the super heavyweight division.
Introducing the fighter to my left, fighting out of the red corner.
With a record of
1 - 1 - 0, fighting out of Helsinki, Vince Buckner!
And introducing the fighter to my right, fighting out of the blue corner.
With a record of
2 - 0 - 0, fighting out of Helsinki, Little Dong!
The judges for this bout are Tarja Halkonen, Arvi Lind and Roosa Järviläinen.
The bell rings for round one and we are underway!
Dong misses with a jab, cross combination.
Buckner is breathing heavily.
Buckner looking to shoot here. He's gone for it and he's landed a takedown into mount! Oh, that's bad for Dong!
Dong tries to lock up and control but Buckner gives him a forearm to the face and pushes him away.
Buckner prevents Dong from getting the reversal.
We get told so often about how wrestlers don't like to be on their backs. Let's see if Dong can do anything to dispel that myth.
Buckner looking to secure an arm triangle but Dong defends it well.
Dong is in all sorts of trouble here.
The ref warns both fighters not to hold the cage as they work up against the meshing.
Buckner working Dong over with strikes here.
It looks like Little Dong has been cut.
Dong can't escape the position.
Dong really doesn't want to stay on the ground with Buckner. If he can't get it back to his feet, it's only a matter of time before he'll be tapping out.
Buckner lands a big shot there that rocks Dong but he's holding on and managing to survive for now.
Dong is rocked!
That has opened up Little Dong's cut even more.
This has been an exciting period of action!
Buckner prevents Dong from getting the reversal.
Dong is still in real trouble! Can Buckner finish him?
Dong is bucking up trying to escape but Buckner cracks him with another couple of good strikes.
Little Dong's cut is absolute horrible now. This looks like something out of a horror film with blood covering both fighters.
The referee calls the doctor in to look at Little Dong's cut. Oh no, the doctor has called an end to the bout!
Ladies and gentlemen, after 1:05 of round 1, we have a winner by way of TKO (Cut). Vince Buckner!
|
|
|
|
|
|
|
|
|
|
|
|
|
|
|
|
|
|
|
|
|
|
|
| S |
C
A |
G |
S |
C
B |
G |
|
S |
C |
G |
|
energy
A | B |
|
hype
A | B |
|
pop
A | B |
|
mgr
A | B |
|
FIGHT
RATING
100% |
|
|
|
|
|
|
|
Undercard bout
|
Coming up we have a super heavyweight MMA rules bout between Dexter Sabre (ranked 0 p4p, 0 weight class) and David Gibson (ranked 0 p4p, 0 weight class). Sabre is coming into this fight with a significant injury, which will no doubt have an effect on his cardio. Fingers crossed for an exciting fight - I'm sure both fighters are looking for a nice under the table bonus!
 |
|
 |
| 201 cm
22
282 lbs
0 - 1 - 0 |
|
210 cm
22
230 lbs
1 - 0 - 0 |
BJJ Blue Belt
Basic striking
Granite chin |
|
BJJ Blue Belt
Brawler
Determined |
|
| |
|
Ladies and gentlemen. This fight is 3 rounds, in the super heavyweight division.
Introducing the fighter to my left, fighting out of the red corner.
With a record of
0 - 1 - 0, fighting out of Helsinki, Dexter Sabre!
And introducing the fighter to my right, fighting out of the blue corner.
With a record of
1 - 0 - 0, fighting out of Helsinki, David Gibson!
The judges for this bout are Johanna Lukiainen, Arvi Lind and Matti Vanhoillinen.
The bell rings for round one and we are underway!
Gibson scores with a takedown into Sabre's guard.
Sabre is breathing heavily.
Gibson wants to control from the top but Sabre keeps moving.
Gibson controls from within his opponent's guard.
Gibson's corner are shouting for him to control the position and he seems happy to oblige.
That's one minute gone in the round.

Gibson stands and steps away. Sabre gets to his feet too and we're back to the striking game.
Gibson closes this distance looking for a takedown but Sabre circles away.
Sabre moves in looking to clinch but Gibson pushes him off.
A chopping leg kick lands by Gibson.
Sabre misses with a takedown
and Gibson counters with a quick right hand to the jaw.
Gibson lets the fists fly and connects with a left straight followed by a right hook.

Gibson rushes Sabre and presses him up against the cage.
Gibson lands a takedown into guard.
Gibson wants to pass the guard but Sabre is keeping the position.
The fighters are pressed up against the cage, both looking to find a bit of space to work.
Gibson trying to control but Sabre is working from the bottom.
Gibson content to stall in guard here.
That's two minutes gone in the round.
Gibson is trying to work a guillotine from the top, or something like that? Don't know how he thinks he's going to get a finish from there.
Sabre looking to sweep using the butterfly guard but Gibson puts pay to that idea as he passes nicely into half guard.
Sabre blocking the ground and pound attempt from Gibson.
Gibson is looking to pass the guard... He's managed it - he's now in full mount!
Gibson wants to control the pace but Sabre is squirming around nicely.
Gibson takes a little breather and maintains the position. The referee will be looking for him to stay active from such a dominant position though.
Gibson is a painfully thin specimen of a man. You do wonder whether a good body kick would snap him clean in two.
That's three minutes gone in the round.
Gibson looking to control but Sabre is working nicely, looking to advance position himself.
Gibson content just to control the position here.
Sabre is squirming around, avoiding Gibson's attempts to control the action.
Despite being in the dominant position, David Gibson just isn't active enough and the referee decides to stand the fighters back up.
Gibson shoots in for a takedown and gets it. Oh and he's advanced to full mount straight away.
Gibson dominating with strikes here.
Gibson scoring with some good ground and pound from mount here. Will he manage to finish Sabre?
That's four minutes gone in the round.
Gibson trying to control but he's not successful this time.
Gibson is in a good position here but he's just trying to control... And he's not even managing to do that successfully.
Gibson controlling the position easily from mount.
Gibson working for a guillotine from mount but Sabre is in no mood to give up.
And thats the end of the round the fighters go back to their corners.
David Gibson dominated that round.
OK. That's time! The bell goes and we're back to the action.
Gibson misses with a takedown attempt - Sabre sprawls well and throws a nice strike on the way out which just misses.
Sabre wants to clinch but Gibson slips to the side
so Gibson counters with a double leg into guard. Good agility.
Gibson trying to control the position from guard on top but Sabre is wriggling around, looking for whatever he can.
Despite being in the dominant position, David Gibson just isn't active enough and the referee decides to stand the fighters back up.
Sabre tries to clinch but fails miserably
and Gibson counters with a nice double leg into guard.
Gibson showing good wrestling skills to control the position.
Gibson trying to control the position from guard on top but Sabre is wriggling around, looking for whatever he can.
Both fighters are absolutely exhausted here.
That's one minute gone in the round.
Gibson advances position into side control!
Gibson scores with a couple of short elbows.
Gibson is looking to take a break and control but Sabre is keeping him honest, looking to work from the bottom.
Sabre is looking to slip a leg under and get half guard but Gibson is one step ahead and moves to full mount!
Gibson content just to control the position here.
Gibson landing strikes from the mount.
That's two minutes gone in the round.
Gibson trying to control but Sabre is having none of it.
Gibson controlling his opponent.
Gibson lands with some strikes.
Gibson controlling his opponent.
The ref warns both fighters not to hold the cage as they work up against the meshing.
That's three minutes gone in the round.
Gibson dominating with strikes here.
Gibson controlling from mount.
Despite being in the dominant position, David Gibson just isn't active enough and the referee decides to stand the fighters back up.
Gibson circles away from the clinch attempt
and Gibson counters with a shoot takedown. Sabre fights it but they end up in guard.
Gibson wants to control from the top but Sabre keeps moving.
Gibson throwing shots from guard but he's hitting more mat than opponent.
Gibson trying to pass the guard but can't manage it just yet.
Gibson tries to stand but Sabre is controlling from the bottom.
Sabre keeping moving, preventing Gibson from controlling successfully.
That's four minutes gone in the round.
Gibson is working Sabre over from the guard. He should look to pass the guard and do a little more damage with these strikes.
Sabre can't do much from the bottom at the moment, as Gibson controls the pace.
Gibson works a leg free and moves into half guard.
Gibson decides he's had enough of the ground and stands up.
Gibson takes the fight into the clinch.
Gibson jumps guard but Sabre stands there with Gibson around his waist. Gibson gives up and drops back to his feet. We remain in the clinch.
The crowd applaud the fighters efforts here as the round comes to an end.
Gibson tightens his grip and picks Sabre up, before dumping him to the ground. Sabre manages to land in guard.
The fans in attendance giving it up for the two fighters, who have really let it all hang out in the last minute or so!
Gibson slips nicely into half guard.
Gibson is trying for a guillotine from the top but the pressure isn't in the right place so Sabre is just riding it out for now. Gibson eventually gives up the hold.
And thats the end of the round the fighters go back to their corners.
David Gibson showed his class in that round. I'd imagine he'll take it on all the scorecards.
OK. That's time! The bell goes and we're back to the action. Let's hear some noise people - this is the final round!

Gibson fails with a takedown attempt.
Sabre throws a jab, cross combination which is slipped
and Gibson counters with a nice double leg into guard.
Sabre keeping moving, preventing Gibson from controlling successfully.
Gibson tries to free his leg and advance position but Sabre is retaining full guard.
Gibson lands a couple of elbows.
A big thud reverberates around the arena there as Gibson accidentally thumps the mat. Hopefully he's not broken his hand.
Gibson loading up with the ground and pound but he's missing more than he's landing in this flurry.
Both fighters are breathing heavily.
Sabre is working an open guard so Gibson takes the opportunity to get back to his feet.
Gibson closes the distance and clinches up with Sabre, looking for a takedown. Gibson pushes Sabre against the cage but Sabre circles to the side and manages to break the clinch.
Sabre fakes an overhand right and shoots for a takedown. Gibson sprawls well initially but Sabre persists and gets the takedown into half guard.
That's one minute gone in the round.
Gibson wants to control but Sabre is keeping busy and won't allow it.
Gibson might have to switch it up a bit here because his efforts to control Sabre kaven't been going to plan, at least at the current moment in time.
Gibson is looking to regain full guard. Not this time though.
David Gibson has got the better of the ground game so far.
Gibson is positioning himself well to prevent Sabre advancing to mount.
Gibson is working for an escape here. He's hooked one of Sabre's legs and he's managed to sneak out and take Sabre's back!
Gibson struggling to keep hold of the position.
Gibson looking for the choke from the back.
That's two minutes gone in the round.
Neither fighter has done anything of merit for a good minute or two here and the crowd are not happy about it.
Sabre is taking damage to the body and head.
Gibson biding his time, controlling Sabre.
Gibson is throwing punches to the body, looking to soften Sabre up.
Sabre is displaying good submission defense - not really looking in danger of submitting to the rear naked choke at the moment. That could change in an instant of course if Gibson gets his way!
Gibson missing with strikes.
Gibson is throwing strikes from the back here. Oh that last one was to the back of the head. Gibson gets a warning from the referee. He throws another strike to the back of the head straight away though and the referee has seen enough. He breaks up the two fighters and stands them back up. Gibson gets a real talking to here and is lucky not to get a point deducted. Gibson apologises and we restart here on the feet.
Nice body kick there by Gibson.
Sabre tries to keep at a distance but Gibson has taken the fight into the clinch.
That's three minutes gone in the round.
Sabre gets double underhooks to prevent a takedown attempt from Gibson.
Dexter Sabre has stuffed three takedown attempts in the round now. That's going to take a lot out of David Gibson.
Gibson has a body lock and is looking for a takedown. Sabre is bouncing around trying to prevent the takedown and somehow he has indeed managed to stay on his feet.
Sabre has Gibson pressed against the cage.
Gibson on the defensive, avoiding the knees to the body.
Gibson scores a nice knee to the body.
Gibson leaning his opponent against the cage.
Gibson is trying to work for a single leg takedown but Sabre pulls him back up using the underhooks.
Gibson stalling here - the referee won't stand for too much of that.
Gibson changes levels and goes for a takedown here. Sabre fights it off and pushes away nicely.
Sabre wants to clinch
and Gibson counters with a nice double leg into side control. Sabre won't be happy with that.
Sabre is trying to get back to half guard.
A lull in the action here.
That's four minutes gone in the round.
Gibson prevents Sabre from escaping the position.
Dexter Sabre has stepped it up - he knows he needs a finish here!
Sabre is not content to let Gibson control the position.
Sabre is looking to regain half guard here but Gibson keeps moving and retains side control.
Sabre pushes Gibson away and creates a bit of space to escape. He's almost out here... but no, Gibson gets a good hold of his legs and remains firmly in side control.
As the round comes to an end the crowd are showing their appreciation for a great round of action.
Gibson lands a nice forearm strike.
Gibson is maintaining the dominant position - no doubt Sabre will start to get frustrated soon if he's not already.
Gibson avoids the strikes from the bottom by Sabre.
And that's the end of the fight!
David Gibson comfortably won the final round on my scorecard.
Well Gibson has outworked and out performed his opponent in all aspects of the game today. He was simply too good and the decision should be no more than a formality. Over to the ring announcer for the scorecards.
Ladies and gentlemen, after 3 rounds of action, we go to the scorecards for a decision.
Judge Johanna Lukiainen scores the fight 26:30
Judge Arvi Lind scores the fight 25:30
Judge Matti Vanhoillinen scores the fight 25:30
In favor of your winner, by unanimous decision... David Gibson!
|
|
|
|
|
|
|
|
|
|
|
|
|
|
|
|
|
|
|
|
|
|
|
| S |
C
A |
G |
S |
C
B |
G |
|
S |
C |
G |
|
energy
A | B |
|
hype
A | B |
|
pop
A | B |
|
mgr
A | B |
|
FIGHT
RATING
79% |
|
|
|
|
|
|
|
Undercard bout
|
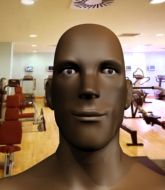
Coming up we have a super heavyweight MMA rules bout between Fat Craig (ranked 0 p4p, 0 weight class) and Mark Summers (ranked 0 p4p, 0 weight class). Fat Craig could well score a knockout today. He has the power to get to Mark Summers 's chin.
 |
|
 |
| 167 cm
22
300 lbs
1 - 1 - 0 |
|
200 cm
22
285 lbs
2 - 0 - 0 |
BJJ Blue Belt
Brawler
KO power |
|
BJJ Blue Belt
Decent boxing
Solid chin |
|
| |
|
Ladies and gentlemen. This fight is 3 rounds, in the super heavyweight division.
Introducing the fighter to my left, fighting out of the red corner.
With a record of
1 - 1 - 0, fighting out of Helsinki, Fat Craig!
And introducing the fighter to my right, fighting out of the blue corner.
With a record of
2 - 0 - 0, fighting out of Helsinki, Mark Summers !
The judges for this bout are Arvi Lind, Marco Blurström and Matti Vanhoillinen.
The bell rings for round one and we are underway!
Craig shoots in for a takedown but Summers shows good takedown defense.
Craig fails with the takedown.
Craig shoots in but no luck this time.
That's three failed takedown attempts in the round for Fat Craig. That's going to take a lot out of him.
Summers throws a monster overhand right that drops Craig! Summers follows up with more strikes from mount and the fight is all over!
Ladies and gentlemen, after 0:14 of round 1, we have a winner by way of TKO (Strikes). Mark Summers !
|
|
|
|
|
|
|
|
|
|
|
|
|
|
|
|
|
|
|
|
|
|
|
| S |
C
A |
G |
S |
C
B |
G |
|
S |
C |
G |
|
energy
A | B |
|
hype
A | B |
|
pop
A | B |
|
mgr
A | B |
|
FIGHT
RATING
52% |
|
|
|
|
|
|
|
Undercard bout
|
Coming up we have a light heavyweight MMA rules bout between Kip Killroy (ranked 0 p4p, 0 weight class) and Felix Torres (ranked 0 p4p, 0 weight class). Kip Killroy could well score a knockout today. He has the power to get to Felix Torres's chin.
 |
|
 |
| 191 cm
20
198 lbs
1 - 0 - 1 |
|
183 cm
18
200 lbs
1 - 0 - 0 |
BJJ Blue Belt
Counter striker
Good chin |
|
BJJ Blue Belt
Brawler
Tends to cut |
|
| |
|
Ladies and gentlemen. This fight is 3 rounds, in the light heavyweight division.
Introducing the fighter to my left, fighting out of the red corner.
With a record of
1 - 0 - 1, fighting out of Helsinki, Kip Killroy!
And introducing the fighter to my right, fighting out of the blue corner.
With a record of
1 - 0 - 0, fighting out of Helsinki, Felix Torres!
The judges for this bout are Roosa Järviläinen, Arvi Lind and Marco Blurström.
The bell rings for round one and we are underway!
Killroy tries to clinch there but Torres circles away.
Killroy wants to clinch up but Torres keeps it at a distance.
A head kick from Killroy lands but Torres takes it in his stride.
Killroy closes the distance and clinches.

Killroy breaks the clinch.
Killroy checks the leg kick nicely there.
Killroy tries for a takedown but Torres sees it coming a mile off and avoids it easily.
The fight moves into the clinch position.
Killroy keeps control of Torres as he tries to wriggle out of the double underhooks.
Torres tries to score a body lock takedown but Killroy shows good agility there to stay on his feet.
Killroy successfully pulls guard.
The ref warns both fighters not to hold the cage as they work up against the meshing.
Torres won't allow Killroy to sweep him here.
Killroy pushes Torres off for just long enough to get back to his feet. Very athletic spring there.
Killroy shoots in and bounces Torres off the cage to secure the takedown into guard.
Torres lands a beautiful switch and he's in full mount! That could spell trouble for Killroy!
That's one minute gone in the round.
Killroy keeping his composure momentarily, calmly looking to get back to half guard.
Killroy tries to hold on but Torres postures up.
Killroy is wriggling around trying to escape.
Killroy wants to try and get back to his feet.
Killroy tries to lock up and control but Torres gives him a forearm to the face and pushes him away.
Killroy is breathing heavily.
That's two minutes gone in the round.
The crowd are showing their displeasure at the lack of action as loud boos ring out around the arena.
Torres takes a little breather and maintains the position. The referee will be looking for him to stay active from such a dominant position though.
Killroy squirming around on the bottom, looking to escape.
Torres trying to control but Killroy is having none of it.
Killroy is wriggling around trying to escape.
Torres working Killroy over with strikes here.
Torres tries to control but Killroy wriggling away.
Killroy wants to hold on but Torres pushes him away.
That's three minutes gone in the round.
A nice elbow there by Torres.
Killroy in a bad spot here, taking shots to the head.
Torres lands a nice shot to the head.
Torres lands a couple of nice shots there from mount.
Torres trying to control but he's not successful this time.
Killroy is trying to escape the mount.
Torres tries to control but Killroy wriggling away.
That's four minutes gone in the round.
Torres scores with a couple of good head shots there.
Torres has the superior BJJ but he's also working some ground strikes into his gameplan.
Torres looking to control but Killroy is working nicely, looking to advance position himself.
Killroy has given up his back, trying to stand up. Not clever.
Torres cracks Killroy with a big shot to body and one to the head - really punishing Killroy from the back mount here, looking to soften him up.
Killroy is trying to break free.
Torres working for the choke.
Killroy has his hands over his head blocking the strikes from Torres.
And thats the end of the round the fighters go back to their corners.
A close round but Felix Torres will probably get the nod.
The referee calls time. The cornermen exit stage left and we're back to business.
Torres with a poor takedown
so Killroy counters with a double leg into guard. Good agility.
Torres is looking to get back to his feet but can't, whilst Killroy is controlling him.
Killroy gets to his feet and steps away from his opponent.
Killroy tries to clinch up but Torres circles away and keeps his distance.
Killroy lands a nice leg kick that just misses Torres's sensitive parts.
Killroy drives through and clinches with Torres against the cage.
Torres tries to jump guard but he falls flat on his backside. Killroy smiles and moves away.
Killroy tries to clinch there but Torres circles away.
Killroy tries to clinch up.
Torres tries to clinch up
and Killroy counters into the clinch. Nicely done.
That's one minute gone in the round.
Killroy stops a takedown attempt from Torres.
Kip Killroy has stuffed three takedown attempts in the round now. That's going to take a lot out of Felix Torres.
Killroy escapes the clinch and we're back to striking.
Killroy clinches with his opponent.
A bit of stalling here from Killroy.
Torres throws a knee to the head but misses.
Killroy tries to land a knee to the head but misses.
Killroy landing knees to the body.
Torres is breathing heavily.
Torres is trying to slow down the pace in the clinch, to catch his breath.
Torres has had enough of the clinch but Killroy keeps him there for the moment.
Killroy trying to land knees to the body.
Killroy throws a knee to the head but misses.
Good body shot from Torres.
Torres takes an elbow to the temple.
Torres has a body lock and is looking for a takedown. Killroy is bouncing around trying to prevent the takedown and somehow he has indeed managed to stay on his feet.
Torres managing to block the knees to the body from Killroy.
Nice elbow from Killroy.
Killroy breaks the clinch.
Torres gets taken down but at least he's managed to land in guard.
Killroy wanted to stand there but Torres had control of the position.
Torres controls Killroy momentarily but Killroy frees himself.
That's two minutes gone in the round.
Torres looking to sweep here. No luck so far.
Torres manages to land a sweep and now he's in mount on top!
Torres lands a couple of nice shots there from mount.
Torres sitting in mount, just looking to control for the moment.
Killroy wants to improve position but instead he's given up his back.
Torres throwing damaging strikes from the back! Killroy could be in trouble here!
That's three minutes gone in the round.
Good control from Torres.
Torres scores with a nice shot to the head of his opponent. Killroy is looking for a way out.
Torres connects with a series of strikes and the referee is calling for Killroy to escape the position.
Torres is looking to finish the fight by rear naked choke. Killroy knows exactly what he's got planned though, so he's defending well. Maybe a few strikes would soften Killroy for a finish.
Killroy prevents Torres from getting a body triangle.
Torres lands with a couple of good shots - one to the side of the head and one questionable shot that could be viewed as to the back of the head but the referee lets it go.
Torres goes for a risky armbar from back mount and it's not paid off. Killroy escapes and is now in half guard on top.
That's four minutes gone in the round.
Killroy is thwarting Torres's attempts to control the position.
Torres is pressing down on Killroy's left leg trying to get back to full guard. He's managed it.
Torres has Killroy pulled in close to control his posture.
Torres is trying to keep Killroy in close.
The crowd applaud the fighters efforts here as the round comes to an end.
Killroy stands up from guard. Let's bang!
Torres is looking to take this fight into the clinch.
And thats the end of the round the fighters go back to their corners.
Kip Killroy dominated that second round.
The referee calls time. The cornermen exit stage left and we're back to business. This is the final round!
Killroy shoots in for a takedown and gets it.
Torres wants to control but Killroy is keeping busy.
Killroy postures up and decides to stand up, from the half guard. The ref calls for Torres to stand up.
No luck for Killroy with that takedown attempt.
Torres tries to clinch but Killroy moves away
and Killroy counters with a nice double leg into guard.
Killroy has decided he wants to stand but the closed guard of Torres is proving hard to escape from.
Killroy prevents Torres from getting back to his feet.
Killroy gets to his feet and steps away from his opponent.
Both fighters are breathing heavily.
That's one minute gone in the round.
Torres doesn't succeed with the takedown
and Killroy moves into the clinch.
Killroy unloads a knee to the mid-section. Torres lets out a prehistoric sounding urrrrgh.
Torres tries to pull guard but Killroy holds him up against the cage and eventually Torres drops back down to his feet.
An uppercut to the body lands inside from Killroy.
Torres managing to block the knees to the body from Killroy.
Torres tries to break the clinch but Killroy is controlling the position.
Killroy looking to throw knees to the head but Torres is blocking nicely.
Torres is trying to slow down the pace of the fight but Killroy is keeping busy.
Killroy unloads a knee to the mid-section. Torres lets out a prehistoric sounding urrrrgh.
Torres wants a takedown.
Kip Killroy has stuffed three takedown attempts in the round now. That's going to take a lot out of Felix Torres.
Killroy throws a vicious knee straight up the middle but Torres blocks it with crossed arms.
Killroy avoids the elbow strike from Torres, against the cage.
Torres on the defensive, avoiding the knees to the body.
Killroy with the Thai clinch. He's looking to land a big knee but he's not managed it this time.
Killroy with a knee to the head.
Torres is rocked!
It looks like Felix Torres has been cut.
Killroy breaks the clinch and we're back to striking at distance.
Torres is still on wobbly legs! Can Killroy finish him?
Killroy lands with a precision combination! Left, right, uppercut and Torres falls flat on his face, eyes wide open but he's out!
Ladies and gentlemen, after 1:54 of round 3, we have a winner by way of KO (Punches). Kip Killroy!
|
|
|
|
|
|
|
|
|
|
|
|
|
|
|
|
|
|
|
|
|
|
|
| S |
C
A |
G |
S |
C
B |
G |
|
S |
C |
G |
|
energy
A | B |
|
hype
A | B |
|
pop
A | B |
|
mgr
A | B |
|
FIGHT
RATING
100% |
|
|
|
|
|
|
|
Undercard bout
|
|
|
|
Undercard bout
|
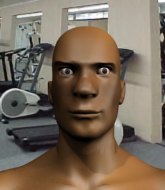
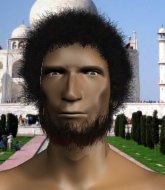
Coming up we have a light heavyweight MMA rules bout between Allan Harris (ranked 0 p4p, 0 weight class) and Bill Ding (ranked 0 p4p, 0 weight class). Bill Ding struggled to make weight for this fight. He only made it down to 207.6lbs at the first attempt and had to take the additional two hours to make the official bout weight. Let's see how much it's taken out of him. I can't wait for this one - let's get the fighter introductions out of the way and get this one started!
 |
|
 |
| 190 cm
22
203 lbs
0 - 1 - 0 |
|
185 cm
22
210 lbs
1 - 1 - 0 |
BJJ Blue Belt
Brawler
Intelligent |
|
BJJ Blue Belt
Brawler
Solid chin |
|
| |
|
Ladies and gentlemen. This fight is 3 rounds, in the light heavyweight division.
Introducing the fighter to my left, fighting out of the red corner.
With a record of
0 - 1 - 0, fighting out of Helsinki, Allan Harris!
And introducing the fighter to my right, fighting out of the blue corner.
With a record of
1 - 1 - 0, fighting out of Helsinki, Bill Ding!
The judges for this bout are Marco Blurström, Arvi Lind and Ben Zyskovitsi.
The bell rings for round one and we are underway!
Ding stuffs the takedown.
Ding looks really tired already! That doesn't bode well for a good, competitive fight!
Harris scores a takedown into full mount!
Harris lands a big shot there that rocks Ding but he's holding on and managing to survive for now.
Harris is landing with some decent strikes but Ding is trying to advance his position so the referee is letting the fight continue.
Harris controlling from the full mount.
Harris looking to ground and pound his opponent to a finish here.
Harris lands a couple of nice shots there from mount.
Ding takes a big shot to the head but keeps on trying to improve his position.
The crowd cheering loudly, showing their appreciation for the quality fight we're seeing here.
Harris has hold of Ding's left arm, perhaps looking for a submission. The two fighters tussle over control of the isolated limb and Ding manages to get his arm back to his side and away from danger.
Ding takes a big shot to the head but keeps on trying to improve his position.
That's one minute gone in the round.
Harris is still in mount, landing shots to his trapped opponent. Ding can't stay in a position like this for much longer.
Harris scoring with strikes but Ding is staying in there.
Harris raining down shots from the mount!
Harris landing shots from mount.
Ding in a bad spot here, taking shots to the head.
Harris controlling the position easily from mount.
Harris looking to control but Ding is working nicely, looking to advance position himself.
Harris controlling his opponent.
Harris landing shots from mount.
The ref warns both fighters not to hold the cage as they work up against the meshing.
That's two minutes gone in the round.
Ding looking to escape from mount but he's given up his back!
Harris has his opponent trapped and is landing shots. Not a good position for Ding.
Harris just keeping the dominant position. He can't wait too long though, otherwise the referee will stand them back up.
Harris scores with punches and elbows.
The fighters are pressed up against the cage, both looking to find a bit of space to work.
Harris lands with a nice looking elbow that stuns Ding.
Harris keeps control of the position as Ding tries to break free.
That's three minutes gone in the round.
Harris is looking to finish the fight by rear naked choke. Ding knows exactly what he's got planned though, so he's defending well. Maybe a few strikes would soften Ding for a finish.
Harris controls the position.
Harris connects with a series of strikes and the referee is calling for Ding to escape the position.
Harris cracks Ding with a big shot to body and one to the head - really punishing Ding from the back mount here, looking to soften him up.
Ding showing good submission defense here.
Harris doesn't have the hooks in and Ding manages to turn into his guard.
That's four minutes gone in the round.
Ding preventing the sweep.
Ding trying to control but Harris is working from the bottom.
Ding tries to free his leg and advance position but Harris is retaining full guard.
Harris tries to land a sweep but no joy.
Harris wants to stand up but Ding is controlling him.
Ding throwing strikes but missing.
The crowd applaud the fighters efforts here as the round comes to an end.
Well, the referee has seen enough. Neither fighter is active enough on the ground so he's stood them back up.
Harris drives through and clinches with Ding against the cage.
A short body shot lands from Ding as the two fighters clinch.
And thats the end of the round the fighters go back to their corners.
Allan Harris dominated that round.
The corners get their ten second warning. Both fighters stand from their stools and stare eachother down, ready to get back to the action.
Ding gets a takedown into half guard.
Harris is working for an escape here. He's hooked one of Ding's legs and he's managed to sneak out and take Ding's back!
Harris is remaining active here, looking for the choke. The more discerning members of the crowd will appreciate his efforts.
You know, I was talking to some of our celebrities at ringside tonight and they were split right down the middle on who was going to win this fight.
Harris loading up with punches from the back mount - how long can Ding hold on?
Ding is breathing heavily.
That's one minute gone in the round.
Harris scores with punches to the body.
Harris lands a punch that was close to the back of the head but the ref thinks it's OK.
The referee is taking a good look at Ding as he is on the wrong end of some big shots from Harris!
Ding is staying cool under pressure, defending well against the rear naked choke attempt from his opponent.
Harris is working the ground and pound. Can Ding escape?
Harris loading up with punches from the back mount - how long can Ding hold on?
Harris is looking cool and calm here, just waiting for a good opportunity to attack and finish the fight from this dominant position.
That's two minutes gone in the round.
Harris's ground tactics aren't going to win him many fans. Let's hope he's got fireworks for us if he gets back to his feet because he's not doing much on the ground.
Harris loading up with punches from the back mount - how long can Ding hold on?
The fans in attendance giving it up for the two fighters, who have really let it all hang out in the last minute or so!
Harris slows the pace down here. Having a little breather whilst he's in a dominant position, looking to rest and regain some energy, ready to go for the finish.
Allan Harris overall seems to be getting the better of the ground position in the fight so far.
Harris struggling to keep hold of the position.
Harris controlling from the back.
That's three minutes gone in the round.
The referee stands the fighters back up. Allan Harris just wasn't active enough from the dominant position.
Harris lands with a straight right. Ding didn't see that one coming.
Ding shoots in but doesn't get the takedown
and Harris counters with a nice double leg into side control. Ding won't be happy with that.
Harris just content to control the position.
Harris tries for an arm triangle. That looks pretty tight to me. Is this one over!?! Possibly, maybe, no Harris has let go of the choke. Obviously it wasn't as tight as we thought!
Harris is looking to take a break and control but Ding is keeping him honest, looking to work from the bottom.
That's four minutes gone in the round.
Harris is looking to finish here, going for an Americana. Ding knows the correct defense though, so he's OK.
Ding is trying to control Harris's posture but Harris avoids it.
Ding tries to work a leg under to get back to half guard but Harris wriggles his own leg back out and remains in side control.
The crowd applaud the fighters efforts here as the round comes to an end.
Harris trying to control the position but Ding is working away.
Harris sitting in side control, looking to soften his opponent up with elbows and hammerfists but Ding is avoiding damage well and looking to escape the position.
And thats the end of the round the fighters go back to their corners.
Allan Harris dominated that second round.
Well, the break between rounds is over. Let's get back to the scrappin! This is the final round!
Ding shoots in for a takedown - he's clinched up with Harris but Harris pushes him off and we're back to square one.
Harris scores with a nice takedown into half guard. Let's see what he's got on the ground.
Harris lands strikes from half guard.
Harris is controlling the pace.
Harris wants to lay and pray for a moment but Ding keeps working.
Ding won't allow Harris to pass to mount.
Harris is looking for a kimura but he's never going to get it from there.
Both fighters are breathing heavily.
That's one minute gone in the round.
The referee calls for the fighters to work.
Ding wants to control but Harris is keeping busy.
Harris looks to score some points with some ground and pound.
Neither fighter is being very active at the moment, with Harris in particular looking to stall.
Ding is looking to improve his position.
Ding keeping his head moving to avoid the ground and pound.
Harris content to control rather than advance.
That's two minutes gone in the round.
The crowd are showing their displeasure at the lack of action as loud boos ring out around the arena.
The referee stands the fighters back up. Allan Harris just wasn't active enough from the dominant position.
Harris rushes Ding and presses him up against the cage.
Harris jumps guard.
Harris is trying to control the position from the bottom.
Harris looking to hit a scissor sweep but Ding is one step ahead there.
Harris keeping moving, preventing Ding from controlling successfully.
That's three minutes gone in the round.
Harris is pulling down on Ding's head. It's preventing any offense from Ding, at least for the moment.
Harris working a defensive guard here.
Harris is working the butterfly guard. He manages to land a nice scissor sweep and is now in half guard on the top. Nice move.
Harris sitting in half guard, looking to land shots. Ding defending well though.
The referee walks around the fighters to get a better view of the action. Harris lands a nice short elbow.
Harris looks over to his corner - he wants some instructions but his corner are not responding.
That's four minutes gone in the round.
Harris trying to control from half guard but Ding is working away.
Ding keeping his head moving to avoid the ground and pound.
Harris postures up and decides to stand up, from the half guard. The ref calls for Ding to stand up.
Harris pulls out of a head kick attempt.
Harris tries to clinch but Ding is having none of it.
Harris misses with a two punch combination.
Harris clinches up against the cage.
Harris breaks from the clinch.
Allan Harris is looking to throw some combinations by the looks of things.
Harris throws a series of punches but Ding avoids them all with ease.
Ding shoots in for a takedown but Harris shows good takedown defense.
Bill Ding has stepped it up - he knows he needs a finish here!
Harris misses with a takedown attempt
and Ding counters with a left and a right that stings Harris.
Ding looks to throw a body kick
and Harris holds on and brings the fighters into a clinch.
And that's the end of the fight!
Allan Harris showed his dominance in that final round.
Well Harris has outscored his opponent in every aspect of the fight today. Only a scarily incompetent judge or two will keep him from a well deserved win... Over to the ring announcer for the scorecards.
Ladies and gentlemen, after 3 rounds of action, we go to the scorecards for a decision.
Judge Marco Blurström scores the fight 30:27
Judge Arvi Lind scores the fight 30:27
Judge Ben Zyskovitsi scores the fight 30:27
In favor of your winner, by unanimous decision... Allan Harris!
|
|
|
|
|
|
|
|
|
|
|
|
|
|
|
|
|
|
|
|
|
|
|
| S |
C
A |
G |
S |
C
B |
G |
|
S |
C |
G |
|
energy
A | B |
|
hype
A | B |
|
pop
A | B |
|
mgr
A | B |
|
FIGHT
RATING
50% |
|
|
|
|
|
|
|
Co-main event
|
Coming up we have a heavyweight MMA rules bout between Soviet Russia (ranked 0 p4p, 0 weight class) and Joe Louis (ranked 0 p4p, 0 weight class). Both these guys have really solid chins. Will we see a standup war or will they both decide that a knockout is unlikely and try to win the fight elsewhere?
 |
|
 |
| 195 cm
22
265 lbs
0 - 1 - 0 |
|
195 cm
20
260 lbs
2 - 0 - 0 |
BJJ White Belt
Counter striker
KO power |
|
BJJ Blue Belt
Excellent boxer
Heavy handed |
|
| |
|
Ladies and gentlemen. This fight is 3 rounds, in the heavyweight division.
Introducing the fighter to my left, fighting out of the red corner.
With a record of
0 - 1 - 0, fighting out of Helsinki, Soviet Russia!
And introducing the fighter to my right, fighting out of the blue corner.
With a record of
2 - 0 - 0, fighting out of Helsinki, Joe Louis!
The judges for this bout are Roosa Järviläinen, Anni Minnemäki and Matti Vanhoillinen.
The bell rings for round one and we are underway!
Russia takes the fight into the clinch.
Russia is working on a single leg takedown against the cage. Louis can't fight it off and eventually Russia manages to take the fight to the floor. Louis looks annoyed but at least he's managed to land in guard.
Louis looking to hit a scissor sweep but Russia is one step ahead there.
Russia postures up in Louis's guard and throws a big left but Louis blocks it.
Russia wants to pass the guard but Louis is keeping the position.
Louis is looking to stand up but Russia isn't so interested in that idea.
Russia throwing strikes but missing.
Louis is looking to get back to his feet but can't, whilst Russia is controlling him.
Russia trying to control the position from guard on top but Louis is wriggling around, looking for whatever he can.
That's one minute gone in the round.
Well, the referee has seen enough. Neither fighter is active enough on the ground so he's stood them back up.
Louis connects with a crisp jab.
Russia slips under a jab.
Russia throws an overhand right that lands on Louis's shoulder, as Louis tries to avoid the shot.
Louis swings away but doesn't land with a series of punches.
Louis misses the shot to the body.
Russia will need to tighten up his combinations if he doesn't want to gas himself out, swinging at thin air.
Nice straight punches there by Louis. You know Roy Jones Jr respects the hands of Louis.
Russia keeping a good distance there, avoiding the body shot.
Russia gets in close and instigates a clinch.
Russia fails to land with a short punch on the inside.
Russia taking a breather.
Russia misses the knee to the body. Nice hip positioning from Louis.
Louis gets underhooks to prevent Russia's takedown attempt.
Louis takes an elbow to the forehead.
Russia misses with a knee to the head.
Russia throws an elbow that misses.
Louis is trying to break the clinch but Russia has him pressed against the cage.
Russia gets an overhook and lands an elbow to the side of the head.
Russia prevents Louis from breaking the clinch.
That's two minutes gone in the round.
Louis is trying to break the clinch but Russia has him pressed against the cage.
Russia scores with a knee to the head.
Russia tries for a takedown but Louis manages to get underhooks.
Russia tries to land knees in the clinch but Louis avoids the damage to the body.
Russia wants a takedown but no success here.
That's three failed takedown attempts in the round for Soviet Russia. That's going to take a lot out of him.
Russia is breathing heavily.
Louis wants to get back to striking at distance but Russia won't allow it.
Russia manages to break the clinch.
Russia doesn't manage to clinch there - Louis circles away.
Russia moves out of range of the leg kick from Louis.
Russia tries to clinch there but Louis circles away.
Louis misses with a series of wild punches.
Louis lands a hook that stumbles Russia back into the cage. Louis follows up with a straight and another hook that land right on the button, dropping Russia to the canvas! Louis pounces and lands several unanswered shots - Russia has had enough and taps out! This one is all over!
Ladies and gentlemen, after 2:36 of round 1, we have a winner by way of Submission (Strikes). Joe Louis!
|
|
|
|
|
|
|
|
|
|
|
|
|
|
|
|
|
|
|
|
|
|
|
| S |
C
A |
G |
S |
C
B |
G |
|
S |
C |
G |
|
energy
A | B |
|
hype
A | B |
|
pop
A | B |
|
mgr
A | B |
|
FIGHT
RATING
47% |
|
|
|
|
|
|
|
Main event
|
Coming up we have a middleweight MMA rules bout between Haraldr Harfagri (ranked 0 p4p, 0 weight class) and Dennis Reynolds (ranked 0 p4p, 0 weight class). Harfagri comes to the cage accompanied by Pursuit of Vikings. Reynolds has a niggling injury. He would have liked to come in 100% fit but that's not always possible. Both fighters look pumped up here. Let's hope this is a good fight!
 |
|
 |
| 185 cm
20
184 lbs
2 - 0 - 0 |
|
185 cm
22
183 lbs
0 - 1 - 0 |
BJJ Blue Belt
Counter striker
Cuts easily |
|
BJJ Blue Belt
Basic striking
Very confident |
|
| |
|
Ladies and gentlemen. This fight is 3 rounds, in the middleweight division.
Introducing the fighter to my left, fighting out of the red corner.
With a record of
2 - 0 - 0, fighting out of Helsinki, Haraldr Harfagri!
And introducing the fighter to my right, fighting out of the blue corner.
With a record of
0 - 1 - 0, fighting out of Helsinki, Dennis Reynolds!
The judges for this bout are Ben Zyskovitsi, Tarja Halkonen and Marco Blurström.
The bell rings for round one and we are underway!
Reynolds pushing out the jab but it's not landing.
Reynolds shoots in for a double leg but Harfagri sprawls well. That's going to sap some energy.
Reynolds shoots in for a double leg but Harfagri sprawls well. That's going to sap some energy.
Reynolds avoids the body shot from Harfagri.
Reynolds gets taken down but at least he's managed to land in guard.
Harfagri looking to pass the guard.
Harfagri seems content to control from guard here. He's going to have to remain active though if he doesn't want to get stood back up.
Reynolds working the defensive guard well to avoid strikes from Harfagri.
Harfagri pushing down on Reynolds's thigh, trying to pass to half guard. He's managed it... Nice work.
Harfagri seems to be looking for submissions.
Harfagri is thinking about going for an arm triangle but he can't free his leg.
That's one minute gone in the round.
Harfagri wants to lay and pray for a moment but Reynolds keeps working.
Harfagri is pressing down on Reynolds's thigh, looking to free his foot. Reynolds is holding on for now.
Harfagri is trying a forearm choke
I don't think that's going to do much at this level of the game.
Harfagri wants to work for an arm triangle but Reynolds is really keeping half guard well and defending the submission attempt.
Harfagri is breathing heavily.
Harfagri is working for a submission of some sort.
Harfagri throwing shots but Reynolds is blocking nicely.
That's two minutes gone in the round.
The crowd are starting to boo a lack of action.
Harfagri is looking for a kimura here.
Reynolds wants to get back to his feet.
The referee has ruled that neither fighter is active enough on the ground and has stood them back up.
Reynolds throws a right and a left that Harfagri avoids nicely.
Reynolds closes the distance and clinches.
Harfagri has had enough of the clinch but Reynolds keeps him there for the moment.
A head punch on the inside from Reynolds fails to land.
Harfagri tries to take the fight to the ground by pulling guard but can't manage it.
The fighters are starting to perspire pretty heavily.
Reynolds with the Thai clinch. He's looking to land a big knee but he's not managed it this time.
Reynolds breaks the clinch and we return to the middle of the mat.
Harfagri tries a head kick but it misses.
That's three minutes gone in the round.
Reynolds misses with a takedown attempt
so Harfagri counters with a double leg into guard. Good agility.
Haraldr Harfagri has stuffed three takedown attempts in the round now. That's going to take a lot out of Dennis Reynolds.
Harfagri drops back for a leg! It's a sloppy attempt though and Harfagri jumps back into guard quickly, to retain the dominant position.
Reynolds bucks up whilst keeping hold of a body lock, managing to reverse the position. Now he's in top in Harfagri's guard.
Reynolds must be cautious of submissions here, given that his opponent has the superior Jiu Jitsu.
Reynolds tries to free his leg and advance position but Harfagri is retaining full guard.
Harfagri escapes his hips to the side and looks to be working for an armbar. Reynolds gives him a little smile and shakes his head. No chance.
Harfagri is working the butterfly guard. He manages to land a nice scissor sweep and is now in half guard on the top. Nice move.
Reynolds trying to hold on to Harfagri's head to control him but Harfagri postures up.
Reynolds is looking to escape.
Harfagri is trying to work for a kimura. He's got his hands clasped together - this could be trouble! No, Reynolds has managed to free his arm - good work.
That's four minutes gone in the round.
Reynolds punching from the bottom.
Harfagri seems very keen to just sit and control from half guard but Reynolds does not like that idea so much and is remaining active off his back.
Reynolds is trying to stand.
Harfagri is looking for an arm triangle, whilst trying to pass to side control. Reynolds doesn't seem that keen to cooperate though. No luck this time Harfagri.
Reynolds is trying to stand.
The referee has ruled that neither fighter is active enough on the ground and has stood them back up.
Nice shot lands for Reynolds.
Harfagri decides to change it up a bit and drives through with a nice takedown into half guard.
Harfagri is looking for a kimura. It's going to be difficult to finish that from half guard though and Reynolds defends it well.
And thats the end of the round the fighters go back to their corners.
Haraldr Harfagri dominated that round.
That's the end of the interval. I'm sure that seemed a lot quicker than a minute for our two fighters! Back to the action.
Harfagri shoots in for a takedown and gets it.
Reynolds won't allow Harfagri to pass to mount.
Reynolds wants to get back to full guard.
Reynolds is defending against the submission attempts here by Harfagri.
Harfagri thumps the canvas. Not on purpose obviously - he just missed Reynolds's head.
Both fighters are absolutely exhausted here.
Reynolds wants to get back to his feet.
Reynolds is staying active underneath Harfagri, who seems content to just control the action from this position.
That's one minute gone in the round.
Reynolds looking to work for a kimura from the bottom.
It looks like we're going to have a standup here. Neither fight is doing enough on the ground.
Reynolds waving his hands out infront of him, looking to distract Harfagri.
Reynolds clinches but Harfagri breaks the clinch
and Harfagri counters with a nice double leg into half guard.
Haraldr Harfagri overall seems to be getting the better of the ground position in the fight so far.
Harfagri passes the half guard and he's now in mount! Big trouble for Reynolds!
Harfagri trying to control but Reynolds is having none of it.
Harfagri is working on an americana here. Ooh, that looks pretty nasty! Nope, Reynolds has managed to escape the submission attempt.
Harfagri avoids the attempt from Reynolds to control.
The fighters are pressed up against the cage, both looking to find a bit of space to work.
That's two minutes gone in the round.
Harfagri can't quite control the action as he would like just now, as Reynolds is looking to escape.
Reynolds is trying to escape but when you're mounted that's not too easy.
Harfagri with the ground and pound from mount.
Harfagri wants to control the pace but Reynolds is squirming around nicely.
The ref warns both fighters not to hold the cage as they work up against the meshing.
Harfagri throwing sloppy strikes, which aren't doing any damage.
Harfagri sends his fist crashing into the mat - the crowd let out a collective ooooooh. Let's hope he's not broken it!
Harfagri sends his fist crashing into the mat - the crowd let out a collective ooooooh. Let's hope he's not broken it!
That's three minutes gone in the round.
Reynolds is trying to escape the mount.
Harfagri wants to control the pace but Reynolds is squirming around nicely.
Harfagri is in full mount, looking to secure a guillotine but Reynolds is surviving well by controlling Harfagri's body position as best he can.
Reynolds working to try and regain half guard.
Harfagri looking to secure an arm triangle but Reynolds defends it well.
Harfagri lands a big shot there that rocks Reynolds but he's holding on and managing to survive for now.
That's four minutes gone in the round.
Reynolds is in a horrible position here, under a barrage of strikes, he's managing to avoid any damage.
Reynolds manages to regain half guard. Good work.
Harfagri not doing much here.
Reynolds is kicking away at Harfagri from the bottom - trying to push off and stand up. Harfagri grabs hold of a leg and drops back for a hell hook! The two fighters roll across the mat, with Reynolds trying to push Harfagri off... Reynolds taps! He's tapped! This one is all over! A throwback to the old Pancrase there with an infrequently seen submission hold! Nice work.
Ladies and gentlemen, after 4:37 of round 2, we have a winner by way of Submission (Heel Hook). Haraldr Harfagri!
|
|
|
|
|
|
|
|
|
|
|
|
|
|
|
|
|
|
|
|
|
|
|
| S |
C
A |
G |
S |
C
B |
G |
|
S |
C |
G |
|
energy
A | B |
|
hype
A | B |
|
pop
A | B |
|
mgr
A | B |
|
FIGHT
RATING
34% |
|
|
|
|
|
|
|
|
|
|
