 |
123 PBP Commentary |
Undercard bout
|
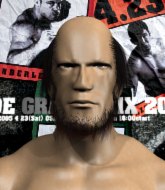
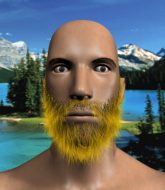
Coming up we have a middleweight MMA rules bout between Iopu Aimaasu (ranked 0 p4p, 0 weight class) and Saliou Sesay (ranked 0 p4p, 0 weight class). Both these guys are coming into the fight with injuries so let's see if that has a bearing on the fight. Iopu Aimaasu has the better chin. Will he look to stand and bang today?
 |
|
 |
| 175 cm
19
178 lbs
5 - 1 - 0 |
|
170 cm
18
135 lbs
2 - 3 - 0 |
Decent wrestler
World class boxer
Experienced |
|
BJJ White Belt
Great elbows
Determined |
|
| |
|
Ladies and gentlemen. This fight is 5 rounds, for the middleweight championship of the world!
Introducing the champion to my left, fighting out of the red corner.
With a record of
5 - 1 - 0, fighting out of Las Vegas, Iopu Aimaasu!
And introducing the challenger to my right, fighting out of the blue corner.
With a record of
2 - 3 - 0, fighting out of Montreal, Saliou Sesay!
The judges for this bout are Stewart Dunkirk, Wesley Smith and Cecil Peabody.

The bell rings for round one and we are underway!

Sesay gets taken down but at least he's managed to land in guard.
Aimaasu is breathing heavily.

Aimaasu is trying to work a guillotine from the top, or something like that? Don't know how he thinks he's going to get a finish from there.
Aimaasu works a leg free and moves into half guard.
Aimaasu seems like he's working for an arm triangle here. He's freed his trapped foot and he's rotating nicely. Sesay is in big trouble! He's tapping out! This one is aaaaaaaaaaaall over!
Ladies and gentlemen, after 0:36 of round 1, we have a winner by way of Submission (Arm Triangle). Iopu Aimaasu!
Iopu Aimaasu retains his middleweight title!
|
|
|
|
|
|
|
|
|
|
|
|
|
|
|
|
|
|
|
|
|
|
|
| S |
C
A |
G |
S |
C
B |
G |
|
S |
C |
G |
|
energy
A | B |
|
hype
A | B |
|
pop
A | B |
|
mgr
A | B |
|
FIGHT
RATING
77% |
|
|
|
|
|
|
|
Undercard bout
|
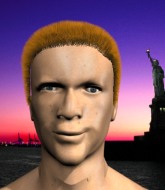
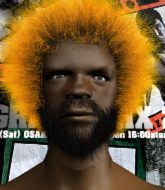
Coming up we have a welterweight MMA rules bout between Wammo Blammo (ranked 0 p4p, 0 weight class) and Mr Gerbik (ranked 0 p4p, 0 weight class). Both these guys are coming into the fight with injuries so let's see if that has a bearing on the fight. Wammo Blammo has the edge in experience - let's see if he can make that count tonight.
 |
|
 |
| 175 cm
24
150 lbs
9 - 8 - 0 |
|
175 cm
19
160 lbs
3 - 3 - 0 |
BJJ White Belt
Solid boxing
KO power |
|
Good wrestler
Excellent boxer
Determined |
|
| |
|
Ladies and gentlemen. This fight is 5 rounds, for the welterweight championship of the world!
Introducing the champion to my left, fighting out of the red corner.
With a record of
9 - 8 - 0, fighting out of Montreal, Wammo Blammo!
And introducing the challenger to my right, fighting out of the blue corner.
With a record of
3 - 3 - 0, fighting out of Las Vegas, Mr Gerbik!
The judges for this bout are Daniel Franklin, Cecil Peabody and Stewart Dunkirk.
The bell rings for round one and we are underway!
Blammo shoots in for a double leg but Gerbik sprawls well. That's going to sap some energy.
Blammo is breathing heavily.
Blammo shoots in and drives through. Gerbik sprawls well.
Blammo fails to land the takedown.
That's three failed takedown attempts in the round for Wammo Blammo. That's going to take a lot out of him.
Gerbik shoots in and drives through. Blammo sprawls well.
Gerbik shoots in for a takedown. "I don't think so" says Blammo as he avoids it easily.
Blammo fakes high and shoots in for a takedown but Gerbik avoids it really well and circles away.
Gerbik looks frustrated there after his takedown attempt is stuffed easily.
Blammo shoots in for a takedown - he's clinched up with Gerbik but Gerbik pushes him off and we're back to square one.
Blammo shoots in looking for a takedown but Gerbik manages to keep the fight standing, pushing Blammo's face into the canvas for good measure before circling away.
Gerbik shoots in for a takedown - he's clinched up with Blammo but Blammo pushes him off and we're back to square one.
Gerbik stuffs a takedown. It's all about dictating where the fight takes place and Gerbik wants it to stay on the feet.
Blammo shoots in for a double leg but Gerbik sprawls well. That's going to sap some energy.
Blammo shoots in looking for a takedown but Gerbik manages to keep the fight standing, pushing Blammo's face into the canvas for good measure before circling away.
Blammo leaves Gerbik with his face pressed against the mat as he sprawls beautifully, defending against a solid takedown attempt.
No luck for Gerbik with that takedown attempt.
Blammo fails with the takedown.

That's one minute gone in the round.
Gerbik fails with a rather predictable takedown attempt.
Blammo tries to score a power double leg takedown but Gerbik sees that one coming and sprawls well. That will dishearten Blammo somewhat.
Blammo shoots in but no luck this time.
Blammo shoots in with a takedown attempt and he has Gerbik pinned against the cage. Gerbik gets the underhooks and manages to circle away.
Gerbik fails miserably with a takedown attempt.
Blammo looks for a takedown but Gerbik sprawls well.
Blammo fails with a takedown attempt.
Blammo misses with a takedown attempt - Gerbik sprawls well and throws a nice strike on the way out which just misses.
Gerbik shoots in for a takedown. "Ole!" shouts Blammo as he jumps to the side.

That's two minutes gone in the round.
Blammo is trying hard to land a takedown here. Gerbik sprawls well and keeps this one on the feet.
Blammo shoots in for a takedown but Gerbik shows good takedown defense there and keeps this one on the feet.
Gerbik shoots in for a takedown. He's persisting with it as Blammo sprawls well. Blammo wins this battle and keeps the fight standing. Gerbik gets slowly back to his feet.
Blammo shoots in looking for a takedown but Gerbik manages to keep the fight standing, pushing Blammo's face into the canvas for good measure before circling away.
Blammo misses with a takedown attempt. He shot from a bit too far out.
Gerbik fails with a takedown attempt.
Blammo looks frustrated there after his takedown attempt is stuffed easily.
Gerbik defends well against a solid takedown attempt from Blammo.
Blammo shoots in but no luck this time.
Blammo looks for a takedown but Gerbik sprawls well.
Blammo looks frustrated there after his takedown attempt is stuffed easily.
Blammo slaps away a takedown attempt from Gerbik, before circling back to the center of the mat.
Gerbik stuffs the takedown attempt from Blammo. Blammo gets slowly back to his feet.

That's three minutes gone in the round.
Blammo leaves Gerbik with his face pressed against the mat as he sprawls beautifully, defending against a solid takedown attempt.
Gerbik shoots in and drives through. Blammo sprawls well.
Wow, both these guys are really going for it!
Blammo shoots in with a takedown attempt and he has Gerbik pinned against the cage. Gerbik gets the underhooks and manages to circle away.
Gerbik slaps away a takedown attempt from Blammo, before circling back to the center of the mat.
Blammo shoots in looking for a takedown. Gerbik tries to sprawl out of it but Blammo keeps driving through. The fighters are pinned against the cage. Gerbik manages to get underhooks and after a bit of a struggle, circles away and we're back to standing.
A telegraphed takedown attempt from Gerbik is defended easily by Blammo.
Blammo shoots in but no luck this time.
Blammo fails with a takedown attempt from distance.
Gerbik displays good takedown defense there as he swats away a double leg from Blammo.
Blammo leaves Gerbik with his face pressed against the mat as he sprawls beautifully, defending against a solid takedown attempt.
Blammo shoots in for a takedown. He's persisting with it as Gerbik sprawls well. Gerbik wins this battle and keeps the fight standing. Blammo gets slowly back to his feet.

That's four minutes gone in the round.
Blammo closes the distance and clinches up with Gerbik, looking for a takedown. Blammo pushes Gerbik against the cage but Gerbik circles to the side and manages to break the clinch.
Blammo fakes high and shoots in for a takedown but Gerbik avoids it really well and circles away.
Gerbik slaps away a takedown attempt from Blammo, before circling back to the center of the mat.
Gerbik looks frustrated there after his takedown attempt is stuffed easily.
No luck with that takedown attempt from Blammo.
Gerbik looks frustrated there after his takedown attempt is stuffed easily.
Gerbik shoots in looking for a takedown. Blammo tries to sprawl out of it but Gerbik keeps driving through. The fighters are pinned against the cage. Blammo manages to get underhooks and after a bit of a struggle, circles away and we're back to standing.
Gerbik slaps away a takedown attempt from Blammo, before circling back to the center of the mat.
Blammo shoots in for a takedown but doesn't get it.

That's five minutes gone in the round.
Blammo misses with a takedown attempt. He shot from a bit too far out.
Blammo slaps away a takedown attempt from Gerbik, before circling back to the center of the mat.
Blammo misses with a takedown attempt. He shot from a bit too far out.
A really sloppy takedown attempt there from Blammo.
Gerbik fails with a takedown attempt from distance.
Blammo shoots in but Gerbik avoids the takedown attempt easily.
Gerbik slaps away a takedown attempt from Blammo, before circling back to the center of the mat.
No luck with that takedown attempt from Gerbik.
A telegraphed takedown attempt from Blammo is defended easily by Gerbik.
Gerbik stuffs a takedown. It's all about dictating where the fight takes place and Gerbik wants it to stay on the feet.
Blammo shoots in for a double leg but Gerbik sprawls well. That's going to sap some energy.
Blammo slaps away a takedown attempt from Gerbik, before circling back to the center of the mat.

That's six minutes gone in the round.
Blammo throws a looping left and ducks down for a takedown. He's got his arms around Gerbik's waist but Gerbik gets an underhook and avoids the takedown by throwing Blammo off to one side.
Blammo shoots for a takedown but Gerbik saw that one coming a mile off and avoided it easily.
Gerbik shoots in for a takedown. "Ole!" shouts Blammo as he jumps to the side.
Blammo stuffs a takedown. It's all about dictating where the fight takes place and Blammo wants it to stay on the feet.
Horrible takedown by Gerbik or perhaps it was just good defense by Blammo which made him look bad.
Gerbik stuffs the takedown attempt from Blammo. Blammo gets slowly back to his feet.
Gerbik displays good takedown defense there as he swats away a double leg from Blammo.
Gerbik looks for a takedown here. Will he get it? Blammo is fending him off so far but Gerbik persists. Nope, Blammo circles away and we're back to standing.
Blammo fails with a rather predictable takedown attempt.
Gerbik changes levels and looks for a double leg takedown. Blammo tries to avoid it but Gerbik manages to keep hold of a leg and drag Blammo to the ground. Blammo escapes though and pops straight back up to his feet.
Blammo tries to shoot in for a takedown. He's got hold of a leg but Gerbik swivels and escapes.
Blammo closes this distance looking for a takedown but Gerbik circles away.
Horrible takedown by Blammo or perhaps it was just good defense by Gerbik which made him look bad.
Blammo fails with a takedown attempt from distance.
Gerbik fails with a takedown attempt from distance.

That's seven minutes gone in the round.
A telegraphed takedown attempt from Blammo is defended easily by Gerbik.
Nice takedown defense from Blammo. No joy for Gerbik on that attempt.
Gerbik shoots for a takedown but Blammo saw that one coming a mile off and avoided it easily.
Gerbik shoots for a double leg takedown but Blammo sprawls well. He's pushed Gerbik's face into the mat and manages to get back to his feet relatively easily.
Blammo fails with a takedown attempt.
Gerbik misses with a takedown attempt. He shot from a bit too far out.
Blammo tries to shoot in for a takedown. He's got hold of a leg but Gerbik swivels and escapes.
Blammo looks frustrated there after his takedown attempt is stuffed easily.
Gerbik stuffs the takedown attempt from Blammo. Blammo gets slowly back to his feet.
Gerbik has a takedown stuffed.
Blammo looks frustrated there after his takedown attempt is stuffed easily.
Gerbik shoots in for a takedown. He's persisting with it as Blammo sprawls well. Blammo wins this battle and keeps the fight standing. Gerbik gets slowly back to his feet.
Blammo shoots in for a takedown but Gerbik shows good takedown defense there and keeps this one on the feet.

That's eight minutes gone in the round.
Gerbik shoots in looking for a takedown. Blammo tries to sprawl out of it but Gerbik keeps driving through. The fighters are pinned against the cage. Blammo manages to get underhooks and after a bit of a struggle, circles away and we're back to standing.
Blammo shoots in for a takedown. "I don't think so" says Gerbik as he avoids it easily.
Nice sprawl there from Gerbik as Blammo shoots in.
Blammo misses with a takedown attempt. He shot from a bit too far out.
Blammo shoots in with a takedown attempt and he has Gerbik pinned against the cage. Gerbik gets the underhooks and manages to circle away.
Blammo keeps the fight standing with a nice sprawl.
Nice takedown defense from Gerbik. No joy for Blammo on that attempt.
Gerbik shoots in looking for a takedown. Blammo tries to sprawl out of it but Gerbik keeps driving through. The fighters are pinned against the cage. Blammo manages to get underhooks and after a bit of a struggle, circles away and we're back to standing.
Blammo fails to land the takedown.
Blammo shoots in for a takedown - he's clinched up with Gerbik but Gerbik pushes him off and we're back to square one.

That's nine minutes gone in the round.
Gerbik shoots in looking for a takedown but Blammo manages to keep the fight standing, pushing Gerbik's face into the canvas for good measure before circling away.
Gerbik shoots in looking for a double leg takedown. Blammo defends it nicely.
Blammo closes the distance and clinches up with Gerbik, looking for a takedown. Blammo pushes Gerbik against the cage but Gerbik circles to the side and manages to break the clinch.
Blammo displays good takedown defense there as he swats away a double leg from Gerbik.
Gerbik shoots in looking for a takedown but Blammo manages to keep the fight standing, pushing Gerbik's face into the canvas for good measure before circling away.
Blammo leaves Gerbik with his face pressed against the mat as he sprawls beautifully, defending against a solid takedown attempt.
Blammo has a takedown stuffed.
Blammo fails miserably with a takedown attempt.
Blammo leaves Gerbik with his face pressed against the mat as he sprawls beautifully, defending against a solid takedown attempt.
Blammo changes levels and looks for a double leg takedown. Gerbik tries to avoid it but Blammo manages to keep hold of a leg and drag Gerbik to the ground. Gerbik escapes though and pops straight back up to his feet.
Gerbik tries to shoot in for a takedown. He's got hold of a leg but Blammo swivels and escapes.
Blammo fails miserably with a takedown attempt.
Gerbik shoots in but Blammo avoids the takedown attempt easily.
And thats the end of the round the fighters go back to their corners.
Mr Gerbik dominated that round.
The referee calls time. The cornermen exit stage left and we're back to business.

Gerbik fails with the takedown.
Blammo shoots in for a takedown but Gerbik shows good takedown defense there and keeps this one on the feet.
No luck with that takedown attempt from Blammo.
Blammo shoots for a double leg takedown but Gerbik sprawls well. He's pushed Blammo's face into the mat and manages to get back to his feet relatively easily.
That's three failed takedown attempts in the round for Wammo Blammo. That's going to take a lot out of him.
Blammo misses with a takedown attempt. He shot from a bit too far out.
Blammo throws a looping left and ducks down for a takedown. He's got his arms around Gerbik's waist but Gerbik gets an underhook and avoids the takedown by throwing Blammo off to one side.
Blammo fails with a takedown attempt from distance.
No luck for Blammo with that takedown attempt.
Gerbik stuffs the takedown attempt from Blammo. Blammo gets slowly back to his feet.
Blammo shoots in for a takedown. He's persisting with it as Gerbik sprawls well. Gerbik wins this battle and keeps the fight standing. Blammo gets slowly back to his feet.
Blammo tries to shoot in for a takedown. He's got hold of a leg but Gerbik swivels and escapes.
Both fighters are absolutely exhausted here.
Gerbik stuffs the takedown.
Blammo closes this distance looking for a takedown but Gerbik circles away.
Blammo stuffs the takedown attempt from Gerbik. Gerbik gets slowly back to his feet.
That's one minute gone in the round.
Blammo shoots in for a takedown - he's clinched up with Gerbik but Gerbik pushes him off and we're back to square one.
Blammo fails miserably with a takedown attempt.
Gerbik fails with a rather predictable takedown attempt.
Blammo shoots in for a takedown - he's clinched up with Gerbik but Gerbik pushes him off and we're back to square one.
Gerbik stuffs a takedown. It's all about dictating where the fight takes place and Gerbik wants it to stay on the feet.
Gerbik looks frustrated there after his takedown attempt is stuffed easily.
Gerbik fails with the takedown.
Blammo stuffs a takedown. It's all about dictating where the fight takes place and Blammo wants it to stay on the feet.
Gerbik closes this distance looking for a takedown but Blammo circles away.
Blammo shoots in for a takedown. "I don't think so" says Gerbik as he avoids it easily.
Gerbik changes levels and looks for a double leg takedown. Blammo tries to avoid it but Gerbik manages to keep hold of a leg and drag Blammo to the ground. Blammo escapes though and pops straight back up to his feet.
Gerbik shoots for a double leg takedown but Blammo sprawls well. He's pushed Gerbik's face into the mat and manages to get back to his feet relatively easily.
Blammo shoots in for a takedown. "Ole!" shouts Gerbik as he jumps to the side.
Blammo keeps the fight standing with a nice sprawl.
That's two minutes gone in the round.
Blammo looks frustrated there after his takedown attempt is stuffed easily.
Blammo misses with a takedown attempt. He shot from a bit too far out.
Gerbik defends well against a solid takedown attempt from Blammo.
Blammo fails with the takedown.
Gerbik fails with the takedown.
Blammo defends well against a solid takedown attempt from Gerbik.
Gerbik shoots in looking for a takedown but Blammo manages to keep the fight standing, pushing Gerbik's face into the canvas for good measure before circling away.
Nice takedown defense from Blammo. No joy for Gerbik on that attempt.
Blammo shoots in with a takedown attempt and he has Gerbik pinned against the cage. Gerbik gets the underhooks and manages to circle away.
Blammo fails with the takedown.
Gerbik dives in and grabs Blammo's left leg, looking for a takedown. Blammo pushes down on Gerbik's head and hops out.
Gerbik tries to score a power double leg takedown but Blammo sees that one coming and sprawls well. That will dishearten Gerbik somewhat.
That's three minutes gone in the round.
Gerbik fails with the takedown.
Blammo looks for a takedown but Gerbik sprawls well.
Gerbik shoots in for a takedown. "Ole!" shouts Blammo as he jumps to the side.
Blammo fails with the takedown.
Blammo closes this distance looking for a takedown but Gerbik circles away.
Blammo will have to do better than that with his takedown attempts.
Blammo shoots in for a double leg but Gerbik sprawls well. That's going to sap some energy.
Blammo shoots for a double leg takedown but Gerbik sprawls well. He's pushed Blammo's face into the mat and manages to get back to his feet relatively easily.
Blammo shoots in for a double leg but Gerbik sprawls well. That's going to sap some energy.
Blammo shoots in for a takedown. He's persisting with it as Gerbik sprawls well. Gerbik wins this battle and keeps the fight standing. Blammo gets slowly back to his feet.
Blammo shoots in looking for a takedown. Gerbik tries to sprawl out of it but Blammo keeps driving through. The fighters are pinned against the cage. Gerbik manages to get underhooks and after a bit of a struggle, circles away and we're back to standing.
Gerbik displays good takedown defense there as he swats away a double leg from Blammo.
That's four minutes gone in the round.
Blammo keeps the fight standing with a nice sprawl.
Blammo changes levels and looks for a double leg takedown. Gerbik tries to avoid it but Blammo manages to keep hold of a leg and drag Gerbik to the ground. Gerbik escapes though and pops straight back up to his feet.
Blammo shoots in for a takedown but Gerbik shows good takedown defense.
Gerbik stuffs the takedown attempt from Blammo. Blammo gets slowly back to his feet.
Blammo shoots in but no luck this time.
Mr Gerbik seems to be getting the better of the standup.
Gerbik shoots for a takedown but Blammo saw that one coming a mile off and avoided it easily.
Blammo tries for a takedown but Gerbik sees it coming a mile off and avoids it easily.
No luck for Blammo with that takedown attempt.
Gerbik fails miserably with a takedown attempt.
Gerbik slaps away a takedown attempt from Blammo, before circling back to the center of the mat.
A really sloppy takedown attempt there from Blammo.
Blammo shoots for a takedown but Gerbik saw that one coming a mile off and avoided it easily.
Blammo fails with a takedown attempt.
Gerbik is trying hard to land a takedown here. Blammo sprawls well and keeps this one on the feet.
That's five minutes gone in the round.
Gerbik leaves Blammo with his face pressed against the mat as he sprawls beautifully, defending against a solid takedown attempt.
Blammo shoots for a double leg takedown but Gerbik sprawls well. He's pushed Blammo's face into the mat and manages to get back to his feet relatively easily.
Blammo shoots in but Gerbik avoids the takedown attempt easily.
Gerbik dives in and grabs Blammo's left leg, looking for a takedown. Blammo pushes down on Gerbik's head and hops out.
Gerbik stuffs the takedown attempt from Blammo. Blammo gets slowly back to his feet.
Nice sprawl there from Gerbik as Blammo shoots in.
Gerbik shoots in for a takedown but Blammo shows good takedown defense.
Gerbik stuffs the takedown.
Blammo is trying hard to land a takedown here. Gerbik sprawls well and keeps this one on the feet.
Blammo looks frustrated there after his takedown attempt is stuffed easily.
Gerbik tries to score a power double leg takedown but Blammo sees that one coming and sprawls well. That will dishearten Gerbik somewhat.
Gerbik shoots in and scores a nice double leg takedown into half guard.
Blammo is working for an escape here. He's hooked one of Gerbik's legs and he's managed to sneak out and take Gerbik's back!
That's six minutes gone in the round.
Blammo working for a choke but Gerbik is defending well.
Blammo is working for the rear naked choke. He has one arm under the chin but Gerbik has hold of the other arm. A bit of a stalemate here.
Gerbik rolls and manages to get back to half guard. Nicely done.
Blammo is looking for a kimura. It's going to be difficult to finish that from half guard though and Gerbik defends it well.
We get told so often about how wrestlers don't like to be on their backs. Let's see if Gerbik can do anything to dispel that myth.
Blammo looking for a kimura but he'll have to free his other leg if he wants to finish that. Perhaps he's just using it as a distraction technique.
Gerbik actively working from the bottom here.
That's seven minutes gone in the round.
Blammo seems to be working for a kimura but Gerbik defends the submission attempt.
Gerbik gets back to full guard.
Gerbik looking for submissions off his back, moving his hips, looking for an opening.
Blammo drops back looking for a leg! Gerbik is in trouble here! The fighters roll with the hold and Gerbik manages to kick Blammo off! Blammo jumps back into Gerbik's guard.
Gerbik is throwing his legs up, looking for submissions. Blammo is aware though and is defending well.
That's eight minutes gone in the round.
Blammo drops back looking for a leg! Gerbik is in trouble here! The fighters roll with the hold and Gerbik manages to kick Blammo off! Blammo jumps back into Gerbik's guard.
Blammo drops back for a leg! It's a sloppy attempt though and Blammo jumps back into guard quickly, to retain the dominant position.
Blammo thinks about going for a leg but decides against it, in order to maintain the position.
Blammo avoids a guillotine attempt easily.
Gerbik working for a triangle but Blammo defends it easily.
Blammo drops back looking for a leg! Gerbik is in trouble here! The fighters roll with the hold and Gerbik manages to kick Blammo off! Blammo jumps back into Gerbik's guard.
The ref warns both fighters not to hold the cage as they work up against the meshing.
Blammo tries to free his leg and advance position but Gerbik is retaining full guard.
That's nine minutes gone in the round.
Blammo drops back for a leg! It's a sloppy attempt though and Blammo jumps back into guard quickly, to retain the dominant position.
Blammo is trying to work a guillotine from the top, or something like that? Don't know how he thinks he's going to get a finish from there.
Gerbik looking to try and escape his hips here, looking for a submission. It looks like he's going for a triangle but Blammo is defending well. Gerbik quickly switches to an armbar and extends the arm! Blammo has no choice but to tap, to a very quick submission! Wow, that was lightning fast! Gerbik celebrates on the cage, with the crowd.
Ladies and gentlemen, after 9:42 of round 2, we have a winner by way of Submission (Armbar). Mr Gerbik!
Mr Gerbik is the new welterweight champion!
|
|
|
|
|
|
|
|
|
|
|
|
|
|
|
|
|
|
|
|
|
|
|
| S |
C
A |
G |
S |
C
B |
G |
|
S |
C |
G |
|
energy
A | B |
|
hype
A | B |
|
pop
A | B |
|
mgr
A | B |
|
FIGHT
RATING
52% |
|
|
|
|
|
|
|
Undercard bout
|
Coming up we have a heavyweight MMA rules bout between Cus Loves The Cock (ranked 0 p4p, 0 weight class) and XX XX (ranked 0 p4p, 0 weight class). Both these guys are coming into the fight with injuries so let's see if that has a bearing on the fight. Cus Loves The Cock has the better chin. Will he look to stand and bang today?
 |
|
 |
| 185 cm
25
210 lbs
2 - 4 - 0 |
|
200 cm
25
240 lbs
1 - 2 - 0 |
BJJ White Belt
Excellent boxer
KO power |
|
BJJ White Belt
Excellent boxer
Powerful |
|
| |
|
Ladies and gentlemen. This fight is 5 rounds, for the heavyweight championship of the world!
Introducing the champion to my left, fighting out of the red corner.
With a record of
2 - 4 - 0, fighting out of Las Vegas, Cus Loves The Cock!
And introducing the challenger to my right, fighting out of the blue corner.
With a record of
1 - 2 - 0, fighting out of Las Vegas, XX XX!
The judges for this bout are Wesley Smith, Tiny Johnson and Cecil Peabody.
The bell rings for round one and we are underway!
The Cock leaves XX with his face pressed against the mat as he sprawls beautifully, defending against a solid takedown attempt.
The Cock is breathing heavily.
The Cock keeps the fight standing with a nice sprawl.
A telegraphed takedown attempt from The Cock is defended easily by XX.
XX shoots for a double leg takedown but The Cock sprawls well. He's pushed XX's face into the mat and manages to get back to his feet relatively easily.
Cus Loves The Cock has stuffed three takedown attempts in the round now. That's going to take a lot out of XX XX.
XX stuffs the takedown attempt from The Cock. The Cock gets slowly back to his feet.
XX throws a looping left and ducks down for a takedown. He's got his arms around The Cock's waist but The Cock gets an underhook and avoids the takedown by throwing XX off to one side.
The Cock tries for a takedown but XX sees it coming a mile off and avoids it easily.
XX stuffs a takedown. It's all about dictating where the fight takes place and XX wants it to stay on the feet.
XX leaves The Cock with his face pressed against the mat as he sprawls beautifully, defending against a solid takedown attempt.
Nice sprawl there from The Cock as XX shoots in.
Wow, both these guys are really going for it!
XX fails with a takedown attempt.
The Cock misses with a takedown attempt - XX sprawls well and throws a nice strike on the way out which just misses.
The Cock fails miserably with a takedown attempt.
XX shoots in but The Cock avoids the takedown attempt easily.
That's one minute gone in the round.
XX shoots in for a takedown. He's persisting with it as The Cock sprawls well. The Cock wins this battle and keeps the fight standing. XX gets slowly back to his feet.
XX shoots in looking for a takedown but The Cock manages to keep the fight standing, pushing XX's face into the canvas for good measure before circling away.
The Cock misses with a takedown attempt. He shot from a bit too far out.
No luck with that takedown attempt from XX.
The Cock will have to do better than that with his takedown attempts.
The Cock will have to do better than that with his takedown attempts.
Nice sprawl there from The Cock as XX shoots in.
XX misses with a takedown attempt. He shot from a bit too far out.
XX throws a looping left and ducks down for a takedown. He's got his arms around The Cock's waist but The Cock gets an underhook and avoids the takedown by throwing XX off to one side.
The Cock closes the distance and clinches up with XX, looking for a takedown. The Cock pushes XX against the cage but XX circles to the side and manages to break the clinch.
The Cock dives in and grabs XX's left leg, looking for a takedown. XX pushes down on The Cock's head and hops out.
The Cock misses with a takedown attempt - XX sprawls well and throws a nice strike on the way out which just misses.
No luck for The Cock with that takedown attempt.
The Cock shoots in looking for a takedown. XX tries to sprawl out of it but The Cock keeps driving through. The fighters are pinned against the cage. XX manages to get underhooks and after a bit of a struggle, circles away and we're back to standing.
That's two minutes gone in the round.
XX shoots in and drives through. The Cock sprawls well.
XX tries to shoot in for a takedown. He's got hold of a leg but The Cock swivels and escapes.
XX fails with the takedown.
XX displays good takedown defense there as he swats away a double leg from The Cock.
XX stuffs the takedown.
The Cock fakes high and shoots in for a takedown but XX avoids it really well and circles away.
The Cock shoots in with a takedown attempt and he has XX pinned against the cage. XX gets the underhooks and manages to circle away.
The Cock fails with a takedown attempt.
XX tries for a takedown but The Cock sees it coming a mile off and avoids it easily.
XX shoots for a double leg takedown but The Cock sprawls well. He's pushed XX's face into the mat and manages to get back to his feet relatively easily.
The Cock stuffs the takedown.
That's three minutes gone in the round.
Nice takedown defense from The Cock. No joy for XX on that attempt.
XX shoots for a double leg takedown but The Cock sprawls well. He's pushed XX's face into the mat and manages to get back to his feet relatively easily.
The Cock fails with a takedown attempt.
XX is trying hard to land a takedown here. The Cock sprawls well and keeps this one on the feet.
XX tries to score a power double leg takedown but The Cock sees that one coming and sprawls well. That will dishearten XX somewhat.
The Cock misses with a takedown attempt - XX sprawls well and throws a nice strike on the way out which just misses.
XX shoots in for a takedown. He's persisting with it as The Cock sprawls well. The Cock wins this battle and keeps the fight standing. XX gets slowly back to his feet.
The Cock displays good takedown defense there as he swats away a double leg from XX.
XX fails to land the takedown.
The Cock will have to do better than that with his takedown attempts.
The Cock slaps away a takedown attempt from XX, before circling back to the center of the mat.
XX shoots for a takedown but The Cock saw that one coming a mile off and avoided it easily.
That's four minutes gone in the round.
XX throws a looping left and ducks down for a takedown. He's got his arms around The Cock's waist but The Cock gets an underhook and avoids the takedown by throwing XX off to one side.
XX throws a looping left and ducks down for a takedown. He's got his arms around The Cock's waist but The Cock gets an underhook and avoids the takedown by throwing XX off to one side.
The Cock shoots in looking for a double leg takedown. XX defends it nicely.
The Cock fails with the takedown.
The Cock shoots for a takedown but XX saw that one coming a mile off and avoided it easily.
XX fails with a rather predictable takedown attempt.
XX shoots in for a takedown but doesn't get it.
XX displays good takedown defense there as he swats away a double leg from The Cock.
The Cock has a takedown stuffed.
The Cock shoots in and drives through. XX sprawls well.
The Cock looks frustrated there after his takedown attempt is stuffed easily.
XX shoots for a double leg takedown but The Cock sprawls well. He's pushed XX's face into the mat and manages to get back to his feet relatively easily.
The Cock closes this distance looking for a takedown but XX circles away.
That's five minutes gone in the round.
The Cock shoots in but XX avoids the takedown attempt easily.
XX shoots for a double leg takedown but The Cock sprawls well. He's pushed XX's face into the mat and manages to get back to his feet relatively easily.
XX fails with a rather predictable takedown attempt.
XX leaves The Cock with his face pressed against the mat as he sprawls beautifully, defending against a solid takedown attempt.
The Cock shoots for a takedown but XX saw that one coming a mile off and avoided it easily.
XX shoots in and drives through. The Cock sprawls well.
The Cock fails to land the takedown.
XX fails with a takedown attempt from distance.
XX closes the distance and clinches up with The Cock, looking for a takedown. XX pushes The Cock against the cage but The Cock circles to the side and manages to break the clinch.
The Cock looks for a takedown here. Will he get it? XX is fending him off so far but The Cock persists. Nope, XX circles away and we're back to standing.
A telegraphed takedown attempt from The Cock is defended easily by XX.
The Cock stuffs a takedown. It's all about dictating where the fight takes place and The Cock wants it to stay on the feet.
The Cock shoots for a double leg takedown but XX sprawls well. He's pushed The Cock's face into the mat and manages to get back to his feet relatively easily.
XX fails to land the takedown.
The Cock shoots in for a takedown but XX shows good takedown defense.
That's six minutes gone in the round.
XX shoots in for a takedown. "Ole!" shouts The Cock as he jumps to the side.
XX misses with a takedown attempt - The Cock sprawls well and throws a nice strike on the way out which just misses.
The Cock throws a looping left and ducks down for a takedown. He's got his arms around XX's waist but XX gets an underhook and avoids the takedown by throwing The Cock off to one side.
XX looks for a takedown but The Cock sprawls well.
No luck for The Cock with that takedown attempt.
XX stuffs the takedown.
XX slaps away a takedown attempt from The Cock, before circling back to the center of the mat.
The Cock stuffs the takedown.
The Cock slaps away a takedown attempt from XX, before circling back to the center of the mat.
The Cock fails miserably with a takedown attempt.
The Cock fails miserably with a takedown attempt.
The Cock fails with a rather predictable takedown attempt.
That's seven minutes gone in the round.
The Cock stuffs a takedown. It's all about dictating where the fight takes place and The Cock wants it to stay on the feet.
XX closes the distance and clinches up with The Cock, looking for a takedown. XX pushes The Cock against the cage but The Cock circles to the side and manages to break the clinch.
XX stuffs the takedown attempt from The Cock. The Cock gets slowly back to his feet.
XX shoots in but no luck this time.
A really sloppy takedown attempt there from The Cock.
The Cock shoots in and drives through. XX sprawls well.
The Cock shoots in for a takedown but XX shows good takedown defense.
The Cock shoots in looking for a takedown. XX tries to sprawl out of it but The Cock keeps driving through. The fighters are pinned against the cage. XX manages to get underhooks and after a bit of a struggle, circles away and we're back to standing.
XX shoots in for a takedown but The Cock shows good takedown defense.
The Cock looks frustrated there after his takedown attempt is stuffed easily.
The Cock slaps away a takedown attempt from XX, before circling back to the center of the mat.
The Cock shoots in for a takedown but doesn't get it.
XX shoots in for a takedown but The Cock shows good takedown defense there and keeps this one on the feet.
XX shoots in for a takedown - he's clinched up with The Cock but The Cock pushes him off and we're back to square one.
A really sloppy takedown attempt there from The Cock.
That's eight minutes gone in the round.
XX shoots in looking for a double leg takedown. The Cock defends it nicely.
The Cock stuffs the takedown.
The Cock shoots in for a takedown. He's persisting with it as XX sprawls well. XX wins this battle and keeps the fight standing. The Cock gets slowly back to his feet.
XX fails miserably with a takedown attempt.
Horrible takedown by XX or perhaps it was just good defense by The Cock which made him look bad.
The Cock tries to shoot in for a takedown. He's got hold of a leg but XX swivels and escapes.
The Cock shoots in for a takedown. He's persisting with it as XX sprawls well. XX wins this battle and keeps the fight standing. The Cock gets slowly back to his feet.
No luck for XX with that takedown attempt.
The Cock shoots in looking for a takedown but XX manages to keep the fight standing, pushing The Cock's face into the canvas for good measure before circling away.
The Cock shoots in for a takedown. "I don't think so" says XX as he avoids it easily.
That's nine minutes gone in the round.
The Cock misses with a takedown attempt. He shot from a bit too far out.
The Cock shoots in for a takedown but XX shows good takedown defense there and keeps this one on the feet.
XX fails with a rather predictable takedown attempt.
The Cock shoots in and drives through. XX sprawls well.
The Cock closes the distance and clinches up with XX, looking for a takedown. The Cock pushes XX against the cage but XX circles to the side and manages to break the clinch.
XX throws a loose over hand right and dives in with a double leg takedown. The Cock tries to sprawl but it's too late and the fighters hit the mat. XX is in The Cock's guard.
The Cock escapes his hips to the side and looks to be working for an armbar. XX gives him a little smile and shakes his head. No chance.
XX thinks about going for a leg but decides against it, in order to maintain the position.
XX is trying to work a guillotine from the top, or something like that? Don't know how he thinks he's going to get a finish from there.
The Cock had isolated an arm as going for a kimura. XX defends it easily.
The Cock working for a triangle but XX defends it easily.
And thats the end of the round the fighters go back to their corners.
A close round but XX XX will probably get the nod.
The minute break is over - no more time for sponges and pep talks - back to the action!
XX fails with the takedown.
The Cock misses with a takedown attempt - XX sprawls well and throws a nice strike on the way out which just misses.
XX misses with a takedown attempt - The Cock sprawls well and throws a nice strike on the way out which just misses.
XX shoots in looking for a takedown. The Cock tries to sprawl out of it but XX keeps driving through. The fighters are pinned against the cage. The Cock manages to get underhooks and after a bit of a struggle, circles away and we're back to standing.
Cus Loves The Cock has stuffed three takedown attempts in the round now. That's going to take a lot out of XX XX.
XX misses with a takedown attempt - The Cock sprawls well and throws a nice strike on the way out which just misses.
XX will have to do better than that with his takedown attempts.
Both fighters are absolutely exhausted here.
We've had a slow start to the round here - hopefully the action picks up.
XX shoots for a takedown but The Cock saw that one coming a mile off and avoided it easily.
The Cock looks for a takedown but XX sprawls well.
XX stuffs the takedown attempt from The Cock. The Cock gets slowly back to his feet.
XX fails with a rather predictable takedown attempt.
XX looks for a takedown here. Will he get it? The Cock is fending him off so far but XX persists. Nope, The Cock circles away and we're back to standing.
That's one minute gone in the round.
The Cock closes the distance and clinches up with XX, looking for a takedown. The Cock pushes XX against the cage but XX circles to the side and manages to break the clinch.
Nice sprawl there from XX as The Cock shoots in.
XX changes levels and looks for a double leg takedown. The Cock tries to avoid it but XX manages to keep hold of a leg and drag The Cock to the ground. The Cock escapes though and pops straight back up to his feet.
XX closes the distance and clinches up with The Cock, looking for a takedown. XX pushes The Cock against the cage but The Cock circles to the side and manages to break the clinch.
XX shoots in for a takedown but doesn't get it.
XX shoots in for a takedown. "Ole!" shouts The Cock as he jumps to the side.
XX changes levels and looks for a double leg takedown. The Cock tries to avoid it but XX manages to keep hold of a leg and drag The Cock to the ground. The Cock escapes though and pops straight back up to his feet.
XX misses with a takedown attempt - The Cock sprawls well and throws a nice strike on the way out which just misses.
XX fakes high and shoots in for a takedown but The Cock avoids it really well and circles away.
A telegraphed takedown attempt from XX is defended easily by The Cock.
The Cock dives in and grabs XX's left leg, looking for a takedown. XX pushes down on The Cock's head and hops out.
XX shoots in for a takedown but The Cock shows good takedown defense there and keeps this one on the feet.
XX looks for a takedown but The Cock sprawls well.
XX dives in and grabs The Cock's left leg, looking for a takedown. The Cock pushes down on XX's head and hops out.
That's two minutes gone in the round.
XX fails with a takedown attempt from distance.
The Cock slaps away a takedown attempt from XX, before circling back to the center of the mat.
XX XX is looking to throw some combinations by the looks of things.
The Cock fails miserably with a takedown attempt.
The Cock shoots in for a takedown but doesn't get it.
The Cock closes this distance looking for a takedown but XX circles away.
XX closes the distance and clinches up with The Cock, looking for a takedown. XX pushes The Cock against the cage but The Cock circles to the side and manages to break the clinch.
XX will have to do better than that with his takedown attempts.
The Cock dives in and grabs XX's left leg, looking for a takedown. XX pushes down on The Cock's head and hops out.
XX shoots in for a takedown. "I don't think so" says The Cock as he avoids it easily.
A telegraphed takedown attempt from XX is defended easily by The Cock.
XX will have to do better than that with his takedown attempts.
XX looks frustrated there after his takedown attempt is stuffed easily.
XX defends well against a solid takedown attempt from The Cock.
Nice sprawl there from XX as The Cock shoots in.
XX tries to shoot in for a takedown. He's got hold of a leg but The Cock swivels and escapes.
That's three minutes gone in the round.
The Cock shoots for a takedown but XX saw that one coming a mile off and avoided it easily.
XX shoots in with a takedown attempt and he has The Cock pinned against the cage. The Cock gets the underhooks and manages to circle away.
XX shoots in but The Cock avoids the takedown attempt easily.
XX looks for a takedown but The Cock sprawls well.
The Cock has a takedown stuffed.
XX shoots in for a double leg but The Cock sprawls well. That's going to sap some energy.
The Cock shoots for a takedown but XX saw that one coming a mile off and avoided it easily.
The Cock changes levels and looks for a double leg takedown. XX tries to avoid it but The Cock manages to keep hold of a leg and drag XX to the ground. XX escapes though and pops straight back up to his feet.
The Cock stuffs a takedown. It's all about dictating where the fight takes place and The Cock wants it to stay on the feet.
The Cock defends well against a solid takedown attempt from XX.
The Cock slaps away a takedown attempt from XX, before circling back to the center of the mat.
XX fakes high and shoots in for a takedown but The Cock avoids it really well and circles away.
No luck with that takedown attempt from The Cock.
That's four minutes gone in the round.
The Cock fails with a rather predictable takedown attempt.
XX stuffs the takedown attempt from The Cock. The Cock gets slowly back to his feet.
The Cock shoots in for a takedown but doesn't get it.
XX changes levels and looks for a double leg takedown. The Cock tries to avoid it but XX manages to keep hold of a leg and drag The Cock to the ground. The Cock escapes though and pops straight back up to his feet.
XX misses with a takedown attempt - The Cock sprawls well and throws a nice strike on the way out which just misses.
The Cock tries for a takedown but XX sees it coming a mile off and avoids it easily.
XX tries to shoot in for a takedown. He's got hold of a leg but The Cock swivels and escapes.
The Cock looks for a takedown here. Will he get it? XX is fending him off so far but The Cock persists. Nope, XX circles away and we're back to standing.
XX displays good takedown defense there as he swats away a double leg from The Cock.
XX stuffs a takedown. It's all about dictating where the fight takes place and XX wants it to stay on the feet.
The Cock will have to do better than that with his takedown attempts.
The Cock stuffs a takedown. It's all about dictating where the fight takes place and The Cock wants it to stay on the feet.
The Cock shoots in but XX avoids the takedown attempt easily.
The Cock looks for a takedown here. Will he get it? XX is fending him off so far but The Cock persists. Nope, XX circles away and we're back to standing.
XX shoots for a double leg takedown but The Cock sprawls well. He's pushed XX's face into the mat and manages to get back to his feet relatively easily.
XX closes this distance looking for a takedown but The Cock circles away.
Cus Loves The Cock is winning the standup battle so far.
That's five minutes gone in the round.
The Cock leaves XX with his face pressed against the mat as he sprawls beautifully, defending against a solid takedown attempt.
The Cock shoots for a double leg takedown but XX sprawls well. He's pushed The Cock's face into the mat and manages to get back to his feet relatively easily.
The Cock stuffs the takedown attempt from XX. XX gets slowly back to his feet.
XX shoots in for a takedown but The Cock shows good takedown defense there and keeps this one on the feet.
XX shoots in but no luck this time.
The Cock shoots in and drives through. XX sprawls well.
The Cock displays good takedown defense there as he swats away a double leg from XX.
The Cock fails miserably with a takedown attempt.
The Cock fails with the takedown.
No luck with that takedown attempt from The Cock.
XX looks frustrated there after his takedown attempt is stuffed easily.
The Cock shoots in looking for a double leg takedown. XX defends it nicely.
The Cock looks for a takedown. He's got it. We're now in half guard.
That's six minutes gone in the round.
The Cock is working for a submission of some sort.
XX looking to work for a kimura from the bottom.
XX looking for submissions from an awkward position here.
Both fighters really going for it on the ground here!
The Cock is working for submissions here but there's nothing on.
XX is looking to sinch up a guillotine here but The Cock pulls his head out easily.
XX actively working from the bottom here.
The Cock is looking for a kimura. It's going to be difficult to finish that from half guard though and XX defends it well.
That's seven minutes gone in the round.
XX looking for submissions off his back.
XX looking for submissions off his back.
The Cock looking for a kimura but he'll have to free his other leg if he wants to finish that. Perhaps he's just using it as a distraction technique.
XX looking to work for a kimura from the bottom.
XX looking for submissions from an awkward position here.
That's eight minutes gone in the round.
Neither fighter has done anything of merit for a good minute or two here and the crowd are not happy about it.
XX actively working from the bottom here.
XX looking for submissions off his back.
XX is looking for a sweep. The Cock is wise to his cunning plan and keeps the top position.
XX looking for submissions off his back.
The Cock is looking for an arm triangle, whilst trying to pass to side control. XX doesn't seem that keen to cooperate though. No luck this time The Cock.
The Cock wants to pass to mount but XX is defending the position.
That's nine minutes gone in the round.
The Cock is thinking about going for an arm triangle but he can't free his leg.
The Cock is trying to work for a kimura. This could be trouble! No, XX has managed to free his arm - good work.
The Cock is looking for a kimura but he's never going to get it from there.
The Cock is trying a forearm choke
I don't think that's going to do much at this level of the game.
The Cock is working for submissions here but there's nothing on.
XX actively working from the bottom here.
And thats the end of the round the fighters go back to their corners.
Cus Loves The Cock dominated that second round.
That's the end of the round. The referee orders the cornermen out of the cage so we can get back down to business.

XX fails with a takedown attempt.
The Cock fails to land the takedown.
XX gets a takedown into half guard.
XX is looking for a kimura here.
XX is looking for a kimura. It's going to be difficult to finish that from half guard though and The Cock defends it well.
The Cock is looking to sinch up a guillotine here but XX pulls his head out easily.
XX is looking for a kimura here.
Both fighters are breathing heavily.
The Cock is working for an escape here. He's hooked one of XX's legs and he's managed to sneak out and take XX's back!
That's one minute gone in the round.
The Cock working for a RNC but it's not happening just yet.
The Cock working for a choke but XX is defending well.
The Cock is staying calm and holding on to the back position, whilst working on a rear naked choke. XX is defending well though. The Cock let's go of the attempt for now.
The fighters are pressed up against the cage, both looking to find a bit of space to work.
The Cock doesn't have the hooks in and XX manages to turn into his guard.
The Cock is looking for a guillotine. You can't force these things though and XX defends well.
The Cock throwing his legs up looking for a triangle.
That's two minutes gone in the round.
Well. There's a bit of a lull in the action here and the crowd are starting to get restless.
The Cock is working actively off his back, looking to secure an arm or perhaps work for a triangle.
The Cock is working actively off his back, looking to secure an arm or perhaps work for a triangle.
The Cock has his foot on XX's thigh. He's trying to push off and get in position for a triangle, I think. XX works his way back into a safe position though.
XX avoids a guillotine attempt easily.
XX is trying to work a guillotine from the top, or something like that? Don't know how he thinks he's going to get a finish from there.
The Cock looking for submissions off his back, moving his hips, looking for an opening.
That's three minutes gone in the round.
XX sneaks a leg through and gets to half guard. That was like a knife through butter how easily he passed The Cock's guard.
The Cock is looking to regain full guard. Not this time though.
XX is looking for a kimura. It's going to be difficult to finish that from half guard though and The Cock defends it well.
XX is thinking about going for an arm triangle but he can't free his leg.
The Cock on his back here. We all know that wrestlers don't like being on their back so let's see if The Cock tries to get out of the position.
The Cock looking for submissions off his back.
The Cock looking for submissions from an awkward position here.
XX is working for a kimura but The Cock is defending it quite comfortably.
XX is looking for an arm triangle, whilst trying to pass to side control. The Cock doesn't seem that keen to cooperate though. No luck this time XX.
That's four minutes gone in the round.
Well. There's a bit of a lull in the action here and the crowd are starting to get restless.
XX is looking for a kimura here.
The Cock slips a foot under and gets full guard. Nice work.
The Cock is looking for a triangle but XX pushes his legs off easily.
The Cock working for a triangle but XX defends it easily.
XX thinks about going for a leg but decides against it, in order to maintain the position.
That's five minutes gone in the round.
The Cock wants to sweep but no luck.
XX drops back for a leg! It's a sloppy attempt though and XX jumps back into guard quickly, to retain the dominant position.
The Cock is throwing his legs up, looking for submissions. XX is aware though and is defending well.
The Cock might be looking to lock onto one of his opponent's long limbs for a submission, whilst we're on the ground.
The Cock working for a triangle but XX defends it easily.
The Cock is active off his back here, looking for submissions.
The Cock keeping full guard, as XX tries to pass.
XX drops back for a leg! It's a sloppy attempt though and XX jumps back into guard quickly, to retain the dominant position.
That's six minutes gone in the round.
The crowd are starting to boo a lack of action.
The Cock is looking for a guillotine. You can't force these things though and XX defends well.
XX drops back looking for a leg! The Cock is in trouble here! The fighters roll with the hold and The Cock manages to kick XX off! XX jumps back into The Cock's guard.
The Cock looking for a guillotine here but XX defends easily.
The Cock throwing his legs up looking for a triangle.
The Cock had isolated an arm as going for a kimura. XX defends it easily.
XX thinks about going for a leg but decides against it, in order to maintain the position.
That's seven minutes gone in the round.
XX thinks about going for a leg but decides against it, in order to maintain the position.
XX drops back looking for a leg! The Cock is in trouble here! The fighters roll with the hold and The Cock manages to kick XX off! XX jumps back into The Cock's guard.
The Cock is looking for a guillotine. You can't force these things though and XX defends well.
The Cock is looking for a guillotine. You can't force these things though and XX defends well.
The Cock has a loose triangle. He'll be looking to tighten that up but XX can see exactly what he's planning and manages to posture up and free himself.
XX is trying to work a guillotine from the top, or something like that? Don't know how he thinks he's going to get a finish from there.
That's eight minutes gone in the round.
The crowd are showing their displeasure at the lack of action as loud boos ring out around the arena.
XX thinks about going for a leg but decides against it, in order to maintain the position.
The Cock is working actively off his back, looking to secure an arm or perhaps work for a triangle.
XX passes into half guard.
The Cock looking for submissions from an awkward position here.
XX is looking for a kimura. It's going to be difficult to finish that from half guard though and The Cock defends it well.
The Cock is looking to regain full guard. Not this time though.
The ref warns both fighters not to hold the cage as they work up against the meshing.
That's nine minutes gone in the round.
The Cock looking for submissions off his back.
The Cock looking for submissions from an awkward position here.
XX is looking for an arm triangle, whilst trying to pass to side control. The Cock doesn't seem that keen to cooperate though. No luck this time XX.
The Cock is trying to get back to full guard.
The Cock looking to work for a kimura from the bottom.
Boooooooooooooooooooo!!! God, this has been a terrible round. Come on you two, sort yourselves out!
XX seems to be looking for submissions.
And thats the end of the round the fighters go back to their corners.
XX XX really dominated that round.
The corners get their ten second warning. Both fighters stand from their stools and stare eachother down, ready to get back to the action.

The Cock dives in and grabs XX's left leg, looking for a takedown. XX pushes down on The Cock's head and hops out.
XX shoots in for a takedown but doesn't get it.
The Cock shoots for a takedown but XX saw that one coming a mile off and avoided it easily.
XX shoots in for a takedown but The Cock shows good takedown defense.
XX misses with a takedown attempt. He shot from a bit too far out.
Cus Loves The Cock has stuffed three takedown attempts in the round now. That's going to take a lot out of XX XX.
A telegraphed takedown attempt from The Cock is defended easily by XX.
XX tries to score a power double leg takedown but The Cock sees that one coming and sprawls well. That will dishearten XX somewhat.
The Cock looks for a takedown here. Will he get it? XX is fending him off so far but The Cock persists. Nope, XX circles away and we're back to standing.
The Cock has a takedown stuffed.
The Cock defends well against a solid takedown attempt from XX.
The Cock shoots in for a takedown. "Ole!" shouts XX as he jumps to the side.
It's got to the stage where if one of these guys blows hard enough, the other might fall over.
The Cock changes levels and looks for a double leg takedown. XX tries to avoid it but The Cock manages to keep hold of a leg and drag XX to the ground. XX escapes though and pops straight back up to his feet.
XX changes levels and looks for a double leg takedown. The Cock tries to avoid it but XX manages to keep hold of a leg and drag The Cock to the ground. The Cock escapes though and pops straight back up to his feet.
XX leaves The Cock with his face pressed against the mat as he sprawls beautifully, defending against a solid takedown attempt.
That's one minute gone in the round.
The Cock stuffs a takedown. It's all about dictating where the fight takes place and The Cock wants it to stay on the feet.
The Cock stuffs the takedown.
XX shoots in for a takedown but The Cock shows good takedown defense.
XX shoots in for a takedown - he's clinched up with The Cock but The Cock pushes him off and we're back to square one.
XX looks frustrated there after his takedown attempt is stuffed easily.
XX changes levels and looks for a double leg takedown. The Cock tries to avoid it but XX manages to keep hold of a leg and drag The Cock to the ground. The Cock escapes though and pops straight back up to his feet.
XX shoots in with a takedown attempt and he has The Cock pinned against the cage. The Cock gets the underhooks and manages to circle away.
XX stuffs the takedown attempt from The Cock. The Cock gets slowly back to his feet.
The Cock fails with a takedown attempt.
The Cock closes this distance looking for a takedown but XX circles away.
The Cock throws a looping left and ducks down for a takedown. He's got his arms around XX's waist but XX gets an underhook and avoids the takedown by throwing The Cock off to one side.
XX shoots in but no luck this time.
XX misses with a takedown attempt. He shot from a bit too far out.
That's two minutes gone in the round.
The Cock tries to shoot in for a takedown. He's got hold of a leg but XX swivels and escapes.
The Cock shoots in for a takedown but XX shows good takedown defense.
The Cock shoots in for a takedown but XX shows good takedown defense.
The Cock dives in and grabs XX's left leg, looking for a takedown. XX pushes down on The Cock's head and hops out.
The Cock changes levels and looks for a double leg takedown. XX tries to avoid it but The Cock manages to keep hold of a leg and drag XX to the ground. XX escapes though and pops straight back up to his feet.
The Cock misses with a takedown attempt - XX sprawls well and throws a nice strike on the way out which just misses.
The Cock shoots for a takedown but XX saw that one coming a mile off and avoided it easily.
The Cock displays good takedown defense there as he swats away a double leg from XX.
The Cock fails with a takedown attempt.
A really sloppy takedown attempt there from XX.
XX shoots in for a takedown but doesn't get it.
XX misses with a takedown attempt. He shot from a bit too far out.
XX shoots in with a takedown attempt and he has The Cock pinned against the cage. The Cock gets the underhooks and manages to circle away.
No luck with that takedown attempt from The Cock.
That's three minutes gone in the round.
XX looks for a takedown but The Cock sprawls well.
XX shoots in but The Cock avoids the takedown attempt easily.
The Cock shoots in looking for a double leg takedown. XX defends it nicely.
The Cock shoots in looking for a takedown. XX tries to sprawl out of it but The Cock keeps driving through. The fighters are pinned against the cage. XX manages to get underhooks and after a bit of a struggle, circles away and we're back to standing.
XX fails miserably with a takedown attempt.
The Cock fails with a takedown attempt from distance.
XX dives in and grabs The Cock's left leg, looking for a takedown. The Cock pushes down on XX's head and hops out.
A momentary lapse in concentration from XX enables The Cock to shoot in and score with a neat double leg. XX manages to secure a closed guard as the fighters hit the mat.
The Cock drops back looking for a leg! XX is in trouble here! The fighters roll with the hold and XX manages to kick The Cock off! The Cock jumps back into XX's guard.
XX is looking for a guillotine. You can't force these things though and The Cock defends well.
That's four minutes gone in the round.
XX has a closed guard, preventing The Cock from standing up.
XX looking for submissions off his back, moving his hips, looking for an opening.
XX working from the bottom, still in full guard. He's managed to get a loose triangle. The Cock doesn't seem to be doing much to defend here, obviously he feels comfortable in the position. The Cock manages to throw the legs off his shoulder and he's back into guard - no problem.
XX is throwing his legs up, looking for submissions. The Cock is aware though and is defending well.
The Cock pressing down on his opponent's thigh, looking to pass guard. XX is keeping the position for now.
The Cock drops back looking for a leg! XX is in trouble here! The fighters roll with the hold and XX manages to kick The Cock off! The Cock jumps back into XX's guard.
The Cock thinks about going for a leg but decides against it, in order to maintain the position.
That's five minutes gone in the round.
The Cock thinks about going for a leg but decides against it, in order to maintain the position.
There's a bit of a scramble here and now XX is on top in guard.
XX drops back looking for a leg! The Cock is in trouble here! The fighters roll with the hold and The Cock manages to kick XX off! XX jumps back into The Cock's guard.
XX is trying to work a guillotine from the top, or something like that? Don't know how he thinks he's going to get a finish from there.
The Cock is looking for a guillotine. You can't force these things though and XX defends well.
The Cock looking for a guillotine here but XX defends easily.
That's six minutes gone in the round.
The crowd are starting to boo a lack of action.
The Cock looking for submissions off his back, moving his hips, looking for an opening.
XX is trying to work a guillotine from the top, or something like that? Don't know how he thinks he's going to get a finish from there.
The Cock is looking for a guillotine. You can't force these things though and XX defends well.
XX advances to half guard.
The Cock actively working from the bottom here.
XX moves nicely into side control.
The Cock is positioning himself to get back to half guard.
That's seven minutes gone in the round.
XX tries for a kimura. Not really close to a finish though.
The Cock is looking for a sweep.
XX thinks about going for a far side armbar but bails out and retains the dominant position instead.
The Cock regains half guard.
XX is looking for a kimura here.
The Cock looking to work for a kimura from the bottom.
That's eight minutes gone in the round.
The crowd are showing their displeasure at the lack of action as loud boos ring out around the arena.
XX is looking for a kimura but he's never going to get it from there.
The Cock tries to get to full guard but XX has control of the leg.
XX is thinking about going for an arm triangle but he can't free his leg.
The Cock looking for submissions from an awkward position here.
XX is looking for a kimura here.
XX seems to be working for a kimura but The Cock defends the submission attempt.
That's nine minutes gone in the round.
XX is looking for a kimura. It's going to be difficult to finish that from half guard though and The Cock defends it well.
The Cock is defending against the submission attempts here by XX.
XX is sneakily working for an arm triangle but The Cock sees it coming and defends easily.
The Cock works his way to full guard. Good work.
XX avoids a guillotine attempt easily.
The crowd thankful this round is nearly over.
XX pressing down on his opponent's thigh, looking to pass guard. The Cock is keeping the position for now.
XX slips nicely into half guard.
And thats the end of the round the fighters go back to their corners.
A close fourth round but XX XX will probably get the nod - 10:9.
The corners get their ten second warning. Both fighters stand from their stools and stare eachother down, ready to get back to the action. This is the final round!

XX shoots for a double leg takedown but The Cock sprawls well. He's pushed XX's face into the mat and manages to get back to his feet relatively easily.
The Cock closes the distance and clinches up with XX, looking for a takedown. The Cock pushes XX against the cage but XX circles to the side and manages to break the clinch.
The Cock stuffs the takedown attempt from XX. XX gets slowly back to his feet.
Nice takedown defense from The Cock. No joy for XX on that attempt.
Cus Loves The Cock has stuffed three takedown attempts in the round now. That's going to take a lot out of XX XX.
XX stuffs the takedown.
XX closes the distance and clinches up with The Cock, looking for a takedown. XX pushes The Cock against the cage but The Cock circles to the side and manages to break the clinch.
A telegraphed takedown attempt from The Cock is defended easily by XX.
XX looks frustrated there after his takedown attempt is stuffed easily.
The Cock tries for a takedown but XX sees it coming a mile off and avoids it easily.
A really sloppy takedown attempt there from XX.
Nice takedown defense from The Cock. No joy for XX on that attempt.
Horrible takedown by The Cock or perhaps it was just good defense by XX which made him look bad.
Both of our modern day gladiators look out of it here - an gruelling 5 rounds of action taking it's toll on them, no doubt.
XX fails miserably with a takedown attempt.
Horrible takedown by The Cock or perhaps it was just good defense by XX which made him look bad.
That's one minute gone in the round.
XX has a takedown stuffed.
The Cock shoots in for a takedown but doesn't get it.
XX shoots in for a takedown. He's persisting with it as The Cock sprawls well. The Cock wins this battle and keeps the fight standing. XX gets slowly back to his feet.
The Cock fails to land the takedown.
XX misses with a takedown attempt - The Cock sprawls well and throws a nice strike on the way out which just misses.
XX shoots in but no luck this time.
XX misses with a takedown attempt. He shot from a bit too far out.
XX fails to land the takedown.
XX stuffs the takedown attempt from The Cock. The Cock gets slowly back to his feet.
The Cock shoots in for a takedown but XX shows good takedown defense there and keeps this one on the feet.
The Cock fails with a rather predictable takedown attempt.
The Cock defends well against a solid takedown attempt from XX.
That's two minutes gone in the round.
The Cock shoots in for a takedown. "I don't think so" says XX as he avoids it easily.
XX fails with the takedown.
XX fails with the takedown.
The Cock fails with a takedown attempt from distance.
XX stuffs a takedown. It's all about dictating where the fight takes place and XX wants it to stay on the feet.
A telegraphed takedown attempt from XX is defended easily by The Cock.
XX closes this distance looking for a takedown but The Cock circles away.
XX leaves The Cock with his face pressed against the mat as he sprawls beautifully, defending against a solid takedown attempt.
The Cock shoots in for a takedown. "Ole!" shouts XX as he jumps to the side.
XX shoots in looking for a double leg takedown. The Cock defends it nicely.
XX defends well against a solid takedown attempt from The Cock.
A really sloppy takedown attempt there from The Cock.
That's three minutes gone in the round.
XX fails to land the takedown.
XX fails with a takedown attempt from distance.
XX shoots in for a takedown. "I don't think so" says The Cock as he avoids it easily.
The Cock closes this distance looking for a takedown but XX circles away.
No luck with that takedown attempt from The Cock.
XX keeps the fight standing with a nice sprawl.
The Cock displays good takedown defense there as he swats away a double leg from XX.
XX shoots in and drives through. The Cock sprawls well.
XX is trying hard to land a takedown here. The Cock sprawls well and keeps this one on the feet.
XX stuffs the takedown attempt from The Cock. The Cock gets slowly back to his feet.
The Cock looks for a takedown here. Will he get it? XX is fending him off so far but The Cock persists. Nope, XX circles away and we're back to standing.
A momentary lapse in concentration from XX enables The Cock to shoot in and score with a neat double leg. XX manages to secure a closed guard as the fighters hit the mat.
The Cock thinks about going for a leg but decides against it, in order to maintain the position.
XX throwing his legs up looking for a triangle.
That's four minutes gone in the round.
The Cock slips nicely into half guard.
The Cock is working for submissions here but there's nothing on.
The Cock wants to work for an arm triangle but XX is really keeping half guard well and defending the submission attempt.
The Cock seems to be looking for submissions.
The Cock is looking for a kimura. It's going to be difficult to finish that from half guard though and XX defends it well.
The Cock is working for submissions here but there's nothing on.
XX actively working from the bottom here.
XX actively working from the bottom here.
That's five minutes gone in the round.
XX looking for submissions off his back.
The Cock is looking for an arm triangle, whilst trying to pass to side control. XX doesn't seem that keen to cooperate though. No luck this time The Cock.
XX wants to improve his position but The Cock is controlling well.
The Cock is looking for a kimura. It's going to be difficult to finish that from half guard though and XX defends it well.
The Cock is sneakily working for an arm triangle but XX sees it coming and defends easily.
XX actively working from the bottom here.
That's six minutes gone in the round.
My god... these two guys really need to pick up the pace or everyone will leave to go get a beer.
The Cock is looking for a kimura but XX is holding onto that half guard position, so it's hard for The Cock to get the leverage.
XX is looking to sinch up a guillotine here but The Cock pulls his head out easily.
XX regains full guard. Nicely done.
The Cock advances position into side control!
XX is trying to improve his position.
The Cock thinks about going for a far side armbar but bails out and retains the dominant position instead.
XX is positioning himself to get back to half guard.
The Cock is looking to finish here, going for an Americana. XX knows the correct defense though, so he's OK.
That's seven minutes gone in the round.
The Cock is looking to finish here, going for an Americana. XX knows the correct defense though, so he's OK.
The Cock tries for a kimura but XX is defending well.
XX sneaks back into half guard.
The Cock is looking for a kimura but he's never going to get it from there.
The Cock seems to be working for a kimura but XX defends the submission attempt.
XX looking for submissions off his back.
That's eight minutes gone in the round.
The crowd are starting to boo a lack of action.
XX looking to work for a kimura from the bottom.
The Cock is working for a kimura but XX is defending it quite comfortably.
XX looking for submissions from an awkward position here.
XX looking for submissions off his back.
XX looking for submissions from an awkward position here.
That's nine minutes gone in the round.
XX looking for submissions off his back.
XX is looking to improve his position.
The Cock is working for a submission of some sort.
XX moves his hips nicely and gets into full guard.
The crowd thankful this round is nearly over.
The Cock drops back for a leg! It's a sloppy attempt though and The Cock jumps back into guard quickly, to retain the dominant position.
The Cock works a leg free and moves into half guard.
And that's the end of the fight!
Cus Loves The Cock showed his dominance in that final round.
I think XX has won this one but let's see whether the judges agree with me. Over to the ring announcer for the scorecards.
Ladies and gentlemen, after 5 rounds of action, we go to the scorecards for a decision.
Judge Wesley Smith scores the fight 47:48
Judge Tiny Johnson scores the fight 47:48
Judge Cecil Peabody scores the fight 47:48
In favor of your winner, by unanimous decision... XX XX! XX XX retains his heavyweight title!
|
|
|
|
|
|
|
|
|
|
|
|
|
|
|
|
|
|
|
|
|
|
|
| S |
C
A |
G |
S |
C
B |
G |
|
S |
C |
G |
|
energy
A | B |
|
hype
A | B |
|
pop
A | B |
|
mgr
A | B |
|
FIGHT
RATING
75% |
|
|
|
|
|
|
|
Co-main event
|
Coming up we have a light heavyweight MMA rules bout between Ahgoo Eegoo (ranked 0 p4p, 0 weight class) and Tim Leston (ranked 0 p4p, 0 weight class). Leston has chosen . as his entrance music. Eegoo has a slight injury, which hopefully won't affect the fight too much. These two fighters really are very evenly matched on the feet - it will be fascinating to see who can assert themselves in that aspect of the fight.
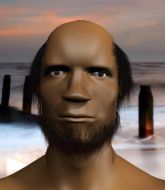 |
|
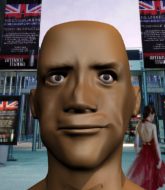 |
| 185 cm
25
205 lbs
6 - 5 - 0 |
|
183 cm
22
192 lbs
12 - 5 - 0 |
BJJ White Belt
Excellent boxer
Good chin |
|
BJJ Blue Belt
World class boxer
Granite chin |
|
| |
|
Ladies and gentlemen. This fight is 5 rounds, for the light heavyweight championship of the world!
Introducing the champion to my left, fighting out of the red corner.
With a record of
6 - 5 - 0, fighting out of Amsterdam, Ahgoo Eegoo!
And introducing the challenger to my right, fighting out of the blue corner.
With a record of
12 - 5 - 0, fighting out of Las Vegas, Tim Leston!
The judges for this bout are Cecil Peabody, Gwen Towbar and Robert Twigg.
The bell rings for round one and we are underway!
Leston tries for a takedown but Eegoo sees it coming a mile off and avoids it easily.
Eegoo is breathing heavily.
Eegoo shoots in for a takedown. He's persisting with it as Leston sprawls well. Leston wins this battle and keeps the fight standing. Eegoo gets slowly back to his feet.
Wow, both these guys are really going for it!
Eegoo throws a looping left and ducks down for a takedown. He's got his arms around Leston's waist but Leston gets an underhook and avoids the takedown by throwing Eegoo off to one side.
Leston closes the distance and clinches up with Eegoo, looking for a takedown. Leston pushes Eegoo against the cage but Eegoo circles to the side and manages to break the clinch.
Leston shoots in but no luck this time.
Ahgoo Eegoo has stuffed three takedown attempts in the round now. That's going to take a lot out of Tim Leston.
Leston scores with a nice takedown into half guard. Let's see what he's got on the ground.
Leston is trying to work for a kimura but Eegoo is defending well.
Eegoo on his back here. We all know that wrestlers don't like being on their back so let's see if Eegoo tries to get out of the position.
Leston passes to full mount!
Leston is working to isolate an arm here. It's a telegraphed submission attempt but he's gone for it anyway - and he's got it! Leston extends the arm and Eegoo is forced to tap!
Ladies and gentlemen, after 0:47 of round 1, we have a winner by way of Submission (Armbar). Tim Leston! Tim Leston retains his light heavyweight title!
|
|
|
|
|
|
|
|
|
|
|
|
|
|
|
|
|
|
|
|
|
|
|
| S |
C
A |
G |
S |
C
B |
G |
|
S |
C |
G |
|
energy
A | B |
|
hype
A | B |
|
pop
A | B |
|
mgr
A | B |
|
FIGHT
RATING
91% |
|
|
|
|
|
|
|
Main event
|
Coming up we have a super heavyweight MMA rules bout between Alekai Petrovich (ranked 0 p4p, 0 weight class) and Lyoto Machida (ranked 0 p4p, 0 weight class). Both these guys are coming into the fight with injuries so let's see if that has a bearing on the fight. Alekai Petrovich looks tired to me. Hopefully he has got enough gas left in the tank to put in a good performance.
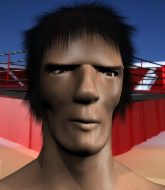 |
|
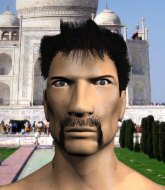 |
| 190 cm
26
275 lbs
17 - 7 - 0 |
|
185 cm
28
185 lbs
19 - 13 - 0 |
BJJ Blue Belt
Solid boxing
Very quick |
|
BJJ Blue Belt
Excellent MT
Knockout power |
|
| |
|
Ladies and gentlemen. This fight is 5 rounds, for the super heavyweight championship of the world!
Introducing the champion to my left, fighting out of the red corner.
With a record of
17 - 7 - 0, fighting out of Sydney, Alekai Petrovich!
And introducing the challenger to my right, fighting out of the blue corner.
With a record of
19 - 13 - 0, fighting out of Las Vegas, Lyoto Machida!
The judges for this bout are Frank Dennis, Tiny Johnson and Stewart Dunkirk.
The bell rings for round one and we are underway!
Nice sprawl there from Machida as Petrovich shoots in.
Petrovich is breathing heavily.
Petrovich is trying hard to land a takedown here. Machida sprawls well and keeps this one on the feet.
Machida shoots for a takedown but Petrovich saw that one coming a mile off and avoided it easily.
Petrovich shoots in but Machida avoids the takedown attempt easily.
That's three failed takedown attempts in the round for Alekai Petrovich. That's going to take a lot out of him.
Machida looks frustrated there after his takedown attempt is stuffed easily.
Petrovich shoots in looking for a takedown but Machida manages to keep the fight standing, pushing Petrovich's face into the canvas for good measure before circling away.
Petrovich defends well against a solid takedown attempt from Machida.
Petrovich tries to score a power double leg takedown but Machida sees that one coming and sprawls well. That will dishearten Petrovich somewhat.
Petrovich shoots in for a takedown. He's persisting with it as Machida sprawls well. Machida wins this battle and keeps the fight standing. Petrovich gets slowly back to his feet.
A really sloppy takedown attempt there from Machida.
Petrovich looks frustrated there after his takedown attempt is stuffed easily.
Machida defends well against a solid takedown attempt from Petrovich.
Petrovich defends well against a solid takedown attempt from Machida.
Petrovich shoots in for a takedown but doesn't get it.
Machida shoots in for a takedown but doesn't get it.
That's one minute gone in the round.
Petrovich shoots in for a takedown. "Ole!" shouts Machida as he jumps to the side.
Machida shoots in but Petrovich avoids the takedown attempt easily.
Petrovich shoots in for a takedown but Machida shows good takedown defense.
No luck with that takedown attempt from Petrovich.
Petrovich fails miserably with a takedown attempt.
Petrovich shoots in but Machida avoids the takedown attempt easily.
Machida looks for a takedown here. Will he get it? Petrovich is fending him off so far but Machida persists. Nope, Petrovich circles away and we're back to standing.
Petrovich looks for a takedown but Machida sprawls well.
Machida leaves Petrovich with his face pressed against the mat as he sprawls beautifully, defending against a solid takedown attempt.
Machida fails miserably with a takedown attempt.
Machida tries to sprawl but Petrovich drives through with a takedown into half guard.
Machida actively working from the bottom here.
Machida looking for submissions off his back.
That's two minutes gone in the round.
Petrovich is trying for a guillotine from the top but the pressure isn't in the right place so Machida is just riding it out for now. Petrovich eventually gives up the hold.
Petrovich is trying to work for a kimura but Machida is defending well.
Petrovich wants to work for an arm triangle but Machida is really keeping half guard well and defending the submission attempt.
Petrovich is working for submissions here but there's nothing on.
Petrovich is sneakily working for an arm triangle but Machida sees it coming and defends easily.
Machida looking for submissions off his back.
The fighters are pressed up against the cage, both looking to find a bit of space to work.
That's three minutes gone in the round.
Machida looking for submissions off his back.
Petrovich is trying to work for a kimura. This could be trouble! No, Machida has managed to free his arm - good work.
Petrovich is working for a submission of some sort.
Machida makes his way to full guard. A much better position for Machida.
Both fighters really going for it on the ground here!
Machida looking for submissions from the bottom here. Moving his hips around, possibly looking for an armbar.
Machida has a loose triangle. He'll be looking to tighten that up but Petrovich can see exactly what he's planning and manages to posture up and free himself.
That's four minutes gone in the round.
The crowd are getting on the fighters' backs, as the pace has dropped off in the last minute or so.
Petrovich is trying to work a guillotine from the top, or something like that? Don't know how he thinks he's going to get a finish from there.
Petrovich drops back looking for a leg! Machida is in trouble here! The fighters roll with the hold and Machida manages to kick Petrovich off! Petrovich jumps back into Machida's guard.
Machida wants to sweep but no luck.
Petrovich is trying to work a guillotine from the top, or something like that? Don't know how he thinks he's going to get a finish from there.
The ref warns both fighters not to hold the cage as they work up against the meshing.
Petrovich drops back for a leg! It's a sloppy attempt though and Petrovich jumps back into guard quickly, to retain the dominant position.
Machida has a loose triangle. He'll be looking to tighten that up but Petrovich can see exactly what he's planning and manages to posture up and free himself.
That's five minutes gone in the round.
Petrovich pushes down on Machida's leg and manages to get into half guard.
Machida looking for submissions from an awkward position here.
Machida is defending against the submission attempts here by Petrovich.
Petrovich wants to pass to mount but Machida is defending the position.
Machida regains full guard. Nicely done.
Machida has his foot on Petrovich's thigh. He's trying to push off and get in position for a triangle, I think. Petrovich works his way back into a safe position though.
Petrovich drops back for a leg! It's a sloppy attempt though and Petrovich jumps back into guard quickly, to retain the dominant position.
Machida throwing his legs up looking for a triangle.
That's six minutes gone in the round.
The crowd are getting on the fighters' backs, as the pace has dropped off in the last minute or so.
Machida looking for a guillotine here but Petrovich defends easily.
Petrovich drops back looking for a leg! Machida is in trouble here! The fighters roll with the hold and Machida manages to kick Petrovich off! Petrovich jumps back into Machida's guard.
Petrovich thinks about going for a leg but decides against it, in order to maintain the position.
Machida looking for a guillotine here but Petrovich defends easily.
Machida throwing his legs up looking for a triangle.
That's seven minutes gone in the round.
Petrovich looking to pass the guard.
Machida has his foot on Petrovich's thigh. He's trying to push off and get in position for a triangle, I think. Petrovich works his way back into a safe position though.
Petrovich thinks about going for a leg but decides against it, in order to maintain the position.
Petrovich works a leg free and moves into half guard.
Petrovich seems to be working for a kimura but Machida defends the submission attempt.
Machida looking for submissions from an awkward position here.
Petrovich looking for a kimura but he'll have to free his other leg if he wants to finish that. Perhaps he's just using it as a distraction technique.
Petrovich is looking for an arm triangle, whilst trying to pass to side control. Machida doesn't seem that keen to cooperate though. No luck this time Petrovich.
That's eight minutes gone in the round.
The crowd are showing their displeasure at the lack of action as loud boos ring out around the arena.
Petrovich seems to be looking for submissions.
Petrovich is looking for a kimura but he's never going to get it from there.
Machida looking to work for a kimura from the bottom.
Machida is defending against the submission attempts here by Petrovich.
That's nine minutes gone in the round.
Machida is defending against the submission attempts here by Petrovich.
Petrovich is looking for an arm triangle, whilst trying to pass to side control. Machida doesn't seem that keen to cooperate though. No luck this time Petrovich.
Petrovich is sneakily working for an arm triangle but Machida sees it coming and defends easily.
The crowd thankful this round is nearly over.
Machida is defending against the submission attempts here by Petrovich.
Petrovich is working for submissions here but there's nothing on.
And thats the end of the round the fighters go back to their corners.
Alekai Petrovich dominated that round.
That's time! Petrovich's corner gives him a slap on the ass as he gets ready to fight.
Machida fails miserably with a takedown attempt.
Petrovich tries to score a power double leg takedown but Machida sees that one coming and sprawls well. That will dishearten Petrovich somewhat.
Petrovich keeps the fight standing with a nice sprawl.
Machida shoots in for a takedown. "Ole!" shouts Petrovich as he jumps to the side.
Alekai Petrovich has stuffed three takedown attempts in the round now. That's going to take a lot out of Lyoto Machida.
Petrovich fakes high and shoots in for a takedown but Machida avoids it really well and circles away.
Machida shoots for a double leg takedown but Petrovich sprawls well. He's pushed Machida's face into the mat and manages to get back to his feet relatively easily.
Petrovich looks for a takedown but Machida sprawls well.
We've had a slow start to the round here - hopefully the action picks up.
Machida looks for a takedown but Petrovich sprawls well.
Machida shoots in but no luck this time.
Both fighters are absolutely exhausted here.
Petrovich shoots in looking for a takedown but Machida manages to keep the fight standing, pushing Petrovich's face into the canvas for good measure before circling away.
Petrovich dives in and grabs Machida's left leg, looking for a takedown. Machida pushes down on Petrovich's head and hops out.
Petrovich shoots in for a takedown but doesn't get it.
That's one minute gone in the round.
Petrovich shoots in for a takedown. "I don't think so" says Machida as he avoids it easily.
Machida will have to do better than that with his takedown attempts.
Petrovich looks frustrated there after his takedown attempt is stuffed easily.
Machida dives in and grabs Petrovich's left leg, looking for a takedown. Petrovich pushes down on Machida's head and hops out.
Machida shoots in for a takedown but Petrovich shows good takedown defense.
Petrovich stuffs the takedown attempt from Machida. Machida gets slowly back to his feet.
Petrovich fails with a rather predictable takedown attempt.
Machida defends well against a solid takedown attempt from Petrovich.
Petrovich defends well against a solid takedown attempt from Machida.
Machida shoots in for a takedown - he's clinched up with Petrovich but Petrovich pushes him off and we're back to square one.
Petrovich dives in and grabs Machida's left leg, looking for a takedown. Machida pushes down on Petrovich's head and hops out.
Machida changes levels and looks for a double leg takedown. Petrovich tries to avoid it but Machida manages to keep hold of a leg and drag Petrovich to the ground. Petrovich escapes though and pops straight back up to his feet.
Machida shoots in but no luck this time.
Petrovich tries to shoot in for a takedown. He's got hold of a leg but Machida swivels and escapes.
Machida closes the distance and gets a double leg, slamming Petrovich to the mat! Petrovich manages to get full guard.
Machida drops back looking for a leg! Petrovich is in trouble here! The fighters roll with the hold and Petrovich manages to kick Machida off! Machida jumps back into Petrovich's guard.
Petrovich throwing his legs up looking for a triangle.
That's two minutes gone in the round.
Machida is trying to work a guillotine from the top, or something like that? Don't know how he thinks he's going to get a finish from there.
Machida drops back for a leg! It's a sloppy attempt though and Machida jumps back into guard quickly, to retain the dominant position.
Machida drops back looking for a leg! Petrovich is in trouble here! The fighters roll with the hold and Petrovich manages to kick Machida off! Machida jumps back into Petrovich's guard.
Petrovich escapes his hips to the side and looks to be working for an armbar. Machida gives him a little smile and shakes his head. No chance.
Machida drops back looking for a leg! Petrovich is in trouble here! The fighters roll with the hold and Petrovich manages to kick Machida off! Machida jumps back into Petrovich's guard.
That's three minutes gone in the round.
Petrovich working from the bottom, still in full guard. He's managed to get a loose triangle. Machida doesn't seem to be doing much to defend here, obviously he feels comfortable in the position. Machida manages to throw the legs off his shoulder and he's back into guard - no problem.
Petrovich escapes his hips to the side and looks to be working for an armbar. Machida gives him a little smile and shakes his head. No chance.
Petrovich is working an open guard here, looking to improve his position. No doubt that will leave him open to counters but at least he's being more offensive.
Petrovich has a loose triangle. He'll be looking to tighten that up but Machida can see exactly what he's planning and manages to posture up and free himself.
Petrovich is throwing his legs up, looking for submissions. Machida is aware though and is defending well.
Petrovich had isolated an arm as going for a kimura. Machida defends it easily.
That's four minutes gone in the round.
My god... these two guys really need to pick up the pace or everyone will leave to go get a beer.
Machida is trying to work a guillotine from the top, or something like that? Don't know how he thinks he's going to get a finish from there.
Machida passes into half guard.
Machida seems to be working for a kimura but Petrovich defends the submission attempt.
Petrovich is looking to sinch up a guillotine here but Machida pulls his head out easily.
Petrovich looking for submissions from an awkward position here.
Petrovich actively working from the bottom here.
Machida is sneakily working for an arm triangle but Petrovich sees it coming and defends easily.
That's five minutes gone in the round.
Machida is working for a kimura but Petrovich is defending it quite comfortably.
Machida wants to work for an arm triangle but Petrovich is really keeping half guard well and defending the submission attempt.
Machida is looking for a kimura. It's going to be difficult to finish that from half guard though and Petrovich defends it well.
Petrovich is looking to sinch up a guillotine here but Machida pulls his head out easily.
Petrovich looking for submissions off his back.
Petrovich is defending against the submission attempts here by Machida.
Machida seems to be working for a kimura but Petrovich defends the submission attempt.
That's six minutes gone in the round.
My god... these two guys really need to pick up the pace or everyone will leave to go get a beer.
Petrovich looking for submissions off his back.
Machida is sneakily working for an arm triangle but Petrovich sees it coming and defends easily.
Petrovich moves into full guard.
Machida wants to pass the guard but Petrovich is keeping the position.
Machida drops back for a leg! It's a sloppy attempt though and Machida jumps back into guard quickly, to retain the dominant position.
Petrovich had isolated an arm as going for a kimura. Machida defends it easily.
That's seven minutes gone in the round.
Machida drops back looking for a leg! Petrovich is in trouble here! The fighters roll with the hold and Petrovich manages to kick Machida off! Machida jumps back into Petrovich's guard.
Petrovich is looking for a triangle but Machida pushes his legs off easily.
Machida is trying to work a guillotine from the top, or something like that? Don't know how he thinks he's going to get a finish from there.
Petrovich looking for submissions from the bottom here. Moving his hips around, possibly looking for an armbar.
Machida drops back looking for a leg! Petrovich is in trouble here! The fighters roll with the hold and Petrovich manages to kick Machida off! Machida jumps back into Petrovich's guard.
Petrovich looking for submissions from the bottom here. Moving his hips around, possibly looking for an armbar.
That's eight minutes gone in the round.
A few boos can be heard. I'm sure they will multiply if the fighters don't pick up the pace.
Machida drops back looking for a leg! Petrovich is in trouble here! The fighters roll with the hold and Petrovich manages to kick Machida off! Machida jumps back into Petrovich's guard.
Petrovich escapes his hips to the side and looks to be working for an armbar. Machida gives him a little smile and shakes his head. No chance.
Machida drops back for a leg! It's a sloppy attempt though and Machida jumps back into guard quickly, to retain the dominant position.
Machida is trying to work a guillotine from the top, or something like that? Don't know how he thinks he's going to get a finish from there.
Petrovich is looking for a guillotine. You can't force these things though and Machida defends well.
Machida drops back for a leg! It's a sloppy attempt though and Machida jumps back into guard quickly, to retain the dominant position.
That's nine minutes gone in the round.
Machida drops back for a leg! It's a sloppy attempt though and Machida jumps back into guard quickly, to retain the dominant position.
Petrovich looking for a guillotine here but Machida defends easily.
Machida got a little sloppy there for a moment and Petrovich has worked his way into a loose triangle - can he finish it?! No, Machida has managed to get both his arms back between Petrovich's legs - danger averted.
Machida passes into half guard.
Machida is working for a kimura but Petrovich is defending it quite comfortably.
The crowd thankful this round is nearly over.
Machida is trying a forearm choke
I don't think that's going to do much at this level of the game.
And thats the end of the round the fighters go back to their corners.
That was a close second round but I would say that Alekai Petrovich will probably get the nod.
The referee calls time. The cornermen exit stage left and we're back to business.
Petrovich looks frustrated there after his takedown attempt is stuffed easily.
Machida shoots in for a takedown - he's clinched up with Petrovich but Petrovich pushes him off and we're back to square one.
Petrovich looks for a takedown but Machida sprawls well.
Machida looks frustrated there after his takedown attempt is stuffed easily.
Machida is trying hard to land a takedown here. Petrovich sprawls well and keeps this one on the feet.
Alekai Petrovich has stuffed three takedown attempts in the round now. That's going to take a lot out of Lyoto Machida.
No luck for Petrovich with that takedown attempt.
Petrovich throws a looping left and ducks down for a takedown. He's got his arms around Machida's waist but Machida gets an underhook and avoids the takedown by throwing Petrovich off to one side.
We've had a slow start to the round here - hopefully the action picks up.
Nice sprawl there from Petrovich as Machida shoots in.
Both fighters are breathing heavily.
Petrovich shoots for a takedown but Machida saw that one coming a mile off and avoided it easily.
Nice takedown defense from Petrovich. No joy for Machida on that attempt.
Petrovich fails to land the takedown.
Petrovich leaves Machida with his face pressed against the mat as he sprawls beautifully, defending against a solid takedown attempt.
Machida shoots in for a takedown - he's clinched up with Petrovich but Petrovich pushes him off and we're back to square one.
That's one minute gone in the round.
Nice takedown defense from Machida. No joy for Petrovich on that attempt.
Machida shoots in for a takedown. "Ole!" shouts Petrovich as he jumps to the side.
Machida fails with a takedown attempt from distance.
Petrovich stuffs the takedown.
Machida shoots in for a takedown. He's persisting with it as Petrovich sprawls well. Petrovich wins this battle and keeps the fight standing. Machida gets slowly back to his feet.
Machida changes levels and looks for a double leg takedown. Petrovich tries to avoid it but Machida manages to keep hold of a leg and drag Petrovich to the ground. Petrovich escapes though and pops straight back up to his feet.
Petrovich fails with a takedown attempt from distance.
Machida shoots for a takedown but Petrovich saw that one coming a mile off and avoided it easily.
Petrovich shoots in with a takedown attempt and he has Machida pinned against the cage. Machida gets the underhooks and manages to circle away.
Petrovich leaves Machida with his face pressed against the mat as he sprawls beautifully, defending against a solid takedown attempt.
Petrovich is trying hard to land a takedown here. Machida sprawls well and keeps this one on the feet.
Petrovich tries to shoot in for a takedown. He's got hold of a leg but Machida swivels and escapes.
Petrovich will have to do better than that with his takedown attempts.
That's two minutes gone in the round.
Petrovich stuffs the takedown.
Lyoto Machida seems to be getting the better of the standup.
Nice takedown defense from Machida. No joy for Petrovich on that attempt.
Petrovich stuffs the takedown.
Petrovich shoots in looking for a takedown. Machida tries to sprawl out of it but Petrovich keeps driving through. The fighters are pinned against the cage. Machida manages to get underhooks and after a bit of a struggle, circles away and we're back to standing.
Machida stuffs a takedown. It's all about dictating where the fight takes place and Machida wants it to stay on the feet.
Machida fails miserably with a takedown attempt.
Petrovich defends well against a solid takedown attempt from Machida.
Machida shoots in for a takedown but Petrovich shows good takedown defense.
Machida stuffs a takedown. It's all about dictating where the fight takes place and Machida wants it to stay on the feet.
Machida tries to shoot in for a takedown. He's got hold of a leg but Petrovich swivels and escapes.
Machida shoots for a takedown but Petrovich saw that one coming a mile off and avoided it easily.
Machida shoots in and drives through. Petrovich sprawls well.
Machida fails to land the takedown.
Petrovich dives in and grabs Machida's left leg, looking for a takedown. Machida pushes down on Petrovich's head and hops out.
Machida fails with a rather predictable takedown attempt.
Petrovich fails with a rather predictable takedown attempt.
That's three minutes gone in the round.
Machida shoots in for a takedown. "I don't think so" says Petrovich as he avoids it easily.
Petrovich shoots for a takedown but Machida saw that one coming a mile off and avoided it easily.
Petrovich drives through with a takedown into guard.
Machida wants to sweep here but Petrovich controlling him for the moment.
Petrovich drops back looking for a leg! Machida is in trouble here! The fighters roll with the hold and Machida manages to kick Petrovich off! Petrovich jumps back into Machida's guard.
Petrovich thinks about going for a leg but decides against it, in order to maintain the position.
Petrovich is trying to work a guillotine from the top, or something like that? Don't know how he thinks he's going to get a finish from there.
Machida looking for submissions from the bottom here. Moving his hips around, possibly looking for an armbar.
Petrovich drops back looking for a leg! Machida is in trouble here! The fighters roll with the hold and Machida manages to kick Petrovich off! Petrovich jumps back into Machida's guard.
That's four minutes gone in the round.
Petrovich drops back for a leg! It's a sloppy attempt though and Petrovich jumps back into guard quickly, to retain the dominant position.
Petrovich passes easily into side control. Nice work.
Machida tries to bench press Petrovich off him but Petrovich keeps the position.
Petrovich tries for an arm triangle. That looks pretty tight to me. Is this one over!?! Possibly, maybe, no Petrovich has let go of the choke. Obviously it wasn't as tight as we thought!
Machida gets one leg under and gets the fight to half guard.
Machida is looking to sinch up a guillotine here but Petrovich pulls his head out easily.
Petrovich is trying for a guillotine from the top but the pressure isn't in the right place so Machida is just riding it out for now. Petrovich eventually gives up the hold.
That's five minutes gone in the round.
Machida looking for submissions off his back.
Machida is looking to sinch up a guillotine here but Petrovich pulls his head out easily.
Machida is looking to improve his position.
Petrovich is trying to work for a kimura. This could be trouble! No, Machida has managed to free his arm - good work.
That's six minutes gone in the round.
The crowd are hurling abuse towards the fighters... You can hardly blame them though because there isn't a lot going on in the fight.
Petrovich is trying for a guillotine from the top but the pressure isn't in the right place so Machida is just riding it out for now. Petrovich eventually gives up the hold.
Machida looking for submissions off his back.
Machida actively working from the bottom here.
Petrovich passes to side control.
Alekai Petrovich overall seems to be getting the better of the ground position in the fight so far.
Machida tries to improve position but can't.
Petrovich is trying to get an arm triangle but Machida is defending well.
Machida tries to improve position but can't.
That's seven minutes gone in the round.
Petrovich tries for an arm triangle. That looks pretty tight to me. Is this one over!?! Possibly, maybe, no Petrovich has let go of the choke. Obviously it wasn't as tight as we thought!
Machida manages to work his way to half guard, despite Petrovich's best efforts.
Petrovich seems to be working for a kimura but Machida defends the submission attempt.
Petrovich wants to work for an arm triangle but Machida is really keeping half guard well and defending the submission attempt.
Petrovich is trying for a guillotine from the top but the pressure isn't in the right place so Machida is just riding it out for now. Petrovich eventually gives up the hold.
Machida looking for submissions off his back.
That's eight minutes gone in the round.
There's not a lot going on here and the crowd are letting the fighters know they're not willing to tolerate a lack of action.
Petrovich is trying for a guillotine from the top but the pressure isn't in the right place so Machida is just riding it out for now. Petrovich eventually gives up the hold.
Petrovich is working for a kimura but Machida is defending it quite comfortably.
Petrovich is thinking about going for an arm triangle but he can't free his leg.
Petrovich is looking for a kimura but Machida is holding onto that half guard position, so it's hard for Petrovich to get the leverage.
Machida wants to get back to full guard.
That's nine minutes gone in the round.
Petrovich passes to side control.
Machida manages to get one leg in to regain half guard.
Petrovich seems to be looking for submissions.
Petrovich seems to be working for a kimura but Machida defends the submission attempt.
Petrovich is trying to work for a kimura. This could be trouble! No, Machida has managed to free his arm - good work.
Petrovich is working for a submission of some sort.
Machida looking to work for a kimura from the bottom.
Petrovich is looking for an arm triangle, whilst trying to pass to side control. Machida doesn't seem that keen to cooperate though. No luck this time Petrovich.
And thats the end of the round the fighters go back to their corners.
Alekai Petrovich clearly takes that round.
The fighters' corners scream their final instructions, as the referee calls time. Here we go, back to the action!
Petrovich misses with a takedown attempt - Machida sprawls well and throws a nice strike on the way out which just misses.
Machida shoots for a double leg takedown but Petrovich sprawls well. He's pushed Machida's face into the mat and manages to get back to his feet relatively easily.
Petrovich shoots for a double leg takedown but Machida sprawls well. He's pushed Petrovich's face into the mat and manages to get back to his feet relatively easily.
Petrovich looks for a takedown but Machida sprawls well.
That's three failed takedown attempts in the round for Alekai Petrovich. That's going to take a lot out of him.
No luck for Petrovich with that takedown attempt.
Petrovich closes the distance and clinches up with Machida, looking for a takedown. Petrovich pushes Machida against the cage but Machida circles to the side and manages to break the clinch.
Machida closes this distance looking for a takedown but Petrovich circles away.
Machida leaves Petrovich with his face pressed against the mat as he sprawls beautifully, defending against a solid takedown attempt.
Nice takedown defense from Petrovich. No joy for Machida on that attempt.
Machida shoots for a double leg takedown but Petrovich sprawls well. He's pushed Machida's face into the mat and manages to get back to his feet relatively easily.
Machida closes this distance looking for a takedown but Petrovich circles away.
It's got to the stage where if one of these guys blows hard enough, the other might fall over.
Petrovich looks for a takedown here. Will he get it? Machida is fending him off so far but Petrovich persists. Nope, Machida circles away and we're back to standing.
Petrovich shoots for a double leg takedown but Machida sprawls well. He's pushed Petrovich's face into the mat and manages to get back to his feet relatively easily.
A really sloppy takedown attempt there from Machida.
That's one minute gone in the round.
Machida shoots for a takedown but Petrovich saw that one coming a mile off and avoided it easily.
Petrovich leaves Machida with his face pressed against the mat as he sprawls beautifully, defending against a solid takedown attempt.
Machida shoots in for a takedown. He's persisting with it as Petrovich sprawls well. Petrovich wins this battle and keeps the fight standing. Machida gets slowly back to his feet.
Petrovich shoots in for a takedown - he's clinched up with Machida but Machida pushes him off and we're back to square one.
Machida shoots in with a takedown attempt and he has Petrovich pinned against the cage. Petrovich gets the underhooks and manages to circle away.
Petrovich shoots in but no luck this time.
Petrovich misses with a takedown attempt - Machida sprawls well and throws a nice strike on the way out which just misses.
Machida stuffs the takedown.
Petrovich will have to do better than that with his takedown attempts.
Machida misses with a takedown attempt. He shot from a bit too far out.
Petrovich shoots for a takedown but Machida saw that one coming a mile off and avoided it easily.
Machida changes levels and looks for a double leg takedown. Petrovich tries to avoid it but Machida manages to keep hold of a leg and drag Petrovich to the ground. Petrovich escapes though and pops straight back up to his feet.
That's two minutes gone in the round.
Petrovich changes levels and looks for a double leg takedown. Machida tries to avoid it but Petrovich manages to keep hold of a leg and drag Machida to the ground. Machida escapes though and pops straight back up to his feet.
Machida fails with the takedown.
Machida shoots in looking for a takedown. Petrovich tries to sprawl out of it but Machida keeps driving through. The fighters are pinned against the cage. Petrovich manages to get underhooks and after a bit of a struggle, circles away and we're back to standing.
Petrovich looks for a takedown but Machida sprawls well.
Petrovich looks frustrated there after his takedown attempt is stuffed easily.
Machida shoots in for a takedown. "I don't think so" says Petrovich as he avoids it easily.
Machida throws a looping left and ducks down for a takedown. He's got his arms around Petrovich's waist but Petrovich gets an underhook and avoids the takedown by throwing Machida off to one side.
Petrovich fails with a rather predictable takedown attempt.
Petrovich changes levels and looks for a double leg takedown. Machida tries to avoid it but Petrovich manages to keep hold of a leg and drag Machida to the ground. Machida escapes though and pops straight back up to his feet.
Petrovich stuffs the takedown.
Petrovich shoots in looking for a double leg takedown. Machida defends it nicely.
Petrovich displays good takedown defense there as he swats away a double leg from Machida.
Machida fails with the takedown.
That's three minutes gone in the round.
Petrovich fails with a takedown attempt from distance.
Petrovich shoots in but no luck this time.
Petrovich displays good takedown defense there as he swats away a double leg from Machida.
Petrovich changes levels and looks for a double leg takedown. Machida tries to avoid it but Petrovich manages to keep hold of a leg and drag Machida to the ground. Machida escapes though and pops straight back up to his feet.
Machida fails with a takedown attempt.
Petrovich fails to land the takedown.
Petrovich shoots in for a double leg but Machida sprawls well. That's going to sap some energy.
Petrovich changes levels and looks for a double leg takedown. Machida tries to avoid it but Petrovich manages to keep hold of a leg and drag Machida to the ground. Machida escapes though and pops straight back up to his feet.
Petrovich shoots for a takedown but Machida saw that one coming a mile off and avoided it easily.
Machida shoots in but no luck this time.
Petrovich fails with a takedown attempt from distance.
Machida looks for a takedown but Petrovich sprawls well.
Machida slaps away a takedown attempt from Petrovich, before circling back to the center of the mat.
Machida shoots in looking for a takedown. Petrovich tries to sprawl out of it but Machida keeps driving through. The fighters are pinned against the cage. Petrovich manages to get underhooks and after a bit of a struggle, circles away and we're back to standing.
That's four minutes gone in the round.
Petrovich shoots in looking for a double leg takedown. Machida defends it nicely.
Machida stuffs the takedown.
No luck with that takedown attempt from Petrovich.
Machida misses with a takedown attempt - Petrovich sprawls well and throws a nice strike on the way out which just misses.
Wow, both these guys are really going for it!
Petrovich is trying hard to land a takedown here. Machida sprawls well and keeps this one on the feet.
Nice takedown defense from Machida. No joy for Petrovich on that attempt.
Machida closes the distance and clinches up with Petrovich, looking for a takedown. Machida pushes Petrovich against the cage but Petrovich circles to the side and manages to break the clinch.
Petrovich will have to do better than that with his takedown attempts.
Petrovich shoots in but no luck this time.
Petrovich shoots in for a takedown. "I don't think so" says Machida as he avoids it easily.
Petrovich shoots in for a takedown. He's persisting with it as Machida sprawls well. Machida wins this battle and keeps the fight standing. Petrovich gets slowly back to his feet.
Machida fails with a takedown attempt.
Machida throws a looping left and ducks down for a takedown. He's got his arms around Petrovich's waist but Petrovich gets an underhook and avoids the takedown by throwing Machida off to one side.
That's five minutes gone in the round.
Machida misses with a takedown attempt. He shot from a bit too far out.
Machida stuffs the takedown attempt from Petrovich. Petrovich gets slowly back to his feet.
Petrovich shoots in and drives through. Machida sprawls well.
Machida slaps away a takedown attempt from Petrovich, before circling back to the center of the mat.
Machida shoots in for a takedown. He's persisting with it as Petrovich sprawls well. Petrovich wins this battle and keeps the fight standing. Machida gets slowly back to his feet.
Machida is trying hard to land a takedown here. Petrovich sprawls well and keeps this one on the feet.
Machida misses with a takedown attempt - Petrovich sprawls well and throws a nice strike on the way out which just misses.
Petrovich stuffs a takedown. It's all about dictating where the fight takes place and Petrovich wants it to stay on the feet.
Petrovich shoots in but Machida avoids the takedown attempt easily.
Petrovich shoots in for a takedown but Machida shows good takedown defense.
Petrovich shoots in looking for a takedown. Machida tries to sprawl out of it but Petrovich keeps driving through. The fighters are pinned against the cage. Machida manages to get underhooks and after a bit of a struggle, circles away and we're back to standing.
Machida shoots in for a takedown. "I don't think so" says Petrovich as he avoids it easily.
That's six minutes gone in the round.
Petrovich shoots in for a takedown - he's clinched up with Machida but Machida pushes him off and we're back to square one.
Petrovich stuffs a takedown. It's all about dictating where the fight takes place and Petrovich wants it to stay on the feet.
Petrovich looks for a takedown here. Will he get it? Machida is fending him off so far but Petrovich persists. Nope, Machida circles away and we're back to standing.
Petrovich stuffs a takedown. It's all about dictating where the fight takes place and Petrovich wants it to stay on the feet.
Petrovich throws a looping left and ducks down for a takedown. He's got his arms around Machida's waist but Machida gets an underhook and avoids the takedown by throwing Petrovich off to one side.
Machida fails with the takedown.
Petrovich shoots in for a takedown but doesn't get it.
Machida fails miserably with a takedown attempt.
Petrovich misses with a takedown attempt - Machida sprawls well and throws a nice strike on the way out which just misses.
Machida misses with a takedown attempt. He shot from a bit too far out.
No luck for Petrovich with that takedown attempt.
Machida fails with a rather predictable takedown attempt.
Petrovich closes this distance looking for a takedown but Machida circles away.
That's seven minutes gone in the round.
Petrovich leaves Machida with his face pressed against the mat as he sprawls beautifully, defending against a solid takedown attempt.
A really sloppy takedown attempt there from Petrovich.
Petrovich shoots in but no luck this time.
Petrovich stuffs the takedown attempt from Machida. Machida gets slowly back to his feet.
Petrovich will have to do better than that with his takedown attempts.
Petrovich closes the distance and clinches up with Machida, looking for a takedown. Petrovich pushes Machida against the cage but Machida circles to the side and manages to break the clinch.
Machida closes the distance and clinches up with Petrovich, looking for a takedown. Machida pushes Petrovich against the cage but Petrovich circles to the side and manages to break the clinch.
Petrovich closes the distance and clinches up with Machida, looking for a takedown. Petrovich pushes Machida against the cage but Machida circles to the side and manages to break the clinch.
Horrible takedown by Petrovich or perhaps it was just good defense by Machida which made him look bad.
Machida shoots in for a takedown. "I don't think so" says Petrovich as he avoids it easily.
Petrovich shoots in for a takedown but doesn't get it.
Machida fakes high and shoots in for a takedown but Petrovich avoids it really well and circles away.
Machida shoots in for a takedown from distance. He catches Petrovich napping and manages to drive through into side control!
Petrovich sneaks back into half guard.
Petrovich looking to work for a kimura from the bottom.
That's eight minutes gone in the round.
Petrovich looking for submissions from an awkward position here.
Petrovich moves his hips nicely and gets into full guard.
Machida drops back looking for a leg! Petrovich is in trouble here! The fighters roll with the hold and Petrovich manages to kick Machida off! Machida jumps back into Petrovich's guard.
Machida thinks about going for a leg but decides against it, in order to maintain the position.
Machida thinks about going for a leg but decides against it, in order to maintain the position.
Petrovich is looking for a guillotine. You can't force these things though and Machida defends well.
Machida trying to pass the guard but can't manage it just yet.
That's nine minutes gone in the round.
Petrovich can't keep his opponent in guard - Machida advances to half guard, no doubt looking to mount.
Petrovich on his back here. We all know that wrestlers don't like being on their back so let's see if Petrovich tries to get out of the position.
Machida is trying a forearm choke
I don't think that's going to do much at this level of the game.
Petrovich is looking to improve his position.
Machida is trying to work for a kimura. This could be trouble! No, Petrovich has managed to free his arm - good work.
Machida is working for a submission of some sort.
Petrovich works his way to full guard. Good work.
And thats the end of the round the fighters go back to their corners.
A close fourth round but Lyoto Machida will probably get the nod - 10:9.
OK. That's time! The bell goes and we're back to the action. This is the final round!
Machida shoots in for a takedown. "Ole!" shouts Petrovich as he jumps to the side.
A telegraphed takedown attempt from Petrovich is defended easily by Machida.
A telegraphed takedown attempt from Petrovich is defended easily by Machida.
Machida displays good takedown defense there as he swats away a double leg from Petrovich.
That's three failed takedown attempts in the round for Alekai Petrovich. That's going to take a lot out of him.
Machida shoots in for a takedown - he's clinched up with Petrovich but Petrovich pushes him off and we're back to square one.
Machida shoots in with a takedown attempt and he has Petrovich pinned against the cage. Petrovich gets the underhooks and manages to circle away.
Petrovich fails with a takedown attempt from distance.
We've had a slow start to the round here - hopefully the action picks up.
Petrovich shoots in but Machida avoids the takedown attempt easily.
Petrovich stuffs the takedown.
Both of our modern day gladiators look out of it here - an gruelling 5 rounds of action taking it's toll on them, no doubt.
Petrovich shoots in for a takedown. "I don't think so" says Machida as he avoids it easily.
Petrovich displays good takedown defense there as he swats away a double leg from Machida.
Machida shoots in for a takedown. "I don't think so" says Petrovich as he avoids it easily.
That's one minute gone in the round.
Petrovich shoots for a takedown but Machida saw that one coming a mile off and avoided it easily.
Petrovich fails with a takedown attempt from distance.
Machida slaps away a takedown attempt from Petrovich, before circling back to the center of the mat.
Petrovich shoots in looking for a double leg takedown. Machida defends it nicely.
Petrovich changes levels and looks for a double leg takedown. Machida tries to avoid it but Petrovich manages to keep hold of a leg and drag Machida to the ground. Machida escapes though and pops straight back up to his feet.
Machida keeps the fight standing with a nice sprawl.
Machida shoots in with a takedown attempt and he has Petrovich pinned against the cage. Petrovich gets the underhooks and manages to circle away.
Machida is trying hard to land a takedown here. Petrovich sprawls well and keeps this one on the feet.
Petrovich fails with a takedown attempt.
Machida has a takedown stuffed.
Machida looks for a takedown but Petrovich sprawls well.
That's two minutes gone in the round.
Petrovich shoots for a takedown but Machida saw that one coming a mile off and avoided it easily.
Machida shoots in looking for a double leg takedown. Petrovich defends it nicely.
Petrovich closes the distance and clinches up with Machida, looking for a takedown. Petrovich pushes Machida against the cage but Machida circles to the side and manages to break the clinch.
Petrovich fails with a takedown attempt.
Machida shoots in for a takedown but doesn't get it.
Petrovich defends well against a solid takedown attempt from Machida.
Machida shoots in and drives through. Petrovich sprawls well.
Petrovich shoots in for a takedown but Machida shows good takedown defense there and keeps this one on the feet.
A big right from Petrovich misses.
Machida shoots in but no luck this time.
Machida stuffs a takedown. It's all about dictating where the fight takes place and Machida wants it to stay on the feet.
Petrovich looks for a takedown but Machida sprawls well.
Machida fails with the takedown.
Machida throws a looping left and ducks down for a takedown. He's got his arms around Petrovich's waist but Petrovich gets an underhook and avoids the takedown by throwing Machida off to one side.
Petrovich stuffs the takedown.
That's three minutes gone in the round.
Horrible takedown by Petrovich or perhaps it was just good defense by Machida which made him look bad.
Machida shoots for a takedown but Petrovich saw that one coming a mile off and avoided it easily.
Petrovich shoots in for a takedown but doesn't get it.
Petrovich shoots in for a takedown - he's clinched up with Machida but Machida pushes him off and we're back to square one.
Machida slaps away a takedown attempt from Petrovich, before circling back to the center of the mat.
Nice takedown defense from Petrovich. No joy for Machida on that attempt.
Petrovich shoots in with a takedown attempt and he has Machida pinned against the cage. Machida gets the underhooks and manages to circle away.
Petrovich looks frustrated there after his takedown attempt is stuffed easily.
Machida fails with a takedown attempt.
Horrible takedown by Petrovich or perhaps it was just good defense by Machida which made him look bad.
Petrovich fails miserably with a takedown attempt.
Machida shoots in for a takedown - he's clinched up with Petrovich but Petrovich pushes him off and we're back to square one.
Machida shoots in for a takedown but Petrovich shows good takedown defense there and keeps this one on the feet.
That's four minutes gone in the round.
Machida stuffs the takedown attempt from Petrovich. Petrovich gets slowly back to his feet.
Machida has a takedown stuffed.
Machida shoots in for a double leg but Petrovich sprawls well. That's going to sap some energy.
Nice sprawl there from Petrovich as Machida shoots in.
Machida shoots for a double leg takedown but Petrovich sprawls well. He's pushed Machida's face into the mat and manages to get back to his feet relatively easily.
Petrovich stuffs the takedown attempt from Machida. Machida gets slowly back to his feet.
Machida keeps the fight standing with a nice sprawl.
Machida stuffs the takedown.
Petrovich looks for a takedown here. Will he get it? Machida is fending him off so far but Petrovich persists. Nope, Machida circles away and we're back to standing.
No luck with that takedown attempt from Machida.
Petrovich fails to land the takedown.
Machida closes this distance looking for a takedown but Petrovich circles away.
Machida shoots in with a takedown attempt and he has Petrovich pinned against the cage. Petrovich gets the underhooks and manages to circle away.
No luck with that takedown attempt from Machida.
That's five minutes gone in the round.
Petrovich shoots in and drives through. Machida sprawls well.
Machida misses with a takedown attempt. He shot from a bit too far out.
Machida misses with a takedown attempt. He shot from a bit too far out.
Petrovich fails to land the takedown.
Machida slaps away a takedown attempt from Petrovich, before circling back to the center of the mat.
Machida looks for a takedown here. Will he get it? Petrovich is fending him off so far but Machida persists. Nope, Petrovich circles away and we're back to standing.
Petrovich shoots in for a takedown. He's persisting with it as Machida sprawls well. Machida wins this battle and keeps the fight standing. Petrovich gets slowly back to his feet.
Machida keeps the fight standing with a nice sprawl.
Petrovich fakes high and shoots in for a takedown but Machida avoids it really well and circles away.
Petrovich keeps the fight standing with a nice sprawl.
That's six minutes gone in the round.
Petrovich fails with a takedown attempt.
Petrovich closes the distance and clinches up with Machida, looking for a takedown. Petrovich pushes Machida against the cage but Machida circles to the side and manages to break the clinch.
Machida fails miserably with a takedown attempt.
Machida will have to do better than that with his takedown attempts.
Petrovich shoots for a takedown but Machida saw that one coming a mile off and avoided it easily.
Machida displays good takedown defense there as he swats away a double leg from Petrovich.
Machida shoots in for a takedown. He's persisting with it as Petrovich sprawls well. Petrovich wins this battle and keeps the fight standing. Machida gets slowly back to his feet.
Petrovich displays good takedown defense there as he swats away a double leg from Machida.
Petrovich tries to shoot in for a takedown. He's got hold of a leg but Machida swivels and escapes.
Machida tries to shoot in for a takedown. He's got hold of a leg but Petrovich swivels and escapes.
Machida tries to shoot in for a takedown. He's got hold of a leg but Petrovich swivels and escapes.
Machida shoots in for a takedown - he's clinched up with Petrovich but Petrovich pushes him off and we're back to square one.
That's seven minutes gone in the round.
Petrovich shoots in with a takedown attempt and he has Machida pinned against the cage. Machida gets the underhooks and manages to circle away.
Machida shoots in but Petrovich avoids the takedown attempt easily.
Petrovich shoots in for a takedown but doesn't get it.
Machida throws a looping left and ducks down for a takedown. He's got his arms around Petrovich's waist but Petrovich gets an underhook and avoids the takedown by throwing Machida off to one side.
Machida shoots for a double leg takedown but Petrovich sprawls well. He's pushed Machida's face into the mat and manages to get back to his feet relatively easily.
Petrovich shoots in for a takedown. "I don't think so" says Machida as he avoids it easily.
Petrovich fails with the takedown.
Petrovich fails with a takedown attempt.
No luck with that takedown attempt from Machida.
Petrovich closes the distance and clinches up with Machida, looking for a takedown. Petrovich pushes Machida against the cage but Machida circles to the side and manages to break the clinch.
Machida stuffs a takedown. It's all about dictating where the fight takes place and Machida wants it to stay on the feet.
Petrovich shoots in for a takedown. He's persisting with it as Machida sprawls well. Machida wins this battle and keeps the fight standing. Petrovich gets slowly back to his feet.
Petrovich throws a looping left and ducks down for a takedown. He's got his arms around Machida's waist but Machida gets an underhook and avoids the takedown by throwing Petrovich off to one side.
That's eight minutes gone in the round.
Machida fails with a takedown attempt.
No luck with that takedown attempt from Petrovich.
Petrovich misses with a takedown attempt - Machida sprawls well and throws a nice strike on the way out which just misses.
Machida displays good takedown defense there as he swats away a double leg from Petrovich.
Petrovich shoots in for a double leg but Machida sprawls well. That's going to sap some energy.
Machida defends well against a solid takedown attempt from Petrovich.
Petrovich fakes high and shoots in for a takedown but Machida avoids it really well and circles away.
Machida tries to shoot in for a takedown. He's got hold of a leg but Petrovich swivels and escapes.
Petrovich has a takedown stuffed.
Machida stuffs the takedown attempt from Petrovich. Petrovich gets slowly back to his feet.
Petrovich stuffs the takedown.
Machida shoots in but Petrovich avoids the takedown attempt easily.
That's nine minutes gone in the round.
Machida fails with the takedown.
Machida stuffs the takedown.
Nice takedown defense from Machida. No joy for Petrovich on that attempt.
Petrovich looks for a takedown here. Will he get it? Machida is fending him off so far but Petrovich persists. Nope, Machida circles away and we're back to standing.
Machida shoots in for a takedown. "Ole!" shouts Petrovich as he jumps to the side.
Machida slaps away a takedown attempt from Petrovich, before circling back to the center of the mat.
Petrovich keeps the fight standing with a nice sprawl.
Petrovich closes the distance and clinches up with Machida, looking for a takedown. Petrovich pushes Machida against the cage but Machida circles to the side and manages to break the clinch.
Petrovich shoots in and drives through. Machida sprawls well.
Petrovich dives in and grabs Machida's left leg, looking for a takedown. Machida pushes down on Petrovich's head and hops out.
Machida dives in and grabs Petrovich's left leg, looking for a takedown. Petrovich pushes down on Machida's head and hops out.
Machida defends well against a solid takedown attempt from Petrovich.
Petrovich closes this distance looking for a takedown but Machida circles away.
Petrovich stuffs a takedown. It's all about dictating where the fight takes place and Petrovich wants it to stay on the feet.
Lyoto Machida has stepped it up - he knows he needs a finish here!
Petrovich shoots in looking for a single leg takedown. Machida is trying to defend but Petrovich finishes it well and ends up in half guard. Let's see if he can advance position further.
Machida is looking to sinch up a guillotine here but Petrovich pulls his head out easily.
And that's the end of the fight!
I would just about give that final round to Lyoto Machida.
I think Petrovich has won this one but let's see what the judges have to say. Over to the ring announcer for the scorecards.
Ladies and gentlemen, after 5 rounds of action, we go to the scorecards for a decision.
Judge Frank Dennis scores the fight 48:47
Judge Tiny Johnson scores the fight 48:47
Judge Stewart Dunkirk scores the fight 48:48
In favor of your winner, by majority decision... Alekai Petrovich!
Alekai Petrovich retains his super heavyweight title!
|
|
|
|
|
|
|
|
|
|
|
|
|
|
|
|
|
|
|
|
|
|
|
| S |
C
A |
G |
S |
C
B |
G |
|
S |
C |
G |
|
energy
A | B |
|
hype
A | B |
|
pop
A | B |
|
mgr
A | B |
|
FIGHT
RATING
83% |
|
|
|
|
|
|
|
|
|
|
