 |
JFC 5: Uncharted Territory PBP Commentary |
Undercard bout
|
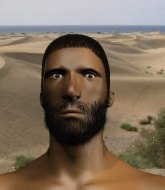
Coming up we have a middleweight MMA rules bout between Alexander Ahleby (ranked 0 p4p, 0 weight class) and Gib Nudger (ranked 0 p4p, 0 weight class). Alexander Ahleby had a look across the cage there at his opponent. He definitely means business
 |
|
 |
| 180 cm
22
184 lbs
1 - 1 - 0 |
|
183 cm
20
180 lbs
1 - 1 - 0 |
BJJ Blue Belt
Brawler
KO power |
|
BJJ Blue Belt
Brawler
Determined |
|
| |
|
Ladies and gentlemen. This fight is 3 rounds, in the middleweight division.
Introducing the fighter to my left, fighting out of the red corner.
With a record of
1 - 1 - 0, fighting out of Las Vegas, Alexander Ahleby!
And introducing the fighter to my right, fighting out of the blue corner.
With a record of
1 - 1 - 0, fighting out of Las Vegas, Gib Nudger!
The judges for this bout are Daniel Franklin, Robert Twigg and Chris Downing.

The bell rings for round one and we are underway!
The fight stays on the outside here - Nudger looks like he's thinking about clinching though.
Nudger takes a swing at Ahleby's ribcage but misses.
Ahleby fails with a takedown attempt from distance.
Nudger tries a switch kick but it misses it's target.
Ahleby throws a series of punches but Nudger avoids them all with ease.
Ahleby looks to clinch

and Nudger counters with a takedown into full mount! That could mean trouble for Ahleby!
Nudger takes a little breather and maintains the position. The referee will be looking for him to stay active from such a dominant position though.

Nudger goes for an armbar but he's not got it
Ahleby turns into him and now he's in Nudger's guard.
Ahleby would like to get this fight back to the feet but can't get free from the closed guard.

That's one minute gone in the round.
Ahleby with a flurry of punches that miss.
Ahleby would like to get this fight back to the feet but can't get free from the closed guard.
Nudger manages to land a sweep and now he's in mount on top!
You get the feeling that Ahleby really doesn't like being in this position too much.

That's two minutes gone in the round.
A lull in the action here being met with boos from the crowd.
Nudger swings around for an armbar but it's a sloppy attempt and Ahleby is now in Nudger's guard. A big mistake from Nudger there, giving up the dominant position!
The fighters are pressed up against the cage, both looking to find a bit of space to work.
Nudger looking to sweep here. No luck so far.
Ahleby makes a bit of distance and scores with some ground and pound, still in guard.
Nudger not looking particularly offensive just at the moment.
Nudger looking for submissions off his back, moving his hips, looking for an opening.

That's three minutes gone in the round.

Nudger scrambles and gets back to his feet.
Nudger looks gassed!
Ahleby tries to score with a low kick but Nudger moves his leg out of the way.
Nudger scores a trip takedown into side control. Nice.
Nudger tries to land with some ground and pound but misses.
Ahleby prevents Nudger from moving into mount.
Ahleby sneaks out the side door and pushes Nudger away - he's back to his feet. The crowd show their appreciation for the escape.
Ahleby tries to clinch there but Nudger circles away.
Nudger fails in his attempt to clinch.
Ahleby will have to do better than that with his takedown attempts.
Nudger scores a takedown into full mount!

That's four minutes gone in the round.
Ahleby tries to buck Nudger off but he can't manage it.
Ahleby really trying hard to get back to half guard here.
Nudger wants to control the pace but Ahleby is squirming around nicely.
Nudger scores with a couple of good head shots there.
The crowd are loving this. Great action here.
The crowd applaud the fighters efforts here as the round comes to an end.
Nudger prevents Ahleby from getting the reversal.
Nudger looking to control and managing it successfully.
And thats the end of the round the fighters go back to their corners.
Gib Nudger dominated that round.
That's the end of the round. The referee orders the cornermen out of the cage so we can get back down to business.

Ahleby throws a jab, cross combination which is slipped
and Nudger counters with a nice double leg into guard.
Ahleby tries to land a sweep but no joy.
Nudger pushing down on Ahleby's thigh, trying to pass to half guard. He's managed it... Nice work.
Ahleby flails away from the bottom but he's not doing any damage.
Nudger wants to control but Ahleby is keeping him busy.
Nudger stalling.
Nudger looking for a kimura but he'll have to free his other leg if he wants to finish that. Perhaps he's just using it as a distraction technique.
Neither fighter is being very active at the moment, with Nudger in particular looking to stall.
That's one minute gone in the round.
Ahleby is looking to improve his position.
Nudger thumps the canvas. Not on purpose obviously - he just missed Ahleby's head.
That's two minutes gone in the round.
There's not a lot going on here and the crowd are letting the fighters know they're not willing to tolerate a lack of action.
Neither fighter is being very active at the moment, with Nudger in particular looking to stall.
Ahleby tries to get to full guard but Nudger has control of the leg.
Nudger seems content to maintain position for now, rather than mounting any offense.
Both fighters are absolutely exhausted here.
Nudger postures up and decides to stand up, from the half guard. The ref calls for Ahleby to stand up.
Ahleby throws a series of punches but Nudger moves out of range.
That's three minutes gone in the round.
Nudger darts in and lands a nice takedown into half guard.
Nudger takes advantage of the dominant position to land a couple of big hammer fists.
Nudger performing his best blanket impression for a moment.
Nudger is working for submissions here but there's nothing on.
Nudger stands up out of the half guard.
That's four minutes gone in the round.
Ahleby gets caught flat footed, as Nudger shoots in with a quick takedown into guard.
Gib Nudger has got the better of the ground game so far.
Nudger stands up and waves to Ahleby to follow him.
Ahleby throws a head kick that misses and slips in the process. He scrambles back to his feet and the fighters circle.
Ahleby doesn't manage to clinch there - Nudger circles away.
Nudger lands a jab, followed by a cross and another cross, as Ahleby backs up against the cage.
Nudger closes this distance looking for a takedown but Ahleby circles away.
The crowd are loving this. Great action here.
Ahleby misses with a telegraphed body shot
and Nudger counters with a driving takedown into guard. Nice work there by Nudger.
Ahleby manages to sweep nicely, so he's now on top. Nudger manages to get himself to full guard.
Ahleby gets to his feet and steps away from his opponent.
The crowd applaud the fighters efforts here as the round comes to an end.
Nudger looks to land a right hand but Ahleby moved out of range.
Alexander Ahleby seems to be the more aggressive standup fighter in this bout.
Ahleby shoots in for a takedown and gets it. Oh and he's advanced to full mount straight away.
And thats the end of the round the fighters go back to their corners.
Gib Nudger showed his class in that round. I'd imagine he'll take it on all the scorecards.
The referee calls time. The cornermen exit stage left and we're back to business. And we move into the final round!

Ahleby keeps the fight on the outside.
No luck for Nudger with that takedown attempt.
Nudger dodges the punch combination from Ahleby.
Nudger shoots in looking for a takedown. Ahleby tries to sprawl out of it but Nudger keeps driving through. The fighters are pinned against the cage. Ahleby manages to get underhooks and after a bit of a struggle, circles away and we're back to standing.
Ahleby throws a left and a right that both miss
and Nudger counters with a nice double leg into half guard.
Nudger blocks the strikes from Ahleby.
Nudger prevents Ahleby from improving his position.
Ahleby is trying to stand.
Nudger is looking for a kimura but Ahleby is holding onto that half guard position, so it's hard for Nudger to get the leverage.
Ahleby slips a foot under and gets full guard. Nice work.
Both fighters are breathing heavily.
That's one minute gone in the round.
Nudger trying to control the position from guard on top but Ahleby is wriggling around, looking for whatever he can.
Ahleby trying to strike from the bottom but really, it's not the best position to be doing that from!
Nudger wants to control from the top but Ahleby keeps moving.

Neither fighter is doing enough for the referee's liking and he's decided to stand them back up.
Ahleby throws a head kick that misses and slips in the process. He scrambles back to his feet and the fighters circle.

Ahleby rushes Nudger and pushes him back against the cage in a clinch.
Nudger lands a short shot on the inside that snaps the head of Ahleby backwards.
Nudger can't break the clinch.
Nudger wants to strike at distance but he can't break free of the clinch.
Nudger tries to break the clinch but Ahleby is controlling the position.
That's two minutes gone in the round.
Neither fighter has done anything of merit for a good minute or two here and the crowd are not happy about it.
Both guys are working to get underhooks.
Nudger has a body lock and is looking for a takedown. Ahleby is bouncing around trying to prevent the takedown and somehow he has indeed managed to stay on his feet.
Alexander Ahleby has stuffed three takedown attempts in the round now. That's going to take a lot out of Gib Nudger.
Nudger fails to pull guard.
Nudger wants to push off and get back to the center of the mat but Ahleby has him pressed against the cage.
Nudger can't get the takedown.
Ahleby lands a nice shot to the body.
Ahleby lands an elbow that stopped Nudger in his tracks for a moment.

It looks like Gib Nudger has been cut.
Nudger can't break the clinch.

Ahleby breaks the clinch.
Nudger drives through with a takedown into guard.
Ahleby looking to hit a scissor sweep but Nudger is one step ahead there.
Nudger wants to pass the guard but Ahleby is keeping the position.
That's three minutes gone in the round.
Ahleby is working an open guard so Nudger takes the opportunity to get back to his feet.
Nudger stuffs the takedown.
Nudger has his takedown stuffed
and Ahleby counters with a low kick, right behind Nudger 's knee.
Decent striking displayed by Nudger there.
Alexander Ahleby is looking to throw some combinations by the looks of things.
Nudger throws a looping left and ducks down for a takedown. He's got his arms around Ahleby's waist but Ahleby gets an underhook and avoids the takedown by throwing Nudger off to one side.
Ahleby throws a left and a right that both miss
and Ahleby takes a counter punch right on the button for his troubles.
Nudger gets the takedown into side control.
A lull in the action here.
Nudger tries for a kimura. Not really close to a finish though.
That's four minutes gone in the round.
Ahleby is trying to escape and get back to his feet.
Alexander Ahleby has stepped it up - he knows he needs a finish here!
Ahleby tries to bench press Nudger off him but Nudger keeps the position.
Nudger tries to stand but Ahleby is controlling his head.
Ahleby throws Nudger to one side and escapes!
And that's the end of the fight!
Gib Nudger comfortably won the final round on my scorecard.
I've got Nudger winning every round here. Surely the decision will go his way and he'll pick up a well deserved decision victory. Over to the ring announcer for the scorecards.
Ladies and gentlemen, after 3 rounds of action, we go to the scorecards for a decision.
Judge Daniel Franklin scores the fight 27:30
Judge Robert Twigg scores the fight 27:30
Judge Chris Downing scores the fight 27:30
In favor of your winner, by unanimous decision... Gib Nudger!
|
|
|
|
|
|
|
|
|
|
|
|
|
|
|
|
|
|
|
|
|
|
|
| S |
C
A |
G |
S |
C
B |
G |
|
S |
C |
G |
|
energy
A | B |
|
hype
A | B |
|
pop
A | B |
|
mgr
A | B |
|
FIGHT
RATING
67% |
|
|
|
|
|
|
|
Undercard bout
|
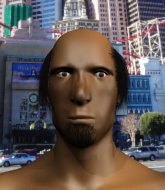
Coming up we have a welterweight MMA rules bout between Jonathan Wiley (ranked 0 p4p, 0 weight class) and Justin Sane (ranked 0 p4p, 0 weight class). Both fighters look fresh as a daisy as they make their way towards the cage.
 |
|
 |
| 185 cm
19
170 lbs
1 - 2 - 0 |
|
186 cm
20
175 lbs
1 - 1 - 0 |
BJJ Blue Belt
Basic striking
Self confident |
|
Dangerous GnP
Counter striker
Tends to cut |
|
| |
|
Ladies and gentlemen. This fight is 3 rounds, in the welterweight division.
Introducing the fighter to my left, fighting out of the red corner.
With a record of
1 - 2 - 0, fighting out of Las Vegas, Jonathan Wiley!
And introducing the fighter to my right, fighting out of the blue corner.
With a record of
1 - 1 - 0, fighting out of Las Vegas, Justin Sane!
The judges for this bout are Daniel Franklin, Chris Downing and George Francis.
The bell rings for round one and we are underway!
Wiley tries to close the distance and clinch but Sane swats him to one side with an open hand palm strike and circles away.
Sane scores a takedown into full mount!
The referee warns Wiley that he has to improve his position here as he takes two more clean shots to the head.
Wiley is writhing around trying to get back to his feet.
Wiley is trying to escape the mount.
Wiley wants to hold on but Sane pushes him away.
Sane dominating with strikes here.

Wiley is rocked!
Sane looks like he's working for a submission but he's not found anything just yet.
Oh Wiley is still in real trouble! Will he be able to recover?!!
Sane with the ground and pound from mount.
Sane putting on the heat here with some good ground and pound!
Wiley tries to get back to half guard but can't.
Wiley tries to lock up and control but Sane gives him a forearm to the face and pushes him away.
Sane cracks Wiley with a nasty head shot there - the crowd let out an audible gasp there, as the noise reverberated around the arena.
The fans in attendance giving it up for the two fighters, who have really let it all hang out in the last minute or so!
Sane unloads with some vicious shots from mount and Wiley wants out - he looks towards the referee who steps in to save him! Sane celebrates on the cage and the crowd goes wild!
Ladies and gentlemen, after 1:01 of round 1, we have a winner by way of TKO (Strikes). Justin Sane!
|
|
|
|
|
|
|
|
|
|
|
|
|
|
|
|
|
|
|
|
|
|
|
| S |
C
A |
G |
S |
C
B |
G |
|
S |
C |
G |
|
energy
A | B |
|
hype
A | B |
|
pop
A | B |
|
mgr
A | B |
|
FIGHT
RATING
100% |
|
|
|
|
|
|
|
Undercard bout
|
|
|
|
Undercard bout
|
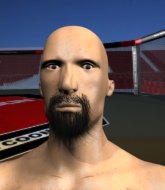
Coming up we have a heavyweight MMA rules bout between Robbie Law (ranked 0 p4p, 0 weight class) and Kouta Hiro (ranked 0 p4p, 0 weight class). Robbie Law could well score a knockout today. He has the power to get to Kouta Hiro's chin.
 |
|
 |
| 190 cm
20
270 lbs
0 - 2 - 0 |
|
195 cm
22
265 lbs
0 - 0 - 0 |
BJJ Blue Belt
Brawler
KO power |
|
BJJ Blue Belt
Excellent MT
Tends to cut |
|
| |
|
Ladies and gentlemen. This fight is 3 rounds, in the heavyweight division.
Introducing the fighter to my left, fighting out of the red corner.
With a record of
0 - 2 - 0, fighting out of Las Vegas, Robbie Law!
And introducing the fighter to my right, fighting out of the blue corner.
With a record of
0 - 0 - 0, fighting out of Las Vegas, Kouta Hiro!
The judges for this bout are Gwen Towbar, Alan Glass and Wesley Smith.
The bell rings for round one and we are underway!
Law circles away from the clinch attempt.
Law tries for a takedown but Hiro sees it coming a mile off and avoids it easily.
Hiro tries to close the distance and clinch up but Law swats him away and circles back towards the center.
Hiro moves in looking to clinch but Law pushes him off.
Hiro fails in his attempt to clinch.
Law fails to land with the punch combination there - jab, cross, hook, miss, miss, miss.
Law shoots in and drives through. Hiro sprawls well.
Law swinging wilding here.
Hiro scores with a kick to the midsection.
Hiro wants to clinch.
Law misses with a hook. Hiro ducked under it nicely.
Hiro wants to clinch.
Law shoots in with a takedown attempt and he has Hiro pinned against the cage. Hiro gets the underhooks and manages to circle away.
That's three failed takedown attempts in the round for Robbie Law. That's going to take a lot out of him.
Law throws a nice looking combination but Hiro bobs and weaves to avoid any damage.
Hiro tries to close the distance and clinch but Law swats him to one side with an open hand palm strike and circles away.
Law swats away the attempt to clinch by Hiro.
Law fails with the takedown.
That's one minute gone in the round.
Hiro fails with an attempt to clinch.
Hiro avoids the body shot from Law.
Hiro tries to clinch but Law is having none of it.
Hiro fails in his attempt to clinch.
Law looks to land a combination but Hiro avoids it well.
Law fails miserably with a takedown attempt.
Law is breathing heavily.
Law misses with a takedown attempt - Hiro sprawls well and throws a nice strike on the way out which just misses.
Hiro keeping a good distance there, avoiding the body shot.
Law swats away the attempt to clinch by Hiro.
Law tries to clinch but Hiro moves out of range.
Law shoots in for a takedown but Hiro shows good takedown defense.
Hiro is looking to clinch but Law is avoiding it.
Hiro tries to clinch but is not successful on this occasion.
Hiro wants to clinch up but Law keeps it at a distance.
Law circles away from the clinch attempt.
Hiro rushes Law and pushes him back against the cage in a clinch.
Hiro crunches a lovely knee into Law's ribcage.
That's two minutes gone in the round.
Hiro using the Thai clinch to land knees to the body.
Law tries to break the clinch but Hiro is controlling the position.
Hiro connects with a nasty looking knee right to Law's face.
It looks like Robbie Law has been cut.
Law wants to push off and get back to the center of the mat but Hiro has him pressed against the cage.
Law goes for a takedown in the clinch but Hiro prevents it.
Hiro looking to stall.
Law wants to break free. God knows he wants to breaaaak freeee.
Hiro is looking to control Law's arms but Law gets an underhook and turns him. Now Hiro has his back to the cage.
Law is trying to work out of this bad position, with his back against the cage.
Hiro crunches a lovely knee into Law's ribcage.
Hiro prevents Law from breaking the clinch.
Law is trying to work for a single leg takedown but Hiro pulls him back up using the underhooks.
Hiro tries to land a knee to the head but Law blocks with his arms.
Hiro crunches a lovely knee into Law's ribcage.
Hiro misses the knee to the body. Nice hip positioning from Law.
Law is trying to break free.
Hiro misses the knee to the body. Nice hip positioning from Law.
Law tries to stall but Hiro uses the opportunity to gain a better position.
Hiro prevents Law from breaking the clinch.
Hiro tries to land knees in the clinch but Law avoids the damage to the body.
Law wants a takedown.
Hiro wants to stall.
Knees to the body from Hiro.
That's three minutes gone in the round.
Law drops down looking for an ankle pick but Hiro pulls his leg out and moves away.
Law is looking to clinch.
A choreographed right hand from Law misses the target.
Law ducks down and throws a hook to the body but Hiro moves away.
Hiro on the receiving end of a decent leg kick there by Law. Law obviously looking to wear him down.
Hiro gets in close and instigates a clinch.
Law avoiding damage as Hiro throws knees to the body.
Hiro landing some nice looking knees to the body.
Hiro lands a knee to the head.
Law goes for a takedown attempt but Hiro pushes him away and we're back to fighting at a distance.
Kouta Hiro is looking to keep the fight on the feet at all costs.
Hiro tries a head kick but it misses.
Law throws a right and a left that both miss.
Hiro darts in trying to clinch
and Law holds on and brings the fighters into a clinch.
Law on the defensive, avoiding the knees to the body.
Law avoiding damage as Hiro throws knees to the body.
Law tries to take the fight to the ground by pulling guard but can't manage it.
Law tries for a takedown but Hiro manages to get underhooks.
Hiro landing knees to the body.
That's four minutes gone in the round.
Hiro lands a knee to the head.
Hiro is trying to slow down the pace in the clinch, to catch his breath.
Law is trying to maintain a safe position but Hiro gets an underhook and turns Law into the cage.
Knees in the clinch landing for Hiro.
Hiro tries to land knees in the clinch but Law avoids the damage to the body.
Hiro stops a takedown attempt from Law.
Law is working on a single leg takedown against the cage. Hiro can't fight it off and eventually Law manages to take the fight to the floor. Hiro looks annoyed but at least he's managed to land in guard.
Law controls from within his opponent's guard.
Law trying to control but Hiro is working from the bottom.
Law tries to free his leg and advance position but Hiro is retaining full guard.
Law throwing elbows and punches but not connecting, as Hiro works some decent striking defense from the bottom.
Law stands up over Hiro, holding his feet. He dives back in and lands a decent shot to the head.
The crowd applaud the fighters efforts here as the round comes to an end.
Law working some strikes from top position.
Fantastic stuff here - a very entertaining period of action, which has drawn cheers from the crowd.
Law lands a couple of decent looking shots.
Law trying to pass the guard but can't manage it just yet.
And thats the end of the round the fighters go back to their corners.
Kouta Hiro dominated that round.
The cut man is working on Robbie Law's cut.
The referee calls time. The cornermen exit stage left and we're back to business.
Law pushes Hiro up against the cage in a clinch.
Law manages to get underhooks and slows down the pace for a moment.
The referee calls for Hiro to work.
Law has picked Hiro up - he's going for a ride! Law dumps his opponent to the mat with a thud and settles into half guard.
Law controlling the action here.
Law thows a wild elbow that connects with the canvas.
Hiro makes his way to full guard. A much better position for Hiro.
Hiro is working from a closed guard but he's struggling to control his opponent.
Law decides he's had enough of playing guard and decides to stand. Come on Hiro, up you get!
Law tries to clinch but Hiro moves out of range.
Hiro forces Law back against the cage and clinches.
A knee to the head by Hiro.
Law has managed to pull guard. Let's see whether he can work an aggressive guard. It will also be interesting to see what tactics Hiro uses from the top position.
Hiro is breathing heavily.
Law looking to sweep here. No luck so far.
That's one minute gone in the round.
Hiro wanted to stand there but Law had control of the position.
Hiro looking to pass the guard.
Hiro wants to get up but he can't break Law's closed guard. He needs to be careful trying to break the legs open, as he's open to submissions here.
Law manages to land a sweep and now he's in mount on top!
Law landing shots from mount.
Law controlling his opponent.
Hiro is trying to stand up.
Law content just to control the position here.
Hiro is wriggling around trying to escape.
Law tries to control but Hiro wriggling away.
That's two minutes gone in the round.
The crowd are showing their displeasure at the lack of action as loud boos ring out around the arena.
Hiro wants to use the cage to get back to his feet here.
Hiro really trying hard to get back to half guard here.
Law trying to control but Hiro is having none of it.
The fighters are pressed up against the cage, both looking to find a bit of space to work.
Law content just to control the position here.
Law sends his fist crashing into the mat - the crowd let out a collective ooooooh. Let's hope he's not broken it!
Law controlling his opponent.
Hiro is looking to improve his position but Law isn't that keen on the idea.
That's three minutes gone in the round.
Law landing strikes, looking to finish!
Hiro is wriggling around trying to escape.
Law punching from mount but Hiro doing a good job of avoiding damage.
Law with shots to the head and body - Hiro looks very uncomfortable down there.
Hiro working to try and regain half guard.
Hiro regains half guard.
Hiro tries to roll over but Law keeps him under control.
Law seems very keen to just sit and control from half guard but Hiro does not like that idea so much and is remaining active off his back.
Law keeping composed on the top, looking to control the action.
Hiro is looking to sinch up a gullotine here but Law pulls his head out easily.
Hiro is trying to stand back up but Law is controlling him
That's four minutes gone in the round.
My god... these two guys really need to pick up the pace or everyone will leave to go get a beer.
Hiro moves into full guard.
Hiro manages to land a sweep and now he's in mount on top!
The ref warns both fighters not to hold the cage as they work up against the meshing.
Hiro working to secure an arm triangle but it's not happening for him just yet.
Hiro wants to get back to his feet but Law is holding on tight.
Law is wriggling around trying to escape.
Hiro stands up from the dominant position. He obviously fancies his chances standing.
Law is looking to take this fight into the clinch.
Law closes the distance, clinches up and gets a nice trip takedown into side control. Very smooth.
Hiro wants to get back to his feet but Law drags him back down.
Hiro manages to get one leg in to regain half guard.
Hiro is trying to control but Law passes into side control!
And thats the end of the round the fighters go back to their corners.
Robbie Law dominated that second round.
The cut man is working on Robbie Law's cut.
The fighters' corners scream their final instructions, as the referee calls time. Here we go, back to the action! This is the final round!
Law doesn't manage to clinch there - Hiro circles away.
Hiro tries to clinch but fails miserably
and Law counters with a nice double leg into half guard.
Hiro looks like he's trying to stand up.
Law is working for a submission of some sort.
Law takes advantage of the dominant position to land a couple of big hammer fists.
Hiro is working for an escape here. He's hooked one of Law's legs and he's managed to sneak out and take Law's back!
Law breaks Hiro's hooks off and manages to turn into his guard.
Law preventing the sweep.
Law is trying to work a guillotine from the top, or something like that? Don't know how he thinks he's going to get a finish from there.
Hiro is looking for a triangle but Law pushes his legs off easily.
Both fighters are breathing heavily.
Law controlling from the top position.
Hiro has his foot on Law's thigh. He's trying to push off and get in position for a triangle, I think. Law works his way back into a safe position though.
That's one minute gone in the round.
Hiro pushes Law off and gets back to his feet.
Hiro pushes Law up against the cage in a clinch.
Law is looking to break free of the clinch but Hiro has double underhooks.
Hiro landing knees to the body.
Knees to the body from Hiro.
Hiro landing knees to the body.
Law manages to break the clinch.
Some wild striking there from Law.
Hiro tries to clinch
and Law counters with a shoot takedown into half guard.
We've seen a great period of action over the last minute or so - credit to both fighters for leaving it all in the cage!
Hiro wants to get back to his feet.
Law working over Hiro with some ground and pound. Hiro looks like he wants out of this position, which is understandable.
Hiro wants to get back to his feet.
Law scores with a couple of good hammerfists.
Hiro keeping his head moving to avoid the ground and pound.
Law stands up and beckons Hiro to join him on the feet.
That's two minutes gone in the round.
Hiro wants to clinch
and Law counters with a series of strikes. Hiro will be more careful next time no doubt.
Hiro is rocked!
Law throws a big shot that misses.
Hiro is still on wobbly legs! Can Law finish him?
Law throws a monster uppercut resembling something out of street fighter but it doesn't land.
Law misses with a straight right.
Hiro feints and then cracks Law's leading leg with a nice low kick. He's obviously looking to slow Law down.
A head kick misses from Hiro.
Law tries to clinch but Hiro moves out of range.
Hiro looks to clinch
and Law counters with a stiff right hand.
Law takes a swing at Hiro's ribcage but misses.
Hiro tries to clinch but Law is having none of it.
The fight stays on the outside here - Law looks like he's thinking about clinching though.
Hiro tries to close the distance and clinch up against the cage but Law paws at him with a jab and circles away.
Hiro tries to close the distance and clinch up against the cage but Law paws at him with a jab and circles away.
Hiro seems to have recovered his senses.
Law tries to close the distance and clinch but Hiro swats him to one side with an open hand palm strike and circles away.
Hiro wants to clinch up but Law keeps it at a distance.
Hiro has Law up against the cage in a clinch.
Knees to the body from Hiro.
Knees in the clinch landing for Hiro.
Law manages to pull guard. Let's see whether he can land a sub off his back.
That's three minutes gone in the round.
Law throwing strikes off his back to little effect.
Hiro slips nicely into half guard.
Hiro trying to pass the guard but Law defending well.
Law actively working from the bottom here.
Law is trying to maintain the position but Hiro is very close to passing his half guard.
Hiro wants to stand up but Law is controlling the position.
Hiro wants to control but Law is keeping him busy.
The referee has ruled that neither fighter is active enough on the ground and has stood them back up.
Law avoids a kick to the body.
Law gets to the clinch - let's see what his plan is here.
Hiro letting Law take a breather here.
Hiro keeps control of Law as he tries to wriggle out of the double underhooks.
Hiro with a knee to the head.
Law manages to break the clinch.
Hiro plants his feet and lands a nice head kick!
That's four minutes gone in the round.
Hiro wants to clinch but Law slips to the side
and Law moves into the clinch.
Law wants a takedown.
Hiro landing knees to the body. They look like they could hurt.
Law has had enough of the clinch but Hiro keeps him there for the moment.
Hiro crunches a lovely knee into Law's ribcage.
Knees in the clinch landing for Hiro.
Wooooo! Give it up for these two warriors! They are putting on a show!
Hiro is trying to slow down the pace in the clinch, to catch his breath.
A shot in the inside from Law.
Law wants to break free but Hiro has control.
Hiro throws a vicious knee straight up the middle but Law blocks it with crossed arms.
Law is trying to work for a single leg takedown but Hiro pulls him back up using the underhooks.
Law lands a nice trip takedown into half guard.
Hiro pushes Law off looking to stand but Law dives back in and keeps control.
Robbie Law overall seems to be getting the better of the ground position in the fight so far.
Law is scoring with some nice ground and pound from the dominant position.
Hiro is staying active underneath Law, who seems content to just control the action from this position.
Law slips a nice elbow through Hiro's hands, connecting with Hiro's forehead.
The crowd are going absolutely nuts as the round comes to an end - what a fantastic round of action!
Hiro wants to control but Law is keeping busy and won't allow it.
Hiro is looking to get full guard. It looks like he might be successful but at the last minute Law jumps into side control!
Law working the body and head with strikes.
Hiro is looking to reverse the position.
Hiro gives up the full mount - oops, sloppy defensive grappling there!
And that's the end of the fight!
That was a close round. You could make an argument for either fighter but I would give it to Robbie Law.
I think Law has won this one but let's see what the judges have to say. Over to the ring announcer for the scorecards.
Ladies and gentlemen, after 3 rounds of action, we go to the scorecards for a decision.
Judge Gwen Towbar scores the fight 29:28
Judge Alan Glass scores the fight 29:28
Judge Wesley Smith scores the fight 29:28
In favor of your winner, by unanimous decision... Robbie Law!
|
|
|
|
|
|
|
|
|
|
|
|
|
|
|
|
|
|
|
|
|
|
|
| S |
C
A |
G |
S |
C
B |
G |
|
S |
C |
G |
|
energy
A | B |
|
hype
A | B |
|
pop
A | B |
|
mgr
A | B |
|
FIGHT
RATING
100% |
|
|
|
|
|
|
|
Undercard bout
|
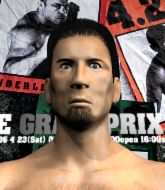
Coming up we have a lightweight MMA rules bout between Sampson Kesler (ranked 0 p4p, 0 weight class) and Timothy Jordan (ranked 0 p4p, 0 weight class). Over to our ring announcer for the fighter introductions!
 |
|
 |
| 170 cm
18
155 lbs
0 - 7 - 0 |
|
179 cm
20
155 lbs
0 - 0 - 0 |
BJJ Blue Belt
Improved boxing
Good chin |
|
BJJ Blue Belt
Brawler
Solid chin |
|
| |
|
Ladies and gentlemen. This fight is 3 rounds, in the lightweight division.
Introducing the fighter to my left, fighting out of the red corner.
With a record of
0 - 7 - 0, fighting out of Las Vegas, Sampson Kesler!
And introducing the fighter to my right, fighting out of the blue corner.
With a record of
0 - 0 - 0, fighting out of Las Vegas, Timothy Jordan!
The judges for this bout are Tiny Johnson, Wesley Smith and George Francis.
The bell rings for round one and we are underway!
Kesler fails in his attempt to clinch.
Kesler looks exhausted already! Oh dear, he should have come in in better shape than this!
Jordan darts in and lands a nice takedown into half guard.
Jordan frees up his trapped foot and advances to mount.
Jordan throws some shoulder strikes here and then postures up. Oh, he's gone for an armbar! Kesler has his hands clasped together but Jordan breaks the hold and Kesler is forced to tap! This one is aaaaaaaaaaall over! That was lightning fast by Jordan!
Ladies and gentlemen, after 0:29 of round 1, we have a winner by way of Submission (Armbar). Timothy Jordan!
|
|
|
|
|
|
|
|
|
|
|
|
|
|
|
|
|
|
|
|
|
|
|
| S |
C
A |
G |
S |
C
B |
G |
|
S |
C |
G |
|
energy
A | B |
|
hype
A | B |
|
pop
A | B |
|
mgr
A | B |
|
FIGHT
RATING
80% |
|
|
|
|
|
|
|
Undercard bout
|
Coming up we have a welterweight MMA rules bout between Alaska Brown (ranked 0 p4p, 0 weight class) and Johan Blick (ranked 0 p4p, 0 weight class). Both fighter's entrance songs getting the crowd jumping here.
 |
|
 |
| 169 cm
18
170 lbs
0 - 0 - 0 |
|
187 cm
22
177 lbs
3 - 0 - 0 |
BJJ White Belt
Good knees
Granite chin |
|
BJJ Purple Belt
Counter striker
Granite chin |
|
| |
|
Ladies and gentlemen. This fight is 3 rounds, in the welterweight division.
Introducing the fighter to my left, fighting out of the red corner.
With a record of
0 - 0 - 0, fighting out of Las Vegas, Alaska Brown!
And introducing the fighter to my right, fighting out of the blue corner.
With a record of
3 - 0 - 0, fighting out of Las Vegas, Johan Blick!
The judges for this bout are Stewart Dunkirk, Robert Twigg and Gwen Towbar.
The bell rings for round one and we are underway!
Blick will have to do better than that with his takedown attempts.
Brown looks exhausted already! Oh dear, he should have come in in better shape than this!
Brown fails with the takedown
and Blick counters with a nice double leg into guard.
Blick forces his way into half guard.
Blick is trying for a kimura here. Brown looks like he's in a lot of pain... and he's tapping out! Blick wins by kimura!
Ladies and gentlemen, after 0:39 of round 1, we have a winner by way of Submission (Kimura). Johan Blick!
|
|
|
|
|
|
|
|
|
|
|
|
|
|
|
|
|
|
|
|
|
|
|
| S |
C
A |
G |
S |
C
B |
G |
|
S |
C |
G |
|
energy
A | B |
|
hype
A | B |
|
pop
A | B |
|
mgr
A | B |
|
FIGHT
RATING
47% |
|
|
|
|
|
|
|
Undercard bout
|
Coming up we have a light heavyweight MMA rules bout between Kari Taalasmaa (ranked 0 p4p, 0 weight class) and Chris Holt (ranked 0 p4p, 0 weight class). Chris Holt has the eye of the tiger tonight.
 |
|
 |
| 190 cm
18
205 lbs
2 - 0 - 0 |
|
180 cm
20
195 lbs
2 - 1 - 0 |
BJJ Blue Belt
Basic striking
Granite chin |
|
BJJ Blue Belt
Basic striking
Solid chin |
|
| |
|
Ladies and gentlemen. This fight is 3 rounds, in the light heavyweight division.
Introducing the fighter to my left, fighting out of the red corner.
With a record of
2 - 0 - 0, fighting out of Las Vegas, Kari Taalasmaa!
And introducing the fighter to my right, fighting out of the blue corner.
With a record of
2 - 1 - 0, fighting out of Las Vegas, Chris Holt!
The judges for this bout are George Francis, Alan Glass and Gwen Towbar.
The bell rings for round one and we are underway!
Holt closes the distance and looks for a trip takedown... aaaand he's got it - Holt lands in his opponent's guard.
Taalasmaa throws some sloppy strikes off his back.
Taalasmaa wants to sweep but no luck.
Holt won't allow Taalasmaa to get back to his feet.
Holt keeps in close for a moment and lands a decent shot to the side of Taalasmaa's head.
Holt wants to control from the top but Taalasmaa keeps moving.
The ref warns both fighters not to hold the cage as they work up against the meshing.
Taalasmaa wants to sweep but no luck.
Holt pushes down on Taalasmaa's leg and manages to get into half guard.
Taalasmaa wants to get back to full guard.
Taalasmaa is trying to stand back up but Holt is controlling him
Taalasmaa is breathing heavily.
Taalasmaa is looking to improve his position.
The fighters are pressed up against the cage, both looking to find a bit of space to work.
That's one minute gone in the round.
Well, the referee has seen enough. Neither fighter is active enough on the ground so he's stood them back up.
Taalasmaa keeps the fight on the outside.
Holt scores with a head kick.
Taalasmaa tries for a takedown but Holt circles away easily
and Holt counters with a body kick that brings a smile to the face of both fighters.
Holt lands a right hook to the body.
Holt stuns Taalasmaa with a nice body shot, before stepping back out of range.
Holt cracks the inside of Taalasmaa's front leg.
Taalasmaa takes a kick to the side of the head.
Taalasmaa shoots and misses
and Holt counters with an outside leg kick.
Taalasmaa shoots in for a takedown but Holt shows good takedown defense.
That's three failed takedown attempts in the round for Kari Taalasmaa. That's going to take a lot out of him.
Holt tries to land a front kick but Taalasmaa steps back. That was a bit too telegraphed.
Taalasmaa gets his takedown attempt stuffed easily
and Holt counters with a leg kick that reverborates around the arena.
Holt lands with a thumping leg kick.
Wooooo! Give it up for these two warriors! They are putting on a show!
Taalasmaa tries for a takedown but Holt circles away easily
and Holt counters with a nice body kick.
Taalasmaa scores a takedown into full mount!
Taalasmaa throws a sloppy strike and Holt uses the opportunity to reverse the position! A bit of a scramble here and Holt has ended up in Taalasmaa's guard.
That's two minutes gone in the round.
Taalasmaa keeping moving, preventing Holt from controlling successfully.
Taalasmaa wants to hit a switch here but Holt passes into full mount! Oh no, disaster for Taalasmaa there!
Holt is landing with some decent strikes but Taalasmaa is trying to advance his position so the referee is letting the fight continue.
Holt looking to control but Taalasmaa is working nicely, looking to advance position himself.
Holt lands a nice shot to the head.
Taalasmaa is in all sorts of trouble here.
Holt tries to control but Taalasmaa wriggling away.
Taalasmaa sneaks a leg under to get to half guard.
That's three minutes gone in the round.
Holt prevents Taalasmaa from standing back up.
Taalasmaa is looking to regain full guard. Not this time though.
Taalasmaa strikes from the bottom but Holt uses the opportunity to move to side control.
Taalasmaa is looking to reverse the position.
Taalasmaa is working hard here to advance position.
Well, the referee has seen enough. Neither fighter is active enough on the ground so he's stood them back up.
Taalasmaa fails with the takedown
and Holt finishes the little exchange by landing a big kick to the body.
That's four minutes gone in the round.
Neither fighter has done anything of merit for a good minute or two here and the crowd are not happy about it.
Taalasmaa looking to shoot here. He's gone for it and he's landed a takedown into mount! Oh, that's bad for Holt!
Taalasmaa lands with some strikes.
Taalasmaa landing strikes from the mount.
Taalasmaa throws an elbow from mount that misses. Lucky escape for Holt because Taalasmaa loaded up on that one.
Taalasmaa looking to finish with strikes here!
Taalasmaa has his opponent pinned against the cage, landing some nasty ground and pound that is really making a bit of a mess out of Holt's face.
Taalasmaa scores with a couple of good head shots there.
Holt is rocked!
Taalasmaa looking to finish with strikes here!
Holt is still in real trouble! Can Taalasmaa finish him?
Taalasmaa with good strikes from the mount here!
The crowd are going absolutely nuts as the round comes to an end - what a fantastic round of action!
Taalasmaa punishing his opponent with strikes.
Taalasmaa lands a nice shot to the head.
Taalasmaa working the ground and pound effectively.
Taalasmaa with good strikes from the mount here!
And thats the end of the round the fighters go back to their corners.
Kari Taalasmaa dominated that round.
That's the end of the round. The referee orders the cornermen out of the cage so we can get back down to business.
Taalasmaa gets his takedown attempt stuffed easily
letting Holt counter with a right hand.
Nice takedown defense from Holt. No joy for Taalasmaa on that attempt.
Taalasmaa looks for a takedown here. Will he get it? Holt is fending him off so far but Taalasmaa persists. Nope, Holt circles away and we're back to standing.
That's three failed takedown attempts in the round for Kari Taalasmaa. That's going to take a lot out of him.
Taalasmaa looks for a takedown but Holt sprawls well.
Kari Taalasmaa seems to be the more aggressive standup fighter in this bout.
Taalasmaa shoots in for a takedown. "Ole!" shouts Holt as he jumps to the side.
Taalasmaa shoots in but no luck this time.
Taalasmaa has a takedown stuffed.
Taalasmaa shoots in looking for a takedown. Holt tries to sprawl out of it but Taalasmaa keeps driving through. The fighters are pinned against the cage. Holt manages to get underhooks and after a bit of a struggle, circles away and we're back to standing.
Taalasmaa shoots for a double leg takedown but Holt sprawls well. He's pushed Taalasmaa's face into the mat and manages to get back to his feet relatively easily.
Taalasmaa fails with the takedown.
Holt seems to have recovered his senses.
Taalasmaa takes a push kick to the midsection and stumbles backwards.
Taalasmaa shoots in and drives through. Holt sprawls well.
Taalasmaa shoots in for a takedown but Holt shows good takedown defense.
That's one minute gone in the round.
Holt misses with a series of wild punches.
Both fighters are absolutely exhausted here.
A cross from Holt lands.
Taalasmaa shoots in for a takedown - he's clinched up with Holt but Holt pushes him off and we're back to square one.
Holt dances in quickly and lands a nice inside leg kick on Taalasmaa. That did some damage!
Taalasmaa takes a nice looking leg kick right on the meat of his thigh there.
Taalasmaa closes the distance and clinches up, looking for a takedown. He shifts his weight and gets a nice trip into half guard.
Taalasmaa is looking to stall here but Holt recovers full guard.
Holt is avoiding any damage by keeping wrist control.
Taalasmaa wanted to stand there but Holt had control of the position.
Holt is working an open guard so Taalasmaa takes the opportunity to get back to his feet.
Taalasmaa shoots in but Holt avoids the takedown attempt easily.
Taalasmaa looks for a takedown here. Will he get it? Holt is fending him off so far but Taalasmaa persists. Nope, Holt circles away and we're back to standing.
That's two minutes gone in the round.
Taalasmaa looks for a takedown here. Will he get it? Holt is fending him off so far but Taalasmaa persists. Nope, Holt circles away and we're back to standing.
Holt tries to close the distance and clinch but Taalasmaa swats him to one side with an open hand palm strike and circles away.
Taalasmaa closes the distance and clinches up with Holt, looking for a takedown. Taalasmaa pushes Holt against the cage but Holt circles to the side and manages to break the clinch.
Holt throws a nice outside leg kick.
Taalasmaa closes the distance and looks for a trip takedown... aaaand he's got it - Taalasmaa lands in his opponent's guard.
This has been an exciting period of action!
Taalasmaa missing there with some ground and pound from the guard.
Taalasmaa is looking to work some ground and pound but Holt has wrist control.
Holt preventing the ground and pound from doing any damage.
Holt wants to stand but Taalasmaa is controlling the position.
Holt working a defensive guard here.
Taalasmaa passes Holt's left leg - he's now in half guard.
Taalasmaa is trying to control the action in half guard but Holt is working away on the bottom, looking perhaps to get back to full guard.
That's three minutes gone in the round.
Taalasmaa working the head and body with strikes.
Taalasmaa throwing shots but Holt is blocking nicely.
Holt is looking for a sweep. Taalasmaa is wise to his cunning plan and keeps the top position.
Taalasmaa wants to stand up but Holt has a hold of him and won't allow it.
Holt works his way to full guard. Good work.
Taalasmaa stands up over Holt, holding his feet. He dives back in and lands a decent shot to the head.
Holt keeping moving, preventing Taalasmaa from controlling successfully.
Holt looking for a sweep. Not yet Holt, not yet.
Taalasmaa connects with a couple of short punches.
Taalasmaa gets to his feet and steps away from his opponent.
Taalasmaa shoots in for a takedown - he's clinched up with Holt but Holt pushes him off and we're back to square one.
Holt connects with a high kick.
That's four minutes gone in the round.
Taalasmaa circles away from the clinch attempt.
A head kick misses from Holt.
Holt looks for the body kick but Taalasmaa saw that one coming.
Holt lands a front kick.
Holt stuffs the takedown attempt from Taalasmaa. Taalasmaa gets slowly back to his feet.
Taalasmaa looks for a takedown but Holt sprawls well.
Kari Taalasmaa is looking to throw some combinations by the looks of things.
Holt shoots in for a takedown! He's got it and he's managed to land in full mount! That's better than Holt was expecting from the takedown attempt, I'm sure!
Taalasmaa in a bad spot here, taking shots to the head.
Taalasmaa bucks up and manages to get a nice reversal! He's in guard on the top - nicely done!
The crowd are loving this. Great action here.
Holt looking to control.
Kari Taalasmaa overall seems to be getting the better of the ground position in the fight so far.
As the round comes to an end the crowd are showing their appreciation for a great round of action.
Taalasmaa has gone for a leg lock! Holt slips out almost immediately though and dives into Taalasmaa's guard.
Holt stands up over Taalasmaa, holding his feet. He dives back in and lands a decent shot to the head.
And thats the end of the round the fighters go back to their corners.
Chris Holt showed his class in that round. I'd imagine he'll take it on all the scorecards.
That's time! Taalasmaa's corner gives him a slap on the ass as he gets ready to fight. And we move into the final round!
Holt drives through and clinches with Taalasmaa against the cage.
Nice body punch from Holt.
Taalasmaa is looking for a takedown up against the cage. Holt gets underhooks though and prevents the takedown attempt.
Holt cracks Taalasmaa with a nice body shot.
Holt breaks the clinch and we're back to striking at distance.
Holt connects with a high kick.
Holt throws a head kick that Taalasmaa semi-blocks.
The fight moves into the clinch position.
Taalasmaa takes a knee right on the jaw!
Taalasmaa is looking for a takedown up against the cage. Holt gets underhooks though and prevents the takedown attempt.
Nice body punch from Holt.
Holt breaks the clinch.
Taalasmaa with a lazy takedown attempt
and Holt counters with a nice leg kick.
That's three failed takedown attempts in the round for Kari Taalasmaa. That's going to take a lot out of him.
Taalasmaa tries for a takedown but Holt sees it coming a mile off and avoids it easily.
Taalasmaa shoots in and gets a takedown into half guard. Taalasmaa showed some decent athleticism there.
Both fighters are breathing heavily.
Taalasmaa scoring with strikes to the body and head.
That's one minute gone in the round.
Holt is looking to control Taalasmaa's leg but it's slowly edging free. Can Holt avoid being mounted?
Holt is working for an escape here. He's hooked one of Taalasmaa's legs and he's managed to sneak out and take Taalasmaa's back!
Holt is staying calm and holding on to the back position, whilst working on a rear naked choke. Taalasmaa is defending well though. Holt let's go of the attempt for now.
Taalasmaa rolls and manages to get back to half guard. Nicely done.
Taalasmaa misses with some strikes from the bottom.
Taalasmaa kicks Holt off and gets back to his feet.
Taalasmaa bobs and weaves into range and then changes levels and scores with a nice takedown into side control.
Taalasmaa passes to full mount! That's big trouble for Holt!
Taalasmaa landing strikes, looking to finish!
This has been an exciting period of action!
The crowd growing excited in anticipation of a finish here! Right on cue, Taalasmaa cracks his opponent with a massive right hand that draws loud cheers!
Holt is working to get back to half guard.
That's two minutes gone in the round.
Taalasmaa with a couple of short strikes.
The referee warns Holt that he has to improve his position here as he takes two more clean shots to the head.
Taalasmaa lands a shot to the body, followed up by a shot to the exposed head of his trapped opponent.
Taalasmaa breaks from Holt's wrist control and lands an elbow.
Taalasmaa fakes a shot to the body and cracks his opponent in the head. Nice ground and pound there!
Holt wants to control but Taalasmaa is having none of it.
Holt is in a horrible position here. Taalasmaa smacks him with another shot as he tries to escape the position.
A nice elbow there by Taalasmaa.
Taalasmaa lands a big elbow.
Taalasmaa scoring with some good ground and pound from mount here. Will he manage to finish Holt?
Taalasmaa putting on the heat here with some good ground and pound!
Taalasmaa is landing with some decent strikes but Holt is trying to advance his position so the referee is letting the fight continue.
That's three minutes gone in the round.
Taalasmaa working away from the top, dropping strikes.
Taalasmaa lands a couple of nice shots there from mount.
Holt working to try and regain half guard.
Taalasmaa lands with some strikes.
The fans in attendance giving it up for the two fighters, who have really let it all hang out in the last minute or so!
Taalasmaa looking to finish Holt with some ground and pound. This is bad for Holt!
Taalasmaa fakes a shot to the body and cracks his opponent in the head. Nice ground and pound there!
Taalasmaa avoids the attempt from Holt to control.
Taalasmaa with shots to the head and body - Holt looks very uncomfortable down there.
Taalasmaa looking to ground and pound his opponent to a finish here.
Holt regains half guard.
Taalasmaa lands a big shot. The thud that echoes around the arena is like music to the fans' ears.
Holt gets full guard.
Taalasmaa with a flurry of punches that miss.
That's four minutes gone in the round.
Holt wants to sweep here but Taalasmaa controlling him for the moment.
Taalasmaa is pushing down on Holt's leg trying to pass to half guard. Holt is fighting to maintain full guard but Taalasmaa has managed to sneak the leg through.
Taalasmaa trying to mount his opponent but Holt defends it.
Taalasmaa lands strikes from half guard.
Taalasmaa wants to stand but his hand is trapped. Holt uses the opportunity to regain full guard.
Taalasmaa tries to free his leg and advance position but Holt is retaining full guard.
Taalasmaa thows a big elbow that misses.
Holt avoiding any damage from the ground and pound.
The crowd are going absolutely nuts as the round comes to an end - what a fantastic round of action!
Holt bucks up whilst keeping hold of a body lock, managing to reverse the position. Now he's in top in Taalasmaa's guard.
Holt postures up and lands a big shot to Taalasmaa's brow.
Taalasmaa is edging up against the cage. He's using the cage to get back to his feet. Nice work there - the fighters are clinched.
Holt is stalling here. The referee will be looking to step in if he doesn't pick up the pace.
And that's the end of the fight!
Kari Taalasmaa showed his dominance in that final round.
I think Taalasmaa has won this one but let's see what the judges have to say. Over to the ring announcer for the scorecards.
Ladies and gentlemen, after 3 rounds of action, we go to the scorecards for a decision.
Judge George Francis scores the fight 29:28
Judge Alan Glass scores the fight 29:28
Judge Gwen Towbar scores the fight 29:28
In favor of your winner, by unanimous decision... Kari Taalasmaa!
|
|
|
|
|
|
|
|
|
|
|
|
|
|
|
|
|
|
|
|
|
|
|
| S |
C
A |
G |
S |
C
B |
G |
|
S |
C |
G |
|
energy
A | B |
|
hype
A | B |
|
pop
A | B |
|
mgr
A | B |
|
FIGHT
RATING
100% |
|
|
|
|
|
|
|
Co-main event
|
Coming up we have a welterweight MMA rules bout between Piotrek Fabianski (ranked 0 p4p, 0 weight class) and John Lorenz (ranked 0 p4p, 0 weight class). Both fighter's entrance songs getting the crowd jumping here.
 |
|
 |
| 178 cm
19
170 lbs
3 - 1 - 0 |
|
174 cm
22
181 lbs
3 - 1 - 0 |
BJJ Blue Belt
Counter striker
Granite chin |
|
Good wrestler
Basic striking
Solid chin |
|
| |
|
Ladies and gentlemen. This fight is 3 rounds, in the welterweight division.
Introducing the fighter to my left, fighting out of the red corner.
With a record of
3 - 1 - 0, fighting out of Las Vegas, Piotrek Fabianski!
And introducing the fighter to my right, fighting out of the blue corner.
With a record of
3 - 1 - 0, fighting out of Las Vegas, John Lorenz!
The judges for this bout are George Francis, Frank Dennis and Chris Downing.
The bell rings for round one and we are underway!
Fabianski tries a switch kick but it misses it's target.
Lorenz tries to close the distance and clinch up but Fabianski swats him away and circles back towards the center.
Fabianski throws a feint and then finishes with a kick to the body.
Lorenz closes the distance and gets a double leg, slamming Fabianski to the mat! Fabianski manages to get full guard.
Fabianski is working actively from the bottom, looking for submissions. He's escaped his hips to the side and he's going for an armbar! Lorenz has his hands clasped together but Fabianski extends an breaks Lorenz's desperate grasp, forcing a tap out due to armbar! Nice BJJ displayed there by Fabianski.
Ladies and gentlemen, after 0:31 of round 1, we have a winner by way of Submission (Armbar). Piotrek Fabianski!
|
|
|
|
|
|
|
|
|
|
|
|
|
|
|
|
|
|
|
|
|
|
|
| S |
C
A |
G |
S |
C
B |
G |
|
S |
C |
G |
|
energy
A | B |
|
hype
A | B |
|
pop
A | B |
|
mgr
A | B |
|
FIGHT
RATING
72% |
|
|
|
|
|
|
|
Main event
|
Coming up we have a light heavyweight MMA rules bout between KJ Kesler (ranked 0 p4p, 0 weight class) and Javian Westmoreland (ranked 0 p4p, 0 weight class). Westmoreland has chosen prayer for the dead as his entrance music. Javian Westmoreland told me before the fight that he's been watching a lot of DVDs so let's see if that helps him in this one! I can't wait to find out!
 |
|
 |
| 185 cm
22
200 lbs
2 - 0 - 0 |
|
190 cm
18
207 lbs
2 - 1 - 0 |
BJJ Purple Belt
Counter striker
Granite chin |
|
BJJ Blue Belt
Counter striker
Determined |
|
| |
|
Ladies and gentlemen. This fight is 3 rounds, in the light heavyweight division.
Introducing the fighter to my left, fighting out of the red corner.
With a record of
2 - 0 - 0, fighting out of Las Vegas, KJ Kesler!
And introducing the fighter to my right, fighting out of the blue corner.
With a record of
2 - 1 - 0, fighting out of Las Vegas, Javian Westmoreland!
The judges for this bout are Chris Downing, Stewart Dunkirk and Wesley Smith.
The bell rings for round one and we are underway!
Kesler gets a takedown into half guard.
The fighters are pressed up against the cage, both looking to find a bit of space to work.
Westmoreland looks really tired already! That doesn't bode well for a good, competitive fight!
Kesler is looking for a kimura but he's never going to get it from there.
Westmoreland really doesn't want to stay on the ground with Kesler. If he can't get it back to his feet, it's only a matter of time before he'll be tapping out.
Westmoreland is defending against the submission attempts here by Kesler.
Kesler misses with a head shot. Westmoreland uses the momentum to regain guard.
Westmoreland has a closed guard, preventing Kesler from standing up.
Westmoreland looking for submissions from the bottom here. Moving his hips around, possibly looking for an armbar.
That's one minute gone in the round.
Kesler advances to half guard.
Westmoreland slips a foot under and gets full guard. Nice work.
Westmoreland is looking for a triangle but Kesler pushes his legs off easily.
Kesler is just sitting in guard, looking to avoid any submissions.
Westmoreland looking for a guillotine here but Kesler defends easily.
Kesler passes easily into side control. Nice work.
Westmoreland gives up the full mount - oops, sloppy defensive grappling there!
That's two minutes gone in the round.
Westmoreland is in all sorts of trouble here.
A nice elbow there by Kesler.
Kesler has his opponent pinned against the cage, landing some nasty ground and pound that is really making a bit of a mess out of Westmoreland's face.
Kesler tries to control but Westmoreland wriggling away.
A nice elbow there by Kesler.
Westmoreland is trying to escape the mount.
Kesler swings around for an armbar and he's got it! Wow, that came out of nowhere! What a finish!
Ladies and gentlemen, after 2:56 of round 1, we have a winner by way of Submission (Armbar). KJ Kesler!
|
|
|
|
|
|
|
|
|
|
|
|
|
|
|
|
|
|
|
|
|
|
|
| S |
C
A |
G |
S |
C
B |
G |
|
S |
C |
G |
|
energy
A | B |
|
hype
A | B |
|
pop
A | B |
|
mgr
A | B |
|
FIGHT
RATING
55% |
|
|
|
|
|
|
|
|
|
|

