|
|
PBP Commentary |
Coming up we have a featherweight MMA rules bout between Sone Fujimaro (ranked 1407 p4p, 1812 weight class) and Marshal Mayhem (ranked 159 p4p, 193 weight class). Marshal Mayhem has the eye of the tiger tonight.
 |
|
 |
| 174 cm
28
155
8 - 8 - 0 |
|
178 cm
28
157
21 - 8 - 0 |
Good wrestling
World class boxer
Insanely flexible |
|
Good wrestler
World class MT
Granite chin |
|
| |
|
Ladies and gentlemen. This fight is 3 rounds, in the featherweight division.
Introducing the fighter to my left, fighting out of the red corner.
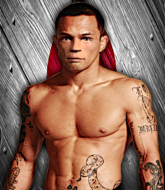
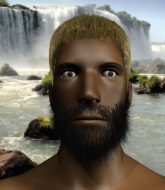
With a record of 8 - 8 - 0, fighting out of Las Vegas, Sone Fujimaro!
And introducing the fighter to my right, fighting out of the blue corner.
With a record of 21 - 8 - 0, fighting out of Tokyo, Marshal Mayhem!
The judges for this bout are Yukihiro Yamamoto, Taro Takaoka and Hirohito Nitta.

The bell rings for round one and we are underway!
Fujimaro tried to score with a low kick but Mayhem checks it.
Fujimaro moves out of range of the strikes.
Fujimaro has been working on his boxing with his coaches at Desert Fitness & Training (14 Elite Coaches) in the buildup to the fight.
Mayhem throws a lazy right hand but Fujimaro sees it coming a mile off and sidesteps it easily.
Sone Fujimaro seems to be the more aggressive standup fighter in this bout.
Fujimaro shapes like he's going to throw a leg kick but settles back down.
Fujimaro fakes a jab and scores with a low kick.
Fujimaro looking to take his opponent's legs away with the low kicks.
A head kick from Fujimaro lands but Mayhem takes it in his stride.
A kick lands to the mid section there for Fujimaro.
Fujimaro looks to score with a jab to the body but Mayhem is just out of range.
Mayhem feints the counter takedown.
Mayhem throws a series of punches but Fujimaro avoids them all with ease.
Mayhem scores with a hook to the body. Fujimaro takes a step back and tries to catch his breath.
Mayhem shoots for a double leg takedown but Fujimaro sprawls well. He's pushed Mayhem's face into the mat and manages to get back to his feet relatively easily.
An attempted straight right counter from Fujimaro misses the target.
A slow jab from Fujimaro misses its intended target.
Mayhem misses with a hook
and Fujimaro counters with a leg kick that reverborates around the arena.

That's one minute gone in the round.
Mayhem cracks Fujimaro with a right hand to the side of the head.
Mayhem lands with a straight right. Fujimaro didn't see that one coming.
Mayhem misses with a body shot.
Mayhem throws the left hand but Fujimaro avoids the punch easily.
Fujimaro lands a jab to the nose.
Mayhem loads up on a big right hand but Fujimaro slips the punch.
Mayhem connects with a body shot that sends Fujimaro's belly button to the back.
Mayhem connects with a body shot.
Fujimaro misses with a wild body shot.
Fujimaro misses with a wild body shot.
Fujimaro misses with a hook
enabling Mayhem to counter with a crisp jab.
Fujimaro throws a jab but it's blocked by Mayhem.
Mayhem uses good footwork to get in and out and land a nice right hand before Fujimaro has time to react.

That's two minutes gone in the round.
Wooooo! Give it up for these two warriors! They are putting on a show!
Mayhem scores with a jab to the jaw.
Mayhem has been spending a lot of time sparring his boxing in the run up to the fight, trying to sharpen up those hands and look for a knockout.
Nice defenses there by Fujimaro.
Fujimaro scores with a punch to the gut of his opponent.
Mayhem cracks Fujimaro with an open hand slap.
Fujimaro misses with a hook.
Fujimaro on the wrong end of a nice hook.
Mayhem scores with a body shot.
Mayhem takes a body punch but keeps moving.
Mayhem lunges in with an uppercut that skims his opponent's chin.
Mayhem uses some good footwork to avoid the body shot by Fujimaro.
Fujimaro takes a solid shot to the body. That one hurt him but he's trying not to show it.
Sone Fujimaro is looking to keep the fight on the feet at all costs.
Fujimaro sizes up Mayhem with a pawing jab and scores with a straight right down the middle.
Mayhem throws an overhand right that lands on Fujimaro's shoulder, as Fujimaro tries to avoid the shot.

That's three minutes gone in the round.
Fujimaro looking to take his opponent's legs away with the low kicks.
Fujimaro tried to score with a low kick but Mayhem checks it.
Fujimaro misses with an uppercut
and Mayhem counters with a good right hand that lands right on the jaw.
Fujimaro misses with a body shot.
Mayhem misses with a body shot.
Fujimaro comes forward and lands a shot to the body, then darts back out of range.
Fujimaro thuds his right hand into Mayhem's forehead from close range. That could be painful for both fighters.
Mayhem throws an uppercut from half a mile away. Fujimaro sees it coming and avoids it easily.

Mayhem feints and then dives in with a takedown. That was a long way out but the feint bought him enough time to close the distance and complete the takedown. Now we'll play guard for a bit and see who can get the better of that position.
Mayhem with a flurry of punches that miss.
Mayhem throws a strike but Fujimaro rolls with it and manages to sweep. Now he's in guard on top.

The fans in attendance giving it up for the two fighters, who have really let it all hang out in the last minute or so!

Mayhem throwing his legs up looking for a triangle.

That's four minutes gone in the round.
Mayhem looking for a guillotine here but Fujimaro defends easily.
Fujimaro trying to stand up but can't free himself from Mayhem's guard.
Mayhem looking for submissions off his back, moving his hips, looking for an opening.
Mayhem isolates an arm and boxes in a triangle. Fujimaro stacks Mayhem on his neck as he steps over and passes to the side. He's now in a much more dominant position where he can look to do some serious damage. Nice move by Fujimaro!

Fujimaro decides to stand up, so the ref orders Mayhem to his feet.
And that is the end of the round. The fighters go back to their corners.
A close round but Marshal Mayhem will probably get the nod.
That's the end of the round. The referee orders the cornermen out of the cage so we can get back down to business.

Fujimaro misses with a hook
and Mayhem counters with a quick right hand to the jaw.
Fujimaro uses good footwork to get in and out and land a nice right hand before Mayhem has time to react.
Fujimaro on the wrong end of a nice hook.
Mayhem takes an uppercut right on the jaw but it doesn't phase him.
Mayhem misses with a hook to the body
enabling Fujimaro to counter with a crisp jab.
Mayhem throws a jab but it's blocked by Fujimaro.
Fujimaro fires out a quick counter leg kick but Mayhem just manages to avoid it.
A good leg kick by Fujimaro.
Fujimaro connects with a leg kick.
Mayhem throws a big shot that misses.
Fujimaro misses with a low kick.
Fujimaro tries to land with a swinging hook to the body but Mayhem was well out of range. Poor timing from Fujimaro.
Mayhem avoids a lazy jab quite easily.
We've seen a great period of action over the last minute or so - credit to both fighters for going all out!
Mayhem throws a big shot that misses.
Fujimaro fakes a jab and scores with a low kick.
That's one minute gone in the round.
Mayhem connects with a good right hand that stumbles Fujimaro. Fujimaro circles away out of range and recomposes himself.
Mayhem waving his hands out in front of him, looking to distract Fujimaro.
Fujimaro lands with a nice low kick. That'll leave a bruise.
Fujimaro misses with an uppercut.
The crowd cheers as Fujimaro lands an impressive looking overhand right. Mayhem doesn't seem phased though.
Sone Fujimaro is winning the standup battle so far.
A slapping leg kick lands for Fujimaro.
Mayhem swings and misses with a hook to the body.
Jab by Fujimaro.
Fujimaro throws a couple of head shots and lands with the final one - a decent hook, which struck Mayhem on the side of the head.
Fujimaro lands with a thumping leg kick.
Fujimaro fakes high and swings low for a body shot but Mayhem manages to avoid it.
Fujimaro defending well as Mayhem loads up on a big left hand.
That's two minutes gone in the round.
Mayhem throws a hard body shot but it just misses.
This is a great period of action - very entertaining stuff!
Fujimaro's jab looks to have found its range, popping Mayhem under the eye.
Mayhem throws a poor cross that misses

and Fujimaro counters with a nice right hand that sends Mayhem toppling to the canvas! Mayhem scrambles and gets back to his feet - can Fujimaro finish him?!

Mayhem is rocked!
Fujimaro connects with a picture perfect right hand that knocks Mayhem out cold! This one is over in a flash!
Ladies and gentlemen, after 2:21 of round 2, we have a winner by way of KO (Punch). Sone Fujimaro!
After winning the bout, Sone Fujimaro thanked all his fans and promised he'd do even better in his next fight. The crowd seemed to love his humility.
|
|
|
|
|
|
|
|
|
|
|
|
|
|
|
|
|
|
|
|
|
|
|
| S |
C
A |
G |
S |
C
B |
G |
|
S |
C |
G |
|
energy
A | B |
|
hype
A | B |
|
pop
A | B |
|
mgr
A | B |
|
FIGHT
RATING
68% |
|
|
|
|
|
|

