|
|
PBP Commentary |
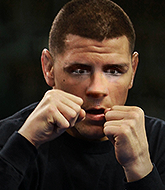
Coming up we have a welterweight MMA rules bout between Niklas Aho (ranked 1601 p4p, 2215 weight class) and Harris Mint (ranked 213 p4p, 283 weight class). Rumors backstage are that the fighters have been paid to keep it standing but we know that would never happen in MMA!
 |
|
 |
| 184 cm
25
177
8 - 6 - 0 |
|
188 cm
26
175
8 - 4 - 0 |
Abu Dhabi Champ
Excellent MT
Very quick |
|
Excellent grappler
World class boxer
Good gas tank |
|
| |
|
Ladies and gentlemen. This fight is 3 rounds, in the welterweight division.
Introducing the fighter to my left, fighting out of the red corner.
With a record of 8 - 6 - 0, fighting out of Las Vegas, Niklas Aho!
And introducing the fighter to my right, fighting out of the blue corner.
With a record of 8 - 4 - 0, fighting out of Las Vegas, Harris Mint!
The judges for this bout are Chris Edwards, James Ackerman and Daniel Bishop.

The bell rings for round one and we are underway!
Mint dives in for a single leg takedown but Aho sprawls and the fighters end up clinched against the cage.

Mint shoots in for a takedown! He's got it and he's managed to land in side control! That's better than Mint was expecting from the takedown attempt, I'm sure!
The fighters are pressed up against the cage, both looking to find a bit of space to work.

Mint tries for a kimura but Aho is defending well.
Mint wants to control for a moment but Aho uses the opportunity to move back to half guard.
Mint seems to be looking for submissions.
We've had a slow start to the round here - hopefully the action picks up.
Mint is thinking about going for an arm triangle but he can't free his leg.
Aho is looking to improve his position.

That's one minute gone in the round.
Mint is looking to advance position but Aho won't allow it.
Aho is in a tricky position. We've heard reports from his gym mates at The Jungle Room that he's been drilling escapes, so let's see if he can get back to his feet.
Mint is trying to work for a kimura but Aho is defending well.
Aho is in trouble now - Mint has advanced to mount!
Aho is squirming around, avoiding Mint's attempts to control the action.
The ref warns both fighters not to hold the cage as they work up against the meshing.
Mint is in full mount, looking to secure a guillotine but Aho is surviving well by controlling Mint's body position as best he can.
Aho is trying to escape the mount.

That's two minutes gone in the round.
Aho is squirming around, avoiding Mint's attempts to control the action.
Mint takes his opponent's back. Perhaps a chance to lock up a rear naked choke here.
Aho fending off the submission attempt from Mint.
Mint doesn't have the hooks in and Aho manages to turn into his guard.
Aho slips nicely into half guard.
Mint makes his way to full guard. A much better position for Mint.
Mint is working an open guard here, looking to improve his position. No doubt that will leave him open to counters but at least he's being more offensive.

That's three minutes gone in the round.
Aho trying to pass the guard but can't manage it just yet.
Mint is looking for a guillotine. You can't force these things though and Aho defends well.
Mint trying to control the position.
Aho tries to free his leg and advance position but Mint is retaining full guard.
Mint has a loose triangle. He'll be looking to tighten that up but Aho can see exactly what he's planning and manages to posture up and free himself.
Aho passes Mint's left leg - he's now in half guard.

Aho is trying to work for a kimura but Mint is defending well.
Mint slips a foot under and gets full guard. Nice work.

That's four minutes gone in the round.
Mint looking for submissions from the bottom here. Moving his hips around, possibly looking for an armbar.
Aho engaging in some classic timewasting tactics.
Mint is throwing his legs up, looking for submissions. Aho is aware though and is defending well.
Mint escapes his hips to the side and looks to be working for an armbar. Aho gives him a little smile and shakes his head. No chance.
Mint keeping moving, preventing Aho from controlling successfully.
The crowd thankful this round is nearly over.
And that is the end of the round. The fighters go back to their corners.
Harris Mint dominated that round.
The minute break is over - no more time for sponges and pep talks - back to the action!

Mint shoots in looking for a takedown but Aho manages to keep the fight standing, pushing Mint's face into the canvas for good measure before circling away.
Aho feinted with a counter takedown.
Nice takedown defense from Aho. No joy for Mint on that attempt.
Mint dives in and grabs Aho's left leg, looking for a takedown. Aho pushes down on Mint's head and hops out.
Niklas Aho has stuffed three takedown attempts in the round now. That's going to take a lot out of Harris Mint.

Aho clinches with his opponent.
Mint tries a shoulder strike but it doesn't do any damage.
Mint has managed to pull guard. Let's see whether he can work an aggressive guard. It will also be interesting to see what tactics Aho uses from the top position.
Aho pushes down on Mint's leg and manages to get into half guard.
Aho looking to pass the half guard. Not this time.
Mint is trying to control but can't.
We've had a slow start to the round here - hopefully the action picks up.
Aho is working for a kimura but Mint is defending it quite comfortably.
Aho tries to pass the half guard into mount. Mint knows what he's doing though and prevents the attempt.
That's one minute gone in the round.
Aho looking for a kimura but he'll have to free his other leg if he wants to finish that. Perhaps he's just using it as a distraction technique.
Mint keeping hold of Aho's head, controlling as best he can.
Mint is trying to get back to full guard.
Mint is not content to let Aho control the position.
Mint is looking to improve his position.
That's two minutes gone in the round.
The crowd are hurling abuse towards the fighters... You can hardly blame them though because there isn't a lot going on in the fight.
Mint is defending against the submission attempts here by Aho.
Mint manages to get to full guard.
Mint controls Aho momentarily but Aho frees himself.
Aho stands up and looks to throw the legs aside to pass to side control. Mint swivels though and keeps the full guard.
Mint is looking for a triangle but Aho pushes his legs off easily.
That's three minutes gone in the round.
Mint working a defensive guard here.
Mint is in a good position here but he's just trying to control... And he's not even managing to do that successfully.
Mint has a loose triangle. He'll be looking to tighten that up but Aho can see exactly what he's planning and manages to posture up and free himself.
Mint working for a triangle but Aho defends it easily.
Aho drops back for a leg! It's a sloppy attempt though and Aho jumps back into guard quickly, to retain the dominant position.
Mint throwing his legs up looking for a triangle.
That's four minutes gone in the round.
The crowd are showing their displeasure at the lack of action as loud boos ring out around the arena.
Aho thinks about going for a leg but decides against it, in order to maintain the position.
Aho stopping the sweep attempt from Mint.
Mint is persisting with the attempt to improve his position.
Aho wants to control from the top but Mint keeps moving.
Aho drops back looking for a leg! Mint is in trouble here! The fighters roll with the hold and Mint manages to kick Aho off! Aho jumps back into Mint's guard.
Aho passes Mint's right leg, so he's now in half guard.
Boooooooooooooooooooo!!! God, this has been a terrible round. Come on you two, sort yourselves out!
Mint regains full guard. Nicely done.
Mint is controlling Aho's posture.
And that is the end of the round. The fighters go back to their corners.
Niklas Aho dominated that second round.
OK. That's time! The bell goes and we're back to the action. Let's hear some noise people - this is the final round!

Mint closes the distance and clinches up, looking for a takedown. He shifts his weight and gets a nice trip into half guard.
Aho is looking to regain full guard. Not this time though.
Aho is not content to let Mint control the position.
Aho actively working from the bottom here.
We've had a slow start to the round here - hopefully the action picks up.
Mint is working for a kimura but Aho is defending it quite comfortably.
Mint wants to take a breather but Aho is having none of it.
That's one minute gone in the round.
Mint is working for submissions here but there's nothing on.
Mint seems to be working for a kimura but Aho defends the submission attempt.
Aho tries to roll over but Mint keeps him under control.
Mint wants to pass the guard but Aho is defending well.
Mint is looking for an arm triangle, whilst trying to pass to side control. Aho doesn't seem that keen to cooperate though. No luck this time Mint.
Aho moves his hips nicely and gets into full guard.
That's two minutes gone in the round.
The crowd are starting to boo a lack of action.
Mint preventing the sweep.
Aho looking for a guillotine here but Mint defends easily.
Mint is frustrating his opponent with some stalling tactics from top position.
Aho not looking particularly offensive just at the moment.
Mint wants to pass the guard but Aho is keeping the position.
That's three minutes gone in the round.
Mint is pushing down on Aho's leg trying to pass to half guard. Aho is fighting to maintain full guard but Mint has managed to sneak the leg through.
Aho is trying to get back to full guard.
Mint is looking for an arm triangle, whilst trying to pass to side control. Aho doesn't seem that keen to cooperate though. No luck this time Mint.
Mint trying to control from half guard but Aho is working away.
Mint is trying for a guillotine from the top but the pressure isn't in the right place so Aho is just riding it out for now. Mint eventually gives up the hold.
Mint is working for a kimura but Aho is defending it quite comfortably.
Harris Mint has got the better of the ground game so far.
That's four minutes gone in the round.
A few boos can be heard. I'm sure they will multiply if the fighters don't pick up the pace.
Aho tries to roll over but Mint keeps him under control.
Aho is trying to maintain the position but Mint is very close to passing his half guard.
Mint slows the pace down in half guard.
Boooooooooooooooooooo!!! God, this has been a terrible round. Come on you two, sort yourselves out!
Mint is trying a forearm choke
I don't think that's going to do much at this level of the game.
And that's the end of the fight!
Harris Mint comfortably won the final round on my scorecard.
I think Mint has won this one but let's see whether the judges agree with me. Over to the ring announcer for the scorecards.
Ladies and gentlemen, after 3 rounds of action, we go to the scorecards for a decision.
Judge Chris Edwards scores the fight 28:29
Judge James Ackerman scores the fight 28:29
Judge Daniel Bishop scores the fight 28:29
In favor of your winner, by unanimous decision... Harris Mint!
Harris Mint decided to thank the fans in attendance for making a great atmosphere. It seemed to go down pretty well.
|
|
|
|
|
|
|
|
|
|
|
|
|
|
|
|
|
|
|
|
|
|
|
| S |
C
A |
G |
S |
C
B |
G |
|
S |
C |
G |
|
energy
A | B |
|
hype
A | B |
|
pop
A | B |
|
mgr
A | B |
|
FIGHT
RATING
21% |
|
|
|
|
|
|

