|
|
PBP Commentary |
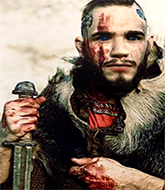
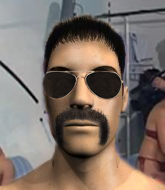
Coming up we have a featherweight MMA rules bout between Thomas Power (ranked 1347 p4p, 142 weight class) and Rad Dood (ranked 4046 p4p, 326 weight class). Both fighters look fresh as a daisy as they make their way towards the cage.
 |
|
 |
| 168 cm
24
159 lbs
12 - 7 - 0 |
|
168 cm
32
152 lbs
8 - 6 - 0 |
Good wrestling
World class boxer
Cardio machine |
|
Powerful takedowns
Excellent boxer
Granite chin |
|
| |
|
Ladies and gentlemen. This fight is 3 rounds, in the featherweight division.
Introducing the fighter to my left, fighting out of the red corner.
With a record of
12 - 7 - 0, fighting out of London, Thomas Power!
And introducing the fighter to my right, fighting out of the blue corner.
With a record of
8 - 6 - 0, fighting out of Los Angeles, Rad Dood!
The judges for this bout are , Don Winkell and Jack Bonds.

The bell rings for round one and we are underway!
Dood works the jab nicely.
Dood looks to throw the jab but Power is out of range.
Dood connects with a nice looking jab.
Dood has been working on his striking defense in training and it's paying off as Power is landing a low percentage of strikes.
A left and a right from Power both land. Nice combination.
Dood takes a nice looking leg kick right on the meat of his thigh there.
Dood with a hook.
Dood thuds his right hand into Power's forehead from close range. That could be painful for both fighters.
Power scores with the left hand. Dood knows he should have avoided that one.
Donk. Power catches Dood right on the button with a cross.
The crowd cheering loudly, showing their appreciation for the quality fight we're seeing here.
Dood scores with a jab to the jaw of his opponent.
Power throws out a leg kick but Dood moves out of range and Power only half commits.
Power lands a two punch combo.
Power jabbing away but nothing is landing.
Dood throws a hook to the body but it doesn't connect.
Power takes one to the side of the head.
Thomas Power seems to be the more aggressive standup fighter in this bout.
Dood comes forward and lands a shot to the body, then darts back out of range.

That's one minute gone in the round.
Dood chopped to the floor by a nice leg kick but he springs right back up before Power can pounce on him.
Dood misses with a right hand
and Power counters with a crisp hook to the side of the head.
Dood misses with a body shot. Nice footwork from Power.
Power displays good takedown defense there as he swats away a double leg from Dood.
Power looks to have improved his striking defense since last time we saw him fight.
Power connects with an inside leg kick.
Power is moving around nicely and scores here with a single head shot.
Power swings away with a leg kick that misses.
And Dood tries to counter it with a takedown but Power pushes his down on his head and steps out.
Dood misses with an uppercut. Power saw that one coming.
Power looks to throw the jab but Dood is out of range.
Dood feints the counter takedown.
Power stooping low to avoid any incoming strikes and then lunges in with an uppercut come cross that lands flush.
Dood misses with a shot to the body
and Power counters with a good right hand that lands right on the jaw.
Power swings and misses with a hook to the body.

That's two minutes gone in the round.
Power throws a monster uppercut resembling something out of street fighter but it doesn't land.
Dood doesn't fully commit to the body shot counter.
Power tries to work over Dood's front leg with a kick but Dood checks it.
Power rushes in with a sloppy looking punch

and Dood counters with a shoot takedown into half guard.
Fantastic stuff here - a very entertaining period of action, which has drawn cheers from the crowd.
Dood is nestled in close to Power, controlling him well. He's worked in a nice elbow to the side of the head as well, for good measure.
Dood wants to take a breather but Power is having none of it.
Dood throws a strike but Power avoids it easily and moves to full guard.
Dood trying to control but Power is working from the bottom.
Dood is looking to work some ground and pound but Power has wrist control.
Dood cracks Power with a solid left hand.
Dood wants to control from the top but Power keeps moving.
Dood postures up to throw the ground and pound strikes but they don't connect.
The ref warns both fighters not to hold the cage as they work up against the meshing.

That's three minutes gone in the round.
Power wants to stand but Dood is controlling the position.
Power trying desperately to get back to his feet here but he's not having any joy at all. He's going to tire himself out if he's not careful.
Dood trying to pass the guard. He's being very persistent here but Power manages to land a sweep and now he's on top!

Power wants to stand but Dood has a closed guard, so he can't escape.
The fighters are pressed up against the cage, both looking to find a bit of space to work.
Dood trying to keep a closed guard but Power is proving a slippery customer.

Dood is active off his back here, looking for submissions.
Power would like to get this fight back to the feet but can't get free from the closed guard.
Dood is working actively off his back, looking to secure an arm or perhaps work for a triangle.
Power wants to get up but he can't break Dood's closed guard. He needs to be careful trying to break the legs open, as he's open to submissions here.

That's four minutes gone in the round.
Dood is looking for a triangle but Power pushes his legs off easily.
The fighters are starting to perspire pretty heavily.
Power wanted to stand there but Dood had control of the position.

Power gets to his feet and steps away from his opponent.
Power throws a hook to the side of Dood's head but Dood sees it coming and ducks under it beautifully.
Dood connects with a right hand. Power shakes it off.
Dood connects with a looping left hand that seems like it dazed Power momentarily.
Thomas Power is looking to keep the fight on the feet at all costs.
Dood is the aggressor but that punch slipped nicely by Power.
Dood misses with a wild body shot.
Dood jabs at Power's body.
Power lands a nice shot that snaps Dood's head back.
Power moves out of range as Dood strikes.
And thats the end of the round the fighters go back to their corners.
That was a close round but I would say that Thomas Power will probably get the nod.
That's the end of the interval. I'm sure that seemed a lot quicker than a minute for our two fighters! Back to the action.

Nice defenses there by Dood.
Dood drops down looking to force a counter takedown but Power defends it well.
Power lands with a right hand.
Power tests Dood's chin there with a solid looking shot.
Dood swats away the attempt to clinch by Power.
Dood drops down looking to force a counter takedown but Power defends it well.
Power throws a sloppy head kick
and Dood counters with a driving takedown into guard. Nice work there by Dood.
Power wants to get back to his feet but he's too absorbed in his own little project and Dood manages to pass to side control.
Dood has the superior BJJ but he's also working some ground strikes into his gameplan.
Dood looking for a kimura but he'll have to free his other leg if he wants to finish that. Perhaps he's just using it as a distraction technique.
Power pushes Dood off but Dood dives into side control.
That's one minute gone in the round.
Dood is trying to ground and pound but Power uses the momentary lack of control by Dood to regain half guard.
Dood is looking for an arm triangle, whilst trying to pass to side control. Power doesn't seem that keen to cooperate though. No luck this time Dood.
Power is looking to escape.
Dood thows a wild elbow that connects with the canvas.
Dood is keen to just control but Power is a slippery customer.
Dood is looking for a kimura here.
That's two minutes gone in the round.
My god... these two guys really need to pick up the pace or everyone will leave to go get a beer.
Dood trying to control the action but Power is working from the bottom.

Power kicks off Dood and gets to his feet.
Dood steps to the side to avoid the strikes from Power.
Power wants to clinch up but Dood keeps it at a distance.
Dood cracks Power with a nice right hand that draws applause from the crowd.
Power has his head snapped back a nice jab. A little nod from Power there as he acknowledges the shot.
Power misses with a hook.
Dood tries a counter takedown but it's more of a dummy move, and he uses it to push himself away.
Dood has his head slapped from side to side by a 3 punch combination. That must have hurt him.
Excellent takedown into side control there by Dood.
Power explodes and escapes back to his feet! Nice escape there!
That's three minutes gone in the round.
Power misses with a looping left.

Power darts in and clinches Dood up against the cage.
A short uppercut from Power.
Dood blocks a punch to the side of the head.
Power lands with a short shot to the head.
Power throws an elbow that misses.
Power is really dominating this fight. Is there anything that Dood can do to turn this around?
Dood can't find room to land a body shot as Power controls the action.
Dood gets control of Power's arms and successfully pulls guard. Dood will no doubt be looking for submissions off his back.
Power avoids a guillotine attempt easily.
Power stands up from guard. Let's bang!
Power cracks the inside of Dood's front leg.
A really sloppy takedown attempt there from Dood.
That's four minutes gone in the round.
Fantastic stuff here - a very entertaining period of action, which has drawn cheers from the crowd.
Dood misses with a wild body shot.
Dood staying out of range there.
Dood steps to the side to avoid the strikes from Power.
Power throws the kick towards the body but Dood avoids it.
Dood changes levels for a counter takedown but doesn't follow through with his attempt.
Power throws a body shot but no joy.
Dood is definitely looking for the counter takedowns here.
Power throws a nice looking combination but Dood bobs and weaves to avoid any damage.
This fight brought to you by 5M nutrition - it's mmmmm tasty. Nice jab by Power.
Dood scores with a hook to the body. Power takes a step back and tries to catch his breath.
Dood throws a looping overhand right but Power ducks down to avoid it.
Power throws a wild combination but nothing lands.
Dood changes levels for a counter takedown but doesn't follow through with his attempt.
A swing and a miss from Power.
Power tries to land a front kick but Dood steps back. That was a bit too telegraphed.
And thats the end of the round the fighters go back to their corners.
Thomas Power dominated that second round.
The fighters' corners scream their final instructions, as the referee calls time. Here we go, back to the action! Let's hear some noise people - this is the final round!

Power throws a nice hook to the body that draws an oooh from the crowd.
Dood scores with a nice head shot.
Power looks to land a combination but Dood avoids it well.
Dood shoots in but no luck this time.
Power closes the distance and presses his opponent up against the cage.
Dood is leaning against Power and scores with a nice uppercut to the body.
Power working aggressively here.
Power lands a right uppercut that snaps the head of Dood backwards.
Dood lands with a right to the head.
A head punch on the inside from Dood fails to land.
We've had a slow start to the round here - hopefully the action picks up.
Power misses with a knee to the head.
Power lands a left hand that snaps the head of Dood backwards.
Power lands a shoulder strike.
The fans in attendance giving it up for the two fighters, who have really let it all hang out in the last minute or so!
Power lands with a quick shot inside that doesn't really do much damage.
Power tries a shoulder strike but it doesn't do any damage.
Power softening up his opponent with strikes, against the cage.
That's one minute gone in the round.
Dood tries to work over Power's body with a swooping hook but it only glances the target.
Dood blocks a punch to the side of the head.
Dood's head jolts backwards as he takes an uppercut right on the button!
Dood blocks a couple of punches on the inside.
Dood fails to land with a short punch on the inside.
Power tries to land a knee to the head but misses.
Thomas Power has scored more points in the clinch so far.
Dood tries to take the fight to the ground by pulling guard but can't manage it.
Dood struggles to land a body shot inside as Power controls his hands.
Dood misses with the head strike.
Power throws a head punch that misses.
Dood misses with a shot to the kidneys.
Dood gets through Power's defenses to land a nice punch to the side of the head.
Dood pulls Power into guard.
Power wanted to stand there but Dood had control of the position.
Power decides he's had enough of playing guard and decides to stand. Come on Dood, up you get!
Dood takes an uppercut right on the button but keeps his composure.
Rad Dood has stepped it up - he knows he needs a finish here!
That's two minutes gone in the round.
Dood lands a nice hook to Power's body. Power takes it in his stride and looks to land his own strikes.
Jab, jab by Power - just one landing.
This is a great period of action - very entertaining stuff!
Power throws a jab, cross combination which is slipped
and Dood counters with a nice shoot takedown that brings the fighters to the ground.
Dood working from the guard for now, landing some ground and pound.
Dood is looking to work some ground and pound but Power has wrist control.
Dood with a flurry of punches that miss.
Power is looking to get back to his feet but can't, whilst Dood is controlling him.
Dood trying to control but Power is working from the bottom.
Dood slips effortlessly into side control - very nice.
Dood tries to advance to mount but can't.
Thomas Power is fighting for a decision here - he's started to take the cautious approach.
That's three minutes gone in the round.
Dood lands an elbow.
Rad Dood has got the better of the ground game so far.
Dood is trying to get an arm triangle but Power is defending well.
Power is trying to stand back up. He's worked his way up against the cage but Dood has just dragged him back down to the mat.
Dood is trying to get an arm triangle but Power is defending well.
Power is looking to work his way out of this bad position but Dood is controlling him well.
Dood creates some space and throws a big elbow, but Power sees it coming and moves his head just enough to avoid the strike.
Dood trying to control the action but Power is working from the bottom.
That's four minutes gone in the round.
Power wants to escape from the position here - easier said than done!
Power is not content to let Dood control the position.
The referee is pacing around the two fighters - he looks like he's thinking about a standup.
Power is looking to work his way out of this bad position but Dood is controlling him well.

The ref stands the fighters back up due to a lack of activity.
Power throws out a token jab with nothing on it.
Power looking to take his opponent's legs away with the low kicks.
And that's the end of the fight!
That was a close round. You could make an argument for either fighter but I would give it to Thomas Power.
Well I reckon that's a shut out for Power, winning every round. Will the judges agree? They are the ones who matter, even if they are often depressingly incompetent. Over to the ring announcer for the scorecards.
Ladies and gentlemen, after 3 rounds of action, we go to the scorecards for a decision.
Judge Percy O'Donnell scores the fight 29:29
Judge Don Winkell scores the fight 29:29
Judge Jack Bonds scores the fight 30:27
The fight is ruled a majority draw!
|
|
|
|
|
|
|
|
|
|
|
|
|
|
|
|
|
|
|
|
|
|
|
| S |
C
A |
G |
S |
C
B |
G |
|
S |
C |
G |
|
energy
A | B |
|
hype
A | B |
|
pop
A | B |
|
mgr
A | B |
|
FIGHT
RATING
58% |
|
|
|
|
|
|

