|
|
PBP Commentary |
Coming up we have a featherweight MMA rules bout between Marky Mark (ranked 1862 p4p, 210 weight class) and Tommy Shelby (ranked 2675 p4p, 270 weight class). Tommy Shelby will no doubt be looking to use his reach advantage to good effect.
 |
|
 |
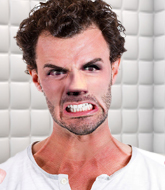
| 165 cm
22
160 lbs
3 - 1 - 0 |
|
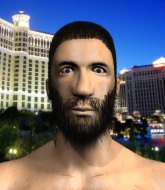
176 cm
23
155 lbs
7 - 5 - 0 |
Good wrestling
Excellent boxer
Cardio machine |
|
BJJ Purple Belt
Excellent boxer
Good gas tank |
|
| |
|
Ladies and gentlemen. This fight is 3 rounds, in the featherweight division.
Introducing the fighter to my left, fighting out of the red corner.
With a record of
3 - 1 - 0, fighting out of Sydney, Marky Mark!
And introducing the fighter to my right, fighting out of the blue corner.
With a record of
7 - 5 - 0, fighting out of London, Tommy Shelby!
The judges for this bout are Matti Vanhoillinen, Arvi Lind and Roosa Järviläinen.

The bell rings for round one and we are underway!
Mark doesn't manage to clinch there - Shelby circles away.
A left lands for Shelby.
Shelby uses some good footwork to avoid the body shot by Mark.
Boom, another hit is landed. "You're gunna get knocked out" taunts Shelby, as that shot connected.
Mark uses some good footwork to avoid the body shot by Shelby.
We've been hearing reports that Mark has been drilling takedowns in recent sessions so let's see if that has an impact on the result of this fight.
Mark avoids a lazy jab quite easily.

Shelby gets caught flat footed, as Mark shoots in with a quick takedown into guard.

Shelby has managed to wall walk up one of the corner posts to get back to his feet. Mark is pushing him up against the cage, looking to control the position.

Shelby escapes the clinch and we're back to striking.
Tommy Shelby seems to be the more aggressive standup fighter in this bout.
The crowd are loving this. Great action here.
Shelby cracks a nice hook into Mark's ribs.
Shelby has his hands up protecting his head but a hook from Mark finds it's way round the side to connect with Shelby's head.
Mark throws a body shot but no joy.
Mark fakes a jab and then connects with a hook.
Mark throws an overhand right that lands on Shelby's shoulder, as Shelby tries to avoid the shot.
Mark throws a jab but it's blocked by Shelby.
Shelby misses with a body shot.
An attempted straight right counter from Mark misses the target.
Shelby throws a looping overhand right but Mark ducks down to avoid it.
Shelby misses with an uppercut. Mark saw that one coming.
Mark takes a swing at Shelby's ribcage but misses.

That's one minute gone in the round.
Mark's hands are dropping dangerously low here and Shelby connects clean with a right hook that sends him down to one knee! Mark scrambles back to his feet.
No luck with that takedown attempt from Mark.
Mark rushes forward with a series of wild hooks but Shelby moves out of range and avoids them all easily.
Mark swings and misses with a shot to the body
and Shelby counters with a quick right hand to the jaw.
Mark keeping a good distance there, avoiding the body shot.
Shelby has used his reach advantage pretty well so far tonight.
Mark takes a punch right to his stomach. That took the wind out of him momentarily.
Mark throws a lazy uppercut
and Shelby cracks him with a counter punch right on the button.
Mark slips under a jab.
Mark on the wrong end of a vicious looking body shot.
Mark walks into a straight right hand from Shelby.
Shelby avoids a lazy jab quite easily.
Shelby looks like he wants to counter punch here.
Shelby lands with a hook. Mark tried to avoid it but it clipped the top of his head.
Wooooo! Give it up for these two warriors! They are putting on a show!
Mark throws a lazy right hand but Shelby sees it coming a mile off and sidesteps it easily.
Shelby comes forward and lands a shot to the body, then darts back out of range.
A jab from Mark does it's job there.
Mark takes a hook to the side of the head. I wonder if that's got his ears ringing.
Mark misses with a straight left.

That's two minutes gone in the round.
Shelby throws an ugly left hook that misses
and Mark makes him pay by landing a nice hook to the body before moving out of range.
Mark dips down and scores with a jab to the body.
Shelby with a body punch. A glancing blow.
Shelby throws the left hand but Mark avoids the punch easily.
Shelby jabs at Mark's body.
Shelby ducks under an overhand right and circles away with a smile on his face.
Shelby misses the body punch
and Mark counters with a left to the body.
Shelby throws a body punch but Mark moves out of range.
The fighters circling - Shelby throws out the jab but it was never going to land.
Shelby throws an uppercut from half a mile away. Mark sees it coming and avoids it easily.
Shelby ducks down and throws a hook to the body but Mark moves away.
A big right from Shelby misses.
Mark shoots and misses
and Shelby counters nicely by changing levels and landing a hook to the body.
Mark misses with a body shot
and Shelby cracks him with a counter punch right on the button.
Shelby misses with a wild body shot.
Shelby misses with a looping right.
Shelby is using his reach advantage to land shots from outside his opponent's range.
Mark lands a right hook to the body.

That's three minutes gone in the round.
Shelby throws a hook to the body but it doesn't connect.
Shelby keeping a good distance there, avoiding the body shot.
Shelby looks to score with a combo but nothing lands.
Shelby throws a hard body shot but it just misses.
Mark keeping a good distance there, avoiding the body shot.
Mark blocks a jab.
Shelby stuffs the takedown.
That's three failed takedown attempts in the round for Marky Mark. That's going to take a lot out of him.
Shelby dips down and scores with a jab to the body.
A big left from Shelby misses.
Mark digs a good hook to Shelby's body.
Mark connects with a good right hand that stumbles Shelby. Shelby circles away out of range and recomposes himself.
Mark drives through with a really nice takedown into side control.
The ref warns both fighters not to hold the cage as they work up against the meshing.
The crowd cheering loudly, showing their appreciation for the quality fight we're seeing here.
Shelby tries to escape but Mark is in control.
Mark advances to full mount.
Both fighters have adopted an aggressive gameplan on the ground!
Shelby tries to buck Mark off but he can't manage it.

That's four minutes gone in the round.
Shelby is using up a lot of energy trying to get back to his feet. Perhaps he should improve his position first.
Mark is looking to work his way around to Shelby's back. He needs to be careful though, as he's in danger of losing this dominant position.
Mark is working hard here to advance position.

Mark goes for an armbar but Shelby turns quickly into his guard - lovely anticipation from Shelby.

Shelby stands up from guard. Let's bang!
The crowd applaud the fighters' efforts here as the round comes to an end.
Shelby moves out of range as Mark strikes.
And thats the end of the round the fighters go back to their corners.
Tommy Shelby dominated that round.
The referee calls time. The cornermen exit stage left and we're back to business.

Shelby misses the shot to the body.
Mark lands with a straight right. Shelby didn't see that one coming.
Shelby misses with a straight left.
Shelby scores with a nice right hand.
Nice body punch from Shelby.
Shelby throws a lazy right hand but Mark sees it coming a mile off and sidesteps it easily.
Mark steps to the side to avoid the strikes from Shelby.
Shelby throws a body punch but Mark moves out of range.
Shelby throws a jab but it's blocked by Mark.
Mark throws a monster uppercut resembling something out of street fighter but it doesn't land.
Shelby misses with a double jab.
Mark on the wrong end of a nice hook.
We've had a slow start to the round here - hopefully the action picks up.
Shelby uses decent footwork to sidestep a right hand from Mark.
Shelby throws a good cross that connects.
Shelby slips under a jab.
Mark defending well as Shelby loads up on a big left hand.
Shelby throws a big shot that misses.
The crowd are loving this. Great action here.
Shelby tries to land with a swinging hook to the body but Mark was well out of range. Poor timing from Shelby.
That's one minute gone in the round.
Mark avoids the body shot from Shelby.
Shelby misses with a straight right.
Shelby throws an uppercut from half a mile away. Mark sees it coming and avoids it easily.
A looping hook to the body misses from Mark. Shelby does a little dance to reset his feet.
Mark lands with a nice body punch.
Shelby pushing out the jab but it's not landing.
Mark drops down looking for a counter takedown but Shelby sprawls and moves away.
Shelby lands a body shot.
Mark shoots in looking for a single leg takedown. Shelby is trying to defend but Mark finishes it well and ends up in half guard. Let's see if he can advance position further.
Shelby pushes Mark off looking to stand but Mark dives back in and keeps control.
Mark works his way into side control.
Shelby wants to get back to his feet but Mark drags him back down.
That's two minutes gone in the round.
Mark is moving around in side control but his primary objective seems to be to maintain the position.
Shelby is trying to escape and get back to his feet.
Mark trying to control the position but Shelby is working away.
Shelby has been the more effective fighter overall so far.
Shelby is trying to escape and get back to his feet.
The referee is pacing around the two fighters - he looks like he's thinking about a standup.
Mark is looking to take a break and control but Shelby is keeping him honest, looking to work from the bottom.
That's three minutes gone in the round.

The referee has stepped in and called for a break in the action. We'll restart on the feet.
Mark shoots and misses
letting Shelby counter with a right hand.
Mark shoots in for a takedown! He's got it and he's managed to land in side control! That's better than Mark was expecting from the takedown attempt, I'm sure!
Shelby is trying to escape and get back to his feet.
Mark wants to control but Shelby is keeping him busy.
Mark prevents Shelby from escaping the position.
That's four minutes gone in the round.
Mark moves into full mount!
Shelby has given up his back. Will we see Mark going for some submissions?
Mark struggling to keep hold of the position.
Shelby is trying to get back to his feet but he's not managed it yet.
Mark is staying calm and holding on to the back position, whilst working on a rear naked choke. Shelby is defending well though. Mark let's go of the attempt for now.
Mark has his opponent's back and is working for the choke.
Shelby manages to stand up with Mark still on his back. Eventually Mark drops to his feet and we're back in the standing position.
And thats the end of the round the fighters go back to their corners.
A close second round but Tommy Shelby will probably get the nod - 10:9.
That's the end of the interval. I'm sure that seemed a lot quicker than a minute for our two fighters! Back to the action. This is the final round!

Shelby scores with a nice right hand.
Shelby's corner calls for a 1-2. Shelby obliges with the 1 part as he scores the single shot and moves back out of range.
Shelby misses with a wild body shot.
Mark moves away from the strike by Shelby.
Mark throws a hook but Shelby blocks it.
Mark changes levels and looks for a double leg takedown. Shelby tries to avoid it but Mark manages to keep hold of a leg and drag Shelby to the ground. Shelby escapes though and pops straight back up to his feet.
Shelby ducks down and throws a hook to the body.
Mark keeping a good distance there, avoiding the body shot.
Mark gets a double leg takedown into Shelby's guard.
Mark might be looking to lock onto one of his opponent's long limbs for a submission, whilst we're on the ground.
Shelby wants to stand but Mark is controlling the position.
Shelby has scooted to the edge of the canvas and used the cage to get back to his feet. Mark has stuck on his opponent and is forcing him back against the cage.
We've seen a great period of action over the last minute or so - credit to both fighters for going all out!
Good body shot from Shelby.
That's one minute gone in the round.
Shelby tries to throw a body punch but Mark avoids it by throwing Shelby back against the cage.
Mark lands a shot to the body.
Shelby breaks the clinch.
Tommy Shelby is looking to keep the fight on the feet at all costs.
Mark waving his hands out in front of him, looking to distract Shelby.
Shelby moves out of range of the strikes.
Shelby connects with a looping right hand.
Shelby throws a body punch but Mark moves out of range.
Shelby scores with a reasonable looking shot to the body. Mark doesn't seem bothered though.
Shelby throws a lazy right hand but Mark sees it coming a mile off and sidesteps it easily.
Mark moves out of range of the strikes.
Mark closes the distance and takes a jab right on the nose as he does so.
A telegraphed right hand from Shelby misses the target.
Shelby looks to score with a jab to the body but Mark is just out of range.
Mark smiles there as he lands a nice right hand right on the button.

Mark clinches up against the cage.
Mark doesn't land with the attempted body shot.
That's two minutes gone in the round.
Mark gets control of Shelby's arms and successfully pulls guard. Mark will no doubt be looking for submissions off his back.
The crowd cheering loudly, showing their appreciation for the quality fight we're seeing here.
Mark working a defensive guard here.
Mark is working an open guard so Shelby takes the opportunity to get back to his feet.
Mark throws a hook to the body but it doesn't connect.
Shelby scores with a nice head shot.
Shelby fakes high and swings low for a body shot but Mark manages to avoid it.
A looping hook to the body misses from Shelby. Mark does a little dance to reset his feet.
Mark went nuts there looking for a big combo counter but none of the flurry connected.
Mark feints and then dives in with a takedown. That was a long way out but the feint bought him enough time to close the distance and complete the takedown. Now we'll play guard for a bit and see who can get the better of that position.
Shelby keeping moving, preventing Mark from controlling successfully.
Mark is going to have to think about doing something other than just controlling because Shelby is managing to avoid having the position dictated to him.
That's three minutes gone in the round.
Shelby uses the cage to get back to his feet.
Mark has his hands up protecting his head but a hook from Shelby finds it's way round the side to connect with Mark's head.
Mark misses with a looping left.
Mark scores with a jab.
Shelby scores with a jab to the jaw of his opponent.
A jab from Shelby misses.
Mark takes one to the chin there.
Shelby on the wrong end of a nice jab.
Shelby connects with a lovely jab that went straight through the gap between Mark's hands.
Mark pivots, looking for a leg kick but Shelby is out of range and Mark settles back down.
Mark connects with a lovely jab that went straight through the gap between Shelby's hands.
The crowd are loving this. Great action here.
Mark throws a hook to the body but it doesn't connect.
Shelby digs a good hook to Mark's body.
That's four minutes gone in the round.
Mark missing with a left hand there. Shelby was out of range so wasted energy throwing that one.
Mark ducks under a wild hook from Shelby.
Mark tries to land with a swinging hook to the body but Shelby was well out of range. Poor timing from Mark.
A nice side step and Shelby releases a counter shot to the body, but it doesn't find it's home.
Tommy Shelby is fighting for a decision - hopefully he's judged it right and he's actually winning the fight.
Shelby fakes high and swings low for a body shot but Mark manages to avoid it.
Shelby throws a hook to the side of Mark's head but Mark sees it coming and ducks under it beautifully.
A little feinted left hand from Mark on the counter but he doesn't commit to it.
Mark takes a shot right to the liver - Bas would have been proud of that punch.
Shelby throws a big shot that misses.
Mark throws an overhand right that lands on Shelby's shoulder, as Shelby tries to avoid the shot.
Mark throws a body shot but no joy.
Shelby looks to score with a combo but nothing lands.
Mark was looking to counter that last move with a shot to the body but he didn't commit.
Shelby thows a left - swing and a miss!
Mark is trying hard to land a takedown here. Shelby sprawls well and keeps this one on the feet.
Mark is pinned up against the cage taking some big shots here. The referee is looking closely deciding whether he should stop the fight.
Shelby throws a big shot that misses.
Marky Mark has stepped it up - he knows he needs a finish here!
Tommy Shelby seems to be getting the better of the standup.
Shelby throws an overhand right that lands on Mark's shoulder, as Mark tries to avoid the shot.
And that's the end of the fight!
Tommy Shelby comfortably won the final round on my scorecard.
I've got Shelby winning every round here. Surely the decision will go his way and he'll pick up a well deserved decision victory. Over to the ring announcer for the scorecards.
Ladies and gentlemen, after 3 rounds of action, we go to the scorecards for a decision.
Judge Matti Vanhoillinen scores the fight 28:29
Judge Arvi Lind scores the fight 27:30
Judge Roosa Järviläinen scores the fight 27:30
In favor of your winner, by unanimous decision... Tommy Shelby!
|
|
|
|
|
|
|
|
|
|
|
|
|
|
|
|
|
|
|
|
|
|
|
| S |
C
A |
G |
S |
C
B |
G |
|
S |
C |
G |
|
energy
A | B |
|
hype
A | B |
|
pop
A | B |
|
mgr
A | B |
|
FIGHT
RATING
67% |
|
|
|
|
|
|

