|
|
PBP Commentary |
Coming up we have a featherweight MMA rules bout between Kuroda Atsushii (ranked 0 p4p, 0 weight class) and Tyrone The Crack Head (ranked 0 p4p, 0 weight class). The crowd seem to be enjoying The Crack Head's choice of entrance music: Mr. Flamboyant. I'm sure you'll be fascinated to know that I was talking to some pointless Z list celebrity before the fight and he thought that Tyrone The Crack Head was going to win. Let's see if he was right.
 |
|
 |
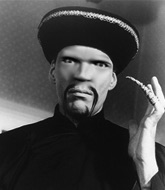
| 172 cm
22
144 lbs
1 - 3 - 0 |
|
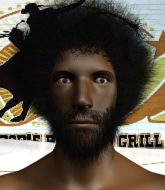
150 cm
24
140 lbs
12 - 6 - 0 |
Good wrestling
World class boxer
Insanely flexible |
|
Good wrestler
World class MT
Good gas tank |
|
| |
|
Ladies and gentlemen. This fight is 3 rounds, in the featherweight division.
Introducing the fighter to my left, fighting out of the red corner.
With a record of
1 - 3 - 0, fighting out of Los Angeles, Kuroda Atsushii!
And introducing the fighter to my right, fighting out of the blue corner.
With a record of
12 - 6 - 0, fighting out of Los Angeles, Tyrone The Crack Head!
The judges for this bout are Jack Bonds, Frank Antenori and .

The bell rings for round one and we are underway!
The Crack Head looking to land some kicks to the body here.
It looked like Atsushii wanted to counter with a hook but didn't fully commit.
A head kick misses from The Crack Head.
The Crack Head lands with a thumping leg kick.
Atsushii blocks the body kick.
An attempted straight right counter from Atsushii misses the target.
The Crack Head tries to clinch there but Atsushii circles away.
The Crack Head throws a low kick, looking for Atsushii's leg but Atsushii calmly moves out of range.
Atsushii is looking to counter punch.
The Crack Head is looking to chop away at Atsushii's legs.
The Crack Head connects with a leg kick. Atsushii looked like he was expecting something else and didn't defend it.
The Crack Head with poor footwork there. He got himself in a bit of a tangle, enabling Atsushii to score with a decent uppercut.
The Crack Head has his hands up protecting his head but a hook from Atsushii finds it's way round the side to connect with The Crack Head's head.
Atsushii throws out a leg kick but The Crack Head moves out of range and Atsushii only half commits.
Kuroda Atsushii seems to be the more aggressive standup fighter in this bout.
Atsushii swats away the attempt to clinch by The Crack Head.
Atsushii circles away from the clinch attempt.
We've had a slow start to the round here - hopefully the action picks up.
The Crack Head tries to clinch but is not successful on this occasion.
Atsushii throwing a counter right hand but The Crack Head manages to avoid it.
Atsushii circles away from the clinch attempt
and Atsushii counters with a slapping leg kick.
The Crack Head tries to clinch up but Atsushii circles away and keeps his distance.
The Crack Head tries to close the distance and clinch up but Atsushii swats him away and circles back towards the center.
The Crack Head takes a push kick to the midsection and stumbles backwards.

That's one minute gone in the round.
The Crack Head tries to clinch there but Atsushii circles away.
The Crack Head wants to slow Atsushii down by chopping away at his legs.
Atsushii will need to tighten up his combinations if he doesn't want to gas himself out, swinging at thin air.
A leg kick checked by The Crack Head.
The Crack Head wants to clinch up but Atsushii keeps it at a distance.
The Crack Head misses with a half-hearted attempt at a head kick.
Atsushii throws a sloppy head kick and The Crack Head moves out of range easily.
Well, he's not going to score with shots like that. A lazy body kick attempt from The Crack Head.
The Crack Head fakes a jab and throws a low kick but Atsushii checks it well.
The Crack Head blocks the body kick.
Nice shot lands for Atsushii.
The Crack Head throws a head kick but Atsushii moves out of range.
Atsushii looking to take his opponent's legs away with the low kicks.
The Crack Head tries a switch kick but it misses it's target.
Atsushii tried to counter with a leg kick but The Crack Head avoided it.
Atsushii scores with a slapping inside leg kick.
Atsushii has been working on his boxing with his coaches at White Eagle in the buildup to the fight.
Atsushii is using his reach advantage well here, landing the more effective single shots from range.
Atsushii connects with a jab.
The Crack Head doesn't manage to clinch there - Atsushii circles away.
As The Crack Head backs away, Atsushii returns fire with a leg kick that just misses.
Atsushii avoids the head kick by The Crack Head.
The Crack Head takes a body kick right on the floating rib. Ouchie.

That's two minutes gone in the round.
This is a great period of action - very entertaining stuff!
The Crack Head walks into a straight right hand from Atsushii.
Left hook, right uppercut from Atsushii.
The Crack Head misses with a body kick.
Well, he's not going to score with shots like that. A lazy body kick attempt from The Crack Head.
Atsushii throwing a counter right hand but The Crack Head manages to avoid it.
The Crack Head wants to clinch.
Atsushii connects with a hook to the side of his opponent's head.
The Crack Head tries to clinch up against the cage, rushing in to close the distance. Atsushii manages to break the clinch and circles back to the middle of the mat.
Atsushii lands a right hook to the body.
The Crack Head throws a leg kick but Atsushii moved away.
Atsushii fakes a jab and scores with a low kick.
The Crack Head tries to clinch but Atsushii moves away
and Atsushii counters with a lovely straight right hand!
Well, he's not going to score with shots like that. A lazy body kick attempt from Atsushii.
The Crack Head tries to clinch up against the cage, rushing in to close the distance. Atsushii manages to break the clinch and circles back to the middle of the mat.
The Crack Head sees a low kick coming and goes to check it, but it's actually a body kick and it thuds into his unprotected ribs.
Atsushii blocks a head kick by The Crack Head.

That's three minutes gone in the round.
Atsushii throws a head kick that misses.
Nice jab there from Atsushii.
The Crack Head throws a head kick that misses and slips in the process. He scrambles back to his feet and the fighters circle.
Atsushii swings for the body but The Crack Head moves out of range.
The Crack Head shapes to counter with a head kick.
The Crack Head throws a leg kick but Atsushii checks it.
Atsushii circles away from the clinch attempt.
Atsushii blocks a head kick by The Crack Head.
The Crack Head takes a kick to the body and keeps moving.
Atsushii lands with a shot to the body.
The Crack Head throws a head kick that misses and slips in the process. He scrambles back to his feet and the fighters circle.
A head kick misses from The Crack Head.
Atsushii with a nice looking leg kick. You could hear that one land in a back row.
Atsushii looks for the body kick but The Crack Head saw that one coming.
The Crack Head tries to clinch up against the cage, rushing in to close the distance. Atsushii manages to break the clinch and circles back to the middle of the mat.
Atsushii scores with a punch to the gut of his opponent.
Atsushii pulls out of a head kick attempt.
The Crack Head looks to land a body kick but Atsushii moved away.
Atsushii keeps his opponent at a distance with a nice jab.
This has been an exciting period of action!
The Crack Head tries to clinch but Atsushii is having none of it.

That's four minutes gone in the round.
The Crack Head wants to clinch up but Atsushii keeps it at a distance.
Atsushii keeps the fight on the outside.
Atsushii scores with a hook to the body. The Crack Head takes a step back and tries to catch his breath.
Atsushii smiles there as he lands a nice right hand right on the button.
Atsushii tries a switch kick but it misses it's target.
The Crack Head tries to close the distance and clinch up but Atsushii swats him away and circles back towards the center.
A thudding body kick lands there by Atsushii!
Atsushii thumps The Crack Head with a low kick.
A head kick misses from The Crack Head.
The Crack Head throws a head kick but Atsushii moves out of range.
The Crack Head looking to land some kicks to the body here.
Atsushii keeps the fight on the outside.
Atsushii connects with a leg kick. The Crack Head looked like he was expecting something else and didn't defend it.
Atsushii is using his height advantage well here, landing a good percentage of his punches.
The Crack Head throws a sloppy head kick and Atsushii moves out of range easily.
The crowd applaud the fighters' efforts here as the round comes to an end.
Atsushii throws a leg kick but he was too far away and it doesn't land.
The Crack Head is loading up here, looking for a big counter of his own.
The sound of bone on bone echoes around the arena as Atsushii checks a leg kick.
Atsushii misses with a leg kick.
As Atsushii backs off The Crack Head throws a huge counter combo but Atsushii manages to avoid it all.
Atsushii swinging wildly here.
And thats the end of the round the fighters go back to their corners.
Kuroda Atsushii dominated that round.
The fighters' corners scream their final instructions, as the referee calls time. Here we go, back to the action!

Atsushii throws a leg kick but The Crack Head moved away.
Atsushii lands with a nice low kick. That'll leave a bruise.
The Crack Head scoring well with a low kick there.
The Crack Head pulls out of a head kick attempt.
The Crack Head avoids the body shot from Atsushii.
Good exchange - Atsushii coming out on top.

The Crack Head darts in and clinches Atsushii up against the cage.
The Crack Head tries to land knees in the clinch but Atsushii avoids the damage to the body.
The Crack Head tries to land a knee to the head but Atsushii blocks with his arms.
The Crack Head tries to land a knee to the body but he is off balance and Atsushii avoids it.
The Crack Head throws a knee to the head but misses.
Atsushii misses with a shot to the kidneys.
Atsushii on the defensive, avoiding the knees to the body.
We've had a slow start to the round here - hopefully the action picks up.
Atsushii throws a head punch that misses.
Atsushii tries to work over The Crack Head's body with a swooping hook but it only glances the target.
The Crack Head with the Thai clinch. He's looking to land a big knee but he's not managed it this time.
The Crack Head with a knee to the head.
Atsushii lands a right hand.
This has been an exciting period of action!
Atsushii wants to push off and get back to the center of the mat but The Crack Head has him pressed against the cage.
That's one minute gone in the round.
Atsushii tries a body shot but The Crack Head blocks it.
The Crack Head misses with a knee to the head.
The Crack Head dictating the pace here, as the fighters clinch against the cage.
Atsushii misses with a knee to the head.
The Crack Head with an attempt at a knee that misses.
The Crack Head looking to throw knees to the head but Atsushii is blocking nicely.
The Crack Head prevents a body shot from Atsushii.
The Crack Head throws a vicious knee straight up the middle but Atsushii blocks it with crossed arms.
The Crack Head misses the knee to the body. Nice hip positioning from Atsushii.
The fighters are starting to get sweaty, which will make takedowns a bit more tricky.
Atsushii is trying to slow down the pace in the clinch, to catch his breath.
A body shot lands from Atsushii.
Nice elbow from The Crack Head.
The Crack Head's leg has a nasty welt from taking a succession of leg kicks. That must be slowing him down.
The Crack Head with the Thai clinch. He's looking to land a big knee but he's not managed it this time.
The Crack Head throws a knee to the head but misses.
Atsushii lands a nice shot to the body.
Tyrone The Crack Head seems to be working more effectively in the clinch in the fight so far.
The Crack Head is breathing heavily.
Atsushii prevents a body shot from The Crack Head.
The Crack Head taking a breather.
That's two minutes gone in the round.

Atsushii manages to break the clinch.
Nice uppercut lands for Atsushii. That snapped The Crack Head's head back.
Ouch! a nice leg kick from Atsushii, right into the meat.
Atsushii is really dominating this fight. Is there anything that The Crack Head can do to turn this around?
The Crack Head scores with a head kick. Atsushii tried to block it but didn't get his arm up in time.
The crowd are loving this. Great action here.
A leg kick checked by The Crack Head.
Atsushii tries to land with a swinging hook to the body but The Crack Head was well out of range. Poor timing from Atsushii.
Good exchange - Atsushii coming out on top.
Atsushii throws a sloppy head kick and The Crack Head moves out of range easily.
The Crack Head throws a counter combo.
Atsushii lands a right hook to the body.
The Crack Head walks into a left hand.
Atsushii misses with a body shot.
A head kick misses from Atsushii.
Atsushii throws a body punch but The Crack Head moves out of range.
The Crack Head tries to clinch but Atsushii is having none of it.
Atsushii dips to his left and cracks The Crack Head with an uppercut!
The Crack Head misses with a low kick as Atsushii jumps back.
Atsushii scores with a straight right hand, right through his opponent's guard.
The fight stays on the outside here - The Crack Head looks like he's thinking about clinching though.
That's three minutes gone in the round.
Atsushii walks forward and throws out a flicking leg kick. The Crack Head checks it nicely though, as he moves to the side.
The Crack Head misses with a half-hearted attempt at a head kick.
Atsushii throws a body kick but he was well out of range there.
The Crack Head takes an uppercut right on the button but keeps his composure.
Atsushii getting the better of the striking in that exchange.
Atsushii swings away with a leg kick that misses.
Kuroda Atsushii is winning the standup battle so far.
Atsushii blocks a head kick by The Crack Head.
Atsushii tries to land a front kick but The Crack Head steps back. That was a bit too telegraphed.
The Crack Head looks to land a body kick but Atsushii moved away.
Atsushii avoids the head kick by The Crack Head.
The Crack Head tries to move into range but Atsushii moves to the side and lands with a nice right hand.
The Crack Head tries a switch kick but it misses it's target.
The fight stays on the outside here - The Crack Head looks like he's thinking about clinching though.
Atsushii connects with a nice looking jab.
Atsushii dips to his left and cracks The Crack Head with an uppercut!
That's four minutes gone in the round.
This fight brought to you by 5M nutrition - it's mmmmm tasty. Nice jab by Atsushii.
Tyrone The Crack Head is looking to throw some combinations by the looks of things.
The fans in attendance giving it up for the two fighters, who have really let it all hang out in the last minute or so!
The Crack Head gets cracked with a nice right hand there by Atsushii.
The Crack Head pivots as if he's going to throw a leg kick but stops half way.
The Crack Head tries a switch kick but it misses it's target.
Atsushii throws a body kick that misses.
The Crack Head throws a fast counter high kick but Atsushii manages to duck under it in time.
The Crack Head lands with a kick to the ribs.
Atsushii lands with a thumping leg kick.
Atsushii throws a head kick that looked like it stung.
The Crack Head looking to land some kicks to the body here.
The Crack Head throws a head kick that misses.
The Crack Head misses with a head kick.
Atsushii feints with a shoulder and throws a nice leg kick to The Crack Head's calf.
The Crack Head takes a shot right to the bread basket.
Atsushii takes a step back and watches a body kick go sailing past his mid section.
The Crack Head misses with a head kick.
Atsushii swings away with a leg kick that misses.
Atsushii sizes up The Crack Head with a pawing jab and scores with a straight right down the middle.
The crowd applaud the fighters' efforts here as the round comes to an end.
That's a knee to de groin and it's over and out! The Crack Head crumples to the ground after an illegal strike from Atsushii - the referee stops the clock and The Crack Head gets 5 minutes to recover from that one. "I'm sorry" says Atsushii. The Crack Head manages to get back to his feet and the fight resumes.
And thats the end of the round the fighters go back to their corners.
Kuroda Atsushii dominated that second round.
The minute break is over - no more time for sponges and pep talks - back to the action! Let's hear some noise people - this is the final round!

Atsushii cracks the inside of The Crack Head's front leg.
Atsushii scores with a slapping inside leg kick.
Atsushii lands a nice looking body kick.
The Crack Head gets his head snapped back by a nice shot there.
Atsushii circles away from the clinch attempt.
Atsushii connects with a jab.
The Crack Head throws a head kick but Atsushii moves out of range.
A clash of legs there as Atsushii blocks the low kick.
Atsushii moves out of range of the body kick from The Crack Head.
Nice uppercut lands for Atsushii. That snapped The Crack Head's head back.
The Crack Head explodes with a nice body kick and back out of range. Nice work.
Atsushii walks forward and throws out a flicking leg kick. The Crack Head checks it nicely though, as he moves to the side.
Atsushii lands a leg kick and bounces back out of range.
The Crack Head throws a wild body kick that Atsushii sees coming a mile off.
Atsushii moves into range and lands a nice body kick.
The crowd cheering loudly, showing their appreciation for the quality fight we're seeing here.
Atsushii lands a lovely overhand right.
The Crack Head drops his hands and takes a jab to the jaw for his troubles.
Atsushii fakes with a right hand and throws a good leg kick, right into the thigh. That had to hurt The Crack Head.
That's one minute gone in the round.
Atsushii scores with a jab to the body.
The Crack Head throws a leg kick but he was too far away and it doesn't land.
Atsushii misses the body punch
and The Crack Head counters with a slapping leg kick.
The Crack Head fakes a couple of low kicks, before throwing one on the third attempt. It connects and Atsushii has to reset his feet before getting ready to engage.
Atsushii lands with an overhand left.
The Crack Head misses with a half-hearted attempt at a head kick.
Atsushii pivots, looking for a leg kick but The Crack Head is out of range and Atsushii settles back down.
The Crack Head lands a leg kick. The shin dug right into the meat of the thigh.
Atsushii throws a nice hook to the body that draws an oooh from the crowd.
The Crack Head is looking to take this fight into the clinch.
Nice jab there from Atsushii.
The Crack Head with poor footwork there. He got himself in a bit of a tangle, enabling Atsushii to score with a decent uppercut.
The Crack Head tries to clinch but Atsushii is having none of it.
Atsushii lunges at The Crack Head with a hook that half lands and is half blocked by The Crack Head's hand.
The crowd are loving this. Great action here.
The Crack Head takes a push kick to the midsection and stumbles backwards.
Nice body kick from The Crack Head.
That's two minutes gone in the round.
The Crack Head checks a low kick from Atsushii.
The Crack Head throws a counter combo.
Atsushii blocks a head kick by The Crack Head.
The Crack Head chopped to the floor by a nice leg kick but he springs right back up before Atsushii can pounce on him.
Atsushii throws a body shot but no joy.
The Crack Head avoids the body shot from Atsushii.
The Crack Head closes the distance and clinches.
A short uppercut from Atsushii.
The Crack Head with an attempt at a knee that misses.
Atsushii pushes off and circles away, back to the middle of the mat.
Atsushii lands with a nice low kick. That'll leave a bruise.
The Crack Head misses with an attempted mid kick.
Atsushii misses with a body shot. Nice footwork from The Crack Head.
The Crack Head tries to close the distance and clinch up against the cage but Atsushii paws at him with a jab and circles away.
Atsushii avoids the head kick by The Crack Head.
That kick from Atsushii tenderised The Crack Head's leg. The Crack Head is trying to keep his angry face on.
The Crack Head closes the distance looking to clinch
enabling Atsushii to counter with a crisp jab.
That's three minutes gone in the round.
Atsushii misses with a body shot. Nice footwork from The Crack Head.
Atsushii cracks The Crack Head with a right hand to the side of the head.
Atsushii avoids the head kick by The Crack Head.
Atsushii misses with a body kick.
The Crack Head is clearly looking to counter with head kicks.
The Crack Head throws a head kick but Atsushii moves out of range.
The Crack Head takes a big intake of breath there - he's definitely tired.
The Crack Head gets cracked with a nice right hand there by Atsushii.
Atsushii lands a nice looking body shot.
The Crack Head misses with a leg kick
letting Atsushii counter with a right hand.
Kuroda Atsushii is fighting for a decision here - he's started to take the cautious approach.
The fighters circle momentarily. Atsushii darts into range and connects with a nice straight punch.
The Crack Head is looking to take this fight into the clinch.
The Crack Head is looking to clinch.
Atsushii throws a jab to the body, straight down the pipe. Boom. That sent The Crack Head stumbling backwards but he manages to regain his composure quickly.
Atsushii digs a good body shot into The Crack Head's ribs.
The Crack Head has closed the distance and engaged Atsushii in a clinch.
The crowd cheering loudly, showing their appreciation for the quality fight we're seeing here.
The Crack Head misses the knee to the body. Nice hip positioning from Atsushii.
That's four minutes gone in the round.
The Crack Head misses the knee to the body. Nice hip positioning from Atsushii.
The Crack Head misses with an elbow over the top.
Atsushii misses with a knee strike.
The Crack Head misses with a knee strike.
Tyrone The Crack Head has stepped it up - he knows he needs a finish here!
The Crack Head tries a knee to the head but Atsushii blocks it.
Atsushii avoiding damage as The Crack Head throws knees to the body.
Atsushii blocks a knee to the body. He'll have a nicely bruised forearm in the morning.
Atsushii blocks a knee to the body. He'll have a nicely bruised forearm in the morning.
Atsushii managing to block the knees to the body from The Crack Head.
The Crack Head looking to throw knees to the head but Atsushii is blocking nicely.
Atsushii avoiding damage as The Crack Head throws knees to the body.
And that's the end of the fight!
Kuroda Atsushii showed his dominance in that final round.
Well I reckon that's a shut out for Atsushii, winning every round. Will the judges agree? They are the ones who matter, even if they are often depressingly incompetent. Over to the ring announcer for the scorecards.
Ladies and gentlemen, after 3 rounds of action, we go to the scorecards for a decision.
Judge Jack Bonds scores the fight 30:27
Judge Frank Antenori scores the fight 30:27
Judge Percy O'Donnell scores the fight 30:27
In favor of your winner, by unanimous decision... Kuroda Atsushii!
During a confident post fight interview, Kuroda Atsushii thanked all his fans. He seemed very genuine when describing how motivated his fans keep him.
|
|
|
|
|
|
|
|
|
|
|
|
|
|
|
|
|
|
|
|
|
|
|
| S |
C
A |
G |
S |
C
B |
G |
|
S |
C |
G |
|
energy
A | B |
|
hype
A | B |
|
pop
A | B |
|
mgr
A | B |
|
FIGHT
RATING
76% |
|
|
|
|
|
|

