|
|
PBP Commentary |
Coming up we have a middleweight MMA rules bout between Raymond Grey (ranked 0 p4p, 0 weight class) and John Rydeland (ranked 0 p4p, 0 weight class). Rydeland is bouncing up and down as he enters the arena, backed by Robbery - Not sneak attack. Raymond Grey has the edge in experience - let's see if he can make that count tonight.
 |
|
 |
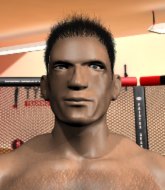
| 182 cm
20
183 lbs
3 - 1 - 0 |
|
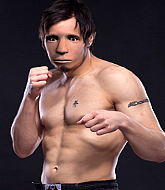
185 cm
19
190 lbs
1 - 1 - 0 |
Powerful takedowns
Solid boxing
Very quick |
|
BJJ Blue Belt
Excellent boxer
Good gas tank |
|
| |
|
Ladies and gentlemen. This fight is 3 rounds, in the middleweight division.
Introducing the fighter to my left, fighting out of the red corner.
With a record of
3 - 1 - 0, fighting out of Helsinki, Raymond Grey!
And introducing the fighter to my right, fighting out of the blue corner.
With a record of
1 - 1 - 0, fighting out of Helsinki, John Rydeland!
The judges for this bout are Paul Aken, Daniel Blasius and Nard Betker.

The bell rings for round one and we are underway!
Rydeland keeping his hands up high there, blocking the jab from Grey.
Rydeland now looks to counter with a shot at the body.
Grey lands a jab to the head.

It looks like John Rydeland has been cut.
Grey throws the left hand but Rydeland avoids the punch easily.
Rydeland throws a lazy right hand but Grey sees it coming a mile off and sidesteps it easily.

Grey darts in and clinches Rydeland up against the cage.
Rydeland is trying to break free.
Rydeland lands a hook that snaps the head of Grey backwards.

Grey breaks the clinch and we return to the middle of the mat.
Grey thuds a left hand into Rydeland's body.
Rydeland ducks down and throws a hook to the body but Grey moves away.
Rydeland fakes high and swings low for a body shot but Grey manages to avoid it.
Grey wants to take advantage of his opponent's missed offense by moving into the clinch.
Rydeland clobbers Grey with an overhand right that has the crowd gasping. That made a horrendous noise.
Grey uses some good footwork to avoid the body shot by Rydeland.
Rydeland scores with a jab.
Grey wants to clinch
enabling Rydeland to counter with a crisp jab.
This is a great period of action - very entertaining stuff!
Grey takes one to the chin there.
Rydeland punishes Grey's body with a nice straight punch.

That's one minute gone in the round.
Rydeland throws a right and a left that both miss.
A looping hook to the body misses from Grey. Rydeland does a little dance to reset his feet.
Grey throws a hook to the body but it doesn't connect.
The fight stays on the outside here - Grey looks like he's thinking about clinching though.
A nice side step and Rydeland releases a counter shot to the body, but it doesn't find it's home.
Grey lands a jab.
We've been hearing reports that Grey has been drilling takedowns in recent sessions so let's see if that has an impact on the result of this fight.
Rydeland looks to land a left hand but Grey moved out of range nicely.
Rydeland slips a jab from Grey.
Rydeland throws out a token jab with nothing on it.
Grey misses with a hook to the body
letting Rydeland counter with a right hand.
Rydeland lands with a right hand.
Grey uses good head movement to avoid the hook from Rydeland.
Grey blocks a jab.
Rydeland throws a nice hook to the body that draws an oooh from the crowd.
Grey lands a head shot.
Rydeland swings for the body but Grey moves out of range.

That's two minutes gone in the round.
Wooooo! Give it up for these two warriors! They are putting on a show!
Rydeland uses some good footwork to avoid the body shot by Grey.
Some wild striking there from Rydeland.
Grey misses the shot to the body.
It seemed like Rydeland was going to counter with the hook but didn't fully commit to it.
Grey with a nice cross.
Rydeland lands a straight punch to the body, keeping Grey at a distance.
Rydeland stooping low to avoid any incoming strikes and then lunges in with an uppercut come cross that lands flush.
A punch combination from Rydeland misses.

Grey bobs and weaves into range and then changes levels and scores with a nice takedown into side control.
Rydeland can't do much from the bottom here.
Rydeland is trying to get back to half guard. He's pushing on Grey's leg. He's managed it. Nice work.
Rydeland is trying to get back to full guard.
Grey seems very keen to just sit and control from half guard but Rydeland does not like that idea so much and is remaining active off his back.

That's three minutes gone in the round.

Grey is working for a submission of some sort.
Grey looking for a kimura but he'll have to free his other leg if he wants to finish that. Perhaps he's just using it as a distraction technique.
Grey is looking for a kimura but Rydeland is holding onto that half guard position, so it's hard for Grey to get the leverage.
Grey is looking for a kimura but he's never going to get it from there.
The ref warns both fighters not to hold the cage as they work up against the meshing.
The fighters are starting to get a bit slippery now, which will make submissions a bit more difficult.
Grey wants to control but Rydeland is keeping him busy.

That's four minutes gone in the round.
The crowd are starting to boo a lack of action.
Grey is looking for a kimura but Rydeland is holding onto that half guard position, so it's hard for Grey to get the leverage.
Grey is trying a forearm choke
I don't think that's going to do much at this level of the game.
Grey is trying to control. Rydeland wants to improve his position but can't escape this time.
Rydeland is looking to improve his position.
Grey wants to control but Rydeland is keeping him busy.
Rydeland moves his hips nicely and gets into full guard.
Grey thinks about going for a leg but decides against it, in order to maintain the position.
Grey wants to pass the guard but Rydeland is keeping the position.
Grey trying to control but Rydeland is working from the bottom.
And thats the end of the round the fighters go back to their corners.
A close round but John Rydeland will probably get the nod.
The cut man is working on John Rydeland's cut.
The fighters get back to their feet, the hooter sounds and we're back to the action!

Rydeland moves out of range as Grey strikes.
Grey throws out a loose jab but Rydeland uses good head movement to avoid it.
Grey throws out a loose jab but Rydeland uses good head movement to avoid it.
Rydeland staying out of range there.
Rydeland doesn't fully commit to the body shot counter.
Good shot there by Rydeland.
Nice defenses there by Grey.
Rydeland gets caught on his heels momentarily as he allows Grey to score an easy takedown into full guard.

Rydeland throwing his legs up looking for a triangle.
Grey is trying to work a guillotine from the top, or something like that? Don't know how he thinks he's going to get a finish from there.
We've had a slow start to the round here - hopefully the action picks up.
Grey forces his way into half guard.
That's one minute gone in the round.
Grey is looking for a kimura here.
Rydeland is looking to improve his position.
Grey trying to control from half guard but Rydeland is working away.
Rydeland is looking to regain full guard. Not this time though.
The fighters are pressed up against the cage, both looking to find a bit of space to work.
Grey is trying to control the action in half guard but Rydeland is working away on the bottom, looking perhaps to get back to full guard.
The referee calls for the fighters to work.
Grey wants to pass the guard but Rydeland is defending well.
That's two minutes gone in the round.
The crowd are hurling abuse towards the fighters... You can hardly blame them though because there isn't a lot going on in the fight.
The fighters are battling for position here. Rydeland manages to regain full guard. Nice work.
Rydeland bucks up whilst keeping hold of a body lock, managing to reverse the position. Now he's in top in Grey's guard.

Grey working the defensive guard well to avoid strikes from Rydeland.
Grey throws his legs up looking for a submission but Rydeland uses it to pass to side control.
Rydeland advances nicely into full mount.
Grey regains half guard.
Grey trying to hold on to Rydeland's head to control him but Rydeland postures up.
Grey blocking the ground and pound attempt from Rydeland.
Rydeland throwing shots but Grey is blocking nicely.
Grey is not content to let Rydeland control the position.
That's three minutes gone in the round.
Rydeland passes into side control, despite Grey's attempt to control the position.
Grey is trying to get back to half guard.
Raymond Grey overall seems to be getting the better of the ground position in the fight so far.
Grey gets one leg under and gets the fight to half guard.
The two fighters exchange a few words. I couldn't hear what they were saying but maybe it's more fun if you make it up yourself. Rydeland connects with a nice short shot to Grey's temple.
Rydeland throwing shots but Grey is blocking nicely.
Rydeland thumps the canvas. Not on purpose obviously - he just missed Grey's head.
Grey on his back here. We all know that wrestlers don't like being on their back so let's see if Grey tries to get out of the position.
Rydeland sitting in half guard, looking to land shots. Grey defending well though.
Grey moves his hips nicely and gets into full guard.
Rydeland landing some decent shots from guard.
Rydeland advances to half guard.
That's four minutes gone in the round.
Grey trying to hold on to Rydeland's head to control him but Rydeland postures up.
Grey won't allow Rydeland to pass to mount.
Grey is not content to let Rydeland control the position.
Grey tries to get to full guard but Rydeland has control of the leg.
Grey trying to control but Rydeland postures up.
The crowd thankful this round is nearly over.
Grey is looking for a sweep. Rydeland is wise to his cunning plan and keeps the top position.
Grey looking for submissions off his back.
And thats the end of the round the fighters go back to their corners.
John Rydeland showed his class in that round. I'd imagine he'll take it on all the scorecards.
The cut man is working on John Rydeland's cut.
OK. That's time! The bell goes and we're back to the action. And we move into the final round!

Rydeland takes a solid shot to the body. That one hurt him but he's trying not to show it.
Grey throws out a token jab with nothing on it.
Rydeland's jab looks to have found its range, popping Grey under the eye.
Rydeland throws a jab to the body, straight down the pipe. Boom. That sent Grey stumbling backwards but he manages to regain his composure quickly.
Rydeland ducks under a wild hook from Grey.
Grey throws an overhand right that lands on Rydeland's shoulder, as Rydeland tries to avoid the shot.
Grey misses with an uppercut.
A nice side step and Rydeland releases a counter shot to the body, but it doesn't find it's home.
Grey takes one on the button.
Rydeland cracks Grey with an open hand slap.
We've had a slow start to the round here - hopefully the action picks up.
Grey misses with a jab to the body
and Rydeland counters nicely by changing levels and landing a hook to the body.
John Rydeland seems to be getting the better of the standup.
Rydeland misses with a looping right.
Grey throws out a token jab with nothing on it.
Rydeland throws a wild combination but nothing lands.
Grey thuds a left hand into Rydeland's body.
That's one minute gone in the round.
Rydeland misses with a body shot.
Grey lands a nice looking body shot.
Grey closes the distance and gets a double leg, slamming Rydeland to the mat! Rydeland manages to get full guard.

Rydeland has scooted to the edge of the canvas and used the cage to get back to his feet. Grey has stuck on his opponent and is forcing him back against the cage.
Rydeland misses with a hook to the ribs.
Rydeland tries a body shot but Grey blocks it.
Grey pushes off an throws an elbow but Rydeland leans to the side and avoids it. We're back to clinching against the cage.
Grey pulls guard.
Rydeland avoids a guillotine attempt easily.
Grey is working actively off his back, looking to secure an arm or perhaps work for a triangle.
Both fighters are breathing heavily.
This is a great period of action - very entertaining stuff!
Rydeland working some ground and pound from guard but it's not doing any damage.
Both fighters have adopted an aggressive gameplan on the ground!
That's two minutes gone in the round.
Grey utilising some decent striking defenses from the guard, preventing the ground and pound.
Rydeland missing there with some ground and pound from the guard.
Rydeland throws a strike but Grey rolls with it and manages to sweep. Now he's in guard on top.

Grey is pushing down on Rydeland's leg trying to pass to half guard. Rydeland is fighting to maintain full guard but Grey has managed to sneak the leg through.
Rydeland is looking to control Grey's leg but it's slowly edging free. Can Rydeland avoid being mounted?
Grey is looking to advance position but Rydeland won't allow it.
Grey is keen to just control but Rydeland is a slippery customer.
Grey is looking for a kimura. It's going to be difficult to finish that from half guard though and Rydeland defends it well.
Rydeland moves into full guard.
There's a bit of a scramble here and now Rydeland is on top in guard.
That's three minutes gone in the round.
Grey is looking for a triangle but Rydeland pushes his legs off easily.
Rydeland has the superior BJJ but he's also working some ground strikes into his gameplan.
Grey looking for a sweep. Not yet Grey, not yet.
Grey avoiding any damage from the ground and pound.
Grey has his foot on Rydeland's thigh. He's trying to push off and get in position for a triangle, I think. Rydeland works his way back into a safe position though.
Rydeland in full guard, throwing the ground and pound. No damage this time.
Grey keeping moving, preventing Rydeland from controlling successfully.
Rydeland trying to land body shots but he keeps hitting the mat.
Rydeland throws a big right hand that misses.
There's a bit of a scramble here and now Grey is on top in guard.
Grey trying to control the position from guard on top but Rydeland is wriggling around, looking for whatever he can.
That's four minutes gone in the round.
Rydeland working a defensive guard here.
Grey won't allow Rydeland to sweep him here.
Grey passes easily into side control. Nice work.
Rydeland felt the need to train up his defensive grappling in the buildup to the fight. Presumably he was expecting to be in a difficult position like this, so let's see if he can get out of it.
Grey is pausing for a moment. What's he doing? It looks like he's clearing his nose. Oh dude! He's shot a load of snot all down Rydeland's shoulder. That is not cool.
Grey trying to control the position but Rydeland is working away.
Grey is really struggling to control Rydeland but he's trying to hold on to the position.
Rydeland is trying to get back to half guard. He's pushing on Grey's leg. He's managed it. Nice work.
And that's the end of the fight!
That was a close round. You could make an argument for either fighter but I would give it to Raymond Grey.
I think Rydeland has won this one but let's see whether the judges agree with me. Over to the ring announcer for the scorecards.
Ladies and gentlemen, after 3 rounds of action, we go to the scorecards for a decision.
Judge Paul Aken scores the fight 28:30
Judge Daniel Blasius scores the fight 28:29
Judge Nard Betker scores the fight 27:30
In favor of your winner, by unanimous decision... John Rydeland!
A victorious John Rydeland thanked his army of followers in his post fight interview, telling people to make sure they follow him on Twitter.
|
|
|
|
|
|
|
|
|
|
|
|
|
|
|
|
|
|
|
|
|
|
|
| S |
C
A |
G |
S |
C
B |
G |
|
S |
C |
G |
|
energy
A | B |
|
hype
A | B |
|
pop
A | B |
|
mgr
A | B |
|
FIGHT
RATING
45% |
|
|
|
|
|
|
