|
|
PBP Commentary |
Coming up we have a bantamweight MMA rules bout between Diagoro Yabaisama (ranked 0 p4p, 0 weight class) and Johnny Whiteside (ranked 0 p4p, 0 weight class). Yabaisama comes to the cage accompanied by Liquid Swords. I'm sure you'll be fascinated to know that I was talking to some pointless Z list celebrity before the fight and he thought that Johnny Whiteside was going to win. Let's see if he was right.
 |
|
 |
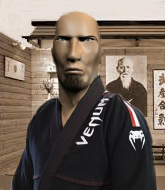
| 163 cm
23
145 lbs
4 - 0 - 0 |
|
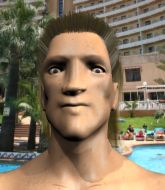
160 cm
22
148 lbs
7 - 5 - 0 |
Abu Dhabi Champ
Dangerous knees
Granite chin |
|
Good wrestler
Counter fighter
Good gas tank |
|
| |
|
Ladies and gentlemen. This fight is 3 rounds, in the bantamweight division.
Introducing the fighter to my left, fighting out of the red corner.
With a record of
4 - 0 - 0, fighting out of London, Diagoro Yabaisama!
And introducing the fighter to my right, fighting out of the blue corner.
With a record of
7 - 5 - 0, fighting out of Las Vegas, Johnny Whiteside!
The judges for this bout are Nard Betker, Albert Achterberg and Saam Ante.

The bell rings for round one and we are underway!

Whiteside clinches.
Yabaisama misses with a knee strike.
Yabaisama misses with some punches.
Yabaisama lands a left hand that snaps the head of Whiteside backwards.
Whiteside is looking for a takedown.
Yabaisama gets double underhooks to prevent a takedown attempt from Whiteside.
Yabaisama tries a shoulder strike but it doesn't do any damage.
Yabaisama lands with a short shot to the head.
Whiteside being controlled against the cage.
Yabaisama lands a knee to the head.
We've had a slow start to the round here - hopefully the action picks up.
Whiteside blocks an uppercut.
Yabaisama fails to land with a short punch on the inside.
Whiteside drops to a knee looking for a takedown but Yabaisama gets the underhooks and prevents it.
Diagoro Yabaisama has stuffed three takedown attempts in the round now. That's going to take a lot out of Johnny Whiteside.
Yabaisama lands with a quick shot inside that doesn't really do much damage.

That's one minute gone in the round.
Yabaisama lands an elbow that stopped Whiteside in his tracks for a moment.
Whiteside blocks a couple of punches on the inside.
Yabaisama lands a knee to the body.
Whiteside dodges an elbow strike from Yabaisama.
Yabaisama lands a shoulder strike that jolts his opponent's head backwards.
Whiteside has Yabaisama pressed against the cage.
Yabaisama misses with a short punch on the inside.
Yabaisama misses with a punch on the inside.
Yabaisama lands with a right to the head.
Whiteside blocks a punch to the side of the head.
Yabaisama scores with an uppercut up the middle.
Yabaisama gets underhooks to prevent Whiteside's takedown attempt.
Yabaisama misses with a punch on the inside.
Yabaisama with the Thai clinch. He's looking to land a big knee but he's not managed it this time.
Whiteside being controlled against the cage.
Still in the clinch, Yabaisama scores with a nice short uppercut.

That's two minutes gone in the round.
Whiteside is working on a leg, looking for a takedown but Yabaisama is defending well.
We've seen a great period of action over the last minute or so - credit to both fighters for going all out!
Yabaisama is struggling to control the position.
Yabaisama lands a right hand that snaps the head of Whiteside backwards.
Whiteside is trying to break free.
Whiteside is trying to force a seperation but Yabaisama has the dominant position.
A quick uppercut on the inside from Yabaisama.
Whiteside is clearly stalling here... Pick up the pace son.
Whiteside takes a shot to the head.
Whiteside is trying to force a seperation but Yabaisama has the dominant position.
Yabaisama lands with a left to the head.
Yabaisama tries to land a knee to the body but he is off balance and Whiteside avoids it.
Yabaisama tries to land a knee to the head but Whiteside blocks with his arms.

That's three minutes gone in the round.
Whiteside is working on a leg, looking for a takedown but Yabaisama is defending well.
Yabaisama softening up his opponent with strikes, against the cage.
Yabaisama misses with the head strike.
Yabaisama prevents Whiteside from breaking the clinch.
Yabaisama lands a knee to the body.
Yabaisama lands a hook that snaps the head of Whiteside backwards.
Yabaisama scores with a shot to the side of Whiteside's head.
Whiteside wants a takedown but no success here.
Whiteside changes levels and goes for a takedown here. Yabaisama fights it off and pushes away nicely.
Yabaisama's corner calls for a 1-2. Yabaisama obliges with the 1 part as he scores the single shot and moves back out of range.
Yabaisama lands a nice shot that snaps Whiteside's head back.
Whiteside rushes in with a sloppy looking punch
and Yabaisama cracks him with a counter punch right on the button.
Yabaisama lands with a cross.
The crowd are loving this. Great action here.
Yabaisama lands with a cross to side of his opponent's head.

That's four minutes gone in the round.
A looping hook to the body misses from Whiteside. Yabaisama does a little dance to reset his feet.
Whiteside tries to land with a swinging hook to the body but Yabaisama was well out of range. Poor timing from Whiteside.
Diagoro Yabaisama seems to be the more aggressive standup fighter in this bout.
Whiteside throws a jab but it's blocked by Yabaisama.
Yabaisama throws a jab to the body, straight down the pipe. Boom. That sent Whiteside stumbling backwards but he manages to regain his composure quickly.
Yabaisama feints and then cracks Whiteside's leading leg with a nice low kick. He's obviously looking to slow Whiteside down.
Yabaisama connects with a high kick.

Whiteside closes the distance and after a bit of a stuggle, scores a takedown into Yabaisama's guard.
Yabaisama trying to keep a closed guard but Whiteside is proving a slippery customer.

Yabaisama throwing his legs up looking for a triangle.
Yabaisama looking for submissions off his back, moving his hips, looking for an opening.
And thats the end of the round the fighters go back to their corners.
Diagoro Yabaisama dominated that round.
That's the end of the round. The referee orders the cornermen out of the cage so we can get back down to business.

Yabaisama moves into range and throws a combination. A nice jab followed by a hook to the body.
Nice body punch from Yabaisama.
Whiteside takes a kick to the side of the head.
Yabaisama avoids a punch combination nicely.
Yabaisama throws a looping overhand right but Whiteside ducks down to avoid it.
Yabaisama throws the left hand but Whiteside avoids the punch easily.
Yabaisama is really dominating this fight. Is there anything that Whiteside can do to turn this around?
A punch lands to the side of Whiteside 's head but he takes it in his stride.
Yabaisama dips down and scores with a jab to the body.
Whiteside moves his head to the side to avoid a jab but walks straight into a cross.
Whiteside moves to clinch but Yabaisama breaks away
and Yabaisama connects with a straight left hand counter down the middle.
We've seen a great period of action over the last minute or so - credit to both fighters for going all out!
Whiteside throws an uppercut from half a mile away. Yabaisama sees it coming and avoids it easily.
Yabaisama scores with a reasonable looking shot to the body. Whiteside doesn't seem bothered though.
That's one minute gone in the round.
A big left from Yabaisama misses.
Yabaisama lands a nice looking body shot.
Yabaisama lands with an overhand left.
Yabaisama misses with a double jab.
A chopping leg kick lands by Yabaisama.
Yabaisama lands with an overhand left.
Yabaisama lands an overhand right.
Whiteside gets his head snapped back by a nice shot there.
Nice shot lands for Yabaisama.
Yabaisama lands a leg kick and bounces back out of range.
Yabaisama lands a glancing blow to the side of Whiteside's head.
This has been an exciting period of action!
Yabaisama throws a big shot that misses.
The fight moves into the clinch position.
That's two minutes gone in the round.
Yabaisama putting his Muay Thai to good use. He has Whiteside in a tight clinch and is doing some damage with knees to the body.
Whiteside takes a knee to the side of the body.
Whiteside blocking some punches.
Yabaisama tries to land a knee to the body but he is off balance and Whiteside avoids it.
Yabaisama landing knees to the body.
Whiteside is working on a leg, looking for a takedown but Yabaisama is defending well.
Yabaisama looking to throw knees to the head but Whiteside is blocking nicely.
Yabaisama lands a shoulder strike that jolts his opponent's head backwards.
Whiteside is looking for a takedown up against the cage. Yabaisama gets underhooks though and prevents the takedown attempt.
Whiteside is looking to take this one to the mat.
Diagoro Yabaisama has stuffed three takedown attempts in the round now. That's going to take a lot out of Johnny Whiteside.
Still in the clinch, Yabaisama scores with a nice short uppercut.
Yabaisama stays in close to his opponent and throws a right hand to the body.
A quick uppercut on the inside from Yabaisama.
Yabaisama tried to land a shot to the body but connects with Whiteside's elbow.
Whiteside's head jolts backwards as he takes an uppercut right on the button!
Our sources have told us that Yabaisama has been working on his knees in the buildup to the fight.
That's three minutes gone in the round.
Yabaisama lands with a short punch from the clinch.
Yabaisama lands an uppercut.
Whiteside drops down for a takedown but doesn't get it.
Whiteside has clasped his hands together around Yabaisama's back... aaand, he's got a takedown into side control. Nicely done.
Whiteside tries to advance to mount but can't.
Whiteside works to advance to full mount. Yabaisama defends for a few seconds but eventually he succumbs.
Yabaisama wriggling around on the bottom manages to avoid the strikes thrown by Whiteside.
Whiteside avoids the attempt from Yabaisama to control.
Whiteside wants to control the pace but Yabaisama is squirming around nicely.
That's four minutes gone in the round.
Yabaisama slips a leg in and gets back to half guard.
Yabaisama avoiding damage under a succession of punches from Whiteside.
Whiteside keeping composed on the top, looking to control the action.
Yabaisama is refusing to be controlled, as Whiteside sits in half guard.
Yabaisama trying to control but Whiteside postures up.
Yabaisama is trying to get back to full guard.
The fighters are pressed up against the cage, both looking to find a bit of space to work.
The crowd cheering loudly, showing their appreciation for the quality fight we're seeing here.
Yabaisama is trying is best to control the position here.
And thats the end of the round the fighters go back to their corners.
Diagoro Yabaisama dominated that second round.
Well, the break between rounds is over. Let's get back to the scrappin! This is the final round!

Whiteside keeps his opponent at a distance with a nice jab.
Whiteside misses with an uppercut
and Yabaisama counters with a stiff right hand.
Whiteside drives through with a takedown into Yabaisama's guard. Let's see what he can do from the top position.
The ref warns both fighters not to hold the cage as they work up against the meshing.
Whiteside got a little sloppy there for a moment and Yabaisama has worked his way into a loose triangle - can he finish it?! No, Whiteside has managed to get both his arms back between Yabaisama's legs - danger averted.
Yabaisama working a defensive guard but Whiteside manages to pass into side control anyway.
Yabaisama gets back to half guard.
Yabaisama is looking to sinch up a guillotine here but Whiteside pulls his head out easily.
We've had a slow start to the round here - hopefully the action picks up.
Yabaisama is looking to regain full guard. Not this time though.
Whiteside working the head and body with strikes.
That's one minute gone in the round.
Whiteside takes a deep breath and rests his weight momentarily on top of his opponent, to control the position.
Yabaisama manages to get to full guard.
Yabaisama throws his legs up looking for a submission but Whiteside uses it to pass to side control.
Yabaisama is looking to regain half guard here but Whiteside keeps moving and retains side control.
Yabaisama wants to control but Whiteside postures up.
Yabaisama manages to get one leg in to regain half guard.
Johnny Whiteside has stepped it up - he knows he needs a finish here!
That's two minutes gone in the round.
Yabaisama looking for subs from the bottom but Whiteside mounts him!
Whiteside is in the full mount, landing strikes.
Whiteside landing strikes from the mount.
Yabaisama is desperately trying to improve his position but Whiteside has a good base and remains in mount.

Whiteside swings around for an armbar but it's a sloppy attempt and Yabaisama is now in Whiteside's guard. A big mistake from Whiteside there, giving up the dominant position!
Johnny Whiteside has got the better of the ground game so far.
Yabaisama trying to control the position from guard on top but Whiteside is wriggling around, looking for whatever he can.
Yabaisama trying to pass the guard but can't manage it just yet.
Whiteside can't keep his opponent in guard - Yabaisama advances to half guard, no doubt looking to mount.
Whiteside slips a foot under and gets full guard. Nice work.
That's three minutes gone in the round.
Yabaisama looking to pass the guard.
Whiteside is working an open guard here, looking to improve his position. No doubt that will leave him open to counters but at least he's being more offensive.
Our spies down at at Woodhouse's inform us that Whiteside has really been working on his submissions in the buildup to this fight. Will it pay off?
Whiteside has his foot on Yabaisama's thigh. He's trying to push off and get in position for a triangle, I think. Yabaisama works his way back into a safe position though.
Yabaisama trying to control but Whiteside is working from the bottom.
Yabaisama looking to sit in guard and control but Whiteside gets the butterfly guard and sweeps. He's now in the guard on the top.

Whiteside pressing down on his opponent's thigh, looking to pass guard. Yabaisama is keeping the position for now.
That's four minutes gone in the round.
Whiteside is holding a leg here, probably looking for an ankle lock - he drops back and goes for it! Yabaisama is in trouble! Is it all over??? No! Yabaisama has escaped and now he's on top!

Whiteside is looking for a triangle but Yabaisama pushes his legs off easily.
Whiteside is throwing his legs up, looking for submissions. Yabaisama is aware though and is defending well.
The crowd thankful this round is nearly over.
Whiteside is active off his back here, looking for submissions.
Whiteside takes a big intake of breath there - he's definitely tired.
Yabaisama passes Whiteside's right leg, so he's now in half guard.
And that's the end of the fight!
Johnny Whiteside comfortably won the final round on my scorecard.
I think Yabaisama has won this one but let's see what the judges have to say. Over to the ring announcer for the scorecards.
Ladies and gentlemen, after 3 rounds of action, we go to the scorecards for a decision.
Judge Nard Betker scores the fight 29:28
Judge Albert Achterberg scores the fight 29:28
Judge Saam Ante scores the fight 29:28
In favor of your winner, by unanimous decision... Diagoro Yabaisama!
Diagoro Yabaisama thanked the fans post fight for their support.
|
|
|
|
|
|
|
|
|
|
|
|
|
|
|
|
|
|
|
|
|
|
|
| S |
C
A |
G |
S |
C
B |
G |
|
S |
C |
G |
|
energy
A | B |
|
hype
A | B |
|
pop
A | B |
|
mgr
A | B |
|
FIGHT
RATING
56% |
|
|
|
|
|
|

