|
|
PBP Commentary |
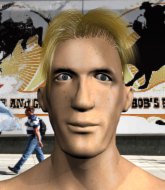
Coming up we have a welterweight MMA rules bout between Alastair Stirling (ranked 0 p4p, 0 weight class) and Romano Redz (ranked 0 p4p, 0 weight class). Chooooooooon! I think Stirling might be my favorite fighter, now he's come out to Endgestalt - Sturmkrieger. Alastair Stirling is staring across the cage at his opponent, tweaking his nipples... Tweaking his own nipples that is.
 |
|
 |
| 187 cm
22
175 lbs
4 - 2 - 0 |
|
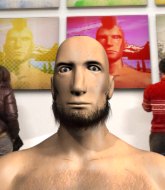
180 cm
27
187 lbs
10 - 8 - 0 |
Good wrestling
Excellent boxer
Cardio machine |
|
Excellent grappler
Excellent boxer
Good gas tank |
|
| |
|
Ladies and gentlemen. This fight is 3 rounds, in the welterweight division.
Introducing the fighter to my left, fighting out of the red corner.
With a record of
4 - 2 - 0, fighting out of Hilo, Alastair Stirling!
And introducing the fighter to my right, fighting out of the blue corner.
With a record of
10 - 8 - 0, fighting out of Amsterdam, Romano Redz!
The judges for this bout are Cecil Peabody, Alan Glass and George Francis.

The bell rings for round one and we are underway!
Stirling uses good head movement to avoid the hook from Redz.
Stirling takes a shot right to the liver - Bas would have been proud of that punch.
A looping hook to the body misses from Redz. Stirling does a little dance to reset his feet.
Stirling looks to have improved his striking defense since last time we saw him fight.
Redz lunges at Stirling with a hook that half lands and is half blocked by Stirling's hand.
Redz misses with a jab and misses with a cross straight after too.
Stirling throws a big counter combination but Redz scrambles out of danger and avoids any damage.
Stirling throws a lazy right hand but Redz sees it coming a mile off and sidesteps it easily.
Stirling misses with a double jab.
Redz swings wildly with a right hand that was never going to find it's target.
Stirling defends well against a solid takedown attempt from Redz.
Stirling misses with a right hand
and Redz counters with a straight punch to the midsection.
Stirling tries to clinch there but Redz circles away.
We've had a slow start to the round here - hopefully the action picks up.
Stirling jabs Redz right on the nose. Redz blinks but takes it well.
We can't be sure of the tactics at this early stage but we have heard that Redz has been working on his takedowns a lot in the buildup to the fight and we can only assume he's going to look to take this to the mat.
Redz throws a hook to the body but it doesn't connect.
Redz throws a right and a left that both miss.
Redz takes a solid shot to the body. That one hurt him but he's trying not to show it.
The fans in attendance giving it up for the two fighters, who have really let it all hang out in the last minute or so!
Stirling lunges in with swinging rights and lefts but Redz circles away quickly and effectively.

That's one minute gone in the round.
Redz misses with a body shot. Nice footwork from Stirling.
Stirling takes a shot right to the liver - Bas would have been proud of that punch.
Stirling misses with a straight right.
Redz looks to land a left hand but Stirling moved out of range nicely.
A looping hook to the body misses from Redz. Stirling does a little dance to reset his feet.
Redz misses with a body shot. Nice footwork from Stirling.
Redz is throwing a lot of body shots here, looking to wear down Stirling rather than just go for the knockout.
Stirling closes the distance and takes a jab right on the nose as he does so.
Redz misses with an uppercut. Stirling saw that one coming.
Redz uses some good footwork to avoid the body shot by Stirling.
A punch combination from Stirling misses.
Redz darts in looking for a takedown but Stirling gets double underhooks and turns Redz into the cage.
Redz's jab looks to have found its range, popping Stirling under the eye.
Stirling walks into a jab.
Redz throws an uppercut from half a mile away. Stirling sees it coming and avoids it easily.
It looked like Stirling was looking amped, ready to throw a big counter but didn't commit.
Redz tries to land with a swinging hook to the body but Stirling was well out of range. Poor timing from Redz.
Redz misses with a body shot. Nice footwork from Stirling.

That's two minutes gone in the round.
Stirling smiles there as he lands a nice right hand right on the button.
The fans in attendance giving it up for the two fighters, who have really let it all hang out in the last minute or so!
Stirling takes a jab on the nose there. A little bit of blood seems to be coming out. Hopefully that won't affect his breathing.
Stirling connects with a body shot that sends Redz's belly button to the back.
A looping hook to the body misses from Stirling. Redz does a little dance to reset his feet.
Redz moves away from the strike by Stirling.
Stirling misses with a double jab
and Redz counters with a quick right hand to the jaw.
Stirling swinging wildly here.
Stirling misses with a body shot.
Redz throws out a counter right but Stirling avoids it with no problem.
Redz wings a very wild body shot but it does the job and lands to the midsection.
Redz takes a jab on the nose there. A little bit of blood seems to be coming out. Hopefully that won't affect his breathing.
Danga de danga de dang - Stirling scores with a four punch combination!
Stirling drops his hands momentarily and Redz takes advantage with a crisp shot to the head.
Stirling ducks down and throws a hook to the body.

That's three minutes gone in the round.
A slow jab from Stirling misses its intended target.
Redz shoots in with a takedown attempt and he has Stirling pinned against the cage. Stirling gets the underhooks and manages to circle away.
Alastair Stirling has stuffed three takedown attempts in the round now. That's going to take a lot out of Romano Redz.
Stirling tries to clinch up against the cage, rushing in to close the distance. Redz manages to break the clinch and circles back to the middle of the mat.
Stirling thows a left - swing and a miss!
Stirling slips under a jab from Redz.
Stirling scores with a jab to the body.
Stirling on the wrong end of an overhand right that came out of nowhere.
Stirling lands an overhand right.
Redz takes a swing at Stirling's ribcage but misses.
Stirling ducks under an overhand right and circles away with a smile on his face.
Stirling staying out of range there.
Stirling throws a hook to the side of Redz's head but Redz sees it coming and ducks under it beautifully.

That's four minutes gone in the round.
Nice cross by Stirling.
Stirling keeping a good distance there, avoiding the body shot.
Redz is landing a lot of head punches in this opening round! Stirling had better start moving his head a bit unless he wants his face to turn into pâté.
Stirling throws an uppercut from half a mile away. Redz sees it coming and avoids it easily.
Redz bobs and weaves and unloads with a good uppercut.
This is a great period of action - very entertaining stuff!
Redz works his jab well there, keeping his opponent at a distance.
Stirling takes a big uppercut there. He seems a bit wobbly but no, he's OK.
Stirling scores with a big left there. The judges will like that one.
A jab from Redz misses.
Redz takes an uppercut right on the jaw but it doesn't phase him.

Redz is rocked!
Redz shoots for a double leg takedown but Stirling sprawls well. He's pushed Redz's face into the mat and manages to get back to his feet relatively easily.
Stirling lunges in with swinging rights and lefts but Redz circles away quickly and effectively.
The crowd applaud the fighters' efforts here as the round comes to an end.
Redz slips a jab from Stirling.
Redz fakes a head punch and goes low to the body. Nicely done.
Redz lands an overhand left. A wild punch that just about connected.
Redz steps to the side to avoid the strikes from Stirling.
And thats the end of the round the fighters go back to their corners.
A close round but Romano Redz will probably get the nod.
The corners get their ten second warning. Both fighters stand from their stools and stare eachother down, ready to get back to the action.

Redz lands a vicious shot with the stealth of a sniper and the strength of a viper. Are vipers that strong? I can think of lots of things that are stronger than a viper - not many rhyme with sniper though.
Redz looks for a takedown here. Will he get it? Stirling is fending him off so far but Redz persists. Nope, Stirling circles away and we're back to standing.
Stirling drops his hands and takes a jab to the jaw for his troubles.
Redz keeping a good distance there, avoiding the body shot.
Stirling throws a monster uppercut resembling something out of street fighter but it doesn't land.
Redz tries to drive through with a takedown attempt but Stirling defends well and Redz ends up having to push Stirling into the cage where they will battle it out in the clinch.
Stirling connects with a body shot that sends Redz's belly button to the back.
Redz shakes his hands off, looking to compose himself, but takes a jab to the jaw whilst he does it.
Redz ducks under a wild hook from Stirling.
Redz connects with the punch.
Alastair Stirling is winning the standup battle so far.
We've had a slow start to the round here - hopefully the action picks up.
Redz shoots in and drives through. Stirling sprawls well.
Alastair Stirling has stuffed three takedown attempts in the round now. That's going to take a lot out of Romano Redz.
Redz connects with a hook to the side of his opponent's head.
Sloppy strikes from Redz. Those never looked like landing.
The crowd are loving this. Great action here.
Stirling lunges in with swinging rights and lefts but Redz circles away quickly and effectively.
Redz takes a punch right to his stomach. That took the wind out of him momentarily.
Alastair Stirling is looking to keep the fight on the feet at all costs.
That's one minute gone in the round.
Stirling stalks Redz and leaps in with a furious combination of punches. Uppercuts and crosses smash into Redz's face. Redz staggers backwards, shaken.
Redz shoots in but no luck this time.
Redz connects with a lovely right hand, straight down the pipe.

Stirling drops Redz with a hook right on the temple. He thinks about going to the ground but Redz looks back up at him and smiles so Stirling waves him back to his feet - he obviously thinks he can knock him out after that shot landed.
Redz is still on wobbly legs! Can Stirling finish him?
This has been an exciting period of action!
Redz misses with a two punch combination.
Redz is breathing heavily.
Stirling rushes in with a sloppy looking punch
and Redz counters with a crisp hook to the side of the head.
Stirling cracks Redz with a hook to the temple - Redz is on wobbly legs here! Stirling swarms him with hook after hook, landing with each one! Redz falls to the canvas face first and the referee dives in to stop the fight! Stirling wins by TKO!
Ladies and gentlemen, after 1:27 of round 2, we have a winner by way of TKO (Punches). Alastair Stirling!
During a confident post fight interview, Alastair Stirling thanked all his fans. He seemed very genuine when describing how motivated his fans keep him.
|
|
|
|
|
|
|
|
|
|
|
|
|
|
|
|
|
|
|
|
|
|
|
| S |
C
A |
G |
S |
C
B |
G |
|
S |
C |
G |
|
energy
A | B |
|
hype
A | B |
|
pop
A | B |
|
mgr
A | B |
|
FIGHT
RATING
73% |
|
|
|
|
|
|
