|
|
PBP Commentary |
Coming up we have a bantamweight MMA rules bout between Sebastian Shot (ranked 0 p4p, 0 weight class) and Simon Adabisi (ranked 0 p4p, 0 weight class). Well, the cameraman is lingering on a pretty young lady for a bit too long there. Keep your eyes on the prize buddy or you'll miss the fighter intros!
 |
|
 |
| 162 cm
22
145 lbs
4 - 0 - 0 |
|
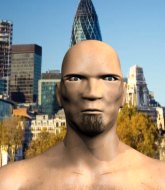
157 cm
30
140 lbs
17 - 6 - 0 |
Good wrestling
Solid boxing
Very quick |
|
Good wrestler
Excellent boxer
Granite chin |
|
| |
|
Ladies and gentlemen. This fight is 5 rounds, for the bantamweight championship of the world!
Introducing the champion to my left, fighting out of the red corner.
With a record of
4 - 0 - 0, fighting out of Rio de Janeiro, Sebastian Shot!
And introducing the challenger to my right, fighting out of the blue corner.
With a record of
17 - 6 - 0, fighting out of Rio de Janeiro, Simon Adabisi!
The judges for this bout are Edson Gomes, Thiago Cunha and Felipe Paraventi.

The bell rings for round one and we are underway!

Adabisi gets caught on his heels momentarily as he allows Shot to score an easy takedown into full guard.
Shot trying to pass the guard but can't manage it just yet.
Adabisi has control of Shot's left arm, preventing Shot from doing any damage.
Shot content to stall in guard here.
Adabisi keeping moving, preventing Shot from controlling successfully.
We've had a slow start to the round here - hopefully the action picks up.
Adabisi is working from a closed guard but he's struggling to control his opponent.

That's one minute gone in the round.
Shot stands up and looks to throw the legs aside to pass to side control. Adabisi swivels though and keeps the full guard.
Shot trying to control but Adabisi is working from the bottom.
Adabisi avoiding any damage from the ground and pound.

The referee decides to stand the fighters back up.
Adabisi stuffs the takedown.
Adabisi looked like he wanted to counter with a punch but didn't throw it.
Adabisi misses with a body shot.
Shot goes for a double leg but Adabisi avoids the attempt and the two fighters end up clinched against the cage as Adabisi continues to drive forward.
Shot uses good footwork to avoid the strikes from Adabisi.
A punch combination from Adabisi misses.
Shot misses with a takedown attempt. He shot from a bit too far out.
That's three failed takedown attempts in the round for Sebastian Shot. That's going to take a lot out of him.

That's two minutes gone in the round.
Shot uses decent footwork to sidestep a right hand from Adabisi.
Shot shoots in for a takedown. "I don't think so" says Adabisi as he avoids it easily.
Shot gets the takedown into side control.
Shot slows the pace down.
Shot misses with a strike but at least he's keeping busy, looking to cause some damage - that will still help him when it comes to the judges scorecards.
Adabisi really doesn't want to stay on the ground with Shot. If he can't get it back to his feet, it's only a matter of time before he'll be tapping out.
Shot tries to move to mount but Adabisi blocks the move with his legs.
The ground and pound from Shot seems to be hitting the mat more than his opponent.
Shot wants to lay and pray for a moment but Adabisi keeps working.
Adabisi prevents Shot from improving position.

That's three minutes gone in the round.

Shot goes for an armbar here - this could be all over! But no, Adabisi has escaped beautifully and is now on top in side control! Oh, that's unlucky for Shot but great work by Adabisi.
Shot tries to bench press Adabisi off him but Adabisi keeps the position.
My spies in The Warehouse inform me that Adabisi has been getting involved in the gym's BJJ sparring sessions. Let's see whether that pays dividends!
Shot is trying to get back to half guard. He's pushing on Adabisi's leg. He's managed it. Nice work.
Shot is looking to regain full guard. Not this time though.
Adabisi wants to pass the guard but Shot is defending well.

That's four minutes gone in the round.
Adabisi prevents Shot from improving his position.
Adabisi trying to control from half guard but Shot is working away.
Adabisi passes into side control, despite Shot's attempt to control the position.
Shot manages to get back to half guard.
Adabisi with a momentary lay and pray from half guard.
Boooooooooooooooooooo!!! God, this has been a terrible round. Come on you two, sort yourselves out!
Shot gets back to full guard.
Shot is working an open guard here, looking to improve his position. No doubt that will leave him open to counters but at least he's being more offensive.
And thats the end of the round the fighters go back to their corners.
That was a close round but I would say that Sebastian Shot will probably get the nod.
That's the end of the interval. I'm sure that seemed a lot quicker than a minute for our two fighters! Back to the action.

Shot is trying hard to land a takedown here. Adabisi sprawls well and keeps this one on the feet.
Shot tries for a takedown but Adabisi circles away easily
and Adabisi counters with a lovely straight right hand!
Shot throws a looping left and ducks down for a takedown. He's got his arms around Adabisi's waist but Adabisi gets an underhook and avoids the takedown by throwing Shot off to one side.
That's three failed takedown attempts in the round for Sebastian Shot. That's going to take a lot out of him.
Shot shoots in looking for a takedown but Adabisi manages to keep the fight standing, pushing Shot's face into the canvas for good measure before circling away.
Adabisi misses with a jab, cross combination.
Shot drops down looking for a counter takedown but Adabisi sprawls and moves away.
Shot looks frustrated there after his takedown attempt is stuffed easily.
A little jabbing left from Adabisi on the counter but it doesn't find it's target.
Nice defenses there by Shot.
Sebastian Shot seems to be the more aggressive standup fighter in this bout.
We've had a slow start to the round here - hopefully the action picks up.
Shot steps to the side to avoid the strikes from Adabisi.
A jab from Adabisi misses.
Shot on the wrong end of a vicious looking body shot.
Adabisi misses with a straight left.
Shot fakes high and shoots in for a takedown but Adabisi avoids it really well and circles away.
That's one minute gone in the round.
Shot changes levels and looks for a double leg takedown. Adabisi tries to avoid it but Shot manages to keep hold of a leg and drag Adabisi to the ground. Adabisi escapes though and pops straight back up to his feet.
Adabisi let fly with a counter punch to the body but it didn't land.
Adabisi fakes a jab and then connects with a hook.
Shot closes the distance and clinches up with Adabisi, looking for a takedown. Shot pushes Adabisi against the cage but Adabisi circles to the side and manages to break the clinch.
Adabisi lands a jab. Then a cross. Then finally a nice hook to the body. Good work there by Adabisi.
Shot shoots in for a takedown. "Ole!" shouts Adabisi as he jumps to the side.
Shot shoots in but doesn't get the takedown
and Adabisi counters with a crisp hook to the side of the head.
Simon Adabisi is looking to keep the fight on the feet at all costs.
Adabisi stuffs a takedown. It's all about dictating where the fight takes place and Adabisi wants it to stay on the feet.
Simon Adabisi seems to be getting the better of the standup.
Shot dives in and grabs Adabisi's left leg, looking for a takedown. Adabisi pushes down on Shot's head and hops out.
It seemed like Adabisi was going to counter with the hook but didn't fully commit to it.
Shot shoots in but doesn't get the takedown
and Adabisi counters with a straight right hand.
That's two minutes gone in the round.
Shot looks frustrated there after his takedown attempt is stuffed easily.
Adabisi misses the jab.
No luck for Shot with that takedown attempt.
We've seen a great period of action over the last minute or so - credit to both fighters for going all out!
Shot goes for a double leg but Adabisi avoids the attempt and the two fighters end up clinched against the cage as Adabisi continues to drive forward.
A telegraphed takedown attempt from Shot is defended easily by Adabisi.
Shot misses with a takedown
and Adabisi counters with a lovely shot to the body.
Both fighters are absolutely exhausted here.

Adabisi drops Shot with a beautiful combination! Shot stares up at his opponent, who ushers him back to his feet - Adabisi is looking for the KO!

Shot is rocked!

It looks like Sebastian Shot has been cut.
That's three minutes gone in the round.
Shot displays some good footwork, moving neatly out of range as Adabisi throws out the jab.
A quick step to the side and Shot tries to counter with a shot to the body but it doesn't connect.
Oh Shot is still all over the place! His legs are completely gone! Will he be able to recover?!!
Shot seems to be moving with more speed, compared to his last bout. He must have been working on that in the gym.
Shot with poor footwork there. He got himself in a bit of a tangle, enabling Adabisi to score with a decent uppercut.
Shot tries for a takedown but Adabisi circles away easily
and Adabisi counters with a huge left! Shot is in big trouble! He's backing up but Adabisi isn't giving him chance to recover. Under a barage of punches the ref has to step in to save Shot from any more damage. A dominating finish by Adabisi!
Ladies and gentlemen, after 3:18 of round 2, we have a winner by way of TKO (Strikes). Simon Adabisi!
Simon Adabisi is the new bantamweight champion!
|
|
|
|
|
|
|
|
|
|
|
|
|
|
|
|
|
|
|
|
|
|
|
| S |
C
A |
G |
S |
C
B |
G |
|
S |
C |
G |
|
energy
A | B |
|
hype
A | B |
|
pop
A | B |
|
mgr
A | B |
|
FIGHT
RATING
34% |
|
|
|
|
|
|
