|
|
PBP Commentary |
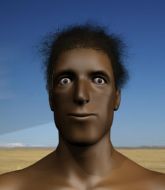
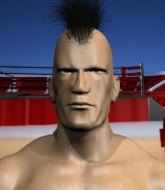
Coming up we have a middleweight MMA rules bout between Ben Saunders (ranked 0 p4p, 0 weight class) and Rex Crawford (ranked 0 p4p, 0 weight class). Rex Crawford is staring across the cage at his opponent, tweaking his nipples.
 |
|
 |
| 200 cm
26
180 lbs
2 - 3 - 0 |
|
185 cm
21
185 lbs
2 - 4 - 0 |
Good takedowns
Brawler
Good chin |
|
BJJ Blue Belt
Decent boxing
Determined |
|
| |
|
Ladies and gentlemen. This fight is 3 rounds, in the middleweight division.
Introducing the fighter to my left, fighting out of the red corner.
With a record of
2 - 3 - 0, fighting out of New York, Ben Saunders!
And introducing the fighter to my right, fighting out of the blue corner.
With a record of
2 - 4 - 0, fighting out of New York, Rex Crawford!
The judges for this bout are Gregory Folan, William Peck and Elvis Blanc.

The bell rings for round one and we are underway!
Crawford throws a sloppy head kick and Saunders moves out of range easily.
Wow, both these guys are really going for it!
Crawford lands a high kick!

It looks like Ben Saunders has been cut.
Saunders throws a looping left and ducks down for a takedown. He's got his arms around Crawford's waist but Crawford gets an underhook and avoids the takedown by throwing Saunders off to one side.

Saunders closes the distance and clinches.
Saunders tries to pull guard but can't drag his opponent to the mat. Crawford just stands there and leans against the cage.
Saunders keeps control of Crawford as he tries to wriggle out of the double underhooks.
Saunders is trying to break the clinch but Crawford is controlling him.
Saunders tries for a takedown but Crawford manages to get underhooks.
That's three failed takedown attempts in the round for Ben Saunders. That's going to take a lot out of him.
Crawford has a body lock and is looking for a takedown. Saunders is bouncing around trying to prevent the takedown and somehow he has indeed managed to stay on his feet.
Crawford has a body lock and is looking for a takedown. Saunders is bouncing around trying to prevent the takedown and somehow he has indeed managed to stay on his feet.
Good body shot from Crawford.
Crawford gets an overhook and lands an elbow to the side of the head.
Saunders is trying to drag Crawford to the mat but Crawford just about manages to keep his footing. He used the cage to his advantage there.
The fans in attendance giving it up for the two fighters, who have really let it all hang out in the last minute or so!
Crawford is looking to take this one to the mat.
Crawford is trying to break the clinch but Saunders is controlling him.

Crawford's corner calls for him to break the clinch, which he does.
Crawford scores with a jab. Saunders acknowledges it with a nod of the head.
Crawford fakes and then throws a beautiful body shot. Saunders looks a bit winded and takes a step backwards to take a breath.

That's one minute gone in the round.
Saunders throws a looping left and ducks down for a takedown. He's got his arms around Crawford's waist but Crawford gets an underhook and avoids the takedown by throwing Saunders off to one side.

Crawford instigates a clinch.
Crawford wants to strike at distance but he can't break free of the clinch.
Saunders is trying to drag Crawford to the mat but Crawford just about manages to keep his footing. He used the cage to his advantage there.
Crawford drops down looking for an ankle pick but Saunders pulls his leg out and moves away.
A decent looking cross lands there for Crawford.
Crawford defends well against a solid takedown attempt from Saunders.
Crawford shoots in for a takedown but Saunders shows good takedown defense there and keeps this one on the feet.
Saunders shoots in for a takedown but Crawford shows good takedown defense.
Saunders is breathing heavily.
Saunders takes an uppercut right on the button but keeps his composure.
Crawford uses good footwork to get in and out and land a nice right hand before Saunders has time to react.
Crawford dips down and scores with a jab to the body.
The fans in attendance giving it up for the two fighters, who have really let it all hang out in the last minute or so!
Saunders slips a jab and a cross from Crawford.

That's two minutes gone in the round.
Crawford lands a jab to Saunders's midsection.
Crawford closes this distance looking for a takedown but Saunders circles away.
Crawford fails with a takedown attempt from distance.
Saunders shoots in for a takedown but Crawford shows good takedown defense there and keeps this one on the feet.

Saunders throws the overhand right but ducks down into a quick takedown attempt. Crawford was covering up waiting for the punch and Saunders finishes the takedown easily into guard.
The ref warns both fighters not to hold the cage as they work up against the meshing.
It looks like the ref is thinking about a standup.
Saunders trying to land body shots but he keeps hitting the mat.
Saunders throwing shots from guard but he's hitting more mat than opponent.
Saunders trying to control the position from guard on top but Crawford is wriggling around, looking for whatever he can.
Crawford not looking particularly offensive just at the moment.
Saunders trying to control the position from guard on top but Crawford is wriggling around, looking for whatever he can.

That's three minutes gone in the round.

We're going to have a standup here because Ben Saunders wasn't active enough for the referee's liking.
Crawford scores with a jab to the body.
Crawford scores with a nice one two combo and darts back out of range to avoid anything coming in the opposite direction.
Saunders shoots in for a takedown. He's persisting with it as Crawford sprawls well. Crawford wins this battle and keeps the fight standing. Saunders gets slowly back to his feet.
Saunders shoots in with a takedown attempt and he has Crawford pinned against the cage. Crawford gets the underhooks and manages to circle away.
Saunders keeps the fight standing with a nice sprawl.
Crawford throws a right high kick that is partially blocked by Saunders.
Saunders really does look like a pencil wearing a pair of gloves. Let's hope he has a gameplan to suit that ridiculous body shape.
Saunders shoots for a double leg takedown but Crawford sprawls well. He's pushed Saunders's face into the mat and manages to get back to his feet relatively easily.
Saunders takes a shot to the nose. Hopefully that hasn't broken it.

That's four minutes gone in the round.
Saunders shoots in looking for a single leg takedown. Crawford is trying to defend but Saunders finishes it well and ends up in half guard. Let's see if he can advance position further.
This is a great period of action - very entertaining stuff!
Saunders thows a wild elbow that connects with the canvas.
Saunders trying to pass the guard but Crawford defending well.
Crawford is trying is best to control the position here.
Crawford wants to control but Saunders is keeping busy.
The crowd are going absolutely nuts as the round comes to an end - what a fantastic round of action!

Saunders seems to be working for a kimura but Crawford defends the submission attempt.
And thats the end of the round the fighters go back to their corners.
Rex Crawford dominated that round.
The cut man is working on Ben Saunders's cut.
That's time! Back to the action!

A looping hook to the body misses from Crawford. Saunders does a little dance to reset his feet.
Nice straight punches there by Crawford. You know Roy Jones Jr respects the hands of Crawford.
Rex Crawford seems to be getting the better of the standup.
A really sloppy takedown attempt there from Saunders.
Saunders takes a punch right to his stomach. That took the wind out of him momentarily.
Crawford lands with a thumping leg kick.
Crawford feints a jab promting Saunders to slip. Crawford then demonstrates his capabilities by jabbing again. Saunders slips again and ducks right into an uppercut.
Saunders chopped to the floor by a nice leg kick but he springs right back up before Crawford can pounce on him.
Crawford looks frustrated there after his takedown attempt is stuffed easily.
Saunders shoots in for a double leg but Crawford sprawls well. That's going to sap some energy.
Crawford closes the distance and lands a one-two.
Fantastic stuff here - a very entertaining period of action, which has drawn cheers from the crowd.
Crawford throws the left hand but Saunders avoids the punch easily.
Crawford lands a two punch combo.
Both fighters are absolutely exhausted here.
That's one minute gone in the round.
A telegraphed takedown attempt from Saunders is defended easily by Crawford.
That's three failed takedown attempts in the round for Ben Saunders. That's going to take a lot out of him.
Crawford misses with a wild combination.
Saunders shoots in from a long way out. He's driving through with the takedown attempt and he eventually gets it, landing in Crawford's guard.
Saunders throws a big elbow that misses.
Crawford keeping moving, preventing Saunders from controlling successfully.
Crawford working a defensive guard here.
Crawford preventing the ground and pound from doing any damage.
Saunders is in close to Crawford's body, working some short punches and elbows.
Saunders trying to control the position from guard on top but Crawford is wriggling around, looking for whatever he can.
That's two minutes gone in the round.

Saunders stands up and waves to Crawford to follow him.
Saunders changes levels and drives through with a really nice takedown into side control. Crawford looks really pissed at himself for not defending that better.
Saunders has been looking to land a fair amount of strikes on the ground. He might be looking to soften his opponent up in order to work for a submission.
Fantastic stuff here - a very entertaining period of action, which has drawn cheers from the crowd.
Crawford is trying to improve his position.
The fighters are pressed up against the cage, both looking to find a bit of space to work.
Saunders wants to work for a kimura but he's foiled early by Crawford, who protects the arm well.
Crawford is not content to let Saunders control the position.
Crawford is positioning himself to get back to half guard.
Ben Saunders overall seems to be getting the better of the ground position in the fight so far.
That's three minutes gone in the round.
Saunders decides to take the fight back to the feet.
Saunders shoots in but Crawford avoids the takedown attempt easily.
Saunders shoots in looking for a double leg takedown. Crawford defends it nicely.
Crawford throws a wild combination but nothing lands.
Crawford lands a really nice looking cross but Saunders seems unphased.
Saunders moves out of range of the body kick from Crawford.
Saunders misses with a takedown attempt. He shot from a bit too far out.
Crawford lunges in with swinging rights and lefts but Saunders circles away quickly and effectively.
That's four minutes gone in the round.
Crawford stuffs the takedown.
Crawford throws a body kick that sends a sickening thudding noise reverberating around the arena.
Crawford shoots in looking for a takedown. Saunders tries to sprawl out of it but Crawford keeps driving through. The fighters are pinned against the cage. Saunders manages to get underhooks and after a bit of a struggle, circles away and we're back to standing.
Saunders wants to clinch up but Crawford keeps it at a distance.
Sloppy strikes from Crawford. Those never looked like landing.
Saunders fails to land the takedown.
Saunders takes a head kick and shrugs it off.
As the round comes to an end the crowd are showing their appreciation for a great round of action.
Saunders fails with the takedown.
Rex Crawford seems to be the more aggressive standup fighter in this bout.
Crawford throws a series of punches but Saunders moves out of range.
Saunders tries for a takedown but Crawford sees it coming a mile off and avoids it easily.
And thats the end of the round the fighters go back to their corners.
That was a close second round but I would say that Ben Saunders will probably get the nod.
The cut man is working on Ben Saunders's cut.
That's the end of the round. The referee orders the cornermen out of the cage so we can get back down to business. This is the final round!

Crawford is trying hard to land a takedown here. Saunders sprawls well and keeps this one on the feet.
Crawford throws a looping overhand right but Saunders ducks down to avoid it.
A punch combination from Crawford misses.
Saunders uses good head movement to avoid the hook from Crawford.
Crawford throws a right and a left that both miss.
Saunders bobs and weaves into range and then changes levels and scores with a nice takedown into side control.
Crawford is pushing Saunders's head away, looking to escape. Saunders manages to hold on to the position though.
Saunders has hold of Crawford's arm here. He's working for an Americana. It looks like he might have it! Crawford tries to escape but he's just digging himself in deeper - Saunders cranks the arm and Crawford screams in pain! The ref makes a decision and ends the fight before the tap - no complains from Crawford, who is just happy to have his arm attached to his body.
Ladies and gentlemen, after 0:45 of round 3, we have a winner by way of Submission (Americana). Ben Saunders!
|
|
|
|
|
|
|
|
|
|
|
|
|
|
|
|
|
|
|
|
|
|
|
| S |
C
A |
G |
S |
C
B |
G |
|
S |
C |
G |
|
energy
A | B |
|
hype
A | B |
|
pop
A | B |
|
mgr
A | B |
|
FIGHT
RATING
100% |
|
|
|
|
|
|
