|
|
PBP Commentary |
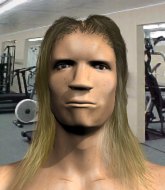
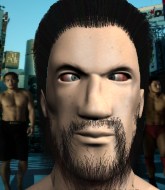
Coming up we have a middleweight MMA rules bout between Bowman Rook (ranked 0 p4p, 0 weight class) and Charlie Meyers (ranked 0 p4p, 0 weight class). Over to our ring announcer for the fighter introductions!
 |
|
 |
| 180 cm
22
190 lbs
5 - 1 - 0 |
|
187 cm
22
198 lbs
6 - 3 - 0 |
Good wrestling
Decent elbows
Cardio machine |
|
Good wrestler
Decent boxing
Good gas tank |
|
| |
|
Ladies and gentlemen. This fight is 3 rounds, in the middleweight division.
Introducing the fighter to my left, fighting out of the red corner.
With a record of
5 - 1 - 0, fighting out of London, Bowman Rook!
And introducing the fighter to my right, fighting out of the blue corner.
With a record of
6 - 3 - 0, fighting out of New York, Charlie Meyers!
The judges for this bout are David Schapiro, Anthony Taglia and Bruno Lombardi.

The bell rings for round one and we are underway!
Rook is looking to clinch.

The fight moves into the clinch position.
Meyers tries to pull guard but can't drag his opponent to the mat. Rook just stands there and leans against the cage.
Rook dictating the pace here, as the fighters clinch against the cage.
Meyers avoiding damage as Rook throws knees to the body.
Rook is pushing Meyers up against the cage, for a bit of lean and pray action. Action being used the in the loosest possible sense of the word.
With the fighters up against the cage, Rook throws an elbow but misses.
Meyers tries to pull guard but Rook holds him up against the cage and eventually Meyers drops back down to his feet.
Meyers avoiding damage as Rook throws knees to the body.
Meyers fails to pull the fight into his guard.
Bowman Rook has stuffed three takedown attempts in the round now. That's going to take a lot out of Charlie Meyers.
Rook misses with a punch to the body.
Meyers avoiding damage as Rook throws knees to the body.

That's one minute gone in the round.
Meyers takes an elbow to the temple.

It looks like Charlie Meyers has been cut.
Rook landing some nice looking knees to the body.
Rook lands a good knee to the midsection. Meyers won't want to take too many of those.
Meyers fails to pull guard.
Rook looking to throw knees to the head but Meyers is blocking nicely.
Meyers blocks a knee to the body. He'll have a nicely bruised forearm in the morning.
Meyers jumps guard but Rook stands there with Meyers around his waist. Meyers gives up and drops back to his feet. We remain in the clinch.
Knees to the body from Rook.
Meyers blocks a couple of punches on the inside.
Rook is looking to score with knees to the body. Maybe he'll change it up and go body then head. Meyers is defending well for now.
Meyers is trying to pull guard but Rook turns him against the cage and we stay in the clinch.
Rook works on Meyers's body with a couple of short punches.
We've seen a great period of action over the last minute or so - credit to both fighters for going all out!
Rook is looking to score with knees to the body. Maybe he'll change it up and go body then head. Meyers is defending well for now.

That's two minutes gone in the round.
Rook tries to land a knee to the head but misses.
Meyers fails to pull guard.
Rook misses with a punch to the body.
Meyers is trying to pull guard but Rook turns him against the cage and we stay in the clinch.
Meyers fails to pull guard.
Kneeeeees! The crowd are calling for knees to the body. Rook obliges.
Meyers looks gassed!
Rook missing with knees to the body.
Kneeeeees! The crowd are calling for knees to the body. Rook obliges.
Rook trying to land knees to the body.
Rook lands a good knee to the midsection. Meyers won't want to take too many of those.
Rook pushes Meyers back against the cage and unloads with a body punch.
Rook content to slow the pace in the clinch.
Rook gets a warning from the ref for wasting time.

That's three minutes gone in the round.
Rook trying to land knees to the body.
Rook misses with a shot to the kidneys.
Rook throws a hook to the body. More of an arm punch but it's all scoring with the judges.
Rook tried to land a shot to the body but connects with Meyers's elbow.
Rook tries to land a knee to the body but he is off balance and Meyers avoids it.
The referee calls for Rook to work.
Meyers blocks an elbow strike from Rook.
Meyers blocks the elbow strike.
Meyers blocks a couple of punches on the inside.
A bit of stalling here from Rook.

That's four minutes gone in the round.
Meyers tries to pull guard but Rook forces him back to his feet, against the cage.
Rook with an attempt at a knee that misses.
Meyers avoiding damage as Rook throws knees to the body.
Rook is struggling to control the position.
Rook utilising his Muay Thai to score with a knee to the body.
Meyers avoiding damage as Rook throws knees to the body.
Meyers tries to pull guard but Rook holds him up against the cage and eventually Meyers drops back down to his feet.
Nice body punch from Rook - that landed with a thud.
Fantastic stuff here - a very entertaining period of action, which has drawn cheers from the crowd.
As the round comes to an end the crowd are showing their appreciation for a great round of action.

Meyers pulls guard effortlessly.
Rook has to be careful here, sitting in the guard of a superior BJJ player.

Meyers looking for a guillotine here but Rook defends easily.
Rook tries to free his leg and advance position but Meyers is retaining full guard.
And thats the end of the round the fighters go back to their corners.
Bowman Rook dominated that round.
The cut man is working on Charlie Meyers's cut.
The fighters get back to their feet, the hooter sounds and we're back to the action!

Rook instigates a clinch.
Meyers fails to pull the fight into his guard.
Meyers tries to pull guard but Rook won't allow it.
Rook goes for a body shot but it's blocked.
Rook tries to land a knee to the body but he is off balance and Meyers avoids it.
Rook struggles to land a body shot inside as Meyers controls his hands.
Rook landing knees to the body. They look like they could hurt.
Rook is looking to score with knees to the body. Maybe he'll change it up and go body then head. Meyers is defending well for now.
Rook tries a body shot but Meyers blocks it.
Rook utilising his Muay Thai to score with a knee to the body.
Rook tries to land a knee to the head but misses.
The fighters are starting to get sweaty, which will make takedowns a bit more tricky.
Meyers on the defensive, avoiding the knees to the body.
Meyers on the defensive, avoiding the knees to the body.
That's one minute gone in the round.
Meyers avoids the elbow strike from Rook, against the cage.
Meyers tries to pull guard but Rook forces him back to his feet, against the cage.
Bowman Rook has stuffed three takedown attempts in the round now. That's going to take a lot out of Charlie Meyers.
Meyers decides to pull guard.
Rook trying to control the position from guard on top but Meyers is wriggling around, looking for whatever he can.
Meyers tries to land a sweep but no joy.
Rook postures up in Meyers's guard and throws a big left but Meyers blocks it.
Meyers looking for subs off his back but Rook has passed one foot through into half guard.
Meyers is looking for a sweep. Rook is wise to his cunning plan and keeps the top position.
That's two minutes gone in the round.
Meyers looking for submissions from an awkward position here.
Meyers tries to get to full guard but Rook has control of the leg.
The fighters are pressed up against the cage, both looking to find a bit of space to work.
Rook wants to stand up but Meyers is controlling the position.
That's three minutes gone in the round.
Meyers slips a foot under and gets full guard. Nice work.
Rook trying to control the position from guard on top but Meyers is wriggling around, looking for whatever he can.
Rook slows down the pace of the fight, as he sits in guard.

The ref stands the fighters back up because Bowman Rook just wasn't active enough.
Rook wants to clinch.
Charlie Meyers is looking to throw some combinations by the looks of things.
Rook is looking to take this fight into the clinch.
That's four minutes gone in the round.
Rook tries to clinch up.
Meyers lands a two punch combo.
Rook tries to close the distance and clinch up but Meyers swats him away and circles back towards the center.
Meyers pulls out of a head kick attempt.
Rook tries to clinch there but Meyers circles away.
Rook stuffs a takedown. It's all about dictating where the fight takes place and Rook wants it to stay on the feet.
Bowman Rook seems to be the more aggressive standup fighter in this bout.
Rook has taken the fight to the clinch.
Rook works for underhooks and lands a body shot in the process.
Rook with a knee to the head.
We've seen a great period of action over the last minute or so - credit to both fighters for going all out!
As the round comes to an end the crowd are showing their appreciation for a great round of action.
Rook misses with a shot to the kidneys.
Rook misses with a shot to the kidneys.
Rook unloads a knee to the mid-section. Meyers lets out a prehistoric sounding urrrrgh.
And thats the end of the round the fighters go back to their corners.
Bowman Rook dominated that second round.
The cut man is working on Charlie Meyers's cut.
The corners get their ten second warning. Both fighters stand from their stools and stare eachother down, ready to get back to the action. This is the final round!

Rook gets to the clinch - let's see what his plan is here.
Meyers blocks a body shot from Rook.
Rook lands with a short shot to the head.
Rook misses the knee to the body. Nice hip positioning from Meyers.
Rook tries to land a knee to the body but he is off balance and Meyers avoids it.
Meyers on the defensive, avoiding the knees to the body.
Rook missing with knees to the body.
Rook is stalling here.
Rook tries a body shot but Meyers blocks it.
Rook working some nice short punches in the clinch.
Rook is looking to control Meyers's arms but Meyers gets an underhook and turns him. Now Rook has his back to the cage.
Rook lands a shot to the body.
Rook missing with knees to the body.
That's one minute gone in the round.
Rook unloads a knee to the mid-section. Meyers lets out a prehistoric sounding urrrrgh.
Rook struggles to land a body shot inside as Meyers controls his hands.
Rook lands a body shot in the clinch.
Meyers takes a big intake of breath there - he's definitely tired.
Meyers blocks a knee to the body. He'll have a nicely bruised forearm in the morning.
Some stalling of biblical proportions here from Rook.
A left hand lands to the body for Rook.
Rook lands a nice knee to the body.
Meyers managing to block the knees to the body from Rook.
Rook stays in close to his opponent and throws a right hand to the body.
Rook is really dominating this fight. Is there anything that Meyers can do to turn this around?
Rook holding his opponent close, against the cage.
Rook is leaning against Meyers and scores with a nice uppercut to the body.
That's two minutes gone in the round.
Rook is looking to score with knees to the body. Maybe he'll change it up and go body then head. Meyers is defending well for now.
This has been an exciting period of action!
Meyers is trying to pull guard but Rook has him pressed against the cage.
Rook lands a nice shot to the body.
Rook crunches a lovely knee into Meyers's ribcage.
Rook trying to land knees to the body.
Bowman Rook has scored more points in the clinch so far.
Rook misses with a body punch.
Rook misses the knee to the body. Nice hip positioning from Meyers.
Rook lands an elbow inside that Meyers shrugs off.
Rook using the Thai clinch to land knees to the body.
Rook misses with a body punch.
Rook tries to land knees in the clinch but Meyers avoids the damage to the body.
Rook trying to land knees to the body.
Meyers fails to pull guard.
That's three minutes gone in the round.
Nice body punch from Rook - that landed with a thud.
Rook lands a hook to the body. It's hard to tell if that hurt Meyers or not.
Rook missing with knees to the body.
Rook lands a short shot on the inside that snaps the head of Meyers backwards.
A left hand lands to the body for Rook.
Rook tried to land a shot to the body but connects with Meyers's elbow.
Rook with the Thai clinch, lands a knee to the head.
Knees in the clinch landing for Rook.
This is a great period of action - very entertaining stuff!
A left hand lands to the body for Rook.
Rook unloads a knee to the mid-section.
Meyers blocks a knee to the body. He'll have a nicely bruised forearm in the morning.
Rook crunches a lovely knee into Meyers's ribcage.
That's four minutes gone in the round.
Rook misses with a knee to the head.
Rook misses with a shot to the kidneys.
Nice body punch from Rook.
Rook trying to land knees to the body.
An uppercut to the body lands inside from Rook.
Rook tries to land knees in the clinch but Meyers avoids the damage to the body.
Rook stalls.
Meyers is trying to pull guard but Rook turns him against the cage and we stay in the clinch.
Bowman Rook has stuffed three takedown attempts in the round now. That's going to take a lot out of Charlie Meyers.
The crowd are going absolutely nuts as the round comes to an end - what a fantastic round of action!
Meyers on the defensive, avoiding the knees to the body.
Charlie Meyers has stepped it up - he knows he needs a finish here!
Meyers tries to jump guard but he falls flat on his backside. Rook smiles and moves away.
And that's the end of the fight!
Bowman Rook showed his dominance in that final round.
Well I reckon that's a shut out for Rook, winning every round. Will the judges agree? They are the ones who matter, even if they are often depressingly incompetent. Over to the ring announcer for the scorecards.
Ladies and gentlemen, after 3 rounds of action, we go to the scorecards for a decision.
Judge David Schapiro scores the fight 30:26
Judge Anthony Taglia scores the fight 30:26
Judge Bruno Lombardi scores the fight 30:26
In favor of your winner, by unanimous decision... Bowman Rook!
After the fight, Bowman Rook was humble in paying tribute to his opponent but made it clear he wants to go on to bigger and better things. It seemed to go down well with the crowd who cheered him loudly.
|
|
|
|
|
|
|
|
|
|
|
|
|
|
|
|
|
|
|
|
|
|
|
| S |
C
A |
G |
S |
C
B |
G |
|
S |
C |
G |
|
energy
A | B |
|
hype
A | B |
|
pop
A | B |
|
mgr
A | B |
|
FIGHT
RATING
66% |
|
|
|
|
|
|
