 |
UnderGround FC 12 PBP Commentary |
Undercard bout
|
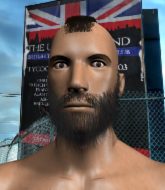
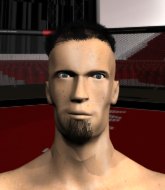
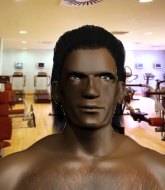
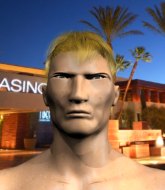
Coming up we have a featherweight MMA rules bout between Roman Bell (ranked 5452 p4p, 361 weight class) and Marlin Scars (ranked 24078 p4p, 403 weight class). Marlin Scars has the power to score a knockout today if he connects clean with Roman Bell's chin.
 |
|
 |
| 170 cm
24
145 lbs
4 - 2 - 0 |
|
190 cm
20
155 lbs
0 - 4 - 0 |
BJJ Blue Belt
Basic striking
Experienced |
|
BJJ Blue Belt
Counter fighter
Granite chin |
|
| |
|
Ladies and gentlemen. This fight is 3 rounds, in the featherweight division.
Introducing the fighter to my left, fighting out of the red corner.
With a record of
4 - 2 - 0, fighting out of Amsterdam, Roman Bell!
And introducing the fighter to my right, fighting out of the blue corner.
With a record of
0 - 4 - 0, fighting out of New York, Marlin Scars!
The judges for this bout are Chris Downing, Tiny Johnson and Gwen Towbar.

The bell rings for round one and we are underway!
Scars avoids a kick to the body.
Scars is a painfully thin specimen of a man. You do wonder whether a good body kick would snap him clean in two.
Bell throws a body kick despite being completely out of range

and Scars counters with a nice shoot takedown that brings the fighters to the ground.
Scars throws a big elbow that misses.

Bell is looking for a guillotine. You can't force these things though and Scars defends well.
Scars in full guard, throwing the ground and pound. No damage this time.
A real slowdown in the pace of the fight for a moment, as Bell holds on and takes a little breather.
Scars wants to control from the top but Bell keeps moving.
We've had a slow start to the round here - hopefully the action picks up.
Scars is just sitting in guard, looking to avoid any submissions.
Scars postures up to throw the ground and pound strikes but they don't connect.
Scars controls the pace of the fight for a moment.

That's one minute gone in the round.
Scars throws a big right hand that misses.
Scars wants to control from the top but Bell keeps moving.
Bell has control of Scars's left arm, preventing Scars from doing any damage.

The referee has stepped in and called for a break in the action. We'll restart on the feet.
Bell throws a body shot but no joy.
Bell tries a head kick but it misses.
Bell throws a lazy right hand but Scars sees it coming a mile off and sidesteps it easily.
Bell throws a sloppy head kick and Scars moves out of range easily.
Scars keeping his hands up high there, blocking the jab from Bell.
Bell misses with a head kick.
A head kick by Bell misses
and Scars counters with a driving takedown into guard. Nice work there by Scars.
Bell is working the butterfly guard. He manages to land a nice scissor sweep and is now in half guard on the top. Nice move.

Scars told us pre-fight that he has been working on his escapes in training. Let's see if he can call on some of his new skills to get back to his feet.

That's two minutes gone in the round.
Scars is looking to control Bell's leg but it's slowly edging free. Can Scars avoid being mounted?
Bell stalling.
Bell's ground tactics aren't going to win him many fans. Let's hope he's got fireworks for us if he gets back to his feet because he's not doing much on the ground.
Scars is trying to maintain the position but Bell is very close to passing his half guard.
The crowd thankful this round is nearly over.
Scars is looking to improve his position.
And thats the end of the round the fighters go back to their corners.
A close round but Marlin Scars will probably get the nod.
That's time! Back to the action!

Bell throws a body shot but no joy.
Bell misses with a half-hearted attempt at a head kick.
Nice body punch from Bell.
Scars throws a looping left and ducks down for a takedown. He's got his arms around Bell's waist but Bell gets an underhook and avoids the takedown by throwing Scars off to one side.
A low kick from Bell is predictable there
and Scars counters with a takedown into side control! That could mean trouble for Bell!
Bell struggling a bit here.
Bell manages to work his way to half guard, despite Scars's best efforts.
Bell won't allow Scars to pass to mount.

Scars is working for a submission of some sort.
We've had a slow start to the round here - hopefully the action picks up.
Scars is looking for a kimura but he's never going to get it from there.
That's one minute gone in the round.
Scars is trying to control the action in half guard but Bell is working away on the bottom, looking perhaps to get back to full guard.
Scars is looking for a kimura but he's never going to get it from there.
Marlin Scars has got the better of the ground game so far.
The fighters are battling for position here. Bell manages to regain full guard. Nice work.
Scars trying to control the position from guard on top but Bell is wriggling around, looking for whatever he can.
Scars stopping the sweep attempt from Bell.
Bell manages to sweep nicely, so he's now on top. Scars manages to get himself to full guard.
Bell connects with a couple of short punches.
That's two minutes gone in the round.
Bell is looking to work some ground and pound but Scars has wrist control.
Bell slows down the pace of the fight for a moment. He'll need to remain active if he doesn't want to see the fight stood back up.
Scars thows some rabbit punches from the bottom but they don't do any damage.
The crowd thankful this round is nearly over.
Bell passes into half guard.
Bell controlling the pace.
And thats the end of the round the fighters go back to their corners.
Roman Bell dominated that second round.
The fighters get back to their feet, the hooter sounds and we're back to the action! This is the final round!

Scars avoids a low kick by using good footwork.
Marlin Scars is looking to throw some combinations by the looks of things.
Bell throws a body punch but Scars moves out of range.
Roman Bell seems to be the more aggressive standup fighter in this bout.
Scars checks a leg kick.
And Scars tries to counter it with a takedown but Bell pushes his down on his head and steps out.
Bell looks for the body kick but Scars saw that one coming.
Bell looking to throw a kick but he's pulled out of it.
Bell scores with a leg kick.
Scars avoids the head kick by Bell.
Scars drops down looking to force a counter takedown but Bell defends it well.
Bell shapes like he's going to throw a leg kick but settles back down.
Scars is definitely looking for the counter takedowns here.
Scars goes for a double leg but Bell avoids the attempt and the two fighters end up clinched against the cage as Bell continues to drive forward.
Scars misses with a jab and misses with a cross straight after too.
Bell is really dominating this fight. Is there anything that Scars can do to turn this around?
Bell throws a body kick that digs right into the meat.
We've had a slow start to the round here - hopefully the action picks up.
Bell throws a low kick but it's checked well by Scars.
Bell dances in quickly and lands a nice inside leg kick on Scars. That did some damage!
Scars misses with a takedown attempt. He shot from a bit too far out.
That's one minute gone in the round.
Bell misses with a kick to the body.
Bell throws a head kick but Scars moves out of range.
A kick lands to the mid section there for Bell.
Good leg kick by Bell there. It's the ones that make that thud noise that hurt and that was an almighty thud.
Scars blocks a head kick by Bell.
Bell tries a head kick but it misses.
Scars is trying hard to land a takedown here. Bell sprawls well and keeps this one on the feet.
Roman Bell has stuffed three takedown attempts in the round now. That's going to take a lot out of Marlin Scars.
The sound of bone on bone echoes around the arena as Scars checks a leg kick.
Scars blocks the body kick.
Scars will have to do better than that with his takedown attempts.
A nice leg kick lands there from Bell.
A lazy left from Bell finds it's target.
Bell turns his hip over beautifully as he lands a nice leg kick.
Scars misses with a body kick.
Some bone on bone action there as Bell checks a low kick. Luckily it wasn't a particularly hard one.
Scars just manages to avoid a counter high kick fromBell.
That's two minutes gone in the round.
Scars shoots in with a takedown attempt and he has Bell pinned against the cage. Bell gets the underhooks and manages to circle away.
Bell lands with a nice low kick. That'll leave a bruise.
Bell throws a low kick but it's checked well by Scars.
Scars displays some good footwork, moving neatly out of range as Bell throws out the jab.
We've seen a great period of action over the last minute or so - credit to both fighters for going all out!
Scars tries to clinch but Bell moves out of range.
A decent looking body kick lands there for Bell.
Scars takes a thudding leg kick, right into the meat of the thigh.
An inside leg kick lands from Bell.
Bell throws out a leg kick but Scars moves out of range and Bell only half commits.
Bell fakes a jab and throws a low kick but Scars checks it well.
And that's the end of the fight!
Roman Bell showed his dominance in that final round.
I think Bell has won this one but let's see what the judges have to say. Over to the ring announcer for the scorecards.
Ladies and gentlemen, after 3 rounds of action, we go to the scorecards for a decision.
Judge Chris Downing scores the fight 29:27
Judge Tiny Johnson scores the fight 29:27
Judge Gwen Towbar scores the fight 29:27
In favor of your winner, by unanimous decision... Roman Bell!
Roman Bell got down on his knees post fight and begged the management for a title shot. 'Please, I want that title shot so bad! Give it to me!'
|
|
|
|
|
|
|
|
|
|
|
|
|
|
|
|
|
|
|
|
|
|
|
| S |
C
A |
G |
S |
C
B |
G |
|
S |
C |
G |
|
energy
A | B |
|
hype
A | B |
|
pop
A | B |
|
mgr
A | B |
|
FIGHT
RATING
36% |
|
|
|
|
|
|
|
Undercard bout
|
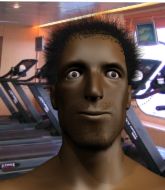
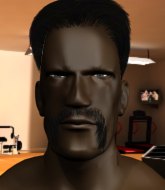
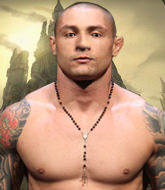
Coming up we have a bantamweight MMA rules bout between Mark Callus (ranked 6338 p4p, 252 weight class) and Daiyan Jr Jesus Valdes (ranked 4485 p4p, 222 weight class). Jesus Valdes is bobbing his head along to his entrance song: a lo cubano. Fingers crossed for an exciting fight - I'm sure both fighters are looking for a nice under the table bonus!
 |
|
 |
| 170 cm
24
140 lbs
3 - 2 - 0 |
|
180 cm
25
131 lbs
2 - 2 - 0 |
BJJ Blue Belt
Solid Muay Thai
KO power |
|
BJJ Purple Belt
Counter fighter
Powerful |
|
| |
|
Ladies and gentlemen. This fight is 3 rounds, in the bantamweight division.
Introducing the fighter to my left, fighting out of the red corner.
With a record of
3 - 2 - 0, fighting out of Las Vegas, Mark Callus!
And introducing the fighter to my right, fighting out of the blue corner.
With a record of
2 - 2 - 0, fighting out of Hilo, Daiyan Jr Jesus Valdes!
The judges for this bout are Daniel Franklin, Stewart Dunkirk and Cecil Peabody.
The bell rings for round one and we are underway!
Callus moves in looking to clinch but Jesus Valdes pushes him off.
Jesus Valdes is loading up here, looking for a big counter of his own.
Jesus Valdes is a painfully thin specimen of a man. You do wonder whether a good body kick would snap him clean in two.
Jesus Valdes lunges in with swinging rights and lefts but Callus circles away quickly and effectively.

Callus closes the distance and presses his opponent up against the cage.
Jesus Valdes managing to block the knees to the body from Callus.
Callus goes for a body shot but it's blocked.
Callus jumps guard but Jesus Valdes stands there with Callus around his waist. Callus gives up and drops back to his feet. We remain in the clinch.
Jesus Valdes tried to land a shot to the body but connects with Callus's elbow.
Jesus Valdes tries a shoulder strike but it doesn't do any damage.
Jesus Valdes lands with a quick shot inside that doesn't really do much damage.
We've had a slow start to the round here - hopefully the action picks up.
Callus jumps guard but his hands slip and he falls flat on his back. Well, he's made himself look a right mug there, as Jesus Valdes walks away with a smile on his face. Callus gets slowly back to his feet and shakes his head.
Callus wants to clinch.
Callus shoots in for a takedown but Jesus Valdes shows good takedown defense there and keeps this one on the feet.
That's three failed takedown attempts in the round for Mark Callus. That's going to take a lot out of him.
That's one minute gone in the round.
Callus doesn't manage to clinch there - Jesus Valdes circles away.
A telegraphed takedown attempt from Callus is defended easily by Jesus Valdes.
Callus tries to clinch but Jesus Valdes moves out of range.
Jesus Valdes avoids the clinch attempt nicely.
Despite the aggression on Jesus Valdes's face he doesn't fully commit to the counter.
Callus gets a clinch.

Callus breaks the clinch and we're back to striking at distance.
Callus takes the fight into the clinch.
Callus misses with an elbow over the top.
Knees to the body from Callus.
Jesus Valdes looks winded!
Callus is trying to pull guard but being pressed up against the cage enables Jesus Valdes to keep the fight standing.
Jesus Valdes lands a nice trip takedown into half guard.
That's two minutes gone in the round.
Jesus Valdes prevents Callus from standing back up.
Jesus Valdes trying to pass the guard but Callus defending well.
Callus looks like he's trying to stand up.
Jesus Valdes is looking for a kimura here.
Jesus Valdes stops Callus from getting back to his feet.
Jesus Valdes is pressing down on Callus's thigh, looking to free his foot. Callus is holding on for now.
Wooooo! Give it up for these two warriors! They are putting on a show!
Callus looks like he's trying to stand up.
Jesus Valdes tries to pass to full mount but Callus defends it.
Jesus Valdes prevents Callus from standing back up.
And thats the end of the round the fighters go back to their corners.
Daiyan Jr Jesus Valdes dominated that round.
Well, the break between rounds is over. Let's get back to the scrappin!
Jesus Valdes circles away from the clinch attempt.
Callus is looking to clinch but Jesus Valdes is avoiding it.
Callus is looking to clinch but Jesus Valdes is avoiding it.
Jesus Valdes shuffles to his left behind two crisp jabs. Callus eats them both and turns towards Jesus Valdes to reposition himself and eats a stinging right hand-left hook combo.
A telegraphed takedown attempt from Callus is defended easily by Jesus Valdes.
We've been informed that Jesus Valdes has been working hard on his conditioning in the buildup to the fight.
A telegraphed takedown attempt from Jesus Valdes is defended easily by Callus.
Callus looks to have improved his striking defense since last time we saw him fight.
We've had a slow start to the round here - hopefully the action picks up.
Callus fails with an attempt to clinch.
Jesus Valdes is breathing heavily.
Jesus Valdes avoids the clinch attempt nicely.
Callus tries to clinch but Jesus Valdes is having none of it.
Jesus Valdes circles away from the clinch attempt.
Despite the aggression on Jesus Valdes's face he doesn't fully commit to the counter.
That's one minute gone in the round.
Callus doesn't manage to clinch there - Jesus Valdes circles away.
As Callus backs off Jesus Valdes throws a huge counter combo but Callus manages to avoid it all.
Callus tries to clinch up.
Jesus Valdes is looking for the big counter here.
Callus tries to close the distance and clinch but Jesus Valdes swats him to one side with an open hand palm strike and circles away.
Callus tries to clinch up.
Callus tries to clinch up.
No luck with that takedown attempt from Callus.
Callus is looking to clinch but Jesus Valdes is avoiding it.
Jesus Valdes closes the distance and clinches up, looking for a takedown. He shifts his weight and gets a nice trip into half guard.
Callus pushes Jesus Valdes off looking to stand but Jesus Valdes dives back in and keeps control.

Callus has one foot on Jesus Valdes's thigh - he pushes off and manages to get back to his feet.
Callus tries to clinch but is not successful on this occasion.
Jesus Valdes is loading up here, looking for a big counter of his own.
Jesus Valdes circles away from the clinch attempt.
Jesus Valdes keeps the fight on the outside.
Mark Callus is looking to throw some combinations by the looks of things.
That's two minutes gone in the round.
Callus tries to clinch but is not successful on this occasion.
Callus changes levels and looks for a double leg takedown. Jesus Valdes tries to avoid it but Callus manages to keep hold of a leg and drag Jesus Valdes to the ground. Jesus Valdes escapes though and pops straight back up to his feet.
That's three failed takedown attempts in the round for Mark Callus. That's going to take a lot out of him.
Callus fails in his attempt to clinch.
Callus lands a jab followed by a nice looking cross.
Fantastic stuff here - a very entertaining period of action, which has drawn cheers from the crowd.
Callus has managed to clinch.
Callus lands a body punch.
Callus is struggling to control the position.
Callus working hard to break the clinch.
Callus tries to break the clinch but Jesus Valdes is controlling the position.
Callus gets underhooks to prevent Jesus Valdes's takedown attempt.
Callus landing knees to the body. They look like they could hurt.
And thats the end of the round the fighters go back to their corners.
A close second round but Daiyan Jr Jesus Valdes will probably get the nod - 10:9.
That's time! Callus's corner gives him a slap on the ass as he gets ready to fight. This is the final round!
Nice sprawl there from Jesus Valdes as Callus shoots in.
Jesus Valdes slaps away a takedown attempt from Callus, before circling back to the center of the mat.
Jesus Valdes rushes forward with a series of wild hooks but Callus moves out of range and avoids them all easily.
Callus tries to counter by moving into the clinch but Jesus Valdes manages to circle out of the way.

Callus scores a trip takedown into side control. Nice.
Jesus Valdes tries to get back to half guard but can't.

Callus decides to stand back up.
Callus tries to clinch but Jesus Valdes moves out of range.
Daiyan Jr Jesus Valdes seems to be getting the better of the standup.
We've had a slow start to the round here - hopefully the action picks up.
Callus doesn't manage to clinch there - Jesus Valdes circles away.
Callus tries to clinch up against the cage, rushing in to close the distance. Jesus Valdes manages to break the clinch and circles back to the middle of the mat.
Jesus Valdes takes a big intake of breath there - he's definitely tired.
Jesus Valdes swats away the attempt to clinch by Callus.
That's one minute gone in the round.
Callus tries to clinch up against the cage, rushing in to close the distance. Jesus Valdes manages to break the clinch and circles back to the middle of the mat.
Callus moves in looking to clinch but Jesus Valdes pushes him off.
Jesus Valdes unleashes a big counter combination but Callus bobs and weaves and avoids any damage.
Callus tries to close the distance and clinch but Jesus Valdes swats him to one side with an open hand palm strike and circles away.
Jesus Valdes shoots in and drives through. Callus sprawls well.
Callus scores with a reasonable looking shot to the body. Jesus Valdes doesn't seem bothered though.
Callus is looking to clinch.
Callus tries to clinch up but Jesus Valdes circles away and keeps his distance.
Callus forces Jesus Valdes back against the cage and clinches.
Callus goes for a body shot but it's blocked.
Jesus Valdes has Callus pressed against the cage, preventing Callus from circling away and getting back to striking at range.
Knees to the body from Callus.
Callus tries to throw a body punch but Jesus Valdes avoids it by throwing Callus back against the cage.
That's two minutes gone in the round.
Callus fails to pull guard.
That's three failed takedown attempts in the round for Mark Callus. That's going to take a lot out of him.
Callus trying to land knees to the body.
Daiyan Jr Jesus Valdes is fighting for a decision - hopefully he's judged it right and he's actually winning the fight.
Callus jumps guard but Jesus Valdes turns him against the cage and keeps the fight standing.
Callus throws a punch but it's blocked by Jesus Valdes.
Callus drops to a knee looking for a takedown but Jesus Valdes gets the underhooks and prevents it.
Callus is looking for a takedown up against the cage. Jesus Valdes gets underhooks though and prevents the takedown attempt.
The crowd thankful this round is nearly over.
Jesus Valdes avoiding damage as Callus throws knees to the body.
Mark Callus has stepped it up - he knows he needs a finish here!
Callus lands a knee to the body.
And that's the end of the fight!
Mark Callus showed his dominance in that final round.
I think Jesus Valdes has won this one but let's see whether the judges agree with me. Over to the ring announcer for the scorecards.
Ladies and gentlemen, after 3 rounds of action, we go to the scorecards for a decision.
Judge Daniel Franklin scores the fight 28:29
Judge Stewart Dunkirk scores the fight 28:29
Judge Cecil Peabody scores the fight 28:29
In favor of your winner, by unanimous decision... Daiyan Jr Jesus Valdes!
A very excited looking Daiyan Jr Jesus Valdes made sure he remembered to thank all the fans both in the arena and on the internet. He said all the coolest people spend all day on MMA websites, which got a big reaction.
|
|
|
|
|
|
|
|
|
|
|
|
|
|
|
|
|
|
|
|
|
|
|
| S |
C
A |
G |
S |
C
B |
G |
|
S |
C |
G |
|
energy
A | B |
|
hype
A | B |
|
pop
A | B |
|
mgr
A | B |
|
FIGHT
RATING
40% |
|
|
|
|
|
|
|
Undercard bout
|
Coming up we have a bantamweight MMA rules bout between Tommy Reed (ranked 2592 p4p, 140 weight class) and Curtis Jackson (ranked 23583 p4p, 292 weight class). Reed kept the crowd waiting but all that was forgotten when his ring entrance music started. The incomparable musical genius that is Tupac ft 50 Cent - Get Up Remix. The fight MMA fans around the world have waited their entire lives for!
 |
|
 |
| 168 cm
20
147 lbs
3 - 0 - 0 |
|
175 cm
25
139 lbs
0 - 2 - 0 |
Good wrestling
Basic striking
Cardio machine |
|
BJJ Blue Belt
Excellent boxer
Granite chin |
|
| |
|
Ladies and gentlemen. This fight is 3 rounds, in the bantamweight division.
Introducing the fighter to my left, fighting out of the red corner.
With a record of
3 - 0 - 0, fighting out of Amsterdam, Tommy Reed!
And introducing the fighter to my right, fighting out of the blue corner.
With a record of
0 - 2 - 0, fighting out of Amsterdam, Curtis Jackson!
The judges for this bout are Frank Dennis, George Francis and Gwen Towbar.
The bell rings for round one and we are underway!
Reed misses with a series of wild punches.
The sound of bone on bone echoes around the arena as Jackson checks a leg kick.
Jackson closes the distance looking to clinch
and Reed counters with a nice double leg into half guard.
The referee calls for the fighters to work.
Reed is working for a kimura here but Jackson manages to reverse the position and he's now in Reed's guard.
Reed pulls Jackson in to control the position.
We've had a slow start to the round here - hopefully the action picks up.
That's one minute gone in the round.
Reed bucks up whilst keeping hold of a body lock, managing to reverse the position. Now he's in top in Jackson's guard.
Reed sitting in guard, not really doing much.
We've been hearing that Reed has been drilling a lot of ground and pound in training, so let's see if he get the finish.
Reed won't allow Jackson to get back to his feet.
Jackson wants to sweep here but Reed controlling him for the moment.
Jackson is looking to stand up but Reed isn't so interested in that idea.
Reed slows down the pace of the fight, as he sits in guard.
That's two minutes gone in the round.
The crowd are getting on the fighters' backs, as the pace has dropped off in the last minute or so.
Reed won't allow Jackson to get back to his feet.
Reed landing with the ground and pound.
Reed looking to control the position here, rather than advance.
Reed slips effortlessly into side control - very nice.
Boooooooooooooooooooo!!! God, this has been a terrible round. Come on you two, sort yourselves out!
Jackson is not in a great position here, taking some shots.
Jackson is looking for a sweep.
And thats the end of the round the fighters go back to their corners.
Tommy Reed dominated that round.
OK. That's time! The bell goes and we're back to the action.
Reed swings away but doesn't land with a series of punches.
The fighters circling - Jackson throws out the jab but it was never going to land.
A big left from Reed misses.
Jackson drops down and drives through with a powerful takedown into guard.
Reed is adopting a defensive guard.
We've had a slow start to the round here - hopefully the action picks up.
Reed trying to strike from the bottom but really, it's not the best position to be doing that from!
That's one minute gone in the round.
Jackson trying to control but Reed is working from the bottom.
Reed is working the butterfly guard. He manages to land a nice scissor sweep and is now in half guard on the top. Nice move.
Reed looks to score some points with some ground and pound.
Reed controlling the pace.
Reed has freed up his trapped foot and advances to mount.
Jackson really doesn't want to stay on the ground with Reed. If he can't get it back to his feet, it's only a matter of time before he'll be tapping out.
Reed controlling the pace for now.
Reed lands a shot to the body, followed up by a shot to the exposed head of his trapped opponent.
That's two minutes gone in the round.
Reed in mount throwing good strikes here, bouncing his opponent's head off the canvas.
Reed controlling the position easily from mount.
Reed's ground tactics aren't going to win him many fans. Let's hope he's got fireworks for us if he gets back to his feet because he's not doing much on the ground.
Jackson is in a horrible position here. Reed smacks him with another shot as he tries to escape the position.
Reed looking to control and managing it successfully.
Reed raining down shots from the mount!
Reed is really dominating this fight. Is there anything that Jackson can do to turn this around?
We've seen a great period of action over the last minute or so - credit to both fighters for going all out!
Reed controlling the position easily from mount.
The ref warns both fighters not to hold the cage as they work up against the meshing.
Reed looking to isolate an arm here. Jackson doesn't see it coming and as Reed extends the arm, he's forced to tap out! Nice submission by Reed!
Ladies and gentlemen, after 2:59 of round 2, we have a winner by way of Submission (Armbar). Tommy Reed!
An out of breath Tommy Reed thanked his loyal fans in his post fight interview, giving them credit for his success over the course of his career.
|
|
|
|
|
|
|
|
|
|
|
|
|
|
|
|
|
|
|
|
|
|
|
| S |
C
A |
G |
S |
C
B |
G |
|
S |
C |
G |
|
energy
A | B |
|
hype
A | B |
|
pop
A | B |
|
mgr
A | B |
|
FIGHT
RATING
42% |
|
|
|
|
|
|
|
Undercard bout
|
Coming up we have a lightweight MMA rules bout between Anthony Linwood (ranked 6133 p4p, 512 weight class) and Kay Teptrom (ranked 3105 p4p, 337 weight class). Anthony Linwood has the edge in experience - let's see if he can make that count tonight.
 |
|
 |
| 178 cm
26
155 lbs
9 - 12 - 0 |
|
165 cm
26
165 lbs
4 - 0 - 0 |
Good wrestling
Brawler
Granite chin |
|
BJJ Brown Belt
Basic striking
Experienced |
|
| |
|
Ladies and gentlemen. This fight is 3 rounds, in the lightweight division.
Introducing the fighter to my left, fighting out of the red corner.
With a record of
9 - 12 - 0, fighting out of Las Vegas, Anthony Linwood!
And introducing the fighter to my right, fighting out of the blue corner.
With a record of
4 - 0 - 0, fighting out of Rio de Janeiro, Kay Teptrom!
The judges for this bout are Gwen Towbar, Robert Twigg and Alan Glass.
The bell rings for round one and we are underway!
Linwood moves away from the strike by Teptrom.
Teptrom throws a chopping leg kick but Linwood manages to avoid taking any serious damage.
Teptrom throws a hook but Linwood avoids it easily.
Linwood changes levels and looks for a double leg takedown. Teptrom tries to avoid it but Linwood manages to keep hold of a leg and drag Teptrom to the ground. Teptrom escapes though and pops straight back up to his feet.
Teptrom tries to close the distance and clinch up against the cage but Linwood paws at him with a jab and circles away.
Teptrom keeps the fight standing with a nice sprawl.
Linwood checks a leg kick.
Linwood checks a low kick from Teptrom.
Linwood shoots in for a takedown. "Ole!" shouts Teptrom as he jumps to the side.
Teptrom swings away with a counter right hand but no contact made.
That's three failed takedown attempts in the round for Anthony Linwood. That's going to take a lot out of him.
Teptrom tries to clinch up.
Linwood checks a low kick. Bone on bone - not my idea of a good time.
Teptrom misses with a hook
and Linwood counters with a single leg into guard. Teptrom didn't expect that.
Linwood postures up and lands some nice ground and pound.
Teptrom has a loose triangle. He'll be looking to tighten that up but Linwood can see exactly what he's planning and manages to posture up and free himself.
Wooooo! Give it up for these two warriors! They are putting on a show!
Teptrom keeping full guard, as Linwood tries to pass.
The fighters are pressed up against the cage, both looking to find a bit of space to work.
Teptrom working for a triangle but Linwood defends it easily.
Teptrom told us pre-fight that he has been working on his escapes in training. Let's see if he can call on some of his new skills to get back to his feet.
That's one minute gone in the round.
Linwood is working the ground and pound from guard. He might want to try advancing position though to get more of an impact.
There's a bit of a scramble here and now Teptrom is on top in guard.

Teptrom slips nicely into half guard, despite the strikes coming from Linwood.
Teptrom controlling the pace.
Teptrom wants to control but Linwood is keeping him busy.
Teptrom frees up his trapped foot and advances to mount.
Linwood is in all sorts of trouble here.
Teptrom can't quite control the action as he would like just now, as Linwood is looking to escape.
That's two minutes gone in the round.
Teptrom working for a submission but Linwood is keeping him at bay.
Teptrom tucks in and makes sure he doesn't lose the dominant position.
Teptrom is working for a guillotine from mount but Linwood frees his head quite easily.
Linwood on his back here. We all know that wrestlers don't like being on their back so let's see if Linwood tries to get out of the position.
The fans in attendance giving it up for the two fighters, who have really let it all hang out in the last minute or so!
Linwood is trying desperately to improve position.
Teptrom can't quite control the action as he would like just now, as Linwood is looking to escape.
The ref warns both fighters not to hold the cage as they work up against the meshing.
Teptrom controlling from mount.
And thats the end of the round the fighters go back to their corners.
Kay Teptrom dominated that round.
That's time! Back to the action!
Teptrom fakes high and swings low for a body shot but Linwood manages to avoid it.
Linwood throwing a counter right hand but Teptrom manages to avoid it.
Teptrom tries to score with a leg kick but it misses it's target.
Teptrom tries to land a leg kick but Linwood saw it coming and moves away.
Linwood appears to be looking for a counter takedown.
Teptrom dives in for a single leg takedown but Linwood sprawls and the fighters end up clinched against the cage.
Teptrom tries to shoot in for a takedown. He's got hold of a leg but Linwood swivels and escapes.
Linwood shoots in and drives through. Teptrom sprawls well.
Teptrom throws out a counter right but Linwood avoids it with no problem.
Teptrom misses with a straight left.
Linwood avoids a low kick by using good footwork.
Linwood attempts a counter takedown but Teptrom avoids it well and moves away.
No luck for Linwood with that takedown attempt.
Linwood gets a takedown into half guard.
Linwood is looking for an arm triangle, whilst trying to pass to side control. Teptrom doesn't seem that keen to cooperate though. No luck this time Linwood.
We've had a slow start to the round here - hopefully the action picks up.
Teptrom trying to control but Linwood postures up.
That's one minute gone in the round.
Teptrom gets full guard.
Linwood throws a big right hand that misses.
Linwood is trying to tuck his arms in to keep them safe but Teptrom has managed to isolate one of them and has got a loose triangle. Linwood is looking to defend but Teptrom has done well to lock his legs together - this could be big trouble for Linwood! Teptrom pulls down on the head and a little smile comes across his face - he knows he's got it. Yep, Linwood taps out and this one is all over!
Ladies and gentlemen, after 1:32 of round 2, we have a winner by way of Submission (Triangle). Kay Teptrom!
|
|
|
|
|
|
|
|
|
|
|
|
|
|
|
|
|
|
|
|
|
|
|
| S |
C
A |
G |
S |
C
B |
G |
|
S |
C |
G |
|
energy
A | B |
|
hype
A | B |
|
pop
A | B |
|
mgr
A | B |
|
FIGHT
RATING
57% |
|
|
|
|
|
|
|
Undercard bout
|
Coming up we have a lightweight MMA rules bout between Kron Gracie (ranked 2916 p4p, 321 weight class) and Jay Popotrek (ranked 6693 p4p, 524 weight class). Gracie comes to the cage accompanied by ROYCE GRACIE. Kron Gracie has a significant reach advantage - let's see if he can make it count.
 |
|
 |
| 185 cm
25
162 lbs
3 - 0 - 0 |
|
172 cm
26
165 lbs
1 - 2 - 0 |
BJJ Purple Belt
Counter fighter
Very strong |
|
Good wrestler
Basic striking
Determined |
|
| |
|
Ladies and gentlemen. This fight is 3 rounds, in the lightweight division.
Introducing the fighter to my left, fighting out of the red corner.
With a record of
3 - 0 - 0, fighting out of Helsinki, Kron Gracie!
And introducing the fighter to my right, fighting out of the blue corner.
With a record of
1 - 2 - 0, fighting out of Rio de Janeiro, Jay Popotrek!
The judges for this bout are Robert Twigg, Frank Dennis and Tiny Johnson.
The bell rings for round one and we are underway!
Gracie checks a leg kick nicely.
Horrible takedown attempt by Popotrek or perhaps it was just good defense by Gracie, which made it look bad.
Popotrek fakes high and swings low for a body shot but Gracie manages to avoid it.
Jay Popotrek seems to be the more aggressive standup fighter in this bout.
Sloppy strikes from Popotrek. Those never looked like landing.
A counter left hand to the body from Gracie misses its target.
Gracie looks for a takedown but Popotrek sprawls well.
Gracie shoots in for a takedown. "Ole!" shouts Popotrek as he jumps to the side.
Gracie avoids the body shot from Popotrek.
It looked like Gracie wanted to counter with a hook but didn't fully commit.
Gracie shoots in for a takedown - he's clinched up with Popotrek but Popotrek pushes him off and we're back to square one.
That's three failed takedown attempts in the round for Kron Gracie. That's going to take a lot out of him.
We've had a slow start to the round here - hopefully the action picks up.
Nice sprawl there from Popotrek as Gracie shoots in.
Popotrek swinging wildly here.
Gracie lands a nice shot to the body.
That's one minute gone in the round.
Gracie staying out of range there.
Gracie cracks Popotrek with a good shot that sees him stumbling back into the cage.
Popotrek tries to bum rush Gracie with a series of wild strikes but Gracie uses good footwork to avoid the assault.
Gracie scores with a nice strike.
Popotrek fails with a rather predictable takedown attempt.
Popotrek looks to land a left hand but Gracie moved out of range nicely.
Popotrek throws a monster uppercut resembling something out of street fighter but it doesn't land.
Gracie keeping his hands up high there, blocking the jab from Popotrek.
Popotrek attempts a low kick but it misses it's target.
Popotrek attempts a low kick but it misses it's target.
Gracie looks to be in better condition than last time we saw him fight. Obviously he's been working hard on his cardio.
Popotrek shoots in for a takedown and gets it. Let's see what he's got on the mat.
The ref warns both fighters not to hold the cage as they work up against the meshing.
Popotrek stands over his opponent and dives in with a flying punch! Gracie throws up his legs and catches Popotrek in a triangle! Oh this looks tight! Popotrek tries to escape but he's forced to tap! Wow, fantastic work there by Gracie! That came out of nowhere!
Ladies and gentlemen, after 2:55 of round 1, we have a winner by way of Submission (Triangle Choke). Kron Gracie!
Our winner, Kron Gracie, made sure he spent some time buttering up the crowd during his post fight interview, which will no doubt bring him a few more fans.
|
|
|
|
|
|
|
|
|
|
|
|
|
|
|
|
|
|
|
|
|
|
|
| S |
C
A |
G |
S |
C
B |
G |
|
S |
C |
G |
|
energy
A | B |
|
hype
A | B |
|
pop
A | B |
|
mgr
A | B |
|
FIGHT
RATING
56% |
|
|
|
|
|
|
|
Undercard bout
|
Coming up we have a welterweight MMA rules bout between Cross A Zoo (ranked 1939 p4p, 239 weight class) and Prince Tonni (ranked 3669 p4p, 392 weight class). Cross A Zoo has the better chin. Will he look to stand and bang today?
 |
|
 |
| 183 cm
20
179 lbs
4 - 2 - 0 |
|
190 cm
19
185 lbs
9 - 8 - 0 |
Decent wrestler
Great elbows
Cardio machine |
|
BJJ White Belt
Decent boxing
Determined |
|
| |
|
Ladies and gentlemen. This fight is 3 rounds, in the welterweight division.
Introducing the fighter to my left, fighting out of the red corner.
With a record of
4 - 2 - 0, fighting out of Los Angeles, Cross A Zoo!
And introducing the fighter to my right, fighting out of the blue corner.
With a record of
9 - 8 - 0, fighting out of London, Prince Tonni!
The judges for this bout are Tiny Johnson, Daniel Franklin and Chris Downing.
The bell rings for round one and we are underway!
No joy there for Tonni, who threw a few shots but didn't land.
A Zoo swung with a counter punch to the body but it didn't connect.
Tonni throws a left and a right that both miss
and A Zoo counters by clinching up.
Nice elbow from A Zoo.

It looks like Prince Tonni has been cut.
Tonni blocks the elbow strike.
A Zoo lands a glancing elbow in the clinch.
A head punch on the inside from Tonni fails to land.
A Zoo comes over the top with an elbow. That landed flush.
A Zoo lands an elbow that stopped Tonni in his tracks for a moment.
Tonni blocks an elbow strike.
Tonni tries to throw a body punch but A Zoo avoids it by throwing Tonni back against the cage.
A Zoo creates a bit of space for himself and sneaks an elbow through Tonni's defenses.
Tonni swings wildly with an uppercut but A Zoo uses good head movement to avoid it.
A Zoo misses with an elbow over the top.
A Zoo throws an elbow that misses.
Tonni's coach down at Tycoon Gym was telling us pre-fight that they have been working on Tonni's balance. Obviously they view that as a key factor in the outcome of this fight.
This is a great period of action - very entertaining stuff!
Tonni effectively controlling the action here.
That's one minute gone in the round.
Tonni avoids the elbow strike from A Zoo, against the cage.
A Zoo lands an elbow just above Tonni 's eye.
A Zoo lands a nice elbow from the clinch.
A Zoo throws an elbow that misses.
A Zoo creates a bit of space for himself and sneaks an elbow through Tonni's defenses.
Tonni takes an elbow to the forehead.
Tonni can't break the clinch.
Tonni throws a head punch that misses.
A Zoo lands with a good tight uppercut to the head.
Tonni blocks an elbow strike.
A Zoo lands a glancing elbow in the clinch.
A Zoo lands an elbow that stopped Tonni in his tracks for a moment.
A Zoo lands an elbow just above Tonni 's eye.
The fans in attendance giving it up for the two fighters, who have really let it all hang out in the last minute or so!
A Zoo lands a nice elbow from the clinch.
That has opened up Prince Tonni's cut even more.
That's two minutes gone in the round.
A Zoo lands a nice elbow from the clinch.
A Zoo creates a bit of distance and throws an elbow that only just misses.
Tonni avoids a wild elbow strike from A Zoo.
With the fighters up against the cage, A Zoo throws an elbow but misses.
A Zoo lands an elbow just above Tonni 's eye.
A nice glancing elbow lands by A Zoo.
A nice glancing elbow lands by A Zoo.
A Zoo lands a nice elbow from the clinch.
A Zoo blocks an uppercut.
A Zoo comes over the top with an elbow. That landed flush.
Tonni takes an elbow to the forehead.
The crowd applaud the fighters' efforts here as the round comes to an end.
A nice glancing elbow lands by A Zoo.

Tonni is rocked!
The cut above Prince Tonni's eye is starting to cause him problems now.
A Zoo lands a nice elbow.
Tonni is still on wobbly legs! Can A Zoo finish him?
A Zoo misses with an elbow strike.
A Zoo creates a bit of space for himself and sneaks an elbow through Tonni's defenses.
And thats the end of the round the fighters go back to their corners.
Cross A Zoo dominated that round.
The cut man is working on Prince Tonni's cut.
The minute break is over - no more time for sponges and pep talks - back to the action!
Tonni scores with a sloppy punch to the body. Not much technique there but it did the business.
Tonni seems to have recovered his senses.
Tonni rushes in with a sloppy looking punch
and A Zoo counters with a huge left! Tonni is in big trouble! He's backing up but A Zoo isn't giving him chance to recover. Under a barage of punches the ref has to step in to save Tonni from any more damage. A dominating finish by A Zoo!
Ladies and gentlemen, after 0:10 of round 2, we have a winner by way of TKO (Strikes). Cross A Zoo!
Cross A Zoo thanked the fans post fight for their support.
|
|
|
|
|
|
|
|
|
|
|
|
|
|
|
|
|
|
|
|
|
|
|
| S |
C
A |
G |
S |
C
B |
G |
|
S |
C |
G |
|
energy
A | B |
|
hype
A | B |
|
pop
A | B |
|
mgr
A | B |
|
FIGHT
RATING
72% |
|
|
|
|
|
|
|
Undercard bout
|
Coming up we have a super heavyweight MMA rules bout between Eddy Soprano (ranked 4173 p4p, 148 weight class) and Joost Van Dijk (ranked 5099 p4p, 168 weight class). Joost Van Dijk has the better chin. Will he look to stand and bang today?
 |
|
 |
| 210 cm
23
290 lbs
4 - 1 - 0 |
|
195 cm
22
265 lbs
1 - 4 - 0 |
Good takedowns
Counter fighter
Big heart |
|
BJJ Blue Belt
Counter fighter
Tends to cut |
|
| |
|
Ladies and gentlemen. This fight is 3 rounds, in the super heavyweight division.
Introducing the fighter to my left, fighting out of the red corner.
With a record of
4 - 1 - 0, fighting out of Amsterdam, Eddy Soprano!
And introducing the fighter to my right, fighting out of the blue corner.
With a record of
1 - 4 - 0, fighting out of Amsterdam, Joost Van Dijk!
The judges for this bout are Gwen Towbar, Frank Dennis and Robert Twigg.
The bell rings for round one and we are underway!
Van Dijk leaves Soprano with his face pressed against the mat as he sprawls beautifully, defending against a solid takedown attempt.
Van Dijk is definitely looking for the counter takedowns here.
Soprano shoots in with a lovely double leg takedown. Van Dijk manages to land in full guard to minimise the damage.
Van Dijk keeping moving, preventing Soprano from controlling successfully.
Soprano is in a tricky position. We've heard reports from his gym mates at that he's been drilling escapes, so let's see if he can get back to his feet.
Van Dijk not looking particularly offensive just at the moment.
Van Dijk seems keen to control Soprano's posture.
We've had a slow start to the round here - hopefully the action picks up.
Van Dijk can't do much from the bottom at the moment, as Soprano controls the pace.
Soprano pressing down on his opponent's thigh, looking to pass guard. Van Dijk is keeping the position for now.
That's one minute gone in the round.
Soprano being controlled here momentarily.
Van Dijk looking to control but Soprano passes into half guard.
Van Dijk wants to improve his position but Soprano is controlling well.
Van Dijk looks more muscular than last time we saw him. He must have been on the weights.
Soprano is thwarting Van Dijk's attempts to control the position.
That's two minutes gone in the round.
A lull in the action here being met with boos from the crowd.
Soprano seems very keen to just sit and control from half guard but Van Dijk does not like that idea so much and is remaining active off his back.
Soprano trying to control the pace.
Van Dijk tries to roll over but Soprano keeps him under control.
The fighters are pressed up against the cage, both looking to find a bit of space to work.
Van Dijk trying to control here.
Van Dijk tries to get to full guard but Soprano has control of the leg.
Van Dijk is looking to control Soprano's leg but it's slowly edging free. Can Van Dijk avoid being mounted?
The ref stands the fighters back up due to a lack of activity.
Boooooooooooooooooooo!!! God, this has been a terrible round. Come on you two, sort yourselves out!
Van Dijk shoots in with a lovely double leg takedown. Soprano manages to land in full guard to minimise the damage.
And thats the end of the round the fighters go back to their corners.
Eddy Soprano dominated that round.
That's the end of the interval. I'm sure that seemed a lot quicker than a minute for our two fighters! Back to the action.
Soprano throws a series of punches but Van Dijk avoids them all with ease.
Soprano looking for a takedown here - he's got it.
Soprano will need to keep those long limbs tucked in whilst he's on the ground, to prevent any submissions.
Van Dijk manages to sweep nicely, so he's now on top. Soprano manages to get himself to full guard.
Van Dijk trying to control the position from guard on top but Soprano is wriggling around, looking for whatever he can.
Van Dijk is looking to advance position but Soprano has hit a scissor sweep - now he's on top in mount!
Soprano is really dominating this fight. Is there anything that Van Dijk can do to turn this around?
Soprano swings around for an armbar but it's a sloppy attempt and Van Dijk is now in Soprano's guard. A big mistake from Soprano there, giving up the dominant position!
Soprano is working actively off his back, looking to secure an arm or perhaps work for a triangle.
The ref warns both fighters not to hold the cage as they work up against the meshing.
Wooooo! Give it up for these two warriors! They are putting on a show!
Van Dijk looking to pass the guard.
That's one minute gone in the round.
Van Dijk drops back looking for a heel hook - he quickly realises he's not going to get it but Soprano manages to dive on top of him before he can escape and now Van Dijk has Soprano in his guard.
Van Dijk looking to control.
Van Dijk has a closed guard, preventing anything of note from happening. Perhaps he's looking to stall.
That's two minutes gone in the round.
My god... these two guys really need to pick up the pace or everyone will leave to go get a beer.
Van Dijk is trying to keep Soprano in close.
Soprano wants to control from the top but Van Dijk keeps moving.
Van Dijk wants to sweep but no luck.
Soprano looking to control the position here, rather than advance.
The crowd thankful this round is nearly over.
Soprano got a little sloppy there for a moment and Van Dijk has worked his way into a loose triangle - can he finish it?! No, Soprano has managed to get both his arms back between Van Dijk's legs - danger averted.
And thats the end of the round the fighters go back to their corners.
Eddy Soprano dominated that second round.
Well, the break between rounds is over. Let's get back to the scrappin! Let's get this one finished - here comes the final round!
Soprano pulls out of a head kick attempt.
Soprano misses with a takedown attempt
enabling Van Dijk to counter with a crisp jab.

Van Dijk drops Soprano with a left and a right! Oh, Soprano is hurt - Van Dijk dives into side control looking to finish!

Soprano is rocked!

It looks like Eddy Soprano has been cut.
This is a great period of action - very entertaining stuff!
Van Dijk tries for a kimura but Soprano is defending well.
Oh Soprano is still in real trouble! Will he be able to recover?!!
Van Dijk wants to control but Soprano is keeping him busy.
Van Dijk tries for an arm triangle. That looks pretty tight to me. Is this one over!?! Possibly, maybe, no Van Dijk has let go of the choke. Obviously it wasn't as tight as we thought!
Soprano seems to have got his legs back now.
Van Dijk trying to control the action but Soprano is working from the bottom.
Soprano is looking for a sweep.
That's one minute gone in the round.
Van Dijk wants to control but Soprano is keeping him busy.
Van Dijk working hard here to secure a kimura but he's not really in the right position for it.
Van Dijk looking for an arm triangle but it's way too loose to do anything.
Soprano is looking to reverse the position.
That's two minutes gone in the round.
A few boos can be heard. I'm sure they will multiply if the fighters don't pick up the pace.
Soprano struggling a bit here.
Soprano is trying to get back to half guard.
Van Dijk advances to mount.
Soprano wriggling around on the bottom manages to avoid the strikes thrown by Van Dijk.
Van Dijk punching from mount but Soprano doing a good job of avoiding damage.
The crowd thankful this round is nearly over.
Van Dijk tries to control but Soprano wriggling away.
Van Dijk is in full mount, looking to secure a guillotine but Soprano is surviving well by controlling Van Dijk's body position as best he can.
And that's the end of the fight!
Joost Van Dijk comfortably won the final round on my scorecard.
I think Soprano has won this one but let's see what the judges have to say. Over to the ring announcer for the scorecards.
Ladies and gentlemen, after 3 rounds of action, we go to the scorecards for a decision.
Judge Gwen Towbar scores the fight 29:28
Judge Frank Dennis scores the fight 29:28
Judge Robert Twigg scores the fight 29:28
In favor of your winner, by unanimous decision... Eddy Soprano!
Eddy Soprano spent the whole post fight interview bigging himself up. It didn't go down that well with the fans after a while as they thought it was a bit arrogant.
|
|
|
|
|
|
|
|
|
|
|
|
|
|
|
|
|
|
|
|
|
|
|
| S |
C
A |
G |
S |
C
B |
G |
|
S |
C |
G |
|
energy
A | B |
|
hype
A | B |
|
pop
A | B |
|
mgr
A | B |
|
FIGHT
RATING
29% |
|
|
|
|
|
|
|
Undercard bout
|
Coming up we have a light heavyweight MMA rules bout between Vincent Lomax (ranked 2020 p4p, 251 weight class) and Desperately To Be Positive (ranked 3290 p4p, 351 weight class). These two fighters really are very evenly matched on the feet - it will be fascinating to see who can assert themselves in that aspect of the fight.
 |
|
 |
| 190 cm
19
200 lbs
3 - 0 - 0 |
|
190 cm
27
212 lbs
6 - 7 - 0 |
Decent wrestler
Excellent boxer
Cardio machine |
|
BJJ Blue Belt
Excellent boxer
Heavy handed |
|
| |
|
Ladies and gentlemen. This fight is 3 rounds, in the light heavyweight division.
Introducing the fighter to my left, fighting out of the red corner.
With a record of
3 - 0 - 0, fighting out of New York, Vincent Lomax!
And introducing the fighter to my right, fighting out of the blue corner.
With a record of
6 - 7 - 0, fighting out of Tokyo, Desperately To Be Positive!
The judges for this bout are Cecil Peabody, Tiny Johnson and Alan Glass.
The bell rings for round one and we are underway!
Lomax avoids a lazy jab quite easily.
Lomax has taken the fight to the clinch.
A body shot lands from Lomax.
A right hook to the body lands for Lomax.
Lomax lands a shoulder strike that jolts his opponent's head backwards.
The two fighters are working to gain dominance in the clinch.
To Be Positive looks like he'd prefer to be striking at range right now.
Lomax works on To Be Positive's body with a couple of short punches.
Lomax is working To Be Positive over against the cage.
To Be Positive looks winded!
A right hand to the body from Lomax.
A nice right hand lands inside from Lomax.
Lomax lands with a short shot to the head.
Nice body punch from Lomax.
Lomax has been talking about how he's improved his wrestling in the run up to the fight so let's see if that's enough to sway the balance.
A shot in the inside from Lomax.
Lomax lands with a left to the head.
Wooooo! Give it up for these two warriors! They are putting on a show!
To Be Positive wants to strike at distance but he can't break free of the clinch.
Lomax lands a hook to the side of the head.
Lomax scores with an uppercut up the middle.
Lomax working on landing some head shots here - that one got through nicely.
Lomax lands with a right to the head.
Lomax just leaning against To Be Positive, taking a breather.
To Be Positive is trying to break free.
Lomax lands a shoulder strike that jolts his opponent's head backwards.
That's one minute gone in the round.
Lomax lands on the inside with an uppercut.
With the fighters clinched against the cage, Lomax creates a bit of distance for himself and scores with a nice uppercut.
Lomax avoiding damage.
Lomax lands a hook that snaps the head of To Be Positive backwards.
Lomax lands a left hand that snaps the head of To Be Positive backwards.
Lomax lands with a left to the head.
A shot in the inside from Lomax.
To Be Positive is rocked!
Lomax working some nice short punches in the clinch.
To Be Positive is still on wobbly legs! Can Lomax finish him?
Lomax lands an uppercut in the clinch that drops To Be Positive to his knees! Lomax keeps firing more shots against his stricken opponent and the referee jumps in to save him!
Ladies and gentlemen, after 1:34 of round 1, we have a winner by way of TKO (Strikes). Vincent Lomax!
Desperately To Be Positive was interviewed post fight and said 'My opponent is a homosexual pedo'.
|
|
|
|
|
|
|
|
|
|
|
|
|
|
|
|
|
|
|
|
|
|
|
| S |
C
A |
G |
S |
C
B |
G |
|
S |
C |
G |
|
energy
A | B |
|
hype
A | B |
|
pop
A | B |
|
mgr
A | B |
|
FIGHT
RATING
88% |
|
|
|
|
|
|
|
Co-main event
|
Coming up we have a light heavyweight MMA rules bout between Spanky Loco (ranked 1893 p4p, 235 weight class) and Chris Robertson (ranked 2266 p4p, 269 weight class). Chris Robertson is staring across the cage at his opponent, tweaking his nipples.
 |
|
 |
| 180 cm
20
209 lbs
4 - 1 - 0 |
|
190 cm
20
205 lbs
5 - 4 - 0 |
Abu Dhabi Champ
Great low kicks
Granite chin |
|
BJJ Purple Belt
Counter fighter
Good gas tank |
|
| |
|
Ladies and gentlemen. This fight is 3 rounds, in the light heavyweight division.
Introducing the fighter to my left, fighting out of the red corner.
With a record of
4 - 1 - 0, fighting out of London, Spanky Loco!
And introducing the fighter to my right, fighting out of the blue corner.
With a record of
5 - 4 - 0, fighting out of Montreal, Chris Robertson!
The judges for this bout are Cecil Peabody, George Francis and Tiny Johnson.
The bell rings for round one and we are underway!
Thud! ouch! good body kick from Loco - that will leave a mark!
Loco lands with a thumping leg kick.
Loco connects with a high kick.
Robertson blocks a head kick by Loco.
Loco tries a head kick but it misses.
Robertson is clearly trying to counter these attacks from Loco with a body shot.

Robertson moves into the clinch successfully.
Robertson is looking to break free of the clinch but Loco has double underhooks.
Loco jumps guard.
Robertson must be cautious of submissions here, given that his opponent has the superior Jiu Jitsu.
Loco working away from the bottom but not quite defensive enough there because Robertson has passed into half guard!
Neither fighter is being very active at the moment, with Robertson in particular looking to stall.
Loco is trying to get back to full guard.
Loco's coaches at Rīga have been working on his defensive grappling in preparation for this fight so let's see if he can get out of this tricky position.
The fighters are pressed up against the cage, both looking to find a bit of space to work.
Loco has a hand on Robertson's thigh, trying to get back to full guard. Robertson takes advantage of the position though and mounts him!
That's one minute gone in the round.
Loco is wriggling around trying to escape.
Robertson avoids the attempt from Loco to control.
Loco is trying to escape the mount.
Robertson controlling the pace for now.
Robertson looking to control but Loco is working nicely, looking to advance position himself.
Robertson prevents Loco from getting the reversal.
That's two minutes gone in the round.
Loco tries to lock up and control but Robertson gives him a forearm to the face and pushes him away.
Loco is desperately trying to get back to half guard.
The ref warns both fighters not to hold the cage as they work up against the meshing.
Loco holds on to Robertson as tight as he can, avoiding damage.
Loco is trying desperately to improve position.
The crowd thankful this round is nearly over.
Loco gets back to half guard.
Loco looking to work for a kimura from the bottom.
Loco is trying to control but can't.
And thats the end of the round the fighters go back to their corners.
That was a close round but I would say that Spanky Loco will probably get the nod.
That's the end of the round. The referee orders the cornermen out of the cage so we can get back down to business.
Loco pushes Robertson up against the cage in a clinch.
Loco pulls guard.
Loco looks to be working for a triangle here. Oh, it looks like he might have it! Robertson has picked Loco up and slammed him! Loco can't keep hold of the triangle and Robertson manages to pass to side control!
Loco is trying to control Robertson's posture but Robertson avoids it.
Loco tries to slip a leg under to move to half guard but Robertson presses down on the leg and jumps into full mount!
Robertson wants to control the pace but Loco is squirming around nicely.
Loco tries to hold on but Robertson pushes him away.
We've had a slow start to the round here - hopefully the action picks up.
Robertson tries to control but Loco wriggling away.
Loco is desperately trying to get back to half guard.
That's one minute gone in the round.
Chris Robertson has got the better of the ground game so far.
Loco regains half guard.
Loco looking for submissions off his back.
Loco regains full guard. Nicely done.
That's two minutes gone in the round.
Loco working for submissions but it's allowed Robertson to get to half guard.
Loco looking to work for a kimura from the bottom.
Loco tries to get to full guard but Robertson has control of the leg.
Loco trying to keep hold of his opponent's head but Robertson manages to pass to mount!
Robertson sitting in mount, just looking to control for the moment.
The crowd thankful this round is nearly over.
Loco is looking to get to half guard.
And thats the end of the round the fighters go back to their corners.
Chris Robertson showed his class in that round. I'd imagine he'll take it on all the scorecards.
The fighters get back to their feet, the hooter sounds and we're back to the action! So, we enter the final round. Let's see if either fighter can bring us a finish, or whether we're going to the judges scorecards.
Loco forces Robertson back against the cage and clinches.
Loco jumps guard but Robertson turns him against the cage and keeps the fight standing.
Loco is trying to pull guard but Robertson turns him against the cage and we stay in the clinch.
Robertson tries to circle away but Loco has him pinned against the cage.

Robertson manages to break the clinch.
Robertson moves into the clinch.
Loco manages to pull guard.
Robertson slows down the pace of the fight for a moment. He'll need to remain active if he doesn't want to see the fight stood back up.
Loco looking for submissions from the bottom here. Moving his hips around, possibly looking for an armbar.
We've had a slow start to the round here - hopefully the action picks up.
Loco working away from the bottom but not quite defensive enough there because Robertson has passed into half guard!
Robertson content to sit in half guard and control for a moment.
That's one minute gone in the round.
Robertson is continuing to stall.
Loco gets full guard.
Loco is trying to control the position but Robertson postures up.
Loco escapes his hips to the side and looks to be working for an armbar. Robertson gives him a little smile and shakes his head. No chance.
Robertson avoids a guillotine attempt easily.
That's two minutes gone in the round.
My god... these two guys really need to pick up the pace or everyone will leave to go get a beer.
Loco escapes his hips to the side and looks to be working for an armbar. Robertson gives him a little smile and shakes his head. No chance.
Robertson trying to pass the guard but can't manage it just yet.
Robertson is intent on slowing down the pace of the fight, simply looking to control.
Loco has his foot on Robertson's thigh. He's trying to push off and get in position for a triangle, I think. Robertson works his way back into a safe position though.
Robertson got a little sloppy there for a moment and Loco has worked his way into a loose triangle - can he finish it?! No, Robertson has managed to get both his arms back between Loco's legs - danger averted.
Boooooooooooooooooooo!!! God, this has been a terrible round. Come on you two, sort yourselves out!
Robertson is intent on slowing down the pace of the fight, simply looking to control.
Loco has an active guard here but Robertson has managed to pass into half guard.
And that's the end of the fight!
That was a close round. You could make an argument for either fighter but I would give it to Spanky Loco.
I think Loco has won this one but let's see what the judges have to say. Over to the ring announcer for the scorecards.
Ladies and gentlemen, after 3 rounds of action, we go to the scorecards for a decision.
Judge Cecil Peabody scores the fight 28:30
Judge George Francis scores the fight 29:28
Judge Tiny Johnson scores the fight 28:29
In favor of your winner, by split decision... Chris Robertson!
Chris Robertson decided to thank the fans in attendance for making a great atmosphere. It seemed to go down pretty well.
|
|
|
|
|
|
|
|
|
|
|
|
|
|
|
|
|
|
|
|
|
|
|
| S |
C
A |
G |
S |
C
B |
G |
|
S |
C |
G |
|
energy
A | B |
|
hype
A | B |
|
pop
A | B |
|
mgr
A | B |
|
FIGHT
RATING
29% |
|
|
|
|
|
|
|
Main event
|
Coming up we have a heavyweight MMA rules bout between Fray Tormenta (ranked 809 p4p, 109 weight class) and Josh Peterson (ranked 2004 p4p, 211 weight class). Both fighters look fresh as a daisy as they make their way towards the cage.
 |
|
 |
| 194 cm
21
244 lbs
11 - 1 - 0 |
|
195 cm
27
255 lbs
6 - 3 - 0 |
Abu Dhabi Champ
Brawler
Granite chin |
|
Decent wrestler
Excellent boxer
Powerful |
|
| |
|
Ladies and gentlemen. This fight is 3 rounds, for the heavyweight championship of the world!
Introducing the champion to my left, fighting out of the red corner.
With a record of
11 - 1 - 0, fighting out of New York, Fray Tormenta!
And introducing the challenger to my right, fighting out of the blue corner.
With a record of
6 - 3 - 0, fighting out of Montreal, Josh Peterson!
The judges for this bout are Frank Dennis, Robert Twigg and Daniel Franklin.
The bell rings for round one and we are underway!
Tormenta wants to clinch up but Peterson keeps it at a distance.
Peterson keeps the fight on the outside.
Peterson lands with a hook. Tormenta tried to avoid it but it clipped the top of his head.
It looks like Fray Tormenta has been cut.
Tormenta bobs and weaves well there to avoid the strikes.
Tormenta gets to the clinch - let's see what his plan is here.
Tormenta has managed to pull guard. Let's see whether he can work an aggressive guard. It will also be interesting to see what tactics Peterson uses from the top position.
Peterson wants to pass the guard but Tormenta is keeping the position.
The fighters are pressed up against the cage, both looking to find a bit of space to work.
Tormenta looking for submissions from the bottom but instead Peterson passes into half guard.
Tormenta is trying to control but can't.
Tormenta is refusing to be controlled, as Peterson sits in half guard.
The ref warns both fighters not to hold the cage as they work up against the meshing.
We've had a slow start to the round here - hopefully the action picks up.
Tormenta trying to control but Peterson postures up.
We've been hearing good reports from Tormenta's training camp. Apparently he has been rolling around with some good quality BJJ practitioners and has been sharpening his skills. Let's see if that has an impact on the fight today.
Tormenta is pressing down on Peterson's left leg trying to get back to full guard. He's managed it.
Tormenta pulls Peterson in to control the position.
Peterson pressing down on his opponent's thigh, looking to pass guard. Tormenta is keeping the position for now.
That's one minute gone in the round.
Tormenta looking for a sweep. Not yet Tormenta, not yet.
Tormenta has thrown up a leg looking for a triangle. Peterson doesn't defend quickly enough and Tormenta has managed to lock this one up! Can Peterson escape?! NO! He's tapping out! Damn, that was a quick submission - congrats to Tormenta on a fantastic submission victory.
Ladies and gentlemen, after 1:28 of round 1, we have a winner by way of Submission (Triangle). Fray Tormenta!
Fray Tormenta retains his heavyweight title!
A relieved looking Fray Tormenta thanked the fans for their support and gave the usual line about them being amazing. They seemed to believe that he actually meant it.
|
|
|
|
|
|
|
|
|
|
|
|
|
|
|
|
|
|
|
|
|
|
|
| S |
C
A |
G |
S |
C
B |
G |
|
S |
C |
G |
|
energy
A | B |
|
hype
A | B |
|
pop
A | B |
|
mgr
A | B |
|
FIGHT
RATING
51% |
|
|
|
|
|
|
|
|
|
|
