 |
CCR 60 PBP Commentary |
Undercard bout
|
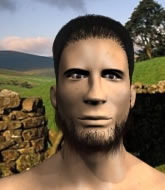
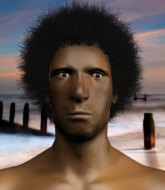
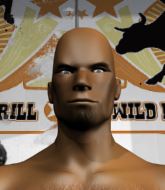
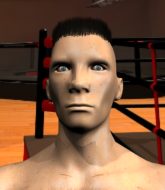
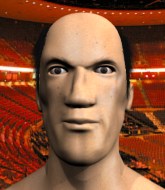
Coming up we have a middleweight MMA rules bout between Ash Camble (ranked 0 p4p, 0 weight class) and Dre Adams (ranked 0 p4p, 0 weight class). Over to our ring announcer for the fighter introductions!
 |
|
 |
| 199 cm
24
198 lbs
8 - 4 - 0 |
|
190 cm
29
190 lbs
5 - 9 - 0 |
BJJ Purple Belt
Excellent boxer
Granite chin |
|
BJJ Blue Belt
Excellent boxer
Powerful |
|
| |
|
Ladies and gentlemen. This fight is 3 rounds, in the middleweight division.
Introducing the fighter to my left, fighting out of the red corner.
With a record of
8 - 4 - 0, fighting out of Montreal, Ash Camble!
And introducing the fighter to my right, fighting out of the blue corner.
With a record of
5 - 9 - 0, fighting out of Rio de Janeiro, Dre Adams!
The judges for this bout are Seu Braga, Daniel Cesar and Felipe Paraventi.

The bell rings for round one and we are underway!
Adams falls off balance throwing a combination
and Camble counters with a left to the body.
Camble lands with a nice body punch.
A combination from Adams does no damage.
Adams misses the body punch
and Camble counters with a lovely shot to the body.
Adams just misses with a punch to the body.
Adams on the wrong end of a decent looking cross there.
Nice jab there from Adams.
Camble misses the jab.
Camble uses some good footwork to avoid the body shot by Adams.
Camble misses with a straight left.
Camble steps to the side to avoid the strikes from Adams.
Camble throwing a counter right hand but Adams manages to avoid it.
Adams ducks under a wild hook from Camble.
Adams throws a combination that misses
and Camble cracks him with a counter punch right on the button.
Fantastic stuff here - a very entertaining period of action, which has drawn cheers from the crowd.
Adams lands a jab, followed by a cross and another cross, as Camble backs up against the cage.
Adams swinging wildly here.

That's one minute gone in the round.
Adams swings widly with a right hand
and Camble counters with a series of strikes. Adams will be more careful next time no doubt.
Left hook, right uppercut from Adams.
Adams misses with a body shot
and Camble counters with a straight right hand.
Dre Adams seems to be the more aggressive standup fighter in this bout.
Camble takes a swing at Adams's ribcage but misses.
Adams misses with a few strikes there.
Adams has been spending a lot of time sparring his boxing in the run up to the fight, trying to sharpen up those hands and look for a knockout.
Adams misses with a telegraphed body shot
and Camble counters with a shot to the ribs. That looked like it hurt.
Adams misses with a left hand
and Camble cracks him with a counter punch right on the button.
Adams takes an uppercut right on the jaw but it doesn't phase him.
This has been an exciting period of action!
Camble thuds his right hand into Adams's forehead from close range. That could be painful for both fighters.
Adams throws a monster uppercut resembling something out of street fighter but it doesn't land.
Adams looks to land a left hand but Camble moved out of range nicely.
Adams will need to tighten up his combinations if he doesn't want to gas himself out, swinging at thin air.
Adams takes an uppercut right on the jaw but it doesn't phase him.

That's two minutes gone in the round.
Adams looks to throw the jab but Camble is out of range.
Camble scores with a crisp jab that stopped Adams in his tracks.
Camble misses with an uppercut
and Adams counters nicely by changing levels and landing a hook to the body.
Camble is using his height advantage well here, landing a good percentage of his punches.
Adams throws a left and a right that both miss
enabling Camble to counter with a crisp jab.
Adams lands with a right hand.
Adams throws a shot from downtown. Camble moves away and avoids it.
Camble misses with an uppercut. Adams saw that one coming.
Adams scores with a body shot.
Adams throws a hook but Camble avoids it easily.
Camble is really peppering his opponent's head with punches.
Camble throws a jab when Adams was well out of range.
Adams is loading up here, looking for a big counter of his own.
Adams feints a straight left to the body, then turns around with a flashy move and hits Cambles jaw with a dramatic spinning back fist!
Adams ducks under an overhand right and circles away with a smile on his face.
It seemed like Adams was going to counter with the hook but didn't fully commit to it.
Camble works the jab nicely.

That's three minutes gone in the round.
Camble takes a shot to the nose. Hopefully that hasn't broken it.
Camble dips to his left and cracks Adams with an uppercut!
Adams throws a combination that misses
and Camble cracks him with a counter punch right on the button.
A jab from Adams misses.
Camble throws a jab but it's blocked by Adams.
Adams moves out of range as Camble strikes.
Adams misses with a lunging right hand
and Camble counters with a straight right hand.
Adams misses with a hook
and Adams takes a counter punch right on the button for his troubles.

Adams is rocked!
Camble slips a straight right by Adams.
Camble scores with a body shot.
Adams takes a body punch that cleary hurt but he's trying not to show any weakness.
Adams ducks under an overhand right and circles away with a smile on his face.
Adams throws a jab to the body, straight down the pipe. Boom. That sent Camble stumbling backwards but he manages to regain his composure quickly.
The crowd are loving this. Great action here.
Camble misses with an uppercut.
Adams throws an overhand right that lands on Camble's shoulder, as Camble tries to avoid the shot.

That's four minutes gone in the round.
Adams lands an overhand left. A wild punch that just about connected.
Adams throws a combination that misses
and Camble counters with a quick right hand to the jaw.
Adams throws a combination but it was largely blocked by Camble.
Adams falls off balance throwing a combination
and Camble counters nicely by changing levels and landing a hook to the body.
Adams slips under a jab from Camble.
Adams throws a shot from downtown. Camble moves away and avoids it.
Camble throws a hook but Adams blocks it.
Adams misses with the combination.
Adams swings wildly with a right hand that was never going to find it's target.
The crowd applaud the fighters' efforts here as the round comes to an end.
Camble scores with a sloppy right hand. Adams should have avoided that one.
Adams steps to the side to avoid the strikes from Camble.
Nice defenses there by Adams.
And thats the end of the round the fighters go back to their corners.
Ash Camble dominated that round.
The referee calls time. The cornermen exit stage left and we're back to business.

Adams lands a slapping body shot.
Adams fakes a head shot and lands one to the body.
Camble tries to clinch but Adams is having none of it.
Camble slips a jab and a cross from Adams.
Adams fails to land with the punch combination there - jab, cross, hook, miss, miss, miss.
A looping hook to the body misses from Camble. Adams does a little dance to reset his feet.
Adams throws a right hand that misses
letting Camble counter with a right hand.
Adams swinging wildly here.
Camble has not gone for a single takedown so far in this fight, which seems like a very strange tactic when you consider that he has the superior wrestling and BJJ.
Adams moves out of range as Camble strikes.
Ash Camble is winning the standup battle so far.
We've had a slow start to the round here - hopefully the action picks up.
Camble throws a shot from downtown. Adams moves away and avoids it.
Camble throws an uppercut from half a mile away. Adams sees it coming and avoids it easily.
A big left from Adams misses.
Adams walks into a stiff left hand from Camble.
A swing and a miss from Camble.
That's one minute gone in the round.
Adams throws out a loose jab but Camble uses good head movement to avoid it.
Adams misses with a looping right.
Camble wings a very wild body shot but it does the job and lands to the midsection.
Adams feints a straight left to the body, then turns around with a flashy move and hits Cambles jaw with a dramatic spinning back fist!
Dre Adams is looking to throw some combinations by the looks of things.
Adams misses with a combination
and Camble cracks him with a counter punch right on the button.
Adams drops his hands and takes a jab to the jaw for his troubles.
Camble avoids the body shot from Adams.
Adams misses with a jab and misses with a cross straight after too.
Adams jabbing away but nothing is landing.
A slow jab from Adams misses its intended target.
A counter left hand to the body from Camble misses its target.
A shot to the body from Camble misses
and Adams counters with a straight right hand.
Camble slips a straight right by Adams.
Adams misses with a left hand
and Camble counters with a crisp hook to the side of the head.
That's two minutes gone in the round.
Adams slips a straight right by Camble.
The crowd are loving this. Great action here.
Adams misses with a looping left.
Camble throws a hook but Adams blocks it.
Camble throws a lazy right hand but Adams sees it coming a mile off and sidesteps it easily.
A telegraphed right hand from Camble misses the target.
It seemed like Adams was going to counter with the hook but didn't fully commit to it.
Adams ducks down and throws a hook to the body but Camble moves away.
Camble throwing a counter right hand but Adams manages to avoid it.
Adams swinging wildly here.
Camble misses with a right hand
and Camble takes a counter punch right on the button for his troubles.
Adams misses with an uppercut.
Camble throws a shot to the body.
Camble moves out of range of the strikes.
Adams swings wildly with a couple of big hooks
and Adams takes a counter punch right on the button for his troubles.
Camble lands a beauty of a right hand that gets the crowd cheering.
That's three minutes gone in the round.
Adams misses with a body shot
and Camble counters with a straight right hand.
Adams is still on wobbly legs! Can Camble finish him?
Adams gets caught by a big overhand right and goes down! Camble gets on top of him and starts throwing some serious punches until the ref intervenes and stops the fight!
Ladies and gentlemen, after 3:11 of round 2, we have a winner by way of TKO (Strikes). Ash Camble!
|
|
|
|
|
|
|
|
|
|
|
|
|
|
|
|
|
|
|
|
|
|
|
| S |
C
A |
G |
S |
C
B |
G |
|
S |
C |
G |
|
energy
A | B |
|
hype
A | B |
|
pop
A | B |
|
mgr
A | B |
|
FIGHT
RATING
70% |
|
|
|
|
|
|
|
Undercard bout
|
Coming up we have a welterweight MMA rules bout between Raja Ohri (ranked 0 p4p, 0 weight class) and Danny Greene (ranked 0 p4p, 0 weight class). Ohri comes to the cage accompanied by The Next Episode. These two fighters really are very evenly matched on the feet - it will be fascinating to see who can assert themselves in that aspect of the fight.
 |
|
 |
| 180 cm
27
180 lbs
4 - 2 - 0 |
|
182 cm
20
182 lbs
0 - 1 - 0 |
BJJ Blue Belt
Basic striking
Experienced |
|
BJJ Purple Belt
Decent boxing
Powerful |
|
| |
|
Ladies and gentlemen. This fight is 3 rounds, in the welterweight division.
Introducing the fighter to my left, fighting out of the red corner.
With a record of
4 - 2 - 0, fighting out of Los Angeles, Raja Ohri!
And introducing the fighter to my right, fighting out of the blue corner.
With a record of
0 - 1 - 0, fighting out of Rio de Janeiro, Danny Greene!
The judges for this bout are Paulo Santos, Matheus Silva and Thiago Cunha.
The bell rings for round one and we are underway!

Greene gets caught napping as Ohri dives in and scores a takedown. Greene manages to retain guard.
Greene trying to keep a closed guard but Ohri is proving a slippery customer.

Greene is looking to cinch up a triangle. Ohri throws the leg off to one side though and gets in tight to Greene's body to avoid the submission. Greene has instead reached around Ohri's neck and now has a guillotine! Oh, this is biiiig trouble! Greene arches his back and squeezes and forces the tap from his hapless opponent.
Ladies and gentlemen, after 0:23 of round 1, we have a winner by way of Submission (Guillotine). Danny Greene!
Raja Ohri spoke after the fight, saying 'I'll comeback and get a win next time!'.
|
|
|
|
|
|
|
|
|
|
|
|
|
|
|
|
|
|
|
|
|
|
|
| S |
C
A |
G |
S |
C
B |
G |
|
S |
C |
G |
|
energy
A | B |
|
hype
A | B |
|
pop
A | B |
|
mgr
A | B |
|
FIGHT
RATING
100% |
|
|
|
|
|
|
|
Undercard bout
|
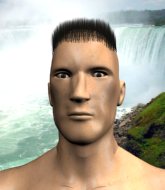
Coming up we have a welterweight MMA rules bout between Lucas Hood (ranked 0 p4p, 0 weight class) and Pat Miletich (ranked 0 p4p, 0 weight class). These two fighters really are very evenly matched on the feet - it will be fascinating to see who can assert themselves in that aspect of the fight.
 |
|
 |
| 180 cm
24
175 lbs
3 - 3 - 0 |
|
182 cm
26
181 lbs
5 - 3 - 0 |
BJJ White Belt
Excellent boxer
Granite chin |
|
BJJ White Belt
Excellent boxer
Determined |
|
| |
|
Ladies and gentlemen. This fight is 3 rounds, in the welterweight division.
Introducing the fighter to my left, fighting out of the red corner.
With a record of
3 - 3 - 0, fighting out of New York, Lucas Hood!
And introducing the fighter to my right, fighting out of the blue corner.
With a record of
5 - 3 - 0, fighting out of Rio de Janeiro, Pat Miletich!
The judges for this bout are Thiago Cunha, Edson Gomes and Emerson Jorge.
The bell rings for round one and we are underway!
Nice jab there from Miletich.
Miletich connects with a body shot that sends Hood's belly button to the back.
A looping hook to the body misses from Miletich. Hood does a little dance to reset his feet.
Miletich looks more muscular than last time we saw him. He must have been on the weights.
Miletich lands with an overhand left.
Miletich lands a straight punch to the body, keeping Hood at a distance.
Miletich takes a swing at Hood's ribcage but misses.
Hood seem to be loading up, looking for a big counter.
Miletich throws a predictable looking body shot
and Miletich takes a counter punch right on the button for his troubles.
Miletich waving his hands out in front of him, looking to distract Hood.
Miletich throws a right hand that misses
and Miletich takes a counter punch right on the button for his troubles.
Miletich looks to land a left hand but Hood moved out of range nicely.
Hood throws a big counter combination but Miletich scrambles out of danger and avoids any damage.
Miletich jabbing away but nothing is landing.
Hood is looking for a counter combo.
Miletich jabbing away but nothing is landing.
Miletich throws a looping overhand right but Hood ducks down to avoid it.
Hood appears to be looking for a big counter.
Miletich throws an ugly left hook that misses
and Hood connects with a straight left hand counter down the middle.
Pat Miletich is looking to keep the fight on the feet at all costs.
That's one minute gone in the round.
Miletich dodges the punch combination from Hood.
Miletich ducks low and lands a nice hook to the body of his opponent.
A punch lands to the side of Hood 's head but he takes it in his stride.
Hood throws a nice looking combination but Miletich bobs and weaves to avoid any damage.
Miletich misses with a body shot. Nice footwork from Hood.
The fighters circle momentarily. Miletich darts into range and connects with a nice straight punch.
Hood moves into range and throws a lovely three punch combination.
Miletich looks to score with a jab to the body but Hood is just out of range.
An attempted straight right counter from Hood misses the target.
Miletich swings for the body but Hood moves out of range.
Miletich dips down and scores with a jab to the body.
Miletich misses with a right hand
and Hood connects with a straight left hand counter down the middle.
That's two minutes gone in the round.
The crowd are loving this. Great action here.

Miletich instigates a clinch.
Hood wants to push off and get back to the center of the mat but Miletich has him pressed against the cage.
Miletich lands on the inside with an uppercut.
Miletich lands a shoulder strike.
Hood takes a shot to the head.
Miletich works for underhooks and lands a body shot in the process.
Hood wants to break the clinch but can't.
A short uppercut from Miletich.
Miletich lands with a right to the head.
Miletich scores with a hook to the body.
Miletich lands with a short head shot on the inside.
Miletich throws a blind hook that connects with the side of Hoods head.
Nice body punch from Miletich - that landed with a thud.
Hood working hard to break the clinch.
Miletich pushes Hood back against the cage and lands a hook to the side of the head.
Hood working hard to break the clinch.
Miletich throws a hook to the body. More of an arm punch but it's all scoring with the judges.

Miletich breaks the clinch and we're back to striking at distance.
Hood fails to land with a series of punches.
That's three minutes gone in the round.
Miletich closes the distance and presses his opponent up against the cage.
Hood wants to strike at distance but he can't break free of the clinch.
Miletich lands a shoulder strike.
Hood can't break the clinch.
A quick uppercut on the inside from Miletich.
Hood wants to strike at distance but he can't break free of the clinch.
With the fighters clinched against the cage, Miletich creates a bit of distance for himself and scores with a nice uppercut.
Miletich breaks the clinch and we're back to striking at distance.
Miletich scores with a crisp jab that stopped Hood in his tracks.
Hood swings away but doesn't land with a series of punches.
And an attempted straight right on the counter from Miletich! But no joy.
Miletich cracks a nice hook into Hood's ribs.
Miletich scores with a decent looking hook.
Miletich misses the shot to the body.
As Miletich looks to move away, Hood throws a big counter combo but Miletich just gets out of the way.
Miletich throws out a loose jab but Hood uses good head movement to avoid it.
Hood went nuts there looking for a big combo counter but none of the flurry connected.
Hood misses with a wild combination.
That's four minutes gone in the round.
Miletich looks to score with a jab to the body but Hood is just out of range.
This has been an exciting period of action!
Miletich cracks Hood with a nice right hand that draws applause from the crowd.
Miletich misses with a hook. Hood ducked under it nicely.
Miletich misses with a body shot.
Miletich slips a jab and a cross from Hood.
Miletich fakes with an overhand right and moves in to clinch with Hood, pushing him back against the cage.
Miletich softening up his opponent with strikes, against the cage.
Miletich lands a body punch in the clinch.
A short left from Miletich.
The crowd applaud the fighters' efforts here as the round comes to an end.
Miletich lands a nice uppercut.
Miletich lands with a short head shot on the inside.
Miletich lands a right hand that snaps the head of Hood backwards.
Miletich lands with a quick shot inside that doesn't really do much damage.
With the fighters clinched against the cage, Miletich creates a bit of distance for himself and scores with a nice uppercut.
And thats the end of the round the fighters go back to their corners.
Pat Miletich dominated that round.
That's time! Hood's corner gives him a slap on the ass as he gets ready to fight.
Miletich throws a big shot that misses.
Miletich bobbing and weaving, closes the distance and lands a hook to the side of Hood's head.
Hood with poor footwork there. He got himself in a bit of a tangle, enabling Miletich to score with a decent uppercut.
Hood moves away from the strike by Miletich.
Miletich closes the distance and pushes Hood back into the cage.
Miletich misses with a shot to the kidneys.
A short left from Miletich.
Pat Miletich seems to be working more effectively in the clinch in the fight so far.
Miletich doesn't land with the attempted body shot.
Miletich lands a nice uppercut.
Miletich throws a hook to the body. More of an arm punch but it's all scoring with the judges.
Miletich works on Hood's body with a couple of short punches.
We've had a slow start to the round here - hopefully the action picks up.
A body shot lands from Miletich.
Miletich lands a body punch.
Miletich pushes Hood back against the cage and unloads with a body punch.
Both fighters are absolutely exhausted here.
Miletich works on Hood's body with a couple of short punches.
Miletich lands with a short punch from the clinch.
We are yet to see a takedown attempt from Miletich in the fight. On paper you would think he is the more dominant ground fighter so let's see if these unusual tactics pay off.
The fans in attendance giving it up for the two fighters, who have really let it all hang out in the last minute or so!
Miletich pushes Hood back against the cage and lands a hook to the side of the head.
Miletich lands punches inside but they're not really causing much damage.
That's one minute gone in the round.
Hood can't break the clinch.
Miletich has been the more effective fighter overall so far.
Miletich manages to break the clinch.
Lucas Hood is looking to throw some combinations by the looks of things.
Hood throws a series of punches but Miletich moves out of range.
Hood doesn't react quick enough there as he takes a shot to the body.
Miletich connects with a body shot that sends Hood's belly button to the back.
Miletich cracks Hood with a good jab.
Miletich instigates a clinch.
A nice right hand lands inside from Miletich.
A nice left hand lands by Miletich.
Miletich lands a shot to the body.
Miletich lands a body shot in the clinch.
Miletich scores with a nice hook to the head.
A left hand lands to the body for Miletich.
Miletich scores with a hook to the body.
Fantastic stuff here - a very entertaining period of action, which has drawn cheers from the crowd.
Miletich escapes the clinch and we're back to striking.
A big right from Miletich misses.
Hood seem to be loading up, looking for a big counter.
Pat Miletich seems to be the more aggressive standup fighter in this bout.
That's two minutes gone in the round.
Miletich catches Hood with a nice straight right. He seems pissed - ooooh, it's on now! On like donkey kong!
Jab from Miletich.
Miletich has taken the fight to the clinch.
Hood is looking to break free of the clinch but Miletich has double underhooks.
Hood is trying to work out of this bad position, with his back against the cage.
Miletich works for underhooks and lands a body shot in the process.
Miletich lands with a short punch from the clinch.
Miletich lands with a quick shot inside that doesn't really do much damage.
Miletich has Hood pressed against the cage, preventing Hood from circling away and getting back to striking at range.
Miletich digs a right hand underneath Hood's ribcage. Hood let out a lung full of air as it connected.
Miletich lands a body shot.
Miletich lands with a short punch from the clinch.
Miletich lands on the inside with an uppercut.
A nice left hand lands by Miletich.
Miletich scores with a nice hook to the head.
A nice right hand lands inside from Miletich.
Miletich lands with a short head shot on the inside.
That's three minutes gone in the round.
Miletich is leaning against Hood and scores with a nice uppercut to the body.
A short body shot lands from Miletich as the two fighters clinch.
Miletich lands a nice looking hook to the body, against the cage.
Miletich works on Hood's body with a couple of short punches.
A quick uppercut on the inside from Miletich.
Miletich throws a blind hook that connects with the side of Hoods head.
Hood looks like he'd prefer to be striking at range right now.
Hood is trying to push Miletich away but Miletich has him pressed against the cage, so he's going nowhere.
Hood tries to break the clinch but Miletich is controlling the position.
Miletich lands a nice looking hook to the body, against the cage.
A nice right hand lands inside from Miletich.
Miletich lands a nice looking hook to the body, against the cage.
Miletich lands a shot to the body.
Miletich lands a body punch - he's looking to wear down Hood.
Good body shot from Miletich.
Still in the clinch, Miletich scores with a nice short uppercut.
Miletich lands a body shot.
Miletich lands a nice looking hook to the body, against the cage.
A short right hand to the side of the head by Miletich.
This is a great period of action - very entertaining stuff!
A short right from Miletich on the inside.
That's four minutes gone in the round.
Miletich lands a shoulder strike.
Miletich lands a nice uppercut.
An uppercut to the body lands inside from Miletich.
Miletich scores with a shot to the side of Hood's head.
A short body shot lands from Miletich as the two fighters clinch.
Miletich is working Hood over against the cage.
Miletich presses Hood against the cage and delivers a mid-strength body shot.
A right handed body shot lands from Miletich.
Miletich lands a body punch in the clinch.
Miletich lands a nice looking hook to the body, against the cage.
A short right from Miletich on the inside.
Miletich lands a hook to the side of the head.
Miletich cracks Hood with a nice body shot.
A left hand lands to the body for Miletich.
Miletich lands a hook that snaps the head of Hood backwards.
The crowd applaud the fighters' efforts here as the round comes to an end.
Good body shot from Miletich.
Miletich digs a right hand into Hood's ribs. Those have got to be taking their toll on Hood's gas tank.
An uppercut to the body lands inside from Miletich.
Hood wants to break the clinch but can't.
And thats the end of the round the fighters go back to their corners.
Pat Miletich showed his class in that round. I'd imagine he'll take it on all the scorecards.
The fighters' corners scream their final instructions, as the referee calls time. Here we go, back to the action! The crowd applaud as we get ready to start the final round!

Miletich fakes low and throws an overhand right that catches Hood on the side of the head.
Hood keeping a good distance there, avoiding the body shot.
Hood avoids the body shot from Miletich.
Hood uses decent footwork to sidestep a right hand from Miletich.
Hood slips under a jab from Miletich.
Hood scores with a nice one two combo and darts back out of range to avoid anything coming in the opposite direction.
Hood tries to keep at a distance but Miletich has taken the fight into the clinch.
Miletich working some nice short punches in the clinch.
We've had a slow start to the round here - hopefully the action picks up.
A hook to the body from Miletich.
Hood wants to push off and get back to the center of the mat but Miletich has him pressed against the cage.
Miletich lands a body punch - he's looking to wear down Hood.
Miletich lands a nice shot to the body.
Miletich is leaning against Hood and scores with a nice uppercut to the body.
Miletich works on Hood's body with a couple of short punches.
Both fighters are breathing heavily.
That's one minute gone in the round.
Miletich scores with a hook to the body.
An uppercut to the body lands inside from Miletich.
A right hook to the body lands for Miletich.
Miletich lands a body punch in the clinch.
Nice body punch from Miletich.
Miletich lands on the inside with an uppercut.
Miletich works on Hood's body with a couple of short punches.
Nice body punch from Miletich.
A short left from Miletich.
Miletich scores with a hook to the body.
Miletich pushes Hood back against the cage and lands a hook to the side of the head.
Miletich scores with an uppercut up the middle.
Nice body punch from Miletich.
A shot in the inside from Miletich.
Good body shot from Miletich.
Nice body punch from Miletich - that landed with a thud.
The crowd are loving this. Great action here.
Miletich scores with an uppercut up the middle.
Miletich works for underhooks and lands a body shot in the process.
Miletich's corner calls for him to break the clinch, which he does.
A lazy left from Miletich finds it's target.
That's two minutes gone in the round.
Hood staying out of range there.
Hood takes a really solid shot there but just smiles back and shrugs his shoulders.
Miletich comes forward and lands a shot to the body, then darts back out of range.
Miletich throws a body punch but Hood moves out of range.
Pat Miletich seems to be getting the better of the standup.
Miletich has managed to clinch.
A short uppercut from Miletich.
Miletich lands with a right to the head.
Miletich softening up his opponent with strikes, against the cage.
Miletich digs a right hand underneath Hood's ribcage. Hood let out a lung full of air as it connected.
Miletich softening up his opponent with strikes, against the cage.
Miletich keeps the fight in the clinch, despite Hood's efforts to push away.
A short right hand to the side of the head by Miletich.
Nice body punch from Miletich - that landed with a thud.
That's three minutes gone in the round.
Miletich lands on the inside with an uppercut.
A quick uppercut on the inside from Miletich.
Miletich lands a body punch.
Miletich lands a body punch - he's looking to wear down Hood.
Miletich lands a hook that snaps the head of Hood backwards.
Hood has had enough of the clinch but Miletich keeps him there for the moment.
Miletich scores with a nice hook to the head.
Miletich lands a body punch in the clinch.
A short left from Miletich.
Miletich lands a shot to the body.
Miletich lands a short shot on the inside that snaps the head of Hood backwards.
Miletich prevents Hood from breaking the clinch.
Miletich lands with a good tight uppercut to the head.
Miletich digs a right hand underneath Hood's ribcage. Hood let out a lung full of air as it connected.
Miletich is working Hood over against the cage.
Still in the clinch, Miletich scores with a nice short uppercut.
The crowd are loving this. Great action here.
Hood is trying to work out of this bad position, with his back against the cage.
Hood looks like he'd prefer to be striking at range right now.
Miletich lands with a quick shot inside that doesn't really do much damage.
That's four minutes gone in the round.
Miletich lands with a light punch inside.
Miletich lands with a short head shot on the inside.
Hood is trying to work out of this bad position, with his back against the cage.
Miletich lands on the inside with an uppercut.
Miletich presses Hood against the cage and delivers a mid-strength body shot.
Hood can't break the clinch.
Miletich digs a right hand into Hood's ribs. Those have got to be taking their toll on Hood's gas tank.
Pat Miletich is fighting for a decision - hopefully he's judged it right and he's actually winning the fight.
Miletich lands a short shot on the inside that snaps the head of Hood backwards.
Hood is trying to break the clinch but Miletich has him pressed against the cage.
Still in the clinch, Miletich scores with a nice short uppercut.
Good body shot from Miletich.
Miletich lands with a right to the head.
Miletich lands punches inside but they're not really causing much damage.
A frustrated look appears on Hood's face as he tries to break the clinch.
The crowd applaud the fighters' efforts here as the round comes to an end.
Miletich keeps control of Hood as he tries to wriggle out of the double underhooks.
Lucas Hood has stepped it up - he knows he needs a finish here!
A short right from Miletich on the inside.
Miletich lands a short shot on the inside that snaps the head of Hood backwards.
Miletich lands a hook to the body. It's hard to tell if that hurt Hood or not.
Miletich avoids a wild elbow strike from Hood.
And that's the end of the fight!
Pat Miletich comfortably won the final round on my scorecard.
Well Miletich has outworked and out performed his opponent in all aspects of the game today. He was simply too good and the decision should be no more than a formality. Over to the ring announcer for the scorecards.
Ladies and gentlemen, after 3 rounds of action, we go to the scorecards for a decision.
Judge Thiago Cunha scores the fight 25:30
Judge Edson Gomes scores the fight 25:30
Judge Emerson Jorge scores the fight 25:30
In favor of your winner, by unanimous decision... Pat Miletich!
|
|
|
|
|
|
|
|
|
|
|
|
|
|
|
|
|
|
|
|
|
|
|
| S |
C
A |
G |
S |
C
B |
G |
|
S |
C |
G |
|
energy
A | B |
|
hype
A | B |
|
pop
A | B |
|
mgr
A | B |
|
FIGHT
RATING
84% |
|
|
|
|
|
|
|
Undercard bout
|
Coming up we have a welterweight MMA rules bout between William Holbert (ranked 0 p4p, 0 weight class) and Jonthan Henry (ranked 0 p4p, 0 weight class). Henry is bobbing his head along to his entrance song: hit em up . The key to victory for William Holbert has got to be keeping the fight on the feet.
 |
|
 |
| 180 cm
24
177 lbs
6 - 8 - 0 |
|
185 cm
30
180 lbs
5 - 4 - 0 |
Good wrestling
World class boxer
Insanely flexible |
|
Good wrestler
Dangerous knees
Granite chin |
|
| |
|
Ladies and gentlemen. This fight is 3 rounds, in the welterweight division.
Introducing the fighter to my left, fighting out of the red corner.
With a record of
6 - 8 - 0, fighting out of Rio de Janeiro, William Holbert!
And introducing the fighter to my right, fighting out of the blue corner.
With a record of
5 - 4 - 0, fighting out of St Petersburg, Jonthan Henry !
The judges for this bout are Alexandre Firmino, Seu Braga and Felipe Paraventi.
The bell rings for round one and we are underway!
Henry darts in looking for a takedown but Holbert gets double underhooks and turns Henry into the cage.
Henry rushes Holbert and pushes him back against the cage in a clinch.
Holbert avoids the elbow strike from Henry , against the cage.
Henry is looking for a takedown up against the cage. Holbert gets underhooks though and prevents the takedown attempt.
Henry can't find room to land a body shot as Holbert controls the action.
Henry is working for a takedown up against the cage. He can't get it on this occasion though.
William Holbert has stuffed three takedown attempts in the round now. That's going to take a lot out of Jonthan Henry .
Henry looking to throw knees to the head but Holbert is blocking nicely.
Holbert managing to block the knees to the body from Henry .
Holbert managing to block the knees to the body from Henry .
Henry trying to land knees to the body.
Holbert blocks an elbow strike.
Holbert gets a nice trip takedown into half guard.
Holbert tries to stand and escape but Henry is controlling the position.
Henry is looking to improve his position.
Henry is holding on to half guard well.
Henry is looking for a sweep. Holbert is wise to his cunning plan and keeps the top position.
That's one minute gone in the round.
Henry is persisting with the attempt to improve his position.
Henry controlling the position for now.
The fighters are pressed up against the cage, both looking to find a bit of space to work.
Henry trying to hold on to Holbert's head to control him but Holbert postures up.
Henry preventing any damage for now, controlling his opponent's head.
Henry wants to get back to full guard.
Henry trying to control but Holbert postures up.
Henry has his hands clasped together around Holbert's back. He's all about the action.
We may be looking at a referee standup if the pace doesn't pick up soon.
Holbert looks to be in better condition than last time we saw him fight. Obviously he's been working hard on his cardio.
That's two minutes gone in the round.
The crowd are getting on the fighters' backs, as the pace has dropped off in the last minute or so.
Henry moves into full guard.
Henry is working an open guard here, looking to improve his position. No doubt that will leave him open to counters but at least he's being more offensive.
Henry keeps trying to improve his position.

The referee has stepped in and called for a break in the action. We'll restart on the feet.
Henry tries to clinch up.
Henry closes the distance and presses his opponent up against the cage.
Holbert avoids the elbow strike from Henry , against the cage.
Holbert pressing his opponent against the cage.
Holbert is pressed up against the cage. Henry has hold of a leg and is looking to drag Holbert down to the mat. Holbert avoids the attempt though and has circled away. We're back to striking at a distance.
That's three minutes gone in the round.
Henry tries to drive through with a takedown attempt but Holbert defends well and Henry ends up having to push Holbert into the cage where they will battle it out in the clinch.
Henry closes the distance and clinches.
Henry throws an elbow that misses.
A right hand to the body from Henry .
With the two fighters working up against the cage, Henry just misses with a elbow thrown towards Holbert's brow.
Henry trying to land knees to the body.
Henry tries to land a knee to the head but Holbert blocks with his arms.
Holbert avoiding damage as Henry throws knees to the body.
Holbert managing to block the knees to the body from Henry .
Holbert has managed to pull guard. Let's see whether he can work an aggressive guard. It will also be interesting to see what tactics Henry uses from the top position.
Henry wants to control from the top but Holbert keeps moving.
Henry sitting in guard, not really doing much.
Henry stands up and looks to throw the legs aside to pass to side control. Holbert swivels though and keeps the full guard.
That's four minutes gone in the round.
Holbert keeping moving, preventing Henry from controlling successfully.
Henry postures up to throw the ground and pound strikes but they don't connect.
Holbert keeping moving, preventing Henry from controlling successfully.
Henry slips effortlessly into side control - very nice.
Holbert is not content to let Henry control the position.
The crowd thankful this round is nearly over.
Henry working the ground and pound but he's contacting the mat, not the fighter.
And thats the end of the round the fighters go back to their corners.
Jonthan Henry dominated that round.
That's the end of the interval. I'm sure that seemed a lot quicker than a minute for our two fighters! Back to the action.

Holbert pushes Henry up against the cage in a clinch.
Henry swings away with an uppercut that misses.

Henry has hold of one of Holbert's legs. Holbert is fighting the takedown attempt but Henry gets the trip and lands the takedown into guard.

Holbert pushes Henry off for just long enough to get back to his feet. Very athletic spring there.
William Holbert is looking to throw some combinations by the looks of things.
Henry moves into the clinch successfully.
Henry is trying to work for a single leg takedown but Holbert pulls him back up using the underhooks.
Henry works on Holbert's body with a couple of short punches.
Henry looking to throw knees to the head but Holbert is blocking nicely.
Holbert tries for a takedown but Henry manages to get underhooks.
We've seen a great period of action over the last minute or so - credit to both fighters for going all out!
Henry is looking to score with knees to the body. Maybe he'll change it up and go body then head. Holbert is defending well for now.
Holbert is trying to pull guard but being pressed up against the cage enables Henry to keep the fight standing.
Holbert tries to throw a body punch but Henry avoids it by throwing Holbert back against the cage.
Henry using the Thai plumb to throw knees but Holbert has his back arched nicely, preventing the strike.
Henry tries to land knees in the clinch but Holbert avoids the damage to the body.
Henry wants a takedown but no success here.
Henry misses with a body punch.
That's one minute gone in the round.
Holbert throws a vicious knee straight up the middle but Henry blocks it with crossed arms.
Holbert misses with a knee to the head.
Henry is looking for a takedown up against the cage. Holbert gets underhooks though and prevents the takedown attempt.
William Holbert has stuffed three takedown attempts in the round now. That's going to take a lot out of Jonthan Henry .
Henry is looking to take this one to the mat.
Henry with an attempt at a knee that misses.
Henry misses the knee to the body. Nice hip positioning from Holbert.
Henry using the Thai plumb to throw knees but Holbert has his back arched nicely, preventing the strike.
Henry is breathing heavily.
Holbert leaning his opponent against the cage.
Holbert is trying to break free.
Holbert prevents the takedown attempt.
Holbert can't break the clinch.
Henry working aggressively here.
Henry using the Thai clinch to land knees to the body.
Henry pushes off an throws an elbow but Holbert leans to the side and avoids it. We're back to clinching against the cage.
That's two minutes gone in the round.
Holbert takes a knee to the side of the body.
Holbert is trying to pull guard but Henry has him pressed against the cage.
Henry wants a takedown.

Holbert pushes off and circles away, back to the middle of the mat.
Jonthan Henry seems to be the more aggressive standup fighter in this bout.
Good work by Henry as he checks the leg kick.
Holbert darts in looking for a takedown but Henry gets double underhooks and turns Holbert into the cage.
Holbert circles away from the clinch attempt.
Henry tries to close the distance and clinch up against the cage but Holbert paws at him with a jab and circles away.
Holbert fakes with an overhand right and moves in to clinch with Henry , pushing him back against the cage.
Henry is working on a leg, looking for a takedown but Holbert is defending well.
Henry misses with a punch on the inside.
Henry missing with knees to the body.
Holbert can't break the clinch.
Holbert avoids a wild elbow strike from Henry .
We've seen a great period of action over the last minute or so - credit to both fighters for going all out!
Holbert is working for takedown but Henry is calmly controlling the position for now.
Henry landing knees to the head.
That's three minutes gone in the round.
An uppercut on the inside fails to land for Henry .
Henry misses with an elbow over the top.
Henry misses with a knee to the head.
Holbert tries a knee to the head but he's missed.
Henry missing with knees to the body.
Henry misses with a knee strike.
Henry throws an elbow but it's blocked.
Henry lands a knee to the head there! That was nasty!
Holbert is pressed up against the cage. Henry has hold of a leg and is looking to drag Holbert down to the mat. Holbert avoids the attempt though and has circled away. We're back to striking at a distance.
Holbert tries for a takedown but Henry sees it coming a mile off and avoids it easily.
Holbert fails with a rather predictable takedown attempt.
Henry is definitely looking for the counter takedowns here.
Holbert rushes Henry and pushes him back against the cage in a clinch.
Henry lands a nice elbow from the clinch.
Henry has been the more effective fighter overall so far.
That's four minutes gone in the round.
Henry misses with a knee to the head.
Henry prevents a takedown attempt there.
Henry misses with an elbow over the top.
Henry tries to land a knee to the body but he is off balance and Holbert avoids it.
Henry pushes off an throws an elbow but Holbert leans to the side and avoids it. We're back to clinching against the cage.
Holbert trying to land knees to the body.
Holbert on the defensive, avoiding the knees to the body.
Henry misses with a knee strike.
Holbert tries to pull guard but Henry won't allow it.
Holbert is looking to take this one to the mat.
This is a great period of action - very entertaining stuff!
Henry is defending well against a takedown attempt.
Holbert is working on a single leg takedown against the cage. Henry can't fight it off and eventually Holbert manages to take the fight to the floor. Henry looks annoyed but at least he's managed to land in guard.
Henry looking to control the pace of the fight rather than finish it.
And thats the end of the round the fighters go back to their corners.
Jonthan Henry showed his class in that round. I'd imagine he'll take it on all the scorecards.
That's the end of the interval. I'm sure that seemed a lot quicker than a minute for our two fighters! Back to the action. This is the final round!
Henry tries to clinch up but Holbert circles away and keeps his distance.
Holbert gets tackled into the cage by Henry . Henry maintains the clinch.
Henry unloads a knee to the mid-section. Holbert lets out a prehistoric sounding urrrrgh.
Henry tries to land a knee to the head but Holbert blocks with his arms.
Henry looking to throw knees to the head but Holbert is blocking nicely.
Holbert managing to block the knees to the body from Henry .
Knees in the clinch landing for Henry .
Henry wants a takedown.
Henry misses with a knee to the head.
Holbert tries to pull guard but can't drag his opponent to the mat. Henry just stands there and leans against the cage.
Holbert jumps guard but his hands slip and he falls flat on his back. Well, he's made himself look a right mug there, as Henry walks away with a smile on his face. Holbert gets slowly back to his feet and shakes his head.
We've had a slow start to the round here - hopefully the action picks up.
Henry tries to clinch up but Holbert circles away and keeps his distance.
Holbert gets in close and instigates a clinch.
Both fighters are breathing heavily.
Holbert takes an elbow to the forehead.
Holbert avoiding damage as Henry throws knees to the body.
Knees to the body from Henry .
That's one minute gone in the round.
Henry pushes off an throws an elbow but Holbert leans to the side and avoids it. We're back to clinching against the cage.
Holbert gets underhooks to prevent Henry 's takedown attempt.
Henry lands a nice knee to the body.
Henry drops down looking for an ankle pick but Holbert pulls his leg out and moves away.
William Holbert has stuffed three takedown attempts in the round now. That's going to take a lot out of Jonthan Henry .
Henry slaps away a takedown attempt from Holbert, before circling back to the center of the mat.
Henry gets a clinch.
Henry misses the knee to the body. Nice hip positioning from Holbert.
Henry gets an overhook and lands an elbow to the side of the head.
Holbert is trying to break the clinch but Henry has him pressed against the cage.
Henry misses with a hook from the clinch.
A head punch blocked on the inside by Holbert.
Holbert jumps guard but Henry turns him against the cage and keeps the fight standing.
Henry is looking for a takedown.
Jonthan Henry seems to be working more effectively in the clinch in the fight so far.
That's two minutes gone in the round.
A right handed body shot lands from Holbert.
Henry gets an overhook and lands an elbow to the side of the head.
Henry has hold of a leg and is looking for a trip takedown. Holbert avoids it nicely though and we remain in the clinch.
Holbert breaks the clinch and we're back to striking at distance.
Henry tries to close the distance and clinch up but Holbert swats him away and circles back towards the center.
Holbert misses with a body kick.
A head kick from Holbert lands but Henry takes it in his stride.
Henry has taken the fight to the clinch.
We've seen a great period of action over the last minute or so - credit to both fighters for going all out!
Holbert blocks a knee to the body. He'll have a nicely bruised forearm in the morning.
A real battle for position is taking place between these two warriors.
Henry has a couple of punches blocked by Holbert.
Holbert managing to block the knees to the body from Henry .
Henry misses with a hook to the ribs.
Holbert jumps guard but Henry turns him against the cage and keeps the fight standing.
Henry tries to land a knee to the body but he is off balance and Holbert avoids it.
That's three minutes gone in the round.
Holbert blocking some punches.
Holbert avoiding damage as Henry throws knees to the body.
Henry landing knees to the head.
Henry pushes off an throws an elbow but Holbert leans to the side and avoids it. We're back to clinching against the cage.
Holbert is looking for a takedown up against the cage. Henry gets underhooks though and prevents the takedown attempt.
Henry tries to land a knee to the head but Holbert blocks with his arms.
Holbert escapes the clinch and we're back to striking.
Henry checks a leg kick nicely.
No luck with that takedown attempt from Holbert.
Holbert circles away from the clinch attempt.
Henry tries to close the distance and clinch but Holbert swats him to one side with an open hand palm strike and circles away.
Holbert is looking to counter with head kicks.
Henry fails with a takedown attempt from distance.
The fight stays on the outside here - Henry looks like he's thinking about clinching though.
That's four minutes gone in the round.
Henry rushes Holbert and presses him up against the cage.
Henry is working for takedown but Holbert is calmly controlling the position for now.
Henry drops down looking for an ankle pick but Holbert pulls his leg out and moves away.
Henry tries to clinch but is not successful on this occasion.
Holbert instigates a clinch.
Holbert on the defensive, avoiding the knees to the body.
Henry has hold of a leg and is looking for a trip takedown. Holbert avoids it nicely though and we remain in the clinch.
Henry prevents a takedown attempt there.
Henry landing knees to the head.
Wooooo! Give it up for these two warriors! They are putting on a show!
Henry looking for a takedown.
Holbert pushes off and circles away, back to the middle of the mat.
Holbert pushes forward with a 1-2 combination that forces Henry back to the cage. Holbert follows up with a solid lead hook to the liver.
William Holbert has stepped it up - he knows he needs a finish here!
Holbert looks to score with a combo but nothing lands.
And that's the end of the fight!
Jonthan Henry comfortably won the final round on my scorecard.
I've got Henry winning every round here. Surely the decision will go his way and he'll pick up a well deserved decision victory. Over to the ring announcer for the scorecards.
Ladies and gentlemen, after 3 rounds of action, we go to the scorecards for a decision.
Judge Alexandre Firmino scores the fight 27:30
Judge Seu Braga scores the fight 27:30
Judge Felipe Paraventi scores the fight 27:30
In favor of your winner, by unanimous decision... Jonthan Henry !
Jonthan Henry was full of energy after the big win and talked about how he thinks he can do big things in this sport. The crowd were appreciative of his determination to succeed.
|
|
|
|
|
|
|
|
|
|
|
|
|
|
|
|
|
|
|
|
|
|
|
| S |
C
A |
G |
S |
C
B |
G |
|
S |
C |
G |
|
energy
A | B |
|
hype
A | B |
|
pop
A | B |
|
mgr
A | B |
|
FIGHT
RATING
46% |
|
|
|
|
|
|
|
Undercard bout
|
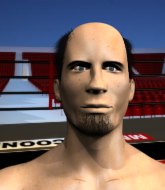
Coming up we have a heavyweight MMA rules bout between Big Tow (ranked 0 p4p, 0 weight class) and Bruce Zimbardo (ranked 0 p4p, 0 weight class). Bruce Zimbardo will no doubt be trying to keep this one on the feet, where he has a distinct advantage.
 |
|
 |
| 198 cm
31
276 lbs
16 - 10 - 0 |
|
220 cm
31
283 lbs
13 - 11 - 0 |
Good wrestling
Basic striking
KO power |
|
Decent wrestler
Excellent MT
Solid chin |
|
| |
|
Ladies and gentlemen. This fight is 3 rounds, in the heavyweight division.
Introducing the fighter to my left, fighting out of the red corner.
With a record of
16 - 10 - 0, fighting out of London, Big Tow!
And introducing the fighter to my right, fighting out of the blue corner.
With a record of
13 - 11 - 0, fighting out of Rio de Janeiro, Bruce Zimbardo!
The judges for this bout are Emerson Jorge, Edson Gomes and Alexandre Firmino.
The bell rings for round one and we are underway!
Tow looks for a takedown but Zimbardo sprawls well.
Zimbardo was about to counter that last move with a leg kick but changes his mind.
Tow shoots in for a takedown but Zimbardo shows good takedown defense.
Zimbardo misses with a looping right.
Tow takes a nasty kick to the mid section... That should keep him thinking. Does he try and block and risk a head kick landing?
Tow shoots in but no luck this time.
Tow moves out of the way of the counter high kick fromZimbardo.
That's three failed takedown attempts in the round for Big Tow. That's going to take a lot out of him.
Tow shoots in looking for a takedown. Zimbardo tries to sprawl out of it but Tow keeps driving through. The fighters are pinned against the cage. Zimbardo manages to get underhooks and after a bit of a struggle, circles away and we're back to standing.
Zimbardo counters with a body kick.
Zimbardo gets taken down but at least he's managed to land in guard.
We've had a slow start to the round here - hopefully the action picks up.
Tow wants to control from the top but Zimbardo keeps moving.
The fighters are pressed up against the cage, both looking to find a bit of space to work.
Tow lands a couple of elbows.
That's one minute gone in the round.
Tow throwing shots from guard but he's hitting more mat than opponent.
Tow wants to control from the top but Zimbardo keeps moving.
Zimbardo utilising some decent striking defenses from the guard, preventing the ground and pound.
Tow pressing down on his opponent's thigh, looking to pass guard. Zimbardo is keeping the position for now.
Zimbardo working the defensive guard well to avoid strikes from Tow.
Tow throwing elbows and punches but not connecting, as Zimbardo works some decent striking defense from the bottom.
Tow has been looking to land a fair amount of strikes on the ground. He might be looking to soften his opponent up in order to work for a submission.
Tow not doing a lot at the moment. He'll have to show some more aggression or the fight will get stood up.
Tow keeps in close for a moment and lands a decent shot to the side of Zimbardo's head.
Tow is just sitting in guard, looking to avoid any submissions.
Tow with a flurry of punches that miss.
Tow is looking to pass into half guard but Zimbardo pushes him away with his feet and jumps on top - now Zimbardo is in guard.

That's two minutes gone in the round.
Tow scrambles and gets back to his feet.
Tow scores a trip takedown into side control. Nice.
Zimbardo can't do much from the bottom here.
Wooooo! Give it up for these two warriors! They are putting on a show!
Zimbardo wants to get back to his feet.
Zimbardo tries to get back to half guard but can't.
Zimbardo is working to avoid the ground and pound but Tow connects with a decent elbow.
Zimbardo takes a nasty elbow to the side of the head.
Check out the look on Tow's face as he threw that strike - that's one determined fighter!
Zimbardo looks winded!
Zimbardo is being controlled here.
Tow postures up a little and throws a couple of hammerfists but they don't connect properly.

Tow has hold of Zimbardo's arm. He's looking for a kimura. Zimbardo seems comfortable defending it but Tow has shifted his position slighty and is cranking on the arm! Zimbardo is real pain and he's forced to tap out! Zimbardo is disgusted with himself for not defending it better but Tow couldn't care less - he's delighted!
Ladies and gentlemen, after 3:55 of round 1, we have a winner by way of Submission (Kimura). Big Tow!
Big Tow managed to slip a mention for his sponsors, Arcticus University: London, into his post fight interview.
|
|
|
|
|
|
|
|
|
|
|
|
|
|
|
|
|
|
|
|
|
|
|
| S |
C
A |
G |
S |
C
B |
G |
|
S |
C |
G |
|
energy
A | B |
|
hype
A | B |
|
pop
A | B |
|
mgr
A | B |
|
FIGHT
RATING
43% |
|
|
|
|
|
|
|
Undercard bout
|
Coming up we have a middleweight MMA rules bout between Frank Dux (ranked 0 p4p, 0 weight class) and Ante Gotovina (ranked 0 p4p, 0 weight class). There are an array of beautiful celebrities at ringside tonight! I wonder if any of them paid for their tickets.
 |
|
 |
| 188 cm
23
203 lbs
9 - 8 - 0 |
|
185 cm
22
197 lbs
8 - 6 - 0 |
BJJ Blue Belt
Excellent MT
Cardio machine |
|
BJJ Purple Belt
Good kicks
Powerful |
|
| |
|
Ladies and gentlemen. This fight is 3 rounds, in the middleweight division.
Introducing the fighter to my left, fighting out of the red corner.
With a record of
9 - 8 - 0, fighting out of New York, Frank Dux!
And introducing the fighter to my right, fighting out of the blue corner.
With a record of
8 - 6 - 0, fighting out of Rio de Janeiro, Ante Gotovina!
The judges for this bout are Felipe Paraventi, Seu Braga and Matheus Silva.
The bell rings for round one and we are underway!
Dux pulls out of a head kick attempt.
Gotovina drops down looking to force a counter takedown but Dux defends it well.
Dux misses with a low kick as Gotovina jumps back.
Dux throws a jab but it's blocked by Gotovina.
Gotovina clinches with his opponent.
Gotovina tries a body shot but Dux blocks it.
Gotovina has hold of one of Dux's legs. Dux is fighting the takedown attempt but Gotovina gets the trip and lands the takedown into guard.
Dux has his feet on Gotovina's hips. He pushes off and gets to his feet. Nice work.
Gotovina looks more muscular than last time we saw him. He must have been on the weights.
Gotovina takes a step back and watches a body kick go sailing past his mid section.
Gotovina with a jab.
Dux throws a nice hook to the body that draws an oooh from the crowd.
The crowd cheering loudly, showing their appreciation for the quality fight we're seeing here.
A decent looking cross lands there for Dux.
Gotovina connects with a body shot that sends Dux's belly button to the back.
Dux throws a head kick that misses.
Dux will need to close the distance a bit before he attacks - that leg kick was thrown from too far away.
Frank Dux seems to be the more aggressive standup fighter in this bout.
Dux throws a series of punches but Gotovina moves out of range.
Gotovina misses with a straight left.
Gotovina blocks a head kick by Dux.
A looping hook to the body misses from Gotovina. Dux does a little dance to reset his feet.
We've been hearing reports that Dux has been drilling takedowns in recent sessions so let's see if that has an impact on the result of this fight.
Gotovina takes a shot to the nose. Hopefully that hasn't broken it.
Dux uses some good footwork to avoid the body shot by Gotovina.
Dux fires out a quick counter leg kick but Gotovina just manages to avoid it.
That's one minute gone in the round.
Gotovina gets to the clinch - let's see what his plan is here.
Gotovina tries to land a shot to the body but it's blocked.
Gotovina can't find room to land a body shot as Dux controls the action.
Gotovina misses with a shot to the kidneys.
Gotovina throws a head punch that misses.
A nice right hand lands inside from Gotovina.
Gotovina tried to land a shot to the body but connects with Dux's elbow.
A short left from Gotovina.
Dux prevents a body shot from Gotovina.
Gotovina tries to work over Dux's body with a swooping hook but it only glances the target.
Gotovina swings wildly with an uppercut but Dux uses good head movement to avoid it.
Gotovina with a knee to the head.
A short body shot lands from Gotovina as the two fighters clinch.
Dux blocks a couple of punches on the inside.
Gotovina tries to land a knee to the body but he is off balance and Dux avoids it.
Dux with an attempt at a knee that misses.
A short uppercut from Gotovina.
An uppercut on the inside fails to land for Dux.
That's two minutes gone in the round.
Dux tries a knee to the head but Gotovina blocks it.
Gotovina misses with a hook to the ribs.
This is a great period of action - very entertaining stuff!
Gotovina scores with a knee to the head.
Gotovina blocks an elbow strike from Dux.
Gotovina tries to land a knee to the head but misses.
Gotovina tries to work over Dux's body with a swooping hook but it only glances the target.
Gotovina misses with a hook from the clinch.
Gotovina misses with a shot to the kidneys.
Gotovina prevents a body shot from Dux.
Gotovina with an attempt at a knee that misses.
Gotovina tries to land a knee to the head but misses.
Gotovina throws a head punch that misses.
Gotovina tries to pull guard but Dux forces him back to his feet, against the cage.
Gotovina lands on the inside with an uppercut.
Gotovina scores with a shoulder strike.
Gotovina doesn't land with the attempted body shot.
Gotovina lands with a short head shot on the inside.
A short body shot lands from Dux as the two fighters clinch.
That's three minutes gone in the round.
Gotovina tried to land a shot to the body but connects with Dux's elbow.
Dux lands a shot to the body.
Gotovina tries to throw a body punch but Dux avoids it by throwing Gotovina back against the cage.
Dux with an attempt at a knee that misses.
Gotovina takes a knee right on the jaw!
Dux blocks a knee to the body. He'll have a nicely bruised forearm in the morning.
Gotovina tried to land a shot to the body but connects with Dux's elbow.
A left hand lands to the body for Gotovina.
Dux lands on the inside with an uppercut.
Dux throws a nice elbow but it doesn't land.
Gotovina breaks from the clinch.

Dux lands a big head kick that sends Gotovina tumbling to the mat! Dux takes a step backwards and waves Gotovina back to his feet - he wants the finish!
Gotovina is rocked!

It looks like Ante Gotovina has been cut.
This is a great period of action - very entertaining stuff!
Ohhhhhhhhhh, brutal head kick from Dux! This one is all over!
Ladies and gentlemen, after 3:46 of round 1, we have a winner by way of KO (Head Kick). Frank Dux!
A determined Frank Dux didn't want to dwell on this fight in his post fight interview. Instead he was more keen to state he wants a title shot. Let's see if he gets it!
|
|
|
|
|
|
|
|
|
|
|
|
|
|
|
|
|
|
|
|
|
|
|
| S |
C
A |
G |
S |
C
B |
G |
|
S |
C |
G |
|
energy
A | B |
|
hype
A | B |
|
pop
A | B |
|
mgr
A | B |
|
FIGHT
RATING
66% |
|
|
|
|
|
|
|
Undercard bout
|
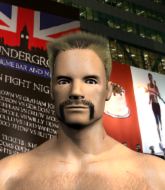
Coming up we have a light heavyweight MMA rules bout between George Chuvalo (ranked 0 p4p, 0 weight class) and Rickson Moura (ranked 0 p4p, 0 weight class). The fight MMA fans around the world have waited their entire lives for!
 |
|
 |
| 187 cm
28
219 lbs
12 - 9 - 0 |
|
185 cm
22
215 lbs
6 - 1 - 0 |
Good wrestling
Excellent boxer
Very quick |
|
Good wrestler
Counter fighter
Powerful |
|
| |
|
Ladies and gentlemen. This fight is 3 rounds, in the light heavyweight division.
Introducing the fighter to my left, fighting out of the red corner.
With a record of
12 - 9 - 0, fighting out of Rio de Janeiro, George Chuvalo!
And introducing the fighter to my right, fighting out of the blue corner.
With a record of
6 - 1 - 0, fighting out of Los Angeles, Rickson Moura!
The judges for this bout are Matheus Silva, Alexandre Firmino and Seu Braga.
The bell rings for round one and we are underway!
Chuvalo throws a hook but Moura blocks it.
Moura feints the counter takedown.
Chuvalo throws a nice looking combination but Moura bobs and weaves to avoid any damage.
Moura feints the counter takedown.
Moura slips a jab from Chuvalo.
Moura with the counter takedown but Chuvalo avoids it easily.
Moura has been spending a lot of time sparring his boxing in the run up to the fight, trying to sharpen up those hands and look for a knockout.
Chuvalo misses with a series of wild punches.
Chuvalo swings for the body but Moura moves out of range.
Moura showing good head movement there, avoiding the strikes from Chuvalo.
Chuvalo keeps the fight standing with a nice sprawl.
We've had a slow start to the round here - hopefully the action picks up.
Moura avoids a lazy jab quite easily.
And Moura tries to counter it with a takedown but Chuvalo pushes his down on his head and steps out.
Moura tries for a takedown but Chuvalo sees it coming a mile off and avoids it easily.
Moura misses with a takedown attempt. He shot from a bit too far out.
George Chuvalo has stuffed three takedown attempts in the round now. That's going to take a lot out of Rickson Moura.
That's one minute gone in the round.
Chuvalo throws a hook to the body but it doesn't connect.
Moura drops down looking to force a counter takedown but Chuvalo defends it well.
Chuvalo scores with a punch to the head.
Chuvalo looks to have improved his striking defense since last time we saw him fight.
Chuvalo stooping low to avoid any incoming strikes and then lunges in with an uppercut come cross that lands flush.
Chuvalo fakes a head shot and lands one to the body.
George Chuvalo is looking to keep the fight on the feet at all costs.
The fighters circle momentarily. Chuvalo darts into range and connects with a nice straight punch.
Moura fails with a takedown attempt.
Moura takes one to the chin there.
Moura closes the distance and gets a double leg, slamming Chuvalo to the mat! Chuvalo manages to get full guard.
Chuvalo on his back here. We all know that wrestlers don't like being on their back so let's see if Chuvalo tries to get out of the position.
Moura won't allow Chuvalo to get back to his feet.
Moura landing with the ground and pound.
We've seen a great period of action over the last minute or so - credit to both fighters for going all out!
Moura is sitting in guard, working some ground and pound.
Chuvalo is working from a closed guard but he's struggling to control his opponent.
That's two minutes gone in the round.
Moura works over Chuvalo with some ground and pound from guard.
Moura won't allow Chuvalo to get back to his feet.
Moura with a flurry of punches that miss.
Moura is working Chuvalo over from the guard. He should look to pass the guard and do a little more damage with these strikes.
Chuvalo wants to stand but Moura is controlling the position.
Moura working in close now, lands a nice elbow to the side of Chuvalo's head.
Chuvalo keeping moving, preventing Moura from controlling successfully.
Chuvalo preventing the ground and pound from doing any damage.
Moura lands a nice shot whilst sitting in his opponent's guard.
Moura looking to pass the guard.
Moura trying to land body shots but he keeps hitting the mat.
Moura is working the ground and pound from guard. He might want to try advancing position though to get more of an impact.
Moura working from the guard for now, landing some ground and pound.
That's three minutes gone in the round.
Moura postures up in Chuvalo's guard and throws a big left but Chuvalo blocks it.
Moura is sitting in guard, working some ground and pound.
Hammerfist, elbow! yells Moura's corner. There ya go! There ya go!
Chuvalo controlling Moura's posture.
Chuvalo has momentary wrist control but Moura slips an elbow through the middle.

Chuvalo is rocked!
Moura stands up over Chuvalo, holding his feet. He dives back in and lands a decent shot to the head.
Moura landing with the ground and pound.
Moura works over Chuvalo with some ground and pound from guard.
Oh Chuvalo is still in real trouble! Will he be able to recover?!!
Chuvalo knows he needs to get back to his feet asap. He's simply no match for Moura on the ground.
Chuvalo keeping moving, preventing Moura from controlling successfully.
Moura arches his back and unloads with a massive left and a right! Chuvalo's eyes roll back into his head, he's out cold! The ref dives in to stop the fight - wow, they were hard shots!
Ladies and gentlemen, after 3:59 of round 1, we have a winner by way of KO (Strikes). Rickson Moura!
Our winner, Rickson Moura, made sure he spent some time buttering up the crowd during his post fight interview, which will no doubt bring him a few more fans.
|
|
|
|
|
|
|
|
|
|
|
|
|
|
|
|
|
|
|
|
|
|
|
| S |
C
A |
G |
S |
C
B |
G |
|
S |
C |
G |
|
energy
A | B |
|
hype
A | B |
|
pop
A | B |
|
mgr
A | B |
|
FIGHT
RATING
44% |
|
|
|
|
|
|
|
Undercard bout
|
Coming up we have a heavyweight MMA rules bout between Patrico Santos Diaz (ranked 0 p4p, 0 weight class) and Gary Aims (ranked 0 p4p, 0 weight class). Both fighters look pumped up here. Let's hope this is a good fight!
 |
|
 |
| 191 cm
24
254 lbs
10 - 2 - 0 |
|
204 cm
29
265 lbs
8 - 8 - 0 |
Good wrestling
Excellent boxer
Cardio machine |
|
BJJ Blue Belt
Excellent boxer
Powerful |
|
| |
|
Ladies and gentlemen. This fight is 3 rounds, in the heavyweight division.
Introducing the fighter to my left, fighting out of the red corner.
With a record of
10 - 2 - 0, fighting out of Rio de Janeiro, Patrico Santos Diaz!
And introducing the fighter to my right, fighting out of the blue corner.
With a record of
8 - 8 - 0, fighting out of Rio de Janeiro, Gary Aims!
The judges for this bout are Luis Engracia, Alexandre Firmino and Leandro Rodrigues.
The bell rings for round one and we are underway!
Santos Diaz uses good head movement to avoid the hook from Aims.
Santos Diaz looks to have improved his striking defense since last time we saw him fight.
Santos Diaz drops Aims with a beautiful combination! Aims stares up at his opponent, who ushers him back to his feet - Santos Diaz is looking for the KO!
It looks like Gary Aims has been cut.
Aims swings and misses with a hook to the body.
Gary Aims seems to be the more aggressive standup fighter in this bout.
Santos Diaz clinches.
Santos Diaz doesn't land with the attempted body shot.
A short body shot lands from Santos Diaz as the two fighters clinch.
An uppercut to the body lands inside from Santos Diaz.
This is a great period of action - very entertaining stuff!
Aims is trying to pull guard but being pressed up against the cage enables Santos Diaz to keep the fight standing.
Santos Diaz lands on the inside with an uppercut.
Santos Diaz digs a right hand into Aims's ribs. Those have got to be taking their toll on Aims's gas tank.
A short right from Santos Diaz on the inside.
Santos Diaz scores with an uppercut up the middle.
Santos Diaz lands a right uppercut that snaps the head of Aims backwards.
Santos Diaz prevents Aims from breaking the clinch.
Santos Diaz keeps control of Aims as he tries to wriggle out of the double underhooks.
Santos Diaz lands with a good tight uppercut to the head.
That's one minute gone in the round.
Santos Diaz lands a nice uppercut.
Santos Diaz pushes Aims back against the cage and lands a hook to the side of the head.
Aims is rocked!
Aims looks winded!
Santos Diaz lands a big right hand that drops Aims! The killer instinct kicks in and Santos Diaz finishes his opponent with a series of strikes from mount. A dominating finish by Santos Diaz!
Ladies and gentlemen, after 1:20 of round 1, we have a winner by way of TKO (Strikes). Patrico Santos Diaz!
After the big win, Patrico Santos Diaz made sure to do all the important stuff like thanking his sponsors Bos Energy MMA159.4 and telling the interviewer how much he loves him.
|
|
|
|
|
|
|
|
|
|
|
|
|
|
|
|
|
|
|
|
|
|
|
| S |
C
A |
G |
S |
C
B |
G |
|
S |
C |
G |
|
energy
A | B |
|
hype
A | B |
|
pop
A | B |
|
mgr
A | B |
|
FIGHT
RATING
77% |
|
|
|
|
|
|
|
Co-main event
|
Coming up we have a middleweight MMA rules bout between Suleijma Tudekiks (ranked 0 p4p, 0 weight class) and Ernesto Panado (ranked 0 p4p, 0 weight class). Panado has chosen Lorde - Team as his entrance music. Both fighters will be looking to make this an exciting fight for the fans, I'm sure!
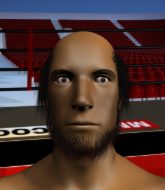 |
|
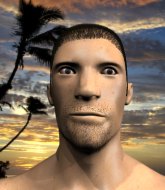 |
| 200 cm
32
192 lbs
12 - 8 - 0 |
|
185 cm
32
195 lbs
15 - 11 - 0 |
Decent wrestler
Excellent boxer
Cardio machine |
|
Good takedowns
Basic striking
Good gas tank |
|
| |
|
Ladies and gentlemen. This fight is 5 rounds, for the middleweight championship of the world!
Introducing the champion to my left, fighting out of the red corner.
With a record of
12 - 8 - 0, fighting out of Rio de Janeiro, Suleijma Tudekiks!
And introducing the challenger to my right, fighting out of the blue corner.
With a record of
15 - 11 - 0, fighting out of Rio de Janeiro, Ernesto Panado!
The judges for this bout are Seu Braga, Leandro Rodrigues and Thiago Cunha.
The bell rings for round one and we are underway!
No joy there for Tudekiks, who threw a few shots but didn't land.
Panado has a takedown stuffed.
Panado is pinned up against the cage taking some big shots here. The referee is looking closely deciding whether he should stop the fight.
Tudekiks avoids the head kick by Panado.
Excellent takedown into side control there by Panado.
Panado tries to advance to mount but Tudekiks denies him.
Tudekiks wants to escape from the position here - easier said than done!
Tudekiks trying desperately to get back to his feet here but he's not having any joy at all. He's going to tire himself out if he's not careful.
Panado has hold of Tudekiks's arm. He's looking for a kimura. Tudekiks seems comfortable defending it but Panado has shifted his position slighty and is cranking on the arm! Tudekiks is real pain and he's forced to tap out! Tudekiks is disgusted with himself for not defending it better but Panado couldn't care less - he's delighted!
Ladies and gentlemen, after 0:50 of round 1, we have a winner by way of Submission (Kimura). Ernesto Panado!
Ernesto Panado is the new middleweight champion!
A very excited looking Ernesto Panado made sure he remembered to thank all the fans both in the arena and on the internet. He said all the coolest people spend all day on MMA websites, which got a big reaction.
|
|
|
|
|
|
|
|
|
|
|
|
|
|
|
|
|
|
|
|
|
|
|
| S |
C
A |
G |
S |
C
B |
G |
|
S |
C |
G |
|
energy
A | B |
|
hype
A | B |
|
pop
A | B |
|
mgr
A | B |
|
FIGHT
RATING
77% |
|
|
|
|
|
|
|
Main event
|
Coming up we have a heavyweight MMA rules bout between Samson Nazirite (ranked 0 p4p, 0 weight class) and Jack Murdock (ranked 0 p4p, 0 weight class). Well, the cameraman is lingering on a pretty young lady for a bit too long there. Keep your eyes on the prize buddy or you'll miss the fighter intros!
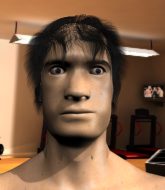 |
|
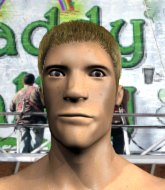 |
| 195 cm
28
283 lbs
15 - 3 - 0 |
|
185 cm
24
255 lbs
11 - 4 - 0 |
Good wrestling
Good knees
Very quick |
|
Decent wrestler
World class boxer
Good gas tank |
|
| |
|
Ladies and gentlemen. This fight is 5 rounds, for the heavyweight championship of the world!
Introducing the champion to my left, fighting out of the red corner.
With a record of
15 - 3 - 0, fighting out of Rio de Janeiro, Samson Nazirite!
And introducing the challenger to my right, fighting out of the blue corner.
With a record of
11 - 4 - 0, fighting out of New York, Jack Murdock!
The judges for this bout are Paulo Santos, Daniel Cesar and Felipe Paraventi.
The bell rings for round one and we are underway!
Nazirite just misses with a punch to the body.
And an attempted straight right on the counter from Murdock! But no joy.
Nazirite closes the distance and presses his opponent up against the cage.
Murdock fails to land with a short punch on the inside.
Nazirite tries to throw a body punch but Murdock avoids it by throwing Nazirite back against the cage.
Nazirite landing knees to the body. They look like they could hurt.
Murdock looks winded!
Nazirite lands with a short punch from the clinch.
I was talking to Nazirite's coach per-fight and he was telling me that they'd been working on the clinch in the runup to this fight.
Murdock is trying to stall.
Nazirite lands a nice shot to the body.
Nazirite misses with a punch to the body.
A frustrated look appears on Murdock's face as he tries to break the clinch.
Nazirite tried to land a shot to the body but connects with Murdock's elbow.
Murdock blocks an uppercut.
Nazirite tries to land a shot to the body but it's blocked.
We've had a slow start to the round here - hopefully the action picks up.
Murdock digs a right hand underneath Nazirite's ribcage. Nazirite let out a lung full of air as it connected.
Nazirite digs a right hand underneath Murdock's ribcage. Murdock let out a lung full of air as it connected.
A nice left hand lands by Nazirite.
Nazirite lands a left hand.
Nazirite is looking to score with knees to the body. Maybe he'll change it up and go body then head. Murdock is defending well for now.
Nazirite lands a nice looking hook to the body, against the cage.
Nazirite lands a hook to the body. It's hard to tell if that hurt Murdock or not.
That's one minute gone in the round.
Murdock misses with a punch on the inside.
Nazirite with the Thai clinch. He's looking to land a big knee but he's not managed it this time.
Nazirite working aggressively here.
Murdock misses with a short punch on the inside.
Nazirite blocks a body shot from Murdock.
With the fighters clinched against the cage, Murdock creates a bit of distance for himself and scores with a nice uppercut.
Nazirite doesn't land with the attempted body shot.
A knee to the head by Nazirite.
Murdock tries to throw a body punch but Nazirite avoids it by throwing Murdock back against the cage.
Murdock lands a right uppercut that snaps the head of Nazirite backwards.
Murdock scores with a shoulder strike.
Murdock blocks a punch to the side of the head.
Nazirite connects with a knee to the head.
It looks like Jack Murdock has been cut.
Murdock lands a right uppercut that snaps the head of Nazirite backwards.
Nazirite throws a punch but it's blocked by Murdock.
Murdock lands a right uppercut that snaps the head of Nazirite backwards.
Wooooo! Give it up for these two warriors! They are putting on a show!
Nazirite missing with knees to the body.
Murdock tries to land a shot to the body but it's blocked.
Murdock misses with a hook to the ribs.
Murdock has been looking to improve his clinch game in recent weeks. Nazirite seems to have the measure of him in the clinch so far, so let's see if Murdock can turn it around.
Nazirite misses with a knee strike.
That's two minutes gone in the round.
Murdock lands an uppercut.
Murdock makes some space for himself and lands an uppercut.
Nazirite scores with a hook to the body.
Still in the clinch, Nazirite scores with a nice short uppercut.
Nazirite tries a knee to the head but he's missed.
Nazirite blocks a couple of punches on the inside.
Nazirite lands a shoulder strike.
Murdock lands with a quick shot inside that doesn't really do much damage.
Nazirite using the Thai plumb to throw knees but Murdock has his back arched nicely, preventing the strike.
Nazirite trying to land knees to the body.
A nice left hand lands by Murdock.
Nazirite misses the knee to the body. Nice hip positioning from Murdock.
Nazirite lands a right uppercut that snaps the head of Murdock backwards.
Nazirite goes for a body shot but it's blocked.
Murdock throws a blind hook that connects with the side of Nazirites head.
Murdock lands a nice shot to the body.
Murdock scores with an uppercut up the middle.
Murdock misses with a shot to the kidneys.
Murdock misses with a shot to the kidneys.
That's three minutes gone in the round.
Murdock lands with a right to the head.
Murdock misses with a short punch on the inside.
Murdock is working Nazirite over against the cage.
Nazirite misses with a hook from the clinch.
With the fighters clinched against the cage, Murdock creates a bit of distance for himself and scores with a nice uppercut.
Murdock pushes Nazirite back against the cage and unloads with a body punch.
Murdock is looking to control Nazirite's arms but Nazirite gets an underhook and turns him. Now Murdock has his back to the cage.

Murdock drops Nazirite onto one knee with a big uppercut from the clinch! Nazirite is propped up by the cage and works his way back to his feet!
Nazirite is rocked!

It looks like Samson Nazirite has been cut.
Murdock throws a head punch that misses.
Oh Nazirite is still all over the place! His legs are completely gone! Will he be able to recover?!!
Murdock pushes Nazirite against the cage. Murdock is working some dirty boxing. Murdock pushes off with a quick right hook! Nazirite goes down! Nazirite tries to stand but stumbles back to his kness! Murdock moves in to finish and the ref steps in to prevent any more damage!
Ladies and gentlemen, after 3:35 of round 1, we have a winner by way of TKO (Strikes). Jack Murdock! Jack Murdock retains his heavyweight title!
Jumping up and down and very excited, Jack Murdock waved his t-shirt featuring Machiavelli Boutique's logo in front of the cameras.
|
|
|
|
|
|
|
|
|
|
|
|
|
|
|
|
|
|
|
|
|
|
|
| S |
C
A |
G |
S |
C
B |
G |
|
S |
C |
G |
|
energy
A | B |
|
hype
A | B |
|
pop
A | B |
|
mgr
A | B |
|
FIGHT
RATING
57% |
|
|
|
|
|
|
|
|
|
|
