 |
Pacio 25 PBP Commentary |
Undercard bout
|
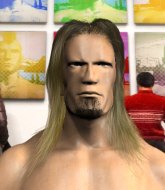
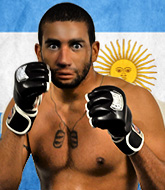
Coming up we have a lightweight MMA rules bout between Fiji Nakamura (ranked 0 p4p, 0 weight class) and Charlie Theron (ranked 0 p4p, 0 weight class). Charlie Theron is the more experienced fighter, so let's see if that makes a difference tonight.
 |
|
 |
| 181 cm
26
154 lbs
3 - 4 - 0 |
|
175 cm
36
165 lbs
9 - 13 - 0 |
BJJ Purple Belt
Good knees
Experienced |
|
BJJ Purple Belt
Basic striking
Solid chin |
|
| |
|
Ladies and gentlemen. This fight is 3 rounds, in the lightweight division.
Introducing the fighter to my left, fighting out of the red corner.
With a record of
3 - 4 - 0, fighting out of Tokyo, Fiji Nakamura!
And introducing the fighter to my right, fighting out of the blue corner.
With a record of
9 - 13 - 0, fighting out of London, Charlie Theron!
The judges for this bout are Shigeki Sano, Sosuke Kotani and Ren Mimura.

The bell rings for round one and we are underway!

Nakamura gets taken down but at least he's managed to land in guard.
Theron throwing strikes but missing.
Nakamura is looking to get back to his feet but can't, whilst Theron is controlling him.
Theron not doing a lot at the moment. He'll have to show some more aggression or the fight will get stood up.
Theron lands a couple of digs.
Theron trying to pass the guard but can't manage it just yet.
The ref warns both fighters not to hold the cage as they work up against the meshing.
Theron is just sitting in guard, looking to avoid any submissions.
Theron distracts Nakamura with his right hand and drops a big elbow with his other arm.
We've had a slow start to the round here - hopefully the action picks up.
Nakamura wants to control but instead he gets his guard passed and Theron is now in half guard.
The fighters are pressed up against the cage, both looking to find a bit of space to work.
Theron is scoring with some nice ground and pound from the dominant position.
Theron is keeping good posture, landing some ground and pound.
Theron looks towards his corner to check for any instructions. The corner give him nothing to work with, so he cracks Nakamura with a short hammerfist. I guess that's as good as any advice he could get in this position.

That's one minute gone in the round.
Nice strikes from Theron there.
Theron working the head and body with strikes.
Theron controlling the action here.

Theron is trying to work for a kimura. This could be trouble! No, Nakamura has managed to free his arm - good work.
Theron uses his free foot to push down on Nakamura's thigh. Eventually he works his other foot free and he's advanced to mount - this is trouble for Nakamura.
Theron landing strikes from the mount and Nakamura is in trouble!

Nakamura is rocked!
A big strike lands for Theron! That's really hurt Nakamura and he's turned his back - Theron keeps firing away and the ref dives in to stop the fight! Theron jumps to his feet to celebrate the victory!
Ladies and gentlemen, after 1:57 of round 1, we have a winner by way of TKO (Strikes). Charlie Theron!
|
|
|
|
|
|
|
|
|
|
|
|
|
|
|
|
|
|
|
|
|
|
|
| S |
C
A |
G |
S |
C
B |
G |
|
S |
C |
G |
|
energy
A | B |
|
hype
A | B |
|
pop
A | B |
|
mgr
A | B |
|
FIGHT
RATING
49% |
|
|
|
|
|
|
|
Undercard bout
|
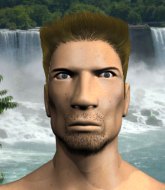
Coming up we have a middleweight MMA rules bout between Pal Ohmsford (ranked 0 p4p, 0 weight class) and Khon Kaen (ranked 0 p4p, 0 weight class). Kaen has chosen Morbid Angel - Where the Slime Live as his entrance music. The atmosphere really building for this one as we go over to our ring announcer for the fighter introductions!
 |
|
 |
| 193 cm
24
196 lbs
8 - 10 - 0 |
|
188 cm
19
195 lbs
4 - 1 - 0 |
BJJ Purple Belt
Counter fighter
Very strong |
|
Powerful takedowns
Basic striking
Granite chin |
|
| |
|
Ladies and gentlemen. This fight is 3 rounds, in the middleweight division.
Introducing the fighter to my left, fighting out of the red corner.
With a record of
8 - 10 - 0, fighting out of Tokyo, Pal Ohmsford!
And introducing the fighter to my right, fighting out of the blue corner.
With a record of
4 - 1 - 0, fighting out of Tokyo, Khon Kaen!
The judges for this bout are Kenichi Hosakawa, Tatsuya Matsuyama and Shirou Masuda.
The bell rings for round one and we are underway!

Ohmsford throws the overhand right but ducks down into a quick takedown attempt. Kaen was covering up waiting for the punch and Ohmsford finishes the takedown easily into guard.

Ohmsford is trying to work a guillotine from the top, or something like that? Don't know how he thinks he's going to get a finish from there.
Kaen looking for submissions from the bottom here. Moving his hips around, possibly looking for an armbar.
Ohmsford missing there with some ground and pound from the guard.
Ohmsford keeps in close for a moment and lands a decent shot to the side of Kaen's head.
Kaen pushes a forearm under Ohmsford's chin to create some space. He's escaped his hips and pivoted quickly for an armbar! Can he extend the arm? Yes, Ohmsford is tapping out! Damn, that was fast!
Ladies and gentlemen, after 0:53 of round 1, we have a winner by way of Submission (Armbar). Khon Kaen!
Khon Kaen thanked the fans post fight for their support.
|
|
|
|
|
|
|
|
|
|
|
|
|
|
|
|
|
|
|
|
|
|
|
| S |
C
A |
G |
S |
C
B |
G |
|
S |
C |
G |
|
energy
A | B |
|
hype
A | B |
|
pop
A | B |
|
mgr
A | B |
|
FIGHT
RATING
85% |
|
|
|
|
|
|
|
Undercard bout
|
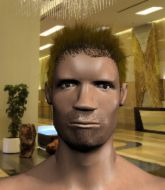
Coming up we have a middleweight MMA rules bout between Michal Filipovic (ranked 0 p4p, 0 weight class) and Andrei Molotov (ranked 0 p4p, 0 weight class). Buckle up people - heeeeeeeeeere we go!
 |
|
 |
| 186 cm
32
195 lbs
17 - 15 - 1 |
|
185 cm
27
185 lbs
5 - 1 - 0 |
Powerful takedowns
Dangerous knees
Very strong |
|
Good wrestler
Counter fighter
Knockout power |
|
| |
|
Ladies and gentlemen. This fight is 3 rounds, in the middleweight division.
Introducing the fighter to my left, fighting out of the red corner.
With a record of
17 - 15 - 1, fighting out of Amsterdam, Michal Filipovic!
And introducing the fighter to my right, fighting out of the blue corner.
With a record of
5 - 1 - 0, fighting out of Tokyo, Andrei Molotov!
The judges for this bout are Yasuomi Hirokawa, Shirou Masuda and Yukihiro Yamamoto.
The bell rings for round one and we are underway!
Filipovic throws a head kick but Molotov moves out of range.
Molotov feints the counter takedown.
Filipovic blocks a leg kick.
Molotov blocks a head kick by Filipovic.
Molotov shoots in for a takedown. "Ole!" shouts Filipovic as he jumps to the side.
Filipovic will need to tighten up his combinations if he doesn't want to gas himself out, swinging at thin air.
Molotov is definitely looking for the counter takedowns here.
We've been told by Filipovic's head coaches at Club Pain that he's been working on his takedown defense in preparation for this fight.
Filipovic fails to land with the punch combination there - jab, cross, hook, miss, miss, miss.
Filipovic throws a head kick that misses

and Molotov counters into the clinch. Nicely done.
We've had a slow start to the round here - hopefully the action picks up.
Filipovic on the defensive, avoiding the knees to the body.
Filipovic is trying to push Molotov away but Molotov has him pressed against the cage, so he's going nowhere.
Molotov pulls guard.
Molotov has a butterfly guard looking to sweep but Filipovic has passed into side control.
Molotov is positioning himself to get back to half guard.
That's one minute gone in the round.
The referee asks Filipovic politely if he wouldn't mind getting on with it and actually doing something. Filipovic prefers to stall for the moment though.
Molotov sneaks back into half guard.
Filipovic looking to pass the half guard. Not this time.
Neither fighter is being very active at the moment, with Filipovic in particular looking to stall.
Molotov misses with some strikes from the bottom.

That's two minutes gone in the round.
There's not a lot going on here and the crowd are letting the fighters know they're not willing to tolerate a lack of action.
Molotov tries to roll over but Filipovic keeps him under control.
Filipovic wants to stand but Molotov has hold of a leg and an arm, so he's trapped for now.
The fighters are pressed up against the cage, both looking to find a bit of space to work.
Molotov wants to get back to full guard.
Filipovic keeping composed on the top, looking to control the action.
Filipovic wants to stand but Molotov has hold of a leg and an arm, so he's trapped for now.
Molotov gets back to full guard.
Molotov has a loose triangle. He'll be looking to tighten that up but Filipovic can see exactly what he's planning and manages to posture up and free himself.
Molotov keeping moving, preventing Filipovic from controlling successfully.
Filipovic wants to pass the guard but Molotov is keeping the position.

That's three minutes gone in the round.
Molotov has his foot on Filipovic's thigh. He's trying to push off and get in position for a triangle, I think. Filipovic works his way back into a safe position though.
Filipovic tries to free his leg and advance position but Molotov is retaining full guard.
Filipovic works a leg free and moves into half guard.
Filipovic prevents Molotov from improving his position.
Filipovic wants to get back to his feet.
Molotov slips a foot under and gets full guard. Nice work.
Filipovic trying to control the position from guard on top but Molotov is wriggling around, looking for whatever he can.
Molotov looking for submissions from the bottom here. Moving his hips around, possibly looking for an armbar.
Molotov looking to sweep here. No luck so far.

That's four minutes gone in the round.
Molotov keeping full guard, as Filipovic tries to pass.
Molotov wants to sweep but no luck.
The ref warns both fighters not to hold the cage as they work up against the meshing.
Molotov is pulling down on Filipovic's head to control his posture.
Molotov keeping full guard, as Filipovic tries to pass.
Filipovic controlling from the guard. I say controlling but really, he's stalling.
Filipovic passes easily into side control. Nice work.
Boooooooooooooooooooo!!! God, this has been a terrible round. Come on you two, sort yourselves out!
Molotov is moving his hips around well on the bottom and has managed to get back to half guard.
Molotov is looking to get back to full guard here but Filipovic has managed to pass to side control instead.
Filipovic in side control, just content to control the action for now.
And thats the end of the round the fighters go back to their corners.
Michal Filipovic dominated that round.
That's the end of the interval. I'm sure that seemed a lot quicker than a minute for our two fighters! Back to the action.

Molotov blocks a head kick by Filipovic.
Filipovic will need to tighten up his combinations if he doesn't want to gas himself out, swinging at thin air.
Molotov throws a loose over hand right and dives in with a double leg takedown. Filipovic tries to sprawl but it's too late and the fighters hit the mat. Molotov is in Filipovic's guard.

Filipovic scrambles and gets back to his feet.
Filipovic throws a head kick that misses and slips in the process. He scrambles back to his feet and the fighters circle.
Molotov punishes Filipovic's body with a nice straight punch.
Filipovic misses with a double jab.
Molotov with the counter takedown but Filipovic avoids it easily.
Fantastic stuff here - a very entertaining period of action, which has drawn cheers from the crowd.
Filipovic lands with a head kick! That's gotta hurt.

It looks like Andrei Molotov has been cut.
Filipovic throws a right hand that Molotov ducks under and follows up with a left that Molotov also avoids with ease.
Filipovic avoids a low kick by using good footwork.
Whack! Filipovic lands a heavy head kick that drops Molotov. The ref tackles Filipovic to stop the fight - a great save by the referee because Molotov was done.
Ladies and gentlemen, after 1:56 of round 2, we have a winner by way of TKO (Head Kick). Michal Filipovic!
|
|
|
|
|
|
|
|
|
|
|
|
|
|
|
|
|
|
|
|
|
|
|
| S |
C
A |
G |
S |
C
B |
G |
|
S |
C |
G |
|
energy
A | B |
|
hype
A | B |
|
pop
A | B |
|
mgr
A | B |
|
FIGHT
RATING
34% |
|
|
|
|
|
|
|
Undercard bout
|
Coming up we have a heavyweight MMA rules bout between Filet Mignon (ranked 0 p4p, 0 weight class) and Yumi NoMono (ranked 0 p4p, 0 weight class). Yumi NoMono will no doubt be looking to use his reach advantage to good effect.
 |
|
 |
| 183 cm
24
232 lbs
7 - 3 - 0 |
|
201 cm
19
270 lbs
3 - 2 - 0 |
BJJ Blue Belt
Excellent boxer
Very strong |
|
BJJ White Belt
Decent boxing
Granite chin |
|
| |
|
Ladies and gentlemen. This fight is 3 rounds, in the heavyweight division.
Introducing the fighter to my left, fighting out of the red corner.
With a record of
7 - 3 - 0, fighting out of Tokyo, Filet Mignon!
And introducing the fighter to my right, fighting out of the blue corner.
With a record of
3 - 2 - 0, fighting out of Tokyo, Yumi NoMono!
The judges for this bout are Tatsuya Matsuyama, Kenichi Hosakawa and Yukihiro Shimada.
The bell rings for round one and we are underway!
Mignon lands a body shot.
NoMono throws a hook but Mignon blocks it.
Mignon keeping his hands up high there, blocking the jab from NoMono.
NoMono connects with a right hand. Mignon shakes it off.
NoMono ducks under a wild hook from Mignon.
Mignon tries to bum rush NoMono with a series of wild strikes but NoMono uses good footwork to avoid the assault.
NoMono now looks to counter with a shot at the body.
Mignon misses with a wild body shot.
Mignon throws an off balance right hand
letting NoMono counter with a right hand.
NoMono throws a hook but Mignon blocks it.
NoMono keeping his hands up high there, blocking the jab from Mignon.
Mignon definitely looks more muscular than last time we saw him fight.
Mignon throws a hook but NoMono blocks it.
And an attempted straight right on the counter from NoMono! But no joy.
NoMono throws an overhand right that lands on Mignon's shoulder, as Mignon tries to avoid the shot.
An attempted straight right counter from Mignon misses the target.
A jab lands there for NoMono.
NoMono closes the distance and clinches.
Wooooo! Give it up for these two warriors! They are putting on a show!
Mignon is working for a takedown up against the cage. He can't get it on this occasion though.
NoMono softening up his opponent with strikes, against the cage.
NoMono is working Mignon over against the cage.
Mignon manages to pull guard.
NoMono tries to free his leg and advance position but Mignon is retaining full guard.
NoMono trying to land body shots but he keeps hitting the mat.
That's one minute gone in the round.
NoMono trying to land body shots but he keeps hitting the mat.
NoMono working some ground and pound from guard but it's not doing any damage.
NoMono missing there with some ground and pound from the guard.
Mignon might be looking to lock onto one of his opponent's long limbs for a submission, whilst we're on the ground.
NoMono throws a big elbow that misses.
NoMono is looking to work some ground and pound but Mignon has wrist control.
NoMono is looking to work some ground and pound but Mignon has wrist control.
Mignon working the defensive guard well to avoid strikes from NoMono.
NoMono postures up to throw the ground and pound strikes but they don't connect.
The referee is asking the fighters to pick up the pace.
Mignon keeping moving, preventing NoMono from controlling successfully.

The referee has motioned to the fighters to stand back up. He just wasn't happy with the level of activity.
NoMono takes one on the button.
Mignon missing with a left hand there. NoMono was out of range so wasted energy throwing that one.
Mignon misses with a hook
and Mignon takes a counter punch right on the button for his troubles.
That's two minutes gone in the round.
Mignon throws a body kick but he was well out of range there.
NoMono is clearly trying to counter these attacks from Mignon with a body shot.
Mignon jabs at NoMono's body.
Sloppy strikes from Mignon. Those never looked like landing.
NoMono's corner calls for a 1-2. NoMono obliges with the 1 part as he scores the single shot and moves back out of range.
NoMono is using his reach advantage to land shots from outside his opponent's range.
Mignon takes a jab right on the nose. That must have hurt but he shrugs his shoulders and looks to return the favor.
NoMono has managed to clinch.
This has been an exciting period of action!
Mignon can't find room to land a body shot as NoMono controls the action.
NoMono fails to land with a short punch on the inside.
NoMono lands a left hand.
Mignon working aggressively here.
Mignon is trying to push NoMono away but NoMono has him pressed against the cage, so he's going nowhere.
NoMono fails to land with a short punch on the inside.
Mignon is really struggling to find his range with his punches. NoMono's reach advantage is clearly causing him problems.
Mignon looking to stall.
A left hand lands to the body for NoMono.
An uppercut on the inside fails to land for NoMono.
NoMono lands punches inside but they're not really causing much damage.
With the two fighters working up against the cage, Mignon just misses with a elbow thrown towards NoMono's brow.
NoMono blocks a couple of punches on the inside.
That's three minutes gone in the round.
Mignon is trying to force a seperation but NoMono has the dominant position.
Mignon misses with a punch to the body.
NoMono has Mignon pressed against the cage, preventing Mignon from circling away and getting back to striking at range.
Mignon misses with some punches.
NoMono stays in close to his opponent and throws a right hand to the body.
A head punch on the inside from NoMono fails to land.
A quick uppercut on the inside from NoMono.
NoMono throws a head punch that misses.
A head punch on the inside from NoMono fails to land.

NoMono drops Mignon onto one knee with a big uppercut from the clinch! Mignon is propped up by the cage and works his way back to his feet!
Mignon is rocked!
Mignon is breathing heavily.
NoMono lands an uppercut in the clinch that drops Mignon to his knees! NoMono keeps firing more shots against his stricken opponent and the referee jumps in to save him!
Ladies and gentlemen, after 3:39 of round 1, we have a winner by way of TKO (Strikes). Yumi NoMono!
A very excited looking Yumi NoMono made sure he remembered to thank all the fans both in the arena and on the internet. He said all the coolest people spend all day on MMA websites, which got a big reaction.
|
|
|
|
|
|
|
|
|
|
|
|
|
|
|
|
|
|
|
|
|
|
|
| S |
C
A |
G |
S |
C
B |
G |
|
S |
C |
G |
|
energy
A | B |
|
hype
A | B |
|
pop
A | B |
|
mgr
A | B |
|
FIGHT
RATING
55% |
|
|
|
|
|
|
|
Undercard bout
|
Coming up we have a heavyweight MMA rules bout between Jack Larsson (ranked 0 p4p, 0 weight class) and Delvin Shore (ranked 0 p4p, 0 weight class). Larsson comes into the arena with BRUTALITY blaring out of the sound system. Delvin Shore has the better chin. Will he look to stand and bang today?
 |
|
 |
| 189 cm
29
255 lbs
9 - 8 - 1 |
|
193 cm
32
277 lbs
12 - 5 - 1 |
Abu Dhabi Champ
Excellent boxer
Cardio machine |
|
Excellent grappler
World class boxer
Good gas tank |
|
| |
|
Ladies and gentlemen. This fight is 3 rounds, in the heavyweight division.
Introducing the fighter to my left, fighting out of the red corner.
With a record of
9 - 8 - 1, fighting out of London, Jack Larsson!
And introducing the fighter to my right, fighting out of the blue corner.
With a record of
12 - 5 - 1, fighting out of Hilo, Delvin Shore!
The judges for this bout are Ren Mimura, Yuuki Gou and Sosuke Kotani.
The bell rings for round one and we are underway!
Shore tries to drive through with a takedown attempt but Larsson defends well and Shore ends up having to push Larsson into the cage where they will battle it out in the clinch.
Shore's coach down at Irish Collar & Elbow Academy was telling us pre-fight that they have been working on Shore's balance. Obviously they view that as a key factor in the outcome of this fight.
Shore shoots in for a double leg but Larsson sprawls well. That's going to sap some energy.
Shore looks for a takedown. He's got it. We're now in half guard.
Larsson works his way to full guard. Good work.
Shore drops back for a leg but he's not going to get it - he lets go and Larsson dives on top into guard.

Shore is trying to keep Larsson in close.
Larsson looking to pass the guard.
Shore looking to sweep here. No luck so far.
We've had a slow start to the round here - hopefully the action picks up.
Larsson seems content to control from guard here. He's going to have to remain active though if he doesn't want to get stood back up.
Shore is looking to sweep but instead, Larsson has passed into half guard.
That's one minute gone in the round.
Shore wants to improve his position but Larsson is controlling well.
Shore is trying to control but can't.
Larsson seems like he's working for an arm triangle here. He's freed his trapped foot and he's rotating nicely. Shore is in big trouble! He's tapping out! This one is aaaaaaaaaaaall over!
Ladies and gentlemen, after 1:38 of round 1, we have a winner by way of Submission (Arm Triangle). Jack Larsson!
Jack Larsson gave a mention to HGH Nutrients Q160 Tycoons Best Quality supps in his post fight interview. That will please them (and hopefully generate some sales).
|
|
|
|
|
|
|
|
|
|
|
|
|
|
|
|
|
|
|
|
|
|
|
| S |
C
A |
G |
S |
C
B |
G |
|
S |
C |
G |
|
energy
A | B |
|
hype
A | B |
|
pop
A | B |
|
mgr
A | B |
|
FIGHT
RATING
50% |
|
|
|
|
|
|
|
Undercard bout
|
Coming up we have a bantamweight MMA rules bout between Yuki Shojo (ranked 0 p4p, 0 weight class) and Jett Armstrong Jr (ranked 0 p4p, 0 weight class). On his way into the cage it seems that Yuki Shojo has been attacked by a crazed fan! It looks like it might have been the just bleed guy! Luckily Yuki Shojo seems to be OK! I thought that lunatic was in prison!?
 |
|
 |
| 165 cm
20
140 lbs
6 - 1 - 0 |
|
171 cm
21
148 lbs
1 - 1 - 0 |
BJJ Blue Belt
Good knees
Cardio machine |
|
BJJ Brown Belt
Excellent boxer
Good gas tank |
|
| |
|
Ladies and gentlemen. This fight is 3 rounds, in the bantamweight division.
Introducing the fighter to my left, fighting out of the red corner.
With a record of
6 - 1 - 0, fighting out of Tokyo, Yuki Shojo!
And introducing the fighter to my right, fighting out of the blue corner.
With a record of
1 - 1 - 0, fighting out of Tokyo, Jett Armstrong Jr!
The judges for this bout are Kenichi Hosakawa, Yasuomi Hirokawa and Shirou Masuda.
The bell rings for round one and we are underway!
Shojo is looking to clinch.
Armstrong Jr throws a right and a left that both miss.
Shojo tries to close the distance and clinch up against the cage but Armstrong Jr paws at him with a jab and circles away.
Shojo moves out of range of the strikes.
Shojo is looking to counter the offense by Armstrong Jr and move into the clinch.

Shojo clinches up against the cage.
Shojo misses the knee to the body. Nice hip positioning from Armstrong Jr.
Shojo tries to land knees in the clinch but Armstrong Jr avoids the damage to the body.
Shojo lands a knee to the body.
Shojo looking to throw knees to the head but Armstrong Jr is blocking nicely.
Shojo looking to throw knees to the head but Armstrong Jr is blocking nicely.
Armstrong Jr blocks a knee to the body. He'll have a nicely bruised forearm in the morning.
I was talking to Shojo's coach per-fight and he was telling me that they'd been working on the clinch in the runup to this fight.
We've had a slow start to the round here - hopefully the action picks up.
Shojo is looking to score with knees to the body. Maybe he'll change it up and go body then head. Armstrong Jr is defending well for now.
Shojo prevents Armstrong Jr from breaking the clinch.
Shojo misses with a body punch.
Armstrong Jr blocks a knee to the body. He'll have a nicely bruised forearm in the morning.
Shojo misses the knee to the body. Nice hip positioning from Armstrong Jr.
That's one minute gone in the round.
Shojo trying to land knees to the body.
Shojo can't find room to land a body shot as Armstrong Jr controls the action.
We can't be sure of the tactics at this early stage but we have heard that Armstrong Jr has been working on his takedowns a lot in the buildup to the fight and we can only assume he's going to look to take this to the mat.
Armstrong Jr avoiding damage as Shojo throws knees to the body.
Armstrong Jr blocks a knee to the body. He'll have a nicely bruised forearm in the morning.
A hook to the body from Shojo.
Armstrong Jr blocks a knee to the body. He'll have a nicely bruised forearm in the morning.
Armstrong Jr avoiding damage as Shojo throws knees to the body.
Shojo is looking to score with knees to the body. Maybe he'll change it up and go body then head. Armstrong Jr is defending well for now.
Armstrong Jr managing to block the knees to the body from Shojo.
Shojo is looking to score with knees to the body. Maybe he'll change it up and go body then head. Armstrong Jr is defending well for now.
Shojo tries a knee to the head but he's missed.
Armstrong Jr avoiding damage as Shojo throws knees to the body.
Armstrong Jr avoiding damage as Shojo throws knees to the body.
Armstrong Jr on the defensive, avoiding the knees to the body.
Shojo doesn't land with the attempted body shot.
That's two minutes gone in the round.
Armstrong Jr on the defensive, avoiding the knees to the body.
Shojo throws a head punch that misses.
Armstrong Jr on the defensive, avoiding the knees to the body.
Shojo is looking to score with knees to the body. Maybe he'll change it up and go body then head. Armstrong Jr is defending well for now.
Armstrong Jr avoiding damage as Shojo throws knees to the body.
Shojo lands with a good tight uppercut to the head.
Shojo prevents a takedown attempt there.
Shojo throws a knee to the head but misses.
Armstrong Jr is looking for a takedown up against the cage. Shojo gets underhooks though and prevents the takedown attempt.
Shojo putting his Muay Thai to good use. He has Armstrong Jr in a tight clinch and is doing some damage with knees to the body.
Armstrong Jr blocks a knee to the body. He'll have a nicely bruised forearm in the morning.
We've seen a great period of action over the last minute or so - credit to both fighters for going all out!
Shojo tries to land knees in the clinch but Armstrong Jr avoids the damage to the body.
Shojo using the Thai plumb to throw knees but Armstrong Jr has his back arched nicely, preventing the strike.
Armstrong Jr avoiding damage as Shojo throws knees to the body.
That's three minutes gone in the round.
Shojo tries to land a knee to the body but he is off balance and Armstrong Jr avoids it.

Armstrong Jr's corner calls for him to break the clinch, which he does.
Armstrong Jr fakes high and shoots in for a takedown but Shojo avoids it really well and circles away.
Yuki Shojo has stuffed three takedown attempts in the round now. That's going to take a lot out of Jett Armstrong Jr.
Armstrong Jr is looking for a takedown here. He's shot in and has managed to get it, finishing up in Shojo's half guard.
Shojo on his back here. We all know that wrestlers don't like being on their back so let's see if Shojo tries to get out of the position.
Armstrong Jr throwing shots but they're hitting the canvas more than the man.
Shojo looking for submissions from an awkward position here.
Armstrong Jr is trying to work for a kimura. This could be trouble! No, Shojo has managed to free his arm - good work.
Armstrong Jr is trying for a guillotine from the top but the pressure isn't in the right place so Shojo is just riding it out for now. Armstrong Jr eventually gives up the hold.
That's four minutes gone in the round.
Shojo is trying to get back to full guard.
The fighters are pressed up against the cage, both looking to find a bit of space to work.
Shojo is trying to stand back up but Armstrong Jr is controlling him
Armstrong Jr looking for a kimura but he'll have to free his other leg if he wants to finish that. Perhaps he's just using it as a distraction technique.
Armstrong Jr is trying for a guillotine from the top but the pressure isn't in the right place so Shojo is just riding it out for now. Armstrong Jr eventually gives up the hold.
And thats the end of the round the fighters go back to their corners.
Yuki Shojo dominated that round.
The fighters get back to their feet, the hooter sounds and we're back to the action!
Shojo is looking to clinch but Armstrong Jr is avoiding it.
Shojo avoids a punch combination nicely.
Jett Armstrong Jr is looking to throw some combinations by the looks of things.
Shojo showing good head movement there, avoiding the strikes from Armstrong Jr.
Shojo takes the fight into the clinch.
Armstrong Jr managing to block the knees to the body from Shojo.
Armstrong Jr wants to get back to striking at distance but Shojo won't allow it.
Good body shot from Shojo.
We've had a slow start to the round here - hopefully the action picks up.
Armstrong Jr managing to block the knees to the body from Shojo.
Shojo crunches a lovely knee into Armstrong Jr's ribcage.
Shojo throws a vicious knee straight up the middle but Armstrong Jr blocks it with crossed arms.
Armstrong Jr breaks the clinch and we return to the middle of the mat.
Shojo tries to clinch up but Armstrong Jr circles away and keeps his distance.
Shojo is really dominating this fight. Is there anything that Armstrong Jr can do to turn this around?
That's one minute gone in the round.
Armstrong Jr darts in and out, connecting with a jab.
Armstrong Jr will have to do better than that with his takedown attempts.
Jab from Armstrong Jr.
Armstrong Jr throws a hard body shot but it just misses.
Shojo tries to counter by clinching up but Armstrong Jr breaks away and moves out of range.
Yuki Shojo is looking to keep the fight on the feet at all costs.
Shojo wants to clinch.
Armstrong Jr misses with a few strikes there.
Shojo avoids a punch combination nicely.
Armstrong Jr gets tackled into the cage by Shojo. Shojo maintains the clinch.
Armstrong Jr can't get the takedown.
Armstrong Jr blocks a body shot from Shojo.
Shojo tries a knee to the head but he's missed.
Shojo struggles to land a body shot inside as Armstrong Jr controls his hands.
That's two minutes gone in the round.
Armstrong Jr blocks a knee to the body. He'll have a nicely bruised forearm in the morning.
Armstrong Jr blocks a knee to the body. He'll have a nicely bruised forearm in the morning.
Armstrong Jr on the defensive, avoiding the knees to the body.
Armstrong Jr wants to break the clinch but can't.
Shojo landing knees to the body.
Armstrong Jr managing to block the knees to the body from Shojo.
Shojo tries to land knees in the clinch but Armstrong Jr avoids the damage to the body.
Shojo lands a left hand that snaps the head of Armstrong Jr backwards.
The crowd are loving this. Great action here.
Armstrong Jr fails to land with a short punch on the inside.
Shojo missing with knees to the body.
Armstrong Jr can't get the takedown.
Yuki Shojo has stuffed three takedown attempts in the round now. That's going to take a lot out of Jett Armstrong Jr.
Armstrong Jr takes a knee to the side of the body.
Shojo is looking to score with knees to the body. Maybe he'll change it up and go body then head. Armstrong Jr is defending well for now.
Yuki Shojo has scored more points in the clinch so far.
That's three minutes gone in the round.
Shojo lands an uppercut.
Shojo landing knees to the body.
Armstrong Jr turns his hips and lands a very nice judo throw into side control!
Shojo wants to get back to his feet but Armstrong Jr is dominant here and he's now got Shojo's back!
Shojo knows he needs to get back to his feet asap. He's simply no match for Armstrong Jr on the ground.
Shojo covering up well under a series of strikes from Armstrong Jr.
Shojo defending nicely against the rear naked choke attempt.
Wooooo! Give it up for these two warriors! They are putting on a show!
Shojo preventing the rear naked choke attempt from Armstrong Jr.
Shojo biding his time here by controlling the hands, looking to escape.
Armstrong Jr working for a choke but Shojo is defending well.
That's four minutes gone in the round.
Armstrong Jr not allowing Shojo to control his hands.
Armstrong Jr keeps control of the position as Shojo tries to break free.
Armstrong Jr is staying calm and holding on to the back position, whilst working on a rear naked choke. Shojo is defending well though. Armstrong Jr let's go of the attempt for now.
Shojo trying to get back to his feet but Armstrong Jr is in full control for now.
And thats the end of the round the fighters go back to their corners.
A close second round but Jett Armstrong Jr will probably get the nod - 10:9.
The referee calls time. The cornermen exit stage left and we're back to business. The crowd applaud as we get ready to start the final round!

Shojo has managed to clinch.
Shojo missing with knees to the body.
Shojo blocking some punches.
Shojo misses the knee to the body. Nice hip positioning from Armstrong Jr.
Shojo is looking to score with knees to the body. Maybe he'll change it up and go body then head. Armstrong Jr is defending well for now.
Shojo tries to land knees in the clinch but Armstrong Jr avoids the damage to the body.
Nice body punch from Shojo.
Armstrong Jr drops down looking for an ankle pick but Shojo pulls his leg out and moves away.
Shojo tries to clinch there but Armstrong Jr circles away.
We've had a slow start to the round here - hopefully the action picks up.
Armstrong Jr bobs and weaves and throws out a fast jab that snaps Shojo's head backwards.

It looks like Yuki Shojo has been cut.
Armstrong Jr shoots in for a takedown but Shojo shows good takedown defense.
Shojo tries to clinch up against the cage, rushing in to close the distance. Armstrong Jr manages to break the clinch and circles back to the middle of the mat.
Shojo tries to clinch there but Armstrong Jr circles away.
Armstrong Jr circles away from the clinch attempt.
That's one minute gone in the round.
Shojo closes the distance and presses his opponent up against the cage.
Shojo misses with a punch to the body.
Armstrong Jr managing to block the knees to the body from Shojo.
Armstrong Jr wants to break free but Shojo has control.
Shojo misses with a hook to the ribs.
Shojo tries to land a shot to the body but it's blocked.
Shojo is looking to score with knees to the body. Maybe he'll change it up and go body then head. Armstrong Jr is defending well for now.
Shojo is looking to score with knees to the body. Maybe he'll change it up and go body then head. Armstrong Jr is defending well for now.
Shojo tries a knee to the head but Armstrong Jr blocks it.
A head punch blocked on the inside by Armstrong Jr.
Shojo is looking to score with knees to the body. Maybe he'll change it up and go body then head. Armstrong Jr is defending well for now.
Armstrong Jr has dropped down and is looking to force the takedown but it's defended by Shojo after a bit of a struggle.
Yuki Shojo has stuffed three takedown attempts in the round now. That's going to take a lot out of Jett Armstrong Jr.
Armstrong Jr takes a knee to the side of the body.
Armstrong Jr on the defensive, avoiding the knees to the body.
That's two minutes gone in the round.
Shojo is looking to score with knees to the body. Maybe he'll change it up and go body then head. Armstrong Jr is defending well for now.
Shojo misses the knee to the body. Nice hip positioning from Armstrong Jr.
Shojo lands a hook to the side of the head.
Shojo can't find room to land a body shot as Armstrong Jr controls the action.
Shojo tried to land a shot to the body but connects with Armstrong Jr's elbow.
Armstrong Jr prevents a body shot from Shojo.
Shojo tries to throw a body punch but Armstrong Jr avoids it by throwing Shojo back against the cage.
Shojo tries a knee to the head but he's missed.
Shojo scores with a knee to the head.
Armstrong Jr wants to strike at distance but he can't break free of the clinch.
Shojo is looking to score with knees to the body. Maybe he'll change it up and go body then head. Armstrong Jr is defending well for now.
Shojo throws a vicious knee straight up the middle but Armstrong Jr blocks it with crossed arms.
Shojo tries to land a knee to the body but he is off balance and Armstrong Jr avoids it.
Both fighters are breathing heavily.
That's three minutes gone in the round.
Shojo struggles to land a body shot inside as Armstrong Jr controls his hands.
Shojo lands a shot to the body.
Armstrong Jr is trying to force a seperation but Shojo has the dominant position.
Armstrong Jr prevents a body shot from Shojo.
Shojo landing knees to the body. They look like they could hurt.
Shojo misses with a punch to the body.
Shojo struggles to land a body shot inside as Armstrong Jr controls his hands.
Shojo tries a knee to the head but he's missed.
Shojo with an attempt at a knee that misses.
Shojo tries a body shot but Armstrong Jr blocks it.
Shojo misses with a hook to the ribs.
Shojo lands a nice uppercut.
Armstrong Jr blocks a knee to the body. He'll have a nicely bruised forearm in the morning.
That's four minutes gone in the round.
Shojo misses the knee to the body. Nice hip positioning from Armstrong Jr.
Shojo missing with knees to the body.
Shojo tries to land a knee to the body but he is off balance and Armstrong Jr avoids it.
Shojo misses with a punch to the body.
Shojo prevents a takedown attempt there.
Shojo misses with a shot to the kidneys.
Armstrong Jr avoiding damage as Shojo throws knees to the body.
Shojo throws a knee to the head but misses.
Armstrong Jr blocks a knee to the body. He'll have a nicely bruised forearm in the morning.
The crowd thankful this round is nearly over.
Shojo tries to land a knee to the body but he is off balance and Armstrong Jr avoids it.
Armstrong Jr takes a knee right on the jaw!
Shojo can't find room to land a body shot as Armstrong Jr controls the action.
And that's the end of the fight!
Yuki Shojo showed his dominance in that final round.
I think Shojo has won this one but let's see what the judges have to say. Over to the ring announcer for the scorecards.
Ladies and gentlemen, after 3 rounds of action, we go to the scorecards for a decision.
Judge Kenichi Hosakawa scores the fight 29:28
Judge Yasuomi Hirokawa scores the fight 29:28
Judge Shirou Masuda scores the fight 29:28
In favor of your winner, by unanimous decision... Yuki Shojo!
Yuki Shojo decided to thank the fans in attendance for making a great atmosphere. It seemed to go down pretty well.
The defeated Jett Armstrong Jr had this to say: 'The world aint all sunshine & rainbows. Its a mean & nasty place. I dont care how tough you are, it will beat you down to your knees & if you let it. Aint nobody gonna hit as hard as life. But aint about how hard you hit... It's about how hard you can get hit & keep moving forward...'.
|
|
|
|
|
|
|
|
|
|
|
|
|
|
|
|
|
|
|
|
|
|
|
| S |
C
A |
G |
S |
C
B |
G |
|
S |
C |
G |
|
energy
A | B |
|
hype
A | B |
|
pop
A | B |
|
mgr
A | B |
|
FIGHT
RATING
44% |
|
|
|
|
|
|
|
Co-main event
|
Coming up we have a middleweight MMA rules bout between Carlos Soto (ranked 0 p4p, 0 weight class) and Yogi Dhamma (ranked 0 p4p, 0 weight class). Dhamma is bobbing his head along to his entrance song: Power Of Soul. Over to our ring announcer for the fighter introductions!
 |
|
 |
| 182 cm
25
189 lbs
9 - 1 - 1 |
|
179 cm
28
189 lbs
16 - 4 - 0 |
Good wrestling
World class boxer
Cardio machine |
|
Excellent grappler
Good kicks
Good gas tank |
|
| |
|
Ladies and gentlemen. This fight is 3 rounds, for the middleweight championship of the world!
Introducing the champion to my left, fighting out of the red corner.
With a record of
9 - 1 - 1, fighting out of Amsterdam, Carlos Soto!
And introducing the challenger to my right, fighting out of the blue corner.
With a record of
16 - 4 - 0, fighting out of Los Angeles, Yogi Dhamma!
The judges for this bout are Shigeki Fujiwara, Yukihiro Yamamoto and Yukihiro Shimada.
The bell rings for round one and we are underway!
No luck for Dhamma with that takedown attempt.
Soto swung with a counter right hand that didn't connect.
Dhamma shoots in and drives through. Soto sprawls well.
As Dhamma tries to get set, Soto tries to push him back and clinch up but Dhamma manages to avoid the attempt.
Dhamma shoots in for a takedown but Soto shows good takedown defense there and keeps this one on the feet.
Carlos Soto has stuffed three takedown attempts in the round now. That's going to take a lot out of Yogi Dhamma.
Dhamma tries to shoot in for a takedown. He's got hold of a leg but Soto swivels and escapes.
Soto is trying to close the distance and clinch up, after that failed offence from Dhamma.
We've had a slow start to the round here - hopefully the action picks up.
Dhamma shoots in for a takedown but Soto shows good takedown defense there and keeps this one on the feet.
It looked like Soto wanted to counter with a hook but didn't fully commit.
Soto stuffs the takedown.
Dhamma shoots in looking for a single leg takedown. Soto is trying to defend but Dhamma finishes it well and ends up in half guard. Let's see if he can advance position further.
That's one minute gone in the round.
Dhamma is working for an americana but Soto has been sneaky and has managed to get back to half guard, whilst Dhamma was thinking about the submission.
Dhamma prevents Soto from getting back to his feet.
Dhamma wants to control from the top but Soto keeps moving.
Dhamma looking to pass the guard.
Dhamma stops Soto from standing up.
Dhamma trying to pass the guard but can't manage it just yet.
That's two minutes gone in the round.
There's not a lot going on here and the crowd are letting the fighters know they're not willing to tolerate a lack of action.

Dhamma gets to his feet. Soto looking to butt scoot but the ref puts an end to that. On your feet son!
Dhamma goes for a double leg but Soto avoids the attempt and the two fighters end up clinched against the cage as Soto continues to drive forward.
A really sloppy takedown attempt there from Dhamma.
Soto throwing a counter right hand but Dhamma manages to avoid it.
Dhamma misses with a takedown attempt - Soto sprawls well and throws a nice strike on the way out which just misses.
Soto was looking to counter that move with a punch but didn't quite pull the trigger.
Dhamma's coach down at Hugs & Kisses was telling us pre-fight that they have been working on Dhamma's balance. Obviously they view that as a key factor in the outcome of this fight.
Dhamma fails with the takedown.
That's three minutes gone in the round.
Dhamma shoots in but Soto avoids the takedown attempt easily.
As Dhamma tries to get set, Soto tries to push him back and clinch up but Dhamma manages to avoid the attempt.
Dhamma changes levels and looks for a double leg takedown. Soto tries to avoid it but Dhamma manages to keep hold of a leg and drag Soto to the ground. Soto escapes though and pops straight back up to his feet.
No luck with that takedown attempt from Dhamma.
Dhamma misses with a takedown
and Soto counters with a crisp hook to the side of the head.
That's four minutes gone in the round.
A really sloppy takedown attempt there from Dhamma.
Dhamma closes the distance and looks for a trip takedown... aaaand he's got it - Dhamma lands in his opponent's guard.
Dhamma is trying to work a guillotine from the top, or something like that? Don't know how he thinks he's going to get a finish from there.
The fighters are pressed up against the cage, both looking to find a bit of space to work.
Boooooooooooooooooooo!!! God, this has been a terrible round. Come on you two, sort yourselves out!
Soto is trying to stand up but he's not managed so far.
And thats the end of the round the fighters go back to their corners.
Carlos Soto dominated that round.
Well, the break between rounds is over. Let's get back to the scrappin!
Dhamma shoots in for a takedown but doesn't get it.
Dhamma fails with a takedown attempt.
It looked like Soto wanted to counter with a hook but didn't fully commit.
Dhamma shoots in for a double leg but Soto sprawls well. That's going to sap some energy.
Carlos Soto has stuffed three takedown attempts in the round now. That's going to take a lot out of Yogi Dhamma.
Dhamma drops down and drives through with a powerful takedown into guard.
We've had a slow start to the round here - hopefully the action picks up.
Dhamma drops back for a leg but he's not going to get it - he lets go and Soto dives on top into guard.
Soto wanted to stand there but Dhamma had control of the position.
That's one minute gone in the round.
Dhamma looking for a guillotine here but Soto defends easily.
Soto trying to stand up but can't free himself from Dhamma's guard.
Dhamma throwing his legs up looking for a triangle.

Soto stands up from guard. Let's bang!
That's two minutes gone in the round.
Dhamma fails with a takedown attempt from distance.
Dhamma looking to shoot here. He's gone for it and he's landed a takedown into side control! Oh, that's bad for Soto!
Soto is working hard to escape and get back to his feet. After a battle for position, Dhamma asserts his dominance and retains side control.
Dhamma tries for a kimura. Not really close to a finish though.
Soto is trying to buck Dhamma off.
Dhamma looking for an arm triangle but it's way too loose to do anything.
That's three minutes gone in the round.
Soto is pushing Dhamma's head away, looking to escape. Dhamma manages to hold on to the position though.
Dhamma tries for an arm triangle. That looks pretty tight to me. Is this one over!?! Possibly, maybe, no Dhamma has let go of the choke. Obviously it wasn't as tight as we thought!
Dhamma is working for what looks like an arm triangle here. Soto is trying to escape and Dhamma transitions quickly into an armbar! He's slapped it on tight and Soto is forced to tap! Nice work there by Dhamma! Very nice indeed!
Ladies and gentlemen, after 3:50 of round 2, we have a winner by way of Submission (Armbar). Yogi Dhamma!
Yogi Dhamma is the new middleweight champion!
Yogi Dhamma very nearly forgot to thank Spartan Nutrition 160Q with Proof amongst all the excitement of his win but just as the interview came to a close, he screamed their name. Hopefully he'll get a few nice freebies in the mail as a thank you.
|
|
|
|
|
|
|
|
|
|
|
|
|
|
|
|
|
|
|
|
|
|
|
| S |
C
A |
G |
S |
C
B |
G |
|
S |
C |
G |
|
energy
A | B |
|
hype
A | B |
|
pop
A | B |
|
mgr
A | B |
|
FIGHT
RATING
31% |
|
|
|
|
|
|
|
Main event
|
Coming up we have a heavyweight MMA rules bout between Cameron Chaos (ranked 0 p4p, 0 weight class) and Daniel Speed (ranked 0 p4p, 0 weight class). These two fighters really are very evenly matched on the feet - it will be fascinating to see who can assert themselves in that aspect of the fight.
 |
|
 |
| 210 cm
31
272 lbs
22 - 12 - 0 |
|
200 cm
40
241 lbs
43 - 24 - 0 |
Good wrestling
World class boxer
Insanely flexible |
|
Good wrestler
Lethal high kicks
Granite chin |
|
| |
|
Ladies and gentlemen. This fight is 3 rounds, for the heavyweight championship of the world!
Introducing the champion to my left, fighting out of the red corner.
With a record of
22 - 12 - 0, fighting out of London, Cameron Chaos!
And introducing the challenger to my right, fighting out of the blue corner.
With a record of
43 - 24 - 0, fighting out of Helsinki, Daniel Speed!
The judges for this bout are Yasuomi Hirokawa, Kenichi Hosakawa and Hirohito Nitta.
The bell rings for round one and we are underway!
Chaos's corner calls for a 1-2. Chaos obliges with the 1 part as he scores the single shot and moves back out of range.
It looks like Daniel Speed has been cut.
Speed shoots in for a takedown from distance. He catches Chaos napping and manages to drive through into side control!
Chaos can't do much from the bottom here.
Chaos is positioning himself to get back to half guard.
Chaos parries the strikes from Speed easily there. Speed is wary of posturing up too much because it might enable Chaos to escape.
Speed in side control lands a nice looking series of punches and elbows.
Speed throws a strike aimed at the side of Chaos's head but Chaos avoids it well.
Speed is trying to get an arm triangle but Chaos is defending well.
Chaos is trying to control Speed's posture but Speed avoids it.
Speed tries to land with some ground and pound but misses.
That's one minute gone in the round.
Speed cracks Chaos with a big elbow.
Speed lands an elbow.
Speed throws a knee to the body but it doesn't do much damage.
Chaos manages to get one leg in to regain half guard.
Speed thows a huge punch but Chaos dodges it nicely.
Chaos wants to get back to full guard.
Chaos pushes Speed off looking to stand but Speed dives back in and keeps control.
Speed is looking to take a break and control but Chaos is keeping him honest, looking to work from the bottom.
Speed missing with the ground and pound from half guard.
Chaos is staying active underneath Speed, who seems content to just control the action from this position.
Speed prevents Chaos from improving his position.
Chaos moves his hips nicely and gets into full guard.
Chaos looking for a sweep. Not yet Chaos, not yet.
That's two minutes gone in the round.
Speed is sitting in guard, working some ground and pound.
Speed wants to pass the guard but Chaos is keeping the position.
Speed missing there with some ground and pound from the guard.
Chaos pulls Speed in close to his closed guard and prevents Speed from doing any damage or advancing position.
Speed throwing strikes from guard but Chaos blocks nicely.
Speed postures up in Chaos's guard and throws a big left but Chaos blocks it.
Hammerfist, elbow! yells Speed's corner. There ya go! There ya go!
Speed is fighting to break Chaos's control of his arms but Chaos is doing a good job of controlling the position at the moment.
Chaos keeping moving, preventing Speed from controlling successfully.
That's three minutes gone in the round.
Chaos seems keen to control rather than go for a submission, at least for now.
Speed missing there with some ground and pound from the guard.
Chaos wants to sweep here but Speed controlling him for the moment.
Chaos is working the butterfly guard. He manages to land a nice scissor sweep and is now in half guard on the top. Nice move.
Chaos wants to pass the guard but Speed is defending well.
The fighters are pressed up against the cage, both looking to find a bit of space to work.
Speed makes his way to full guard. A much better position for Speed.
That's four minutes gone in the round.
Chaos is intent on slowing down the pace of the fight, simply looking to control.
Chaos's ground tactics aren't going to win him many fans. Let's hope he's got fireworks for us if he gets back to his feet because he's not doing much on the ground.
Speed wants to stand and escape but Chaos is having none of it.
The crowd thankful this round is nearly over.
Chaos won't allow Speed to sweep him here.
Chaos showing good wrestling skills to control the position.
And thats the end of the round the fighters go back to their corners.
Daniel Speed dominated that round.
The cut man is working on Daniel Speed's cut.
The corners get their ten second warning. Both fighters stand from their stools and stare eachother down, ready to get back to the action.
Speed lands with a shot to the body.
The step up in weight doesn't seem to be a problem for Speed. He's performing admirably here against the bigger man.
Speed shoots in for a takedown but doesn't get it.
Chaos cracks Speed with a good shot that sees him stumbling back into the cage.
Speed uses decent footwork to sidestep a right hand from Chaos.
Speed fails with the takedown
and Chaos counters with a lovely shot to the body.
A lazy left from Chaos finds it's target.
Chaos misses with a looping right.
Speed throws a fast counter high kick but Chaos manages to duck under it in time.
Speed lands with a slapping head kick.
Chaos uses good footwork to get in and out, landing a nice hook.
Chaos waving his hands out in front of him, looking to distract Speed.
Daniel Speed seems to be the more aggressive standup fighter in this bout.
Nice sprawl there from Chaos as Speed shoots in.
Cameron Chaos has stuffed three takedown attempts in the round now. That's going to take a lot out of Daniel Speed.
Speed throws a head kick that misses and slips in the process. He scrambles back to his feet and the fighters circle.
The fans in attendance giving it up for the two fighters, who have really let it all hang out in the last minute or so!
Chaos connects with a slap. Keep your fist closed son.
A cross from Chaos lands.
That has opened up Daniel Speed's cut even more.
Speed looks for a takedown. He's got it. We're now in half guard.
That's one minute gone in the round.
Chaos is doing well to control the position and prevent Speed from advancing to side control.
Chaos works his way to full guard. Good work.
Chaos manages to sweep nicely, so he's now on top. Speed manages to get himself to full guard.
Speed looking for a sweep. Not yet Speed, not yet.
Chaos is stalling in the full guard.
That's two minutes gone in the round.
Speed is looking to get back to his feet but can't, whilst Chaos is controlling him.
Speed can't do much from the bottom at the moment, as Chaos controls the pace.
That's three minutes gone in the round.
Chaos stands up from guard. Let's bang!
Chaos with a jab.
Speed throws a leg kick but he was too far away and it doesn't land.
Speed pulls out of a head kick attempt.
That's four minutes gone in the round.
Chaos throws a shot from downtown. Speed moves away and avoids it.
A nice combination there by Chaos.
Chaos is really head hunting here, hardly looking to strike to the body at all.
Speed slips a straight right by Chaos.
Chaos misses with a left hand
letting Speed counter with a right hand.
Speed looks frustrated there after his takedown attempt is stuffed easily.
Sloppy strikes from Chaos. Those never looked like landing.
Cameron Chaos is winning the standup battle so far.
Speed lands with a nice low kick. That'll leave a bruise.
Chaos connects with a nice looking jab.
The cut above Daniel Speed's eye is starting to cause him problems now.
Wooooo! Give it up for these two warriors! They are putting on a show!
Chaos moves out of range as Speed strikes.
No luck for Speed with that takedown attempt.
Chaos smiles there as he lands a nice right hand right on the button.
Speed misses with a takedown attempt
and Speed takes a counter punch right on the button for his troubles.
Speed fails with a takedown attempt.
And thats the end of the round the fighters go back to their corners.
Cameron Chaos dominated that second round.
The cut man is working on Daniel Speed's cut.
The minute break is over - no more time for sponges and pep talks - back to the action! This is the final round!
Chaos moves into range and throws a combination. A nice jab followed by a hook to the body.
Speed avoids a punch combination nicely.
Speed throws a couple of head shots and lands with the final one - a decent hook, which struck Chaos on the side of the head.
Chaos misses with a few strikes there.
Chaos is using his height advantage well here, landing a good percentage of his punches.
Speed is pinned up against the cage taking some big shots here. The referee is looking closely deciding whether he should stop the fight.
Chaos misses with a straight right.
Speed avoids the body shot from Chaos.
Chaos blocks a head kick by Speed.
It looked like Chaos wanted to counter with a hook but didn't fully commit.
Chaos lands a jab.
Daniel Speed's cut is absolute horrible now. This looks like something out of a horror film with blood covering both fighters.
Speed shoots in from a long way out. He's driving through with the takedown attempt and he eventually gets it, landing in Chaos's guard.
This is a great period of action - very entertaining stuff!
Chaos seems keen to control Speed's posture.
Speed postures up and lands a big shot to Chaos's brow.
That's one minute gone in the round.
Chaos wants to sweep but no luck.
Chaos working a defensive guard here.
Speed is fighting to break Chaos's control of his arms but Chaos is doing a good job of controlling the position at the moment.
Speed lands a couple of elbows.
Speed lands a couple of elbows.
Chaos pushes Speed off for just long enough to get back to his feet. Very athletic spring there.
Chaos misses with a looping right.
Chaos takes a jab right on the kisser.
That's two minutes gone in the round.
Chaos lands a head shot.
The referee calls the doctor in to look at Daniel Speed's cut. Oh no, the doctor has called an end to the bout!
Ladies and gentlemen, after 2:12 of round 3, we have a winner by way of TKO (Cut). Cameron Chaos!
Cameron Chaos is the new heavyweight champion!
Cameron Chaos tried to hype himself up post fight but didn't word it too well and it ended up with him sounding like a bit of a tool.
|
|
|
|
|
|
|
|
|
|
|
|
|
|
|
|
|
|
|
|
|
|
|
| S |
C
A |
G |
S |
C
B |
G |
|
S |
C |
G |
|
energy
A | B |
|
hype
A | B |
|
pop
A | B |
|
mgr
A | B |
|
FIGHT
RATING
39% |
|
|
|
|
|
|
|
|
|
|
